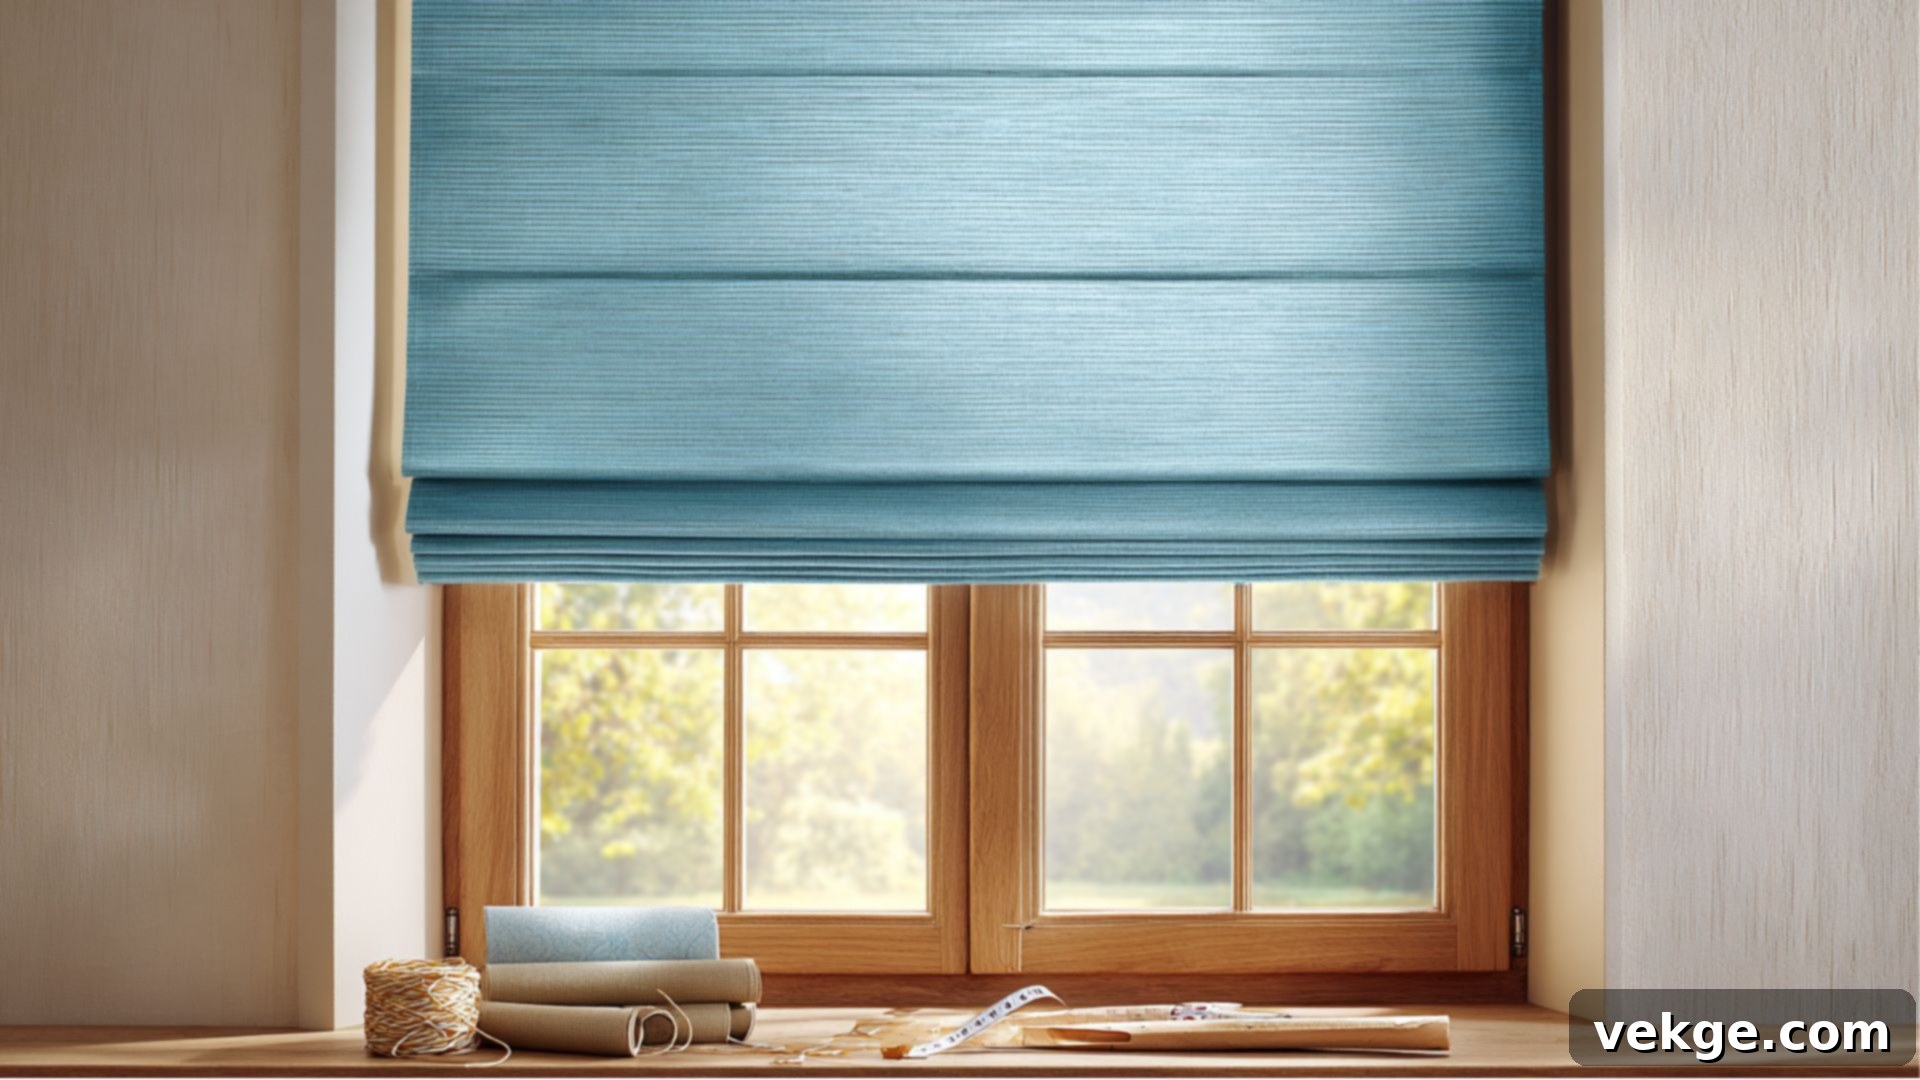
DIY Roman Shades: The Ultimate Guide to Crafting Elegant and Custom Window Treatments
Are you looking to elevate your home’s aesthetic with window treatments that offer both style and functionality? Perhaps you’re tired of generic, off-the-shelf blinds or curtains that lack character and a personalized touch. Roman shades are a timeless and sophisticated solution, known for their ability to fold into neat, elegant pleats when raised and lie flat, offering a sleek look when lowered. These smart window coverings are versatile enough to enhance any room, providing essential privacy, precise light control, and an undeniable touch of class.
Creating your own DIY Roman shades allows you to achieve a high-end, custom look without the hefty price tag associated with designer options. This comprehensive guide will walk you through every step of making beautiful Roman shades that perfectly complement your home decor. From selecting the ideal fabric and taking accurate measurements to the final installation, you’ll gain the skills and confidence to craft shades that fit your exact needs and budget. Let’s embark on this rewarding journey to transform your windows and infuse your living space with unique style.
Why Opt for DIY Roman Shades? The Benefits of Crafting Your Own
The allure of DIY Roman shades extends far beyond just the aesthetic appeal. While store-bought Roman shades can easily cost hundreds, or even thousands, of dollars depending on the fabric and customization, making your own offers significant financial savings. You can achieve the same sophisticated, tailor-made appearance for a mere fraction of the price, making luxurious window treatments accessible to everyone.
Beyond the cost-effectiveness, the most compelling reason to choose the DIY route is the unparalleled control you gain over every single detail. No longer are you limited to a narrow selection of patterns, colors, or sizes. With DIY shades, you become the designer. Want a bold floral print to liven up your living room? Or perhaps subtle stripes to complement a minimalist bedroom? You have the freedom to select any fabric that speaks to your personal style and existing decor, ensuring a perfect match or creating a stunning focal point that truly stands out. This level of personalization is simply not possible with mass-produced options.
Furthermore, the process of crafting your own Roman shades is incredibly rewarding. There’s an immense sense of accomplishment that comes from watching a simple piece of fabric transform into a graceful and functional window treatment, created entirely by your own hands. Imagine the satisfaction when friends and family compliment your exquisite shades, and you can proudly say, “I made them myself!” It’s not just about saving money; it’s about investing your creativity and personality into your home. Plus, the DIY approach allows for a learning curve – if a small mistake happens, you can easily adjust or re-attempt without the financial stress of ruining an expensive, pre-made item.
Exploring the Diverse Types of Roman Shades
Before you begin your DIY project, it’s helpful to understand the various styles of Roman shades available. Each type offers a unique aesthetic and functional quality, allowing you to choose the perfect match for your home’s architecture and your personal taste. Here’s a quick overview to guide your selection:
- Flat Roman Shades: Characterized by a smooth, unbroken panel of fabric that folds neatly and evenly when raised. This minimalist style is incredibly versatile and perfect for modern, contemporary, or even transitional decor, offering a sleek and uncluttered look that highlights the fabric pattern. They are ideal for windows where you want to emphasize a clean line.
- Pleated Roman Shades (or Classic/Soft Fold): These shades gather into soft, cascading pleats when raised, adding fullness and a more traditional, romantic appeal to your windows. They are a classic choice that works beautifully in formal dining rooms, bedrooms, or any space desiring a touch of elegant drapery. The folds provide a sense of depth and luxury.
- Relaxed Roman Shades: As the name suggests, this style features a soft, unconstructed look with gentle folds that puddle gracefully at the bottom when lowered. There are no dowels or rigid structure, making them perfect for casual, bohemian, or coastal-inspired spaces. They exude an effortless charm and are particularly lovely in linens or lightweight fabrics.
- Hobbled Roman Shades (or Cascading/Teardrop): This is a more formal and luxurious style, featuring deep, permanent pleats that cascade down the entire length of the shade, even when fully extended. These continuous folds create a rich, dimensional look reminiscent of traditional draperies, making them suitable for grand living rooms, master bedrooms, or formal studies.
- Euro Roman Shades (or European Flat): Similar to flat Roman shades but with a slightly softer, more tailored appearance. They often have tighter, more defined pleats, giving them a contemporary or European-inspired elegance. They offer a refined look that can bridge the gap between modern simplicity and classic charm.
- Top-Down/Bottom-Up Roman Shades: This functional design allows you to lower the shade from the top down, or raise it from the bottom up, offering unparalleled flexibility in light control and privacy. You can maintain natural light while blocking views from the street, or cover the entire window. This style is particularly useful for ground-floor rooms or bathrooms where privacy is paramount without sacrificing daylight.
Each type offers something different to fit your space and style. Consider the overall ambiance of your room, the level of formality you desire, and your functional needs (like privacy and light) when making your selection. Choosing the right style will ensure your DIY Roman shades not only look beautiful but also perform perfectly in your home.
Essential Materials and Tools for Your DIY Roman Shade Project
Before diving into the creative process, gathering all your materials and tools is crucial. This will ensure a smooth and enjoyable crafting experience. While the specific costs can vary based on fabric choice, local prices, and whether you already own basic tools, the table below provides a general estimate. Remember, investing in quality materials will contribute to the longevity and professional finish of your Roman shades.
| Material | Estimated Cost Range (USD) | Purpose and Considerations |
|---|---|---|
| Drapery fabric and lining | $10 – $40 per yard | The main fabric dictates your shade’s appearance. Choose a durable, non-stretching fabric. Lining adds body, protects the main fabric from sun damage, and provides light control (blackout lining for bedrooms, thermal for insulation). |
| Wooden dowels (3/8″ or 5/16″) | $1 – $6 (per dowel) | These provide structure and ensure even pleats when the shade is raised. The diameter depends on the shade size; larger shades benefit from thicker dowels. |
| 1×2 wood board (headrail) | $2 – $8 (per 4ft board) | This serves as the top mounting board (headrail) for your shade. It should be cut to the exact width of your finished shade. |
| Metal rod or wood slat (weight) | $2 – $6 | Inserted into the bottom hem, this weight helps the shade hang straight and flat when lowered. |
| Blind cord, cord lock, cleat | $3 – $10 | The cord system allows you to raise and lower the shade. A cord lock secures the shade at your desired height, and a cleat provides a safe place to wrap excess cord. |
| Pulleys or eye screws | $2 – $8 (set) | These are essential for the cord system, guiding the cords smoothly from the rings on the fabric up to the cord lock. Pulleys offer smoother operation. |
| Stitch Witchery (fusible web) | $3 – $7 | An optional but helpful material for creating neat, no-sew hems and dowel pockets, especially if you prefer not to sew or want a cleaner finish without visible stitches. |
| Fabric marker, thread, needle | $2 – $6 (set) | Basic sewing supplies. Choose a thread color that matches or complements your fabric. A fabric marker helps mark precise lines for cutting and sewing. |
| Pins, scissors, ruler/measuring tape | $5 – $15 (if you don’t have) | Essential for accurate measuring, marking, cutting, and holding fabric pieces together before sewing. |
| Staple gun, iron, sewing machine | $0 – $10 (borrowed or entry-level tools) | A staple gun is needed to attach the fabric to the headrail. An iron ensures crisp seams. While Stitch Witchery can be used, a sewing machine will create a more durable, professional finish. |
| Drill, screws, rings (for cords) | $3 – $10 | A drill and screws are needed for mounting the headrail. The rings (plastic or metal) are sewn onto the shade to guide the lift cords. |
| Total Estimated Cost | $33 – $136+ (per shade) | This range is for materials only and can fluctuate significantly based on fabric cost per yard and whether you need to purchase tools. |
NOTE: These costs are estimates and may vary significantly based on fabric quality, store sales, and your existing tool collection. Owning basic tools like an iron, sewing machine, staple gun, and scissors will considerably lower your total material costs per shade. Always measure your window carefully before purchasing fabric to avoid waste.
DIY Roman Shades: A Detailed Step-By-Step Guide
Crafting your own Roman shades is a rewarding project that involves careful measuring, precise cutting, and thoughtful assembly. This section will guide you through each stage, from preparing your materials to installing your beautiful new window treatments. We’ll ensure you understand how to add structural dowels, set up the cord system, and install your finished shade perfectly.
Step 1: Measure and Cut Fabric and Wood Precisely
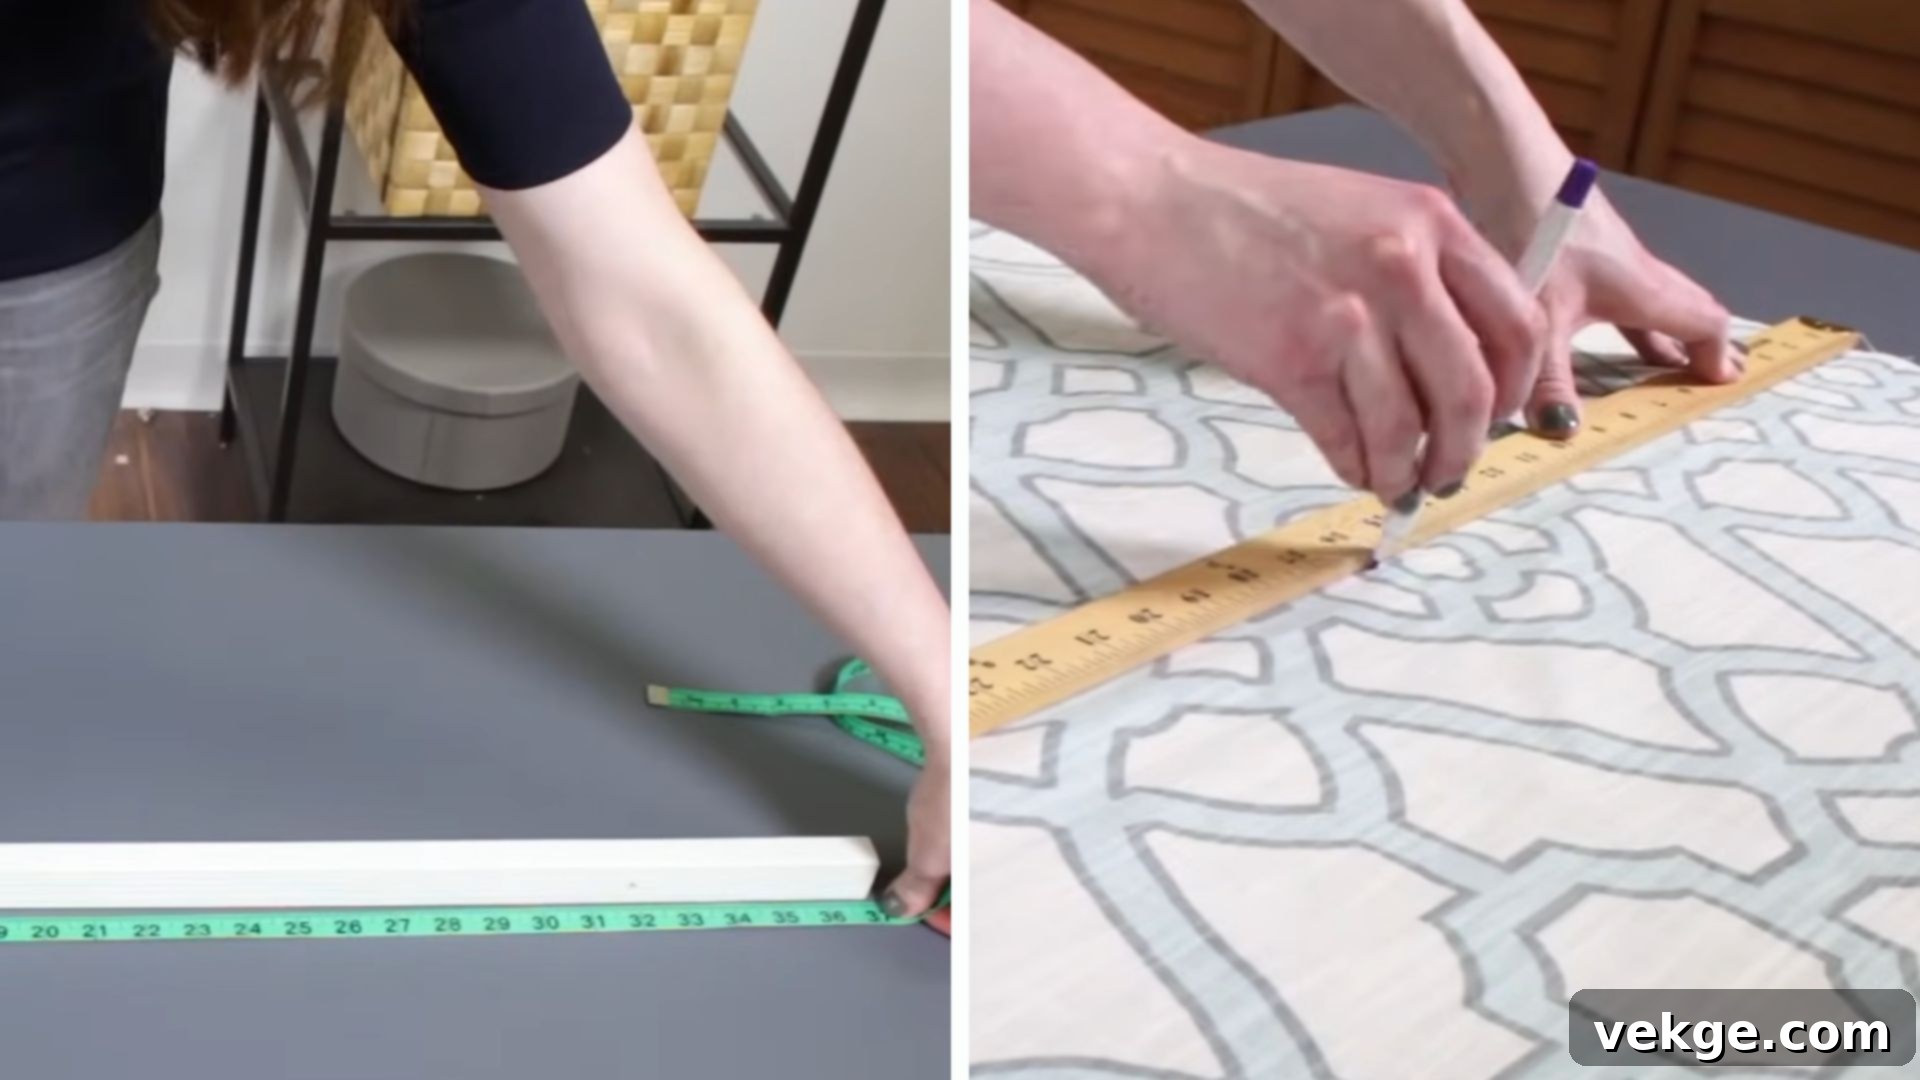
Accuracy in this initial step is paramount for a professional-looking Roman shade. Begin by deciding whether you want an inside mount (shade fits within the window frame) or an outside mount (shade covers the frame and extends slightly beyond). For an inside mount, measure the exact width of the inside of your window frame at three points (top, middle, bottom) and use the smallest measurement. For an outside mount, measure the width where you want the shade to hang, typically extending 1-2 inches beyond the frame on each side, and the desired length. For the wood headrail (1×2 board), cut it to the exact finished width of your Roman shade (for inside mount, this is your smallest window width; for outside mount, this is your chosen width).
Next, prepare your fabric. For the main drapery fabric, cut it to be 3 inches wider than your shade’s finished width and 5 inches longer than its finished length. This extra fabric accounts for side hems and top/bottom allowances. For the drapery lining, cut it to be 1 inch shorter than the finished width of your shade and the same length as your main fabric. The slightly narrower lining ensures it doesn’t show from the sides of the finished shade. Ensure all cuts are straight by using a large ruler or cutting mat and a rotary cutter if possible. If your fabric has a pattern, align it carefully to ensure it’s straight and centered when the shade is finished.
Pro Tips:
- Always double-check your window measurements at least twice before making any cuts to the wood or fabric. “Measure twice, cut once” is a golden rule here.
- When cutting fabric, especially patterned material, consider the fabric grain. Cutting along the grain will ensure the shade hangs straight and doesn’t distort over time.
- If you’re new to sewing, add an extra inch to your fabric length and width measurements as a buffer for adjustments. You can always trim excess later, but you can’t add fabric back.
- For perfect straight cuts, draw a line with your fabric marker along a straight edge before cutting.
Step 2: Sew the Fabric and Lining Together for a Clean Finish
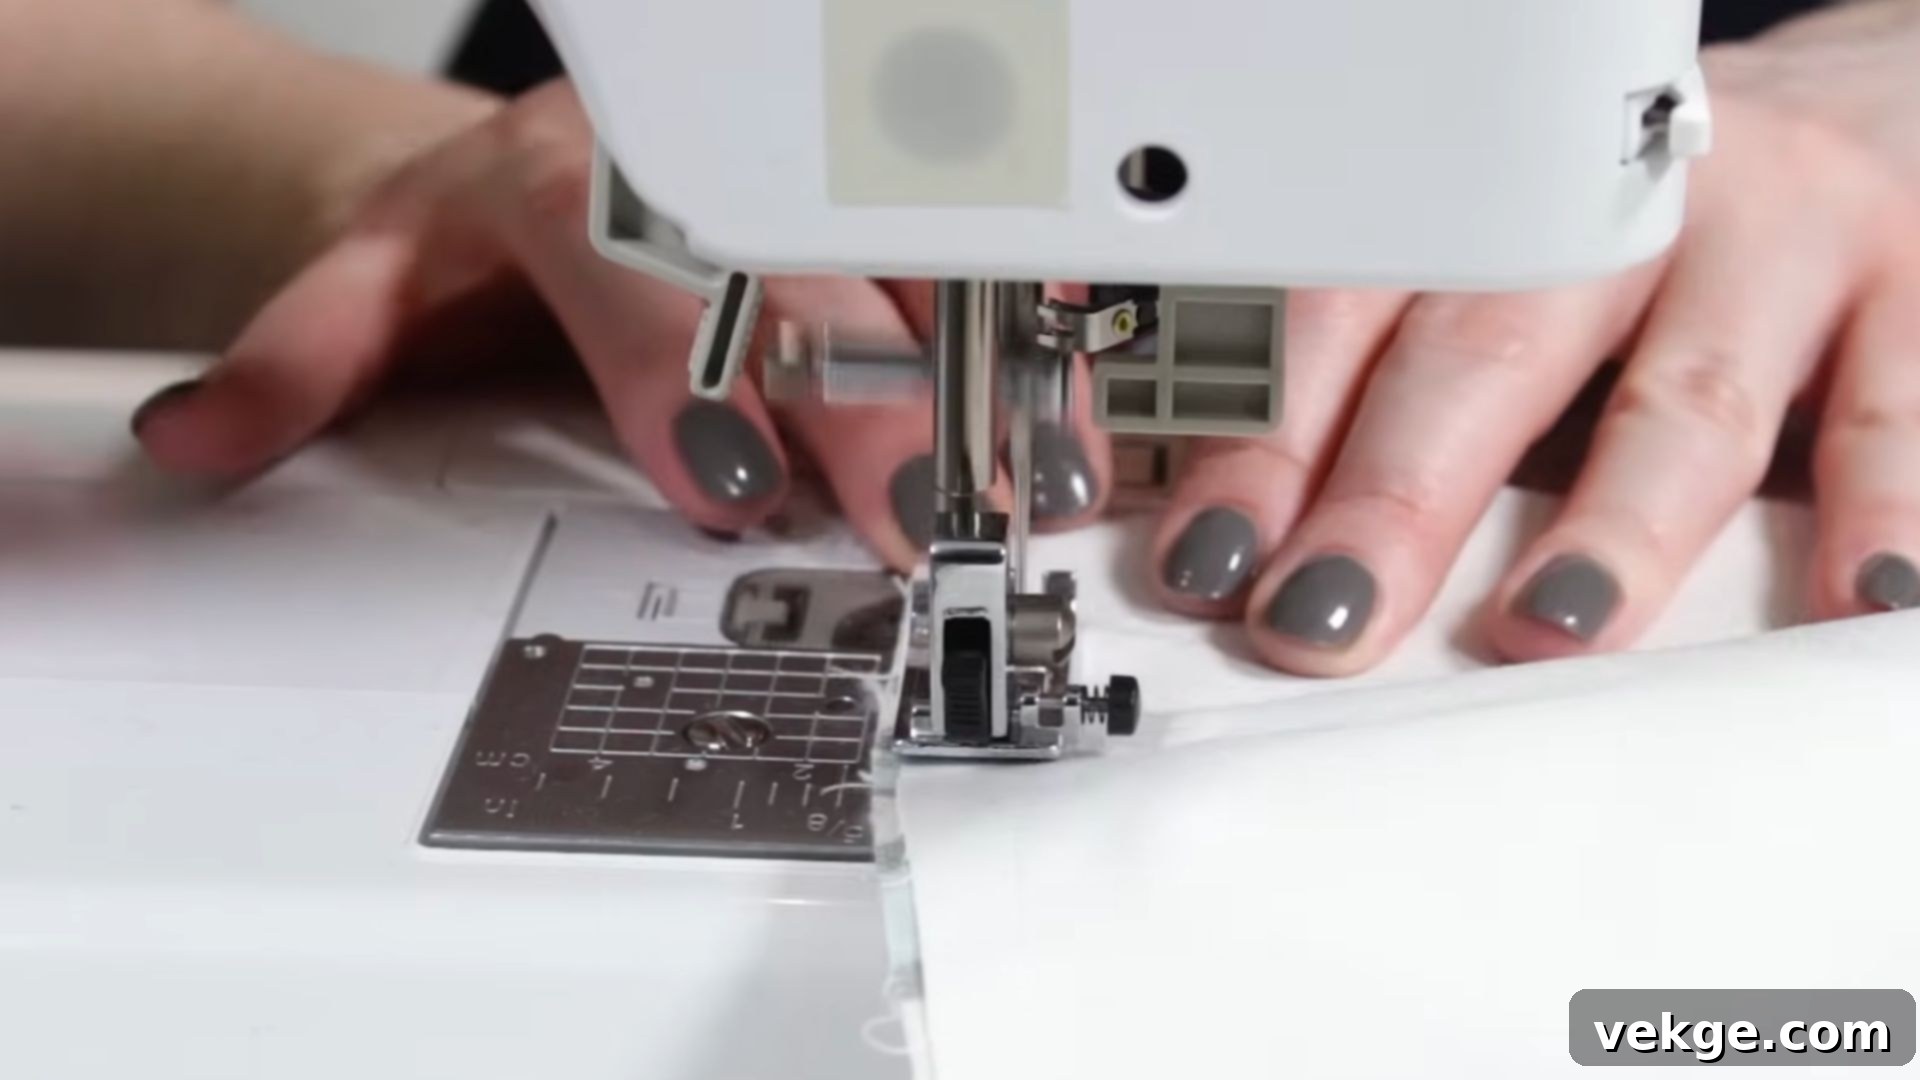
Now that your fabric and lining are cut, it’s time to join them. Lay your main drapery fabric right side up on a clean, flat surface. Center your lining fabric on top of the main fabric, ensuring the right sides are facing each other. There should be an equal amount of main fabric extending beyond the lining on both sides. Pin the fabric and lining together securely along both vertical sides. Use plenty of pins, placing them perpendicular to the seam line, to prevent shifting while sewing.
Using your sewing machine, sew along both side edges with a consistent 1/2-inch seam allowance. Start and end each seam with a backstitch to secure the stitching. Once sewn, press the seams open for a crisp, flat finish. Then, turn the shade right side out, gently pulling the corners so they are sharp. Press the newly sewn side seams again from the right side, ensuring the lining is completely hidden and the edges are straight and smooth. This creates a clean, professional edge for your Roman shade.
Pro Tips:
- Iron your fabric thoroughly before sewing to remove any wrinkles or creases. This will result in a much smoother and more professional final product.
- Use a sewing gauge or a ruler to ensure your 1/2-inch seam allowance is consistent along the entire length of the shade. Inconsistent seams can lead to a crooked shade.
- For heavier fabrics, you might want to use a walking foot on your sewing machine to help feed both layers of fabric evenly.
- After turning the shade right side out, use a point turner (or a blunt object like a knitting needle) to gently push out the corners for a sharper, more defined look.
Step 3: Insert Dowels for Structural Integrity and Even Pleats
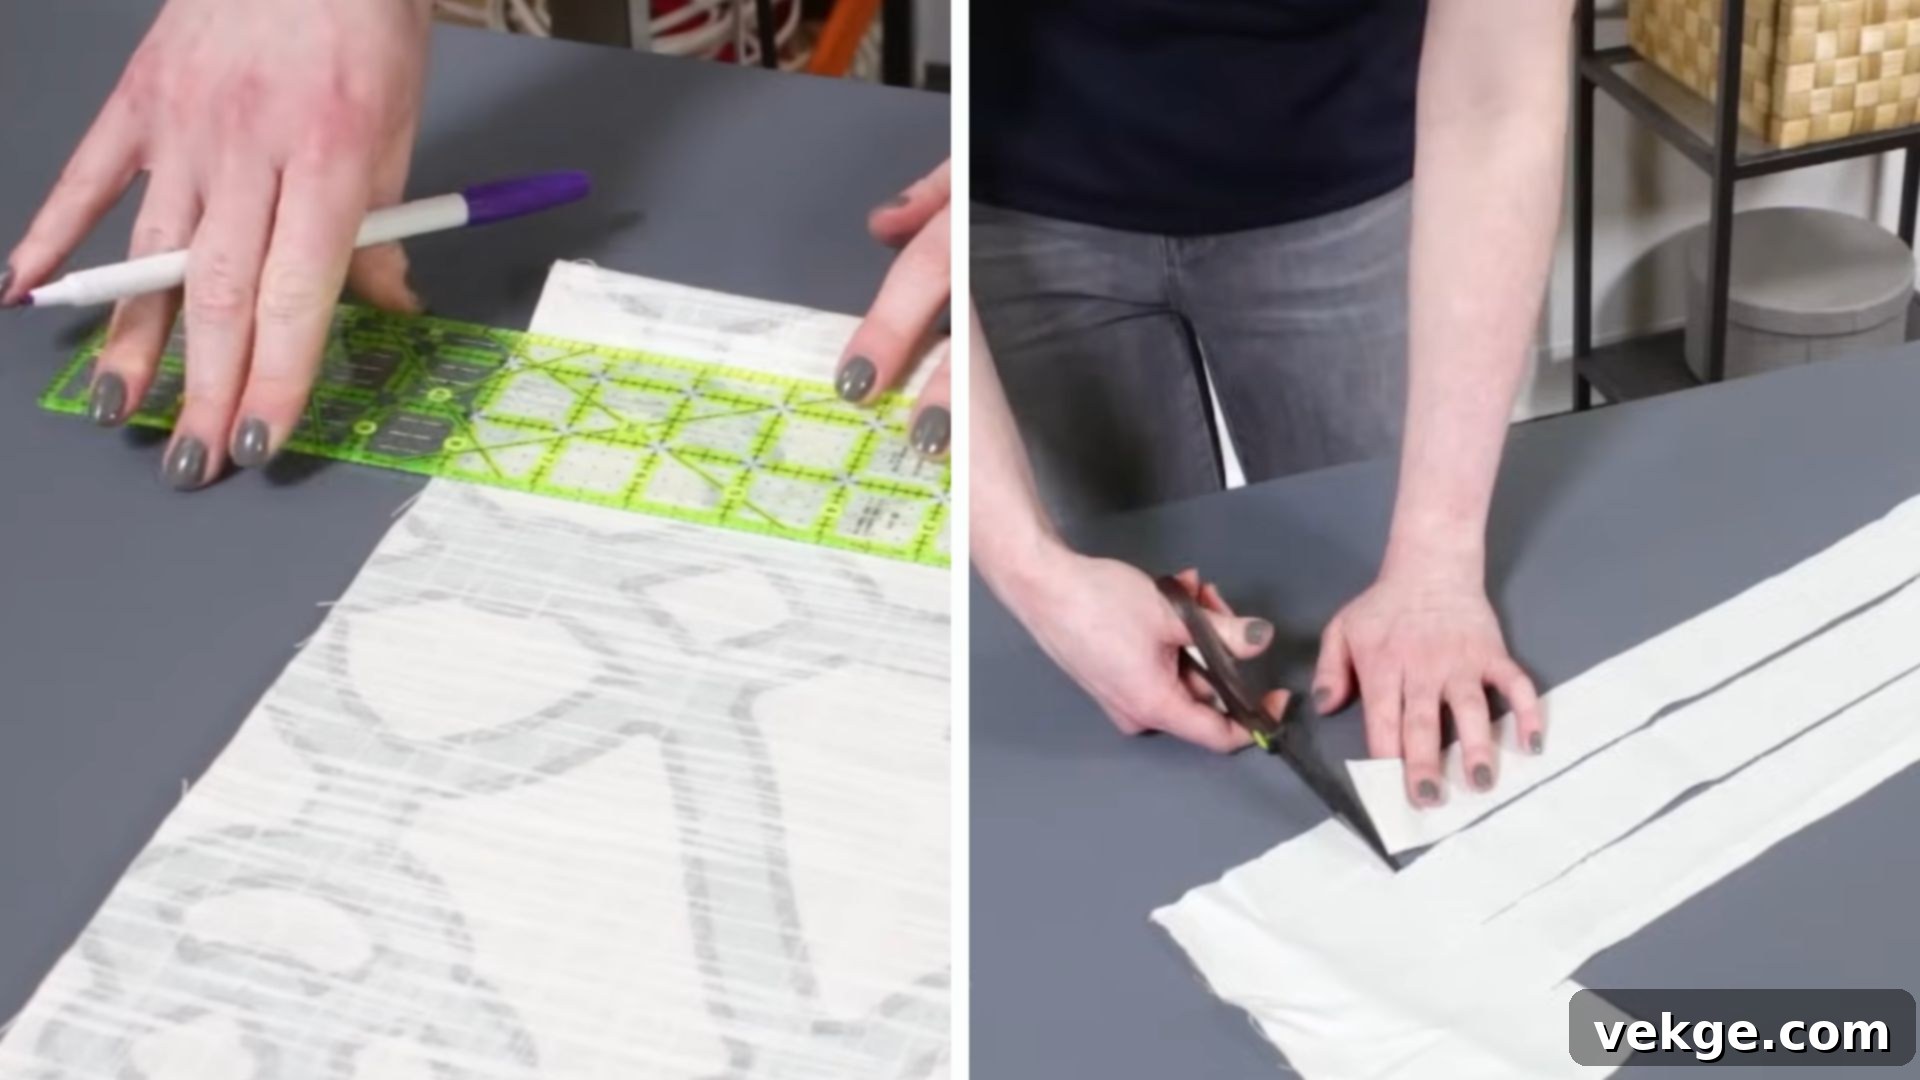
Dowels are critical for creating the characteristic neat folds of Roman shades and preventing the fabric from sagging. Begin by determining the spacing for your dowels. A common spacing is 8-12 inches apart, with closer spacing for shorter windows and wider spacing for taller windows to ensure uniform pleats. Mark these placements accurately on the wrong side of your lining fabric using a fabric marker. Ensure the lowest dowel pocket is above your bottom hem by at least 1-2 inches.
To create the dowel pockets, you have a few options: you can sew continuous channels, or use separate strips of lining fabric. For a no-sew or minimalist approach, cut 2-inch wide strips of lining fabric for each dowel pocket. Place these strips over your marked lines on the lining and use Stitch Witchery (a fusible web) to bond them to the fabric. Iron firmly to ensure a strong adhesion, creating a channel. Alternatively, you can fold the lining fabric over and stitch channels directly. Once the channels are formed, cut your wooden dowels to be about 1 inch shorter than the finished width of your shade and insert them into these pockets. This slight shortness allows the dowels to sit flush without poking out the sides.
Pro Tips:
- For the bottom edge, create a hem that is wide enough to accommodate a heavier metal rod or wood slat, which will act as the weight to keep the shade hanging straight. This bottom weight is crucial for a professional drape.
- Ensure your dowel pockets are wide enough for the dowels to slide in and out easily, but snug enough to hold them in place. Too tight, and inserting them will be difficult; too loose, and they might shift.
- Before adhering or sewing the dowel pockets, double-check that all markings are perfectly horizontal and parallel to each other. Even spacing is key for uniform pleats.
- If sewing the dowel channels, use a straight stitch with a matching thread color, sewing close to the edges of your folded channels.
Step 4: Add Rings for the Cord Mechanism
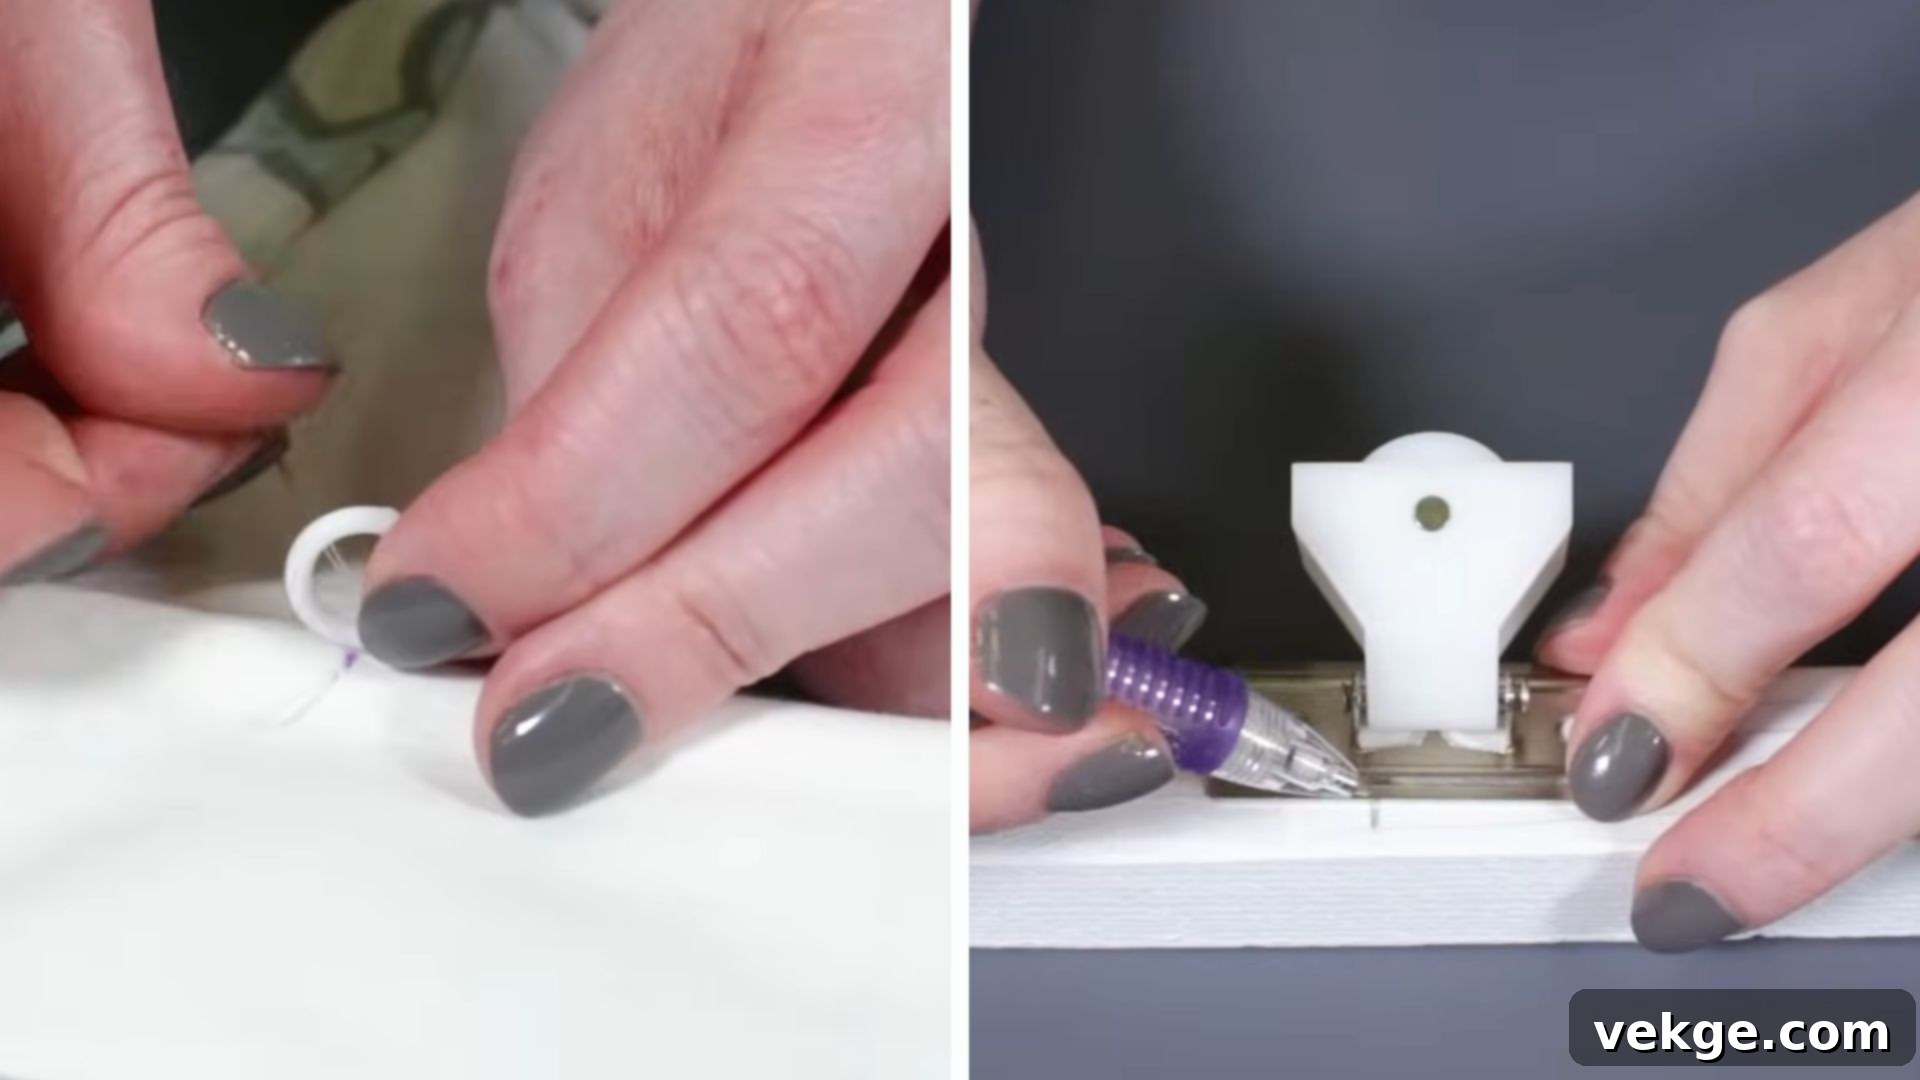
The rings are fundamental for the cord system that allows your Roman shade to be raised and lowered smoothly. Lay your shade flat with the lining side facing up. Mark the placement for your rings. You’ll need at least two vertical lines of rings, typically 2-3 inches in from each side of the shade. For wider shades (over 36 inches), you may need to add additional vertical lines of rings in the center to prevent sagging and ensure even lifting. Sew a small ring onto the shade near each end of every dowel, ensuring vertical alignment.
Use a strong, durable thread (e.g., upholstery thread or double-threaded regular thread) and secure each ring with several stitches. The rings should be attached firmly but not so tightly that they distort the fabric. Once the rings are sewn onto the fabric, it’s time to prepare your headrail. Attach your pulley system or eye screws to the bottom edge of your 1×2 wood headrail. Position these directly above each vertical line of rings on the shade. The pulleys should be evenly spaced and securely fastened, ready to guide the lift cords.
Pro Tips:
- Use a measuring tape to ensure precise vertical alignment of the rings. A consistent vertical line is crucial for smooth operation and even pleats.
- Before sewing, use a fabric marker to lightly dot where each ring should be placed. This helps maintain accuracy.
- For a more professional and durable finish, consider using sturdy plastic or metal rings that won’t break or fray over time.
- If using eye screws instead of pulleys, make sure they are open enough for the cord to pass through without snagging. Pulleys generally offer a smoother lift.
- Ensure the rings are attached to the dowel pockets, not directly to the main fabric, for added strength and to keep the dowels securely in place.
Step 5: Install the Shade and Configure the Cord System
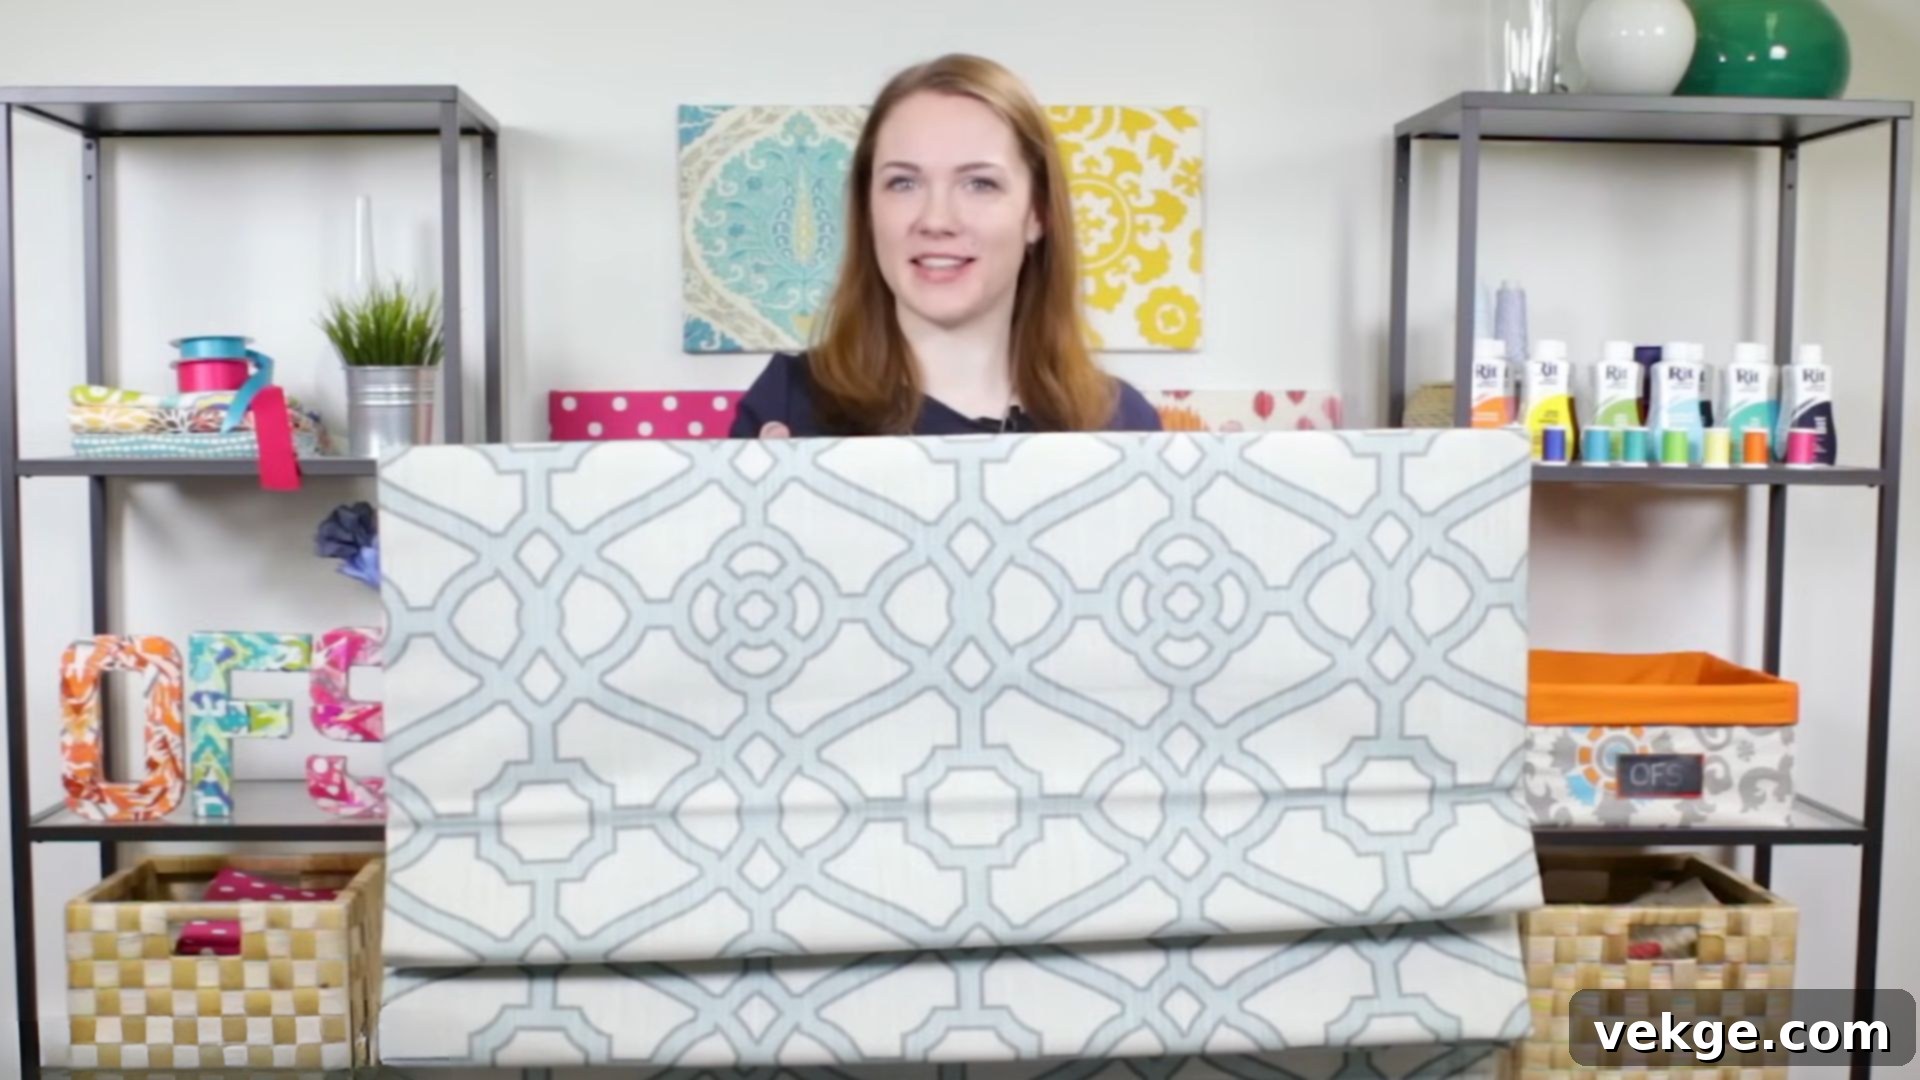
With the rings in place, your Roman shade is almost ready for its window debut. First, attach the shade to the 1×2 wood headrail. Lay the top edge of your shade (the part without dowels) flat against the back side of the headrail. Use a staple gun to securely fasten the fabric to the wood, spacing staples every 1-2 inches. Ensure the fabric is taut and straight before stapling. Once secured, you can install the headrail into your window frame using L-brackets and screws, ensuring it is level and firmly attached.
Now, for the cord system: Cut your blind cords. You will need one cord for each vertical line of rings. Each cord should be approximately twice the length of your window’s height plus its width. Starting from the bottommost ring on one side, thread a cord upwards through all the rings in that vertical line, then thread it horizontally through the pulleys or eye screws on the headrail until it reaches one designated “pull” side (usually the far right or left). Repeat this for each vertical line of rings. Once all cords are threaded through their respective lines and pulleys, gather them together and thread them through a cord lock. This mechanism will hold the shade at your desired height. Attach a decorative pull or knot the ends of the cords.
Finally, secure a safety cleat to the side of your window frame, about 4-5 feet off the ground. This cleat allows you to wrap any excess cord, keeping it tidy and, most importantly, out of reach of children and pets for safety. Test the shade thoroughly: raise and lower it several times to ensure it moves smoothly and the pleats form evenly. Adjust cord tension as needed until the shade operates flawlessly.
Pro Tips:
- When stapling the fabric to the headrail, start by stapling the center, then work your way out to the sides, pulling the fabric taut as you go. This helps prevent wrinkles or unevenness.
- To ensure the shade lifts evenly, make sure the cords are not tangled and have the same tension. If one side is lifting faster, gently pull the cord on the slower side.
- For child safety, always install a cord cleat and wrap excess cords securely. Consider using cordless Roman shade hardware if you have young children or pets for ultimate safety.
- If your shade isn’t hanging perfectly level, check the installation of your L-brackets and the headrail. Small adjustments can make a big difference.
- Trim your cords to a manageable length after the cord lock is installed, ensuring there’s enough slack for full operation but not excessive length that could become a hazard.
Watch How to Make Roman Shades: A Visual Video Tutorial
While written instructions are incredibly helpful, sometimes seeing the process in action can make all the difference. For a more detailed, step-by-step walkthrough of making Roman shades, particularly if you’re a visual learner, we highly recommend watching this comprehensive video tutorial. It brings all the steps to life, demonstrating techniques and offering practical tips that can clarify any uncertainties you might have.
Tips to Customize and Personalize Your Roman Shades
One of the greatest advantages of DIY Roman shades is the ability to infuse them with your unique style. Here are some easy ways to customize your shades and make them truly stand out, combining both functionality and aesthetic appeal:
- Embellishments and Trims: Add decorative trim, fringe, tassels, or a contrasting fabric band along the bottom edge or sides of your shade for an extra touch of sophistication and flair. This can dramatically change the look of a simple fabric.
- Lining Choices: Beyond standard lining, consider blackout lining for bedrooms or media rooms to completely block light, or thermal lining for added insulation against heat and cold. This customization directly impacts the functionality of your shades.
- Decorative Pulls: Instead of a basic knot, attach a decorative pull or finial to the end of your lift cords. This small detail can add a touch of elegance or whimsy.
- Mixing Fabrics: Create a two-tone Roman shade by using a different fabric for the main panel and the bottom band, or by incorporating a contrasting color for the lining that peeks through when raised.
- Edge Finishing: If your fabric edges appear crooked after cutting, use a fabric marker and a long ruler to draw a perfectly straight line, then carefully trim away the excess. This ensures a clean, professional finish.
- Preventing Fabric Stretch: When sewing, avoid pulling the fabric too tightly, as this can cause it to stretch or warp. If stretching does occur, gently iron the fabric back into shape, and if necessary, carefully re-hem the affected section.
- Cord Management: To prevent cords from tangling, especially during operation, double-check that they are properly threaded through all rings and pulleys. Ensure no cords are crossed or snagged, allowing for smooth, friction-free movement.
- Even Hanging: If your finished shade isn’t hanging evenly, the most common culprits are uneven dowel spacing or an unlevel headrail. Check the dowels to ensure they are perfectly horizontal and evenly spaced. Also, re-verify that your headrail is installed level using a spirit level and adjust its mounting if needed.
These customization tips will help give your Roman shades a unique touch, transforming them from simple window coverings into bespoke design elements. With a little creativity and attention to detail, you can make your shades both highly functional and incredibly stylish, reflecting your personal taste throughout your home.
Troubleshooting Common Issues When DIYing Roman Shades
Even the most experienced DIYers encounter a hiccup or two. Don’t be discouraged if your Roman shade project doesn’t go perfectly on the first try. Here are some simple tips to help you troubleshoot common issues and ensure your project turns out beautifully:
- Uneven Pleats: If your shade is forming uneven pleats when raised, the dowel spacing or ring placement might be inconsistent. Lay the shade flat, adjust the fabric, and re-pin the pleats to ensure even folds. If sewing dowel channels, ensure they are perfectly parallel. You might need to unpick and re-sew a channel or re-position rings for better balance.
- Fabric Wrinkles and Creases: Persistent wrinkles can detract from the shade’s crisp appearance. Always use a steam iron to smooth out fabric thoroughly before cutting and stitching. For wrinkles that appear during the process, iron them out before proceeding to the next step. A good pressing can make a significant difference in the finished look.
- Mistakes in Cutting: If you’ve accidentally cut your fabric a little too small or crooked, assess the damage. For minor crookedness, carefully trim any excess fabric to create a straight line. If a piece is too short, you might need to reconsider your mounting style (e.g., switch from inside to outside mount) or, worst case, recut the specific piece, adjusting your overall measurements. Always err on the side of cutting larger; you can trim down, but you can’t add back.
- Shade Not Mounting Securely: If your headrail feels wobbly or the shade isn’t firmly attached to the window frame, double-check your measurements for bracket placement. Ensure you’re using appropriate screws for your wall type (e.g., drywall anchors if not drilling into a stud). Make sure all brackets are firmly tightened to the window frame or wall.
- Cords Getting Stuck or Not Gliding Smoothly: This often indicates that the cords are tangled, frayed, or the rings/pulleys are misaligned. Inspect each cord for snags or knots. Ensure the rings are securely sewn and the cord passes freely through them. Check that the pulleys or eye screws on the headrail are aligned with the rings and allow for smooth movement without friction. Sometimes, a tiny bit of silicone spray on pulleys can help.
- Shade Not Staying Up: If your Roman shade doesn’t stay at its desired height, the cord lock might not be functioning correctly or the cords aren’t threaded properly through it. Ensure the cord lock is installed according to instructions and that all cords are firmly held by its mechanism. Adjusting the tension might also be necessary.
- Uneven Hems: If your bottom hem looks crooked, it could be due to uneven cutting of the fabric or stretching during sewing. Lay the shade flat and re-measure from the top edge down. Mark a new, perfectly straight hemline with a fabric marker, then carefully trim and re-hem the bottom edge.
With these troubleshooting tips, you’ll be well-equipped to handle common challenges and ensure your Roman shades turn out just right. Remember, crafting is a process of learning and refinement. Don’t worry about small mistakes; just make adjustments as you go, and soon you’ll have beautiful, handmade Roman shades to admire!
Final Words: Embrace the Beauty of Handmade Elegance
Congratulations! You’ve now gained a comprehensive understanding of how to measure, cut, sew, and install elegant Roman shades that are perfectly tailored to your space. You’re no longer just a homeowner; you’re a skilled artisan, ready to transform your windows with bespoke beauty.
I still fondly recall the excitement of picking out my favorite fabric, envisioning its transformation, and then experiencing the immense satisfaction of seeing it turn into functional, stylish shades I crafted myself. It’s truly a fun, rewarding, and deeply personal project that adds unique character to any room. This endeavor isn’t just about covering a window; it’s about infusing your home with your personality and craftsmanship.
As you embark on your own Roman shade journey, remember to take your time, double-check each step, and most importantly, enjoy the creative process. Even small, thoughtful changes like custom window treatments can significantly freshen up a space and reflect your individual style. You now possess the knowledge and confidence to create something truly special.
Want to explore more easy and impactful DIY projects to try around your home? Be sure to check out other blogs and guides on our website for simple yet effective ideas and tips to help you upgrade your home with renewed confidence and flair. Happy crafting!
