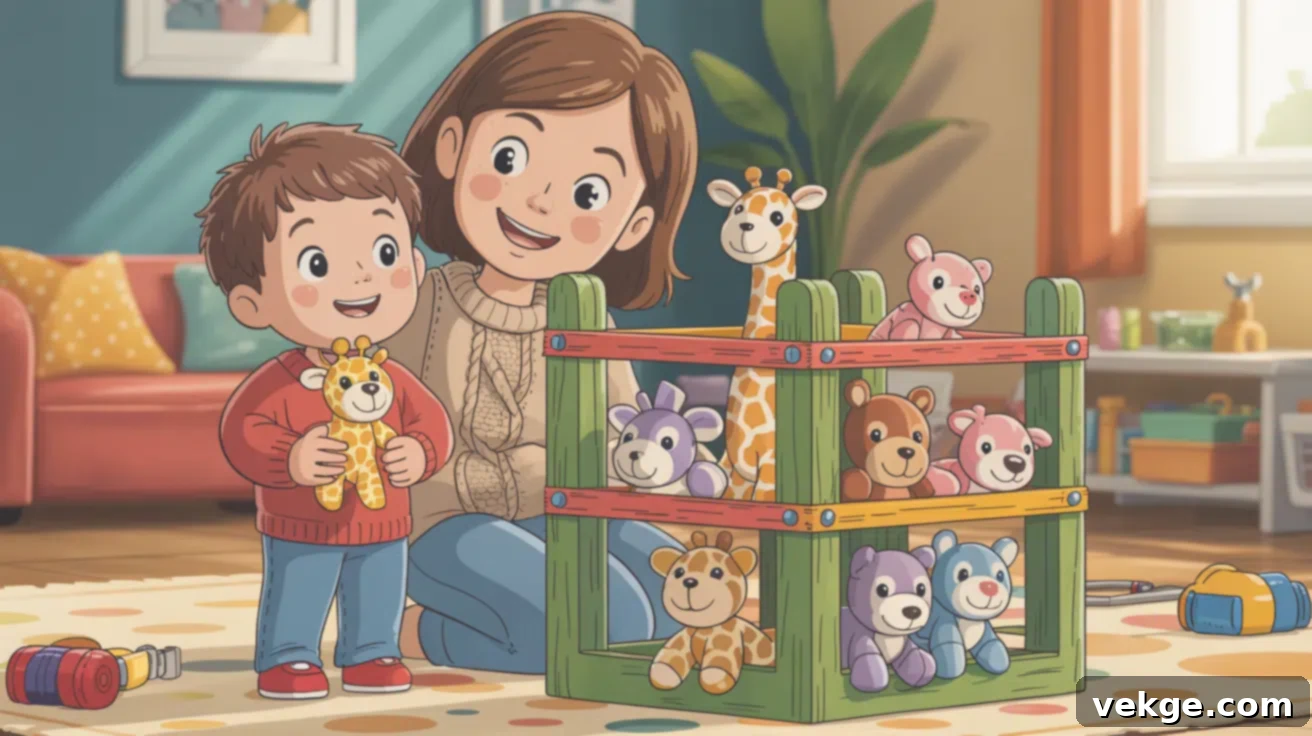
Tame the Plush Pile: The Ultimate Guide to Building a DIY Stuffed Animal Zoo
Are stuffed animals staging a silent takeover of your home? From sprawling across floors to precariously perched on beds and shelves, the beloved plush collection can quickly become a source of clutter. We’ve all been there, staring at an adorable but overwhelming array of soft toys.
The good news? There’s a delightful, budget-friendly, and highly effective solution that keeps all those cherished companions in one spot without having to part with any favorites. Introducing the DIY stuffed animal zoo – a creative and practical storage solution that brings order to the chaos.
In this comprehensive guide, we’ll walk you through everything you need to know to build a functional and charming stuffed animal zoo. You’ll get step-by-step instructions, innovative design ideas to spark your creativity, and simple yet crucial safety tips to ensure your new storage solution is both cute and child-friendly. Plus, we’ll explore alternative storage options if a full DIY build isn’t quite your style.
Ready to transform that mountain of plush toys into an organized, accessible, and even decorative feature in your child’s room? Let’s dive in and build a stuffed animal zoo that truly works for your family!
Why a DIY Stuffed Animal Zoo is a Game Changer for Toy Organization
If your home resembles a plush toy factory, you know the struggle of keeping stuffed animals off the floor. They multiply quickly and seem to migrate to every available surface. This common dilemma is precisely why building a dedicated stuffed animal zoo is such a brilliant idea.
A DIY stuffed animal zoo offers a beautifully simple way to consolidate and organize an ever-growing collection. Imagine a designated space where every beloved teddy bear, unicorn, and dinosaur has a clear home, easily accessible for playtime, yet neatly contained when not in use. Beyond just tidiness, this project offers several compelling benefits:
- Effortless Organization: Say goodbye to tripping hazards and endless tidying. A zoo keeps all plush toys in one central location.
- Easy Accessibility: Unlike bins or baskets where toys get buried, a zoo design (often with bungee cords) allows children to easily see and retrieve their favorites without creating a new mess.
- Fun Family Project: Building a zoo can be a wonderful bonding activity. Kids can help with planning, painting, and even assembling, giving them a sense of ownership over the final product.
- Budget-Friendly: Compared to purchasing large, specialized toy storage units, a DIY zoo is incredibly cost-effective, often utilizing readily available and inexpensive materials.
- Customizable to Your Space: You have complete control over the size, shape, and aesthetic. Tailor it to fit a specific corner, match your child’s room decor, or incorporate their favorite colors and themes.
- Fosters Independence: When toys are easy to put away and take out, children are more likely to participate in cleanup, promoting valuable organizational skills.
- More Engaging than Off-the-Shelf Options: A handmade zoo often becomes a cherished part of the room, more personal and fun than a generic store-bought solution.
It’s practical, affordable, and honestly, a much more enjoyable solution than any standard storage bin. Let’s turn that stuffed animal chaos into a charming and functional feature!
Planning Your Stuffed Animal Zoo: Setting the Foundation for Success
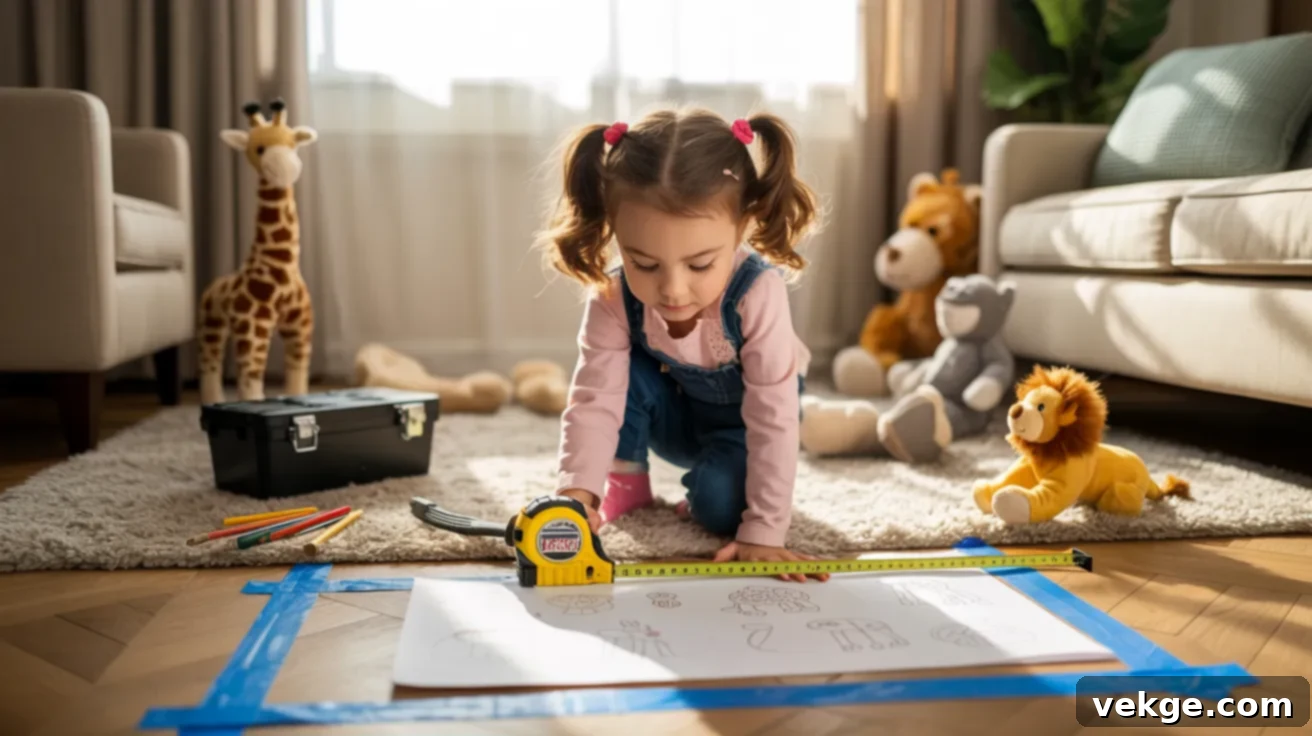
Before you even think about cutting wood or heading to the hardware store, dedicating a little time to planning your stuffed animal zoo is crucial. This initial step isn’t just about drawing pretty pictures; it’s about saving time, minimizing material waste, and ensuring you build a storage solution that perfectly fits your space and meets your child’s needs. A thoughtful plan makes the entire project smoother, more enjoyable, and ultimately more successful.
Here’s how to plan your build the right way from the start:
1. Measure Your Space Accurately
The very first step is to accurately measure the exact area where you intend to place the stuffed animal zoo. Use a measuring tape to note the height, width, and depth of the desired location. Consider how it will interact with existing furniture, doorways, and windows. Write these numbers down and keep them handy when shopping for materials or sketching your design. Accurate measurements are key to avoiding sizing mistakes and ensuring your zoo fits seamlessly into the room.
2. Estimate Your Time Commitment
Building a DIY project, even a simple one, requires time. Basic tower designs, often perfect for beginners, typically take 2-3 hours to complete. More elaborate designs might require half a day or even spread across a weekend. Factor in drying times for paint and glue. Having a realistic time estimate helps you schedule the project, gather materials in advance, and manage expectations, preventing frustration during the build.
3. Choose a Fun and Engaging Theme
This is where the creativity truly begins! Involve your child in choosing a theme that aligns with their personality and bedroom decor. Whether it’s a vibrant jungle adventure, a heroic superhero HQ, a soft pastel dreamland, or a rustic farm, a theme adds a personal touch. Consider using specific colors, adding playful labels like “Sam’s Safari,” or incorporating decorative shapes to reflect the chosen theme. A well-chosen theme makes the zoo a captivating focal point, not just a storage unit.
4. Visualize with Sizing Tools
Still uncertain about the optimal size or placement? There are simple tricks to visualize your zoo before you commit to building. Use painter’s tape to mark the footprint of your proposed zoo on the floor or wall. This allows you to “see” how much space it will occupy in real-time. Alternatively, explore free online sizing tools or even sketch out a few different dimensions on paper. This visualization step helps you adjust the design, ensuring it’s proportionate to the room and accommodates your collection of plush toys.
Essential Tools and Materials You’ll Need
Gathering all your tools and materials before you begin will make the building process much smoother. Here’s a straightforward list of what you’ll need for a basic wooden stuffed animal zoo:
- 8 wood pieces (2 feet each for horizontal frames)
- 4 wood pieces (3 feet each for vertical posts)
- Bungee cords (ensure they are long enough for your design)
- Paint (child-safe, water-based is recommended) and brushes
- Sandpaper or an electric sander (medium grit)
- Small hooks (enough for your cord spacing, at least 4 per side)
- Small nails (for securing wood joints)
- Wood glue (strong adhesive)
- Hammer
- Drill (for pre-drilling pilot holes for hooks, optional but recommended)
- Measuring tape
- Permanent marker
- Drop cloths or old bags (for protecting your work surface during painting)
DIY Stuffed Animal Zoo: A Step-by-Step Construction Guide
This detailed guide will help you build a sturdy and attractive stuffed animal zoo, making toy organization an enjoyable and rewarding project. Even if you’ve never built anything before, these instructions are simple to follow. Just take it one step at a time, and you’ll have a fantastic new storage solution for your child’s plush collection.
Step 1: Cut and Sand the Wood for Safety and Smoothness
Begin by verifying that all your wood pieces are cut to the correct dimensions: eight shorter pieces for the horizontal frames and four taller pieces for the vertical posts. Accuracy here ensures a well-proportioned zoo. Once confirmed, use a hand sander or an electric sander to meticulously smooth every edge and corner of each wooden piece. This step is critical for two reasons: it creates a much cleaner finish for paint adhesion and, more importantly, eliminates splinters and sharp edges, making the zoo safe for children to interact with. Don’t rush this part; it’s the foundation for a polished and child-friendly end product. After sanding, wipe away all dust with a damp cloth so the wood is perfectly clean and ready for painting.
Step 2: Paint All Wood Pieces with Fun, Kid-Safe Colors
Lay down drop cloths or place your wood pieces in old leaf bags to protect your workspace. Now comes the fun part: painting! Choose colors that you and your child adore. Bright, vibrant colors can make the zoo an exciting focal point in the room. Consider using small paint samples; they are often sufficient and cost-effective, providing excellent coverage for a project of this size. Apply an even coat to all sides of each wooden piece. For durability and a smoother finish, you might opt for two thin coats rather than one thick one. After painting, allow the pieces to dry completely. We recommend giving them a full day to cure thoroughly to prevent chipping or stickiness. Involving your child in the painting process is a fantastic way to make them feel invested in their new toy storage!
Step 3: Mark Hook Spots for Even Bungee Cord Placement
Once your painted wood pieces are completely dry, it’s time to mark the precise locations for your hooks. Using a measuring tape, carefully measure and mark spots on the inside face of the four short frame pieces. A consistent spacing, such as 4.5 inches apart, works well to keep the bungee cords neatly aligned and provide adequate tension for holding toys. Use a permanent marker so your dots are clearly visible during hook installation. Precision in this step will ensure your bungee cords are evenly spaced, creating a balanced and aesthetically pleasing look for your zoo. Taking a little extra time here makes a significant difference in the final appearance and functionality.
Step 4: Install the Hooks Securely
With your marks in place, you can now install the hooks. Position each hook directly over a marked spot. Start by gently tapping the hook with a hammer, just enough to create a small indentation and get it started in the wood. Then, twist each hook into the wood by hand. This might require a bit of effort, but ensure they are screwed in tightly and securely. Repeat this process for all the marked spots on both the top and bottom frame pieces. A crucial detail: make sure all hooks face inward, towards the center of the frame. This prevents the bungee cords from slipping out once they are strung, ensuring your stuffed animals remain safely contained.
Step 5: Build the Top and Bottom Frames of Your Zoo
Now, let’s construct the foundational square frames. Arrange four of the short wooden pieces into a square shape to create the bottom frame. Apply a small amount of wood glue to each corner joint, ensuring a strong bond. Then, carefully hammer nails through the corners to secure the pieces tightly together. Once the bottom frame is complete and stable, repeat these exact steps to build the top frame using the remaining four short wooden pieces. As you assemble, double-check that all the hooks on both frames remain facing inward. A secure and perfectly aligned frame is essential for the stability and durability of your stuffed animal zoo.
Step 6: Attach the Vertical Posts for Structure
With your top and bottom frames ready, it’s time to add the vertical posts that give your zoo its height and structure. Take one of the taller wooden pieces and carefully line it up at one corner of the bottom frame. Apply wood glue to the ends that will connect to the frame. Hold it firmly in place and then use nails to secure the post to the bottom frame, ensuring it’s straight and stable. Repeat this for all four vertical posts, attaching each to a corner of the bottom frame. Once all four are attached and feel secure, carefully place the top frame onto the vertical posts, aligning its corners with the tops of the posts. Glue and nail the top frame into place in the same manner. A second pair of hands can be incredibly helpful here to hold the top frame steady while you secure it.
Step 7: String the Bungee Cords to Create the Enclosure
This step brings your stuffed animal zoo to life! Take one end of a bungee cord and tie a firm, secure knot onto one of the top, inward-facing hooks. Then, guide the cord downwards, weaving it through each hook on the way to the bottom frame. As you string the cord, apply sufficient tension. The cords need to be tight enough to hold the stuffed animals securely within the frame, preventing them from falling out, but not so tight that they distort the frame or are difficult for a child to manipulate. Once you reach the bottom, tie off the bungee cord with another strong knot on a bottom hook. Repeat this process for each row of hooks, creating a series of elastic barriers. As you complete each row, you’ll see your structure transform into a recognizable, functional stuffed animal zoo!
Step 8: Add Names or Designs for a Personalized Touch
This is where your stuffed animal zoo truly becomes unique and special! Choose the front wood panel of your zoo. Using paint and a brush, or even a permanent marker, personalize it with your child’s name, such as “Sam’s Zoo,” “Lily’s Plush Palace,” or “The Wild One’s Wildlife.” You can also add fun shapes, vibrant colors, or thematic designs that align with your chosen theme. If you prefer to decorate earlier, you can mark the front board before assembly and paint it first. Whichever timing you choose, take your time with this step. It adds that cherished personal touch, making the project feel complete and deeply connected to your child. This customization makes the zoo more than just storage; it becomes a piece of art.
Step 9: Final Fixes, Cleanup, and the Grand Opening
Before declaring your project finished, take a moment for final inspection. Walk around your newly built stuffed animal zoo and check all joints for stability. Add a bit more wood glue to any areas that feel less secure and tap in any loose nails. Go back with your paint to touch up any spots where the wood might have gotten scratched or smudged during assembly. Once everything looks perfect and is fully dry, it’s time for the grand reveal! Let your child help load up their favorite stuffed animals into their new home. This isn’t just a DIY build; it’s a shared creation, a practical solution, and a fun addition to their room. Enjoy the satisfaction of a clutter-free space and the joy on your child’s face!
Need a visual guide for extra help and inspiration? Watch this stuffed animal zoo DIY video to see the process in action!
Choosing the Right Design: Stuffed Animal Zoo Ideas for Every Space
The beauty of a DIY project is the freedom to choose a design that perfectly suits your room size, available tools, and the sheer volume of plush toys you’re trying to organize. From towering structures to clever wall mounts, here are various stuffed animal zoo design ideas to inspire your next build.
Tower Zoo: Maximizing Vertical Space
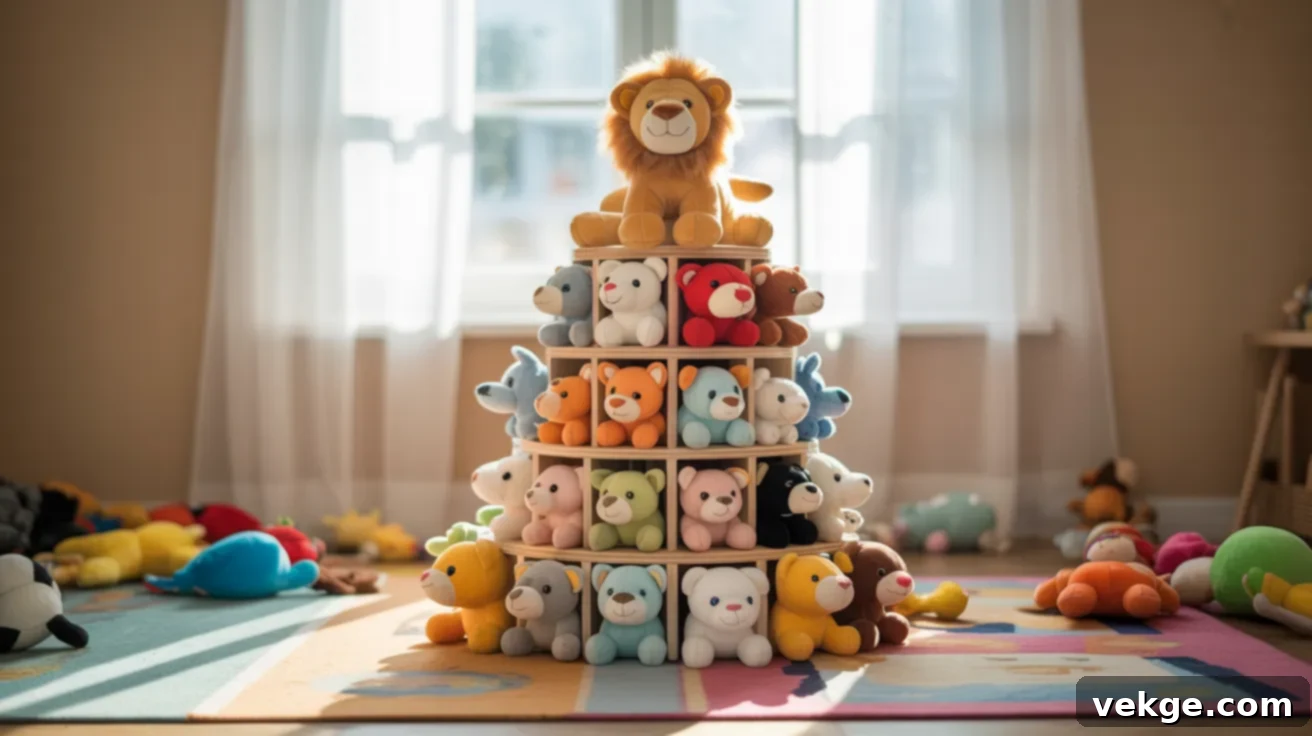
The classic tower zoo is an excellent choice for homes with limited floor space but ample vertical height. This tall, narrow design efficiently stacks stuffed animals without spreading them across the room, making it ideal for playrooms or bedrooms with high ceilings. It’s particularly beneficial if your child enjoys seeing and easily grabbing their favorite toys. You can construct a tower zoo using wood, PVC pipes, or even by repurposing a large, sturdy hamper frame. Beyond its primary function, a well-designed tower zoo can also serve as a striking and playful room feature, drawing the eye upwards and adding character.
PVC Zoo: Lightweight, Affordable, and Safe
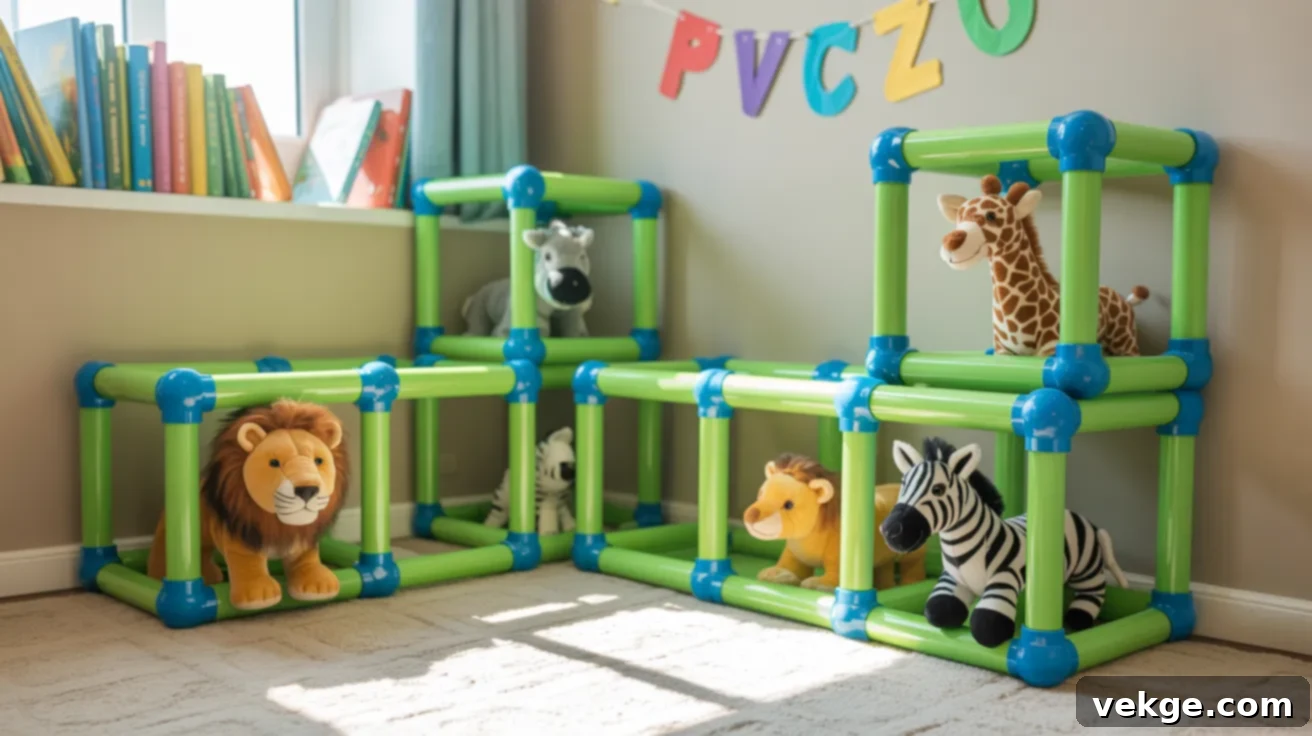
For one of the most cost-effective and straightforward building options, consider a PVC zoo. Constructed from lightweight plastic pipes and connectors readily available at any hardware store, this design is incredibly easy to assemble. It’s also exceptionally simple to move around or disassemble if you need to reconfigure a room or move homes. The PVC zoo is especially well-suited for younger children’s rooms due to its soft, rounded edges and inherent safety. You can build it in various configurations – a simple cube, a taller tower, or even a specialized corner unit. Add elastic cords or soft netting, and you can have this practical storage solution ready in just a single day.
Repurposed Table Zoo: Upcycling for Unique Storage
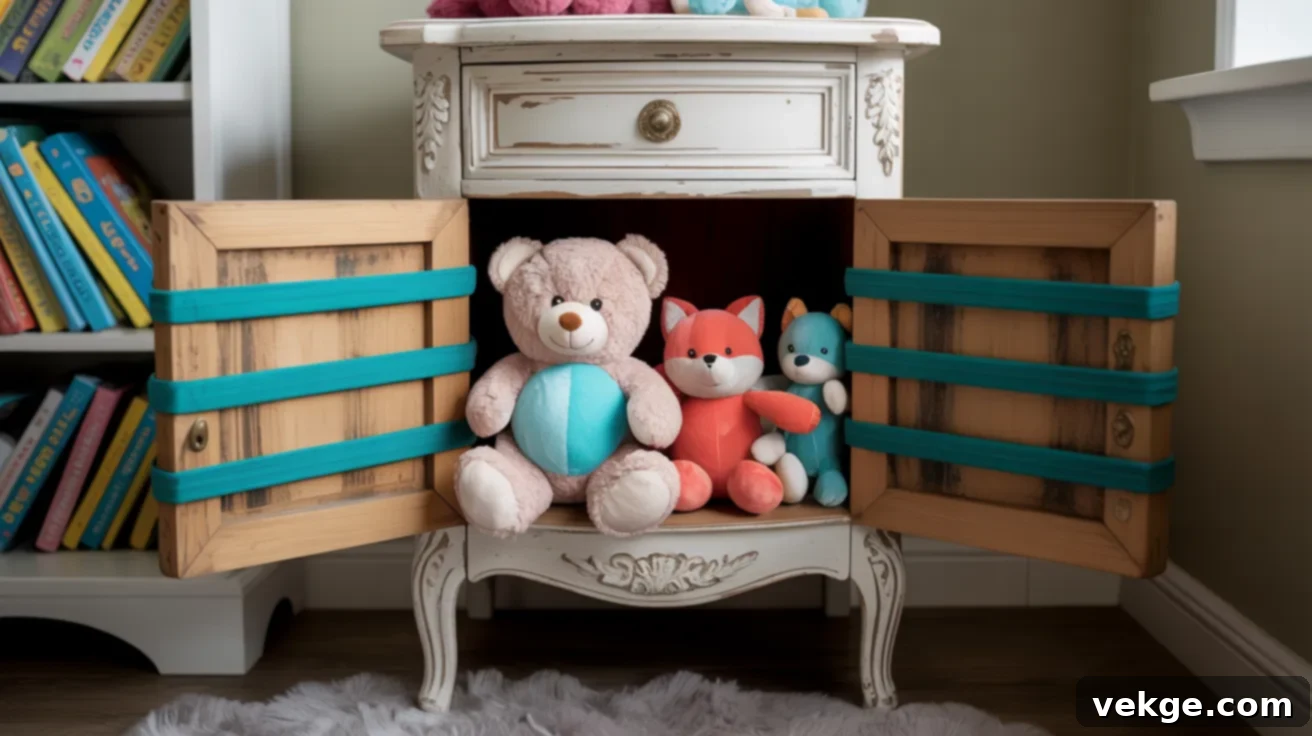
Give new life to old furniture by transforming an unused side table, coffee table, or nightstand into a unique stuffed animal zoo. This innovative approach is a fantastic way to upcycle existing pieces and add unexpected function to your child’s room. Simply attach vertical rods, dowels, or bungee cords to the open sides of the table, and you instantly have a charming and contained toy storage area. This design works exceptionally well in nurseries, reading corners, or as a bedside companion, blending seamlessly with existing furniture while keeping plush toys neatly off the floor and within easy reach.
Corner Zoo: Maximizing Unused Space
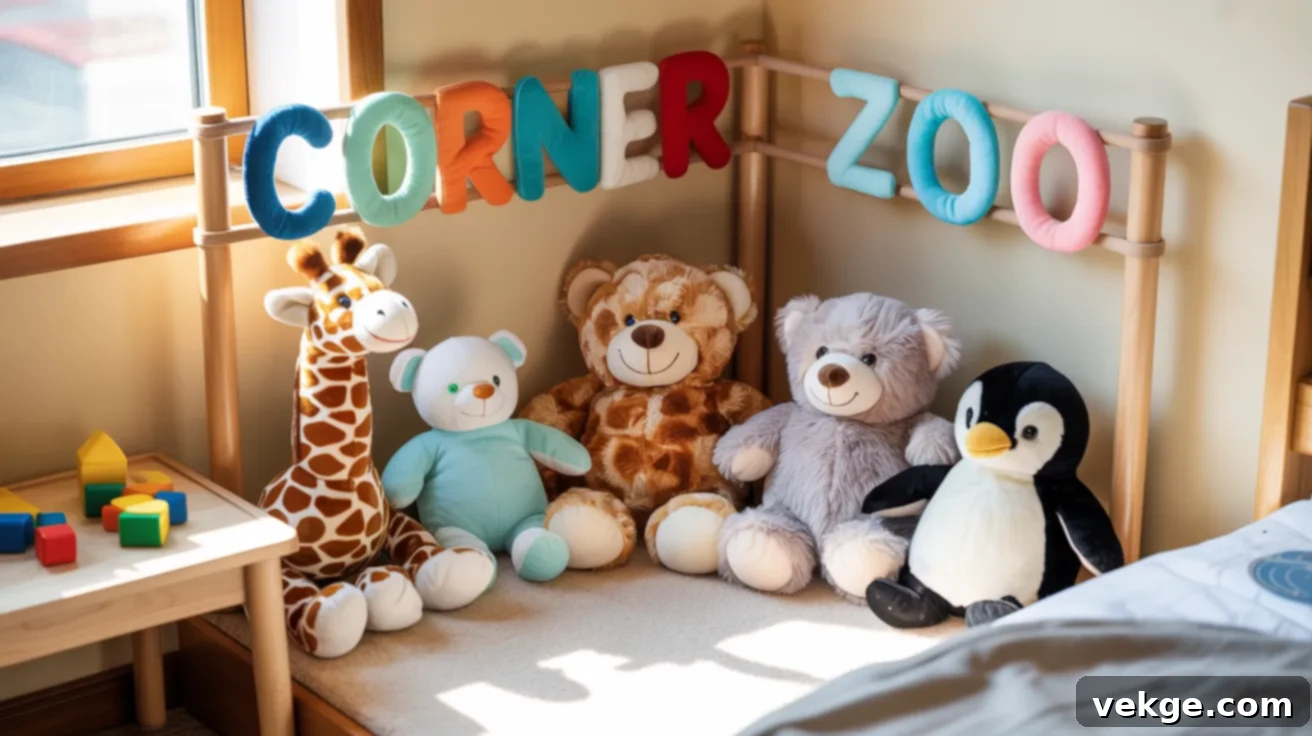
If you’re dealing with a tight or unusually shaped room, a corner zoo is an ingenious way to utilize often-wasted space. This design fits snugly into a room’s corner, keeping everything contained and tidy without encroaching on valuable floor area. It’s relatively simple to build, typically requiring just a few vertical posts (wooden or PVC) and a series of elastic or bungee cords strung between them. Corner zoos are highly effective in bedrooms where toys naturally tend to accumulate in the corners anyway, offering a smart and unobtrusive organization solution that frees up central floor space for play.
Wall-Mounted Zoo: Freeing Up Floor Space Entirely
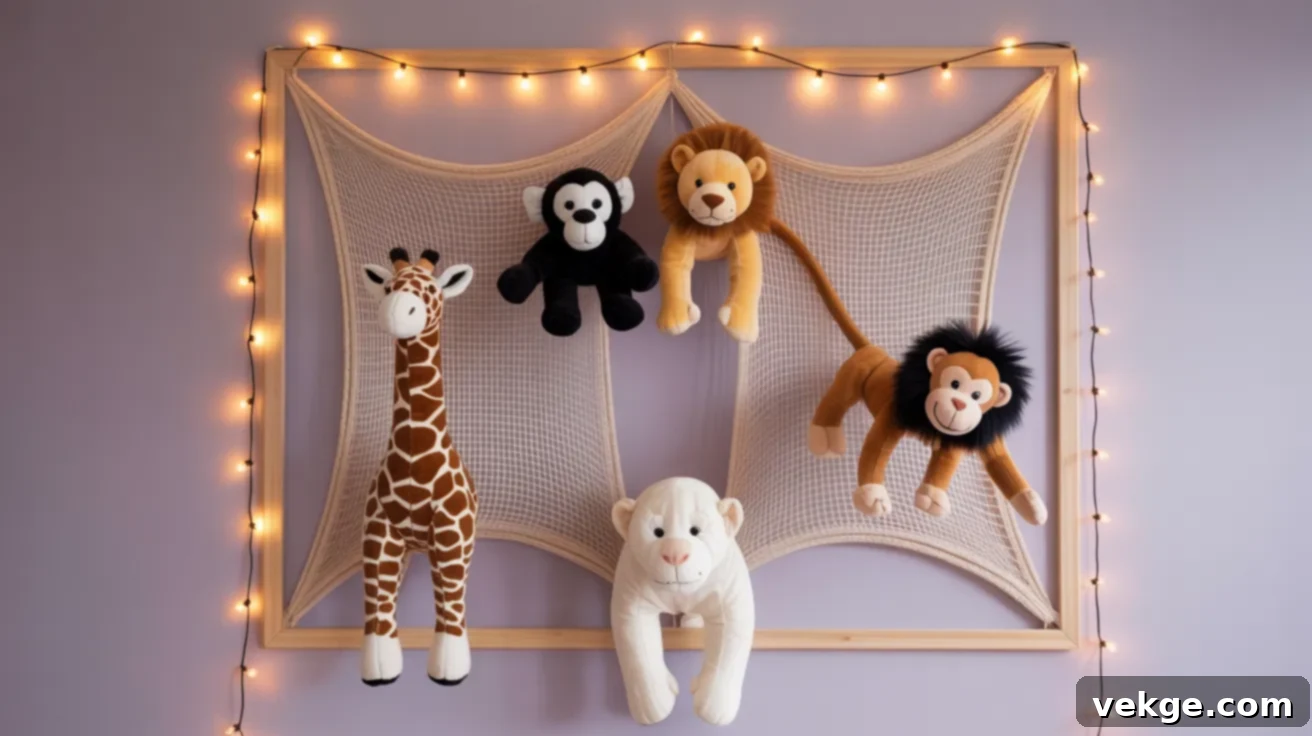
For those who want to completely free up floor space, a wall-mounted stuffed animal zoo is an elegant and practical choice. This version turns toy storage into a form of wall art. Construct a sturdy framed structure from wood or lightweight metal, then string bungee cords, rope, or netting across the opening. This frame is then securely mounted to the wall, keeping stuffed animals visible, accessible, and off the floor entirely. This option is particularly beneficial for smaller bedrooms, shared spaces, or minimalist designs. Crucially, ensure the unit is mounted directly into wall studs for maximum safety and stability, as kids might be tempted to tug on it.
Hanging Nets & Toy Hammocks: Quick and Cozy Storage
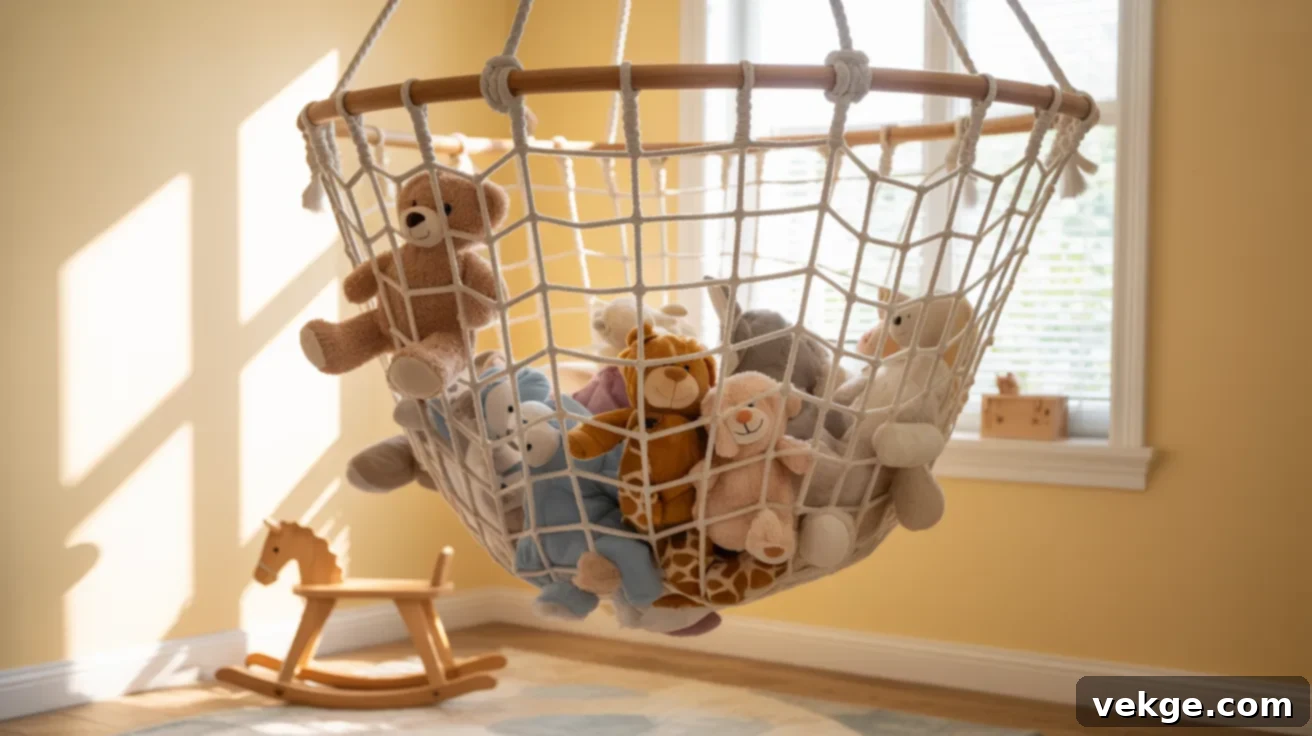
If a full build isn’t on your agenda, hanging nets and toy hammocks offer a quick, simple, and effective way to lift the plush pile off the floor. These are perfect for utilizing unused corner spaces or the area above a bed. Install strong, secure hooks into your wall or ceiling (ensuring they are anchored properly), then hang the net or hammock. Place them at a height where your child can safely reach their toys without assistance. Ideal for lightweight stuffed animals, these solutions give the room a cozy, playful feel while keeping everything visible, accessible, and beautifully contained.
Over-the-Door Organizers: The No-Drill Hack
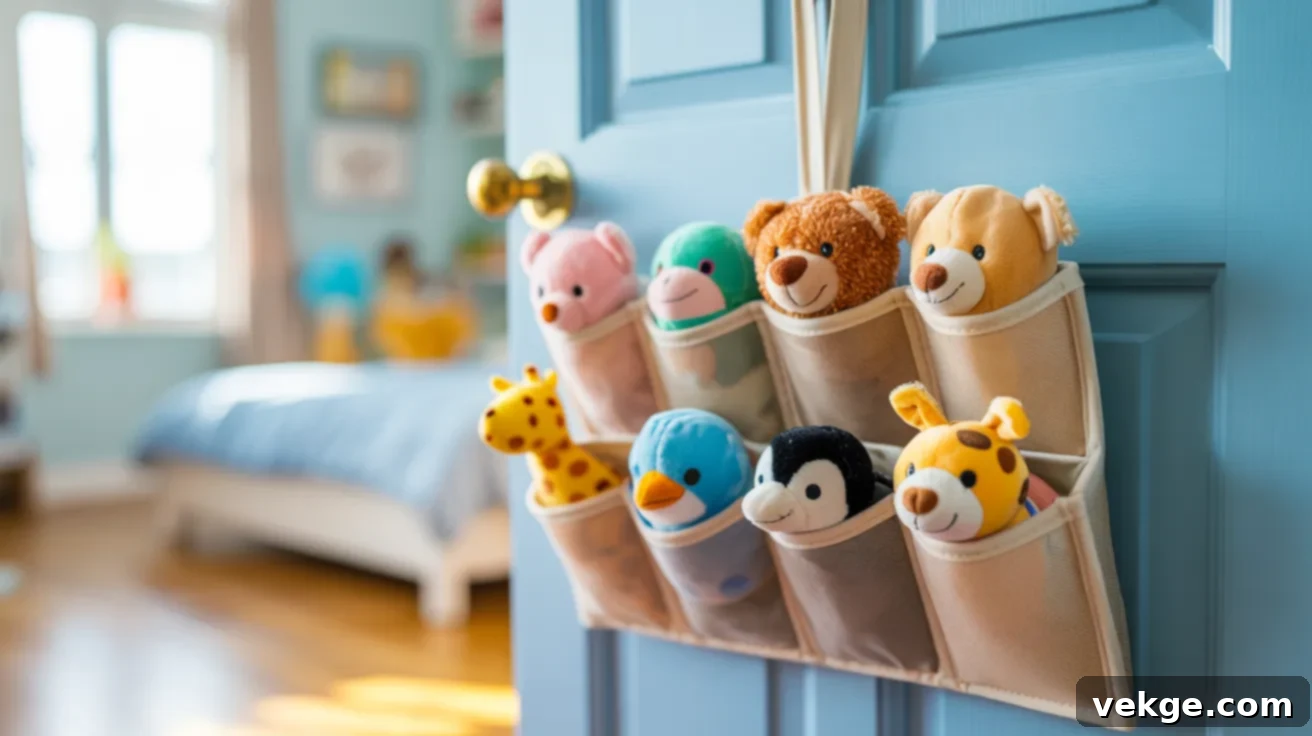
You’ve likely seen over-the-door organizers used for shoes, but they are surprisingly perfect for small plush toys, too! This is one of the ultimate no-drill storage hacks, making it ideal for renters or anyone looking for an instant solution. Simply hang an organizer over the closet or bedroom door, and you immediately gain dozens of individual pockets ready for action. Kids love this method because they can see all their beloved animals at a glance and easily pick out their favorite without having to rummage through a deep basket. It’s a win-win for quick setup, visibility, and keeping the floor clear.
Cubbies with Bins or Drawers: Tidy and Customizable
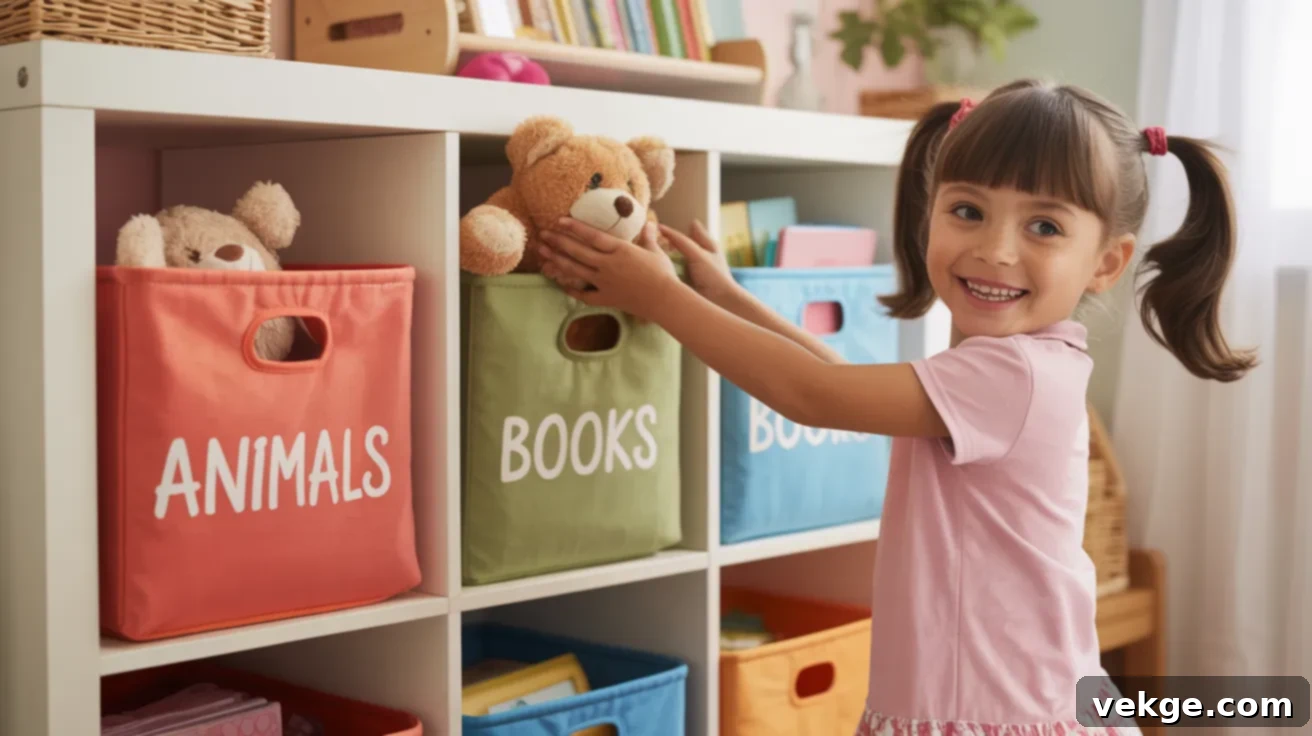
For a more traditional yet equally effective storage solution, cubbies paired with fabric bins or drawers are an excellent choice, especially if you have a little floor space to spare. Cubby units provide a tidy, modular system where each compartment can house a specific category of toys. The fabric bins are fantastic because kids can easily toss their toys in without worrying about perfect placement. Each bin can be labeled (with pictures for younger children) for animals, dolls, or even books, promoting early organizational skills. Some cubby units even come with built-in drawers, perfect for hiding away mess when guests arrive. You can further personalize this solution by letting your child decorate the bins, making the space feel uniquely theirs and fun.
Safety & Usability: Important Tips for Your Stuffed Animal Zoo
When creating anything for children, safety must always be the paramount concern. These essential tips will help you build a stuffed animal zoo that is not only sturdy and well-designed but also safe, stable, and easy for little ones to use independently. Prioritizing these aspects will give you peace of mind and ensure the zoo remains a beloved feature for years to come.
Toddler Safety First: Adapting for Little Hands
If your stuffed animal zoo will be used by toddlers or very young children, it’s crucial to adapt certain elements for their safety. Avoid using standard bungee cords, as they can pose a risk of snapping back, pinching small fingers, or even creating a choking hazard if sections come loose. Instead, opt for softer alternatives like wide elastic bands with low tension, sturdy fabric straps, or soft ropes. Ensure all components are securely attached and that there are no small parts that could detach and be swallowed. A few proactive childproofing steps during construction can prevent many worries later on.
Wall Anchoring Basics: Preventing Tipping Hazards
Any tall or freestanding furniture in a child’s room, including a stuffed animal zoo, should be securely anchored to the wall to prevent tipping. Children naturally pull, climb, and lean on objects, making furniture tip-overs a significant hazard. Use furniture straps or L-brackets designed for anti-tip anchoring. For the strongest hold, drill directly into wall studs. If studs aren’t available, choose heavy-duty drywall anchors specifically rated for the weight of your zoo and its contents. This vital step ensures the structure remains stable and safe, even during active playtime.
Kid-Friendly Access: Fostering Independence
A truly effective stuffed animal zoo is one that children can use themselves, fostering independence in playtime and cleanup. Ensure that the spacing between your bungee cords or bars allows children to easily reach in and retrieve their toys without struggling, but is still tight enough to keep toys securely contained. Place frequently used or favorite plush toys at a lower level so children can access them without needing help. Avoid placing items too high, as this can lead to children attempting to climb the structure, which poses a safety risk. Thoughtful placement encourages self-sufficiency and makes cleanup time a much more enjoyable and manageable activity for everyone.
DIY Plans & Kits: Get Started Without Guesswork
If the idea of designing your stuffed animal zoo from scratch feels a bit daunting, don’t worry! There are abundant resources available to guide you, from free downloadable instructions to complete kits. This section will help you find the perfect starting point, ensuring your building experience is smooth and successful.
Free Plans to Download and Inspire
For those who love a good DIY challenge but prefer some structure, many reputable sources offer free plans that you can download and follow. These plans often provide detailed diagrams, material lists, and step-by-step instructions. Here are a few excellent options:
- Ana White: Known for her practical and beginner-friendly woodworking plans, Ana White’s website is a treasure trove for DIY enthusiasts. Her designs are often simple, clearly explained, and perfect for those new to building.
- Kreg Tool: A leader in woodworking jigs and tools, Kreg Tool offers a selection of solid woodworking plans. Their instructions are well-organized, reliable, and often include helpful tips for using their products, which can simplify joinery.
- Instructables: This platform is a hub for creative projects shared by a global community. You’ll find a wide variety of stuffed animal zoo builds from other parents, complete with step-by-step photos, various design approaches, and user comments that can offer additional insights.
Before you start cutting, always remember to print out the plans, double-check the material lists, and verify that the measurements provided will fit your specific space. This pre-check ensures a smooth building process.
Where to Buy Plans & Kits for Convenience
Sometimes, the convenience of having everything in one place, or a pre-designed plan, is exactly what you need. Whether you’re looking for detailed blueprints or a ready-to-assemble package, these options can save you time and effort:
- Etsy: This marketplace is a fantastic source for unique and aesthetically pleasing downloadable plans. Many sellers offer detailed cutting diagrams, layout sketches, and even personalized design notes. You can often find plans with stylish touches that go beyond basic functionality.
- Amazon: If you’re seeking maximum convenience, Amazon offers a selection of full DIY kits. These kits typically come with pre-cut pieces, hardware, and all necessary components, eliminating the need for measuring or sawing on your end. This is ideal for those who want to jump straight into assembly.
- Toynk Toys: For a more themed or decorative approach, specialized toy retailers like Toynk Toys sometimes offer themed kits. These might include pre-designed elements, unique colors, or specific aesthetic features (like animal-themed cutouts or pastel color schemes) that kids will adore right out of the box.
When purchasing plans or kits, always read reviews carefully and check the “what’s included” section to ensure you’re getting a product that perfectly matches your needs and expectations.
Conclusion: Reclaim Your Home with a DIY Stuffed Animal Zoo
Now that you’ve explored the simplicity and numerous benefits of building a DIY stuffed animal zoo, we hope you feel inspired and ready to give your child’s plush pile a well-deserved and organized home. You’re equipped with comprehensive step-by-step instructions, a wealth of creative design ideas, and crucial safety tips to ensure your project is both fun and functional.
Remember, your stuffed animal zoo doesn’t need to be an elaborate masterpiece; it simply needs to be effective for your unique space and bring joy to your child. A little planning goes a long way in ensuring a smooth and successful build.
Take what you’ve learned, personalize it to your heart’s content, and enjoy the profound difference a tidy and organized space can make. Not only will you reclaim your floors and shelves, but you’ll also create a cherished, handmade item that your child will love. For more practical DIY guides and clever storage solutions to further enhance your home, be sure to explore our other insightful blogs as well!
