DIY Staircase Renovation: A Comprehensive Step-by-Step Guide to Transforming Your Worn Stairs
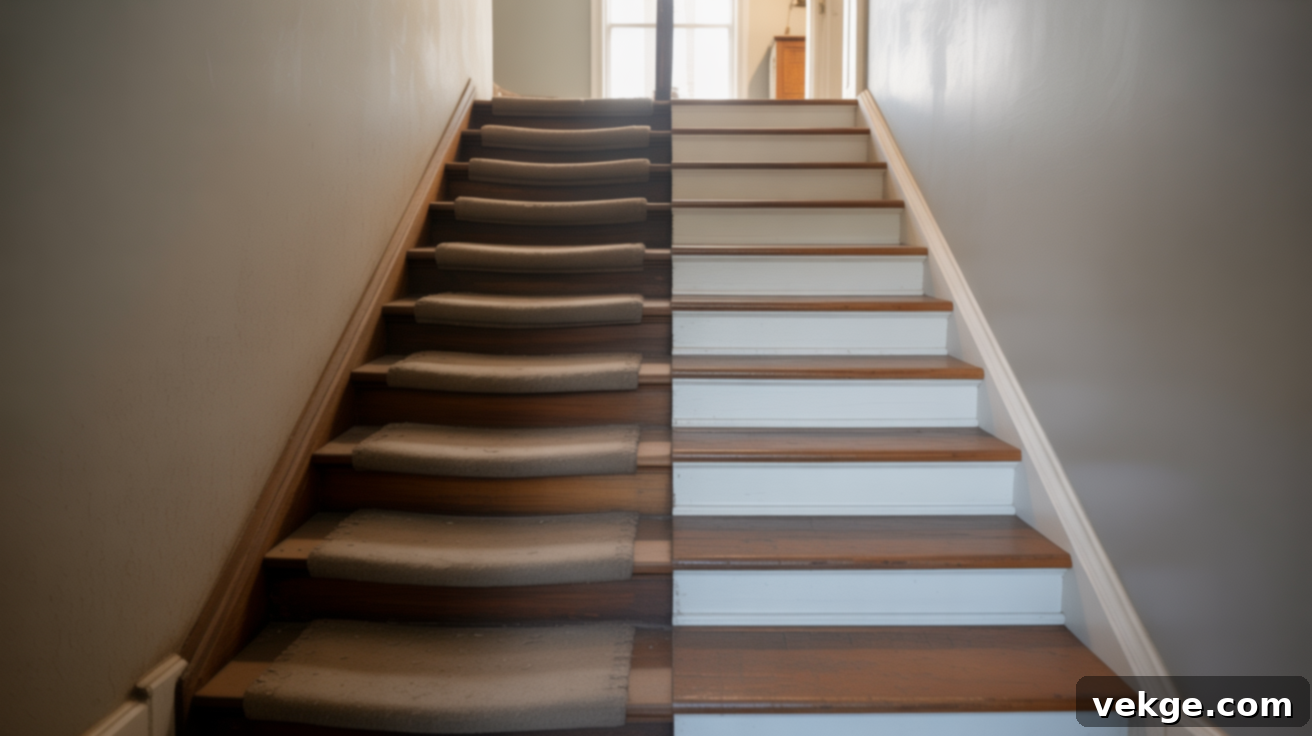
Have you ever looked at your stairs and felt a sense of dread? Perhaps the carpet is frayed and faded, the wood beneath creaks with every step, or the entire structure simply no longer fits the aesthetic of your updated home. That’s precisely how many homeowners feel, and it’s what often sparks the desire for a significant change. The good news? A full-scale staircase renovation doesn’t have to be a costly, professional endeavor. With a bit of planning, the right materials, and this detailed guide, you can embark on a DIY staircase makeover that’s both achievable and incredibly rewarding, transforming an eyesore into a stunning focal point.
This comprehensive guide will walk you through every critical stage of DIY stair renovation. From conducting an initial assessment of your stairs’ condition to making informed decisions about repairs or replacements, selecting the perfect materials, and executing each step safely and efficiently, we’ve got you covered. You’ll also discover invaluable tips for maintaining your beautifully finished stairs and learn how to sidestep common pitfalls that often trip up DIY enthusiasts. Prepare to dive into a home improvement project that truly feels manageable and delivers stunning, lasting results that enhance the safety and beauty of your living space.
Should You Update or Do a Full Staircase Renovation?
When faced with outdated or worn stairs, the first crucial decision is to determine whether a cosmetic refresh (an update) will suffice or if a more extensive, full-scale staircase renovation project is necessary. This choice will significantly impact your budget, time commitment, and the types of materials you’ll need, making a careful assessment essential.
Quick Stair Condition Checklist
Before you lift a single tool, a thorough inspection of your existing stairs is paramount. This quick checklist will help you identify potential issues and guide your decision-making process:
- Tread Stability: Are the treads solid and firmly attached? Do they wobble or shift when you apply weight? Minor creaks might be fixable, but significant movement indicates a structural issue that needs addressing immediately for safety.
- Wood Condition: Examine the wood for signs of damage. Are there small chips, superficial scratches, or just cosmetic wear that can be sanded away? Or do you see deep cracks, soft spots, or areas of rot? Soft or cracked wood often necessitates replacement for structural integrity and safety reasons.
- Riser Integrity: Check the risers (the vertical parts between treads). Are they evenly spaced and secure? Look for large gaps, significant damage, or missing support elements. Uneven riser heights can be a trip hazard and usually require more than just a surface-level fix.
- Stringer Health: Inspect the stringers (the angled boards supporting the treads and risers on the sides). Are they straight, free of cracks, and securely fastened to the floor and upper landing? Any compromise here could indicate a major structural concern, requiring professional assessment.
- Railing and Baluster Security: Give your handrail and balusters a good shake. Are they loose, wobbly, or damaged? Code compliance for railings is also an important safety consideration, especially in older homes where standards may have changed.
Addressing structural issues like cracked wood, shifting treads, or compromised stringers is essential for safety. If your stairs exhibit these more serious problems, a full renovation (replacing treads, risers, or even structural components) is likely the safest and most effective path. For purely cosmetic issues like scuffs, outdated colors, or minor chips, painting or refinishing can work wonders, offering a cost-effective solution.
Costs of Each Option
Understanding the financial implications of each approach is key to planning your budget-friendly stair makeover, ensuring you get the most value for your investment:
- Painting or Refinishing: This is generally the most economical option, ideal if your existing treads are structurally sound but aesthetically dated.
- Paint: Costs typically range from $50 to $150 for materials (quality paint, primer, painter’s tape, sandpaper) if you already own basic tools.
- Stain and Polyurethane: Slightly higher due to the cost of quality stains and durable polyurethane finishes, usually staying under $200 for materials, but offering a more natural wood look.
- Full Tread and Riser Replacement: This involves removing the old surfaces and installing new ones, providing a brand-new foundation.
- Plywood or Hardwood Treads: Depending on the length of your staircase and the chosen material (e.g., stain-grade plywood, oak, or engineered flooring overlays), costs typically range from $200 to $600 for materials. Hardwoods will be at the higher end, offering superior durability and aesthetics.
- Additional Costs: If you decide to update the railing, balusters, or newel posts, expect to add another $100 to $500 or more, depending on the complexity and materials (e.g., simple wooden spindles vs. ornate metal balusters).
Your ultimate choice should be guided by a balance of your budget, the tools you have access to, your DIY skill level, and the true condition of your stairs. Always get accurate price estimates for all materials before committing to your chosen renovation path to avoid unexpected expenses.
Essential Materials for Your Stair Makeover
For a DIY staircase renovation that’s both cost-effective and built to last, selecting the right materials is crucial. Here’s a list of sturdy, readily available items that work exceptionally well for transforming your stairs, ensuring a professional and durable finish:
- Plywood Treads: Opt for good quality, stain-grade or sanded plywood (at least 3/4 inch thick) for new treads. It’s durable, cost-effective, and takes paint or stain beautifully.
- Plywood Risers: Standard 1/4 or 1/2 inch plywood, or even pre-primed MDF, works well for risers. Pre-primed options save you a step if you plan to paint them white, offering a smooth finish.
- Bullnose Edging or Stair Nosing Strips: These are essential for creating a finished, safe edge on your new treads. Available in various wood species or vinyl to match your flooring, they provide a professional look and prevent tripping.
- Construction Adhesive or Wood Glue: A heavy-duty construction adhesive (like Liquid Nails) or high-quality wood glue is vital for securely bonding new treads and risers to the existing structure without relying solely on nails. This creates a strong, squeak-free installation.
- Wood Filler: Indispensable for filling nail holes, small gaps, and imperfections, ensuring a perfectly smooth surface before finishing. Choose a filler that accepts paint or stain well.
- Paint: If painting, choose a durable, floor-grade latex or oil-based enamel paint designed for high-traffic areas. This will resist scuffs, chips, and daily wear, maintaining its appearance longer.
- Wood Stain: If you’re aiming for a natural wood look, select a quality wood stain in your desired color. Always test it on a scrap piece first to ensure the color matches your expectations.
- Polyurethane: A protective topcoat is non-negotiable for durability. Water-based polyurethanes dry faster and clean up with water, while oil-based options offer maximum durability but take longer to cure. Consider a satin or matte finish for enhanced grip.
- Primer: Absolutely necessary if you’re painting bare wood or a previously stained surface. It ensures better adhesion of your topcoat, provides uniform color, and blocks stains, leading to a smoother, more even final coat.
- Painter’s Tape: Essential for achieving crisp, clean lines when painting or staining adjacent surfaces, protecting walls and trim.
- Sandpaper: You’ll need various grits (e.g., 60-grit for heavy removal, 120-grit for smoothing, 220-grit for fine finishing) for proper preparation and creating a smooth base between coats.
- Caulk: For sealing any small gaps between risers, treads, and stringers, providing a clean, professional finish that prevents dirt accumulation. Paintable caulk is ideal.
Step-by-Step DIY Staircase Makeover Guide
Ready to transform your worn-out stairs into a stunning focal point? Follow this detailed, step-by-step guide to confidently upgrade your staircase from start to finish.
Step 1: Remove the Railing and Stair Runner (If Applicable)
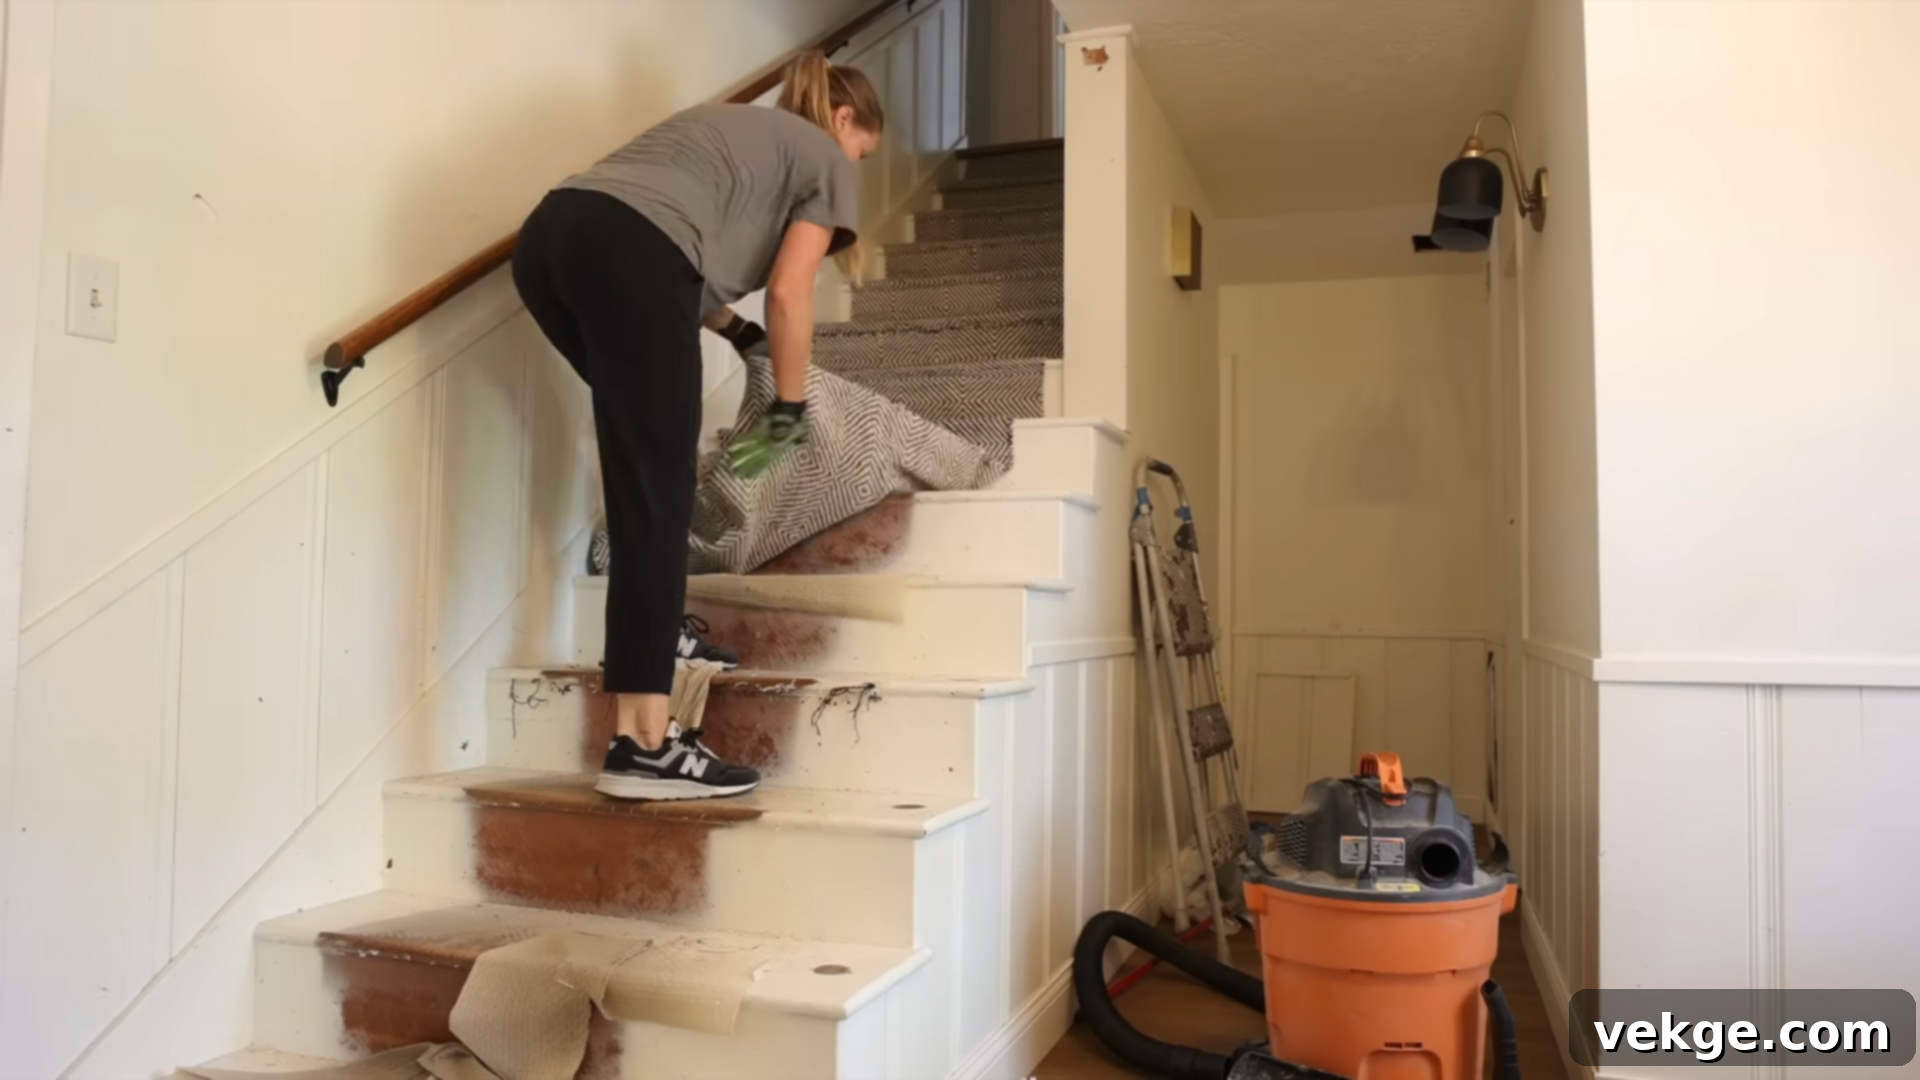
This initial phase often involves more muscle and patience than anticipated. If your stairs have an existing railing that’s outdated, wobbly, or doesn’t meet current safety codes, it’s best to remove it. You might find screws hidden under layers of paint, requiring a paint stripper or a utility knife to expose them. A chisel can be useful for prying stubborn pieces away, especially if they’ve been painted over multiple times.
Next, tackle any old stair runner. This can be surprisingly laborious. Many runners are secured with hundreds, if not thousands, of staples. Invest in a good pair of pliers, a dedicated staple remover tool, and even a flathead screwdriver for stubborn ones. Be prepared for a physically demanding task; this step is often cited as the most exhausting part of the entire renovation due to the sheer volume of staples and potential for blisters. Take your time and wear gloves.
Step 2: Deep Clean and Prep the Stairs
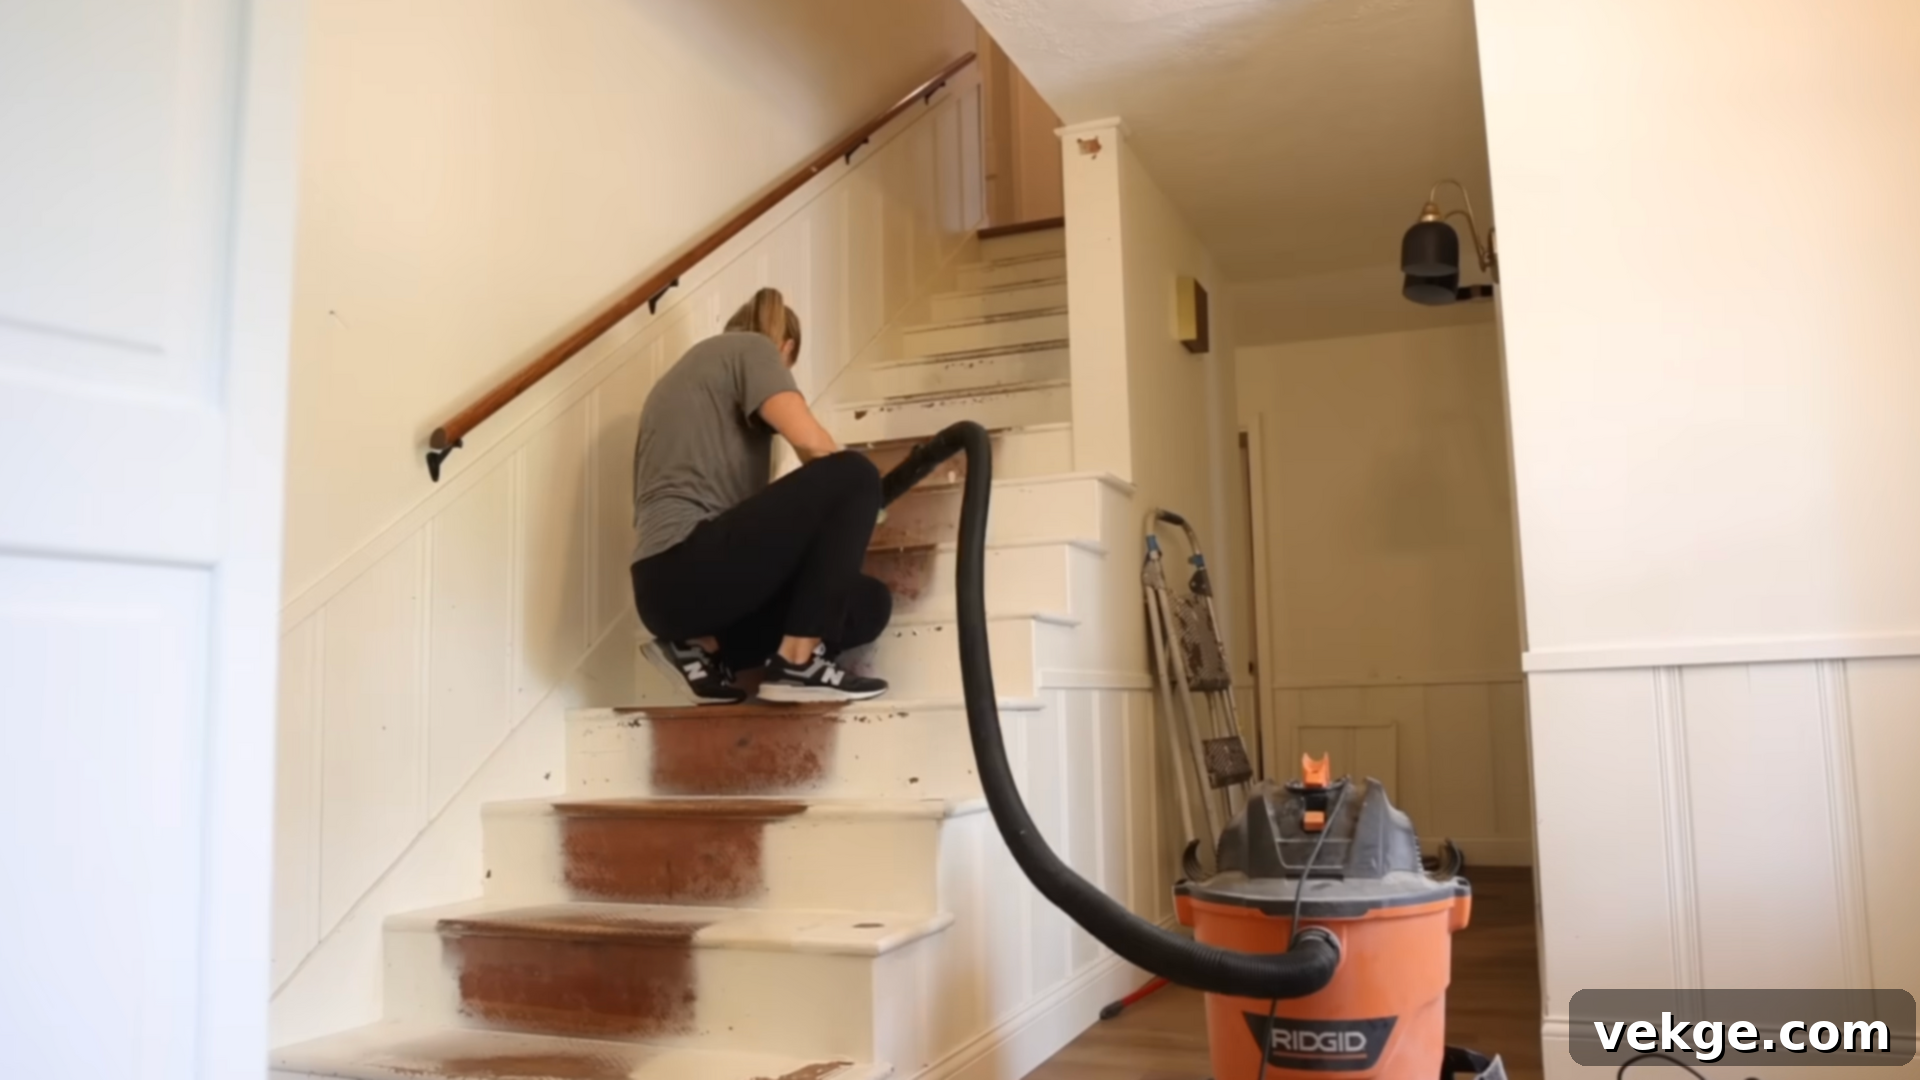
Once the old runner, staples, and any removed railing components are out of the way, a thorough deep clean is absolutely essential. Start by vacuuming every nook and cranny to remove loose dirt, dust, and any stray staple remnants. Follow up with a good scrub using a degreaser or an all-purpose cleaner to remove grime, adhesive residue, and any other build-up. For wood stairs, ensure the cleaner is wood-safe and allow ample time for the surface to dry completely before proceeding.
This meticulous cleaning and preparation phase, though tedious, is critical. Proper adhesion of new materials, paint, or stain relies heavily on a clean, dry, and sound surface. Don’t skip or rush this step; it directly impacts the longevity, adhesion, and overall quality of your finished staircase makeover.
Step 3: Install the Risers
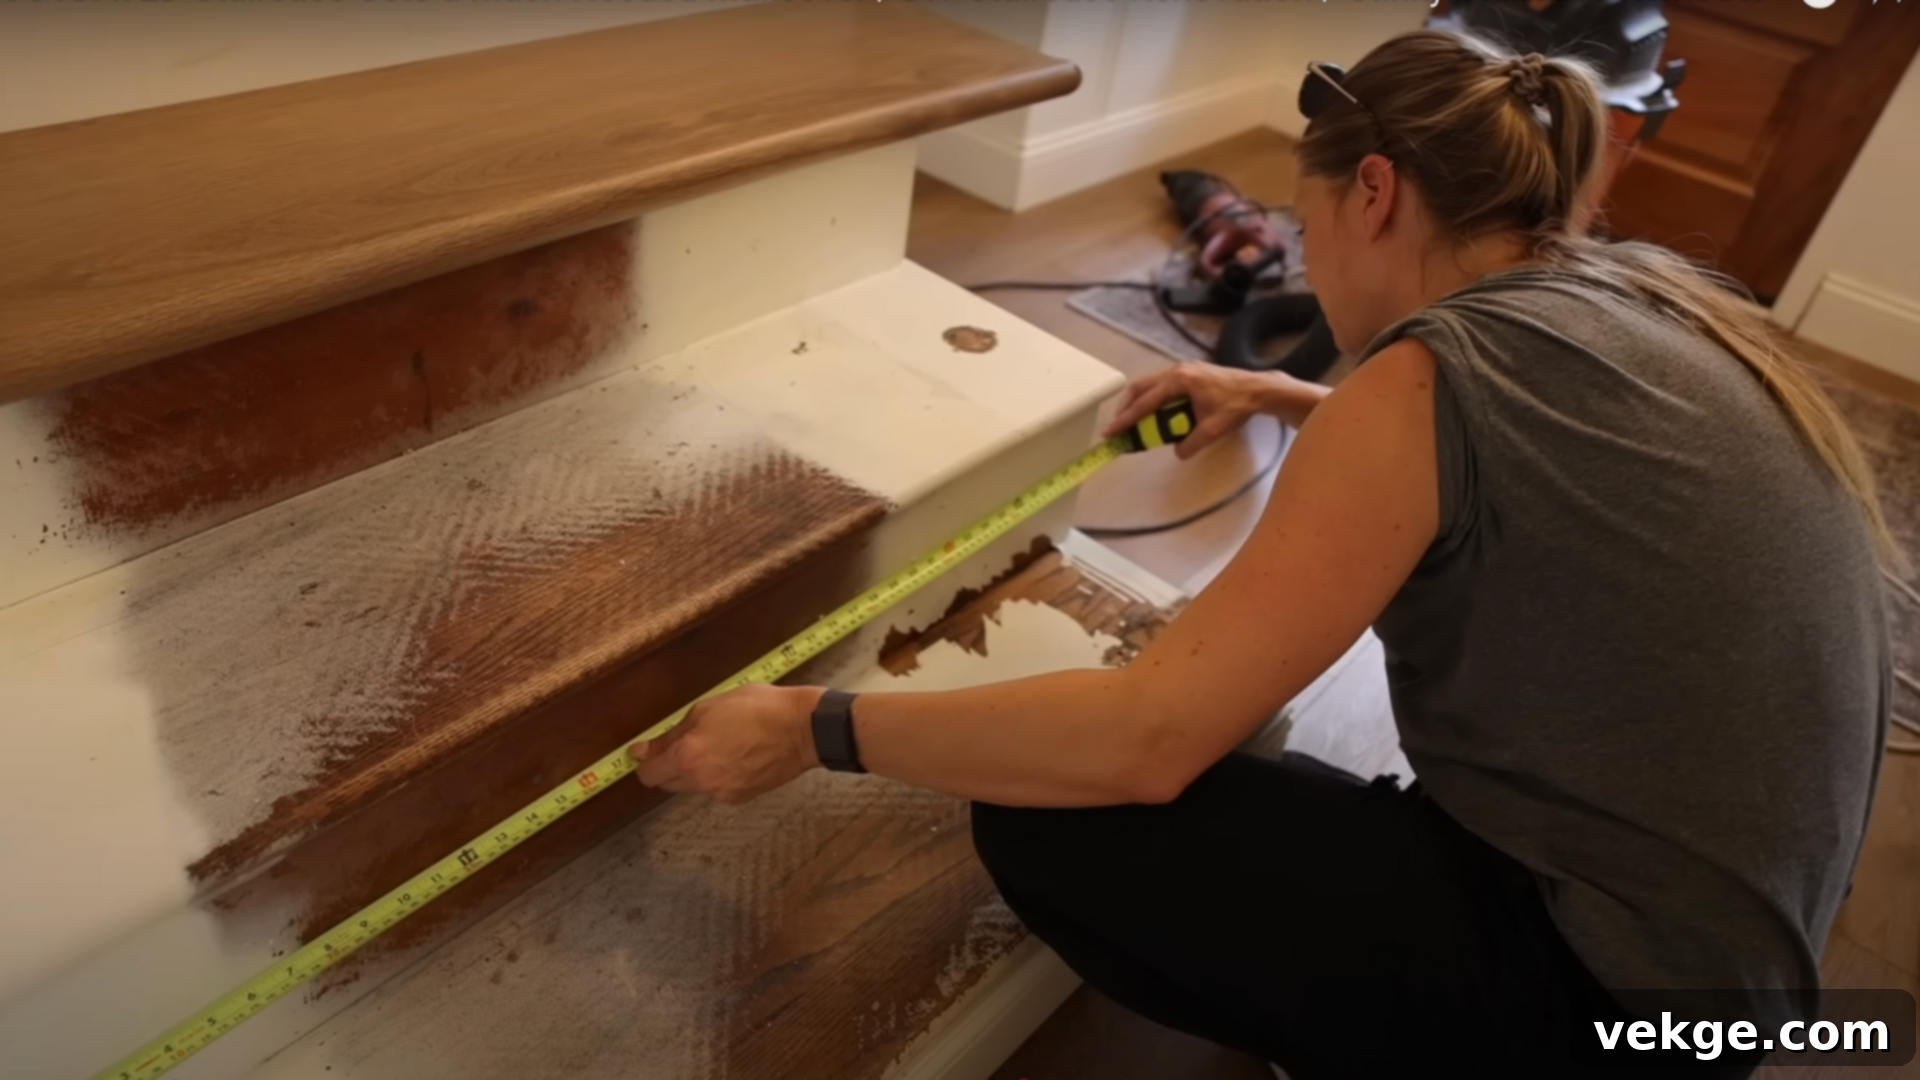
The risers are the vertical boards that connect each step. For a clean, modern look, many homeowners opt for prefinished white boards or prime and paint their own cut plywood. Measure each riser opening carefully, as they might vary slightly in height and width. Use a table saw or circular saw with a straight edge to accurately rip the riser boards down to the correct height. Precision here is key to a professional-looking, seamless finish.
Apply a strong paneling or construction adhesive generously to the back of each cut riser board. Press the riser firmly into place, ensuring it’s level and flush with the existing structure. To ensure a tight bond and prevent shifting while the adhesive cures, use painter’s tape or temporary bracing (like scrap wood held by pressure) to hold the risers in position for several hours. This creates a crisp appearance that complements existing baseboards and trim throughout your home.
Step 4: Measure and Cut Stair Treads
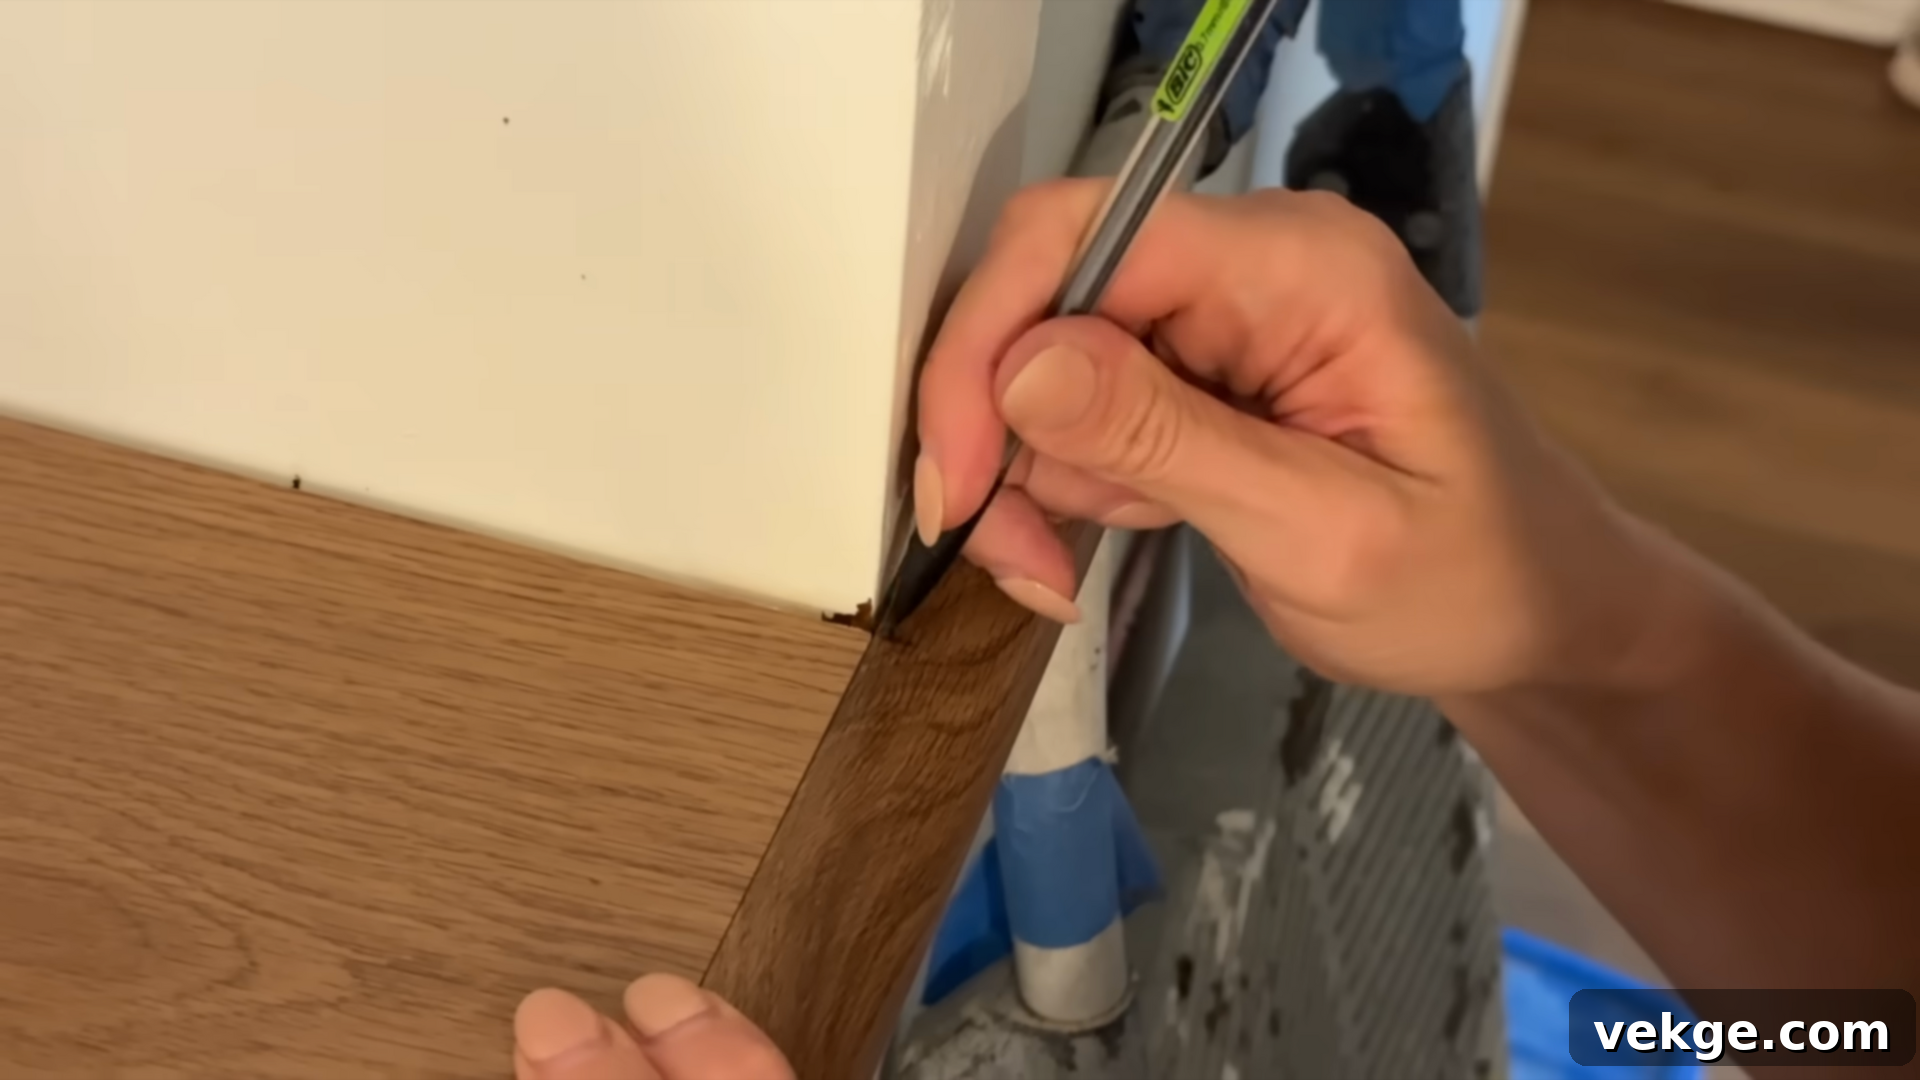
Accurate measurement is paramount for installing new treads. If you’re using stair tread overlays designed to match your existing flooring (like vinyl plank or engineered wood), ensure you follow the manufacturer’s specific instructions. When working with plywood or hardwood boards, measure each individual stair tread’s length and depth meticulously. Remember, stairs are rarely perfectly uniform, so avoid cutting all treads at once based on a single measurement—each step might be slightly different.
A common strategy is to start with the wider bottom steps. This allows you to use any potential miscut pieces for shorter steps at the top, minimizing material waste. Set up a stop block on your miter saw for repetitive cuts of similar-sized treads, which significantly speeds up the process and improves consistency. Don’t forget to cut end cap and trim pieces as well; these details provide a highly polished and professional finish, especially if your stairs are open-ended.
Step 5: Install the Stair Treads and Trim
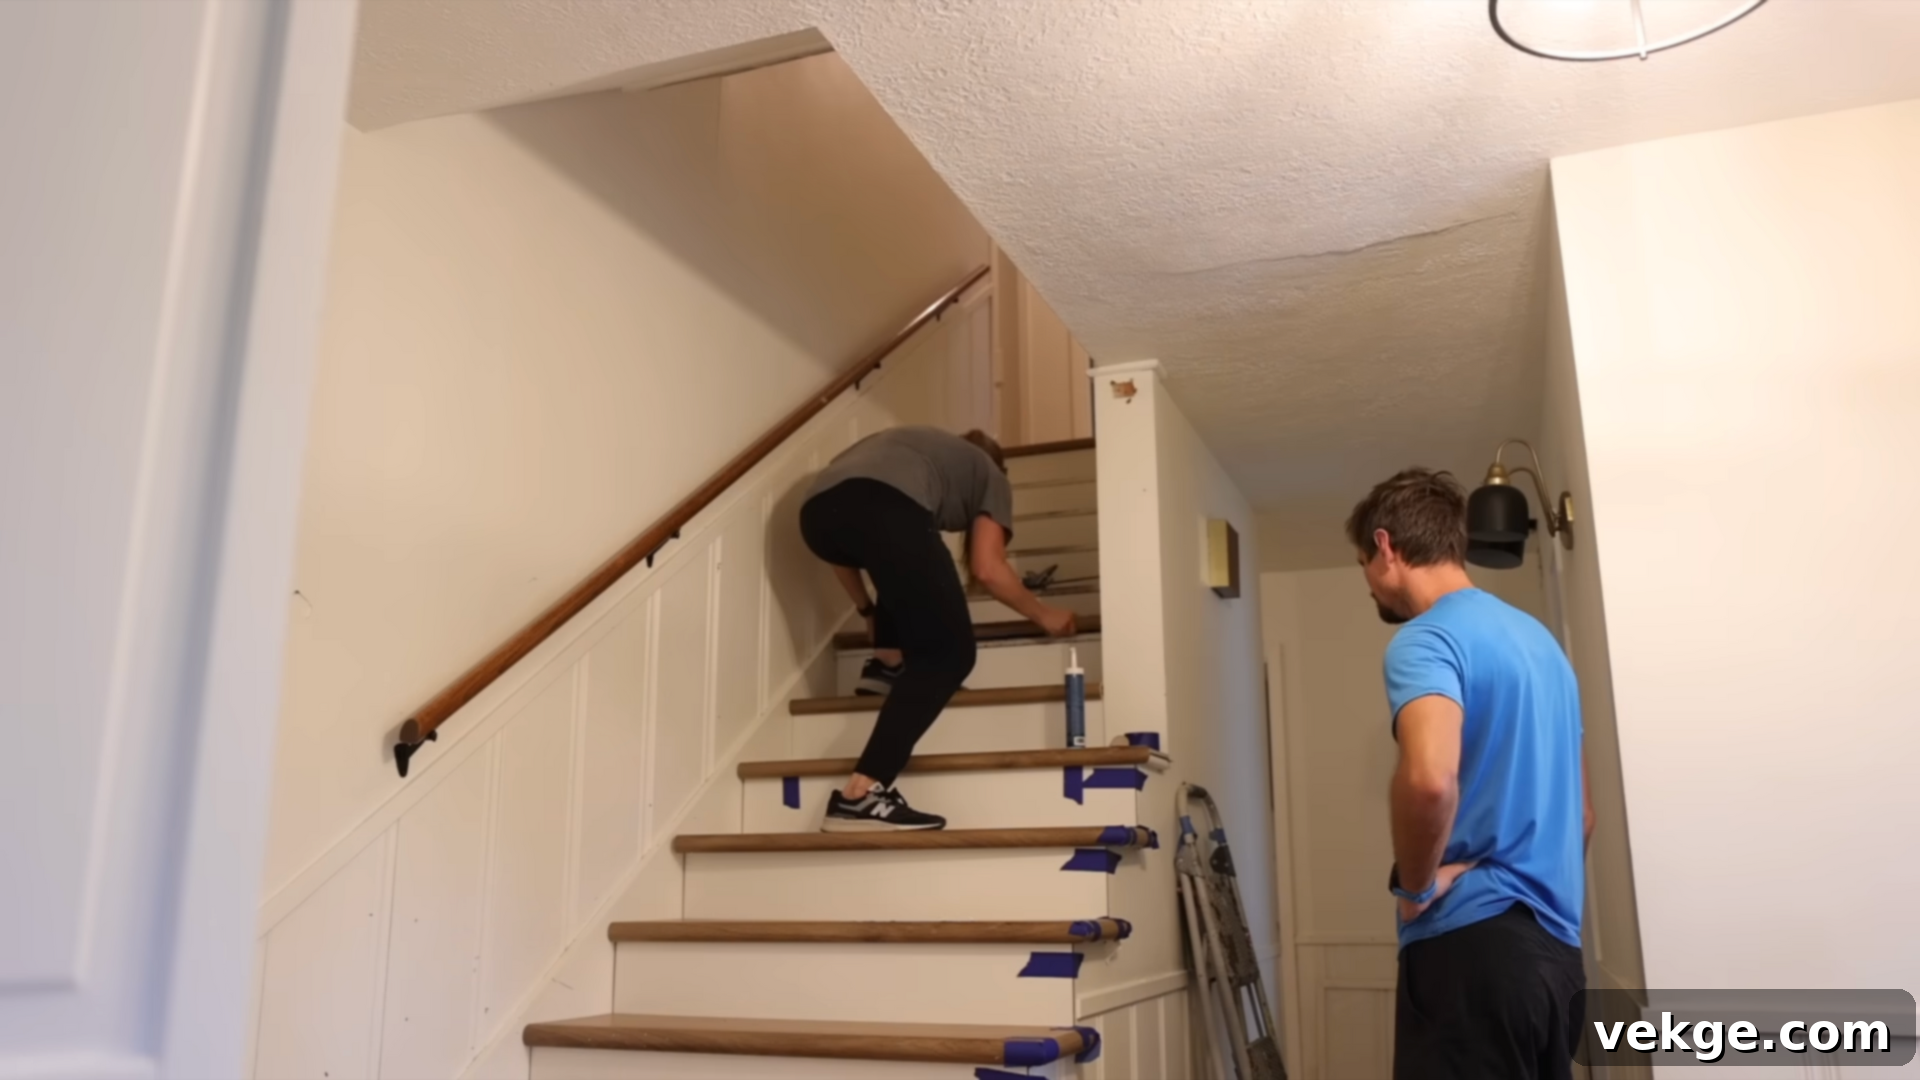
With your risers securely in place, it’s time for the treads. Apply a generous, even layer of construction adhesive to the back of each new tread, particularly along the edges and in a zigzag pattern across the center. Carefully position the tread, starting from the bottom of the staircase and working your way up. Ensure a tight, snug fit against the riser below it and the stringers on the sides. You may need to use a rubber mallet to gently tap the treads into their final position, ensuring a level and secure fit.
Once the main treads are installed, focus on the finishing details. Mitered side pieces and small end caps (often called return nosing) are crucial for creating a complete, custom look, especially if your stairs are open on one or both sides. For irregularly shaped steps or landings, a jigsaw will be your best friend, allowing you to make precise, custom cuts. Secure these trim pieces with construction adhesive and, if desired, a few small finishing nails, ensuring the nail heads are countersunk and later filled with wood filler for a flawless appearance.
Step 6: Clean-Up and Final Inspections
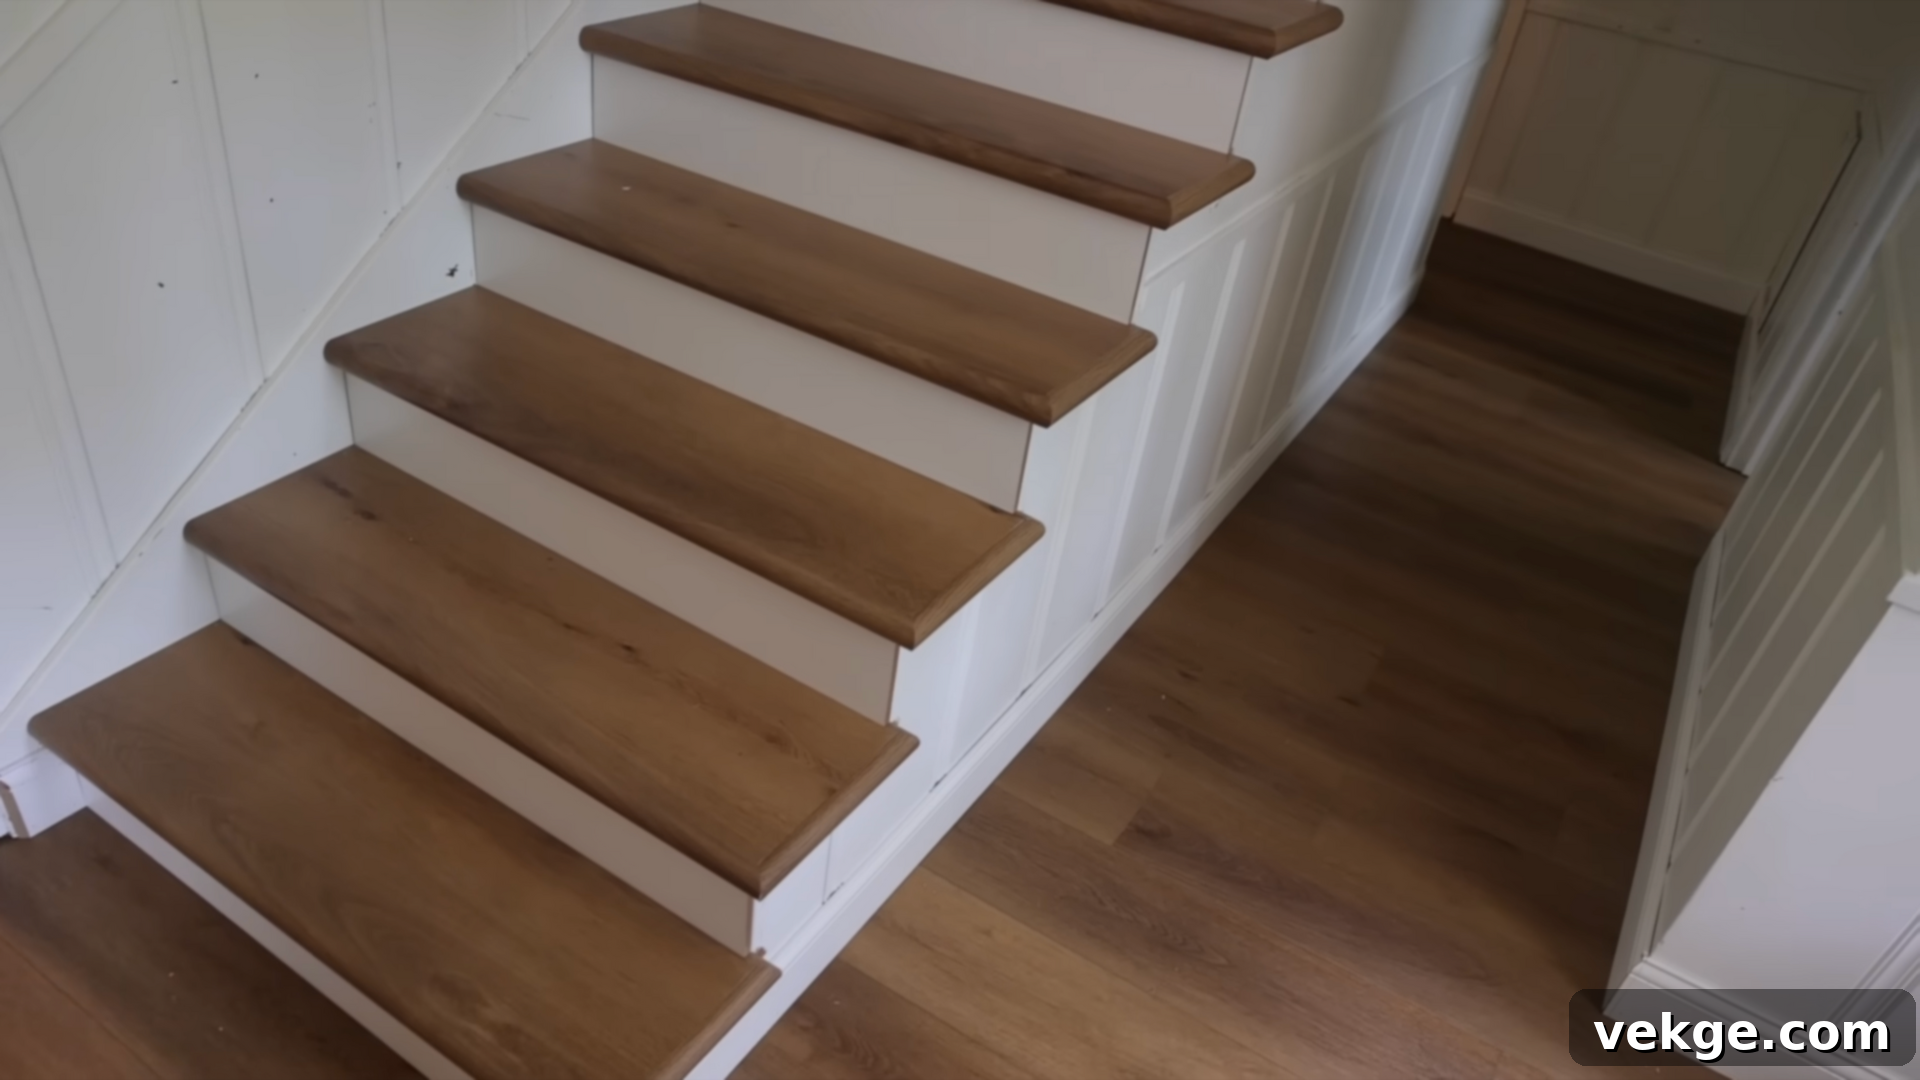
After the last tread and trim piece are securely in place, the hard work is largely done! Now, it’s time for the final cleanup. Thoroughly vacuum all surfaces to remove any sawdust, wood shavings, and construction debris. Wipe down the new stairs with a damp cloth to remove fingerprints and surface dirt, ensuring they are pristine.
Take a moment to inspect your work. Look for any small gaps that need to be caulked, nail holes requiring wood filler, or areas that might need a touch-up of paint or stain. The transformation at this stage is usually dramatic – your stairs will look brand new and seamlessly integrated with the rest of your home’s aesthetic. Many DIYers report that the new stairs feel significantly sturdier and safer without the old carpet runner and hidden staples, enhancing both the look and functionality of their space. At this point, you can also plan for adding a new custom railing or updating the existing one to truly complete your staircase remodel.
Staircase Finishing Touches: Elevating Your Renovation
Once the main renovation of your treads and risers is complete, small but impactful upgrades like painting the stringers and updating your railing details can dramatically elevate the overall look of your staircase, giving it a polished and professional finish.
Paint the Stringers
The stringers, which are the angled boards running along the sides of your stairs, often frame the entire structure. Painting them can profoundly change the character of your staircase. A popular choice is crisp white paint, which creates a striking contrast against stained or darker treads, imparting a clean, modern, and expansive feel. This high-contrast look is timeless and brightens the entire stairwell, making the space feel larger and more inviting. Alternatively, if you prefer a more rustic or natural aesthetic, you can sand the original stringer wood and apply a clear sealant or a light stain to highlight its natural grain, adding warmth and character.
When painting stringers, take your time. Use high-quality painter’s tape to create sharp lines where the stringers meet the walls and the new treads. Angled brushes are excellent for precision work in tight corners. Apply several thin coats for a durable, smooth finish, allowing adequate drying time between each coat to prevent drips and ensure even coverage.
Railing and Baluster Options
You don’t necessarily need to completely tear out your entire railing system to achieve a fresh, updated look. There are several budget-friendly options to modernize your stairs:
- Repaint or Restain Handrail: Sanding down your existing handrail and repainting it in a sophisticated black, a rich dark brown, or even a deep charcoal can instantly add a touch of modern elegance and contrast to your newly renovated stairs.
- Swap Balusters: If your balusters (the vertical spindles) are dated or damaged, consider replacing just these components. Simple wooden square or turned spindles, or even sleek metal balusters, can provide a significant aesthetic upgrade without the cost of a full newel post and handrail replacement.
- Faux Custom Look: For square balusters, you can wrap them with thin trim pieces to create a more substantial, custom-paneled appearance. This trick adds architectural interest and makes basic balusters look high-end without extensive carpentry.
- Two-Tone Approach: Painting the handrail in one color (e.g., a dark shade) and the balusters in another (e.g., crisp white) is a classic strategy that modernizes the space, adds depth, and complements virtually any interior design style, creating a visually appealing contrast.
Common DIY Stair Renovation Mistakes to Avoid
A successful DIY staircase makeover is often about preventing errors before they happen. Avoiding these common mistakes can save you significant time, money, and frustration, ensuring your project goes smoothly and yields professional results:
- Rushing Sanding: Inadequate or rushed sanding is a top culprit for poor finishes. Skipping proper sanding or not using the correct grit sequence (coarse to fine) leads to a rough, uneven surface. Paint won’t adhere well, stain will look blotchy, and the final result will lack professionalism. Always sand thoroughly, working from coarser to finer grits, and clean dust completely between stages for optimal adhesion.
- Skipping Wood Filler and Caulk: Leaving nail holes, screw holes, or small gaps unfilled can drastically detract from the final aesthetic. Wood filler creates a seamless surface for painting or staining, while caulk seals gaps between different components (treads, risers, stringers, walls), preventing dirt buildup and creating clean lines. These small details make a huge difference in the finished look.
- Mismatched Wood Colors (without testing): If you’re mixing different types of wood (e.g., new treads with existing stringers) or trying to match a specific stain color, always test your chosen stain on a scrap piece of each type of wood first. Different woods absorb stain differently, leading to unpredictable and potentially mismatched colors if not tested beforehand.
- Using the Wrong Finish: Stairs are high-traffic areas, enduring constant foot traffic. Using a standard wall paint or a furniture-grade varnish simply won’t hold up. Always opt for durable, floor-grade polyurethane or enamel paint specifically designed for high-wear surfaces. Softer finishes will quickly show scuffs, scratches, and peel, requiring premature re-dos and more maintenance. Consider an anti-slip additive for the final topcoat.
- Ignoring Building Codes: Especially when replacing or modifying railings, be aware of local building codes for height, baluster spacing, and load-bearing capacity. Non-compliant stairs can be unsafe and may cause issues during future home inspections or even result in fines.
- Not Acclimating Materials: If you’re using solid wood treads or engineered wood overlays, allow them to acclimate to your home’s humidity and temperature for several days (typically 3-7 days) before installation. This prevents warping, gapping, or buckling after installation, which can ruin your hard work.
Styling and Maintenance Tips for Your New Stairs
Your beautifully renovated staircase deserves to stay looking its best. A few simple habits and smart additions can ensure your stairs remain sharp, clean, and safe for years to come, preserving your DIY staircase renovation investment.
- Keeping Wood Stairs Clean:
- Regular Sweeping/Vacuuming: The most important tip. Frequently sweep or vacuum (using a soft brush attachment) to remove dirt, dust, and abrasive grit that can scratch the finish over time.
- Damp Mopping: Use a slightly damp (not wet) mop with a pH-neutral, wood-safe cleaner. Avoid excessive water, which can damage wood and its finish, leading to swelling or discoloration.
- Immediate Spill Cleanup: Wipe up spills as quickly as possible to prevent staining or moisture damage from penetrating the finish.
- Avoid Harsh Chemicals: Steer clear of ammonia-based cleaners, abrasive pads, or wax polishes (unless specifically designed for your finish and desired effect) as they can dull or damage the protective layer of your stairs.
- When to Add a Runner: Even after a beautiful renovation, a stair runner can be a practical and stylish addition:
- Increased Safety: Excellent for homes with children, pets, or elderly residents as it provides extra grip and reduces the risk of slips and falls on hard surfaces.
- Noise Reduction: Softens the sound of footsteps, making your home quieter and more peaceful, especially in multi-story homes.
- Protection: Protects the underlying wood finish from wear and tear in high-traffic areas, extending the life of your renovation.
- Aesthetic Enhancement: Adds a layer of texture, color, and pattern, allowing you to introduce a new design element or tie the stairs into the overall decor of your home.
- Slip-Resistant Finish Tips: To enhance safety on newly finished wood stairs:
- Satin or Matte Polyurethane: Opt for a satin or matte finish for your polyurethane topcoat instead of high-gloss. These finishes offer slightly more grip due to less reflection.
- Grit Additive: Consider adding a fine, non-skid grit additive (available at hardware stores) to your final coat of polyurethane. It’s nearly invisible but provides significant traction.
- Avoid Waxes: Unless specifically formulated for anti-slip, avoid applying waxes or polishes that can make wood stairs dangerously slippery, especially when wet.
- Proper Footwear: Encourage family members and guests to wear appropriate footwear (e.g., slippers with rubber soles) on the stairs, avoiding socks or slick-soled shoes.
Conclusion: Embrace Your Transformed Space
Completing a DIY staircase renovation project is undeniably one of the most gratifying home improvements you can undertake. Each time you ascend or descend your beautifully transformed stairs, you’ll feel a profound sense of accomplishment and pride, knowing that your own hands brought this vision to life. You’ve not only saved money but have also created a custom look that perfectly reflects your personal style and enhances the overall value and appeal of your home.
By diligently following the steps outlined in this guide—from the initial inspection and meticulous planning to the careful selection of materials, precise installation, and thoughtful finishing touches—you’ve mastered the process of upgrading your staircase without exceeding your budget. Every detail, from thorough sanding to the application of durable sealant, plays a crucial role in creating a significant, lasting upgrade that will be enjoyed for years to come.
The journey of transforming your stairs demonstrates that with patience, attention to detail, and a clear plan, even seemingly daunting projects are entirely within your reach. If this project has empowered you to feel more confident and connected to your living space, we encourage you to continue exploring the possibilities. There’s always another corner of your home waiting for your creative touch and the satisfaction of a job well done.
Please continue to explore our collection of how-to guides and inspiring ideas to further enhance the interiors of your cherished home. Your next DIY adventure awaits, ready for you to make your mark!
