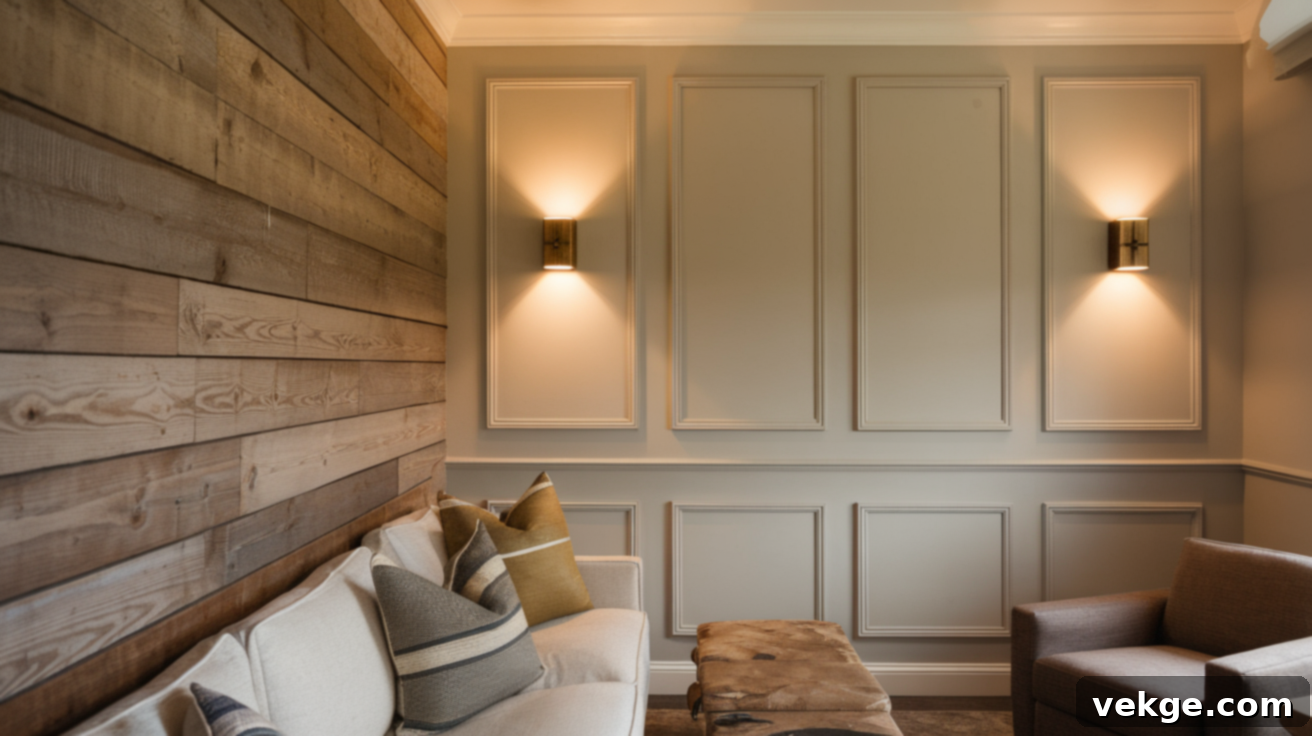
Wainscoting vs. Shiplap: The Ultimate Guide to Choosing Your Wall Paneling Style
Are you looking to infuse your walls with character and style, but find yourself deliberating between wainscoting vs. shiplap? You’re not alone. Both of these popular wall paneling options are celebrated for their ability to add depth, texture, and a distinct personality to any room. However, despite their shared goal of enhancing interior aesthetics, they each offer a unique visual appeal and serve different design purposes.
This comprehensive guide is designed to clarify the distinctions between wainscoting and shiplap, helping you make an informed decision for your home. We’ll delve into their unique features, explore where each style shines brightest, provide a detailed step-by-step installation guide, and offer essential maintenance tips to keep your chosen wall treatment looking its best for years to come. Whether you’re drawn to the timeless elegance of classic detailing or the cozy, inviting charm of a modern farmhouse vibe, this article will equip you with all the knowledge you need to select the perfect wall finish.
Let’s discover the ideal wall paneling solution that best suits your home’s aesthetic and functional needs, be it wainscoting or shiplap.
Wainscoting vs. Shiplap: A Detailed Overview
When it comes to elevating your interior walls, shiplap and wainscoting are two outstanding choices that can transform a room from ordinary to extraordinary. Both add a sense of completeness and rich character, but they achieve this with fundamentally different looks and applications. Understanding these differences is key to making the right choice for your space.
1. Shiplap: Rustic Charm and Modern Simplicity
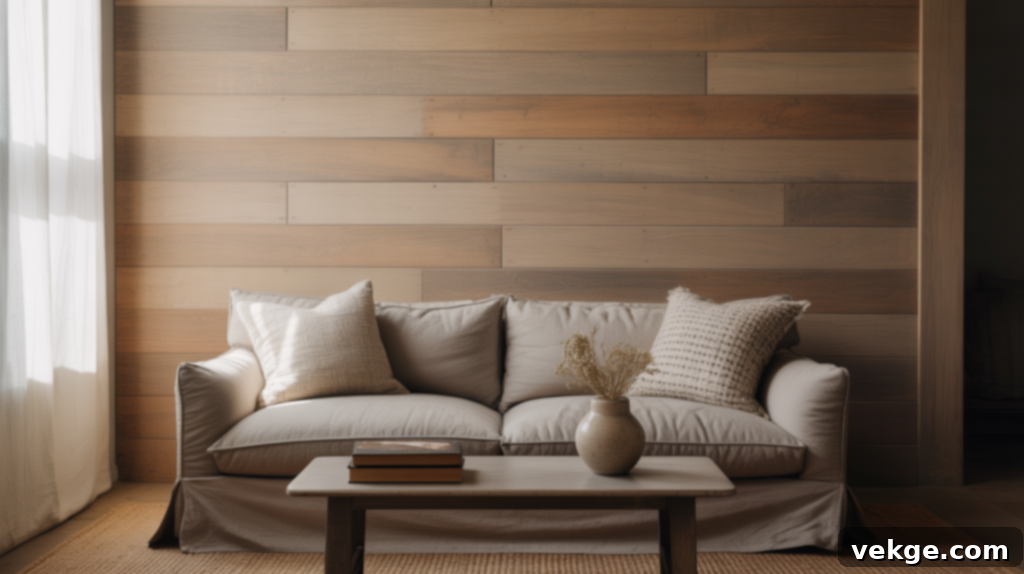
Originally used for exterior siding on barns and sheds, shiplap has made a remarkable comeback as a popular interior design element. It is typically crafted from wood or engineered wood planks, featuring characteristic grooves along the sides that allow the boards to overlap and interlock. This unique rabbet joint creates distinct, tight seams, providing both structural integrity and a signature aesthetic that has become synonymous with rustic and modern farmhouse styles.
- Wood Selection: Shiplap planks are commonly made from softwoods like pine or cedar, or engineered wood products. If intended for exterior use or areas prone to moisture, these materials are often treated to enhance their resistance to the elements. For interiors, untreated wood is common, providing a natural base for various finishes.
- Installation Orientation: Shiplap is most frequently installed horizontally, which creates a visually expansive effect, making rooms feel wider and more spacious. However, it can also be installed vertically for a different visual dynamic, or even diagonally for a truly unique accent. The interlocking nature of the planks ensures a consistent gap between boards, contributing to its distinctive appearance.
- Finish Versatility: One of shiplap’s greatest advantages is its adaptability to various finishes. It can be painted in crisp whites for a clean, coastal look, or in bolder colors to make a statement. Alternatively, staining can bring out the natural beauty of the wood grain, perfect for a rustic or cabin-inspired aesthetic. This versatility allows shiplap to seamlessly integrate into almost any home décor scheme.
Why Shiplap Stands Out for Modern Homes
- Design Versatility: Beyond the popular farmhouse aesthetic, shiplap effortlessly complements a range of styles including modern, rustic, industrial, and coastal themes. Its clean lines can provide a minimalist backdrop or a textured focal point.
- Textural Appeal: The subtle shadow lines created by the overlapping planks introduce compelling visual interest, adding a layer of depth and warmth to flat walls. When installed horizontally, it can make a room feel larger and more open, drawing the eye around the space.
- Relatively Easy Maintenance: Shiplap is generally considered low-maintenance. While the grooves can accumulate dust, regular dusting with a soft cloth or a vacuum attachment is usually sufficient. Depending on the material and finish, repainting or resealing may be required every few years to maintain its pristine condition, especially in high-traffic areas or spaces with fluctuating humidity.
- DIY-Friendly Installation: For those with basic carpentry skills, shiplap can be a rewarding DIY project. The interlocking planks simplify alignment, making the installation process more manageable than some other paneling types.
2. Wainscoting: Timeless Elegance and Wall Protection

Wainscoting has a rich history, dating back centuries, primarily used to protect the lower portions of walls from dampness and damage while also providing insulation. Today, it is revered for its decorative qualities, typically covering the lower one-third to one-half of a wall. This paneling style often incorporates intricate decorative elements such as raised or recessed panels, vertical stiles, horizontal rails, and a cap molding, all contributing to a sophisticated and refined aesthetic.
- Material Options: Wainscoting offers a wide array of material choices to suit different budgets and design needs. Traditional wood (such as oak, maple, or cherry) provides classic warmth, while MDF (Medium-Density Fiberboard) is a cost-effective and paint-ready alternative. For areas exposed to moisture, like bathrooms, PVC wainscoting offers excellent water resistance and durability.
- Design Styles: The beauty of wainscoting lies in its extensive range of design possibilities. From simple, flat-panel styles that offer a clean, contemporary look to more elaborate raised-panel or recessed-panel designs that exude traditional grandeur, wainscoting can be custom-tailored to perfectly complement your room’s existing décor and architectural style. Beadboard wainscoting, a sub-style featuring vertical grooves, offers a charming, cottage-like appeal.
- Finish Options: Wainscoting is most commonly painted in neutral colors like white, cream, or light grey, which allows the intricate paneling details to stand out and provides a crisp contrast with the upper wall color. For a more natural and luxurious feel, wood wainscoting can be stained to highlight its inherent grain patterns, adding warmth and richness to a space.
Why Wainscoting Enhances Interior Spaces
- Adds Grace and Formality: Wainscoting instantly elevates the perceived value and sophistication of a room. It imparts a sense of traditional elegance and formality, making it an ideal choice for dining rooms, entryways, studies, and hallways where a refined ambiance is desired.
- Superior Wall Protection: Beyond its aesthetic appeal, wainscoting serves a practical purpose by providing an effective barrier against scuffs, dents, and general wear and tear. This makes it particularly valuable in high-traffic areas and children’s playrooms, protecting your walls from everyday damage.
- Versatile Design Integration: Despite its classic origins, wainscoting is remarkably versatile. The choice of paneling style—be it classic raised panels, clean shaker-style flat panels, or charming beadboard—allows it to seamlessly integrate into both traditional and contemporary design schemes. It can also be combined with different wall treatments above for dynamic contrast.
- Architectural Interest: Wainscoting breaks up large, monotonous wall expanses, adding architectural depth and interest. It defines the lower portion of the wall, creating a visual anchor that can make a room feel more grounded and thoughtfully designed.
Quick Comparison Table: Shiplap vs. Wainscoting
To help you quickly grasp the key differences, here’s a side-by-side comparison:
| Feature | Shiplap | Wainscoting |
|---|---|---|
| Primary Material | Wood or engineered wood (e.g., pine, MDF) | Wood, MDF, or PVC |
| Wall Coverage | Can cover full wall, accent wall, or specific sections | Typically covers the lower third or half of the wall |
| Aesthetic Style | Rustic, modern farmhouse, coastal, relaxed, minimalist | Traditional, formal, classic, elegant, transitional |
| Durability & Protection | Good durability, can be weather-resistant (if treated); may show wear on painted surfaces over time | Highly durable, excellent protection against scuffs and damage, especially in high-traffic areas |
| Maintenance Level | Low-maintenance; may require periodic repainting/resealing | Low to moderate maintenance; easy to clean, can be painted/stained |
| Typical Cost (Materials) | Generally affordable to moderately priced | Can be more expensive, especially for intricate wood designs |
| Design Elements | Horizontal (most common) or vertical planks with distinct, overlapping seams | Vertical stiles, horizontal rails, decorative panels (raised, recessed, flat, beadboard), cap molding |
| Eco-Friendliness | Available in recycled wood or engineered wood options | Some options made from sustainable wood or recycled materials |
| Best Suited Rooms | Living rooms, kitchens, bedrooms, bathrooms, mudrooms, accent walls | Dining rooms, entryways, hallways, studies, formal living rooms |
Shiplap vs. Wainscoting: Step-by-Step Installation Guide
Installing either shiplap or wainscoting can be a deeply satisfying DIY project, transforming your space with a custom touch. While the general steps are similar, there are crucial differences in technique for each style. This detailed guide will walk you through the process, ensuring a successful and professional-looking finish.
Essential Tools Needed for Installation
Before embarking on your installation journey, gathering all the necessary tools is paramount. Having everything at hand will not only make the job faster but also significantly smoother and more enjoyable, preventing unnecessary interruptions.
- Paint Brush / Roller: For priming and painting/staining.
- Measuring Tape: For accurate measurements of walls and panels.
- Pencil: For marking cuts and layout.
- Utility Knife: For scoring and cutting materials like caulk.
- Pry Bar: Useful for removing old trim or for slight adjustments.
- Stud Finder: Essential for locating wall studs to ensure secure fastening.
- Standard Level (4-6 ft): Crucial for ensuring all panels and lines are perfectly straight.
- Jigsaw: For intricate cuts around outlets, windows, and irregular shapes.
- Pneumatic Nail Gun (with air compressor): For efficient and secure fastening of panels (can use hammer and finishing nails for smaller projects).
- Circular Saw or Miter Saw: For straight and angled cuts of planks and rails.
- Caulk Gun & Caulk: For filling gaps and creating a seamless finish.
- Wood Filler / Spackle: For filling nail holes.
- Safety Glasses & Gloves: Always prioritize safety during power tool operation.
Once your toolkit is complete, you’ll be ready to move on to preparing your walls and beginning the installation process with confidence.
Step 1: Prepare the Wall Surface Thoroughly
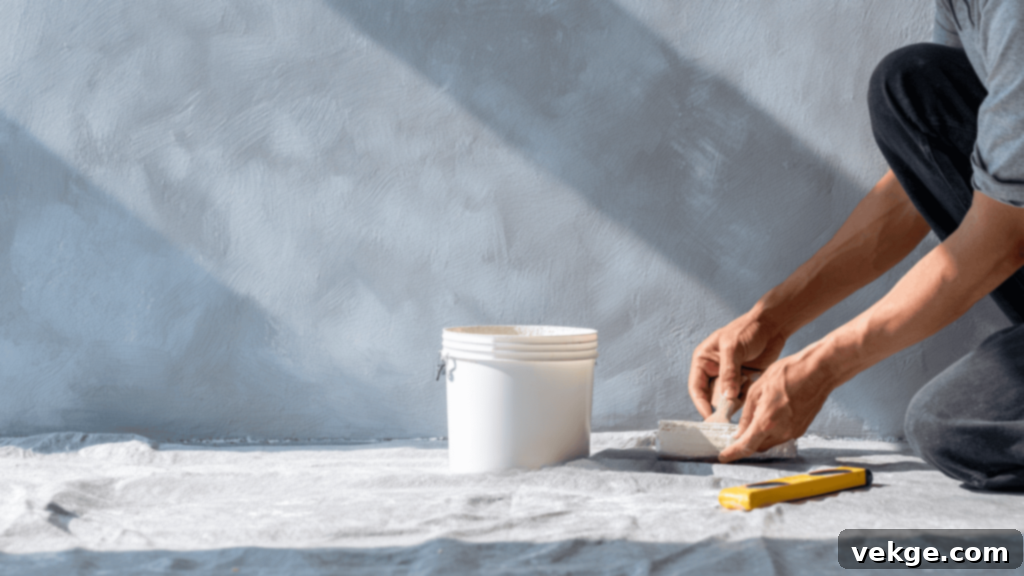
This foundational step is crucial for a flawless final result. Start by thoroughly cleaning the wall surface, removing any dirt, dust, or grease. Inspect the wall for imperfections; fill any existing holes or cracks with wall filler or spackle, then sand these areas smooth once dry. If installing wainscoting, carefully remove any existing baseboards or chair rails using a pry bar to create a clean slate. Use your stud finder to mark the locations of all wall studs with a pencil; these will be your anchor points for securing the paneling. Finally, for wainscoting, use a level to mark the desired height (typically 32-36 inches from the floor) for the top rail, ensuring your panels will be placed perfectly level and even across the room.
Step 2: Precisely Measure and Cut the Paneling Materials

Accuracy in measuring and cutting will prevent frustrating gaps and misalignments. Measure the exact length and height of the wall sections you plan to cover. Carefully cut your shiplap planks or wainscoting panels to fit, taking into account any obstacles like doors, windows, or electrical outlets. For outlets and switches, use a jigsaw to create precise cutouts. Remember to leave a small expansion gap (about 1/16 to 1/8 inch) at the top and bottom of your panels, especially if you are working with solid wood, to allow for natural material expansion and contraction with humidity changes. This small detail prevents buckling and ensures a long-lasting installation.
Step 3: Install the Paneling with Care and Precision
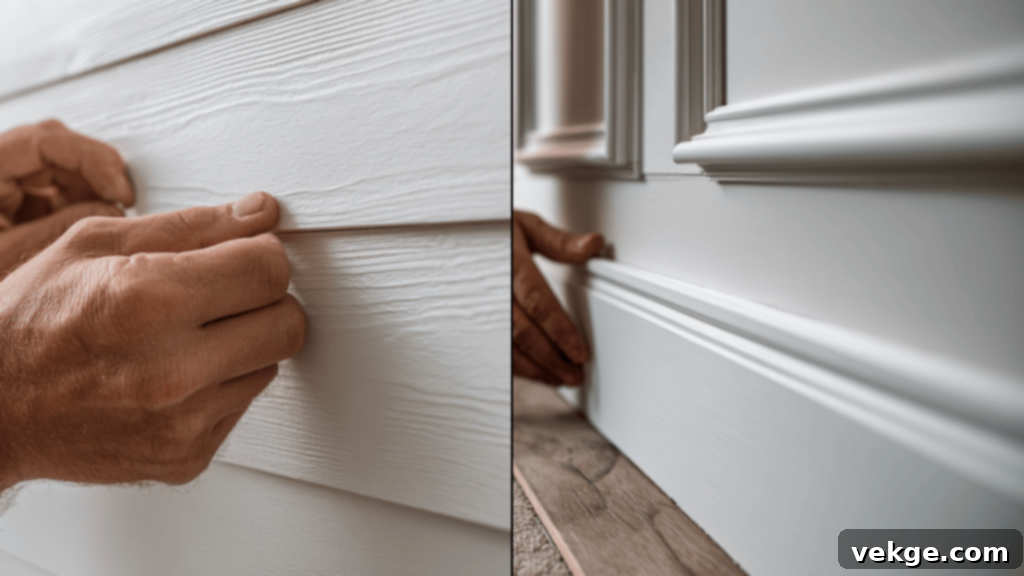
This is where the distinct installation methods for shiplap and wainscoting come into play:
- For Shiplap Installation: Begin at the bottom of the wall, ensuring your first shiplap board is perfectly level using your long level. Secure this bottom plank by nailing into the wall studs, typically through the tongue of the board for a hidden fastener look. Subsequent planks are then interlocked with the one below, creating those characteristic tight seams and shadow lines. Continue this process, checking for levelness every few boards, working your way up the wall until the desired height or full wall coverage is achieved.
- For Wainscoting Installation: Start by installing the bottom rail (baseboard) and the top rail, securing them firmly to the wall studs at your pre-marked heights. Use your level frequently to ensure these horizontal elements are perfectly straight. Next, measure and cut the vertical stiles (the narrow strips) to fit precisely between the top and bottom rails. Secure the stiles to the wall studs. Finally, cut and fit the decorative panels (e.g., raised, recessed, or flat panels) into the framework created by the rails and stiles, securing them with adhesive or small finishing nails. For a clean, finished edge at the top, add a decorative cap molding along the top rail.
Step 4: Fill Gaps and Conceal Nail Holes for a Smooth Finish
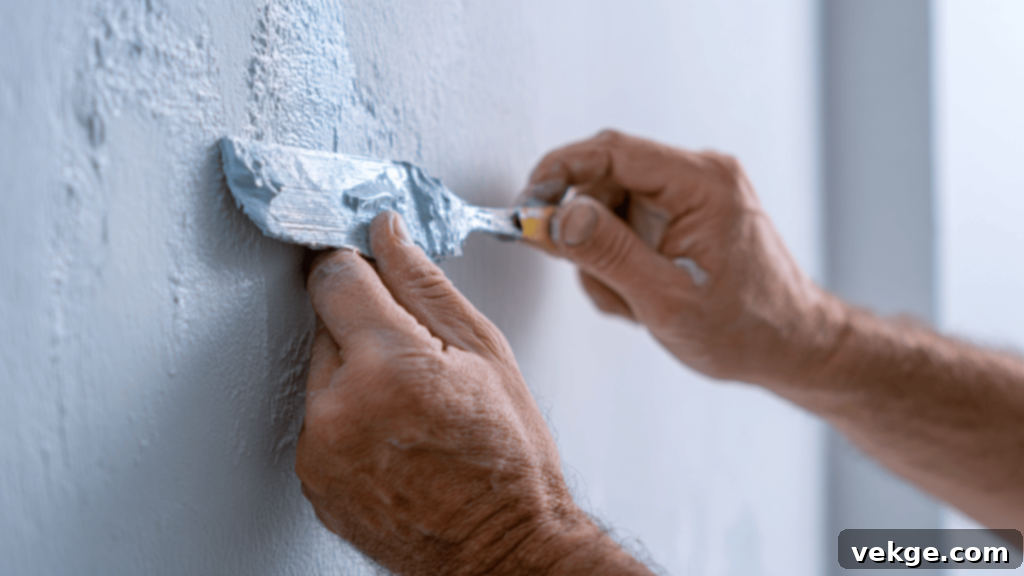
This stage is critical for achieving a professional, polished appearance. Use a high-quality paintable caulk to meticulously fill in any visible gaps between the paneling and the wall, as well as any joints between individual panels (for wainscoting) or where planks meet corners. Next, carefully fill all nail holes with wood filler or spackle. Once the filler has thoroughly dried (refer to product instructions for drying times), lightly sand the entire surface with fine-grit sandpaper until it is perfectly smooth to the touch. This attention to detail will eliminate imperfections and prepare the surface beautifully for finishing.
Step 5: Apply the Final Paint or Stain Finish
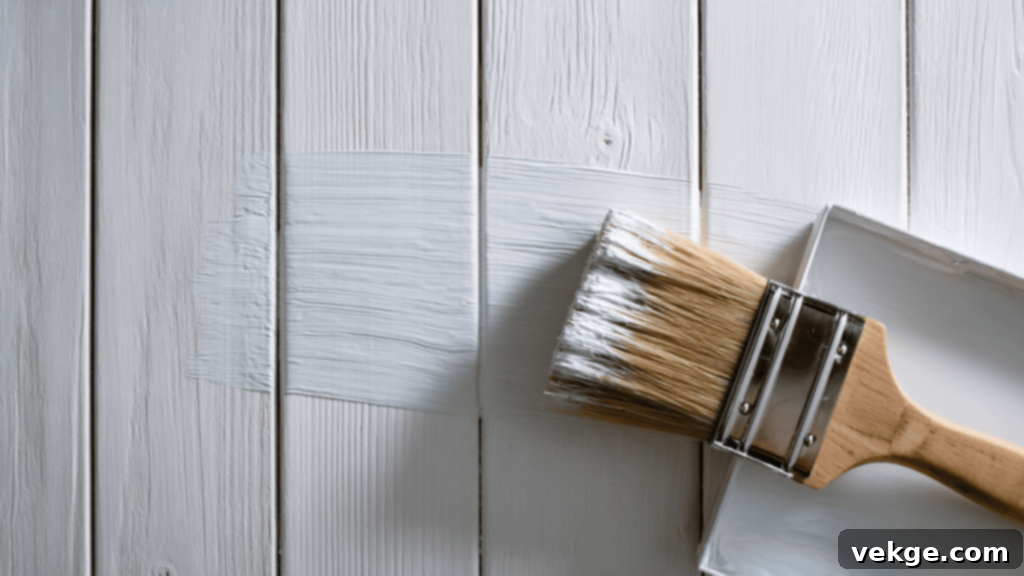
With the installation complete and surfaces prepped, it’s time for the aesthetic transformation. Begin by applying a high-quality primer to all the newly installed panels and any exposed seams or filled areas. Primer ensures better paint adhesion, provides a uniform base, and helps prevent wood tannins from bleeding through. Once the primer is dry, apply two to three thin, even coats of your chosen paint or stain to achieve your desired finish. For paint, a semi-gloss or satin finish is often preferred for its durability and ease of cleaning. For stain, follow with a protective clear coat. Always allow each coat to dry completely according to the manufacturer’s instructions before applying the next. This patience will reward you with a smooth, durable, and beautiful surface that will last for years.
When to Use Shiplap or Wainscoting: Tailoring to Your Space
The choice between shiplap and wainscoting largely depends on the specific ambiance you wish to create, the existing style of your home, and the functional needs of the room. Each style excels in different environments:
Opt for Shiplap if:
- You’re aiming for a relaxed, casual, or cozy vibe. Shiplap is the quintessential element for modern farmhouse, rustic, coastal, or even minimalist and transitional design aesthetics.
- You want to make a room feel larger and more open. The horizontal lines of shiplap can visually expand a space, drawing the eye across the room.
- You’re creating an accent wall or adding texture to a specific area. Shiplap works wonderfully behind a bed, in a dining nook, or as a feature wall in a living room.
- You prefer a clean, uncluttered look with subtle architectural interest.
- Your home already features elements of natural wood or a simplified color palette.
- Best Rooms: Living rooms, bedrooms (especially master or guest rooms), kitchens (as a backsplash or on an island), bathrooms (with proper moisture-resistant materials), mudrooms, and hallways for a continuous, flowing feel.
Choose Wainscoting when:
- You desire a classic, formal, or elegant atmosphere. Wainscoting instantly adds a layer of sophistication and traditional charm.
- You need to protect the lower portion of your walls from scuffs, chair backs, or general wear and tear, particularly in high-traffic zones.
- You want to introduce architectural detail and define the lower part of a room. It adds structure and a sense of permanence.
- You’re looking to create visual interest through decorative paneling, such as raised or recessed designs.
- Your home leans towards traditional, colonial, craftsman, or even some contemporary styles where a refined finish is appreciated.
- Best Rooms: Dining rooms, formal living rooms, entryways, staircases, hallways, home offices, and studies. It can also be used in bathrooms for a touch of elegance but ensure moisture-resistant materials.
Consider the room’s function, your desired aesthetic, and the level of formality you wish to achieve. Sometimes, a combination of both styles in different areas of the house can create a dynamic and cohesive interior design.
Common Mistakes to Avoid During Installation
While installing shiplap or wainscoting can be a highly rewarding DIY endeavor, being aware of potential pitfalls can save you time, frustration, and ensure a professional-quality finish. Here’s an expanded list of common mistakes to actively avoid:
- Inaccurate Measurements and Insufficient Material: This is arguably the most common and frustrating mistake. Failing to precisely measure the wall dimensions can lead to costly material shortages, uneven panel runs, or awkward gaps. Always measure twice, and cut once. Additionally, purchase at least 10-15% more material than calculated to account for miscuts, waste, or future repairs.
- Neglecting Thorough Wall Preparation: Skipping the crucial step of preparing your walls (cleaning, filling holes, sanding smooth, and locating studs) can severely compromise the outcome. Uneven walls will show through the paneling, and panels won’t adhere or fasten securely. A well-prepared surface is the foundation of a successful installation.
- Rushing the Installation Process: Patience is a virtue in DIY projects. Rushing can lead to misaligned panels, crooked lines, or improperly secured boards. Take your time with each panel, double-checking for levelness and tightness before moving on to the next. Especially with shiplap, ensure each board is properly interlocked. For wainscoting, carefully align all rails and stiles before attaching panels.
- Choosing the Wrong Material for the Environment: Not considering the specific conditions of the room can lead to premature damage. For high-humidity areas like bathrooms, kitchens, or basements, opt for moisture-resistant materials such as PVC, vinyl, or specially treated engineered wood. Regular wood in these environments can warp, rot, or grow mold over time.
- Improper Fastening Techniques: Panels must be securely fastened to wall studs for stability and longevity. Failing to hit studs, using too few fasteners, or using nails that are too short can result in panels loosening, sagging, or creating unsightly bulges. Use a stud finder religiously and select appropriate nail lengths for your material and wall type.
- Ignoring Expansion Gaps: Wood is a natural material that expands and contracts with changes in temperature and humidity. Failing to leave small expansion gaps (typically 1/16″ to 1/8″) at the top, bottom, and corners of your paneling can lead to buckling, cracking, or warping as the material shifts.
- Skipping the Caulking and Finishing Touches: The final details make all the difference between a DIY project and a professional finish. Neglecting to caulk gaps between panels, trim, and walls, or not adequately filling nail holes, will leave your project looking unfinished and unprofessional. These steps create a seamless, polished appearance.
By keeping these common mistakes in mind and approaching your project with care and attention to detail, you will ensure your shiplap or wainscoting installation goes smoothly and results in a stunning, long-lasting finish that enhances your home for years.
Modern Alternatives to Shiplap and Wainscoting
As interior design trends continually evolve, a variety of contemporary alternatives to traditional shiplap and wainscoting have emerged, offering fresh aesthetics and innovative solutions for wall paneling. These options provide diverse textures, patterns, and benefits, catering to a wide range of tastes and functional requirements.
1. Beadboard Paneling: Classic Charm with Vertical Lines
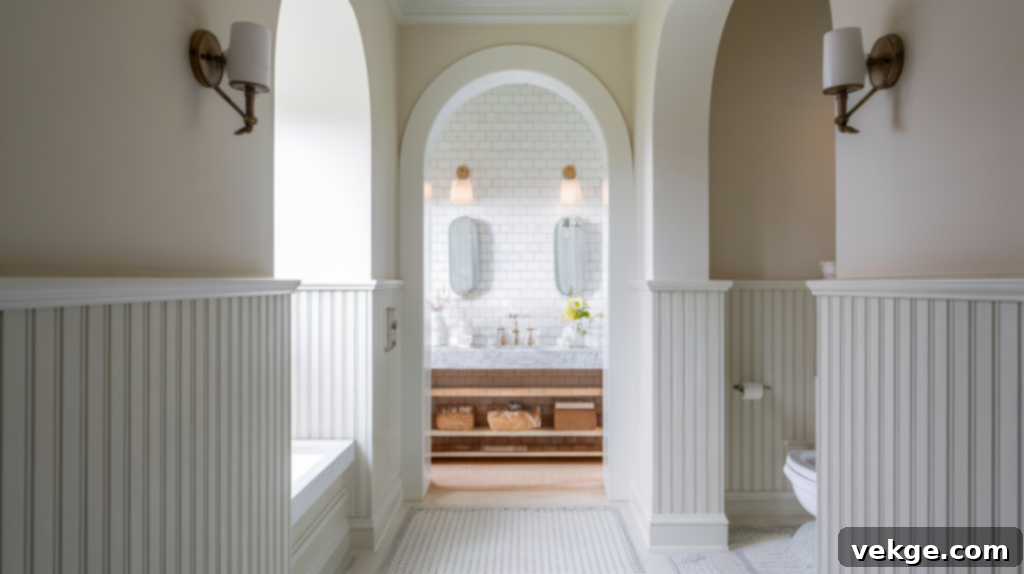
Beadboard offers a clean, stylish look characterized by narrow, vertical planks with a small, decorative ridge (or “bead”) between them. It’s often associated with cottage, country, and traditional styles, providing a subtle texture that’s less pronounced than shiplap. Beadboard is typically sold in large pre-made panels, making it significantly simpler and faster to install than piece-by-piece wainscoting. This makes it an excellent choice for DIY enthusiasts looking to add a polished, durable finish to areas like bathrooms, kitchens, laundry rooms, or hallways, where its vertical lines can also make ceilings appear higher.
2. Board and Batten: Bold and Geometric
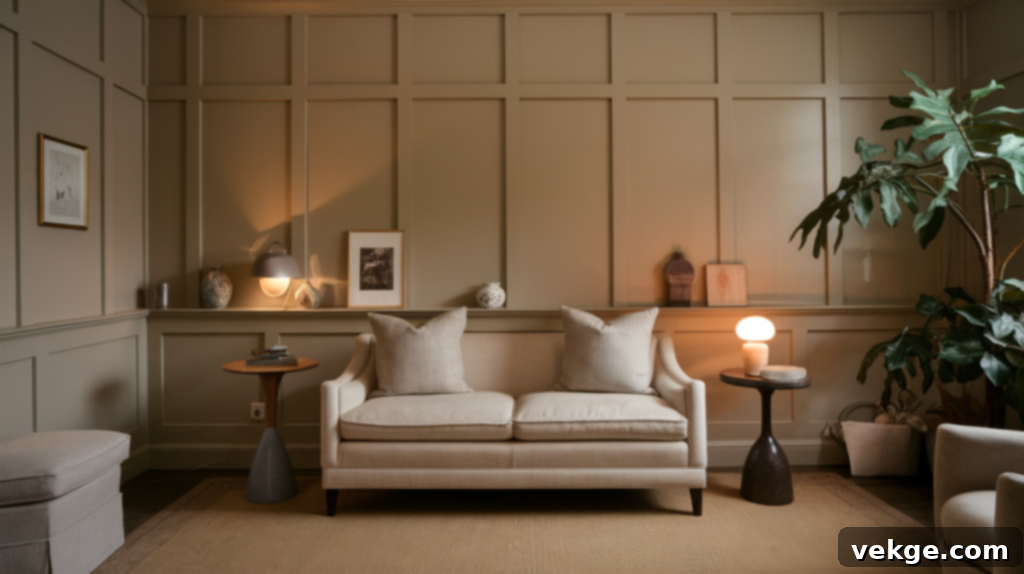
Board and Batten paneling creates a striking, geometric aesthetic by featuring wide wooden boards (the “boards”) covered with narrow strips (the “battens”) placed over the seams. This design adds significant depth and a three-dimensional effect to walls, suitable for a range of styles from modern farmhouse to transitional and even contemporary. While it requires more precise measurements and cuts for proper alignment, the impactful visual result is well worth the effort. It’s perfect for creating a bold statement in entryways, living rooms, or children’s bedrooms, providing a traditional or rustic feel with a strong architectural presence.
3. Tongue and Groove: A Refined, Seamless Finish
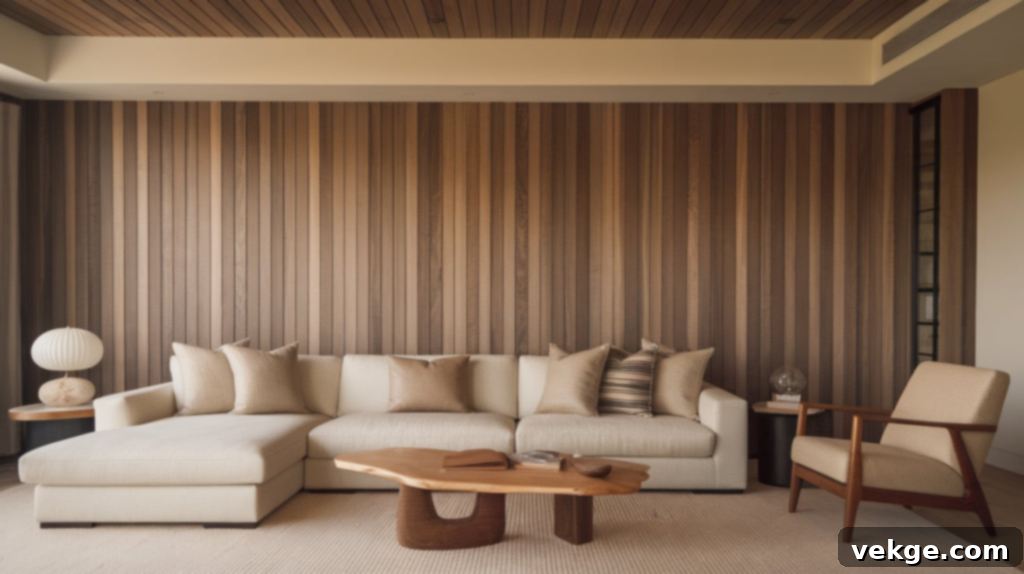
Tongue and Groove paneling provides an incredibly smooth and seamless finish thanks to its precisely milled interlocking boards. Unlike shiplap’s distinctive gap, tongue and groove planks fit together tightly, creating a continuous surface that can be installed horizontally, vertically, or diagonally. This style is often seen as a more refined version of shiplap, offering a sleek, clean look ideal for modern, minimalist, or formal areas. Installation is straightforward, as the interlocking mechanism aids in alignment, making it popular for ceilings, floors, and walls in dining rooms, studies, or high-end living spaces where a polished, uninterrupted surface is desired.
4. PVC or Vinyl Paneling: Durable and Moisture-Resistant
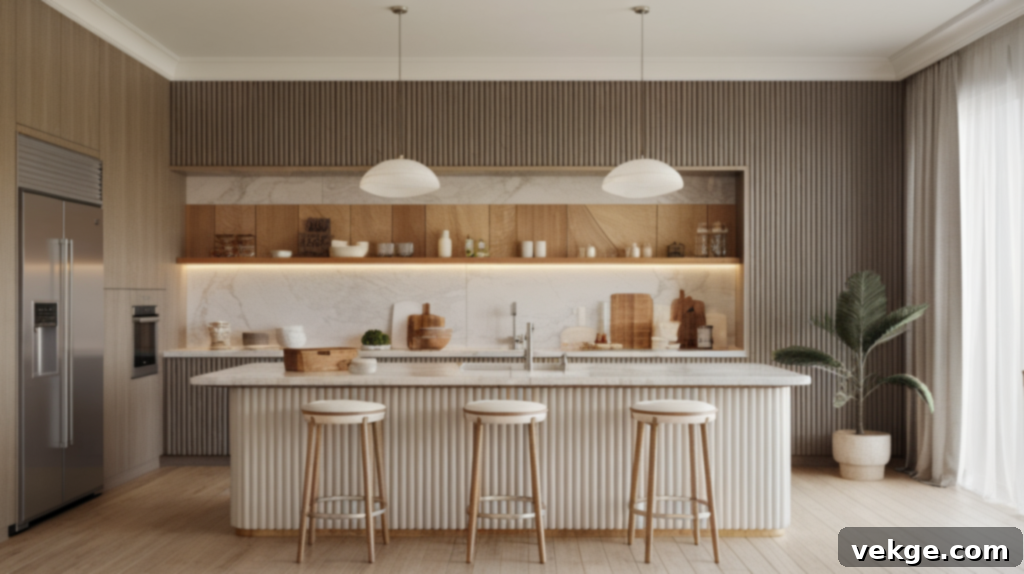
For areas exposed to moisture and heavy use, PVC or vinyl paneling stands out as an exceptionally practical choice. These synthetic panels are completely waterproof, highly durable, and remarkably low-maintenance, making them perfect for wet environments like bathrooms, kitchens, laundry rooms, and basements. Lightweight and often available in pre-finished styles that mimic wood or other textures, they are typically easy to install, reducing both installation time and the need for sanding, priming, or sealing. This option provides the aesthetic appeal of traditional paneling with superior performance in challenging conditions.
5. Reclaimed Wood Panels: Sustainable Character and History
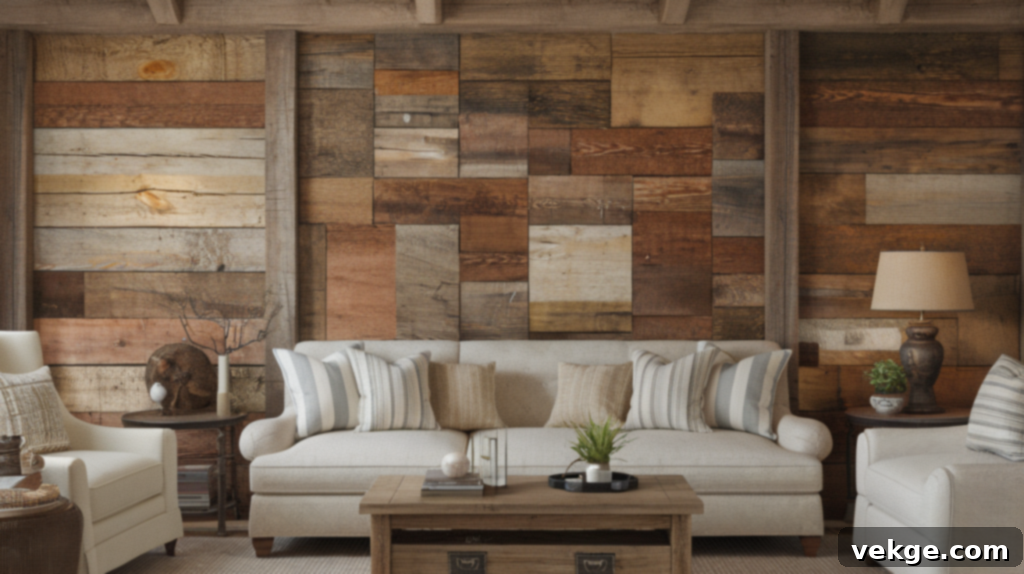
Reclaimed wood panels offer a distinctive, eco-friendly option that brings a sense of history and unique character to any space. Sourced from old barns, factories, or other structures, these panels boast natural textures, weathered finishes, and inherent imperfections that tell a story. Choosing reclaimed wood significantly reduces the demand for new timber, making it a highly sustainable choice for environmentally conscious homeowners. While installation might present more challenges due to varying board thicknesses and the need for proper cleaning and treatment, the resulting distinct, rustic, and authentic feel is unparalleled, creating a focal point that is both beautiful and meaningful.
Why Consider Modern Alternatives for Wall Paneling?
As home design continues to evolve, modern alternatives to traditional paneling materials offer a compelling blend of fresh aesthetics, enhanced functionality, and practical benefits. Here are several key reasons to explore these updated options for your space:
- Eco-Friendly Choices: Many newer paneling options prioritize sustainability. Materials like reclaimed wood, or engineered products made from recycled content, allow you to make more environmentally conscious decisions for your home, contributing to a greener living space.
- Unique Style and Aesthetic Diversity: Modern alternatives, such as the bold lines of board-and-batten or the subtle texture of beadboard, offer distinct designs that can perfectly complement contemporary home styles. They provide creative ways to introduce pattern, depth, and character beyond traditional shiplap or wainscoting.
- Enhanced Durability and Performance: Innovations in materials have led to paneling solutions that are better suited for specific environments. PVC and vinyl paneling, for instance, offer superior moisture resistance, making them ideal for bathrooms and kitchens where traditional wood might struggle.
- Low Maintenance Requirements: Many modern alternatives are designed for minimal upkeep. Pre-finished panels, or materials like vinyl, reduce the need for frequent painting, staining, or sealing, saving you time and effort in the long run while maintaining their aesthetic appeal.
- Simplified Installation: Some alternative paneling systems are engineered for easier and faster installation, often utilizing large sheets or click-and-lock mechanisms, making them more accessible for DIY enthusiasts or reducing labor costs.
By exploring these modern alternatives, you can achieve a stylish, sustainable, and highly functional update to your home that reflects current design sensibilities while maintaining an enduring appeal.
Essential Maintenance Tips for Your Wall Paneling
Proper and consistent maintenance is crucial to preserving the beauty and extending the lifespan of your shiplap or wainscoting. By following these simple yet effective care tips, you can ensure your panels remain fresh, vibrant, and in top condition for many years to come.
- Regular Dusting and Gentle Cleaning: To prevent the buildup of dirt and debris, gently dust your panels regularly using a soft microfibre cloth, a feather duster, or a soft brush attachment on your vacuum cleaner. This routine cleaning helps maintain the intricate texture and fresh appearance of the wood or painted surface, especially in the grooves of shiplap or the profiles of wainscoting.
- Use Mild Cleaners for Spot Stains: For more stubborn stains or smudges, apply a small amount of mild, non-abrasive household cleaner (or a mixture of warm water and a tiny drop of dish soap) to a damp cloth. Gently wipe the affected area, then immediately follow with a clean, dry cloth to remove any moisture residue. Always avoid harsh chemical cleaners, abrasive scrubbers, or excessive moisture, as these can damage the finish, cause discoloration, or compromise the material over time.
- Promptly Touch-Up Paint or Stain as Needed: Periodically inspect your paneling for any signs of wear and tear, such as chips, scratches, or fading, especially in high-traffic zones or areas exposed to sunlight. Keep a small amount of your original paint or stain on hand for quick touch-ups. Applying a fresh coat to minor imperfections as soon as they appear will maintain a uniform appearance and provide an added layer of protection to the underlying material, preventing further damage.
- Prevent Water Damage in High-Humidity Areas: In rooms prone to moisture, such as bathrooms, kitchens, or basements, it’s vital to protect your paneling from water damage. Ensure these areas are well-ventilated, perhaps by using an exhaust fan or dehumidifier. If using wood paneling, consider applying a water-resistant sealant to the base or any areas that might come into contact with splashes. Promptly wipe away any spills or condensation to prevent warping, swelling, or mold growth.
- Consider Periodic Sanding and Refinishing: Every few years (or as needed, depending on wear and personal preference), consider lightly sanding the entire surface of your paneling with fine-grit sandpaper. This prepares the surface for a fresh application of paint or stain, rejuvenating its look and providing a renewed protective layer. This step is particularly beneficial for high-traffic areas or panels that have started to show noticeable signs of aging, ensuring their longevity and continued aesthetic appeal.
By diligently following these simple maintenance steps, you can significantly extend the life and beauty of your shiplap or wainscoting, ensuring it remains a cherished feature of your home with minimal ongoing effort.
Final Thoughts: Making Your Wall Paneling Choice
By now, you should have a much clearer understanding of the nuanced differences between wainscoting and shiplap, and how each distinctive style can profoundly influence the character and ambiance of a room. I’ve found that the ultimate decision between the cozy, informal charm of shiplap and the classic, sophisticated detail of wainscoting truly boils down to finding what resonates most with your personal style, the architectural integrity of your home, and your everyday lifestyle.
As you move forward with your home improvement plans, take a thoughtful moment to consider the overall aesthetic you’re striving for. Reflect on how each room is primarily used and what functional benefits (like wall protection or visual expansion) would be most advantageous. Remember, a successful wall paneling project begins with meticulous preparation; properly prepping your walls before installation is a non-negotiable step that will dramatically impact the quality and longevity of your final result.
Eager for more inspiring ideas and practical guidance to refresh and update your home? Explore other articles on our website for a wealth of practical tips, detailed step-by-step guides, and fresh design inspiration aimed at making every home project more manageable and enjoyable. Happy decorating!
