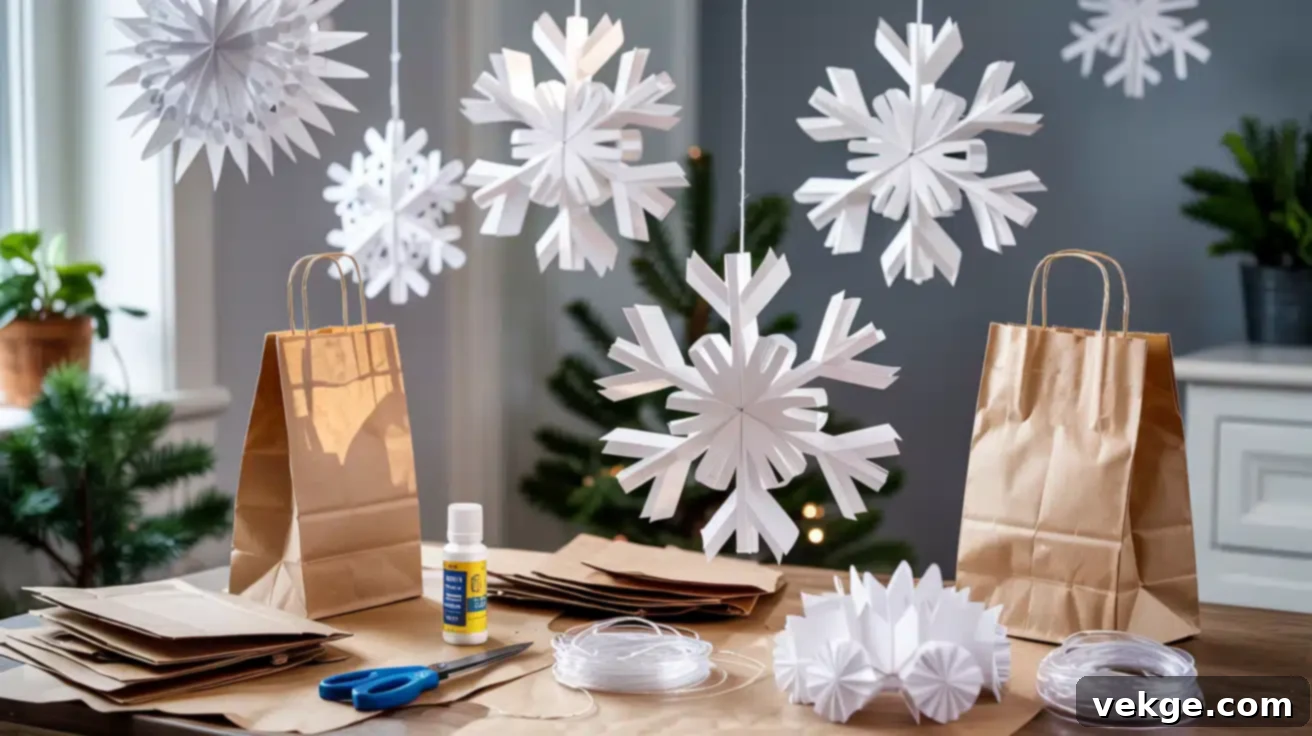
DIY 3D Paper Bag Snowflakes: Easy & Affordable Winter Wonderland Decor
Looking for a charming, budget-friendly way to infuse your home with the magic of winter? Look no further than paper bag snowflakes! These beautiful, three-dimensional decorations are incredibly simple to make, cost next to nothing, and effortlessly transform any space into a cozy, enchanting winter wonderland. They offer a unique blend of rustic charm and delicate beauty, perfect for holiday seasons or simply adding a touch of natural elegance to your everyday decor.
In this comprehensive guide, you’ll discover everything you need to know about creating stunning 3D snowflakes using just a few common household items like paper lunch bags, glue, and scissors. We’ll walk you through the entire process, from gathering your materials to cutting intricate designs and displaying your finished masterpieces. Plus, we’ll explore creative ways to enhance your snowflakes with dazzling lights, glitter, and even customize them for different seasons or special occasions, ensuring your decor always feels fresh and personalized.
Whether you’re decorating for the festive holidays, hosting a winter celebration, or simply adding a touch of serene winter charm to your home, these DIY paper bag snowflakes are an outstanding choice. Their versatility and captivating visual appeal make them a favorite for crafters of all ages and skill levels. Keep reading to unlock the secrets of making these magical decorations and bring a little handcrafted winter enchantment into your home today!
Choosing the Best Materials for Your Stunning Snowflakes
The beauty of paper bag snowflakes lies in their simplicity, starting with readily available materials. While the basic concept is universal, selecting the right supplies can elevate your creation. Brown paper lunch bags are ideal for a natural, rustic, or farmhouse-style aesthetic, offering warmth and an organic texture. White lunch bags, on the other hand, lend themselves to a more classic, crisp winter feel, evoking fresh fallen snow and elegant simplicity. Both are excellent choices, often found affordably in grocery or craft stores.
For tools, precision and strength are key to achieving clean cuts and a durable structure:
- Strong Scissors: Heavy-duty scissors are highly recommended. They effortlessly cut through multiple layers of paper bags, preventing tearing and ensuring smooth edges for your intricate designs. A sharp pair will make the cutting process much easier and more enjoyable.
- Adhesive: Your choice of glue impacts drying time and strength.
- Hot Glue Gun: Provides a quick, strong bond, allowing you to assemble your snowflake rapidly. Be cautious with younger crafters due to the heat.
- White Craft Glue (e.g., Elmer’s): A safer, more forgiving option, especially for children. It offers ample time to adjust bag alignment before drying, though it requires more drying time before cutting.
- Clear Tape: Essential for the final step of securing your snowflake into its circular shape, and also useful for temporary holds or minor repairs.
- Stapler: While optional, a stapler can be incredibly helpful for a strong, instant hold when joining the ends of your snowflake, especially for larger designs or when quick assembly is desired.
To elegantly display your beautiful creations and enhance their floating effect, consider these hanging supplies:
- Fishing Line: Clear fishing line is perfect for creating the illusion that your snowflakes are gracefully suspended in the air. Its near-invisibility makes your decorations appear to float.
- Hole Punch: A standard hole punch creates a neat, clean opening for threading your fishing line or string.
- Optional: Battery-Operated Twinkle Lights: For an extra touch of enchantment, small LED string lights can transform your snowflakes into glowing beacons. Choose battery-operated ones for flexibility in placement without needing an outlet.
While the basic supplies are all you need to start, incorporating small lights can make your snowflakes glow with a magical warmth at night, casting beautiful shadows and adding an unparalleled layer of winter charm to any room.
Step-by-Step Guide to Making DIY Lunch Bag Snowflakes
Creating these captivating decorations is a fun and rewarding process. The magic happens by stacking bags with glue in a precise “T” shape pattern, carefully cutting innovative designs along the edges, and then gently opening them into a breathtaking 3D circular form. Mastering the proper technique ensures your snowflakes hold their form beautifully and achieve that professional, polished look.
Step 1: Gather Your Materials for Snowflake Crafting
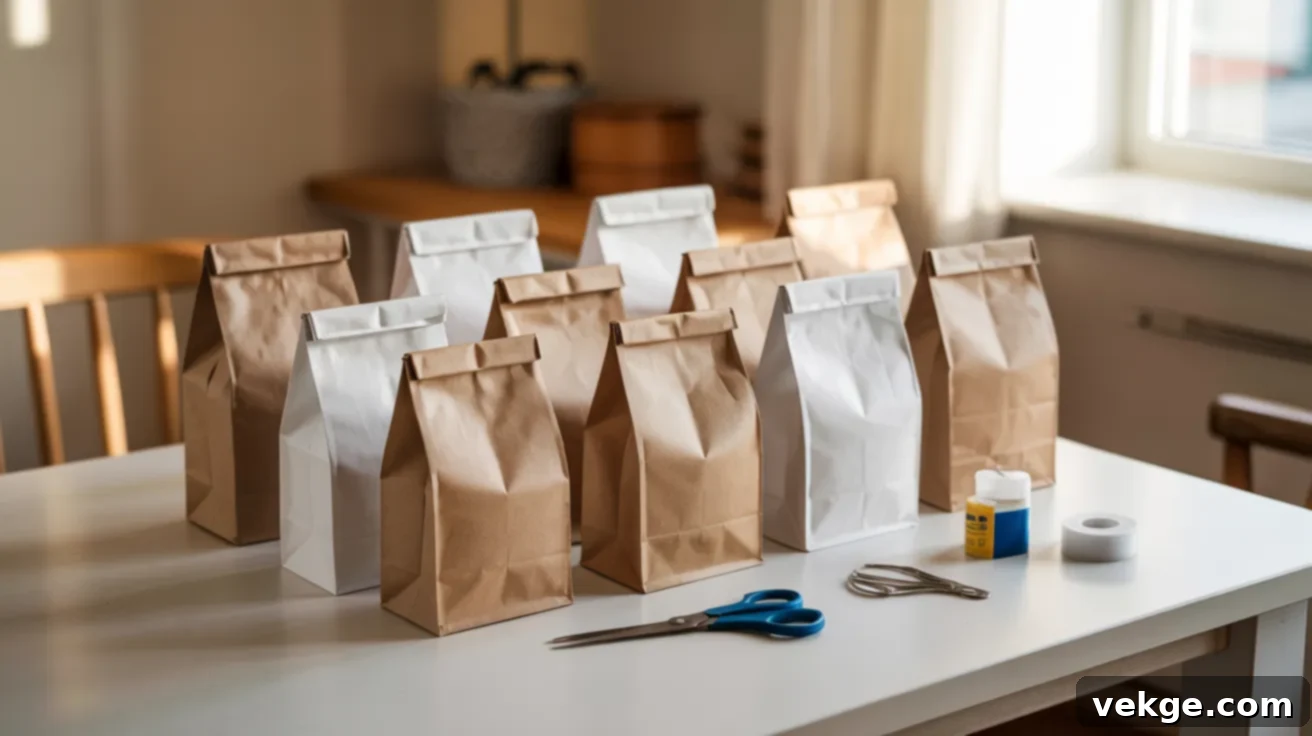
Begin by collecting 9 to 12 standard paper lunch bags for each snowflake you intend to create. The exact number can vary depending on how full and dense you want your snowflake to appear. Brown kraft bags are excellent for a rustic, natural look that complements various home decor styles, from farmhouse to bohemian. White bags, on the other hand, offer a crisp, classic winter appearance, perfect for a more minimalist or traditional aesthetic. Crucially, ensure all your bags are of the same size and type for a consistent and symmetrical end result.
Before you start, double-check that your scissors are sharp. Dull scissors can tear the paper layers, leading to frayed edges and a less refined design. A good, sharp pair will glide through the stack cleanly. Have your chosen adhesive (hot glue gun or white craft glue), clear tape, and any other hanging supplies like fishing line or a hole punch readily accessible on your workspace. Proper preparation makes the crafting process smooth, enjoyable, and efficient.
Step 2: Create Your Bag Stack with Precision
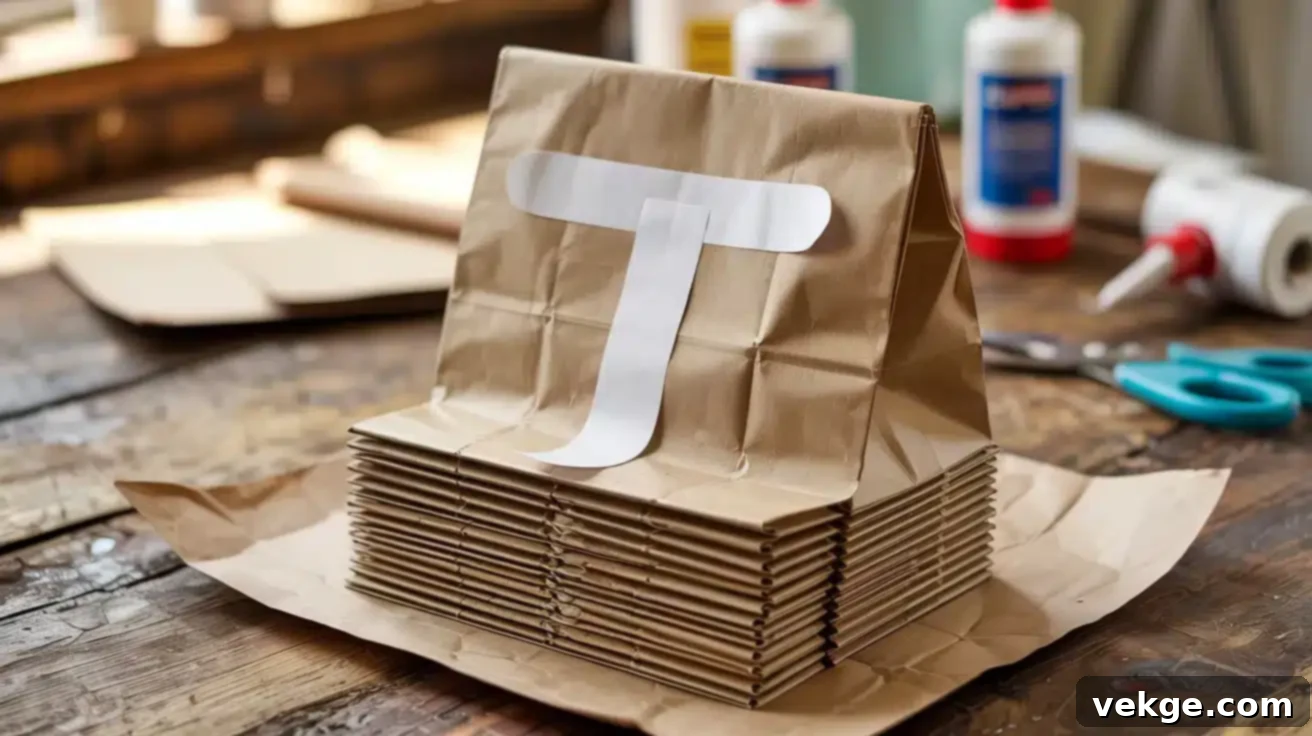
Lay your first lunch bag flat on a clean, sturdy work surface. Ensure the opening of the bag is facing upwards, towards you. Now, apply your chosen adhesive in a distinctive “T” shape: one continuous line of glue running vertically down the center of the bag, and another horizontal line across the bottom folded edge. This specific “T” pattern is vital as it provides the necessary connection points to keep the bags perfectly aligned and ensures that your snowflake will fan out uniformly when opened.
Carefully place the second bag directly on top of the first, making sure all the edges, especially the side and bottom folds, line up precisely. Press down firmly for a few seconds to secure the glue bond. Repeat this “T” shape gluing and stacking process with each subsequent bag, maintaining the same orientation throughout the entire stack. Continue until you have a stack of 9 to 12 bags. If you’re crafting with younger children, white craft glue is a safer and more manageable option than a hot glue gun, allowing for adjustments before it sets.
Step 3: Cut Your Unique Snowflake Design
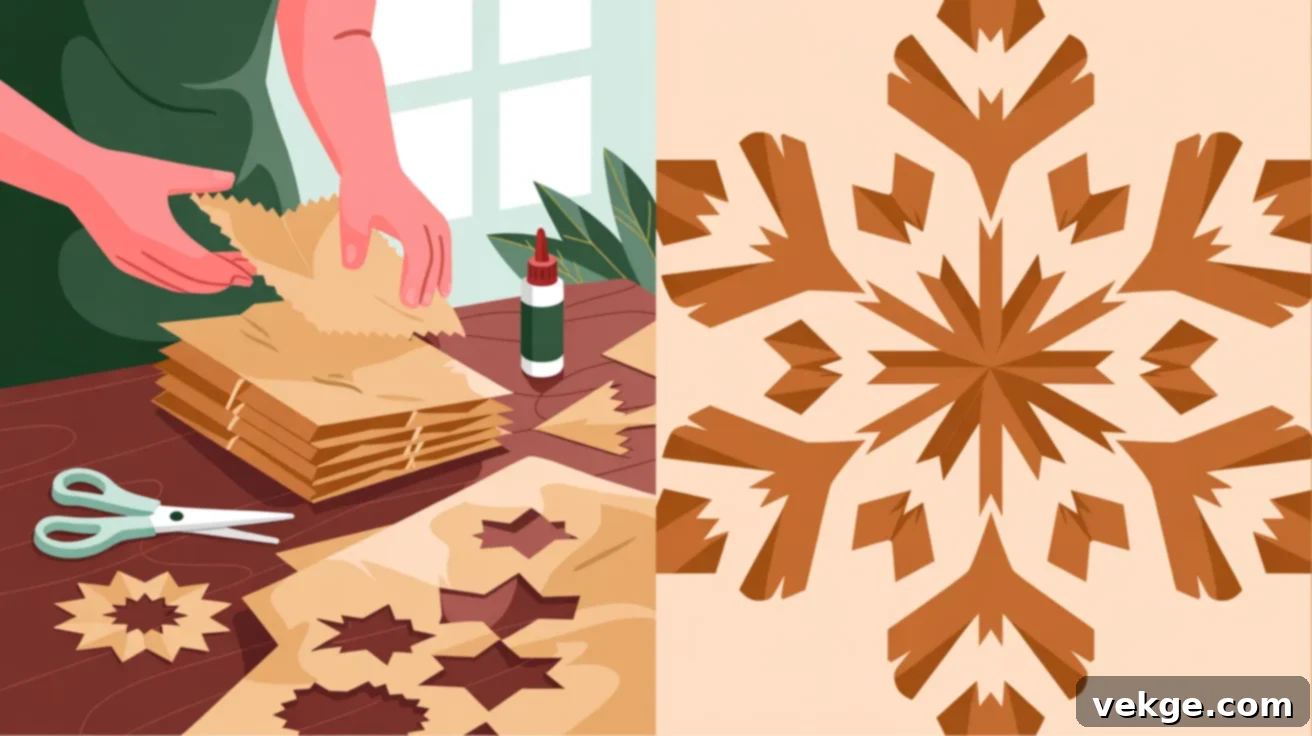
If you’re using white craft glue, it’s crucial to allow the stack to dry completely before moving to this step. This might take 30 minutes to an hour, depending on the glue thickness. Once dry, hold the stack of bags firmly together. This is where your creativity comes into play! Begin cutting various shapes along the three open edges of the stacked bags (the top opening and both sides). Experiment with different patterns such as sharp triangles, gentle half-circles, intricate zigzags, or even wavy lines.
The golden rule here is to leave a portion of the side edges and the glued ‘T’ center intact. These un-cut sections are what keep the bags connected and form the structural backbone of your snowflake. Deeper cuts towards the center of the stack will result in more pronounced points on your final snowflake. For a fuller, more detailed appearance, opt for smaller, more numerous cuts. Don’t stress about achieving perfect symmetry; much like real snowflakes, each paper bag snowflake is unique and beautiful in its own way! A helpful tip is to sketch your design lightly with a pencil first, or cut one side and then flip the stack to mirror the pattern on the other side.
Step 4: Open and Shape Your Majestic Snowflake
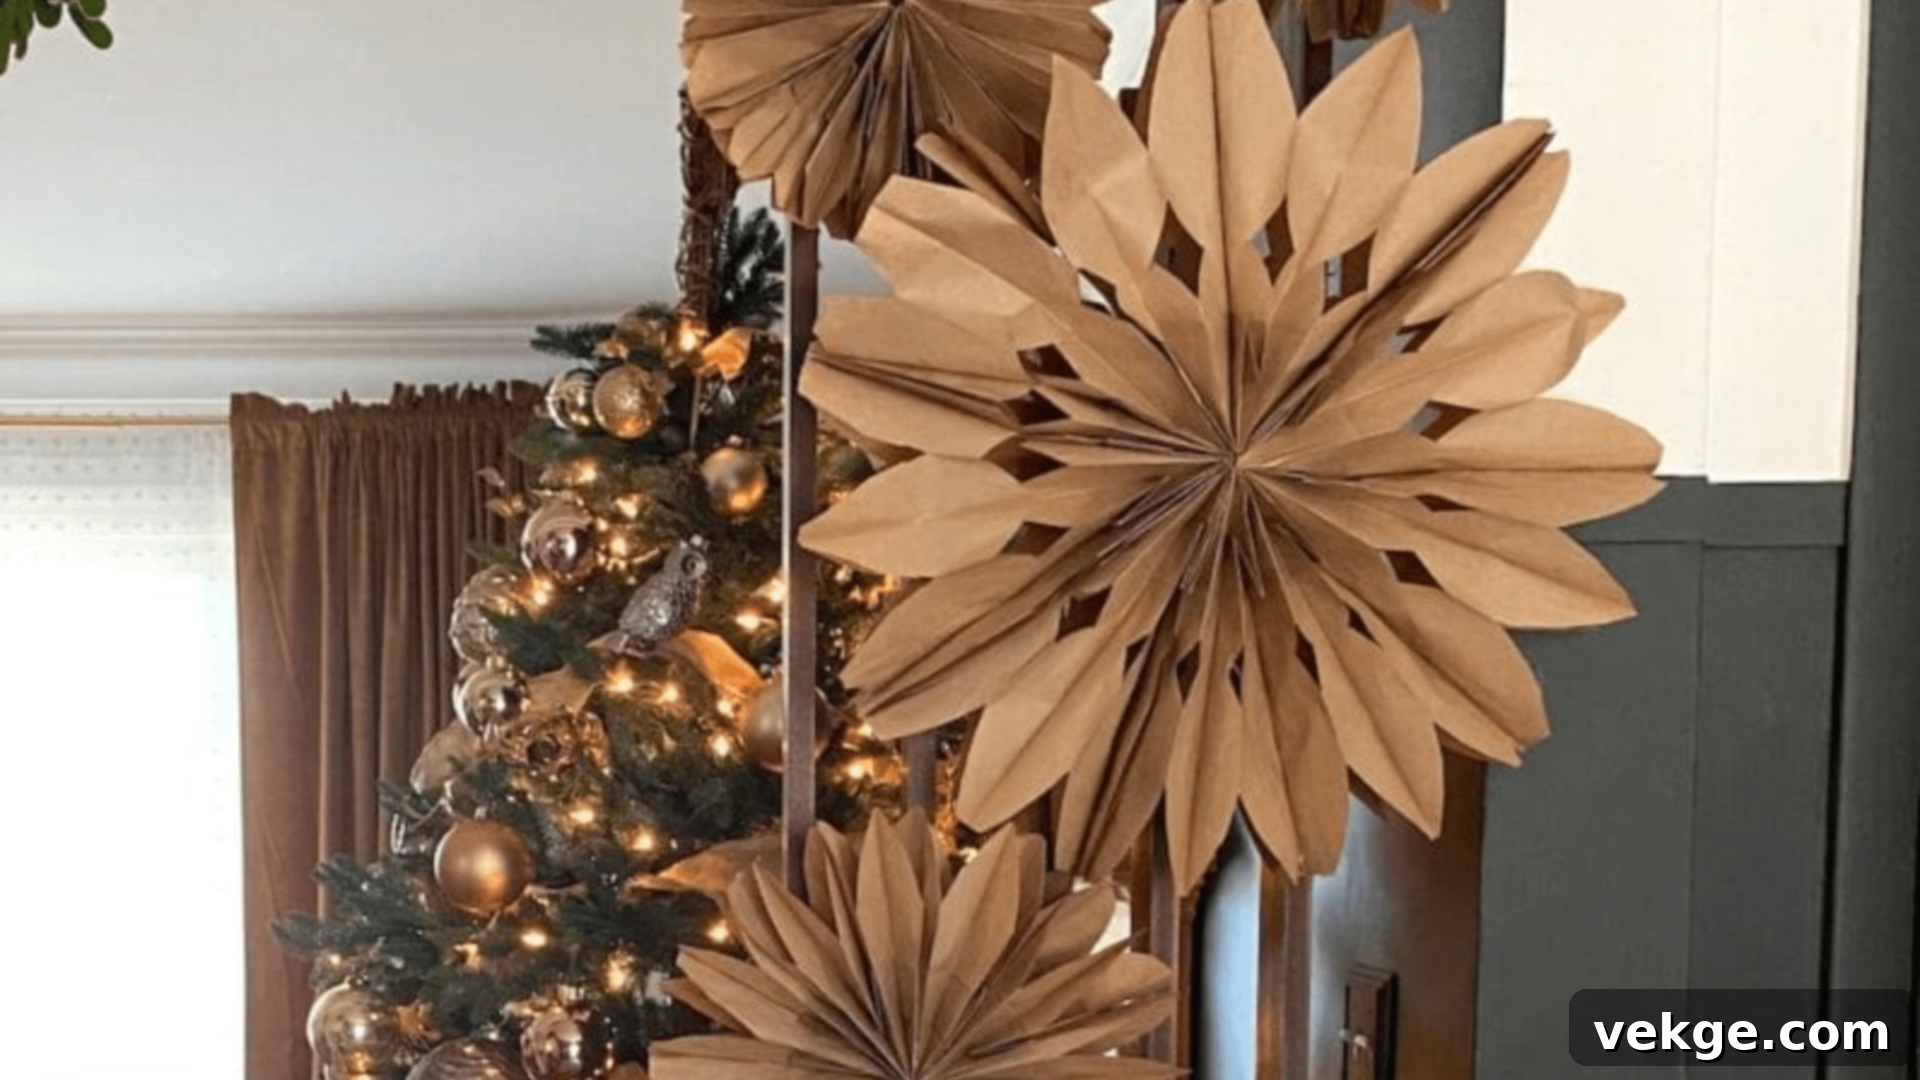
This is the moment of truth where your design comes to life! Carefully grab the top bag on one end of your stack and the bottom bag on the opposite end. Gently, but steadily, pull these two ends towards each other. As you do this, all the individual cut sections of the bags will fan out, beginning to form the captivating 3D structure of your snowflake. This step requires a bit of patience and a delicate touch. Move slowly to prevent any accidental tearing, especially in areas where the glue might not have fully set or where cuts are particularly intricate.
As the bags spread open, the unique design you meticulously cut will become fully visible, creating a stunning visual effect. Once you have gently fanned it out into a full circular shape, bring the two original outer ends together. Secure these ends permanently to hold the snowflake’s form. You can use a strong piece of clear tape, carefully applying it on the inside where the two ends meet, or use a stapler for a more secure and instant bond. This final securing step is crucial for the snowflake to maintain its elegant shape and three-dimensional integrity.
Step 5: Hang and Display Your Enchanting Creation
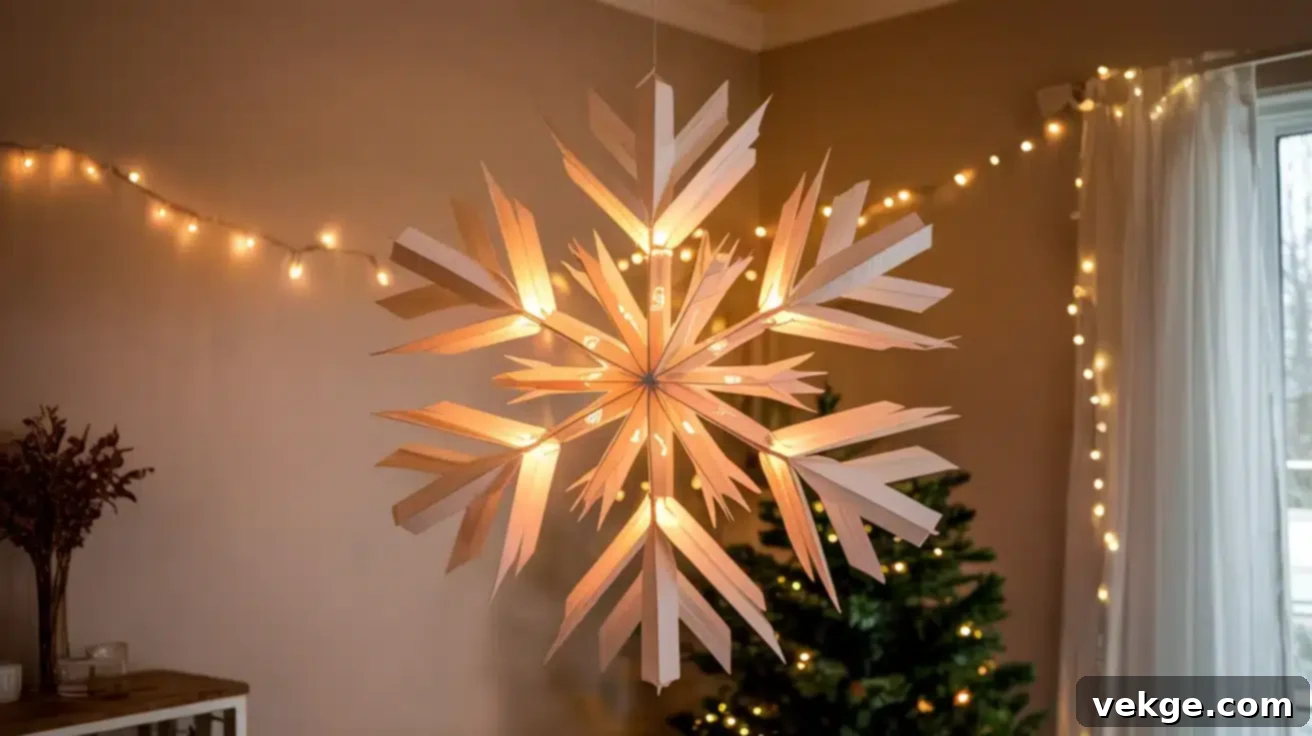
To prepare your snowflake for display, use a hole punch to create a small, neat hole in one of the snowflake’s points. Thread a length of fishing line or decorative string through this hole, tying a secure knot to create a loop for hanging. Clear fishing line is particularly effective as it creates a beautiful “floating” effect, making your snowflake appear as if it’s magically suspended in mid-air. For wall hanging, a small piece of clear tape placed strategically just below the knot can provide extra stability.
Hang your completed paper bag snowflakes at varying heights for a dynamic and visually dramatic look that mimics falling snow. To truly elevate their magical appeal, integrate small battery-operated LED twinkle lights. You can tuck these thin wire lights subtly between the layers of paper when you open the snowflake, creating a warm, ethereal glow that brings an extraordinary sparkle to your evenings. These simple 3D snowflakes effortlessly transform any room into a captivating winter wonderland, beautifully catching natural light during the day and casting intriguing shadows at night in ways that flat decorations simply cannot. This project is not only incredibly budget-friendly but also delivers professional-looking results that will impress all your guests. For added versatility, experiment with different sizes by trimming your lunch bags before starting, or mix white and brown bags for a striking two-tone effect.
Innovative Designs: Finding the Perfect Snowflake Shape
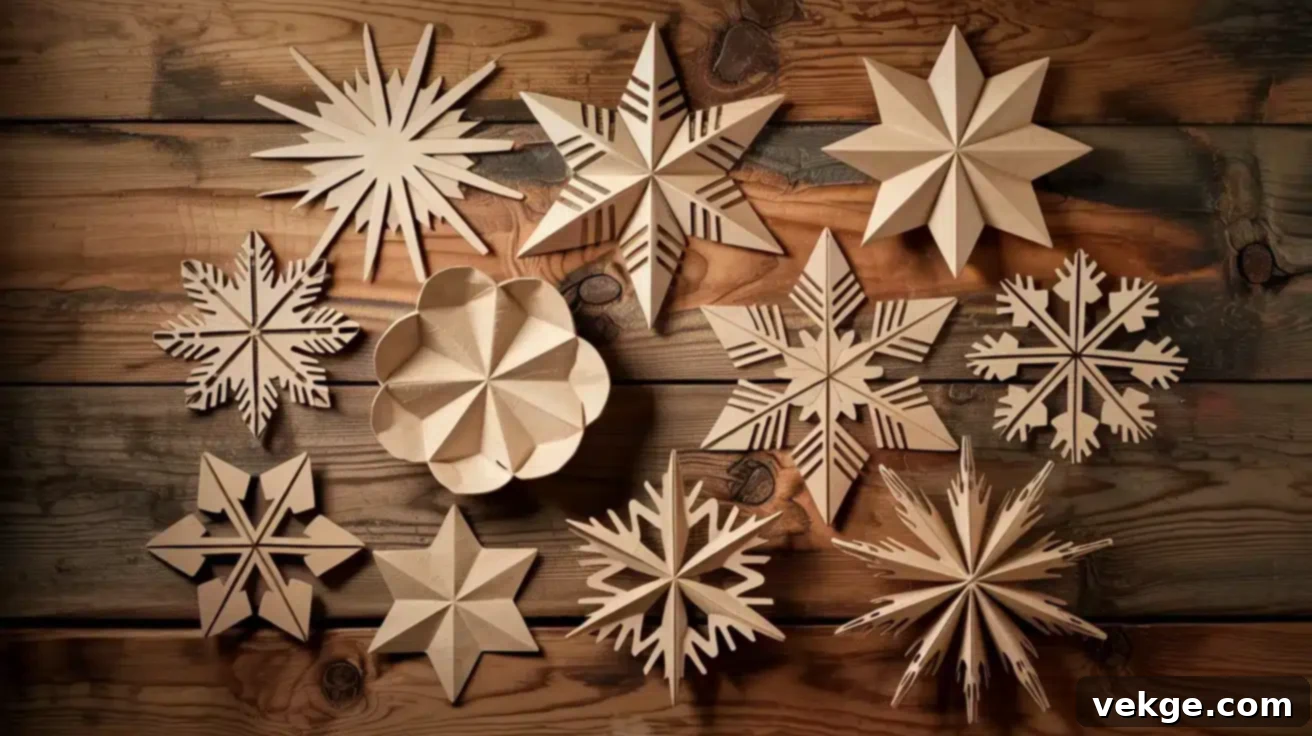
The true artistry of paper bag snowflakes comes alive through diverse cutting styles. Explore a range of patterns, from the timeless elegance of classic pointed stars to the soft allure of gentle rounded edges. Don’t hesitate to mix different cut patterns within a single snowflake for truly unique and intricate looks, or experiment with bold geometric shapes to complement more modern interior designs. Combining various sizes and colors in your display can add significant visual interest and depth to your winter decor.
Classic Pointy Snowflake: Timeless Elegance
For a traditional and universally loved snowflake design, cut deep, sharp triangles into the open edge of your bag stack. These triangular cuts will fan out to form distinct, star-like points. Vary the sizes of your triangles – some long and slender, others shorter and wider – to achieve a more natural, organic appearance, mimicking the intricate irregularities found in real snowflakes. The deeper you make your cuts, the more dramatic and pronounced the points will be when your snowflake is fully opened. This classic design most closely resembles traditional paper snowflakes and evokes a quintessential winter feel, perfect for a cozy holiday setting. Consider adding tiny triangles between larger ones for an extra layer of delicate detail. This style looks particularly striking when grouped in threes, hung at different heights to create maximum visual impact in an entryway or living room.
Rounded Gentle Snowflake: Modern Softness
If you prefer a softer, more contemporary aesthetic, opt for cutting gentle half-circle or curved shapes along the edge of your stacked bags instead of sharp points. These elegant, curved cuts create a gentler, cloud-like snowflake appearance that feels inherently modern and serene. The rounded edges beautifully catch and diffuse light, producing subtle, soft shadows on your walls that add to the tranquil ambiance. This design harmonizes perfectly with minimalist home styles and looks exceptionally beautiful when crafted from crisp white paper bags. For an added touch of airy lightness, incorporate small round cutouts throughout the body of the snowflake, creating a delicate, lacy effect that further enhances its soft, ethereal appearance.
Mixed-Shape Snowflake: Rich Visual Texture
Unleash your creativity by combining various cut styles on a single snowflake for a truly captivating and complex design. Along the outer edge, alternate between sharp, pointed triangles and flowing, rounded scallops. For additional texture and depth, integrate diamond shapes or small squares between these varied cuts. This eclectic approach generates rich visual interest and beautifully mimics the incredibly complex, asymmetrical patterns found in authentic snowflakes. The diverse edges capture light from different angles, giving the snowflake a dynamic quality that seems to shift and change as you move around it. This intricate design excels as a standalone statement piece, drawing attention and admiration in any room.
Geometric Snowflake: Contemporary Edge
For a sleek, modern aesthetic, embrace clean lines and precise geometric shapes. Instead of typical curved or organic patterns, cut sharp rectangles, perfect squares, and straight lines into your bag stack. This contemporary approach is a perfect fit for modern decor styles, offering a refreshing contrast to traditional winter themes. The structured, linear look creates bold, defined shadows and stands out elegantly against busy or patterned backgrounds. To add depth and a layered effect, try cutting some geometric shapes completely through both sides of the bags while strategically leaving others intact within the layers. This technique adds an intriguing architectural quality to your finished snowflake.
Mini Mixed-Size Cluster: Organic Snowfall Effect
To create a dynamic and natural-looking display reminiscent of gently falling snow, craft several snowflakes in various sizes and arrange them in a cohesive cluster. To make tiny versions, simply cut your standard lunch bags in half or even quarters before beginning the stacking process. Full-sized bags are perfect for medium-sized snowflakes, while for truly grand statement pieces, you can combine two regular-sized bags (taped together along their open edges) before gluing them into a stack, creating larger dimensions. The varied sizes create an organic, natural feel, mirroring the diverse flakes found in a real snowfall. This clustered approach works exceptionally well in corner spaces, above a mantelpiece, or over furniture where a single snowflake might otherwise get lost, offering a striking focal point.
Two-Tone Snowflake: Striking Contrast
Introduce a captivating visual element by alternating white and brown bags within your stack. When opened, this creates a striking striped or patterned effect that immediately draws the eye. The two-tone contrast not only adds significant dimension to your snowflake but also makes the intricacies of your cut patterns stand out more clearly and boldly. This technique is particularly effective with simpler, cleaner cut designs, allowing the color pattern itself to become a prominent feature. The interplay of colors magnificently highlights the individual layers and folds of the finished snowflake, accentuating its impressive three-dimensional quality.
Window Silhouette Snowflake: Luminous Glow
Design snowflakes specifically for display in windows to maximize their interaction with natural light. For this purpose, choose less elaborate, simpler cutting patterns. These minimalist shapes allow a greater amount of light to shine through the paper, creating a warm, inviting glow when illuminated from behind by natural daylight. The translucent quality of the paper transforms your window into a soft, glowing canvas. Try hanging several of these silhouette snowflakes at different heights across a window pane to create a charming winter scene effect. This approach works especially well with white bags, as they allow more light to pass through compared to the slightly denser brown kraft ones, enhancing the luminous quality.
Extra Decorations for Your Snowflakes: Elevate Your Design
Beyond the basic cuts, there are countless ways to enhance your paper bag snowflakes and make them truly shine. Improve your creations with magical string lights, dazzling glitter, or rustic natural elements. For a captivating visual contrast, consider ingeniously combining both white and brown bags. Employing proper hanging techniques will also create the delightful illusion of floating snowflakes, ensuring maximum visual impact and transforming your space into a dreamlike winter scene.
Snowflakes That Light Up: A Magical Glow
Small, battery-operated LED string lights are a game-changer, transforming basic paper snowflakes into truly magical evening decor. The trick is to discreetly tuck the thin wire lights between the paper layers as you form the final circular shape of your snowflake. Ensure the battery pack is hidden behind the snowflake or taped securely to the wall or ceiling, keeping it out of sight. The warm, soft glow emanating from within creates an incredibly cozy and inviting feeling as the light filters beautifully through your intricate cut patterns, casting enchanting, dancing shadows on nearby walls. This luminous effect works best with snowflakes made from 10-12 bags, as the increased layers provide more ample space to artfully conceal the light strand without making the snowflake appear bulky.
Sparkle and Shine: A Touch of Frosty Glamour
For a dazzling, frosty appearance, add a touch of sparkle to your snowflakes. After you’ve completed your cutting but before you open the snowflake, lightly brush the edges of your cut shapes with a thin layer of white school glue. While the glue is still wet, generously sprinkle fine glitter over the glued areas. This application method is much easier than trying to glitter an already opened 3D snowflake. The glitter will catch ambient light beautifully, adding a captivating, shimmering effect that evokes fresh fallen snow glistening in the sun. As an alternative, or in addition, you can use a metallic paint pen (silver or gold works wonderfully) to trace some of the edges for a more subtle, elegant sheen. This sparkling enhancement is particularly effective in entryways or dining areas where the shimmer will be noticed and appreciated during festive gatherings.
Two-Tone Beauty: Dynamic Visual Interest
Create stunning visual interest by intentionally mixing white and brown bags in a patterned sequence within your stack. For a bold striped effect, you might use four white bags followed by five brown ones, then repeat the pattern. Alternatively, alternate them one by one for a more blended, interwoven look. The inherent contrast between the white and brown paper brilliantly highlights your intricate cut patterns and adds incredible depth and dimension to the finished snowflake. For a sophisticated gradient effect, arrange your bags from darkest brown to lightest brown, or mix white and brown bags in a fading sequence when gluing your stack. This clever technique makes your finished snowflakes stand out dramatically against both light and dark walls, providing a versatile decorative solution.
Perfect Hanging: The Illusion of Floating
When displaying your snowflakes from the ceiling, clear fishing line is your best friend. It creates the marvelous illusion of floating, making your snowflakes appear weightless and ethereal. Simply punch a small hole in one of the points of your snowflake, thread the fishing line through, and tie a secure knot to create a hanging loop. For wall hanging, place a small, inconspicuous piece of clear tape just below the knot where the fishing line meets the snowflake for better stability and to prevent it from shifting. Hang multiple snowflakes at varying heights to achieve a dynamic, enchanting “falling snow” effect that fills the vertical space. If you’re decorating windows, use small suction cup hooks to avoid any damage to the glass or window frames. For a charmingly rustic aesthetic, consider using natural twine or thin jute string instead of fishing line, particularly when complementing brown kraft paper snowflakes.
Nature-Inspired Additions: Bringing the Outdoors In
Infuse your snowflakes with organic beauty by adding small, natural elements. Tuck tiny sprigs of artificial greenery, such as miniature pine branches or frosted berries, subtly between the layers of your snowflake as you open it. Small, delicate pinecones or acorns, glued carefully to the center point or along some of the outer points, can add wonderful natural texture and depth. For a delightful holiday theme, consider attaching small cinnamon sticks or thinly sliced, dried orange slices to the points of your snowflake. These additions not only look beautiful but also release a wonderful, festive scent that subtly fills the room, creating a multi-sensory experience. These nature-inspired elements pair exceptionally well with the rustic charm of kraft brown paper bags, fostering a warm, inviting, and truly festive atmosphere.
Color Washes: Subtle Tints of Winter Hues
For a delicate artistic touch, experiment with subtle color washes. Before you begin cutting, lightly brush the edges of your stacked bags with diluted watercolor paint in soft winter-inspired hues like pale blues, shimmering silvers, gentle purples, or frosty greens. The watercolor will subtly seep into the paper, creating a beautiful, gentle tint that elegantly enhances the winter theme without overwhelming the natural paper texture. It’s important to keep the color application very light to prevent the paper from warping or becoming too damp. This technique generally works best on white bags, where the colors show up more clearly and vibrantly. You can also try creating stunning ombre effects by gradually increasing the color intensity across different points of your snowflake, moving from a light tint to a slightly deeper shade for added visual depth.
Seasonal Switching: Year-Round Decor Versatility
The beauty of the paper bag snowflake technique lies in its incredible adaptability, allowing you to create beautiful decor that transcends the winter season. Develop foundational snowflakes and then easily swap out seasonal elements to refresh your decor throughout the year. For vibrant spring versions, you could attach tiny silk flowers, delicate butterflies, or pastel ribbons. Summer designs might feature small seashells, faux starfish, or bright, summery colored accents. And for autumn, incorporate mini artificial leaves in warm reds and golds, small faux pumpkins, or sprigs of dried wheat. This ingenious approach allows you to retain the same basic snowflake structure but completely transform its appearance to match any season or holiday. The fundamental paper bag snowflake technique thus becomes a versatile foundation for innovative, ever-changing seasonal displays that keep your home decor feeling fresh, engaging, and always on-trend.
Personalizing Your Snowflakes: Truly Unique Creations
Make your paper bag snowflakes truly your own by embracing personalization. Create custom designs with carefully planned cutting patterns, intricate decorative hole punches, and strategic size variations. Match your decor perfectly by adapting shapes and colors to suit specific rooms or holiday themes. You can even add delightful multi-sensory appeal by incorporating small photos or subtle scents.
1. Custom Cut Patterns: Reflect Your Style
- Sketch First: Before making any cuts, lightly draw your desired pattern with a pencil on the top bag of your stack. This allows you to plan your design precisely and visualize the outcome, preventing mistakes.
- Words & Names: For a truly unique touch, try cutting out simple letters or short words along the open edge of your snowflake stack. When opened, these will appear as part of your intricate design, perfect for names or festive greetings.
- Kid-Friendly Shapes: For children’s rooms or as a fun family activity, cut out small, playful shapes like hearts, stars, crescent moons, or animal silhouettes. These delightful shapes will magically appear around the edge when the snowflake is unfolded.
- Practice Makes Perfect: To ensure your pattern will work, test it on a single folded piece of paper (or a single paper bag folded in half) first. This quick trial run lets you see how the cuts will look when opened, saving you time and materials on your full stack of bags.
2. Hole Punch Magic: Delicate Details
Elevate the intricacy of your snowflakes by using standard hole punches to add charming circular details. These small, perfectly round holes create a delicate, lacy, and ethereal look throughout your snowflake when it’s opened. For even greater visual interest and variety, explore decorative hole punches that come in various shapes like stars, hearts, flowers, or even tiny leaves.
- Patterned Punching: Space your punched holes evenly around your design for a uniform look, or create specific, repeating patterns that add structure and visual rhythm.
- Layered Effect: For optimal results and to prevent tearing or dulling your punch, it’s best to punch through just 3-4 bags at a time rather than attempting to punch through the entire stack at once. This ensures clean, crisp holes.
3. Size Matters: Tailoring to Your Space
Thoughtfully adjust the size of your snowflakes to best suit where you intend to display them, creating visual harmony and impact.
- Tiny Ornaments: For delicate tree ornaments, charming window decorations, or even unique gift tags, create tiny versions by cutting standard lunch bags in half or even quarters before you begin the stacking and gluing process.
- Medium Mainstays: Standard lunch bag snowflakes (using 9-12 full-sized bags) result in medium-sized decorations that are perfect for adorning walls, doors, or smaller spaces, offering a balanced visual presence.
- Grand Statements: For breathtaking statement pieces in large rooms, high-ceilinged areas, or grand entryways, consider using bigger grocery bags or even combining two regular lunch bags taped together along their side edges before stacking. This allows you to create impressive snowflakes that can measure 18-24 inches or more across.
Grouping different sizes together creates compelling visual interest and a natural, organic feel, beautifully mimicking the varied sizes of real snowflakes falling softly.
4. Room-Specific Themes: Customized Ambiance
Design custom snowflakes that perfectly complement the function and aesthetic of specific rooms in your home:
- Bathroom: Opt for cool blue and white tones, perhaps with simple, clean-lined cuts, to match typical bathroom color schemes and create a serene, spa-like atmosphere.
- Dining Room: Incorporate metallic accents (like silver glitter or gold paint pen outlines) that will elegantly catch candlelight during meals, adding a touch of sophisticated sparkle.
- Kids’ Rooms: Feature brighter, cheerful colors or fun, whimsical patterns (like stars, hearts, or simple animal cutouts) that align with their interests and create a playful vibe.
- Kitchen: Choose simpler, more robust patterns that are less likely to collect dust or be easily damaged by cooking steam. Consider food-related shapes for a quirky touch.
- Bedroom: Select soft, rounded shapes and muted, calming colors for a tranquil and relaxing effect, promoting rest and serenity.
5. Holiday Adaptations: Festive Versatility
Extend the life of your crafting technique by adapting your cut patterns and colors to match various holidays throughout the year, making your craft budget-friendly and endlessly useful.
- Christmas: Integrate classic festive shapes by cutting small tree silhouettes, candy canes, or bell shapes into the edges of your bags. Add red and green accents.
- Easter: Create charming Easter-themed snowflakes featuring bunny ear cutouts, delicate egg shapes, or tiny cross patterns along the edges. Use pastel colors.
- Halloween: Embrace spooky fun by incorporating simple pumpkin shapes, friendly ghost outlines, or tiny bat wings along the edges for a playful, not-too-scary Halloween decoration.
This remarkable versatility ensures that the same fundamental crafting technique can be enjoyed year-round, making it an incredibly smart and sustainable choice for your decorative needs.
6. Photo Frame Snowflakes: Cherished Memories
Create a truly special and heartwarming snowflake design that frames a small photograph. This personalized touch makes for exceptional, thoughtful gifts or beautiful, custom memory displays.
- Central Opening: Before opening your snowflake, carefully cut a circle or square shape right in the center of your stacked bags. This will become the “frame” for your photo.
- Perfect Frame: Once the snowflake is opened and secured into its circular form, the central space you cut will perfectly frame a small picture or a cherished drawing.
- Secure the Photo: Gently secure the photo to the back layers of the snowflake using small dots of white craft glue or double-sided tape, ensuring it stays in place without damaging the paper.
7. Scented Snowflakes: Aromatic Ambiance
Engage another sense by adding a delightful aromatic element to your finished snowflakes. Lightly spray your completed decorations with a favorite room spray or a few drops of essential oils diluted in water. For winter themes, enchanting scents like peppermint, pine, cinnamon, or frankincense work wonderfully.
- Subtle Release: The paper material effectively absorbs the scent and then slowly releases it into the air, creating a subtle, inviting fragrance that enhances the ambiance of your room.
- Enhanced Diffusion: This technique is particularly effective when snowflakes are hung near heating vents, as the warm, circulating air gently helps to disperse the scent throughout the space.
Re-mist lightly every few weeks to refresh the fragrance. This multi-sensory approach makes your beautiful paper bag decorations even more immersive, memorable, and enjoyable for everyone in your home.
Maintenance Tips for Long-Lasting Paper Snowflakes
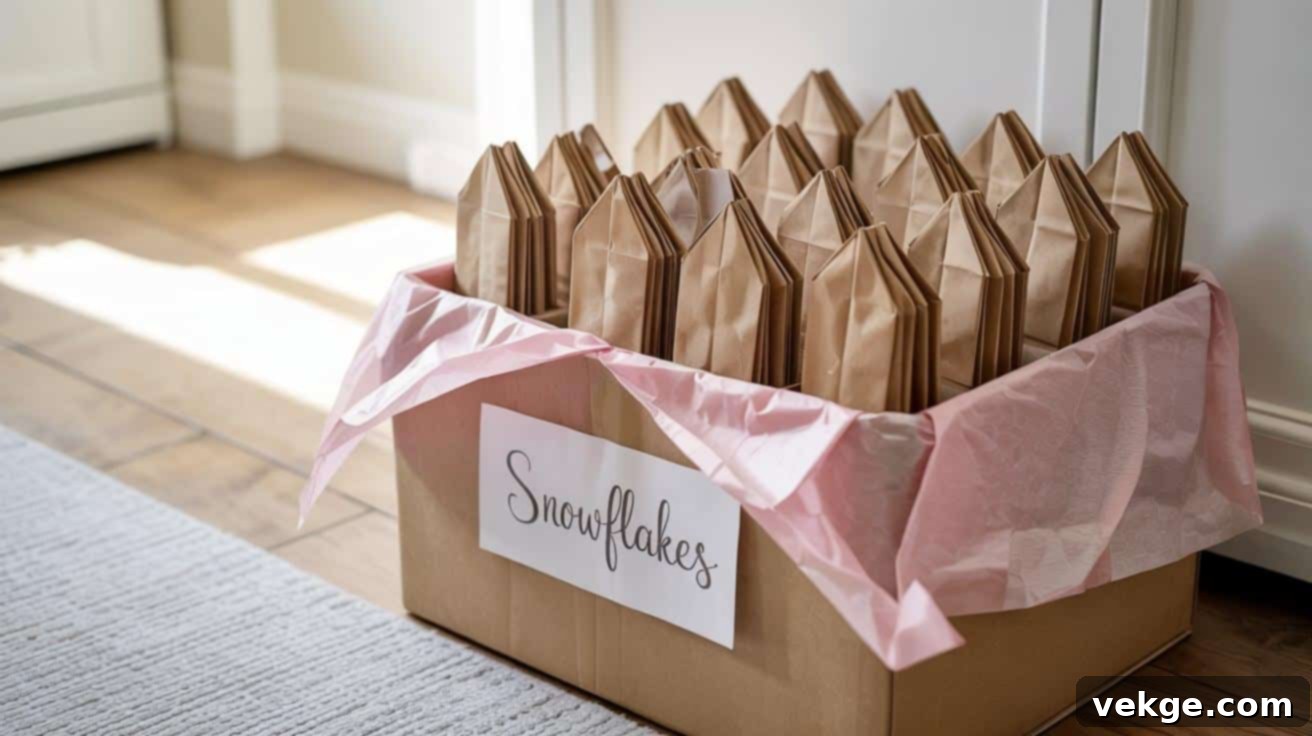
To ensure your handcrafted paper bag snowflakes retain their beauty and fresh appearance year after year, proper care and storage are essential. Follow these simple maintenance tips to preserve your delicate creations:
- Store Flat and Protected: The best way to store your snowflakes is flat. Place them carefully in sturdy, rigid boxes. To prevent bending, crushing, or the designs from snagging, lay a sheet of acid-free tissue paper or wax paper between each snowflake. This also helps protect against dust and light damage.
- Avoid Direct Sunlight: Store your snowflakes in a cool, dry place away from direct sunlight. Prolonged exposure to sunlight can cause the paper to yellow and the colors (if added) to fade significantly over time, diminishing their vibrant appeal.
- Dust Regularly: Over time, dust can accumulate on the intricate cut patterns. Gently dust your snowflakes with a soft, dry paintbrush or a microfiber cloth. A soft, clean makeup brush works wonderfully for reaching into small crevices without damaging the paper. Regular dusting keeps them looking crisp and pristine.
- Spray for Durability (Optional): For an extra layer of protection against moisture, humidity, and general wear and tear, consider lightly spraying your finished snowflakes with a clear, matte-finish acrylic sealer. Do this in a well-ventilated area. This protective coat can help strengthen the paper and make it slightly more resistant to minor damage.
- Repair Minor Damage Promptly: Before putting your snowflakes into storage at the end of the season, carefully inspect them for any minor tears, creases, or sections where the glue might have loosened. Use a tiny dot of white craft glue to mend any tears or re-secure loose sections. Prompt repairs prevent small issues from becoming larger problems later.
- Rest Before Hanging: When retrieving your snowflakes from storage for a new season, allow them to “rest” flat for at least a day. This gives the paper fibers time to relax and helps them regain their original flat shape before you gently fan them out and hang them. This prevents stress on the paper and maintains their structural integrity.
Common Mistakes to Avoid for Perfect Snowflakes
While making paper bag snowflakes is generally forgiving, being aware of common pitfalls can save you frustration and ensure your creations turn out beautifully and durably. Avoid these frequent errors:
- Using Too Much Glue: A common mistake is applying an excessive amount of glue. Too much adhesive, especially white craft glue, can cause the paper bags to stick together in unwanted places, making it difficult to open the snowflake evenly. It can also lead to the paper warping or puckering as it dries, spoiling the smooth finish. Always apply glue sparingly and precisely in the “T” pattern.
- Leaving Insufficient Connected Areas: When cutting your designs, it’s tempting to make deep, elaborate cuts across the entire surface. However, cutting too deeply or removing too much paper can weaken the structure, causing the snowflake to fall apart or tear when you try to open it. Always ensure you leave enough of the side edges and the central glued “T” intact to maintain structural integrity.
- Rushing Drying Time: Patience is key, especially with white craft glue. Rushing the drying process and attempting to cut or open the snowflake before the glue has fully set can lead to layers separating, weak bonds, and ultimately ruin the structure of your beautiful design. Allow adequate drying time, often an hour or more, before proceeding to the next steps.
- Over-Cutting Shapes: While intricate designs are beautiful, cutting too many shapes too close together can significantly weaken the paper. This creates fragile points and thin sections that are prone to tearing easily, especially during the opening process or when handling. Aim for a balance between detail and structural strength.
- Skipping the Final Securing Step: Once you’ve opened your snowflake into its 3D circular form, it’s crucial not to skip the final securing step. Failing to firmly join the two outer ends with tape or staples means the snowflake will not hold its shape and will likely unfold or collapse. This step is vital for its long-term display.
- Using Weak Hanging Materials: After all your hard work, using flimsy or weak materials for hanging your snowflakes can lead to disappointment. Thin thread or weak adhesive tape might cause your beautiful decorations to fall, potentially damaging them. Always opt for strong fishing line or robust string, and secure wall or ceiling attachments properly to ensure your snowflakes stay safely displayed.
Conclusion
Paper bag snowflakes are a testament to how simple materials can create extraordinary beauty, bringing genuine winter magic to your home without breaking the bank. With just a few dollars’ worth of basic supplies and a touch of creativity, you can craft stunning, three-dimensional decorations that look far more elaborate and expensive than they truly are. The straightforward, step-by-step process we’ve outlined makes this an incredibly accessible and rewarding project for crafters of all ages and skill levels, promising delightful results every time.
These versatile decorations are perfect for any space, from adding a serene touch to a bathroom to creating a grand statement in a living room. Their adaptability allows for endless customization through different cutting patterns, colors, and added embellishments. From sparkling glitter and subtle lighting to nature-inspired elements and personalized photo frames, your imagination is the only limit. With proper care and smart storage techniques, these charming paper bag snowflakes will bring joy and elegance to your home for many seasons to come, becoming cherished components of your annual decor.
Why wait to infuse your home with this unique brand of handmade charm? Gather your supplies today and embark on the delightful journey of creating your very own winter wonderland. Your family and guests will undoubtedly be captivated by these beautiful, intricate decorations, and they’ll never guess that such enchanting pieces began as simple paper lunch bags. For more inspiring ideas, DIY guides, and creative tips to add even more style and personal touch to your home, be sure to explore other blogs and resources on our website. Happy crafting!
