Mastering Appliance Error Codes: Your Guide to DIY Troubleshooting and Home Appliance Repair
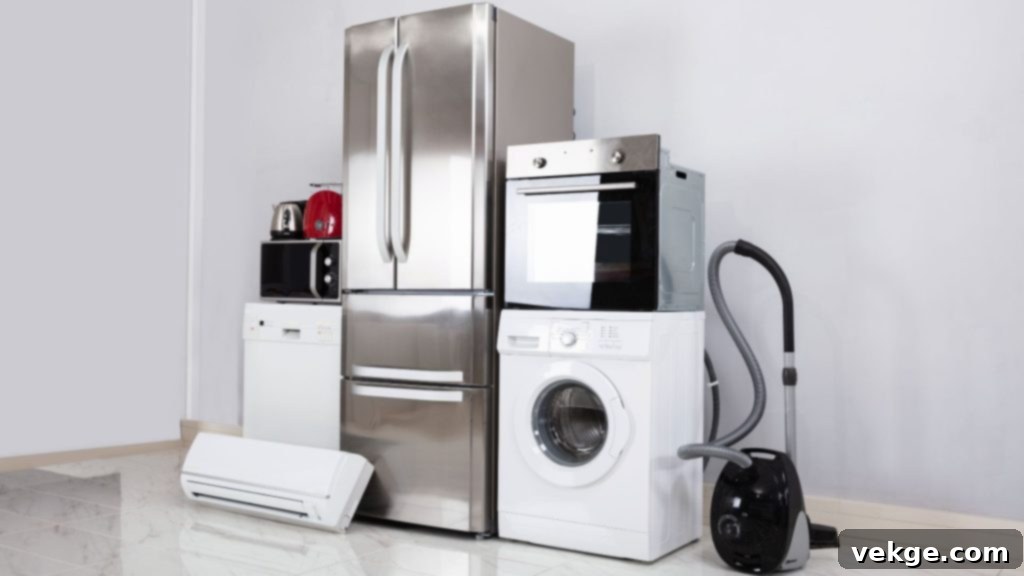
That familiar moment when your dishwasher starts flashing like a mini disco or your refrigerator emits a series of beeps that sound suspiciously like Morse code can instantly send a wave of panic through any homeowner. Before you rush to schedule an emergency home appliance repair appointment, it’s incredibly valuable to know that many common error codes have surprisingly simple solutions you can often handle yourself. Understanding the basics of household appliance repair troubleshooting can be a game-changer, saving you significant time, money, and the considerable headache of waiting for a technician when the fix might be as straightforward as clearing a filter or performing a quick reset of a sensor. This comprehensive guide will empower you to interpret these cryptic messages and potentially resolve issues independently.
The Secret Language of Modern Appliances: Decoding Your Home’s Machines

Our modern homes are equipped with an array of sophisticated machines that, despite their sleek designs and advanced functionalities, aren’t always the best communicators when something goes awry. Instead of speaking in plain English, they tend to use a secret language of cryptic codes and blinking lights. It’s akin to trying to understand a toddler’s first attempts at conversation – you intuitively know they’re conveying something important, but deciphering the exact message requires a bit of intuition, patience, and a basic understanding of their “vocabulary.”
Modern appliances operate much like miniature computers, complete with intricate self-diagnostic systems. These systems are constantly monitoring internal functions, from temperature sensors to water levels and motor speeds. When these internal monitors detect any anomaly or malfunction that falls outside their programmed parameters, they trigger an error code. These codes are not random; they are specifically designed to help technicians quickly identify specific problems, streamlining the repair process. The excellent news for homeowners is that you don’t need an engineering degree or a technician’s full training to understand the basics of this mechanical language. With a little knowledge, you can often pinpoint the issue and perform a DIY fix, significantly reducing the need for professional appliance repair services.
Refrigerator Codes: Beyond the Mysterious Beep to Essential Troubleshooting
As the cornerstone of your kitchen, your refrigerator performs one of the most vital jobs in your home: preserving food and keeping beverages chilled. This makes its error messages particularly stress-inducing. When your refrigerator starts flashing numbers or letters on its digital display panel, it’s not just alarming; it’s trying to give you a critical update on its condition. Here’s what some common codes might be trying to tell you, and how you can approach a DIY appliance repair:
- “Er IF” or “5E” – Ice Maker Failure: This common code typically indicates an issue with the ice maker. Before you panic and search for refrigerator repair services, first check for the simplest culprit: a ‘bridge’ of ice that might have formed in the ice bucket, physically blocking the mechanism. Gently breaking up this ice formation can often resolve the issue. Also, inspect the water line connected to the ice maker for kinks or blockages, and ensure the water supply valve is fully open. Sometimes, low water pressure can prevent the ice maker from filling properly.
- “88” – Power Reset Indicator: If “88” appears on your display, your refrigerator isn’t trying to take you back to the 1980s. Instead, it’s usually indicating a power reset or a temporary electrical glitch. While this often resolves itself, it might require a manual reset. Unplugging the entire unit from the wall outlet for two to five minutes (a soft reset) can often clear the control board and resolve transient electronic errors. Remember to plug it back into a dedicated outlet.
- “H” followed by a number – Temperature Alarm: Temperature alarms, frequently displayed as “H” with a number, typically signify that the refrigerator or freezer compartment is warmer than its set point. Before calling for appliance repair, consider simple factors. Has the door been left slightly ajar? Was a large quantity of hot food recently placed inside? Overpacking can also obstruct airflow. Additionally, check if the condenser coils (usually at the back or bottom of the fridge) are dirty, as this impairs heat dissipation and efficiency. Ensure that the refrigerator’s vents, both inside and outside, are not blocked by food items or debris.
- Flashing Lights (No Specific Code) – Door Ajar Warning: Many modern refrigerators use subtle flashing lights or a continuous beeping sound to indicate that a door has been left open or isn’t sealed properly. Even a tiny gap can cause significant energy waste and temperature fluctuations. Check the door gasket for tears or obstructions and ensure nothing is preventing the door from closing completely.
Dishwasher Dialogues: Decoding the Blinking Lights for DIY Solutions
Dishwashers can often feel like the drama queens of kitchen appliances, with their persistent beeping and flashing lights designed to grab your attention when things go awry. Understanding these common communications can help you perform quick DIY appliance fixes:
- Blinking “Clean” Light – Drain Issue: A blinking “Clean” light is a very common signal, often indicating a drain issue. Think of your dishwasher like a bathtub – if the water can’t flow out properly, nothing else works correctly. The most frequent culprit is a clogged drain filter located at the bottom of your dishwasher. This filter traps food particles and debris, and regular cleaning (usually monthly) can prevent blockages. Also, check the drain hose for kinks or obstructions, and ensure your sink’s garbage disposal (if you have one) is clear, as a backed-up disposal can prevent dishwasher drainage.
- “i30” or “E24” Codes – Water Intake Problems: These codes are your dishwasher’s way of saying, “I’m thirsty!” They typically point to issues with water intake. First, check that the main water supply valve behind the dishwasher (or under your sink) is fully open. Next, inspect the water intake hose for any kinks, twists, or blockages, much like a garden hose left out too long. Sediment buildup in the inlet valve screen can also restrict water flow, requiring a gentle cleaning.
- Flashing Start Button – Door Latch Issue: A flashing start button is the dishwasher equivalent of a toddler tugging on your sleeve for attention. Most often, this simply means the door isn’t properly latched or closed. Give the door a firm, gentle push to ensure it clicks shut. If the problem persists, inspect the latch mechanism itself for any damage or debris that might be preventing it from engaging correctly. Sometimes, older latches can wear out and may need replacement.
- “F11” or “Water Leak” – Leak Detection: Some advanced dishwashers feature leak detection systems. If these codes appear, it means the appliance has detected water where it shouldn’t be. Immediately turn off the water supply to the dishwasher and investigate underneath for visible leaks. Common leak points include hose connections, the door seal, or the pump assembly. While some minor leaks can be fixed by tightening connections, persistent leaks often require professional attention to prevent water damage.
Washing Machine Whispers: Understanding the Spin Cycle Signals for Effective Repair

When your washing machine refuses to enter the spin cycle, displays cryptic messages, or generally acts temperamental, it’s not without reason. Understanding its “whispers” can lead you to a quick DIY appliance fix:
- “UE” or “E13” Codes – Unbalanced Load: These codes typically indicate an unbalanced load. Your washing machine is essentially telling you it’s dizzy from trying to spin an unevenly distributed pile of clothes. An unbalanced load not only causes excessive vibration and noise but can also prevent the machine from spinning at high speeds, leaving clothes soaking wet. Simply redistributing the laundry more evenly in the drum usually solves this without requiring any professional appliance repair. Avoid washing a single heavy item with many light ones, or overstuffing the machine.
- Door Lock Indicators Flashing – Latch or Sensor Issue: If the door lock indicator flashes or the machine refuses to start, it means exactly what it suggests – the door hasn’t sealed properly or the locking mechanism isn’t engaging. This is the washing machine’s version of refusing to start a road trip until everyone’s seatbelt is securely fastened. Check for any clothes caught in the door seal, ensure the door is firmly shut, and inspect the latch itself for damage or misalignment. A faulty door lock switch is also a common culprit requiring replacement.
- “E10” or Water Supply Errors – Thirsty Machine: These codes mean your washing machine isn’t getting enough water to complete its cycle. First, check that both the hot and cold water supply valves behind the machine are fully open. Next, inspect the supply hoses for any kinks, blockages, or sediment buildup in the small screen filters often located at the hose connections. Ensure your household water pressure is adequate; sometimes, low pressure can trigger these errors.
- “F05” or “Drain Pump Error” – Drainage Problems: If your washing machine fills but doesn’t drain, or the cycle stops mid-wash with this error, it’s likely a drain pump issue. Check the drain filter (often located at the bottom front of the machine) for lint, coins, or small objects. Also, examine the drain hose for any blockages or clogs, especially where it connects to your standpipe or sink.
Dryer Dialects: Hot Air and Warning Signals to Keep Your Laundry Flowing
Dryers may seem less complicated than their washing machine counterparts, but they have their own critical language of alerts and warning signals that are crucial for both performance and safety:
- Flashing “Check Lint Screen” – Breathe Easy: This isn’t just a casual suggestion; it’s your dryer telling you it’s having trouble breathing. A clogged lint filter drastically reduces drying efficiency, making your dryer work harder and longer, thus consuming more energy. More critically, it creates a significant fire hazard as lint is highly flammable. Always clean the lint screen before or after every load. This is one of the most important preventative measures for dryer longevity and household safety.
- “AF” or “Airflow Restricted” Warnings – Ventilate Properly: These warnings indicate that your dryer’s ventilation system is blocked. Think of your dryer vent like a snorkel – if it’s blocked, the entire system struggles to expel hot, moist air. This leads to longer drying times, excessive heat buildup, and reduced appliance lifespan. Check the entire length of the vent hose for kinks or crushing, and inspect the exterior vent cap for lint buildup or obstructions from bird nests or debris. Regular professional vent cleaning is highly recommended, ideally annually.
- Thermal Fuse Errors / “Check Exhaust” – Overheating Prevention: Thermal fuse errors often manifest as “Check Exhaust” warnings or a complete lack of heat. The thermal fuse is a critical safety feature designed to cut power to the heating element if the dryer overheats, preventing a fire. If triggered, it will need replacement. However, the underlying cause is often a severely clogged vent system that caused the overheating in the first place. Always address vent blockages before replacing a thermal fuse to prevent the new fuse from blowing prematurely.
- “E1” or “Heating Element Issue” – No Heat: If your dryer runs but produces no heat, it could be a fault with the heating element. While this specific issue usually requires professional dryer repair, checking the circuit breaker or fuse box for a tripped breaker dedicated to the dryer (especially a 240V breaker) is a worthwhile initial step. Sometimes, a simple power issue is the cause.
When DIY Diagnosis Meets Its Match: Knowing When to Call for Professional Appliance Repair
While understanding common appliance error codes and performing basic DIY troubleshooting can resolve a surprising number of issues, it’s equally important to recognize when a situation warrants calling for proper appliance repair. Some problems are simply too complex, too dangerous, or require specialized tools and expertise. Think of these scenarios like health symptoms – minor issues can be handled with home remedies, but certain warning signs deserve immediate professional attention:
- Any Error Codes Related to Gas Supply in Gas Appliances: If your gas range, oven, or dryer displays an error code related to gas ignition, gas leaks, or gas supply, do NOT attempt a DIY fix. Immediately turn off the gas supply to the appliance and call a certified technician or your gas company. Gas leaks are extremely dangerous and can lead to explosions or carbon monoxide poisoning.
- Electrical Issues Involving Sparking, Burning Smells, or Frayed Wires: If you observe sparking, smell burning plastic or electrical components, or see visibly frayed wires, disconnect the appliance from power immediately. These are serious electrical hazards that can lead to fire or electric shock. A qualified electrician or appliance technician should be called to diagnose and repair the issue safely.
- Water Leaking Onto Electrical Components or Near Outlets: While minor leaks can often be addressed, any significant water leakage, especially if it’s contacting electrical components, power cords, or wall outlets, poses a severe risk of electrocution or short-circuiting. Turn off the power to the appliance and call a professional.
- Persistent Error Codes That Return After Attempted Fixes: If you’ve diligently followed troubleshooting steps, performed a reset, and the same error code reappears quickly, it indicates a deeper, more persistent problem. This suggests a faulty component, a complex system malfunction, or an issue that requires advanced diagnostics beyond simple DIY appliance repair.
- Any Situation Where the Appliance Seems Unsafe to Operate: Trust your instincts. If an appliance is making strange, loud noises, vibrating excessively, producing smoke, or otherwise feels unsafe to use, err on the side of caution. Discontinue use and seek professional assessment to ensure your safety and prevent further damage.
For these situations, attempting a DIY fix could not only void your warranty but also potentially cause further damage, incur higher repair costs, or, most importantly, put your safety at risk. Knowing when to call in the experts is a crucial part of responsible home appliance ownership.
Preventative Measures: Keeping the Appliance Conversation Friendly and Functional
The best relationships with your appliances involve regular, proactive maintenance rather than reactive crisis management. Just as regular check-ups prevent serious health issues, routine appliance care significantly prevents major breakdowns, extends lifespan, and ensures optimal performance:
- Monthly Cleaning of Refrigerator Coils: Dust and pet hair accumulate on condenser coils, making your refrigerator work harder to dissipate heat. Cleaning them monthly (or every 2-3 months) keeps the compressor running efficiently, saves energy, and prevents overheating issues.
- Quarterly Dishwasher Filter Cleaning: Regularly cleaning the dishwasher filter prevents food particles and debris from recirculating, leading to cleaner dishes and preventing drainage issues and foul odors.
- Regular Washing Machine Drum Cleaning: Performing an empty hot wash cycle with white vinegar or a specialized washing machine cleaner monthly prevents odor buildup, mold, and mildew, especially in front-loading machines. Also, leave the door ajar after use to allow the drum to air dry.
- Annual Dryer Vent Cleaning: Beyond cleaning the lint screen with every load, a thorough annual cleaning of the entire dryer vent system prevents lint accumulation, which is a major fire hazard and reduces drying efficiency. Consider hiring a professional for this task.
- Avoid Overloading: Overloading any appliance (washer, dryer, dishwasher) forces it to work harder than designed, leading to premature wear and tear on motors, belts, and other components.
- Use Correct Detergents and Amounts: Using too much detergent or the wrong type can create excessive suds that interfere with washing machine sensors or leave residue in your dishwasher.
- Check Hoses and Cords Periodically: Inspect water supply hoses for cracks or bulges, and power cords for fraying or damage. Replace them if any issues are found.
Implementing these simple routines keeps the “conversation” between you and your appliances cordial, efficient, and long-lasting, minimizing unexpected malfunctions and the need for costly appliance repair.
The Future of Appliance Communication: Smarter Homes, Easier Fixes
The landscape of home appliance diagnosis is rapidly evolving with the advent of smart appliances. Many new models are now capable of self-diagnosing issues and sending detailed error information directly to your smartphone via dedicated apps. This technological evolution is like moving from deciphering cryptic smoke signals to receiving detailed text messages – it’s much more helpful, precise, and user-friendly for everyone involved.
These advanced systems can often provide not just an error code but also a description of the problem, potential causes, and even step-by-step troubleshooting guides or direct links to service request forms. Some can even order parts or schedule service appointments automatically. This integration of smart technology promises to make appliance maintenance and repair significantly less daunting in the years to come.
Until all our homes are equipped with these cutting-edge, communicative systems, keeping this comprehensive guide handy will continue to empower you. Understanding what your appliances are truly trying to tell you when they start flashing, beeping, or otherwise demanding your attention will save you time, money, and unnecessary stress. Empower yourself with knowledge, and take control of your home appliance maintenance and repair needs.
