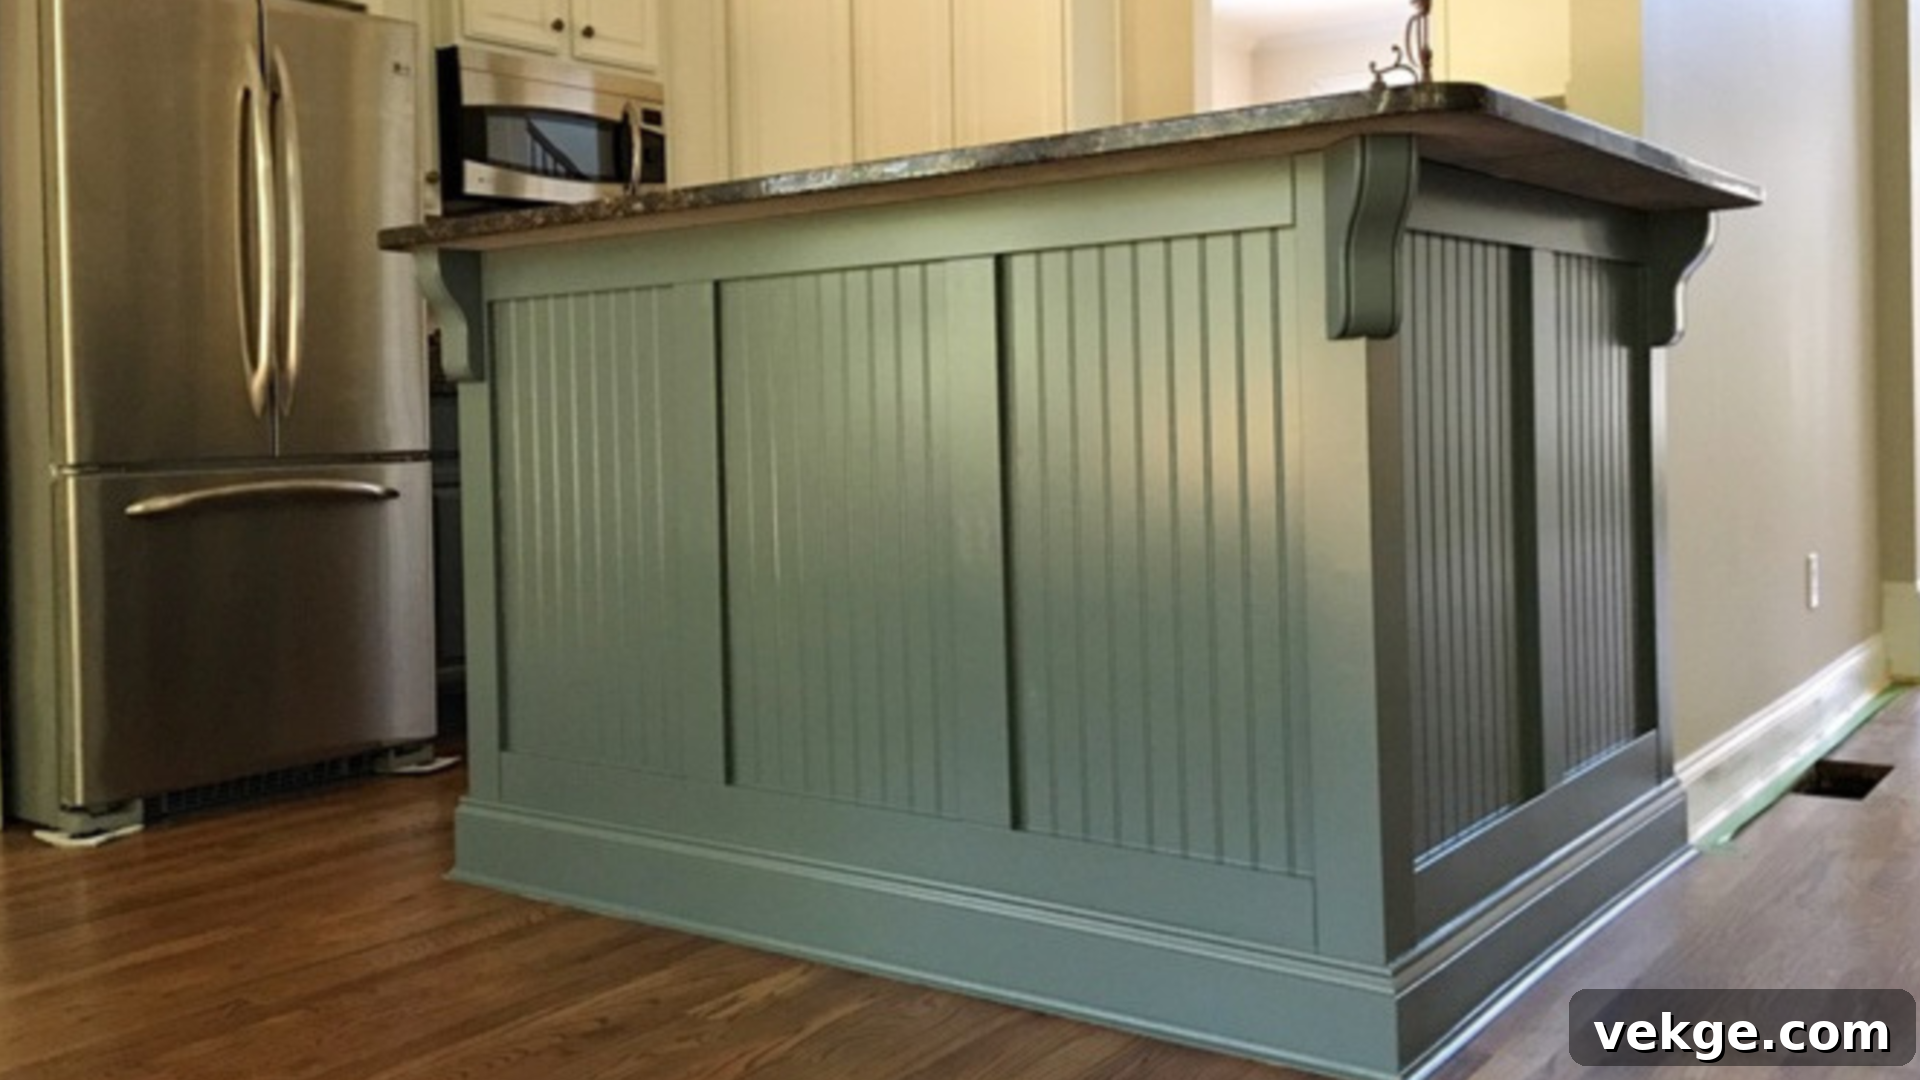
Transform Your Kitchen: The Ultimate Guide to a Beadboard Kitchen Island (DIY & Ready-Made Options)
Does your kitchen island feel like an afterthought, a functional but visually uninspiring block in the heart of your home? Perhaps it looks dull, outdated, or simply doesn’t quite blend with the evolving style of your space. You’re not alone, and the good news is that you don’t need to embark on a costly and time-consuming complete kitchen remodel to fix it.
A beadboard kitchen island is a remarkably simple, yet incredibly effective, solution to refresh the entire look and feel of your kitchen without having to tear everything down and start from scratch. This classic paneling adds instant character, texture, and a touch of timeless charm that can dramatically elevate your kitchen’s aesthetic.
In this comprehensive guide, we’ll walk you through every step of adding beadboard to your kitchen island, empowering you to achieve a professional-looking result. From understanding the essential tools and materials you’ll need, to exploring diverse design ideas that perfectly match your personal style – whether you’re considering a hands-on DIY project or looking for convenient ready-made options, you’ll find clear answers and invaluable tips right here.
By the time you finish reading, you’ll be equipped with all the knowledge to confidently plan, build, and finish your beadboard kitchen island project. Ready to discover what a single weekend upgrade can do to completely revitalize your kitchen space and make your island a true focal point?
What is a Beadboard Kitchen Island and Why Choose It?
Beadboard is a distinctive type of wood paneling characterized by its narrow, vertical boards separated by a small, rounded ridge or “bead” and a groove. Historically used as wainscoting to protect walls, it has evolved into a versatile decorative element that brings a touch of traditional craftsmanship and architectural detail to any surface. When applied to a kitchen island, beadboard instantly transforms flat, uninspired planes into surfaces rich with texture and visual interest.
Choosing beadboard for your kitchen island is a smart move for several compelling reasons. It offers a straightforward yet elegant way to add character and depth to otherwise plain surfaces, elevating the island from a mere utility to a key design feature. This transformation provides both enhanced function through improved aesthetics and a significant visual upgrade without the need for extensive, disruptive, and costly renovation work.
Unmatched Benefits and Design Flexibility
One of the primary benefits of beadboard is its ability to add a sense of depth and structured order to even the most utilitarian surfaces. It helps kitchen islands feel more substantial, more ‘finished,’ and inherently more integrated into the overall kitchen design. Beyond its aesthetic appeal, beadboard boasts remarkable design flexibility, seamlessly blending with a wide array of interior styles. Whether your kitchen leans towards traditional farmhouse, classic colonial, sleek modern, or breezy coastal, beadboard can be adapted to enhance its specific charm.
Its installation process is generally simple and accessible for most DIY enthusiasts, making it an ideal weekend project. Furthermore, beadboard is incredibly versatile: it’s paintable in any color imaginable, allowing for endless customization to match or contrast with your existing decor. This adaptability means it’s perfect for small, impactful updates or as a foundational element in larger renovation projects. If you’re seeking a fresh coat of color, or need a durable surface that cleverly hides minor wear and tear, beadboard offers a practical and stylish solution, making future updates significantly easier than replacing the entire island structure.
Common Materials: MDF vs. Wood vs. PVC
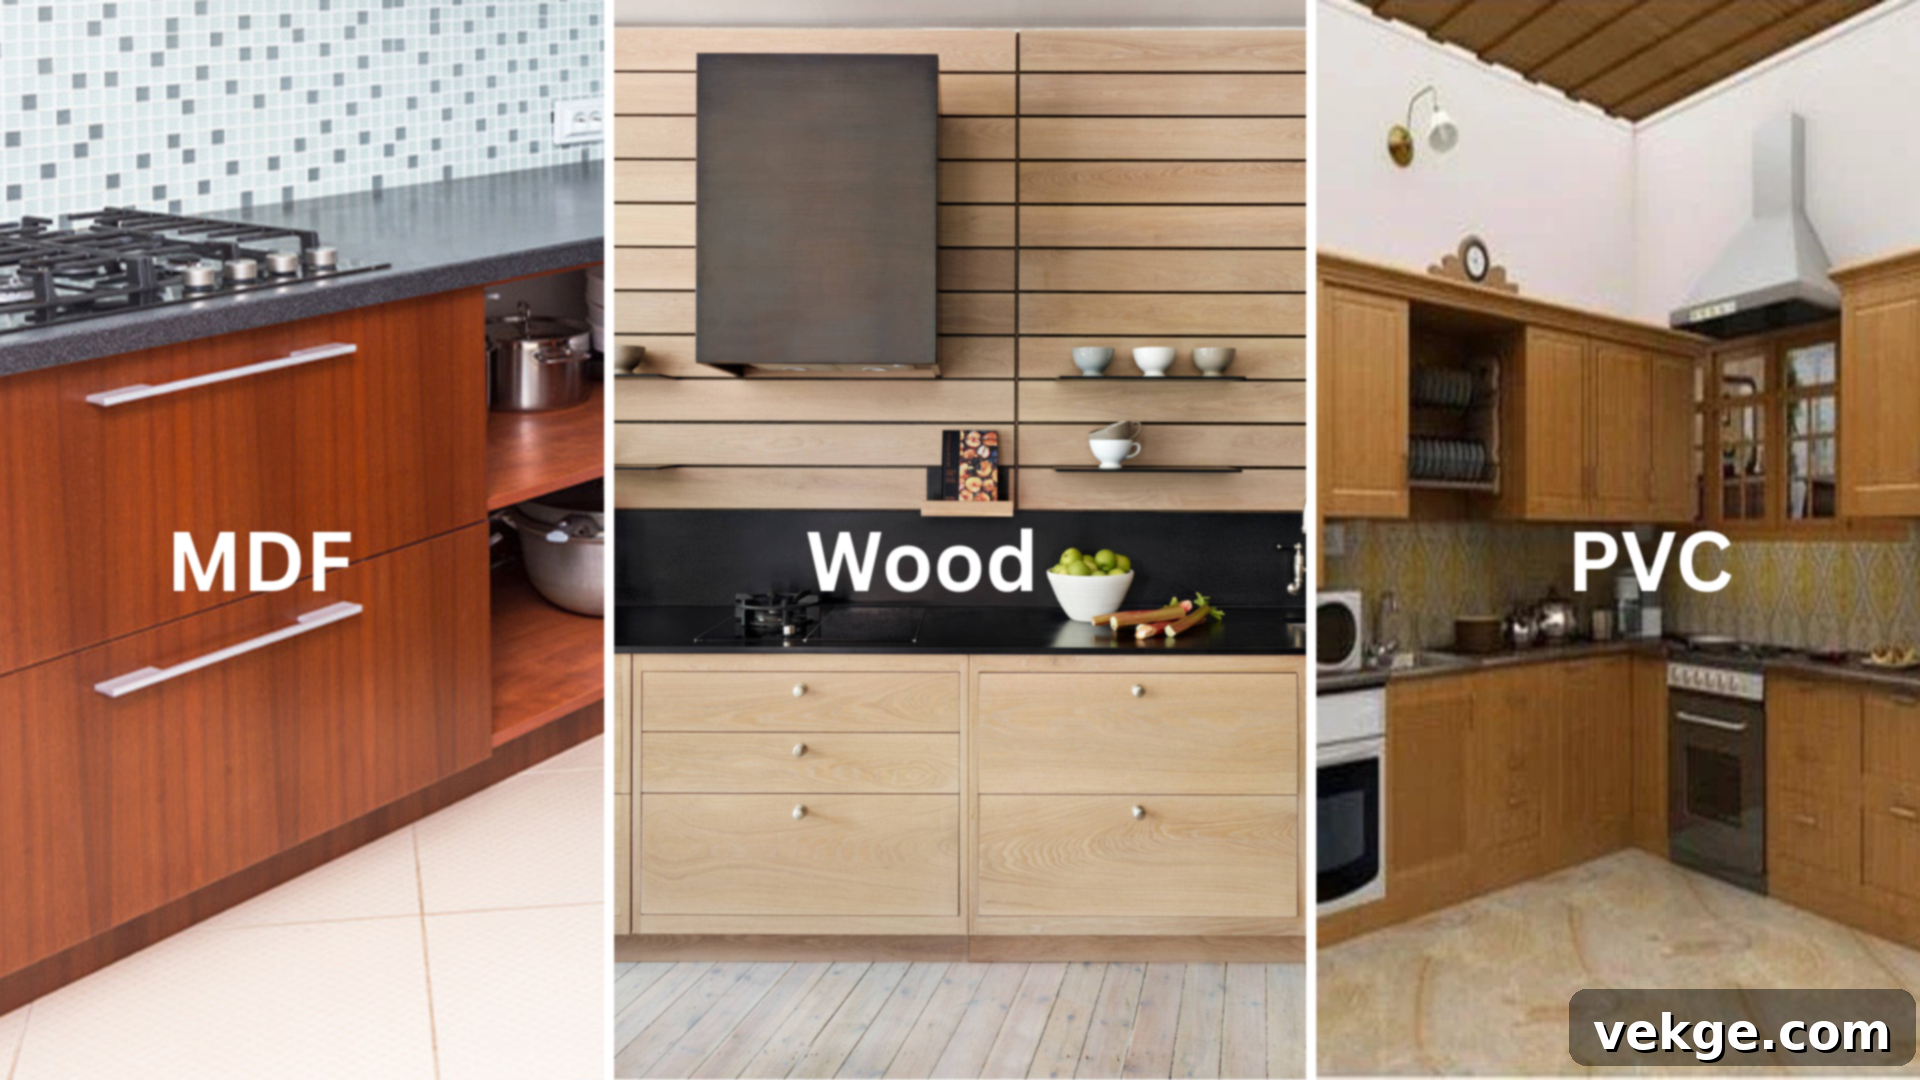
When selecting beadboard for your kitchen island, the material choice is crucial, as each offers distinct advantages based on your kitchen’s environment, the expected wear and tear, and your maintenance preferences. Understanding the properties of MDF, natural wood, and PVC will help you make the best decision for a durable and beautiful finish.
|
Material |
Details |
Best For |
|
MDF (Medium-Density Fiberboard) |
Engineered from compressed wood fibers, MDF offers a remarkably smooth, uniform surface that is exceptionally easy to paint for a flawless finish. It’s stable and resists warping. However, it requires careful sealing, especially in areas with high humidity, as it can swell if exposed to moisture. |
Budget-conscious projects, kitchens with low moisture levels, and when a perfectly smooth, painted finish is desired. Ideal for a quick, affordable refresh. |
|
Natural Wood |
Offers an authentic, natural grain and texture, providing inherent strength and long-lasting durability. Wood beadboard can be stained or painted and refinished multiple times over its lifespan. It is crucial to seal wood properly, as it can be prone to warping or expanding in humid conditions if left unprotected. |
Achieving a high-end, traditional, or rustic look. Suited for durable, heirloom-quality finishes where the natural beauty of wood is celebrated. Requires more initial preparation and sealing. |
|
PVC (Polyvinyl Chloride) |
A synthetic material that is inherently moisture-resistant, non-porous, and incredibly easy to clean, making it ideal for high-traffic or damp areas. PVC beadboard is lightweight and simple to install. While highly practical, it generally offers fewer texture options compared to real wood, though it can be painted. |
Damp environments like kitchens and bathrooms, low-maintenance homes, and where extreme durability and water resistance are paramount. Excellent for busy family kitchens. |
How to Update Your Kitchen Island with Beadboard
Adding beadboard is an excellent way to give your kitchen island a clean, sophisticated, and thoroughly upgraded look without the hassle and expense of major construction. This DIY project is surprisingly achievable for most homeowners with basic tools, a bit of careful preparation, and a dedicated weekend. This section will guide you through every essential step, from gathering your supplies to applying the final coat of paint, ensuring a smooth and successful project.
Tools and Materials Checklist
Before you dive into the project, taking the time to gather all the necessary tools and materials will prevent frustrating delays and ensure a continuous workflow. Here’s a detailed checklist to keep handy:
- Tape Measure: Essential for accurate length and width measurements.
- Circular Saw or Handsaw: For precise, straight cuts on your beadboard panels. A circular saw with a fine-tooth blade is ideal for efficiency and clean edges.
- Jigsaw: Crucial for making intricate cuts around electrical outlets, irregular corners, or other obstructions.
- Beadboard Panels: Choose your preferred material (MDF, wood, or PVC) and ensure you purchase enough to cover all surfaces, plus a little extra for mistakes.
- Trim Pieces: (Corner and Base): These are vital for covering seams, protecting edges, and giving your island a polished, built-in appearance. Consider shoe molding or quarter-round for the base.
- Construction Adhesive: A high-quality instant-grab adhesive specifically designed for paneling will secure the beadboard firmly to the island’s surface.
- Finishing Nails or Nail Gun: For extra security and to hold panels and trim in place while the adhesive cures. A brad nailer or pin nailer will leave minimal holes to fill.
- Sandpaper: Fine-grit sandpaper (120-220 grit) for smoothing cut edges, filling nail holes, and preparing surfaces for paint.
- Caulk and Caulking Gun: Essential for sealing gaps between panels, trim, and the existing island structure, preventing moisture intrusion and providing a seamless look.
- Primer and Paint: Choose a high-quality primer suitable for your beadboard material, followed by durable paint (semi-gloss or satin are ideal for kitchen surfaces for easy cleaning).
- Painter’s Tape: For masking off adjacent surfaces to ensure crisp, clean paint lines.
- Safety Gear: Always wear gloves to protect your hands and safety goggles to shield your eyes, especially when cutting or nailing.
- Cleaning Supplies: Rags, brushes, and a utility knife for cleanup and precise caulk application.
Measuring and Planning Tips for a Flawless Finish
Accurate measurements are truly the cornerstone of a professional and well-fitted beadboard finish. Before making any cuts, meticulously measure the height and width of each distinct panel section on your island. Record these measurements carefully, double-checking each one to avoid costly errors.
Remember to account for the thickness of any trim pieces you plan to use – these will slightly overlap the beadboard. Pay special attention to areas around electrical outlets, existing cabinetry, or any unusual edges; these will require precise template creation or careful notching with a jigsaw. A helpful tip is to create paper templates for complex areas to ensure your cuts are perfect before applying them to the actual beadboard.
If your island isn’t perfectly square, or if it features angled corners, take additional measurements from multiple points and draw detailed diagrams. This foresight will help you anticipate challenges and make precise cuts. It’s always wise to purchase a little extra material, as even experienced DIYers can make minor miscalculations. A small investment in upfront planning and precision helps significantly reduce errors, saving both time and materials in the long run. Good preparation ensures the final result is even, perfectly aligned, and looks professionally installed.
Step-by-Step Installation Guide
With your tools gathered and measurements confirmed, you’re ready to begin the transformation of your kitchen island. Follow these steps for a smooth installation:
Step 1: Precisely Cut Your Panels. Begin by laying out your beadboard panels and marking your measurements carefully. Use a circular saw for long, straight cuts across the width of the panels. If you’re working with PVC panels, you’ll find them lightweight and easy to handle and cut. For a subtle design variation, some beadboard panels are reversible, offering a wider plank look on one side; decide on your preferred aesthetic before cutting. For any intricate cuts around outlets or irregular shapes, use a jigsaw, moving slowly and steadily for a clean line.
Step 2: Apply Adhesive and Firmly Press. Once your panels are cut to size, apply a generous, zigzag bead of instant-grab construction adhesive to the entire back surface of each panel. Ensure even coverage, paying close attention to the edges. Carefully position the panel onto the island surface, aligning it precisely. Press it firmly against the surface, applying even pressure across the entire panel. A grout float or a roller can be helpful here to ensure maximum contact and adhesion, pushing out any air bubbles and securing the panel in place.
Step 3: Secure and Attach Trim Pieces. After the panels are adhered, it’s time to add the crucial trim pieces. Corner trim, often called outside corner molding, will cover the vertical seams where two beadboard panels meet at an outside corner, providing a crisp, finished edge. Base trim (like shoe molding or quarter-round) will be attached along the bottom edge of the beadboard, where it meets the floor, creating a more substantial and polished look. Use finishing nails or a nail gun to securely attach these trim pieces, ensuring they are flush and straight. This step not only adds a decorative touch but also helps to visually “frame” the beadboard and makes the entire project look much more integrated and complete.
Step 4: Seal All Seams with Caulk. This often-overlooked step is vital for both aesthetics and durability. Load your caulking gun with paintable caulk. Carefully apply a thin, even bead of caulk along all gaps: where beadboard panels meet each other, where they meet the island’s countertop, and especially where the trim pieces meet the beadboard and the floor. Smooth the caulk with a wet finger or a damp sponge for a clean, professional finish. This step helps prevent moisture from seeping behind the panels, which is particularly important in a busy kitchen environment, and creates a seamless, built-in appearance that will truly make your DIY project shine.
Step 5: Prime and Paint the Surface. Once the caulk has fully dried (check manufacturer’s instructions, typically a few hours), it’s time for painting. If your beadboard panels aren’t pre-primed, apply a high-quality primer first – this ensures better paint adhesion and a more uniform finish. After the primer dries, paint the entire island, including the beadboard and all trim pieces, in your chosen color. Apply thin, even coats, using a brush to get into the grooves and a small roller for flat surfaces. Allow adequate drying time between coats. PVC surfaces, once painted and dry, are particularly easy to wipe clean, offering excellent durability for kitchen use.
Step 6: Optional Reuse Ideas & Creative Applications. Don’t let leftover beadboard go to waste! These versatile panels work wonderfully in other areas of your home. Consider using them for a charming accent wall in a bathroom, creating a cozy cottage feel in a bedroom, or even backing shelves in a pantry or mudroom. Coordinating your design across different spaces can create a cohesive and thoughtful aesthetic throughout your home.
Want to see how it all comes together visually? Watch this quick video for a step-by-step look at the process in action, providing valuable visual guidance for your project.
Expert Painting and Finishing Advice
The painting and finishing stages are where your beadboard kitchen island truly comes to life. After your panels are securely attached, trimmed, and caulked, if your beadboard isn’t pre-primed, start with a high-quality primer. Primer is crucial because it creates a uniform surface for the paint, seals the material, and ensures better adhesion, leading to a more durable and even finish that will last for years.
When applying paint, use a good quality brush for the vertical grooves of the beadboard, ensuring full coverage without heavy buildup. For the flatter sections, a small foam roller or a fine-nap roller will provide a smooth, even application. Always apply thin, even coats rather than one thick coat; this prevents drips, ensures better adhesion, and results in a more professional appearance. Allow each coat to dry completely according to the paint manufacturer’s instructions before applying the next layer – patience here will pay off significantly.
For crisp, professional-looking edges, apply painter’s tape meticulously along any adjacent surfaces (like countertops or flooring) before you begin painting. Once the final coat has dried completely, gently remove the tape. After the paint is fully cured, inspect the entire island for any small spots that might need touch-ups or areas where the coverage isn’t perfect. A smooth, even, and well-finished paint job not only adds significant polish to your island but also contributes greatly to its long-term durability and ease of maintenance.
Beadboard Kitchen Island Ideas for Every Style
One of beadboard’s most appealing qualities is its remarkable versatility, allowing it to seamlessly integrate into virtually any kitchen aesthetic. The right combination of paint color, trim selection, and overall layout can dramatically shift the entire look and feel of your kitchen island.
Whether you dream of a kitchen imbued with traditional farmhouse charm, a crisp and clean updated feel, or something entirely unique, these style ideas offer practical guidance for customizing your beadboard island to perfectly suit your space and personal taste, transforming it into a true centerpiece.
Farmhouse Style
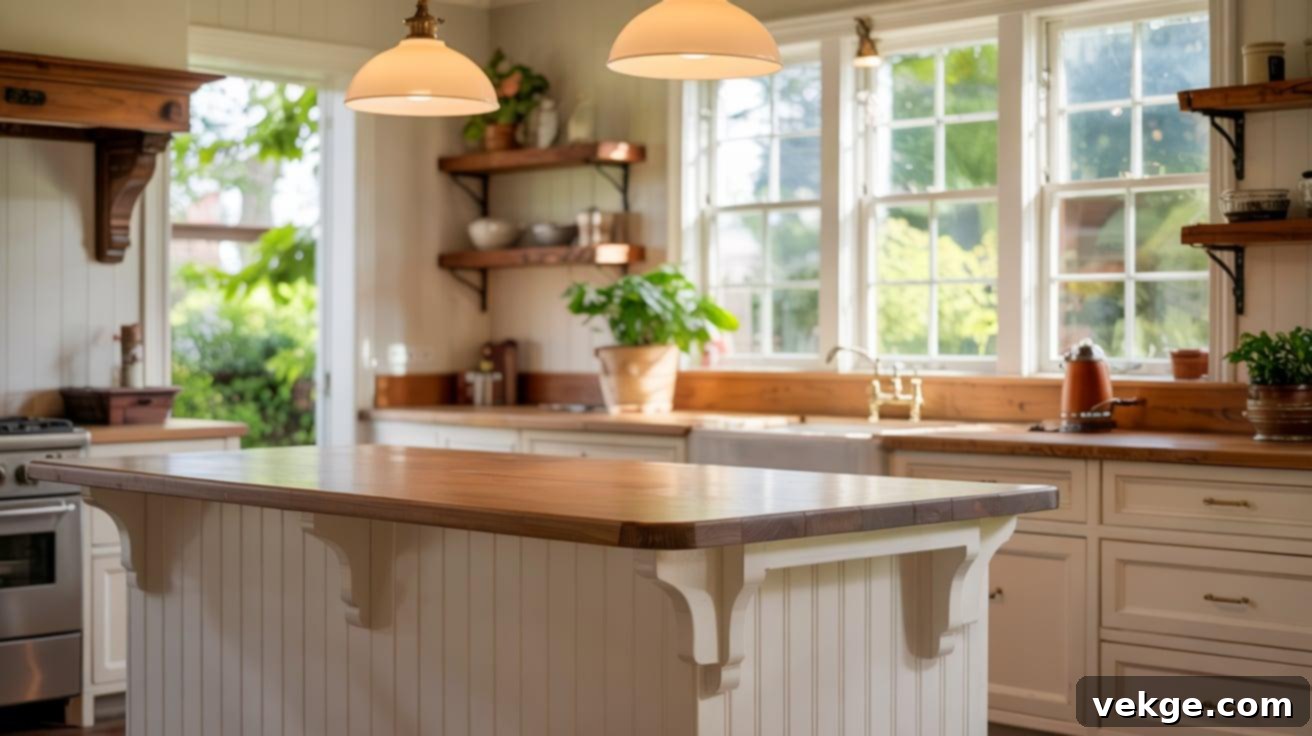
To capture that quintessential farmhouse feel, opt for beadboard painted in classic white, a soft off-white, or a gentle light gray. Pair these serene tones with the warmth of natural wood countertops – perhaps butcher block or a reclaimed wood surface – and complement the look with open shelving for displaying rustic dishware. Incorporate simple, robust corbels beneath the countertop overhang and wide, sturdy trim pieces around the base and corners for a more grounded and authentic appearance. This combination blends beautifully with neutral cabinetry, matte black hardware, and soft, inviting lighting, making your island feel like a welcoming, functional hub perfect for everyday family life.
Coastal Charm
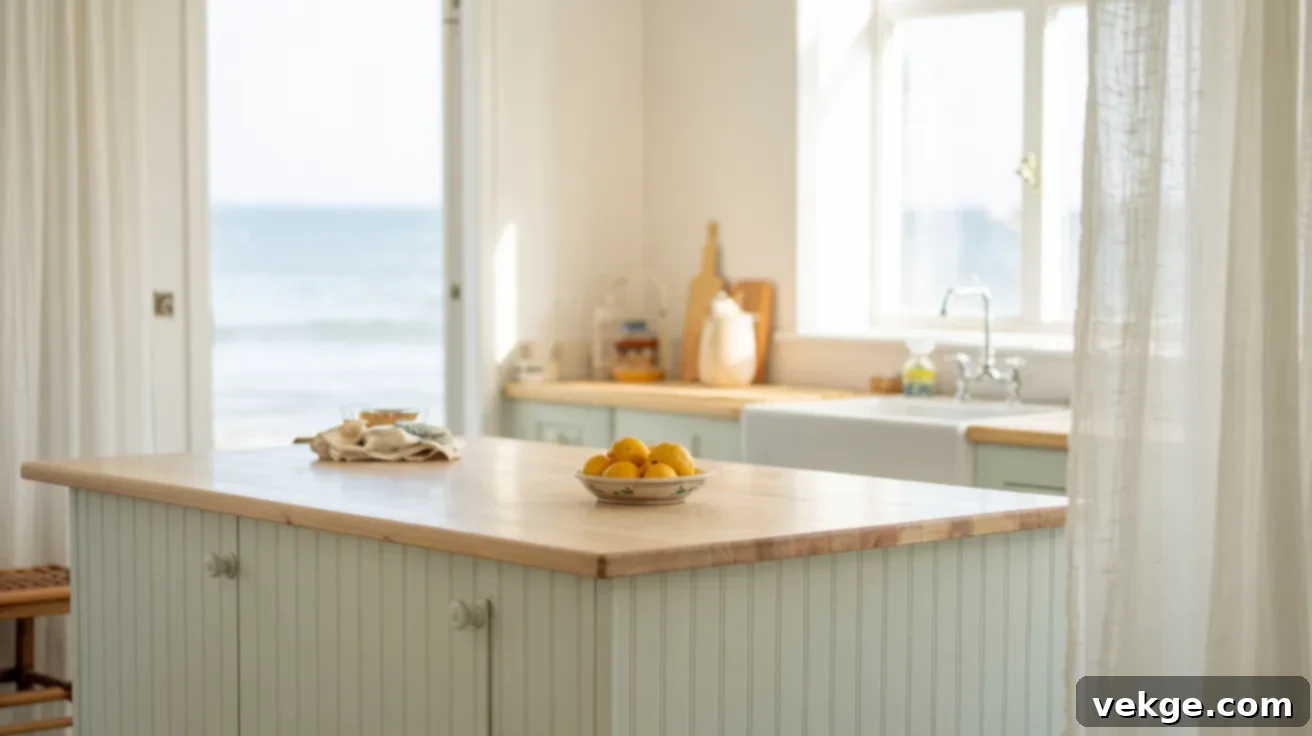
For a lighter, airier coastal aesthetic, choose beadboard in soothing pale blue, refreshing mint green, or a crisp off-white. These soft, ocean-inspired tones mix harmoniously with sandy-colored accents, polished chrome or brushed nickel finishes, and natural textures like wicker or rattan. Keep the trim minimal and the lines simple to maintain an open, uncluttered feel reminiscent of a beachfront cottage. Coastal styling works exceptionally well in smaller kitchens where brightness, a sense of expansive space, and good airflow are essential. Consider adding subtle rope detailing or sea glass accents to complete the look.
Minimalist/Modern Edge
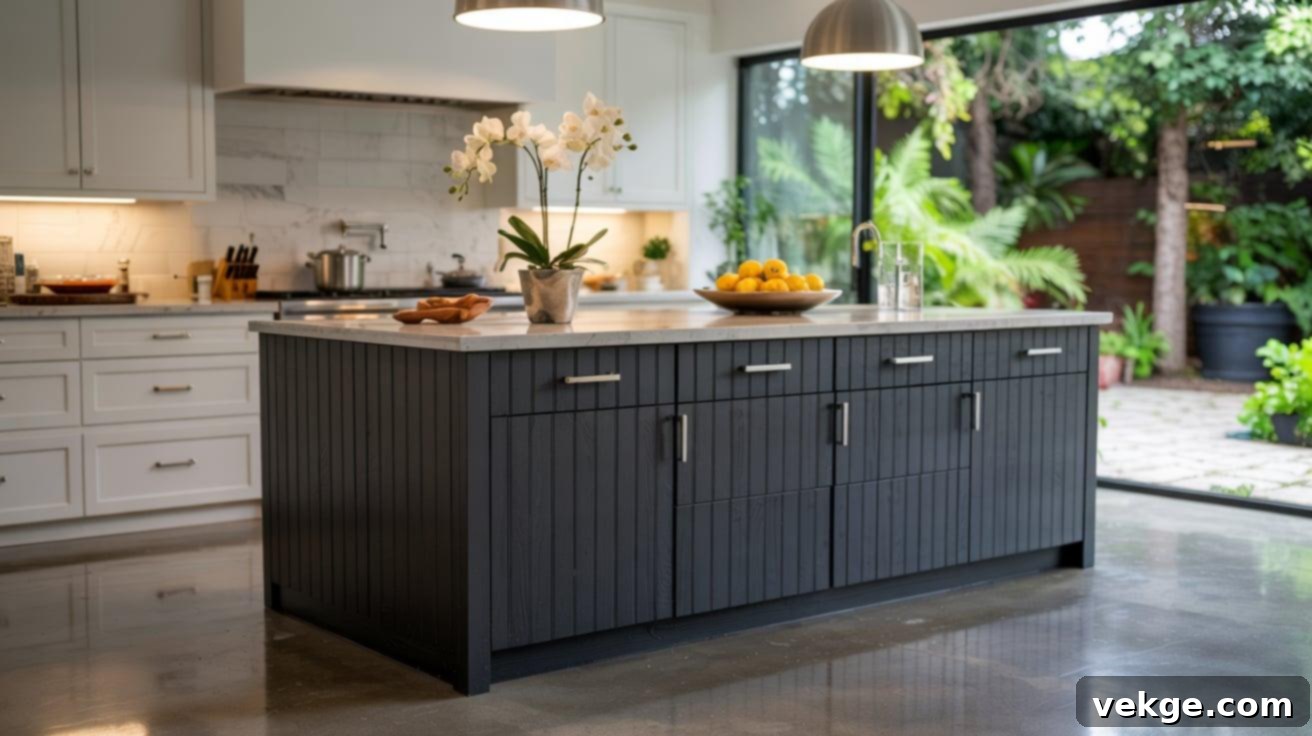
For a striking minimalist or modern design, deep navy, sophisticated charcoal, or even a bold black beadboard can provide a strong visual anchor for your kitchen island. Pair these dramatic colors with slim, understated trim and sleek, flat-panel cabinets for a cohesive, contemporary look. Matte paint finishes are ideal for this application, as they help to maintain a clean, smooth surface that absorbs light rather than reflecting it, enhancing the modern feel. Simple hardware, such as brushed metal bar pulls or handle-less push-to-open mechanisms, fits perfectly. This streamlined layout is not only practical and low-maintenance but also ideal for those who desire a sharp, clean, and uncluttered aesthetic in their kitchen.
Vintage/Cottage Appeal
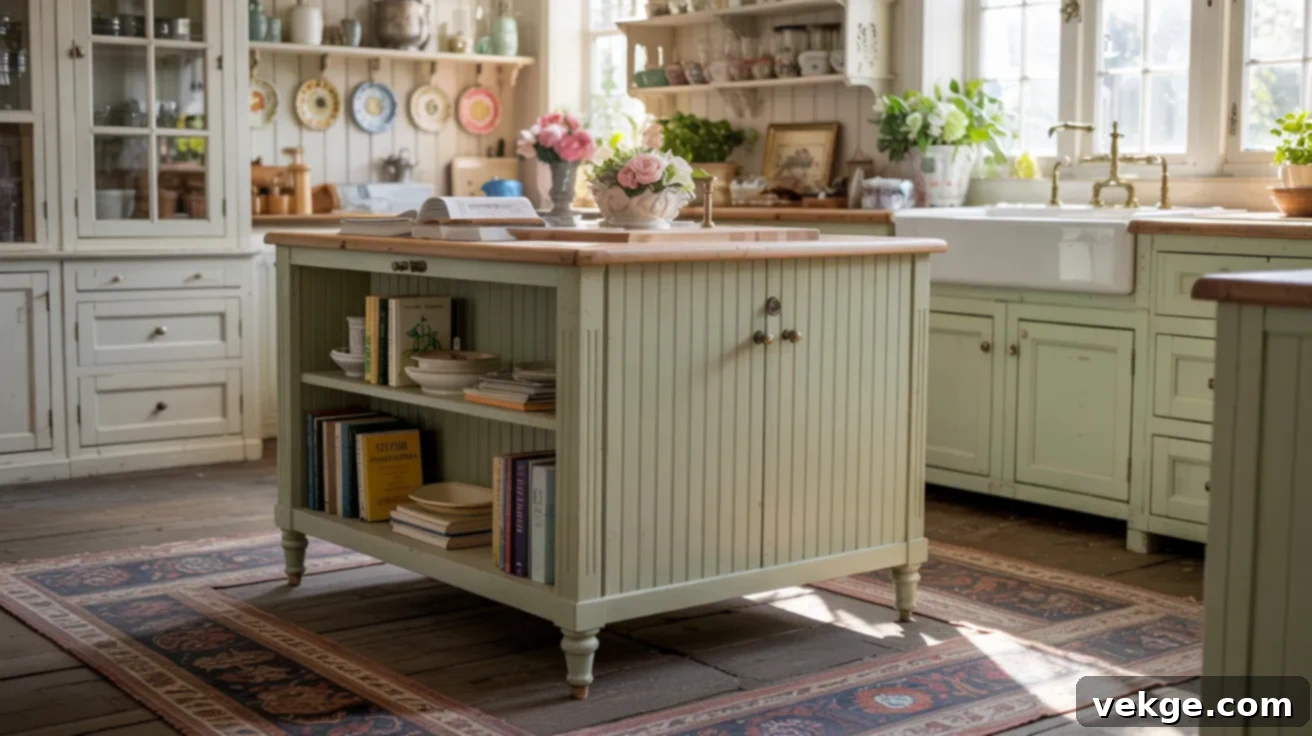
To evoke a sense of vintage charm or a cozy cottage feel, select beadboard in soft pastel hues such as pale green, delicate blush pink, or a dusty blue. These gentle colors add warmth and character without being overpowering, creating an inviting and nostalgic atmosphere. Combine the beadboard with charming details like subtly curved legs or decorative corner posts on your island. Integrate open shelving or glass cabinet fronts to display antique dishware or cherished collections. Finish the look with vintage-style knobs or pulls, perhaps in distressed brass or ceramic. This style offers a relaxed, unpretentious tone, making it ideal for older homes or kitchens where character and a sense of history are celebrated.
Should You Buy or Do It Yourself? Making the Right Choice
Adding a beadboard kitchen island can be approached in several ways: as a hands-on do-it-yourself upgrade, by purchasing a ready-made piece, or commissioning a custom-built solution. Each option presents distinct advantages and disadvantages, and the best choice ultimately depends on a careful assessment of your available time, your budget constraints, your skill level, and the degree of control you wish to have over the final aesthetic and functional outcome.
Understanding these different paths is key to making an informed decision that aligns with your specific needs and aspirations for your kitchen. Below, we’ve outlined the key points to help you compare these options and determine which approach is best suited for your beadboard kitchen island project.
|
Option |
Pros |
Cons |
|
DIY (Do-It-Yourself) |
Significantly more cost-effective as you save on labor costs. Offers maximum design flexibility in terms of material choice, paint color, and trim details. Deeply satisfying to complete a project with your own hands, adding personal value to your home. |
Requires a considerable investment of your personal time and effort. You’ll need access to basic carpentry tools, and may need to learn new skills. Potential for mistakes if not careful, which can add to material cost. |
|
Ready-Made Island |
Offers fast setup and immediate gratification, as it’s often delivered fully assembled or with minimal assembly required. Involves less physical work and fewer tools. Many options include integrated storage solutions like drawers, cabinets, or shelves. |
Can be limited in terms of size, color, and specific design choices, making it harder to perfectly match existing decor. Higher upfront cost compared to DIY, especially for pieces made with quality materials. |
|
Custom-Built Island |
Guarantees a perfect fit for your unique kitchen dimensions and layout. Complete freedom in material selection, finishes, and functional features (e.g., integrated power outlets, custom seating). Results in a truly unique, bespoke piece tailored to your exact vision. |
Typically the most expensive option due to specialized labor and materials. Requires a longer timeline from design to completion. Success hinges on finding a reliable, skilled contractor or cabinetmaker. |
Each of these choices serves different needs and project goals. A DIY approach is perfectly suited for weekend warriors eager to add a personal touch and save money. Ready-made options are ideal for those seeking fast, convenient upgrades with built-in functionality. Custom builds, while an investment, are the ultimate choice for specific spaces, unique design requirements, or homeowners who desire a truly bespoke kitchen centerpiece.
Exploring the Best Ready-Made Beadboard Options
If the convenience of a ready-made solution appeals to you, the market offers several attractive beadboard-style kitchen islands from major retailers. These options provide a quick way to integrate the classic beadboard look into your kitchen with minimal effort:
- StyleWell Bainport Kitchen Island: Available at Home Depot, this popular choice typically features built-in drawers and open shelves, offering practical storage and display opportunities. Its classic white finish and beadboard siding make it a versatile fit for various kitchen styles, particularly modern farmhouse or transitional designs. It’s a pragmatic selection for kitchens needing immediate added storage and surface space without extensive renovation.
- August Grove Authements Island: Found on Wayfair, this island often comes with a beautifully painted finish, authentic beadboard-style siding, and a durable solid wood top. It frequently includes cabinet space for enclosed storage, helping to keep your kitchen tidy. The August Grove collection tends to lean towards a charming cottage or rustic aesthetic, perfect for adding a cozy, inviting feel.
- Aurora Mills Beadboard Counter: Offered by Aurora Mills, this option typically stands out for its unique use of reclaimed or antique beadboard, often paired with a robust oak top. Aurora Mills specializes in pieces with character and history, making this a strong choice for those seeking a distinctive, one-of-a-kind addition that brings warmth and a story to their kitchen. This is less a mass-produced item and more a unique, handcrafted piece.
Each of these ready-made options presents different features in terms of size, layout, material composition, and finish. Before committing to a purchase, it’s highly recommended to thoroughly review their specifications, double-check measurements to ensure they fit your space, and read customer feedback to confirm the quality and functionality align with your expectations and specific kitchen needs.
Custom Build Considerations for Unique Spaces
A custom-built beadboard island becomes the undeniable best choice if your kitchen boasts unusual dimensions, presents challenging architectural features, or if you simply have very specific material preferences and a distinct design vision. Hiring a local carpenter or cabinetmaker allows you to create an island that perfectly integrates with your existing kitchen architecture and personal aesthetic.
Custom builders can match your existing cabinetry’s finish and style, seamlessly integrating the new island. Furthermore, they can incorporate bespoke features such as integrated electrical outlets for appliances, custom-sized storage compartments, wine racks, or even built-in seating arrangements that perfectly suit your family’s lifestyle. When seeking a custom build, always ask for a precise, detailed quote that outlines all materials and labor, along with a clear timeline for completion. It’s also crucial to request samples or review photos from their previous builds to confirm their craftsmanship and style align perfectly with your vision for a unique and perfectly tailored kitchen island.
Maintenance & Durability: Keeping Your Beadboard Island Beautiful
One of the many advantages of a beadboard kitchen island is its relatively easy maintenance, ensuring it remains a beautiful and functional centerpiece for years to come. With just a few basic care practices and timely minor touch-ups, you can significantly extend its lifespan and preserve its fresh appearance.
- Regular Cleaning: Wipe down beadboard surfaces frequently with a soft cloth dampened with mild soap and water. Avoid abrasive cleaners or harsh scrubbing pads that could scratch the paint or surface.
- Thorough Drying: After cleaning, always dry the grooves and flat surfaces thoroughly. This is crucial to prevent moisture buildup, especially if your beadboard is made of MDF or wood, as prolonged dampness can lead to swelling or warping.
- Seal Joints and Edges: During installation, properly seal all joints and edges with high-quality paintable caulk. Regularly inspect these areas and reapply caulk if you notice any cracking or separation. This acts as a vital barrier against water entry, protecting the underlying material.
- Inspect for Wear: Periodically check the base and corners of your island for any signs of chipping, peeling paint, or soft spots. Addressing these minor issues early with a quick patch, sand, and repaint can prevent them from escalating into larger, more expensive problems.
- Occasional Refresh: Over time, everyday use might dull the finish. Lightly sand and repaint the beadboard as needed (perhaps every few years) to refresh the surface and keep it looking vibrant and new.
- Protect from Standing Water: In high-splash zones near sinks or prep areas, consider placing small mats or trays to catch drips and spills, preventing standing water from damaging the beadboard.
- Material Choice for Humidity: If your kitchen is naturally humid or prone to moisture (e.g., near a frequently used dishwasher), opting for moisture-safe materials like PVC beadboard during the initial installation provides an added layer of robust protection and easier maintenance.
Conclusion: Your Transformed Kitchen Awaits
As we’ve explored, a beadboard kitchen island offers an incredibly effective and accessible way to completely shift the look and feel of your kitchen, all without demanding excessive time, a prohibitive budget, or the stress of a full-scale renovation. It’s a project that truly delivers significant visual impact for a relatively modest investment of effort and resources.
With just a few basic tools, a bit of careful planning, and a little patience, you’ll discover that upgrading your island with beadboard is one of the simplest yet most transformative home improvement projects you can undertake. From selecting the perfect material to meticulously cutting, adhering, trimming, and painting, this guide has equipped you with every essential step and insight to ensure you complete your project with confidence and achieve stunning, lasting results.
Whether you choose to personalize your existing island with a fresh coat of paint and custom trim, or opt for the convenience of a ready-made beadboard unit, the principles remain the same. Use the knowledge and practical tips you’ve gained here to shape a kitchen island that not only fits seamlessly into your life but also reflects your unique style and vision for your home.
If you’re now feeling inspired and ready to continue making positive changes to your living space, don’t hesitate to explore our other kitchen DIY ideas and helpful tips. There’s always one more easy project waiting to be tried, bringing you closer to the dream home you envision!
