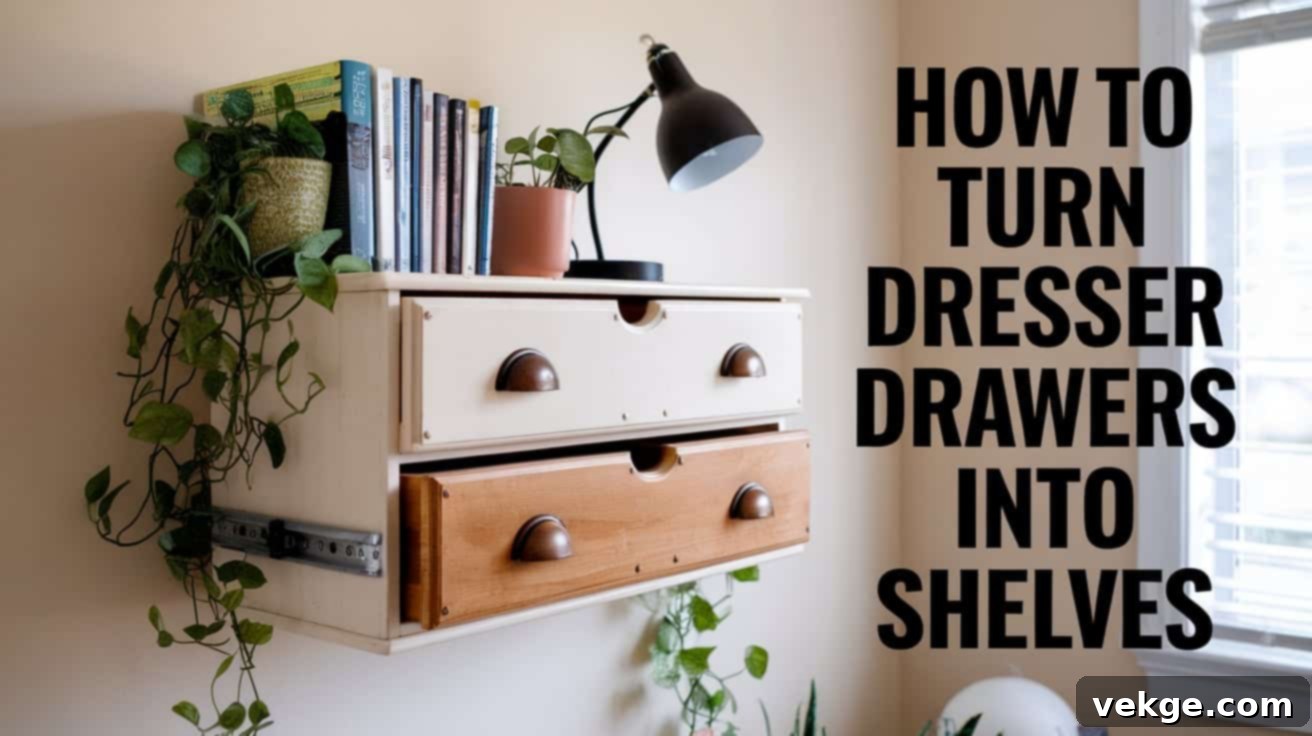
Transform Your Space: Upcycling Old Dresser Drawers into Stunning Wall Shelves
Do you ever look at an old, unused piece of furniture and feel a mix of burden and guilt? That worn-out dresser gathering dust in your garage or attic might seem like a useless relic, taking up valuable space. The thought of discarding it feels wasteful, yet keeping it as is serves no practical purpose. It’s a common dilemma for many homeowners, and one I’ve personally faced countless times.
But what if I told you there’s a remarkably budget-friendly and creative solution that can breathe new life into those forgotten drawers? Imagine transforming those dusty wooden boxes into elegant, functional wall shelves that look like they’ve been custom-designed for a high-end interior design catalog. Not only will you create valuable storage, but you’ll also add a unique touch of personalized decor to your home, all while making an eco-conscious choice.
In this comprehensive guide, I will walk you through my proven step-by-step process for converting old dresser drawers into beautiful, sturdy, and stylish wall-mounted shelves. This isn’t just about saving money; it’s about unlocking your creativity, contributing to environmental sustainability, and crafting a truly unique piece that tells a story.
You’ll discover exactly which essential tools and materials you’ll need to get started, how to meticulously prep the drawers for their new purpose, and the safest, most effective ways to mount them securely to your walls. Beyond the practical steps, I’ll also share my favorite expert tips for painting, staining, and adding those all-important finishing touches that elevate your DIY project from good to absolutely stunning. Get ready to turn what was once considered junk into a household gem!
The Undeniable Benefits of Upcycling Dresser Drawers
Embracing the art of upcycling old dresser drawers offers a multitude of advantages, touching upon environmental responsibility, financial savings, and the joy of personalized home decor. It’s a win-win-win scenario for you, your wallet, and the planet.
Environmental Impact: Repurpose, Reduce, Recycle
In today’s consumer-driven world, landfills are overflowing with discarded furniture, much of which could have been given a second life. When you choose to transform old dresser drawers into shelves, you’re doing much more than just a DIY project; you’re actively participating in a crucial global effort to reduce waste and promote sustainability. By reusing materials that are already in circulation, we significantly decrease the demand for new manufacturing. This directly translates to fewer trees being felled for new wood, less energy consumed in production processes, and a reduction in harmful emissions associated with factory operations and transportation. Every drawer saved from the trash heap contributes to a healthier planet and a more sustainable future, embodying the principles of a circular economy where resources are valued and kept in use for as long as possible.
Cost-Saving Advantages: Smart Storage Without Breaking the Bank
Let’s talk about money – because who doesn’t appreciate smart savings? If you’ve ever shopped for new shelving units, you know how quickly the costs can add up. High-quality, stylish shelving can easily set you back hundreds, if not thousands, of dollars, especially for custom or designer pieces. This is where upcycling truly shines. When I embark on a project to convert old dresser drawers, my primary expenses are typically limited to just a few essentials: paint or stain, sandpaper, and sturdy mounting brackets. In most cases, these materials can be acquired for under $30, offering an incredible return on investment compared to purchasing brand-new units. This drastic cost reduction makes stylish and functional storage accessible to everyone, regardless of budget constraints.
Unique, Personalized Home Decor: A Story in Every Piece
Perhaps one of the most rewarding aspects of transforming dresser drawers into shelves is the unparalleled opportunity for personalization and creativity. Unlike mass-produced furniture, no two upcycled pieces ever look exactly alike. You have complete creative control to paint them in vibrant colors that complement your room’s existing palette, apply distressed finishes for a vintage charm, or carefully sand them down to reveal the natural beauty of the original wood grain. The possibilities are endless, allowing you to create a piece that perfectly reflects your personal style and aesthetic. Moreover, these unique shelves become instant conversation starters. I’ve found that friends and guests are always genuinely surprised and impressed to learn that my “new” shelves once served as humble dresser drawers, giving each piece a fascinating backstory and a unique character that manufactured furniture simply cannot replicate.
Essential Tools and Materials Needed for Converting Drawers into Shelves
Before diving into your upcycling project, gathering all the necessary tools and materials will ensure a smooth and efficient process. Here’s a comprehensive list to help you prepare:
| Tools | Materials |
|---|---|
| Screwdriver (Phillips and Flathead) | Old Dresser or individual Dresser Drawers (the core of your shelves) |
| Saw (Hand saw, Jigsaw, or Circular saw recommended for clean cuts) | Plywood, MDF, or other suitable back panel material |
| Measuring Tape | Wood Screws or Nails (various sizes for different applications) |
| Pencil or Marker | Metal Brackets or Wood Blocks (for mounting and support) |
| Sandpaper (medium-grit like 100-150, and fine-grit like 220-300) | Wood Glue (optional, but highly recommended for added strength) |
| Sanding Block or Electric Sander (for efficiency) | Primer (if painting), Paint, or Wood Stain |
| Drill (with various drill bits) | Clear Sealant (Polyurethane, Polycrylic, or Wax) |
| Paintbrush, Foam Roller, or Paint Sprayer | Felt Pads or Protective Stickers (for furniture that sits on floors) |
| Level (essential for straight mounting) | Protective Sheet or Drop Cloth (to cover your workspace) |
| Crowbar or Pry Bar (optional, for disassembly of stubborn parts) | Safety Glasses and Gloves (always prioritize safety!) |
How to Turn Dresser Drawers Into Shelves: Your Easy Step-by-Step Guide
Transforming old dresser drawers into functional and stylish wall shelves is a rewarding DIY project. Follow these detailed steps to achieve professional-looking results.
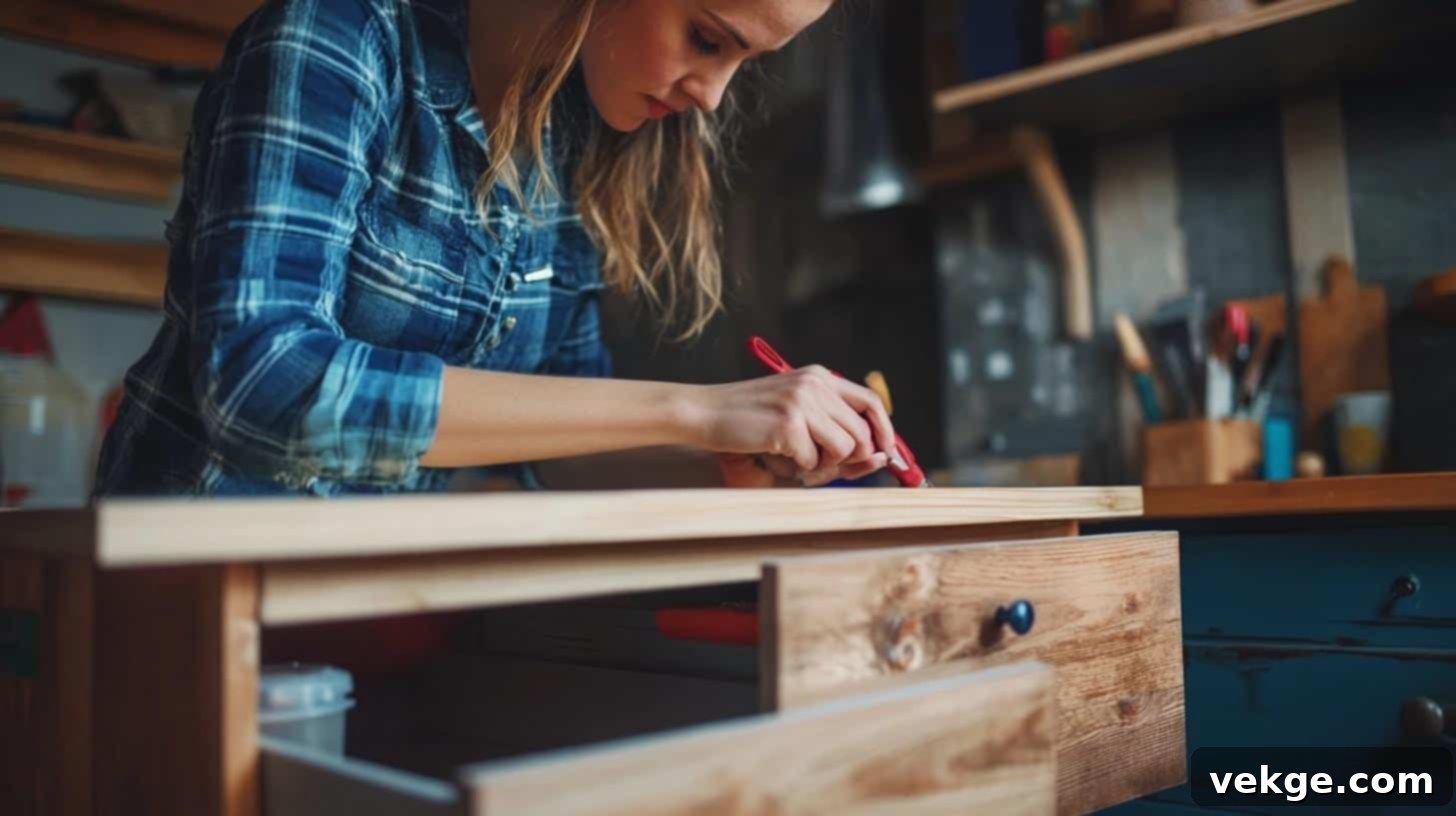
Step 1: Meticulously Clean and Disassemble the Dresser/Drawers
- Begin by thoroughly cleaning the dresser’s exterior and interior surfaces. Use a damp cloth with a mild all-purpose cleaner to remove accumulated dust, grime, and any old residue. Pay close attention to corners and crevices where dirt tends to settle. This initial cleaning ensures better adhesion for any new paint or finish.
- Carefully remove all drawers from the dresser unit and set them aside. If you are only using the drawers as individual shelves, you might not need the dresser frame at all. Inspect each drawer for any signs of damage, loose joints, or broken components that might need repair.
- Using a screwdriver, systematically remove all existing hardware, such as handles, knobs, and drawer pulls, from both the drawers and the dresser frame (if you plan to use parts of it). Store these items safely if you intend to reuse them or recycle them responsibly if you’re opting for new hardware.
- Should the dresser top, trim, or any other structural component be damaged or unnecessary for your new shelf design, carefully detach these parts using a crowbar or pry bar. Exercise caution to avoid further damage or injury during this disassembly phase.
Step 2: Determine and Precisely Mark Shelf Dimensions
- Before making any cuts, meticulously measure the specific space where your new shelves will be installed. Consider the desired height, width, and depth to ensure they fit perfectly and provide optimal storage.
- Decide on the number of shelves you wish to create from your drawers and how they will be oriented (e.g., individual floating shelves, or multiple shelves within a section of the dresser frame). Calculate the optimal spacing between each shelf to accommodate the items you plan to display.
- Using a measuring tape, pencil, and a straight edge or ruler, carefully mark the precise cutting lines on the dresser drawers or frame. For consistency and a professional look, ensure that all marks are straight and uniform.
- It is crucial to consider the structural integrity of the dresser frame if you are cutting it down to create a multi-shelf unit. Ensure your cuts will not compromise the stability of the remaining structure. For individual drawers, plan cuts to create a clean, open front while retaining the side and back structure.
Step 3: Carefully Cut the Dresser/Drawers to Size
- Once your marking is complete, don your safety glasses and carefully proceed with cutting. Use a hand saw for smaller, precise cuts, or an electric saw (like a jigsaw or circular saw) for longer, straighter cuts, especially if you’re modifying the dresser frame. Focus on maintaining clean, straight lines for a professional finish.
- Remove any superfluous internal dividers, drawer slides, or support pieces that are no longer required for your final shelf design. The goal is to create a clean, open box shape for each shelf.
- After cutting, all newly exposed edges will likely be rough and splintered. Use medium-grit sandpaper (100-150 grit) to smooth out these rough surfaces and shape the edges. Follow up with fine-grit sandpaper (220-300 grit) to achieve a silky-smooth finish, preparing the wood perfectly for painting or staining.
Step 4: Install the Shelves and Ensure Stability
- If you are repurposing the entire dresser frame to hold multiple shelves, carefully position the modified drawers (or new shelf bases) at your pre-measured intervals within the frame. Use a level to ensure each shelf is perfectly straight and flush.
- Secure the shelves using sturdy metal brackets, well-placed wood screws, or nails. For enhanced stability and longevity, consider applying wood glue along the contact points before fastening with screws or nails.
- If you are mounting individual drawers as floating wall shelves, mark the mounting points on the wall, ensuring they are level. Install appropriate wall anchors if drilling into drywall. Attach metal brackets (L-brackets or hidden floating shelf brackets) to the wall, then secure the drawer to the brackets. Alternatively, you can attach sturdy wood blocks to the inside corners of the drawer and then screw these blocks directly into wall studs for maximum support.
- For any type of installation, reinforce the corners with small wooden blocks or additional brackets to prevent sagging and ensure the shelves can support the weight of your items.
Step 5: Refinish and Paint for a Flawless Look
- Thorough surface preparation is key to a lasting finish. Sand all visible surfaces of the dresser structure and shelves thoroughly. This step removes old paint, scratches, imperfections, and provides a ‘tooth’ for new finishes to adhere to. Pay extra attention to corners and edges for a uniformly smooth surface.
- If you intend to paint, apply one or two coats of a high-quality primer. Primer helps block stains, ensures uniform paint adhesion, and makes your topcoat color more vibrant. Once the primer is completely dry, apply your chosen paint or wood stain. For paint, use multiple thin coats rather than one thick coat, allowing sufficient drying time between each layer to prevent drips and achieve even coverage. For stain, follow the product instructions, wiping off excess as needed.
- Conclude with a clear protective sealant, such as polyurethane, polycrylic, or wax. This final layer protects the surface from wear, moisture, and scratches, while also adding a professional, polished look. Choose a finish (matte, satin, gloss) that complements your desired aesthetic.
Step 6: Attach Back Panel and Add Final Details
- To give your shelves a finished and cohesive look, cut a back panel from plywood, MDF, or even decorative beadboard. Measure precisely to fit the rear of your dresser frame or individual drawer. Sand the edges of the panel and paint or stain it to either match or beautifully contrast with the main dresser color.
- Attach the back panel securely with small screws or nails, ensuring it is flush with the frame. This not only enhances the aesthetic but also adds structural rigidity.
- To protect your floors (if the piece is freestanding) or walls (if it’s mounted), attach felt pads or protective stickers to the bottom edges or back of the dresser. This prevents scratches and scuffs when moving or installing.
- Reattach any original hardware that you decided to keep and refurbish, or install stylish new handles and knobs that perfectly complement your refreshed design. These small details can significantly elevate the overall appearance.
- Finally, move your beautifully finished shelves into their designated position. Take pleasure in decorating them with books, plants, decorative objects, and cherished mementos. Enjoy your newly transformed, personalized piece of furniture!
For a detailed visual tutorial on how to turn dresser drawers into shelves, check out the video below:
Expert Tips for Styling Your Newly Upcycled Shelves
Once your beautiful new shelves are ready, the fun of styling begins! Here are some expert tips to make your display both functional and aesthetically pleasing:
- Group in Threes: Arrange items in odd numbers, typically groups of three, for a visually balanced and appealing composition.
- Vary Heights and Textures: Mix heights by stacking books alongside shorter decorative pieces, and incorporate a variety of textures – smooth ceramics, rough wood, patterned fabrics – to add visual interest.
- Introduce Greenery: Add small potted plants, succulents, or artificial foliage to bring natural warmth, life, and a pop of color to your shelves.
- Strategic Weight Placement: Always place heavier items closer to the mounting brackets or directly over vertical supports for better stability and to prevent potential sagging.
- Embrace Negative Space: Avoid overcrowding. Leave some open space on each shelf to allow items to breathe and to prevent a cluttered, overwhelming feel.
- Utilize Bookends: Invest in decorative bookends to keep your reading materials tidy, upright, and organized, while also adding another design element.
- Eye-Level Accessibility: Position frequently used items or your most cherished pieces at eye level for easy access and prominent display.
- Create Focal Points: Incorporate a small framed photo, a unique art piece, or a striking sculptural object to serve as a central focal point on a shelf.
- Layer for Depth: Place taller items toward the back of each shelf and layer smaller, complementary items in front to create visual depth and a dynamic arrangement.
- Personalize with Purpose: Display items that reflect your personality, hobbies, and memories. Your shelves should tell a story about you.
Creative Ways to Use Dresser Drawers as Shelves: Inspiration Unleashed
The versatility of upcycled dresser drawers extends far beyond basic shelving. Here are some innovative ideas to inspire your next project:
1. Gourmet Kitchen Spice Racks
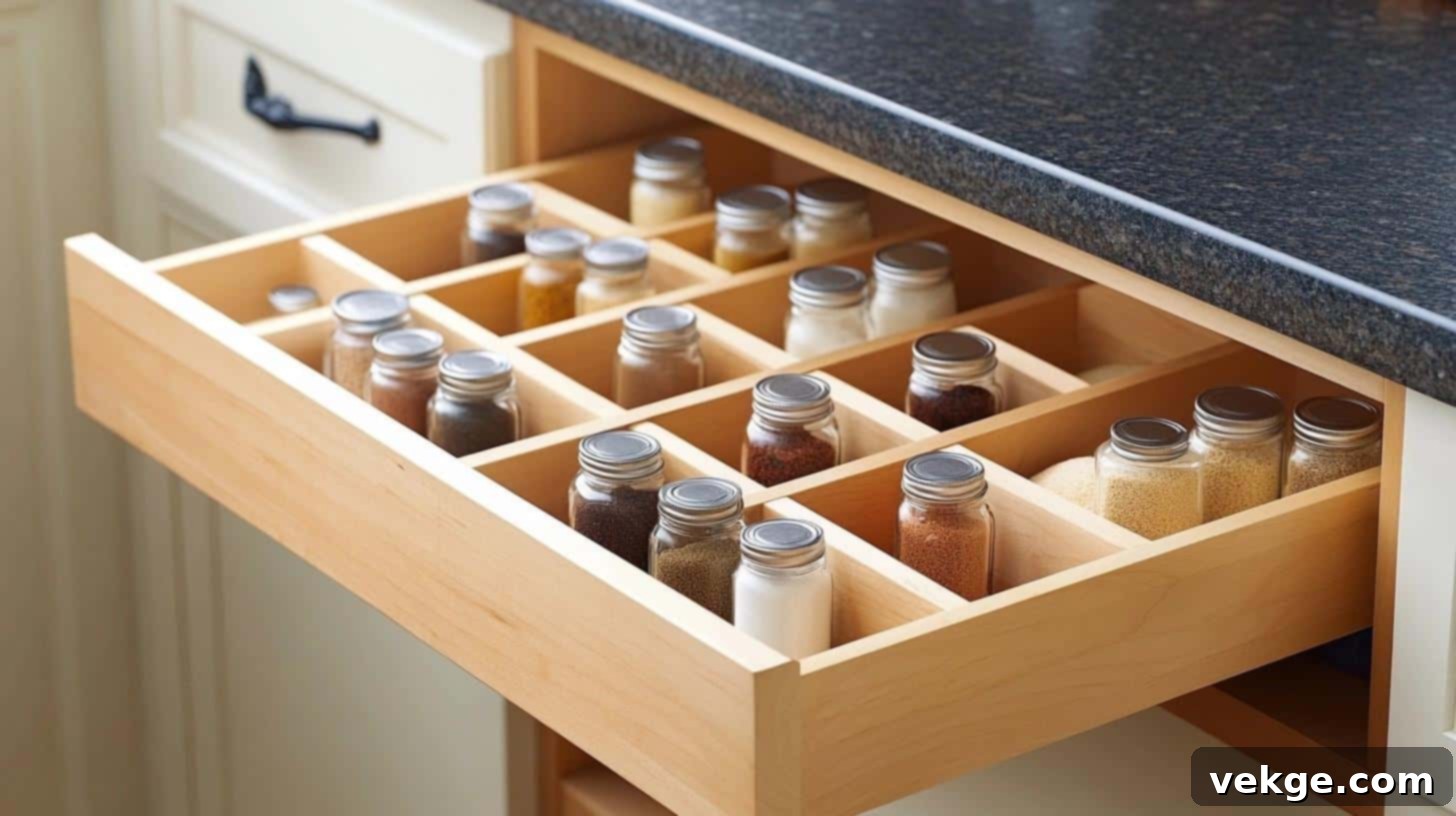
Transform a single shallow drawer into a highly organized and accessible spice rack. Line the drawer with a non-slip mat and use small jars or custom dividers to keep your spices neatly arranged. This can be mounted on an empty kitchen wall for easy reach during cooking, or simply placed on the countertop for a stylish, functional display. It brings order to your culinary adventures.
- DIY Difficulty Level: Medium (Involves precise measuring and potentially adding dividers)
2. Elegant Jewelry Organizer
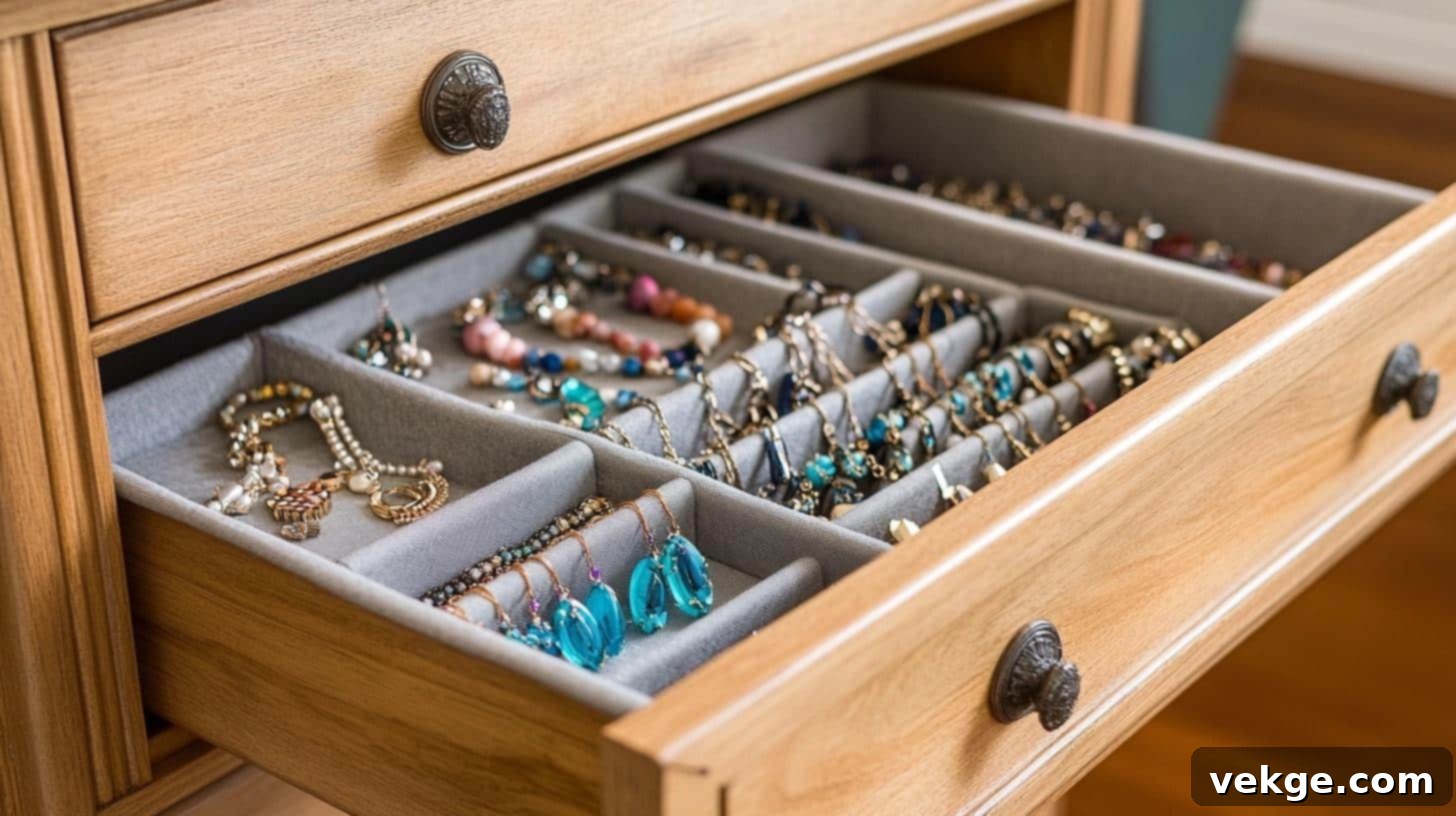
Give your precious jewelry a beautiful home. Line the bottom of a drawer with soft velvet or a patterned fabric to protect delicate pieces. Add small hooks or pegs along the inside edges to gracefully hang necklaces and bracelets, preventing tangles. This stylish wall-mounted organizer keeps your jewelry visible, organized, and easily accessible, turning it into a decorative art piece itself.
- DIY Difficulty Level: Medium (Requires careful fabric lining and hook placement)
3. Functional Entryway Organizer
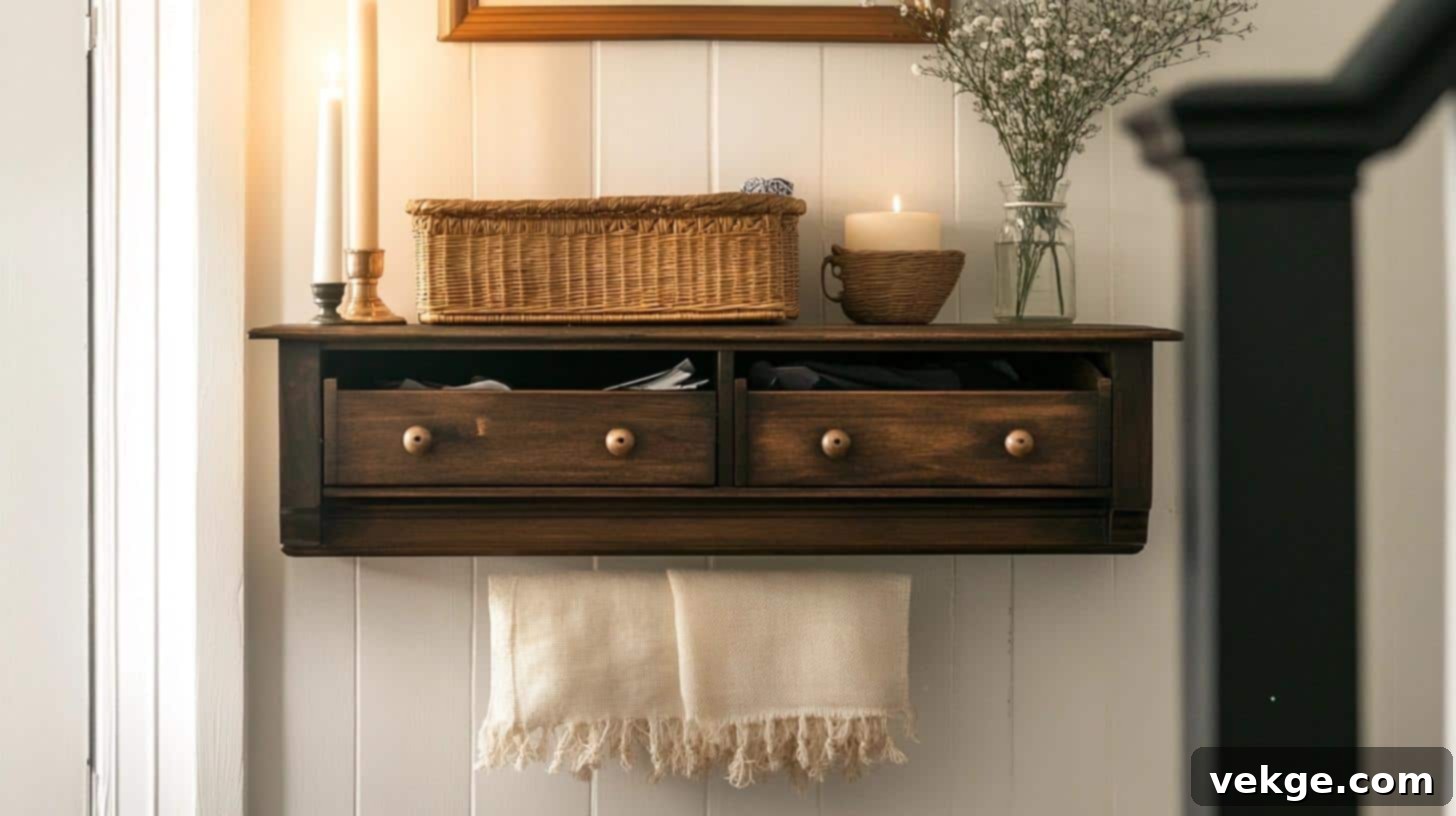
Create a welcoming and practical hub right by your front door. Mount a drawer shelf near the entryway to serve as a dedicated spot for keys, wallets, sunglasses, and incoming mail. You can also add a decorative catch-all basket, a small plant, or a scented candle for a warm and inviting first impression when you or your guests arrive home.
- DIY Difficulty Level: Easy (Basic mounting skills required)
4. Inspired Music Corner
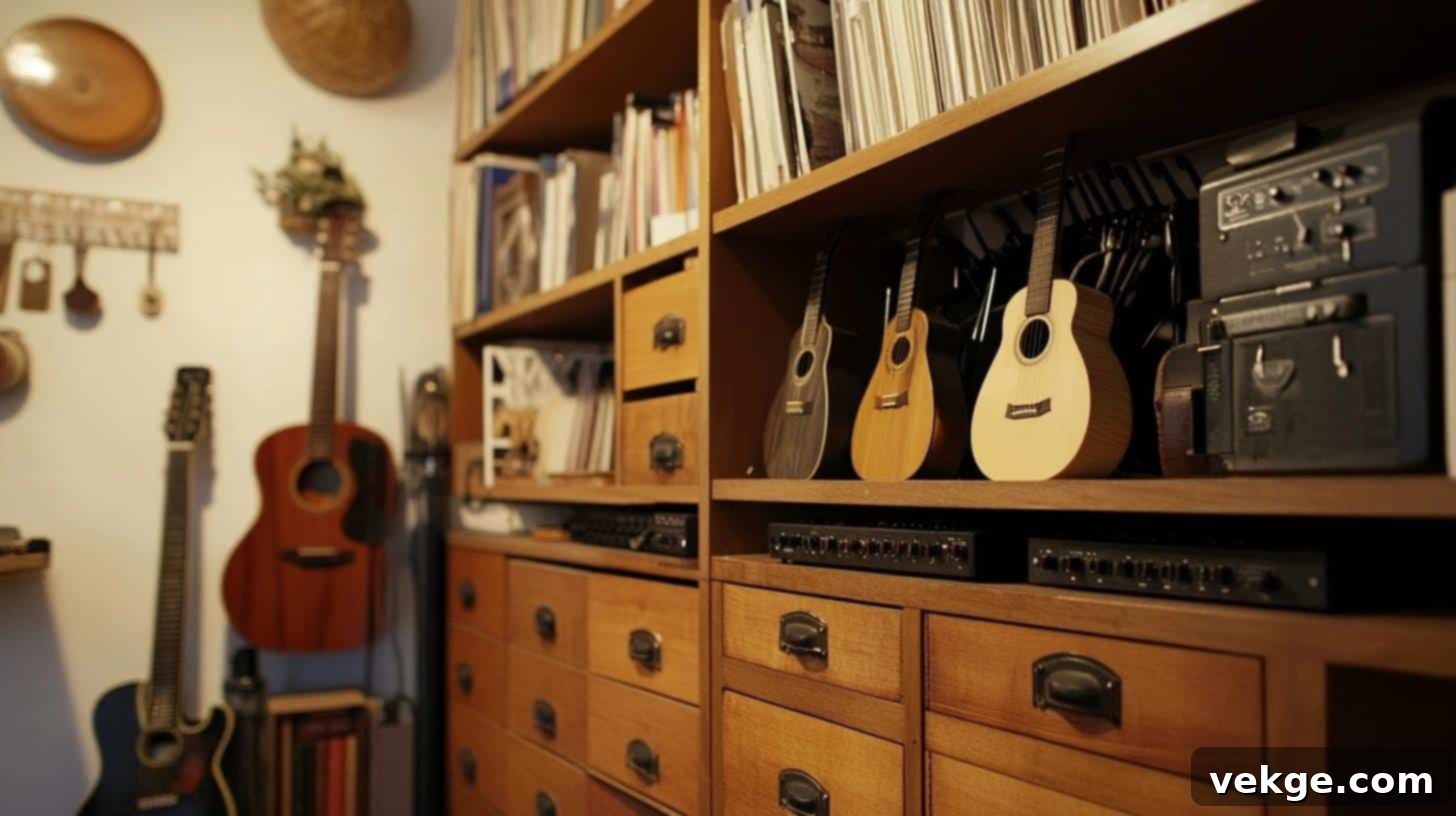
For the music lover, a converted dresser drawer can become the heart of a cozy music corner. Use the shelf to proudly display and organize sheet music, hold small instruments like ukuleles, harmonicas, or tambourines. Attach hooks beneath the drawer for hanging headphones, instrument cables, or even a small guitar pick holder, ensuring everything is tidy, accessible, and ready for your next jam session.
- DIY Difficulty Level: Medium (May involve custom sizing for instruments and hook installation)
5. Dedicated Craft Supplies Holder
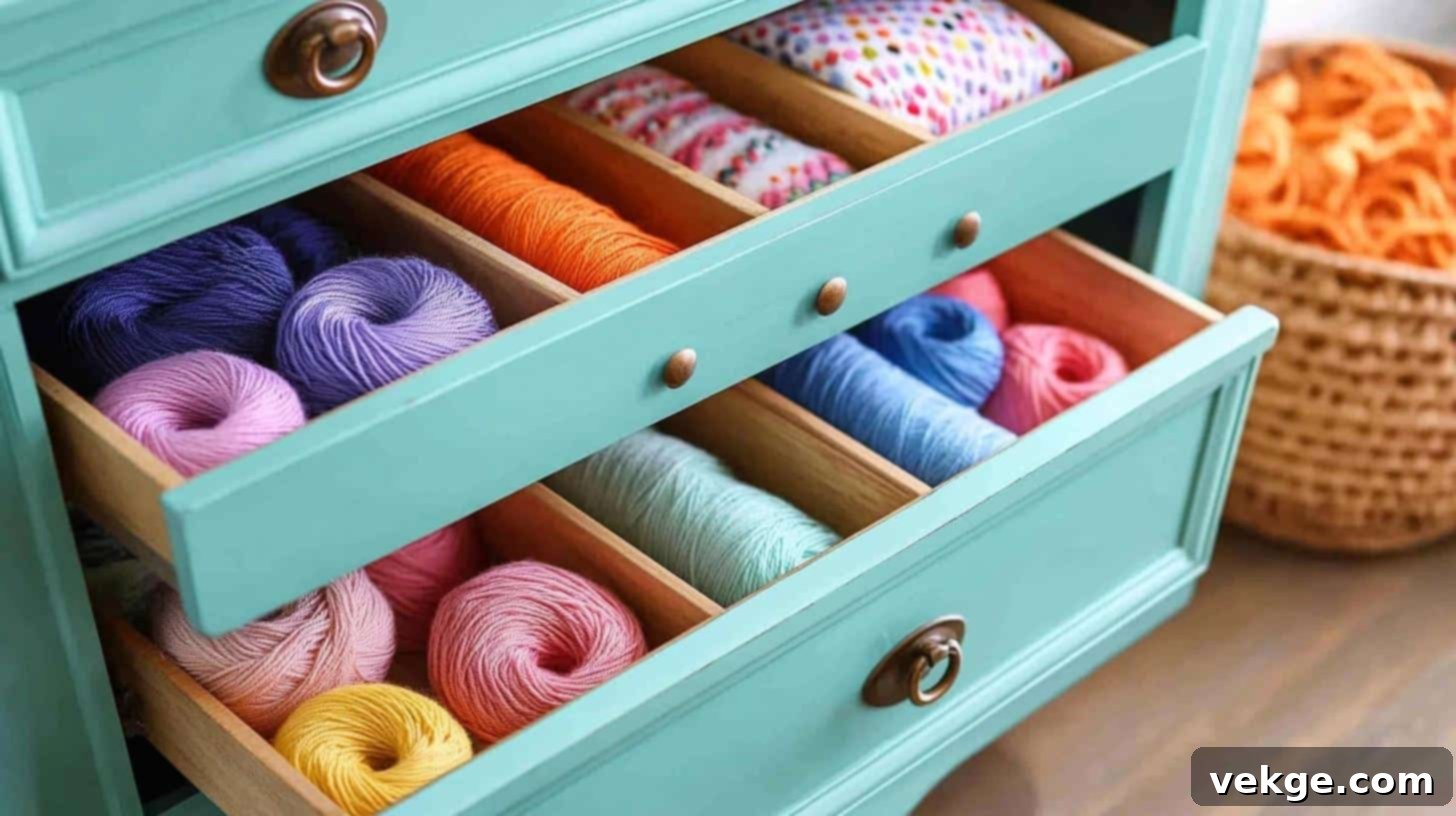
Keep your creative chaos beautifully contained. Decorate a drawer with paint, decoupage, or fabric to match your craft room’s aesthetic. Use it to store skeins of yarn, sewing kits, fabric scraps, or various other craft supplies. To maximize functionality, consider attaching hooks underneath for hanging spools of ribbon, scissors, or cutting tools, keeping your workspace organized and inspiring.
- DIY Difficulty Level: Medium (Requires good organization and potentially added dividers/hooks)
6. Chic Bathroom Towel Rack
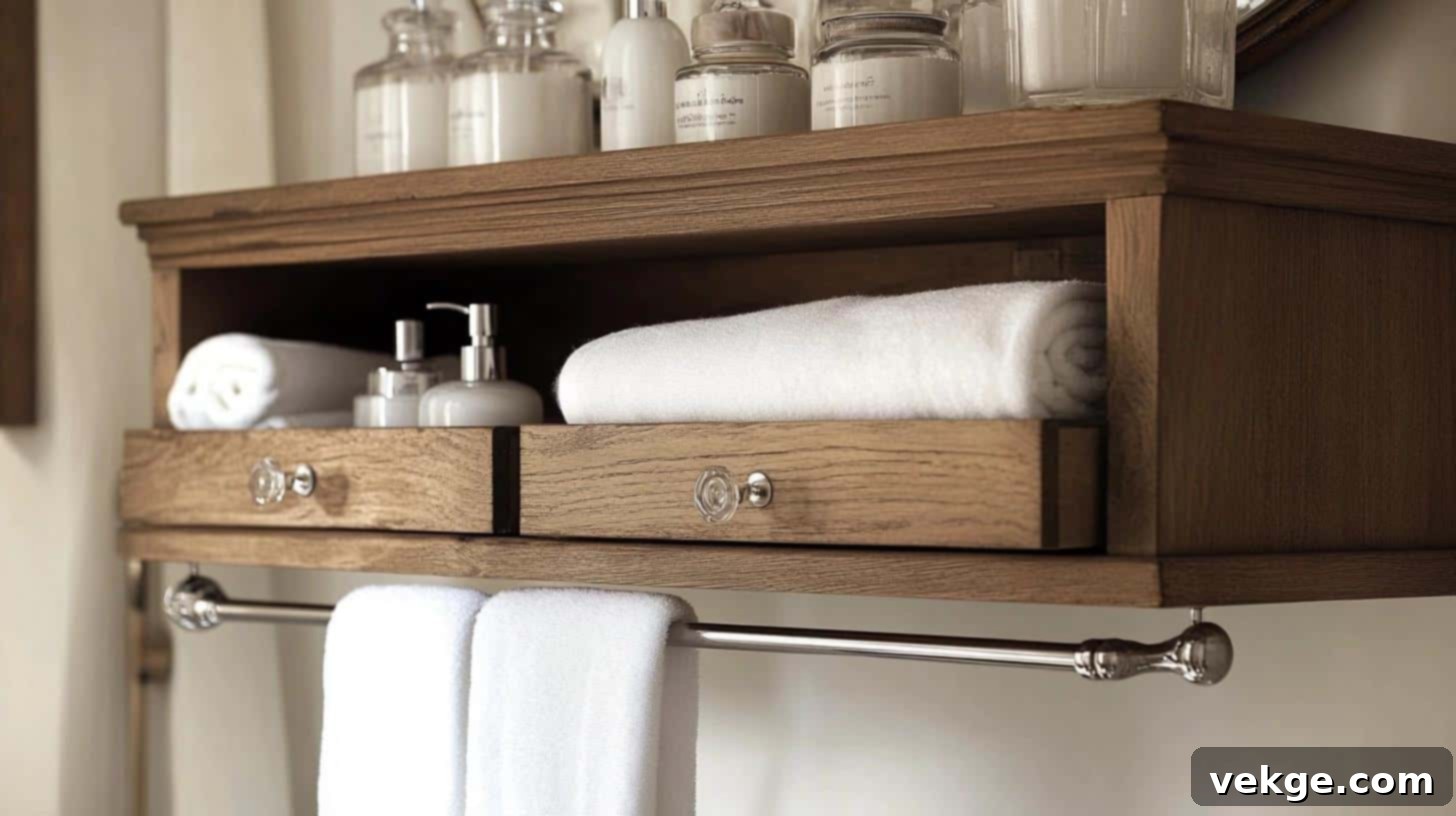
Elevate your bathroom’s style and functionality. Mount a dresser drawer horizontally on the wall. Attach a sleek metal bar or wooden dowel directly underneath the drawer to elegantly hold hand towels or washcloths. The top surface of the drawer can then be used to display lotions, soaps, candles, or decorative bath accessories, creating a spa-like feel.
- DIY Difficulty Level: Medium (Requires secure mounting in a bathroom environment and bar attachment)
7. Modern Floating Wall Shelves
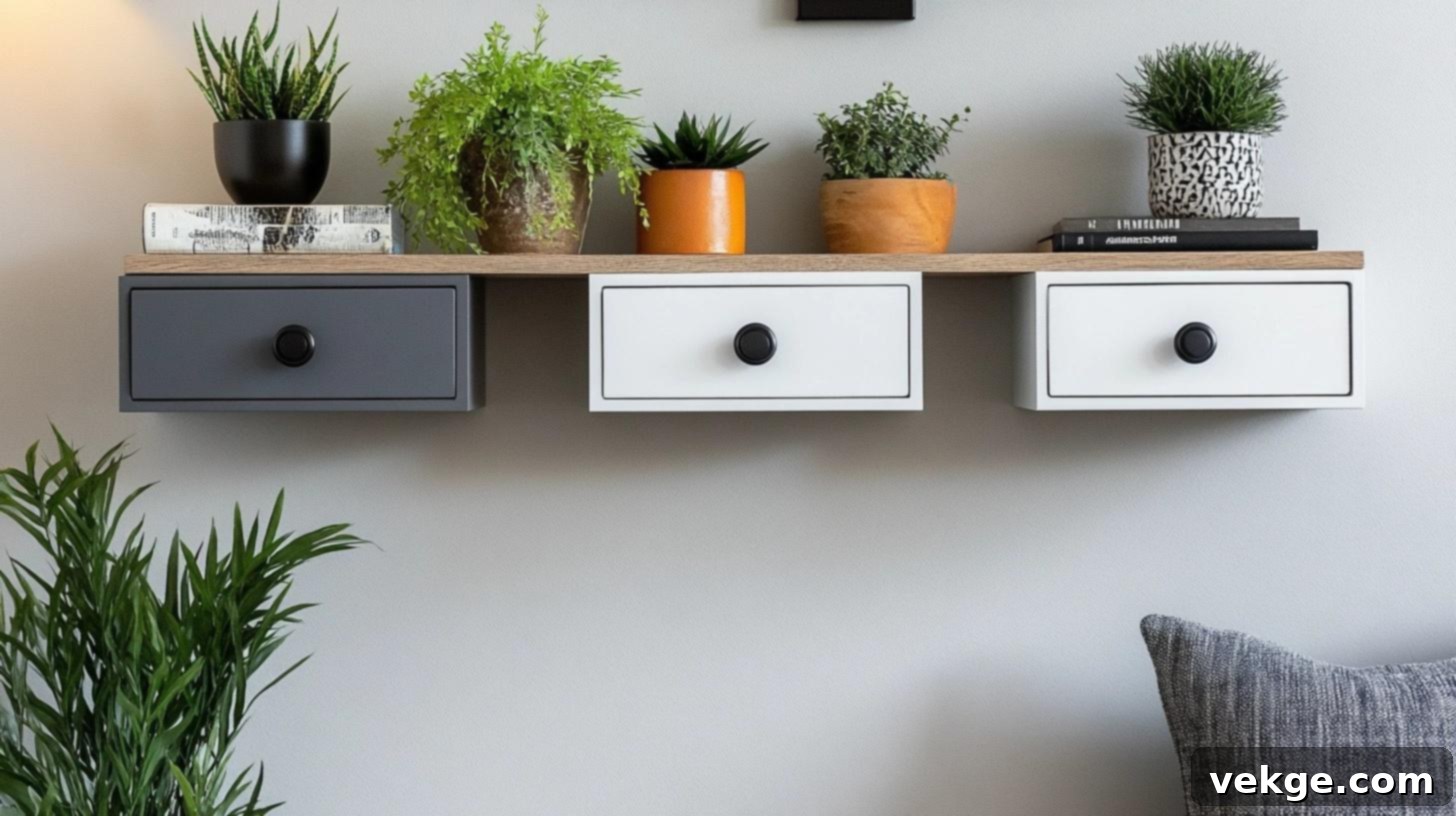
For a minimalist and contemporary look, mount individual drawers directly to the wall using hidden floating shelf brackets. These clean-lined shelves are ideal for showcasing a curated collection of books, small plants, art pieces, or other decorative items. Enhance their visual impact by applying bold paint colors, geometric patterns, or a high-gloss finish for a truly unique statement.
- DIY Difficulty Level: Easy (Basic mounting with floating brackets)
8. Stylish Shoe Display and Organizer
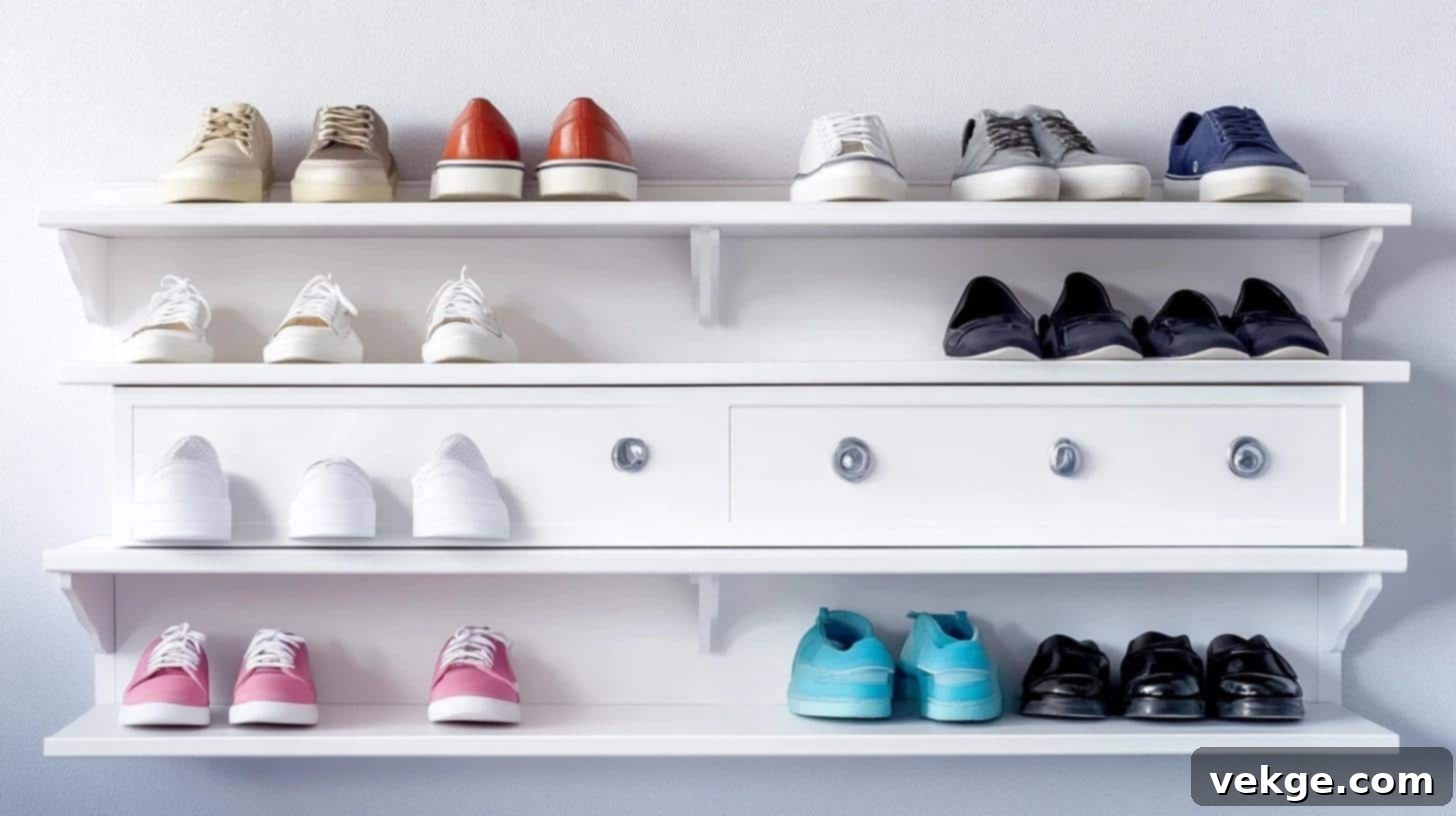
Turn your shoe collection into a display-worthy feature. Mount dresser drawers on the wall, one above the other, to create chic, open shoe shelves. Line the base of each drawer with grip liners or non-slip mats to keep shoes stable and prevent scuffing. This innovative setup is perfect for small entryways, closets, or bedrooms, allowing you to stylishly showcase your favorite pairs while keeping them organized and off the floor.
- DIY Difficulty Level: Easy (Straightforward mounting, potentially in series)
Wrapping It Up: Your Upcycling Journey Awaits!
As you’ve seen, those old dresser drawers, once destined for the landfill, hold incredible potential for transformation. I’ve personally experienced the immense satisfaction of turning what seemed like trash into cherished treasures, and I am confident that you can too! With just a few basic tools, a dash of creativity, and a willingness to get your hands a little dirty, those forgotten wooden boxes can evolve into stunning, functional, and conversation-starting wall shelves that everyone will admire.
Remember, the core message behind these projects isn’t solely about the significant financial savings, although that’s undoubtedly a fantastic bonus. It’s fundamentally about embracing the spirit of upcycling, giving new purpose and extended life to old pieces, and actively contributing to a more sustainable environment. Each drawer you rescue from waste becomes a unique, personalized chapter in your home’s story, reflecting your ingenuity and your commitment to thoughtful living.
So, are you ready to embark on your own upcycling adventure? Don’t let those old dresser drawers languish in storage any longer. Pull them out, gather your tools, and unleash your inner DIY enthusiast. The satisfaction of crafting something beautiful and useful with your own hands is truly unparalleled.
I would absolutely love to see your finished creations! Please feel free to share photos of your newly styled shelves in the comments section below – your unique designs could inspire others. And if you found these tips and ideas helpful, I encourage you to explore my other furniture upcycling guides for more creative projects and sustainable living solutions.
Let’s continue to keep good furniture out of landfills, one repurposed drawer at a time!
