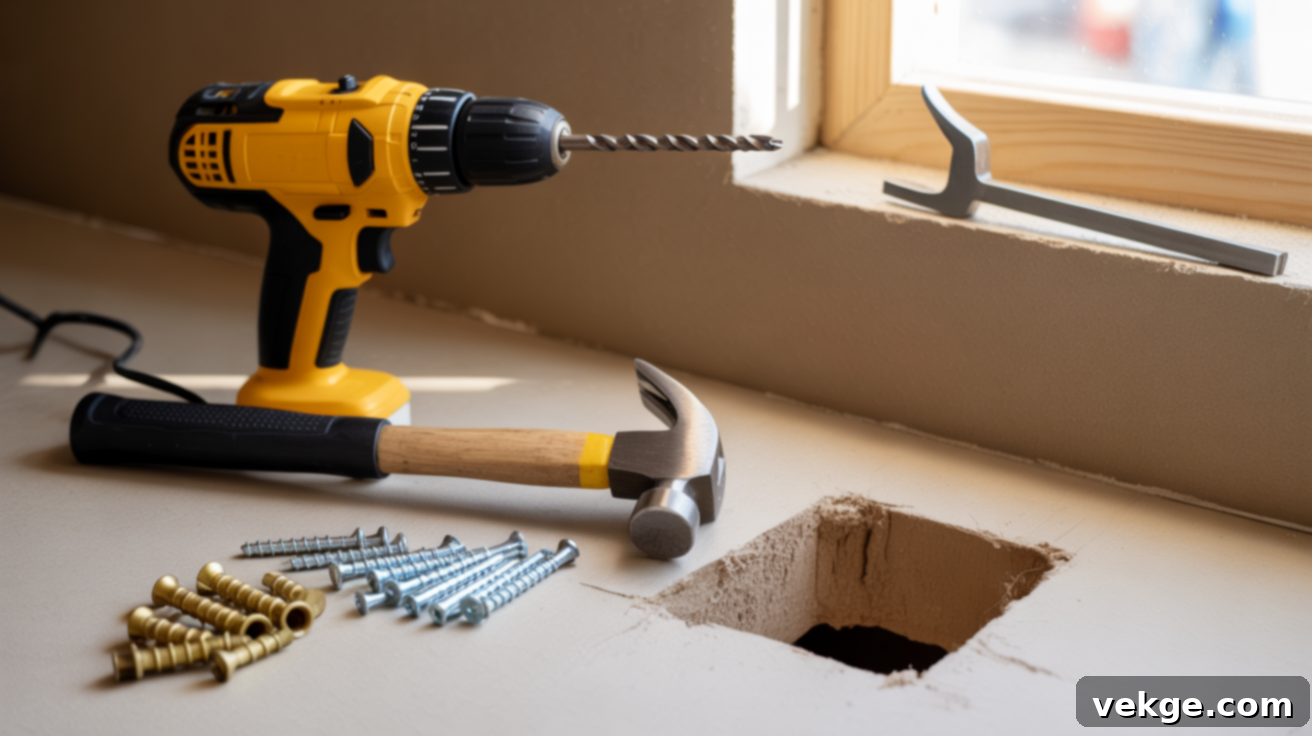
How to Securely Hang Anything on Drywall: The Ultimate Guide to Hollow Wall Anchors
The thought of hanging anything substantial on drywall used to fill me with a mix of anxiety and frustration. I’d stand there, drill in hand, picturing the inevitable crash of a new shelf, a cherished mirror, or a heavy piece of art. The elusive “stud” often seemed to vanish exactly where I needed it most, leaving me feeling helpless against the flimsy nature of plasterboard.
That’s when I discovered the true power of hollow wall anchors – a real game-changer in the world of home improvement. With the right anchor, my days of second-guessing and hoping for the best were over. No more leaning shelves, crooked picture frames, or unsightly repair jobs. Instead, I found a reliable, rock-solid solution for mounting items securely, even when there’s nothing but hollow space behind the drywall.
If you’ve ever felt uncertain about drilling into drywall or worried about the stability of your wall hangings, this comprehensive guide is for you. I’ll walk you through everything you need to know about hollow wall anchors: how they work, how to select the perfect type for your project, and step-by-step instructions to install or remove them without causing damage to your walls. Get ready to transform your approach to hanging and make your home both functional and stylish.
Understanding Hollow Wall Anchors: Your Solution for Stud-Free Mounting
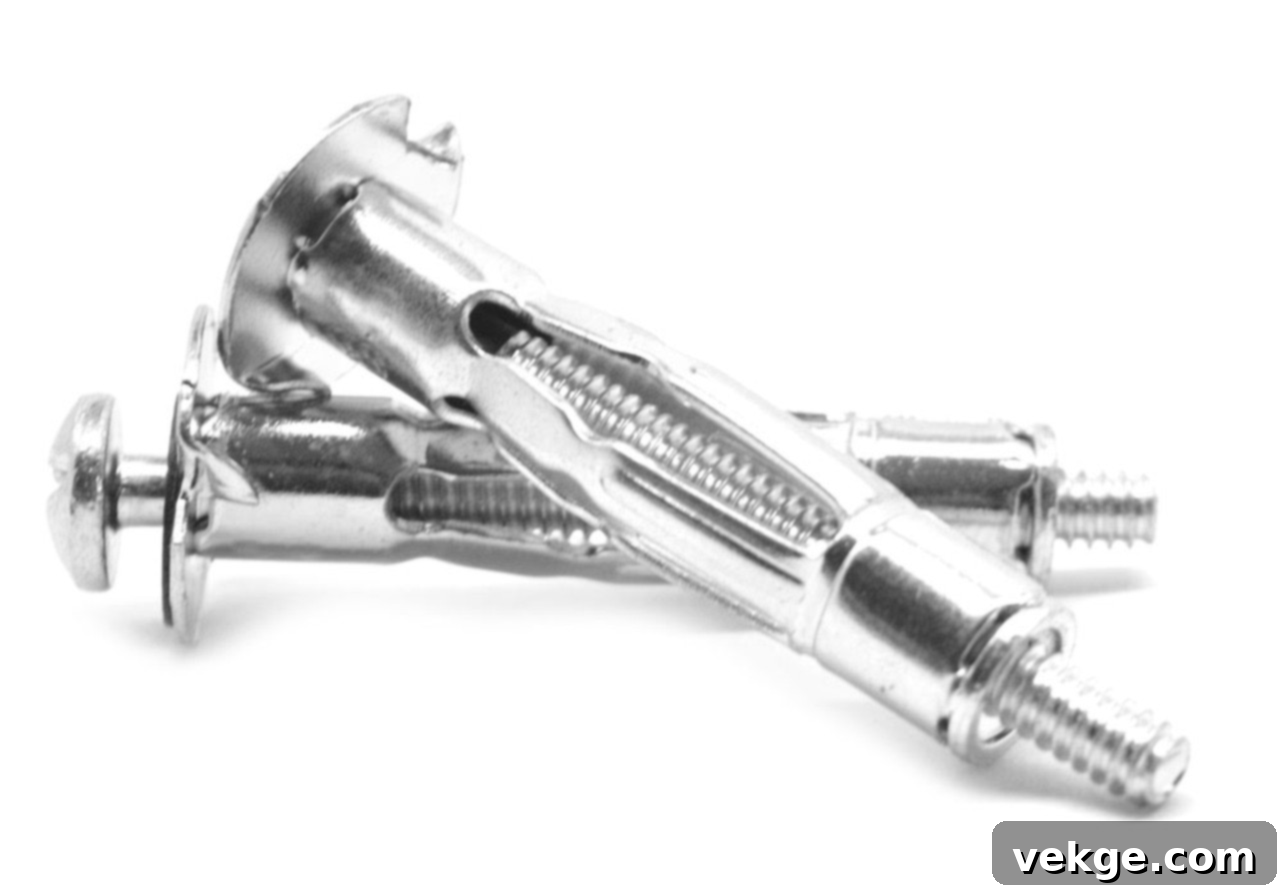
A hollow wall anchor, often referred to as a drywall anchor, is an ingenious fastener designed specifically for mounting items on walls where no solid wood stud or backing exists. These surfaces typically include drywall (gypsum board), plaster, or even some types of hollow paneling.
Unlike traditional screws that need to bite into solid material, hollow wall anchors are engineered to grip securely within the hollow space behind the wall. They achieve this by expanding, flaring out, or toggling open once inserted, creating a secure brace against the interior surface of the wall. This expansion mechanism prevents the anchor from pulling back through the drilled hole, distributing the weight of the hung item across a larger area of the wall material.
These anchors come in a variety of designs, including the popular toggle bolts, molly bolts, and various plastic expansion anchors, each suited for different weight capacities and wall conditions. They are indispensable for a wide range of household tasks, from hanging lightweight picture frames and curtain rods to more substantial items like wall-mounted shelves, large mirrors, and even flat-screen TVs. Their primary advantage lies in their versatility and ease of installation, making them ideal for quick fixes and planned decor updates around the house, requiring only basic tools and minimal wall preparation.
Choosing the right hollow wall anchor means you no longer have to compromise on where you want to hang something. With proper selection and installation, these anchors provide a strong, reliable, and durable hold, giving you peace of mind that your belongings are safely mounted.
Types of Hollow Wall Anchors: Choosing the Right Fastener for Your Project
Hollow wall anchors are not one-size-fits-all. They come in several distinct types, each engineered with specific mechanisms to provide different levels of support and suitability for various wall conditions and load requirements. Selecting the correct anchor is crucial for a successful and secure installation, depending primarily on the weight of the item you wish to hang and the specific type and thickness of your wall surface.
Plastic Expansion Anchors: The Go-To for Light Loads
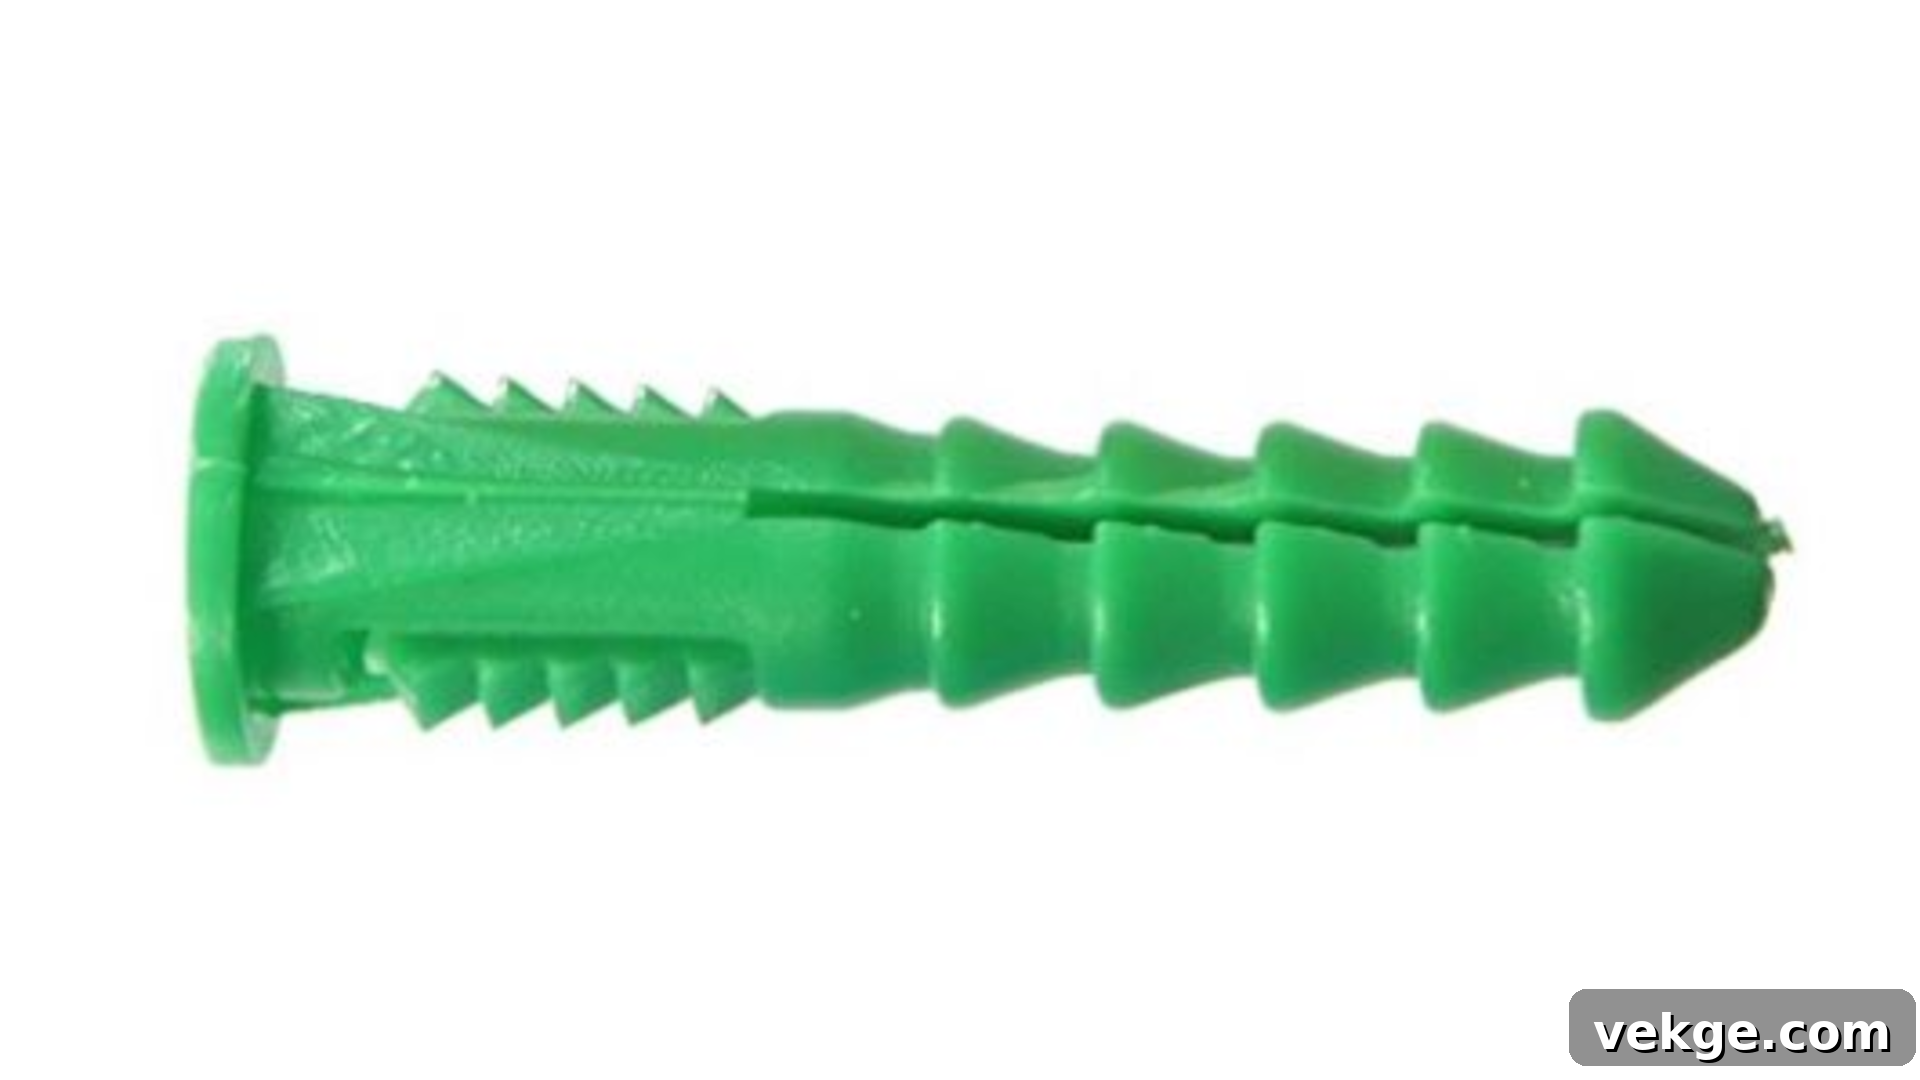
Plastic expansion anchors are among the most common and easiest to use, perfect for light-duty tasks in standard drywall or plaster. Their design is simple yet effective: as a screw is driven into the anchor, the plastic body expands, pressing firmly against the inside of the drilled hole. This outward pressure creates friction and a secure grip within the wall material.
These anchors are most commonly utilized for lightweight items that don’t exert significant pull or shear force. Think small picture frames, decorative wall art, clocks, light-duty towel hooks, or lightweight shelving. When installed correctly and in good quality drywall, plastic expansion anchors typically support weights ranging from 10 to 25 pounds. They are ideal for quick, everyday hanging needs where minimal fuss is desired.
Toggle Bolts: Heavy-Duty Heroes for Maximum Support
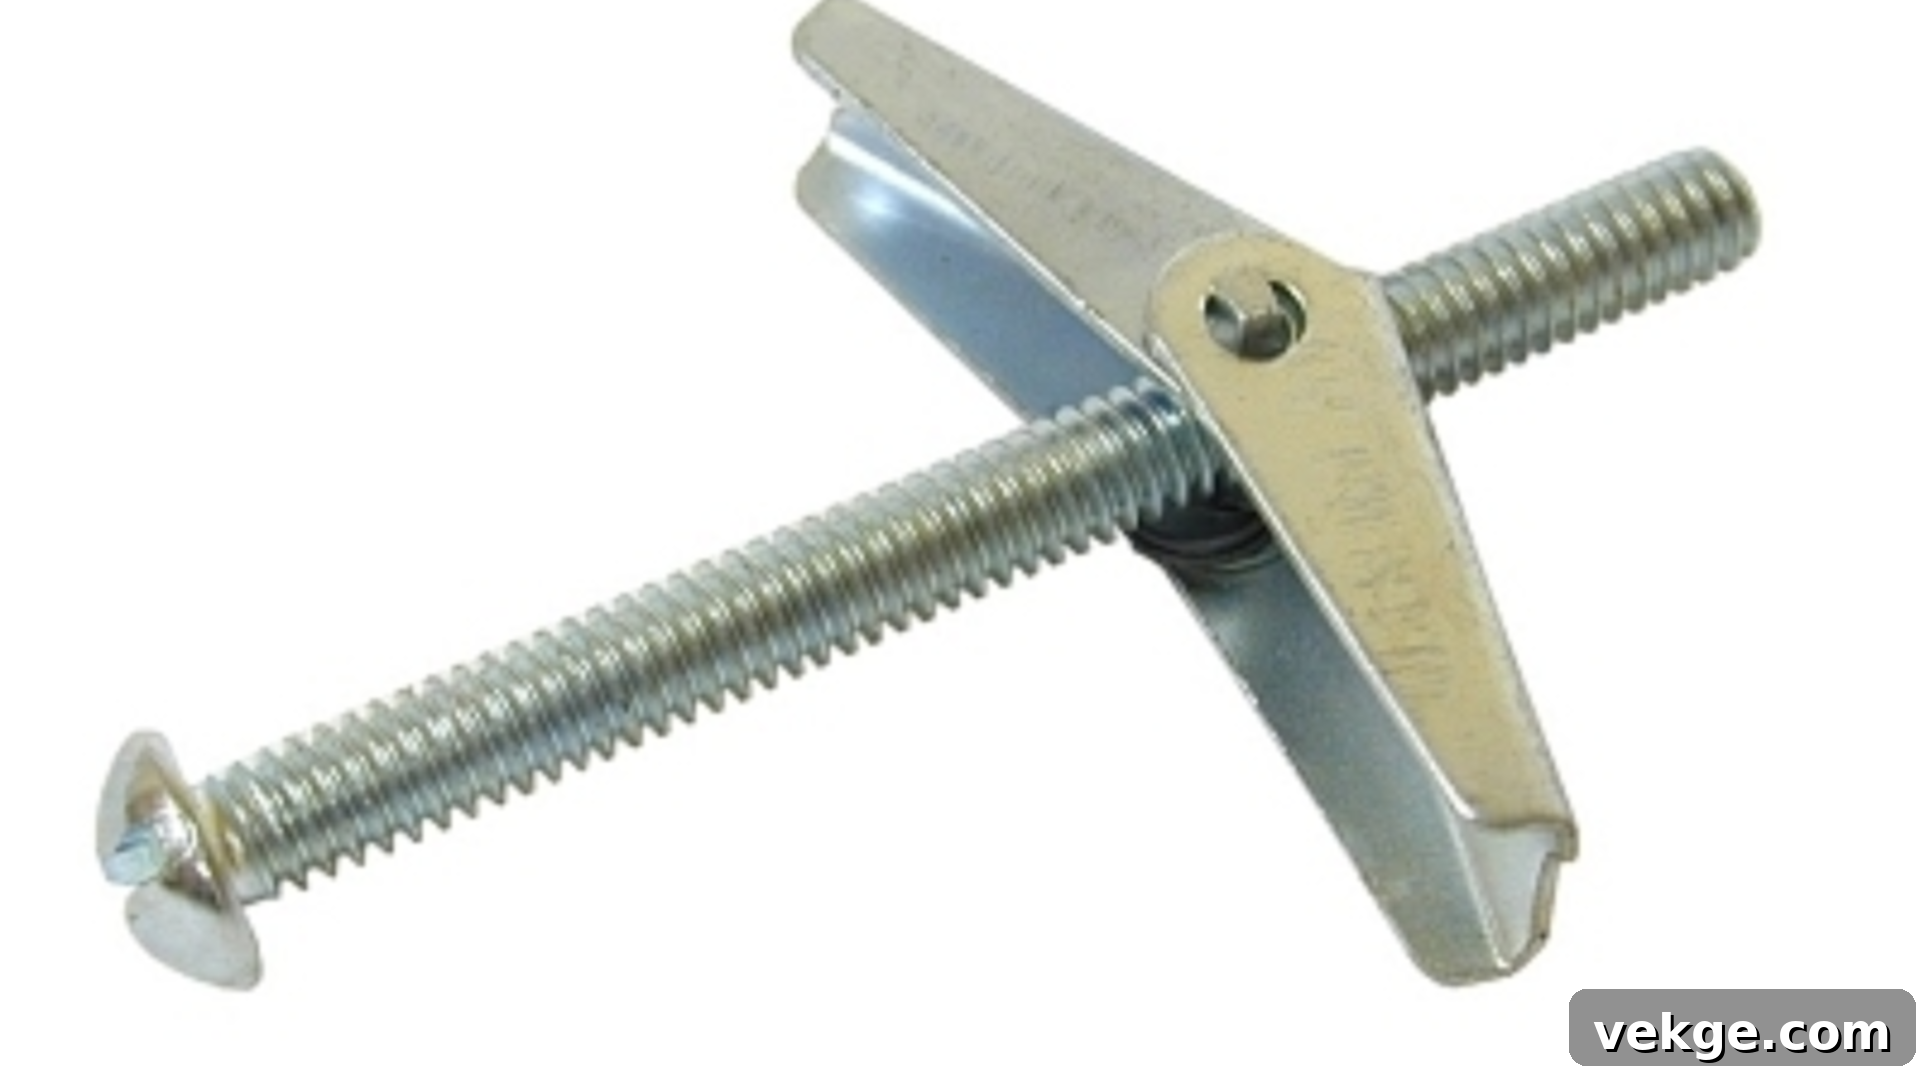
When you need serious holding power for medium to heavy loads, toggle bolts are your best bet. These anchors feature a long machine screw combined with spring-loaded metal wings (or a plastic strap system for newer designs) that fold to pass through a pre-drilled hole. Once they clear the back of the wall, the wings spring open, bracing firmly against the interior surface of the drywall. As the screw is tightened, it pulls the wings tight against the backside of the wall, creating an incredibly strong and stable anchor point.
Toggle bolts are the preferred choice for items like wall-mounted televisions, heavy shelves, large and ornate mirrors, cabinet installations, and other fixtures that demand significant support. Depending on their size and the quality of the drywall, toggle bolts can support substantial weights, often ranging from 50 to 100 pounds or even more for larger sizes and multiple anchors. They are highly reliable but typically require a larger pilot hole than other anchor types.
Molly Bolts (Sleeve Anchors): Robust and Reusable
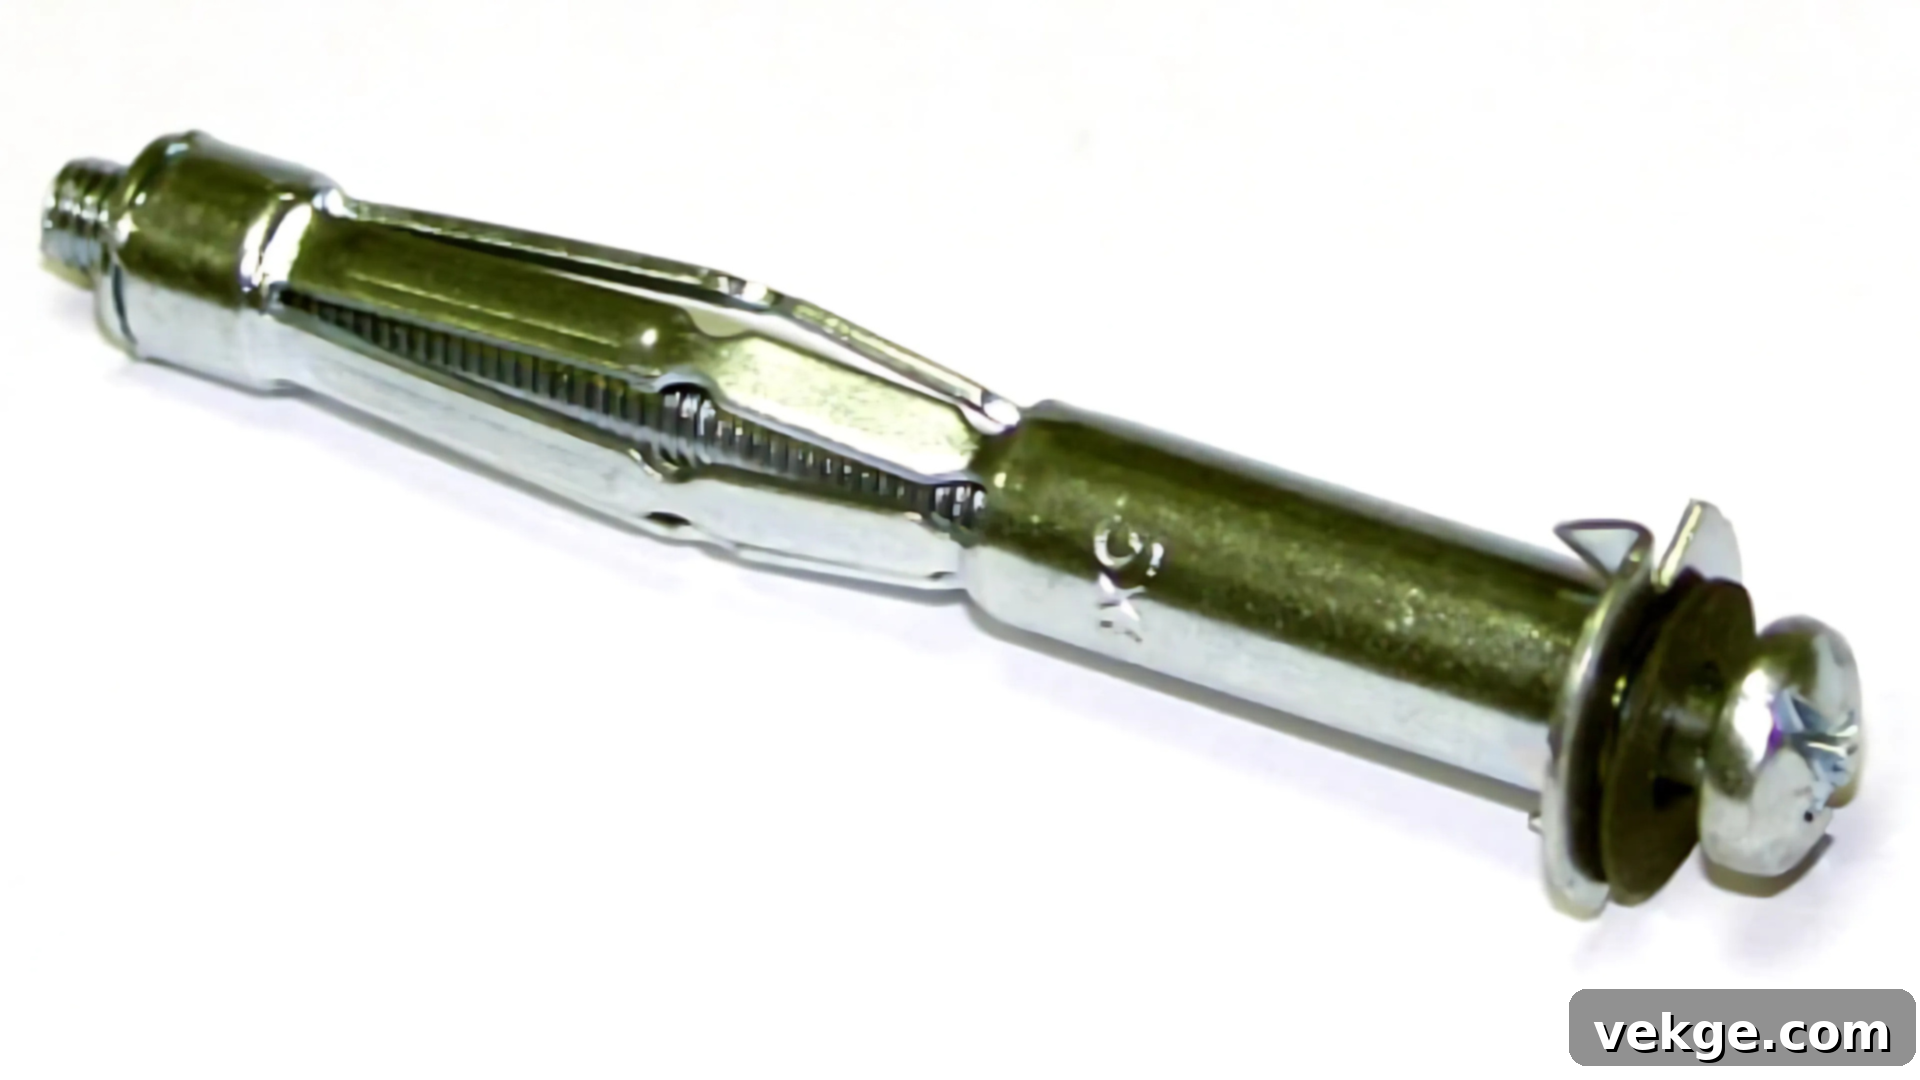
Molly bolts, also known as hollow wall anchors or sleeve anchors, are another excellent option for medium-weight applications. These are typically metal anchors with a pointed or flanged end and a ribbed sleeve that expands as a screw is tightened. As the screw draws the inner part of the anchor outwards, the sleeve crushes or flares out behind the wall, forming a secure, permanent grip. A key advantage of molly bolts is that the screw can often be removed and reinserted without losing the anchor’s integrity, making them ideal for items that might need to be taken down occasionally.
Molly bolts are a robust choice for items such as curtain rods, wall organizers, medium-sized pictures, sconce lighting, and lighter bathroom accessories. They offer significantly more stability and holding power than plastic expansion anchors, usually capable of holding between 25 to 50 pounds, depending on their size and the wall material. They are particularly effective in slightly thicker drywall.
Self-Drilling Anchors (Screw-In Anchors): Quick and Convenient
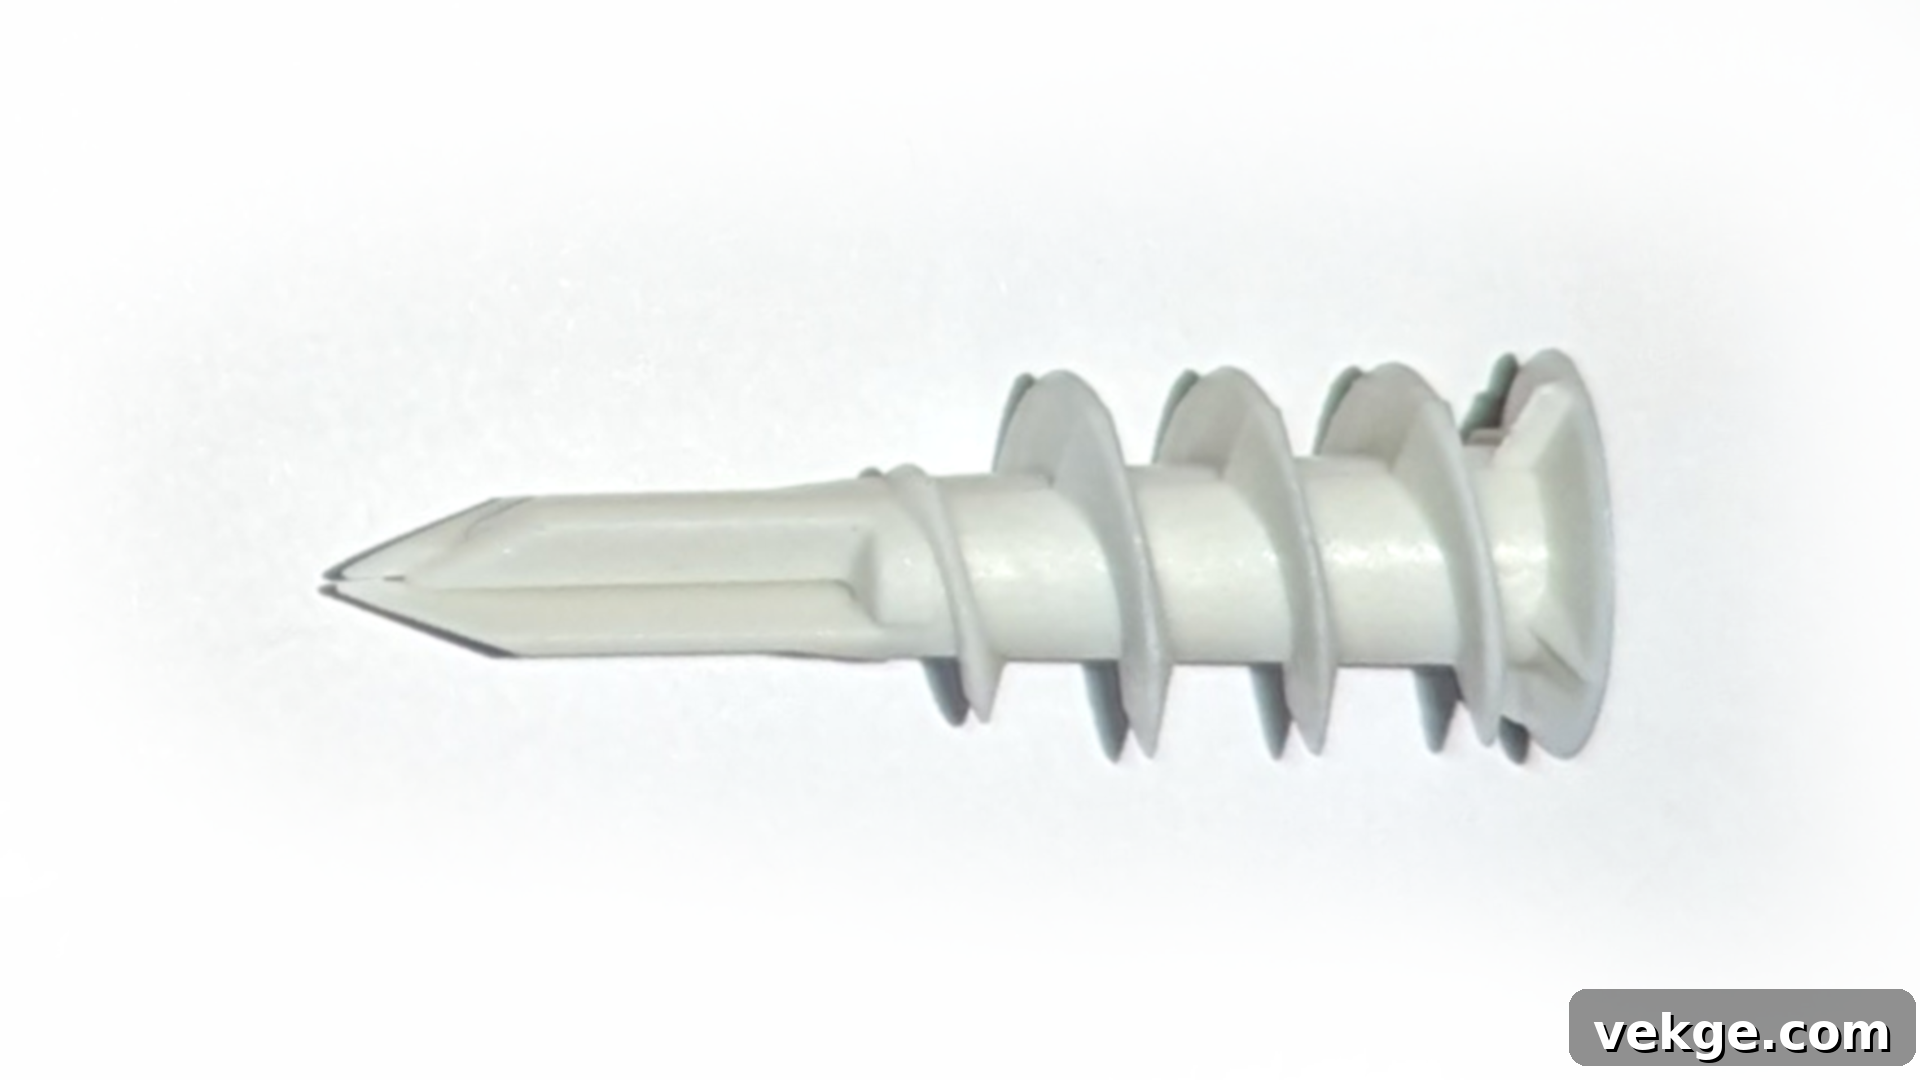
Self-drilling anchors, often made of plastic or metal, are celebrated for their ease and speed of installation. As their name suggests, these anchors feature a sharp, auger-like tip and aggressive threads that allow them to be screwed directly into drywall without the need for a pre-drilled pilot hole. This convenience saves time and reduces the number of tools required for installation.
They are ideal for light to medium loads and quick projects like hanging key holders, small racks, lightweight mirrors, or small shelving units. While incredibly convenient, their holding power is generally less than toggle or molly bolts. Most self-drilling anchors can support weights ranging from 25 to 50 pounds, though this can vary significantly based on the wall’s condition, the anchor’s material (plastic vs. metal), and its design. It’s important not to overtighten them, as this can strip the drywall or cause the anchor to break.
How to Install Hollow Wall Anchors: A Step-by-Step Guide
Installing hollow wall anchors is a straightforward process, but the specific method can vary slightly depending on the type of anchor you’ve chosen. Always ensure you have the right tools and follow the instructions carefully for a secure and lasting hold.
Essential Tools Required for Installation
Having the correct tools on hand will make the installation of hollow wall anchors much smoother, safer, and more secure. While some are basic household items, others can significantly improve efficiency and handle more challenging tasks.
- Pencil: For marking your precise drilling location on the wall.
- Tape Measure and Level: Essential for accurate placement and ensuring your item hangs straight.
- Stud Finder: Even if you plan to use hollow wall anchors, it’s always wise to check for studs first. You might find one where you need it, which is always the strongest mounting option.
- Power Drill and Drill Bits: Crucial for creating pilot holes. Ensure you have a range of bit sizes to match the anchor’s specifications (check packaging).
- Screwdriver: For driving screws into anchors or removing them when necessary. Both Phillips and flathead types might be needed.
- Hammer: Can be useful for gently tapping certain types of anchors (like some plastic expansion anchors or molly bolts) flush into their pilot holes.
- Anchor Setting Tool: Specifically designed for molly bolts and some other metal expansion anchors, this tool drastically speeds up the installation process and ensures a strong, uniform expansion behind the wall.
- Safety Glasses: Always protect your eyes from dust and debris when drilling.
Method 1: Installing Anchors with a Setting Tool (Common for Molly Bolts)
This method is highly recommended for molly bolts and other metal expansion anchors that benefit from precise and strong expansion behind the wall. Using a setting tool provides a faster, more secure, and cleaner result, especially for heavier items or thicker drywall.
Step 1: Mark and Drill the Pilot Hole. Using your pencil, mark the exact spot where you want to install the anchor. Refer to the anchor’s packaging for the recommended drill bit size. Use your power drill to create a clean, appropriately sized hole in the plasterboard or drywall. Ensure the hole is perpendicular to the wall surface.
Step 2: Insert the Anchor. Carefully push the molly bolt anchor through the drilled hole until its flange (the rim around the edge) is flush with the wall surface. If it’s a tight fit, you can gently tap it with a hammer until it sits flat against the wall.
Step 3: Prepare the Setting Tool. The anchor setting tool is designed to expand the molly bolt. It typically has two plates that grip under the screw head of the anchor. Pulling the handle of the tool draws the screw back, which in turn expands the anchor’s sleeve behind the wall.
Step 4: Attach the Setting Tool. Hook the setting tool securely onto the head of the screw that is already threaded into the molly bolt anchor.
Step 5: Expand the Anchor. Firmly and steadily squeeze the handles of the setting tool. As you squeeze, the tool will pull the screw outwards, causing the molly bolt’s sleeve to expand and grip tightly against the backside of the wall. Continue squeezing until you feel significant resistance and the anchor is fully expanded and secure. Avoid over-tightening excessively, but ensure it’s snug.
Step 6: Release the Tool. Once the anchor is set, press the release lever or button on the setting tool to detach it from the screw head.
Step 7: Verify Secureness. The molly bolt anchor should now be tightly and permanently set in the wall, ready to bear weight. Give the screw a gentle tug to confirm it’s firm.
Step 8: Final Mounting. Remove the screw from the anchor. Position your fixture or bracket over the anchor point, align the mounting holes, and then reinsert the screw, tightening it firmly until your item is securely mounted. Be careful not to overtighten the final screw, as this can strip the screw head or damage the mounted item.
Using a setting tool truly gives you a stronger, more professional-looking result, especially for heavier items or when working with thicker plasterboard. Watch the video below for a full walkthrough and to see each step in real time, making the process even clearer.
Method 2: Installing Anchors Without a Setting Tool (General Method for Other Anchors)
Many types of hollow wall anchors, particularly plastic expansion anchors and self-drilling anchors, can be installed effectively using just basic hand tools. This approach is practical for lighter-duty applications or when specialized tools are not available.
Step 1: Prepare the Hole. For plastic expansion anchors, you will need to drill a pilot hole first, matching the anchor’s diameter. For self-drilling anchors, no pilot hole is typically required; the anchor itself acts as the drill. Always double-check the anchor’s specific instructions.
Step 2: Insert the Anchor.
- For Plastic Anchors: Push the anchor into the pilot hole until it’s flush. If it’s snug, you can gently tap it with a hammer, ensuring not to deform the opening.
- For Self-Drilling Anchors: Position the sharp tip of the anchor on your marked spot. Apply firm, steady pressure and use a Phillips head screwdriver (or a drill on a low-torque setting) to slowly twist the anchor clockwise. It will cut its own thread into the drywall.
- For Molly Bolts (without a setting tool): Insert the molly bolt. Then, carefully turn the screw clockwise using a screwdriver. As you tighten, the anchor’s sleeve will expand behind the wall. This takes more turns and can be more challenging than using a setting tool, but it’s feasible.
Step 3: Secure the Anchor. Continue turning the screw (for self-drilling or molly bolts) or driving it (for plastic anchors) until the anchor feels snug and firmly seated in the wall. You’ll feel increased resistance. Crucially, stop once it’s snug and doesn’t spin freely in the wall. Over-tightening can strip the threads, damage the drywall, or cause the anchor to fail.
Step 4: Prepare for Mounting. If the anchor came with a screw already inserted (like many plastic and molly bolts), remove this screw now. If it’s a self-drilling anchor where the screw is part of the anchoring mechanism, you’ll install your item directly with that screw.
Step 5: Attach Your Hardware. Position your item or its mounting bracket over the now-secured anchor.
Step 6: Final Tightening. Reinsert and tighten the screw to complete the assembly, ensuring your item is firmly held against the wall. Again, avoid excessive force.
Tips for a Secure Hold: Ensuring Long-Lasting Wall Mounts
Mounting items to hollow walls can be surprisingly reliable, but achieving a truly secure and lasting hold requires attention to detail. These simple, yet crucial, tips will help you get it right every time, preventing costly damage and frustrating fall-downs.
- Select the Right Anchor for Your Wall and Item’s Weight: This is arguably the most critical step. Never use a light-duty plastic anchor for a heavy mirror.
- Lightweight items (under 25 lbs): Picture frames, small clocks, unframed posters. Use plastic expansion anchors or small self-drilling anchors.
- Medium-weight items (25-50 lbs): Curtain rods, medium shelves, small wall organizers, sconces. Molly bolts or larger self-drilling anchors are appropriate.
- Heavy-weight items (50+ lbs): Large mirrors, heavy shelves loaded with books, wall-mounted TVs. Toggle bolts are almost always the best choice here.
Always check the anchor’s packaging for its specific weight rating and recommended drywall thickness. When in doubt, err on the side of caution and choose a stronger anchor or use multiple anchors. For the ultimate strength, always try to anchor into a stud first, if one is available at your desired location.
- Match the Anchor to Your Wall Type and Condition: Not all hollow walls are created equal. Drywall thickness can vary (e.g., 1/2 inch vs. 5/8 inch), and plaster walls behave differently. Ensure your chosen anchor is designed for the specific surface you’re working with. Avoid anchoring into weak, crumbling, or extensively patched drywall, as these areas may not provide sufficient grip. Look for solid, intact sections of the wall.
- Avoid Overtightening: This is a common mistake that can lead to failure. Once the anchor feels snug and secure, stop turning the screw. Overtightening can strip the threads of the anchor, crack the surrounding drywall, or deform the anchor itself, severely compromising its holding power. The goal is firm, not forced.
- Plan Your Placement Carefully: Precision is key. Use a tape measure and a level to mark your drilling spots accurately before making any holes. A well-balanced layout distributes the load evenly across the anchors, reducing stress on any single point and preventing the hung item from sagging or becoming crooked over time. For items with multiple mounting points, ensure they are perfectly aligned.
- Consider the Item’s Center of Gravity: For heavier or oddly shaped items, think about where the bulk of the weight will be. Distribute anchors to support this weight effectively, especially if it’s not evenly distributed.
- Check for Hidden Obstructions: Before drilling, use a stud finder or a non-contact voltage tester to check for electrical wires, water pipes, or other obstructions behind the wall. Drilling into these can be dangerous and costly.
- Test the Anchor (Gently): After installing an anchor and before hanging your final item, gently tug on the screw to confirm it feels secure. For heavier items, you can put a slight amount of the anticipated weight on the anchor (e.g., press down lightly on a bracket) to ensure it’s firmly seated.
By carefully selecting the right materials, taking a few extra minutes to plan, and following these practical tips, you’ll achieve a secure, long-lasting hold for your wall-mounted items without damaging your walls or experiencing frustrating mishaps.
How to Remove Hollow Wall Anchors: A Guide to Clean Wall Repair
Removing hollow wall anchors requires a delicate touch to avoid unnecessary damage to your wall. The method you employ will largely depend on the specific type of anchor you’ve installed. The goal is to remove the anchor cleanly, leaving a minimal hole that is easy to patch.
- Unscrew and Pull (Plastic or Threaded Anchors): For many plastic expansion anchors or self-drilling (screw-in) anchors, you can often simply reverse the installation process. Use a screwdriver to turn the screw counter-clockwise. For plastic anchors, the screw might back out completely, allowing you to then pull the plastic sleeve out of the wall with pliers. For self-drilling anchors, keep unscrewing until the anchor itself backs out of the drywall.
- Push Through (Toggle Bolts): Toggle bolts are designed to expand behind the wall, and their wings often cannot be pulled back through the original hole. The easiest way to remove them is to first remove the main screw. Once the screw is out, the spring-loaded wings will typically fall into the wall cavity. You can then gently push the remaining plastic or metal sleeve into the wall, leaving only a hole that needs patching. There’s no need to retrieve the wings from inside the wall.
- Cut or Pry (Molly Bolts): Molly bolts, being metal and designed for a very strong grip, can be more challenging. First, try unscrewing the central screw. If the anchor remains firmly in place, you may need to use a utility knife to carefully cut around the flange of the molly bolt, scoring the drywall to loosen its grip. Alternatively, carefully pry the edges of the flange away from the wall using needle-nose pliers or the flat end of a screwdriver. Once slightly lifted, you might be able to twist it out. In some cases, if the flange is small and flush, you might decide to leave it in and patch over it, especially if it’s not protruding.
- Drill Out (Stubborn Anchors): As a last resort for very stubborn or broken anchors, you can carefully drill through the center of the anchor with a drill bit slightly larger than the anchor’s internal diameter. This will typically break the anchor’s structure, allowing it to be pushed into the wall cavity or pulled out. Use caution to avoid enlarging the hole excessively.
- Patch the Hole: Once the anchor is removed, you’ll be left with a hole.
- Clean any loose debris from around the hole.
- Fill the hole completely with spackle or wall filler. For larger holes (e.g., from toggle bolts), you might need a patch kit or multiple layers of filler.
- Allow the filler to dry completely according to the manufacturer’s instructions.
- Once dry, gently sand the patched area smooth, making it flush with the surrounding wall.
- Finally, apply primer and paint to match your wall, and the repair will be virtually invisible.
Common Mistakes and Maintenance Tips for Drywall Anchors
A secure setup begins with proper installation, but its longevity also depends on avoiding common pitfalls and adopting a few simple maintenance habits. Understanding what can go wrong and how to mitigate it will keep your fixtures solid and your walls pristine over time.
- Mistake: Skipping the Pilot Hole (When Needed): If your anchor isn’t explicitly self-drilling, attempting to force it into drywall without a pre-drilled pilot hole can lead to several problems. It can crack or crumble the drywall, create an irregularly shaped hole that prevents the anchor from gripping properly, or cause the anchor to go in crooked, resulting in poor alignment and reduced holding power. Always consult the anchor’s packaging for the correct drill bit size and whether a pilot hole is required.
- Mistake: Not Fully Expanding the Anchor: Some anchors, particularly molly bolts and toggle bolts, rely on full expansion or opening behind the wall to achieve their rated strength. If an anchor isn’t fully expanded (either due to insufficient tightening with a screwdriver or not using a setting tool for molly bolts), it won’t grip properly and can easily pull out under load. Always ensure you feel firm resistance and that the anchor is fully engaged.
- Mistake: Anchoring into Weak or Damaged Drywall: Drywall that is wet, crumbling, or extensively patched provides a poor foundation for any anchor. The material won’t be strong enough to resist the expansion or tension of the anchor, leading to premature failure and further wall damage. Always choose a clean, solid, and structurally sound section of the wall for anchor placement. If a wall has signs of water damage, address the moisture issue first.
- Maintenance Tip: Check for Movement or Stress Regularly: Periodically inspect your wall-mounted items. Look for subtle signs of sagging, tilting, or shifting, especially around the mounting points. These visual cues can indicate that an anchor is beginning to work loose, the load is too heavy, or the wall material itself is failing. Early detection allows for corrective action before a collapse occurs.
- Maintenance Tip: Watch for Cracks Around the Anchor: Small hairline cracks radiating from the anchor point can develop over time, particularly with heavier items or if the anchor was slightly overtightened during installation. Even minor cracks can propagate and worsen, compromising the anchor’s integrity. Address these cracks promptly by removing the item, assessing the damage, patching the wall, and potentially relocating the anchor or using a stronger type.
- Maintenance Tip: Protect Against Moisture Damage: In environments with high humidity, such as bathrooms or basements, moisture can significantly weaken drywall over time and lead to rust on metal anchors or screws. Use rust-resistant hardware (e.g., stainless steel screws) in damp areas and inspect these installations more often. Ensure proper ventilation to reduce moisture levels.
- Maintenance Tip: Replace Worn or Loose Anchors: If an anchor feels weak, spins freely, or the surrounding wall is visibly damaged, do not attempt to reuse it. Remove the old anchor, patch the hole, and install a new, appropriate anchor in a sturdier, adjacent spot. This ensures the safety and stability of your mounted items.
Staying alert to these common issues and integrating a few simple maintenance checks into your routine will significantly enhance the reliability of your wall anchors, ensuring your fixtures remain safely and securely in place for years to come.
Conclusion: Confidently Hanging Anything on Your Walls
Mastering the use of hollow wall anchors transforms the way you approach home decorating and organization. No longer do you need to dread the task of hanging items on drywall or feel limited by the absence of studs. This comprehensive guide has equipped you with the knowledge to confidently tackle a wide array of wall-mounting projects, from lightweight picture frames to heavy wall-mounted televisions.
We’ve explored the fundamental principles of how these ingenious fasteners work, delved into the distinct characteristics and ideal applications of various anchor types—including plastic expansion, toggle, molly, and self-drilling anchors—and provided detailed, step-by-step instructions for their installation both with and without specialized tools. Crucial tips for ensuring a secure, long-lasting hold and practical advice for removal and maintenance have also been covered, empowering you to avoid common mistakes and prolong the integrity of your walls.
With these insights and practical techniques, you are now better prepared to handle any light or heavy wall-hanging challenge without worry. Remember, a little preparation, selecting the right tools, and meticulous attention to detail go a long way toward achieving a clean, professional, and supremely secure result. You don’t need to be a seasoned DIY expert—simply follow each step, take your time, and trust in the process.
Embracing the proper use of hollow wall anchors will not only enhance the functionality and aesthetic appeal of your living space but also instill a newfound confidence in your home improvement capabilities. Even small improvements like these can make your space feel more organized, put-together, and truly your own.
Now that you’ve learned about how to use hollow wall anchors, why not expand your DIY skills? Check out our other blogs for easy, hands-on tips that can help with various other household projects and empower you to tackle more around your home with confidence!
