Master the Art of Furniture Stripping: Your Ultimate Guide to Restoring Wood
Embarking on a furniture stripping project can be one of the most rewarding endeavors for any DIY enthusiast or home decorator. It’s an art that breathes new life into worn-out pieces, revealing the hidden beauty of the wood beneath years of old finishes. As someone deeply involved in furniture restoration, I’ve seen firsthand how the right approach can transform a forgotten item into a cherished centerpiece.
Whether you’re looking to rejuvenate a precious family heirloom, update a vintage find from a thrift store, or simply give a tired piece of furniture a fresh look, the process of stripping requires patience, precision, and the right techniques. This comprehensive guide will walk you through every essential step, from choosing the best stripping method—be it chemical or mechanical—to achieving that flawless finish that will make your furniture truly shine. Get ready to uncover the potential in your old pieces and give them a second chance at glory!
Best Way to Strip Furniture: A Step-by-Step Guide for Stunning Results
1. Thoroughly Assess the Furniture and its Existing Finish
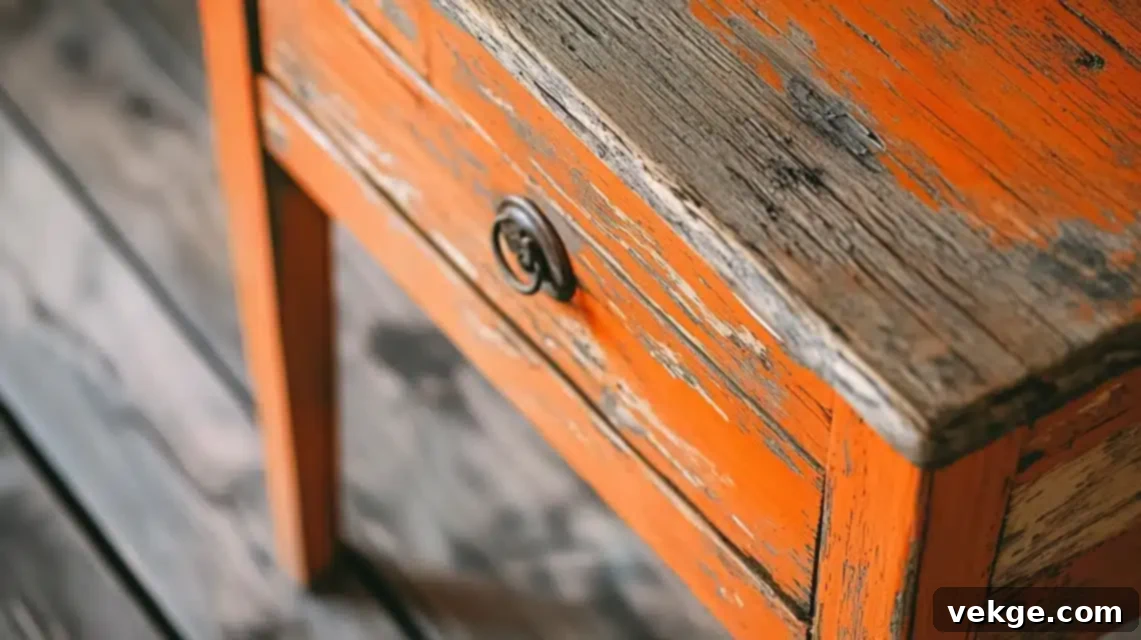
Before you begin, take the time to carefully examine your furniture. This initial assessment is crucial for determining the best stripping strategy. Consider the type of wood – is it solid hardwood, or does it feature a delicate veneer? Veneers require a much gentler approach to avoid damage. Look closely at the existing finish: How many layers are there? Is it varnish, paint, lacquer, or a combination? Identify any existing damage such as deep scratches, gouges, water rings, or extensive scuff marks. For example, the nightstands mentioned might have an orange, worn-out finish with visible imperfections. Decide whether your goal is to restore the wood to its natural state, apply a new stain, or perhaps even paint over it. This assessment will guide your choice of stripping method and the tools you’re going to need.
2. Choose Your Optimal Stripping Technique
Selecting the right stripping method is paramount for a successful outcome. There are two primary approaches, each with its own advantages:
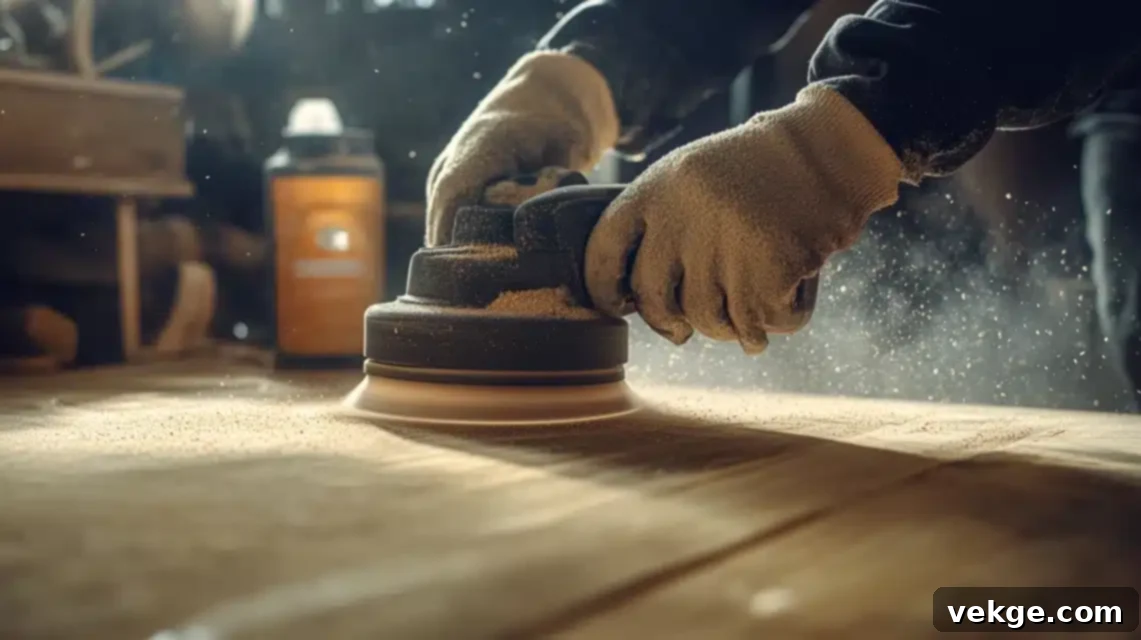
- Sanding (Mechanical Stripping): Utilizing an orbital sander or even hand sanding, this method effectively removes layers of sealer, varnish, and stain. It’s an excellent choice for solid wood pieces with relatively thin finishes or minor imperfections that need smoothing. Sanding also helps level out small dents and scratches.
- Chemical Stripping: This method involves applying a chemical solution to break down and lift the top layers of varnish and stain. It’s often followed by light sanding. Chemical strippers are ideal for furniture with intricate carvings, delicate veneers, or multiple stubborn layers of old finish that would be difficult or risky to remove solely by sanding. For delicate veneers, a chemical stripper is generally the safest option as it minimizes abrasion.
- Tip: Always work in a well-ventilated area, and wear appropriate personal protective equipment (PPE) regardless of the method chosen, especially for chemical stripping.
3. Gather All Your Essential Supplies
Preparation is key. Ensure you have all the necessary tools and materials before you start. This minimizes interruptions and helps maintain focus. For a typical furniture stripping project, you will need:
- Chemical Stripper: Consider an eco-friendly, soy-based option for a safer, lower-odor experience. These products are often biodegradable and less harsh than traditional chemical strippers.
- Personal Protective Equipment (PPE): Essential items include chemical-resistant gloves to protect your hands and safety goggles or glasses to shield your eyes from splashes and dust. A respirator mask is also highly recommended, particularly if working with stronger chemicals or producing a lot of dust from sanding.
- Disposable Chip Brushes: These are inexpensive and perfect for applying chemical stripper evenly without damaging your good brushes.
- Scrapers: A plastic scraper is ideal for removing softened finish without gouging the wood. For more stubborn areas, a metal putty knife can be used carefully, but always be mindful of the wood surface.
- Plastic Wrap (Optional but Recommended): Covering the applied stripper with plastic wrap helps keep it moist and active for longer, significantly improving its effectiveness.
- Water: For cleaning up the stripped surface and rinsing off chemical residue.
- Steel Wool: Fine-grade steel wool (000 or 0000) is excellent for cleaning the wood grain, especially in intricate areas, and for removing any residual finish after stripping.
- Sandpaper or Orbital Sander: A range of sandpaper grits (e.g., 80, 120, 180, 220) will be useful. An orbital sander speeds up the process for larger, flat surfaces, while hand sanding or specialized tools will be needed for detailed areas.
- Mineral Spirits or Denatured Alcohol: For a final wipe-down to remove dust and prepare the surface for staining.
- Clean Rags or Paper Towels: For wiping, cleaning, and applying certain finishes.
4. Carefully Apply the Chemical Stripper
If you’ve chosen the chemical stripping method, follow these steps with caution: Begin by thoroughly shaking the stripper container to ensure all components are well mixed. Using your disposable chip brush, apply a generous, even coat of the chemical stripper to a manageable section of the furniture. Avoid over-brushing, as this can cause the stripper to evaporate prematurely. Once applied, immediately cover the treated area with plastic wrap. This crucial step creates a barrier that prevents the stripper from drying out, allowing it to penetrate and loosen the finish more effectively over the recommended dwell time (typically 2–4 hours, but always check the product’s instructions). After the waiting period, remove the plastic wrap and observe the finish; it should appear bubbled, softened, or wrinkly. Gently scrape off the loosened finish using a plastic scraper, moving with the grain of the wood. For deeper crevices or detailed areas, a stiff nylon brush or even a toothpick can be helpful. Repeat this process for all sections of your furniture until most of the old finish is removed.
5. Thoroughly Clean Up the Stripped Surface
After the majority of the old finish has been scraped away, it’s time for a thorough cleaning. Use water to rinse the stripped surface, ensuring all chemical residue and loosened finish particles are removed. For an even deeper clean, especially to open the wood grain and remove any stubborn, embedded residue, use fine-grade steel wool (000 or 0000) dipped in water. Gently rub with the grain; the steel wool will conform to the wood’s contours and lift any remaining gunk without scratching. Allow the furniture to dry completely before moving to the next step. Any moisture trapped in the wood can negatively impact subsequent sanding or staining.
6. Master the Sanding of the Stripped Surface
Once the surface is completely dry, it’s time to refine the wood with sanding. This step is crucial for achieving a smooth, uniform surface that’s ready for new finishes. Start with a medium-grit sandpaper (e.g., 120 or 150 grit) on your orbital sander to remove any lingering specks of old finish and to level out minor imperfections. Always sand with the grain of the wood to prevent unsightly swirl marks or cross-grain scratches. Progress to a finer grit sandpaper, such as 220 grit, for a final smoothing pass. The goal is to achieve an incredibly smooth surface, ensuring even absorption of stain and a professional-looking finish. Pay close attention to achieving even sanding across the entire piece, eliminating any rough patches or uneven areas that could stand out later.
7. Expertly Deal with Curved or Detailed Edges
Intricate details, turned legs, or rounded edges can be challenging with a standard orbital sander. For these areas, you have several options:
- Specialized Sanders: Tools like a 3×4 electric detail sander equipped with foam abrasives or specialized sanding pads can reach into tighter spots.
- Contour Sanding Kits: These kits, readily available online or at hardware stores, provide various rubber or foam profiles that you can wrap sandpaper around. They allow you to mold the abrasive to the exact shape of the detail, ensuring consistent sanding without altering the original design.
- Hand Sanding: For very fine details or delicate carvings, hand sanding with small strips of sandpaper is often the safest and most effective method. Use your fingers to apply even pressure and carefully follow the contours.
8. Neutralize Unwanted Wood Tones
Sometimes, after stripping, the wood may reveal an undesirable undertone (like strong orange, red, or yellow) that you want to neutralize before applying your chosen stain. This can be achieved using a very diluted “wash” of a color opposite to the dominant tone on the color wheel. The concept is similar to color correction in art or makeup:
- For Orange Tones: Apply a very watered-down blue wash. Blue counteracts orange.
- For Red Tones: Use a green wash. Green is opposite red on the color wheel.
- For Yellow Tones: Apply a subtle purple wash. Purple neutralizes yellow.
Mix a small amount of acrylic craft paint or a highly diluted wood dye with water to create a translucent wash. Apply it thinly and evenly, let it dry completely, then evaluate. You can apply multiple thin coats until the desired neutralization is achieved. This step is optional but can significantly improve the final stained color.
9. Meticulously Prepare the Surface for Staining
After all stripping and sanding are complete, and any color neutralization is dry, the final preparation before staining is vital. Wipe down the entire wood surface thoroughly with mineral spirits or denatured alcohol. This step removes all residual dust, sanding particles, and any leftover stripper or oils that could interfere with stain absorption. Allow the solvent to evaporate completely. For woods known for blotchy staining (like pine, maple, or birch), consider applying a pre-stain wood conditioner. This product helps to even out the wood’s porosity, ensuring the stain absorbs uniformly and preventing a splotchy appearance.
10. Skillfully Stain and Seal the Wood
This is where your vision truly comes to life! Begin by applying your chosen wood stain (such as popular gel stains or traditional oil-based stains). Use a foam brush or a clean rag, applying the stain generously but evenly. Allow the stain to penetrate for a few minutes (check product instructions), then wipe off any excess with a clean paper towel or rag, always moving in the direction of the wood grain. If you desire a darker, richer finish, allow the first coat to dry completely—typically 12–24 hours, depending on the product and humidity—before applying a second coat. Repeat the process until you achieve your desired depth of color.
Once the stain is fully dry, it’s time to protect your beautiful work with a topcoat. This not only seals the color but also provides durability against wear and tear. You can choose between oil-based (e.g., polyurethane, varnish) or water-based topcoats (e.g., polycrylic). Oil-based products tend to impart a warmer, amber tone and are very durable, while water-based options dry faster, offer clear protection, and are easier to clean up. For smaller or intricate surfaces, a spray topcoat can be particularly convenient, ensuring an exceptionally smooth and even finish without brush strokes. Apply thin, even coats, following the product’s recommended drying times between coats. Allow the final topcoat to cure completely before putting the furniture into use: generally 12–24 hours for oil-based products, and up to 72 hours or even a week for water-based products to achieve maximum hardness. Proper curing ensures the finish is fully hardened and resistant to damage.
How do you strip furniture without chemicals?

Absolutely, there are several effective non-chemical and eco-friendly ways to strip furniture finishes, which are often preferred for their safety and minimal environmental impact:
- Sanding (Mechanical Removal): This is arguably the most eco-friendly method, as it relies purely on abrasion and doesn’t introduce any harsh chemicals. An orbital sander equipped with various grits of sandpaper (starting coarse and moving to fine) can efficiently remove old finishes. For intricate details, hand sanding or specialized detail sanders are excellent. Always ensure good ventilation and wear a dust mask when sanding.
- Natural / Eco-Friendly Strippers: The market now offers a range of chemical strippers formulated with natural, biodegradable ingredients. Products like soy-based strippers, often made from soybeans, are highly effective at breaking down finishes without the toxic fumes or harsh chemicals found in traditional alternatives. They are typically low-odor, non-caustic, and safer for both you and the environment.
- Heat Gun Application: A heat gun provides a non-toxic method to soften and loosen old finishes, particularly thick layers of paint or varnish. By applying concentrated heat, the finish bubbles and lifts, allowing you to easily scrape it away with a plastic or metal scraper. Extreme caution is needed to avoid burning or scorching the wood, so keep the gun moving constantly and work in small sections.
- Citrus-Based Strippers: These products harness the power of natural citrus oils (d-limonene) to break down and lift finishes. They are generally low in odor, non-flammable, and less toxic than traditional chemical strippers, making them a popular choice for those seeking a gentler alternative.
Is sanding better than using a chemical stripper?

The choice between sanding and chemical stripping largely depends on the specific piece of furniture, the type of existing finish, and your desired final results. Both methods have distinct advantages and disadvantages:
| Method | Pros | Cons | Best For |
|---|---|---|---|
| Sanding | – Generally faster for flat surfaces and thin finishes. – No harsh chemicals required, making it eco-friendlier. – Effectively smooths uneven surfaces, removes minor scratches, dents, and imperfections in the wood itself. – Provides a clean, smooth base directly for new finishes. |
– Can be abrasive and risks damaging delicate veneers, thin wood, or intricate details if not handled carefully. – Generates a significant amount of dust, requiring thorough cleanup and proper respiratory protection. – Can be labor-intensive and challenging for curved or highly detailed areas. – May require multiple passes with different grit sandpaper. |
– Solid wood surfaces without complex details. – Removing thin layers of varnish or stain. – Correcting minor surface imperfections like scratches or shallow dents. – When working in an outdoor or well-ventilated space where dust can be managed. |
| Chemical Stripping | – Gently removes multiple layers of finish without damaging the underlying wood, making it ideal for delicate veneers or intricate carvings. – Excellent for furniture with complex designs where sanding is impractical. – Many eco-friendly, low-VOC options are now available, reducing toxicity and odor. – Less physical effort required for thick, stubborn finishes. |
– Some traditional strippers can be harsh, contain strong odors, and require robust ventilation. – Requires protective gear (gloves, goggles, respirator) to ensure safety. – The process can be time-consuming, often requiring several hours for the stripper to work and potentially multiple applications. – Requires thorough cleanup to remove all chemical residue before finishing. |
– Thin veneers and antique furniture where preserving the original wood is paramount. – Intricate or delicate woodwork, carvings, and turned legs. – Pieces with multiple layers of old paint or stubborn finishes that are difficult to sand. – When minimal wood removal is desired. |
Summing Up Your Furniture Restoration Journey
Having walked through these detailed steps, you are now well-equipped and ready to confidently take on your next furniture stripping project. Remember that furniture restoration is a journey, not a race. Taking your time with each stage of the process is crucial; rushing can lead to imperfections and less-than-satisfactory results. Start with smaller, less intimidating pieces to build your confidence and refine your techniques before tackling larger or more valuable items.
Above all, always prioritize safety. Ensure you’re working in a properly ventilated area, and consistently wear appropriate protective gear, including gloves, goggles, and a respirator. With these proven techniques and a bit of patience in your toolkit, you possess the power to unlock the inherent beauty in any wooden piece, transforming it from old and tired to stunning and renewed. Happy stripping!
Frequently Asked Questions About Furniture Stripping
What is the easiest way to strip furniture for beginners?
For newcomers, I highly recommend starting with a modern, eco-friendly chemical stripper on a small, flat surface. These soy-based or citrus-based strippers are less aggressive and more forgiving than traditional types. Apply a generous, even coat, allow it to dwell for the recommended time (which can be a few hours), then gently scrape off the softened finish with a plastic scraper. It requires less technique and precision than extensive sanding, making it a great entry point into furniture restoration.
Can you strip furniture without damaging the wood?
Absolutely, it is entirely possible to strip furniture without causing damage to the underlying wood. The key is to use the right tools and techniques, working slowly and patiently. Always opt for plastic scrapers over metal ones to avoid gouging, especially on veneers. When sanding, start with a finer grit than you think you need and gradually move coarser only if necessary. Always sand with the wood grain. I make it a practice to test any stripper or sanding technique on an inconspicuous area first to ensure it’s safe for that particular wood type and finish. Gentle hands and attention to detail are your best allies.
How do professionals strip furniture?
Professional furniture restorers typically employ a combination of methods, adapting their approach to each unique piece. We often begin with a high-quality, professional-grade chemical stripper for the bulk removal of old finishes, especially on intricate or veneered pieces. This is followed by careful hand-scraping and cleaning. After the initial chemical stripping, extensive sanding (often starting with a medium grit and progressing to very fine grits) is used to smooth the wood, remove any remaining residue, and prepare it perfectly for new finishes. Specialized tools, such as detail sanders, contour sanding pads, and even abrasive brushes, are utilized for intricate carvings, rounded edges, and specific wood types, ensuring a meticulous and flawless result that preserves the integrity of the antique or vintage piece.
