Jump to Recipe
The Ultimate Guide to Baking Crusty Dutch Oven Sourdough Bread
An Introduction to Homemade Artisan Loaves
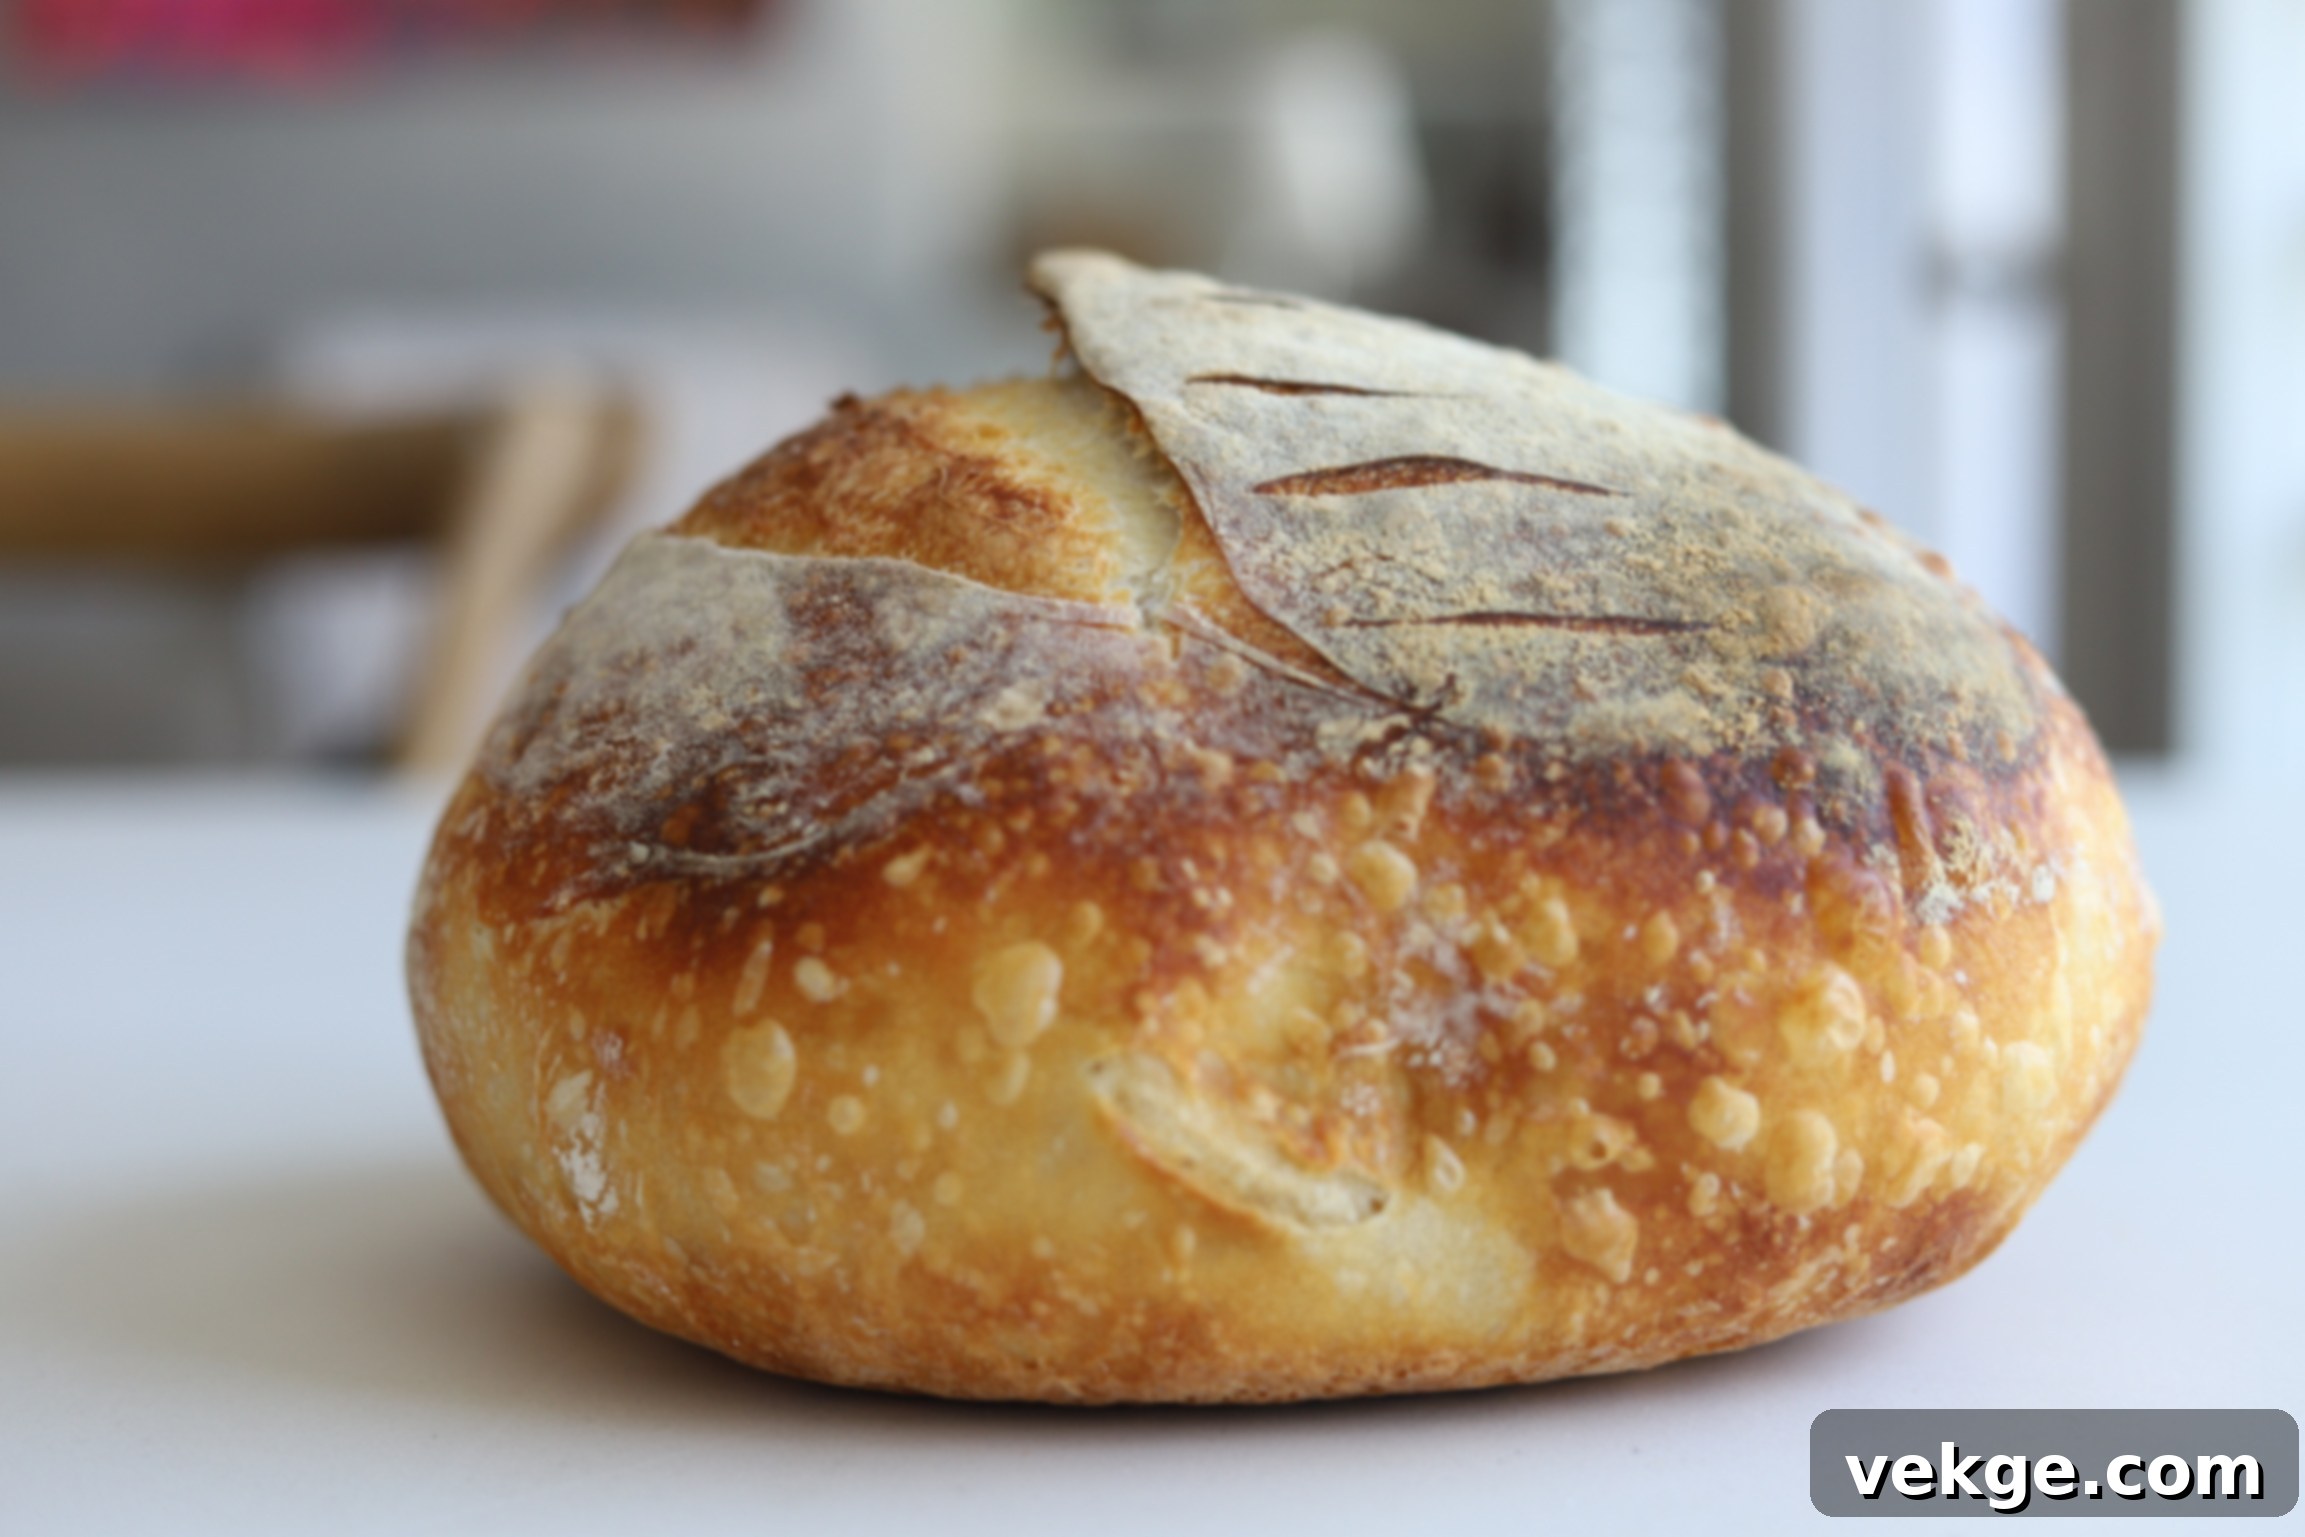
There’s nothing quite like the aroma and taste of freshly baked sourdough bread. This iconic artisan loaf, with its delightfully crisp crust and soft, airy crumb, is a true masterpiece crafted from just four simple ingredients: flour, water, salt, and active sourdough starter. If you’ve ever dreamt of pulling a perfect loaf of homemade bread from your oven, this comprehensive guide will walk you through every step to achieve that dream.
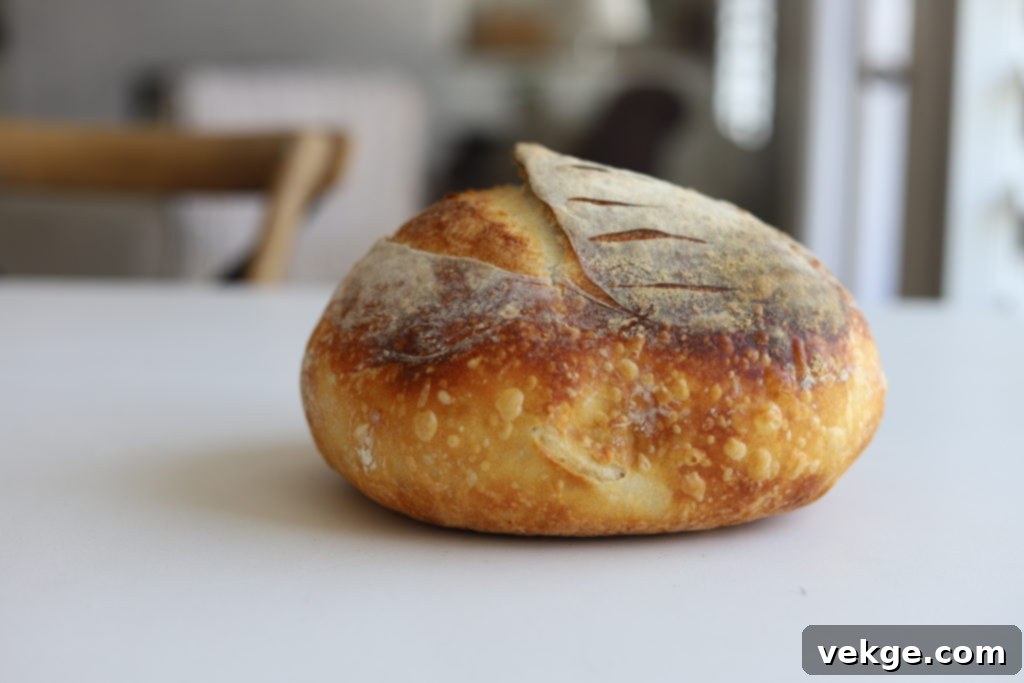
You Can Master the Art of Sourdough Baking!
While the journey into sourdough bread making might seem daunting at first glance, especially with its extended process often spanning up to 36 hours, it is a profoundly rewarding culinary adventure. This particular recipe, designed for baking in a Dutch oven, is among the more technical sourdough methods. However, with our clear, detailed instructions and a bit of patience, even a complete beginner can achieve an incredible, professional-quality loaf.
Embrace the challenge, and you’ll discover the immense satisfaction of creating something truly magical from humble ingredients. Your first attempt might feel intense, requiring careful attention to timing and technique. But trust the process, meticulously follow these specific directions, and you will bake the most glorious loaf of bread you’ve ever seen – a true testament to your newfound baking skills.
Practice is paramount in the world of sourdough. Each successive loaf will build your confidence, transforming you into an intuitive baker. Soon, you’ll be shaping and baking with ease, impressing friends and family who will undoubtedly covet your delicious, naturally leavened creations. Beyond the incredible flavor, homemade sourdough offers numerous health benefits, including improved digestibility and nutrient absorption, making your efforts even more worthwhile.
Understanding Sourdough: Essential Terminology for Bakers
Diving into sourdough baking introduces a unique vocabulary. Familiarizing yourself with these essential terms will significantly enhance your understanding and success in the kitchen, helping you troubleshoot and perfect your technique.
Sourdough Lingo Demystified
Let’s clarify some common terms you’ll encounter throughout your sourdough journey:
Natural Yeast = Sourdough = Wild Yeast: These terms are often used interchangeably to describe the living culture of wild yeasts and beneficial bacteria responsible for leavening sourdough bread. This complex microbial community is nurtured in a ‘starter’ by regular feeding with flour and water, giving sourdough its distinctive flavor and texture.
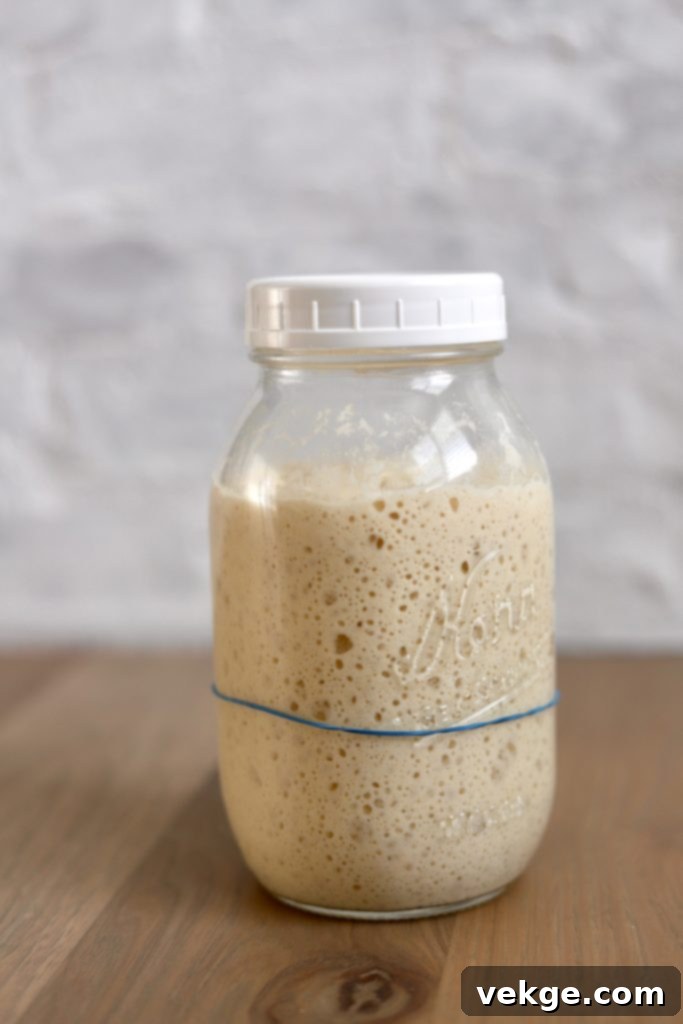
Active Starter (or Levain): An active starter is one that has been recently fed with flour and water and is bursting with life and metabolic activity. It should have roughly doubled in volume since its last feeding, exhibiting numerous bubbles throughout its structure and on its surface. This vibrant, bubbly state indicates that the natural yeasts are strong and ready to provide the necessary lift for your bread dough. A weak or inactive starter will not adequately leaven your dough, leading to dense loaves. The feeding ratio significantly affects activation time: a larger feed will take longer to become active, while a smaller feed will activate more quickly, making timing a crucial factor in your baking schedule.
Discard: Discard refers to the portion of your sourdough starter that is removed before a fresh feeding. In its inactive, unfed state, discard is typically runny and less bubbly. Rather than simply throwing it away, discard can be a fantastic ingredient in many baked goods, such as pancakes, waffles, or muffins. It adds a subtle tangy flavor and unique texture without the need for active leavening, making it a sustainable and delicious byproduct of sourdough maintenance.
Hooch: Hooch is the liquid, which can range in color from clear to dark brown, that collects on top of an unfed, inactive starter. Its presence is a clear sign that your starter has consumed all available food and is now hungry, signaling that it needs a feed. Hooch is essentially a byproduct of the starter’s metabolism. Depending on your preference, you can either pour off the hooch before feeding to maintain a milder-tasting starter, or stir it back in to contribute a more pronounced sour flavor to your bakes. Regardless of its color, hooch always signals a hungry starter in need of a fresh meal.
Feed: To “feed” your sourdough starter means to provide it with its sustenance: fresh flour and water. A typical feed involves mixing approximately equal weights of flour and water into your existing starter until the consistency resembles a thick pancake batter. Regular and consistent feeding is crucial for maintaining a healthy, robust, and predictable starter.
Powerfeed: A powerfeed is a specific feeding ratio designed to invigorate and strengthen a sluggish or underperforming starter, or one that has been unfed for an extended period. This technique involves feeding a very small amount of starter with a much larger quantity of food (flour and water). Common powerfeed ratios include 1:4:4 or 1:8:8 (1 part starter to 4 or 8 parts water and flour, respectively). Implementing a series of powerfeeds, typically every 12-24 hours for 2-4 days, can dramatically boost your starter’s metabolism and leavening power. If you’re struggling to achieve good rise in your bread, a powerfeed regimen is highly recommended to build your starter’s strength. Any extra discard starter generated during powerfeeds can be repurposed into other recipes. Don’t let it go to waste! You can incorporate it into sourdough pancake batter, German pancakes, or various other delicious discard recipes, making use of every part of your sourdough journey.
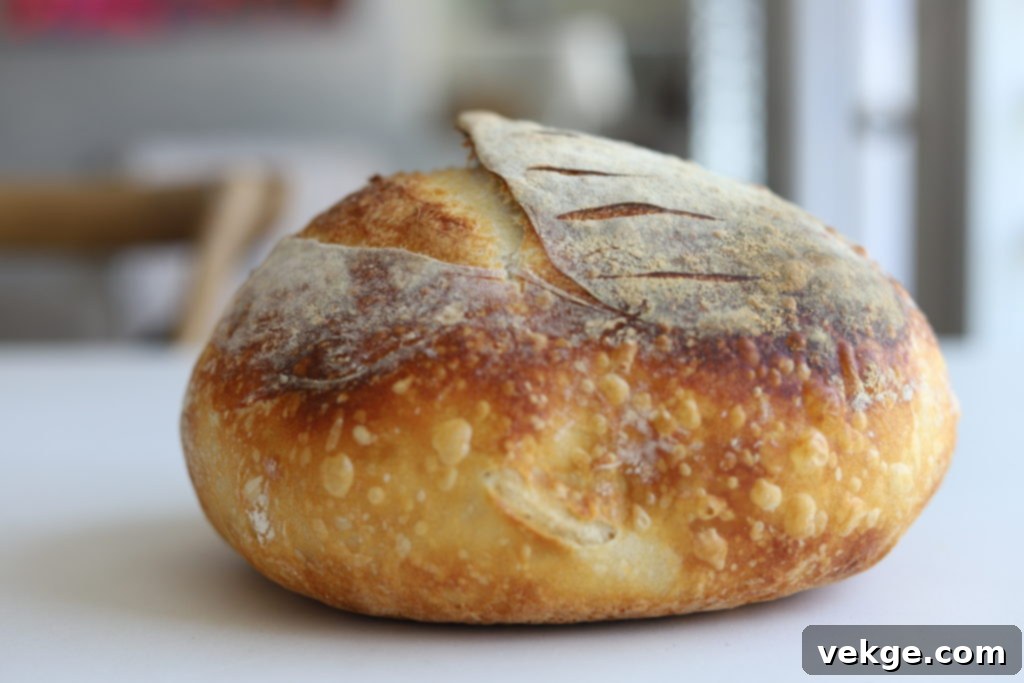
Essential Tips for Sourdough Baking Success
Achieving a perfect sourdough loaf involves understanding a few key principles and having some flexibility in your approach. These tips will help you navigate common challenges and customize your baking experience:
- Doubling the Recipe for Multiple Loaves: This versatile recipe is easily scalable! If you wish to bake two loaves, simply double all the ingredient quantities. Follow all steps up to and including the bulk ferment. Once that’s complete, divide the dough into two equal portions for forming. Each portion can then undergo its cold proof in two separate banneton baskets. You won’t necessarily need two Dutch ovens; simply bake the first loaf, then once it’s done, place the second loaf into the preheated Dutch oven for baking.
- Troubleshooting Dense Loaves and Weak Starters: If your sourdough loaves consistently fail to rise properly or turn out dense and heavy, the culprit is often a weak or inactive starter. A starter lacking sufficient strength won’t be able to provide the necessary lift and aeration for your bread. Refer to the “Powerfeed” section above and commit to more consistent and robust feeding to revitalize your starter’s activity and strength. A strong starter is the foundation of a successful sourdough loaf.
- Customizing Your Loaf with Delicious Inclusions: This base recipe serves as a fantastic canvas for customization. Feel free to add ingredients like nuts, seeds, grated cheddar cheese, fresh or dried herbs, minced garlic, or sliced jalapeños (cheddar and jalapeño is an especially fantastic and popular combination!). The ideal time to incorporate these additions is during the lamination step, just before the dough is folded and shaped. This method ensures even distribution throughout the dough without compromising its delicate structure.
Recommended Supplies and Tools for Sourdough Baking
While minimal equipment can get you started, certain tools significantly enhance the sourdough baking experience, improve results, and make the process more enjoyable. Here are the items that will prove most helpful:
- A Six-Quart Dutch Oven: A Dutch oven is almost indispensable for achieving that signature thick, crisp crust and impressive oven spring characteristic of artisanal sourdough. It creates a steamy environment around the dough during the initial bake, mimicking a professional bakery oven. If you don’t own a fancy enameled cast iron Dutch oven, don’t despair! A non-enameled cast iron pot (perhaps from your camping gear) or any oven-safe stainless steel pot with a tight-fitting lid will work as an alternative. Consider borrowing one from a friend or checking thrift stores and online marketplaces for affordable used options. If you’re ready to invest, the one I use and love is a highly recommended and affordable choice that provides excellent value and durability.
- A Kitchen Scale: Precision is paramount in sourdough baking. Ingredients are best measured by weight rather than volume, as this ensures consistent hydration and accurate ratios, leading to more predictable and successful results. A reliable kitchen scale, which doesn’t need to be expensive or overly complicated, is an essential tool for any serious sourdough baker.
- A Banneton Basket: While not strictly essential, a banneton (proofing basket) is highly recommended. It helps the dough maintain its shape and develops a beautiful pattern on the crust during the crucial cold proofing stage. These adaptable baskets can handle varying temperatures and moisture levels. Many affordable sourdough bundles include a banneton, and an 8.5 or 9-inch basket is ideal for this recipe. This bundle is a great starting point if you’re looking for multiple tools.
- Pre-Cut Parchment Paper: Parchment paper is vital for easily transferring the delicate dough into and out of the searing hot Dutch oven. Pre-cut rounds designed for Dutch ovens can save time and prevent awkward, potentially dangerous handling of the dough.
- Sourdough “Shower Caps”: These food-grade elastic covers are incredibly convenient and highly recommended for maintaining an airtight seal over your dough during bulk fermentation and cold proofing. They prevent the dough from drying out and forming an undesirable skin, ensuring optimal hydration and flexibility.
- Crusty Bread Storage Bags: Proper storage is key to preserving your loaf’s texture and extending its freshness. Avoid storing crusty bread in plastic bags, as they trap moisture and turn the crust chewy in an undesirable way. Paper bags or simply wrapping the bread in a clean kitchen towel are excellent methods for maintaining its crispness and freshness. These specialized bags are also wonderful for gifting or transporting your homemade bread.
- A Lame Blade: A lame (pronounced “LAHM,” French for blade) is a specialized tool used to score the top of your dough before baking. Scoring isn’t just for decoration; it controls where the loaf expands during oven spring, encouraging a beautiful upward rise rather than outward spread, which is crucial for a great crumb structure. While a very sharp knife or razor blade can suffice for beginners, a dedicated lame offers superior precision and cleaner cuts. Lame blades can dull quickly, so it’s wise to use a different corner for every one or two loaves and replace blades frequently, as they are generally inexpensive.
- A Large Bowl with a Lid: A spacious mixing bowl, ideally one with a tight-fitting lid, is perfect for combining ingredients and performing the stretch and folds. Most kitchens will already have a suitable option. The lid helps maintain a consistent environment for the dough, preventing it from drying out.
- A Dough Scraper: This handy tool isn’t a strict necessity but is incredibly useful for scraping sticky dough from your hands and work surface, dividing dough precisely, and even assisting with stretch and folds. A sturdy kitchen knife can serve as a makeshift alternative if you don’t have one.
- A Sharp Bread Knife: After all your hard work, a dull knife is the last thing you want when attempting to slice into a beautifully crusty loaf. A high-quality, sharp serrated bread knife makes a world of difference, ensuring clean cuts without crushing your tender crumb. For an excellent yet affordable option, consider the Mercer Culinary bread knife. If your budget allows for a more serious investment and you’re a dedicated bread baker, the professional-grade Wusthof bread knife comes highly recommended for its longevity and superior performance with very crusty breads; it’s a personal favorite after experiencing its quality.
Understanding Stretch and Folds in Sourdough Baking
Unlike traditional bread recipes that often rely on vigorous kneading to develop gluten, this sourdough method employs a gentler technique known as “stretch and folds.” This method is particularly well-suited for wetter sourdough doughs, which can be challenging to knead effectively due to their high hydration. Stretch and folds are crucial for developing the dough’s gluten structure and elasticity, which are essential for achieving a good crumb and an impressive rise.
Moreover, each series of stretch and folds gently agitates the dough, renewing the oxygen supply and stimulating the natural yeast, thereby enhancing fermentation and strengthening the dough’s network. As you progress through the series, typically over a couple of hours, you’ll observe a remarkable transformation in the dough’s texture: it will become noticeably smoother, more cohesive, flexible, and relaxed, indicating proper gluten development.
How to Perform the Stretch and Fold:
After combining all your ingredients and allowing the dough to rest for 30 minutes (a crucial step often called autolyse), approach the bowl. Grab a portion of the dough from the side of the bowl, gently pull it upwards, stretching it over to the opposite side of the bowl, and then lightly press it into the dough mass. Rotate the bowl 90 degrees and repeat this action with the next “corner” or section of the dough. Continue this process for all four “corners” of the dough to complete one round of stretch and folds. Afterward, invert the dough ball within the bowl and cover it to prevent drying. Repeat this entire sequence every 20 to 30 minutes for a total of four times over a two-hour period. While consistency is ideal, don’t worry excessively if you occasionally miss a round; your bread will still turn out wonderfully.
The Art of Lamination in Sourdough Baking
Laminating sourdough dough is a vital step that significantly contributes to its strength and the desired open, airy crumb structure. While not identical to the lamination process used for buttery pastries like croissants, it serves a similar purpose of developing and aligning gluten strands within the dough. This step invigorates the gluten network, leading to a more extensible, elastic, and robust dough that can hold its shape and trap gases more effectively during fermentation and baking.
How to Laminate Your Sourdough Dough:
Gently turn your dough out onto a clean, lightly floured countertop. Using your fingertips, begin to carefully flatten and pull the edges of the dough outwards, gradually stretching it into a thin, rectangular or square shape. The key is to be gentle and patient; avoid pulling too hard or too quickly, as this can tear the delicate gluten network that you’ve worked hard to build. Continue stretching little by little until the dough becomes quite thin, almost transparent in places. This process isn’t rushed and may take some time as the dough gradually relaxes and spreads. If you accidentally create any small holes, simply push the dough back together with your fingertips to repair them.
The lamination stage is also the perfect moment to incorporate any desired additions to your dough, such as nuts, seeds, grated cheese (cheddar is excellent!), sliced jalapeños, or fresh herbs. Distribute them evenly over the flattened dough before carefully folding it up into a compact shape. This ensures they are well integrated throughout the loaf without hindering gluten development or compromising the dough’s structure.
Expand Your Sourdough Repertoire
Once you’ve mastered the foundational sourdough loaf, a world of delicious possibilities opens up! Sourdough baking can quickly become a cherished culinary passion, offering endless opportunities to experiment and create.
Explore more exciting sourdough recipes here to continue your baking adventure and discover new ways to use your active starter and delicious discard.
More Sourdough Recipes >>
For even more in-depth guidance on maintaining your starter and mastering general sourdough techniques, consult my detailed Natural Yeast Sourdough Sandwich Bread post, which offers a wealth of information for all skill levels.
Crusty Dutch Oven Sourdough Bread
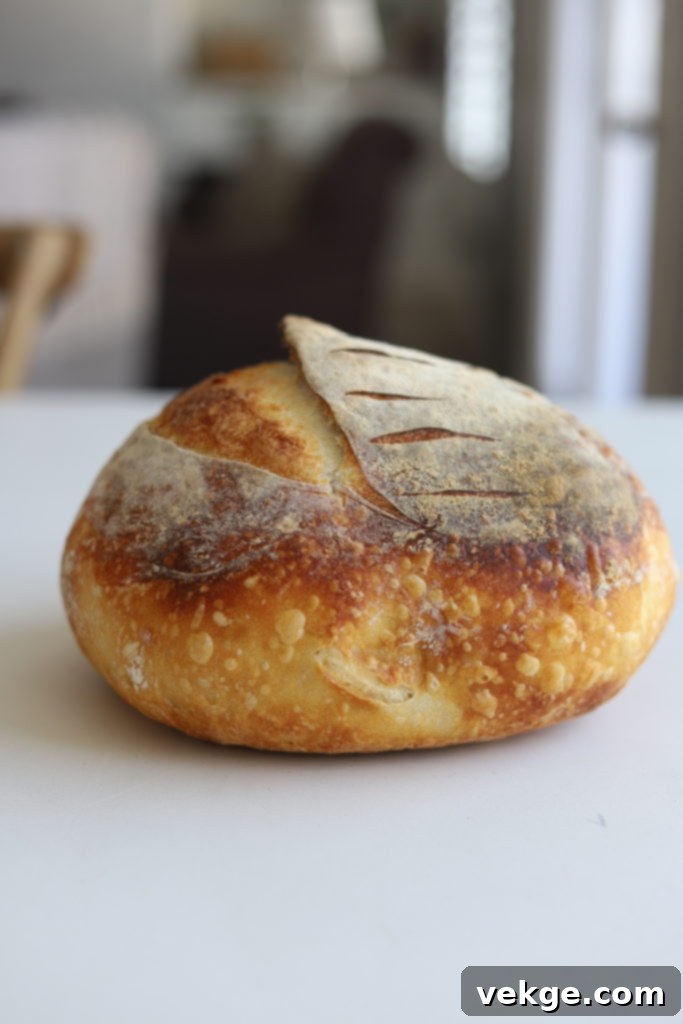
This iconic Sourdough crusty artisan loaf is a thing of beauty. Crusty on the outside, delicate soft crumb on the inside. Only 4 humble ingredients combine to make this classic masterpiece. This recipe focuses on precise measurements and traditional techniques to guide you from beginner to confident sourdough baker, yielding a loaf that is both visually stunning and incredibly delicious.
Course: Breads
Prep Time: 45 minutes (active, excludes starter activation and proofing)
Cook Time: 45 minutes
Total Active Time: 1 hour 30 minutes (total time including fermentation can be up to 36 hours)
Yields: 1 loaf
Ingredients
- 125 grams active sourdough starter
- 390 grams water
- 500 grams high quality bread flour
- 12 grams fine sea salt
Instructions
- Activate Your Starter: Begin by activating your sourdough starter. You will need a total of 125 grams of active starter (approximately one volume cup). If you need to refresh an inactive starter, a common ratio is to combine 1/4 cup runny discard starter with a generous 3/4 cup flour and slightly less than 3/4 cup water in a jar. Mix until it reaches a thick pancake batter consistency (adjust flour or water as needed). Mark the starter’s initial height. Allow it to activate for 4-7 hours, or until it has visibly doubled in size and is full of bubbles. Once active, proceed promptly, as an active starter is at its peak for baking.
- Combine Water and Active Starter: In a large mixing bowl, combine the 390 grams of water with the 125 grams of active sourdough starter. Stir them together thoroughly until the starter is fully dissolved and the mixture has a milky appearance.
- Add Remaining Ingredients and Rest (Autolyse): Add the 500 grams of high-quality bread flour and 12 grams of fine sea salt to the wet mixture. Use a Danish dough whisk (or your hands, which also works well) to mix everything thoroughly until no dry flour remains and all ingredients are just combined. The dough will be shaggy, uneven, and quite sticky at this stage. Clean off your hands, cover the bowl (with a lid or plastic wrap), and let the dough rest undisturbed for 30 minutes. This resting period, known as autolyse, allows the flour to fully hydrate and gluten development to begin naturally.
- Perform Stretch and Folds: Return to your dough after the autolyse. Perform the first “stretch and fold” as described in the dedicated section above. Repeat this process every 20-30 minutes for a total of four times over a two-hour period. You will notice the dough’s structure and strength improving significantly with each fold, becoming smoother and more elastic. Always ensure the dough is covered with a lid or plastic wrap between sets of stretch and folds to prevent it from drying out.
- Bulk Ferment (First Rise): After the final stretch and folds, cover the dough securely and allow it to bulk ferment at room temperature. This crucial stage is complete when the dough has increased in volume by approximately 50%. This can take anywhere from 3 to 6 hours, depending on your room’s ambient temperature and the vitality of your sourdough starter. A warmer spot can speed this up; a cooler spot will slow it down considerably.
- Laminate the Dough: Gently turn the dough out onto a clean, lightly floured countertop. Carefully “laminate” the dough by stretching it into a thin, rectangular layer. Use your fingertips to gently pull and flatten the edges, being mindful not to tear the dough. This step, explained in detail above, helps build strength and ensures an open, airy crumb structure. If you’re adding inclusions (nuts, seeds, cheese, etc.), sprinkle them evenly over the flattened dough at this point before folding.
- Preshape the Dough: With the laminated dough spread out, fold one-third of the dough inward, then fold the opposite one-third inward, creating a compact triple layer. Starting from one end, tightly roll the dough up into a somewhat irregular, “wonky” shaped ball. This initial shaping helps organize the gluten.
- Rest (Bench Rest): Cover the preshaped dough ball with a bowl or a clean towel and let it rest at room temperature for 30 minutes. This bench rest allows the gluten to relax, making the dough much easier to handle and shape in the next step, preventing it from resisting your efforts.
- Shape the Dough: With minimal flour dusting (or no flour if possible to maximize surface tension), use your hands to gently smooth the preshaped dough into a tight, round ball. Create surface tension by gently pulling and turning the dough against the countertop, carefully tucking edges underneath without tearing the taut top layer. The goal is a firm, tightly structured ball that will hold its shape during proofing.
- Transfer to Banneton and Cold Proof: Generously dust the top of the shaped dough with flour (brown rice flour is excellent for preventing sticking, but bread flour works just fine). Spread the flour evenly across the surface. Sprinkle some of this (brown rice or bread) flour inside your lined banneton basket to prevent sticking. Carefully invert the dough ball and place it seam-side up (floured side down) into the prepared banneton basket. Cover your banneton basket with a dough shower cap or plastic wrap to prevent the dough from drying out. Transfer the covered dough to the refrigerator for its cold proof. An ideal cold proof lasts 8-12 hours, contributing significantly to flavor development, digestibility, and optimal oven spring. For convenience, proofing for up to 24 hours is also acceptable and can lead to a more pronounced sour flavor.
- Preheat Oven and Dutch Oven: Approximately one hour before you plan to bake, place your Dutch oven inside your oven. Crucially, place a pizza stone or a heavy cookie sheet underneath the Dutch oven. This simple trick provides insulation and prevents the bottom of your loaf from becoming overly dark or crusty. Preheat the oven to 450°F (232°C). Once the oven reaches temperature, allow it to continue preheating for at least 30 minutes with the Dutch oven inside to ensure it is thoroughly heated through.
- Transfer to Parchment Paper and Score: Remove the cold dough from the refrigerator. Place a sheet of parchment paper over the banneton, then invert the dough so it rests, floured-side up, on the parchment. Using a sharp lame blade, confidently score the top of the dough in your desired pattern (a crescent shape or a simple cross is popular for classic oven spring). Scoring is not just decorative; it strategically directs the steam and expansion of the dough during baking, promoting a beautiful vertical lift (oven spring) instead of horizontal spreading, and creating an attractive ear.
- Bake in Dutch Oven: Carefully remove the preheated Dutch oven from the oven, using oven mitts. Open the lid, and using the corners of the parchment paper as handles, gently lift and lower the dough (still on the parchment) into the hot Dutch oven. Replace the lid securely. Return the Dutch oven to the oven and bake at 450°F (232°C) for 30 minutes with the lid on. This initial covered bake traps steam, crucial for crust development.
- Finish Baking and Cool: After 30 minutes, carefully remove the lid from the Dutch oven. This allows the crust to brown and crisp up. Continue baking for another 10-15 minutes, or until the crust achieves a deep golden-brown color to your liking. Immediately remove the loaf from the Dutch oven (using oven mitts) and transfer it to a wire cooling rack.
- Cool Completely: This is arguably the hardest part of the entire process, but it is absolutely essential! Allow the hot loaf to cool on the rack for at least one hour (preferably longer, up to 2-3 hours for larger loaves) before attempting to slice into it. Cutting into a still-warm loaf will cause the tender, hot crumb to tear, compress, and become gummy or mushy. Patience is key here; waiting ensures a perfectly set crumb, the best possible texture, and the full development of flavor.
- Enjoy Your Masterpiece: Once completely cooled, slice your homemade sourdough bread with a sharp bread knife and savor every bite! Enjoy it with softened grass-fed butter, a drizzle of high-quality olive oil and balsamic vinegar, or alongside your favorite meal. Close your eyes and experience the culmination of your baking efforts. ENJOY!!!
