DIY Kitchen Island: Build Your Dream Workspace on a Budget (Step-by-Step Guide)
Are you tired of feeling cramped in your kitchen? Do you dream of more counter space, better storage, and a functional hub for cooking and entertaining? If you’re like many homeowners, store-bought kitchen islands often come with a hefty price tag and rarely fit your unique space or style perfectly. The good news is, you don’t have to settle! This comprehensive guide will show you exactly how to build a custom kitchen island that perfectly suits your needs, your budget, and your aesthetic vision.
I’ve been there myself – a small kitchen, big dreams, and a determination to create a functional yet beautiful space. Building my own kitchen island was one of the most rewarding and impactful DIY projects I’ve ever undertaken, transforming my kitchen into a true centerpiece of my home. And now, I’m going to share everything I learned, walking you through the entire process, from initial planning and material selection to expert construction techniques and adding smart, personalized features.
Imagine a kitchen where everything has its place, where meal prep is a breeze, and where friends and family naturally gather. That dream is within reach, and with this guide, you’ll gain the confidence and knowledge to make it a reality. If you’re ready to take control of your kitchen and create a truly custom piece that reflects your personal style, grab your tools, and let’s start building your ideal kitchen island!
Why DIY Your Kitchen Island? Unlocking Savings and Customization
Choosing to build your own kitchen island isn’t just a project; it’s a smart investment that offers unparalleled financial advantages and complete design freedom. While the idea of a DIY build might seem daunting at first, the benefits far outweigh the effort, especially when you have a clear, step-by-step guide like this one.
Significant Cost Savings
One of the most compelling reasons to build your kitchen island yourself is the substantial savings. On average, a DIY island can cost 40-60% less than a comparable store-bought or custom-ordered unit. While pre-made islands can easily range from $1,500 to $4,000 or even more, a well-planned DIY project typically falls between $300 and $1,200. This massive difference is largely due to eliminating the manufacturing, shipping, retail markups, and installation fees associated with commercial products. Your labor is your biggest asset, and it comes at no monetary cost, allowing you to allocate your budget towards higher-quality materials or advanced features.
Complete Design Control and Customization
Beyond the savings, a DIY approach provides you with absolute control over every aspect of your island’s design. This means:
- Perfect Dimensions: No more trying to force a standard-sized island into an awkward space. You can build an island that fits your kitchen’s exact layout, ensuring optimal traffic flow and maintaining the crucial “kitchen work triangle” (the path between your sink, refrigerator, and stove).
- Ideal Height: Whether you prefer a standard counter height, a lower prep area, or a raised bar for seating, you dictate the dimensions for maximum ergonomic comfort and functionality.
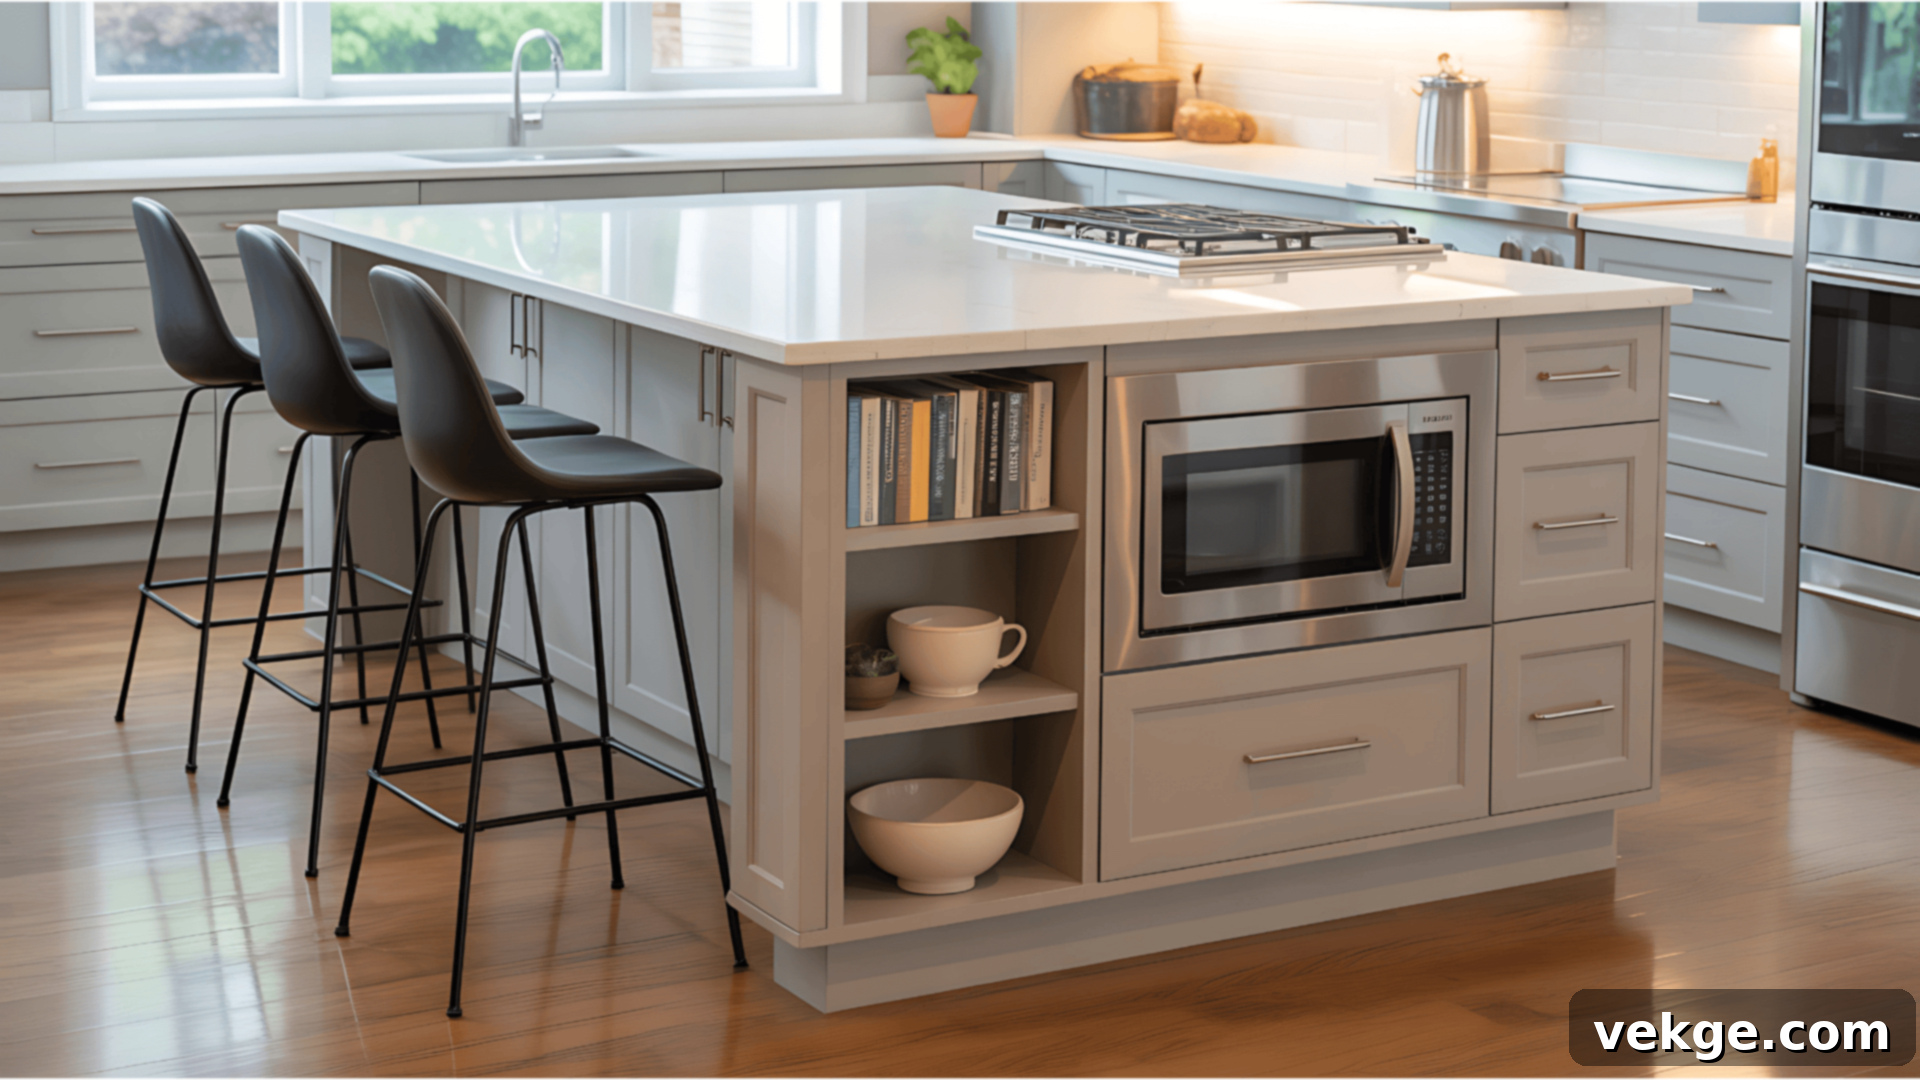
- Tailored Storage: Design specialized compartments precisely for your needs. This could include deep drawers for pots and pans, pull-out spice racks, open shelving for cookbooks, a dedicated microwave cabinet, or even a built-in pet feeding station.
- Personalized Functionality: Integrate features that enhance your lifestyle. Think about adding a secondary prep sink, a built-in wine rack, a compact trash pull-out, a charging station for devices, or even a small beverage refrigerator for entertaining.
- Seamless Style Integration: Match your existing cabinetry, choose any countertop material (from classic butcher block to luxurious quartz), select custom finishes like paint or stain, and pick hardware that complements your home’s decor. Your island won’t just be a piece of furniture; it will be an integral, cohesive part of your kitchen’s overall design.
By taking on this project, you’re not just saving money; you’re crafting a highly personalized and efficient workspace that perfectly integrates into your home and enhances your daily life. It’s a true expression of your vision and a testament to your DIY skills.
How to Build a Kitchen Island: A Comprehensive Step-by-Step Guide
Embarking on a DIY kitchen island project is a rewarding endeavor that culminates in a custom, functional, and stylish addition to your home. This section provides a detailed, step-by-step guide to help you construct a professional-quality kitchen island, from the initial foundation to the final decorative touches. Follow these instructions carefully to ensure a sturdy, beautiful, and long-lasting result.
Materials and Tools Required
Before you begin, gather all the necessary materials and tools. Having everything on hand will streamline the building process and prevent unnecessary delays. Here’s a comprehensive list of what you’ll need:
- Plywood (¾-inch thick): Essential for constructing the robust base, cabinet boxes, and sturdy shelving. Opt for a good quality grade for durability.
- Red Oak (or other hardwood): Ideal for crafting durable and attractive trim, face frames, and any decorative accents, providing a professional finish.
- IKEA or Custom Cabinets: These form the structural core of your island. IKEA offers cost-effective, modular options, while custom-built boxes provide ultimate flexibility.
- Butcher Block Countertop or Quartz Slab: The crowning glory of your island. Butcher block offers warmth and a natural feel, while quartz provides a sleek, modern, and highly durable surface.
- Soft-close Drawer Slides (e.g., Blum Tandem Plus): Invest in high-quality, undermount soft-close slides for smooth, quiet, and effortless drawer operation, adding a touch of luxury.
- Trim Wood (various profiles): Used for base molding, crown molding, and other decorative elements to give your island a polished, built-in look.
- Electrical Outlet(s): Essential for integrating appliances (like a microwave) and providing convenient charging stations or power for small kitchen tools on the island’s exterior.
- Drill/Driver: A versatile power tool for pre-drilling holes, driving screws, and installing various hardware components.
- Measuring Tape: Crucial for accurate measurements, ensuring precise cuts and perfect alignments throughout the project.
- Level: Absolutely vital for ensuring all surfaces, cabinets, and the countertop are perfectly level and plumb, preventing wobbling and structural issues.
- Screwdriver Set: For assembling parts, adjusting hardware, and tightening screws.
- Circular Saw or Table Saw: For making precise cuts on plywood, trim wood, and other lumber.
- Miter Saw: Ideal for making accurate angled cuts on trim and face frames.
- Pocket Hole Jig (e.g., Kreg Jig): For creating strong, concealed joints in your cabinet construction.
- Wood Glue: For reinforcing joints and ensuring long-lasting stability.
- Clamps: To hold pieces securely while glue dries or screws are driven.
- Safety Glasses and Gloves: Always prioritize safety when working with power tools and lumber.
Step 1: Plan and Design the Island
The foundation of a successful kitchen island project is meticulous planning. Begin by accurately measuring your available kitchen space. Consider standard walking path dimensions – generally, you want at least 36-42 inches of clearance around the island to ensure comfortable movement and access to appliances and existing cabinetry. Sketch out your design in detail, thinking about how the island will integrate into your kitchen’s work triangle (refrigerator, sink, stove). Determine the ideal size, ensuring it’s as large as possible without obstructing flow.
Visualize the features you want to include: dedicated storage, a built-in microwave, an electrical outlet, or even additional seating with an overhang. Consider the island’s primary function – will it be mainly for prep, dining, or both? Factor in common island heights: 36 inches for counter height (standard), or 42 inches for bar height. Use graph paper or a digital design tool to create a scaled drawing, ensuring every dimension and component is accounted for before you start cutting any materials. This initial design phase will save you time and prevent costly errors down the line.
Step 2: Build the Cabinet Boxes
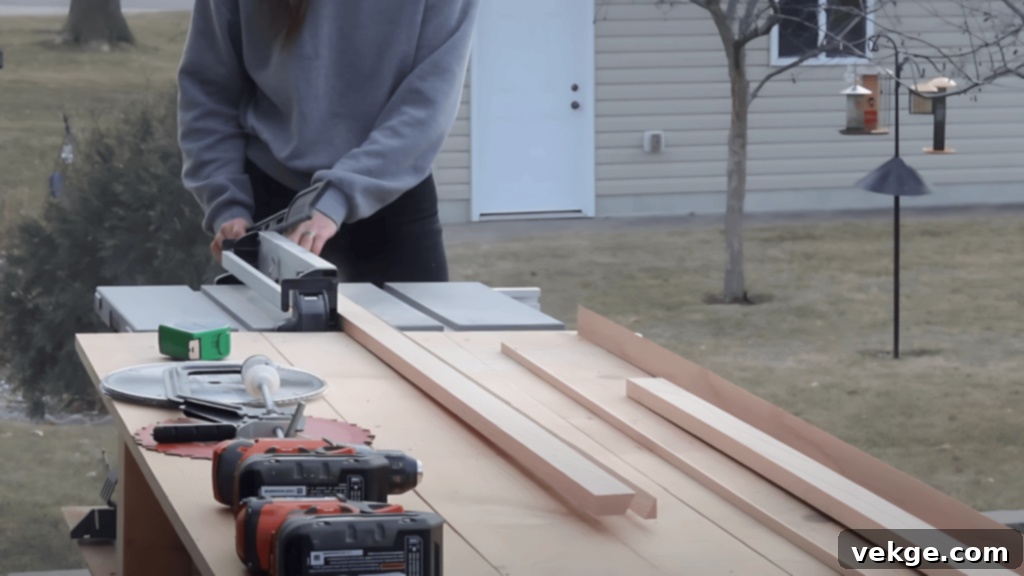
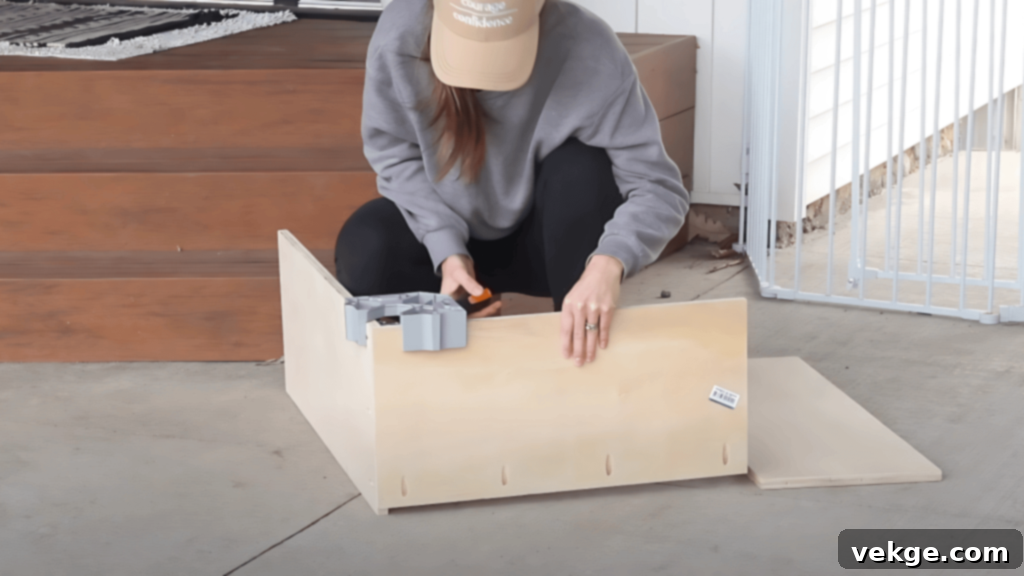
The cabinet boxes form the structural backbone of your island. You have two primary options: building them from scratch using plywood or assembling pre-made units, such as those from IKEA. For custom boxes, cut your plywood panels according to your design. Use a pocket hole jig and screws for strong, concealed joints, reinforcing with wood glue for added durability. Pre-drill all holes for drawer slides and panels to prevent wood splitting. Ensure your boxes are perfectly square before assembly.
For a typical island, you might build a combination of units: perhaps three shallow cabinets with shelving on one side for display or less-used items, two deeper drawer stacks for primary storage, and one dedicated cabinet designed specifically for microwave housing. When assembling, ensure the face frames (if using them) are flush with the cabinet boxes, creating a seamless front surface for your doors and drawers. Use blocking between cabinet boxes when joining them together to create a rigid, unified structure, especially for wider sections like the microwave cabinet.
Step 3: Cut and Assemble the Base

The base frame provides the essential support and stability for your entire kitchen island. Use 2×4 lumber to construct a sturdy rectangular frame that matches the footprint of your cabinet boxes. Lay the 2x4s flat rather than on edge; this creates a wider footprint for stability, conserves vertical space, and allows for easier leveling. Assemble the frame using wood glue and long screws or pocket holes.
Once the frame is assembled and in position, it’s crucial to level it perfectly. Use a long level and shims generously, especially if your kitchen floor is uneven – a common issue in older homes. Place shims wherever gaps exist between the base and the floor until the frame is perfectly level in all directions. Secure the base to the subfloor using long wood screws, ensuring they penetrate deeply for maximum stability. If you have a floating floor, you may need to carefully remove a section to properly anchor the island directly to the subfloor, ensuring it won’t shift over time.
Step 4: Install Drawer Slides and Build the Framework
Now it’s time to integrate the cabinet boxes onto the leveled base and prepare for drawers. Carefully lift and place your assembled cabinet boxes onto the base frame, securing them together with pocket screws and additional blocking where needed to create a single, robust unit. Ensure they are perfectly aligned and level with each other.
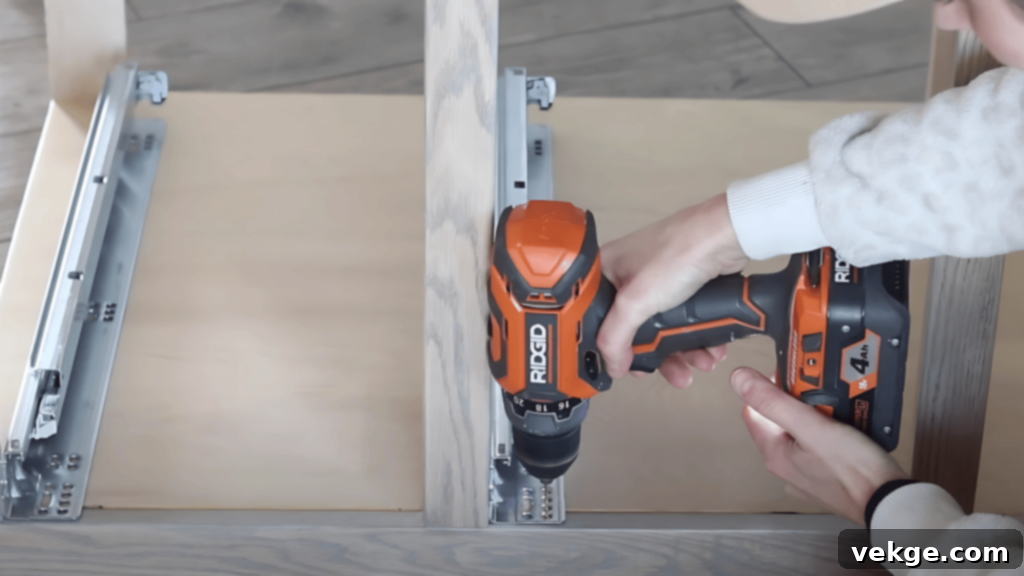
Next, install the soft-close undermount drawer slides, such as the recommended Blum Tandem Plus. For easier installation and precise alignment, it’s often helpful to flip the cabinet boxes on their side. Pre-drill all holes to prevent splitting and ensure the slides are set back a minimum of 1/8 inch from the front edge of the cabinet opening to allow for the drawer face. Precise measurements are key here; even a slight misalignment can cause drawers to stick or operate unevenly. For wider cabinets, like a microwave housing unit, reinforce the framework with additional blocking or support beams to prevent sagging or shifting over time.
Step 5: Add Electrical Wiring and Install the Microwave
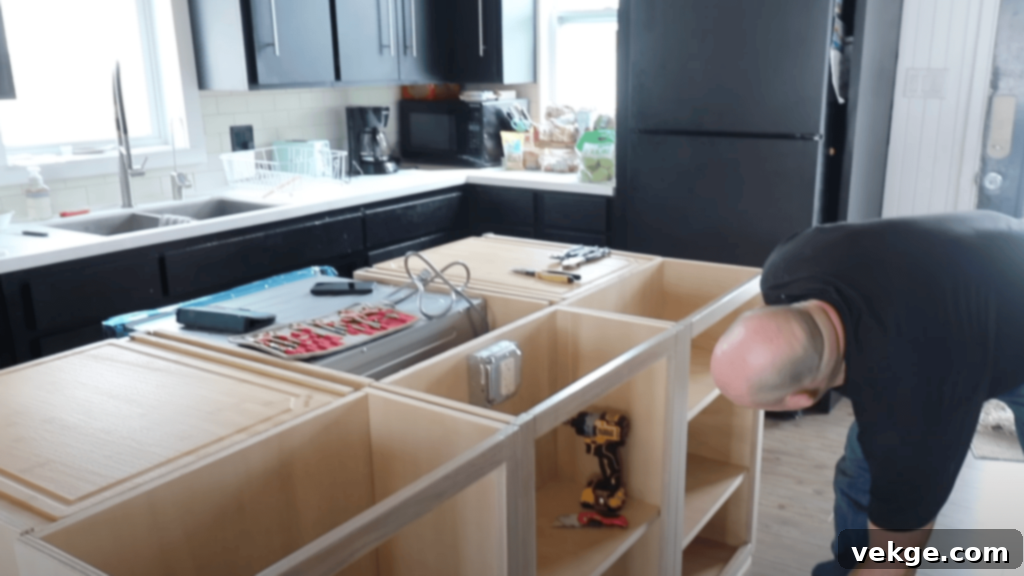
For safety and compliance with electrical codes, it’s highly recommended to call a licensed electrician for this step. They will properly wire an outlet inside the designated cabinet for your microwave, and any additional outlets you plan for the island’s exterior (e.g., for charging devices or small appliances). Ensure the wiring is correctly routed and secured within the cabinet structure.
Once the electrical work is complete, carefully install your microwave into its housing. Double-check your initial measurements to ensure the microwave’s width perfectly matches the face frame opening. The microwave should slide in snugly but without force, allowing for proper ventilation. Secure the microwave according to its manufacturer’s instructions. Having an electrician handle this ensures all connections are safe, up to code, and properly grounded, preventing potential hazards and ensuring long-term functionality.
Step 6: Attach the Countertop and Sides
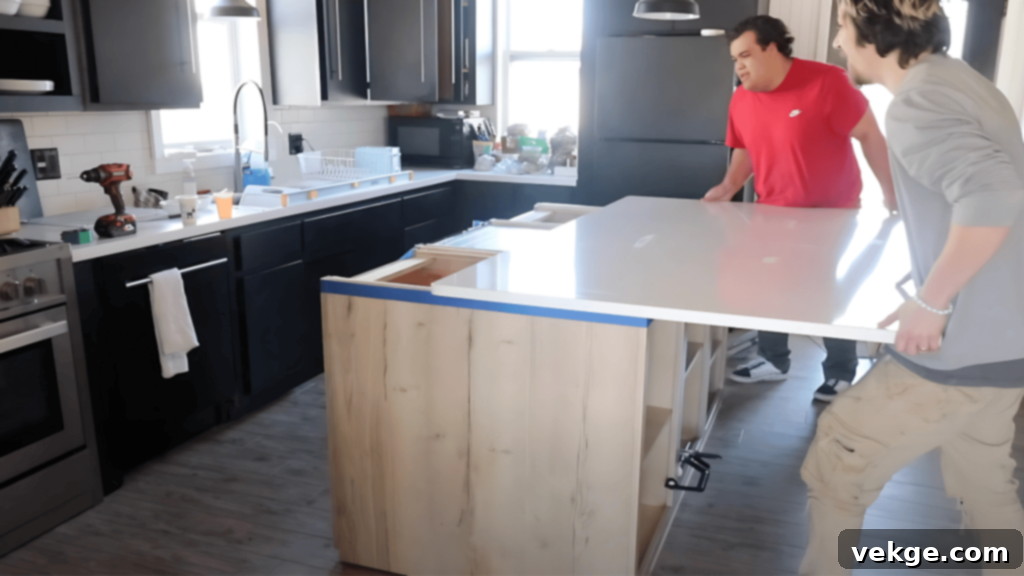
With the cabinet boxes and framework securely in place and perfectly level, it’s time to add the finishing panels and prepare for the countertop. Measure and cut ¾-inch thick panels to cover all exposed sides of the island. These panels provide a clean, finished look and help tie the entire structure together. Attach them securely from the inside of the cabinets using screws, ensuring the screw heads are countersunk. Take extra care to ensure these panels are plumb and flush with the cabinet fronts.
Once the side panels are installed, you can precisely measure and order your countertop material (butcher block or quartz). If using a heavy material like quartz, consider having it professionally templated and installed to ensure a perfect fit and safe handling. For butcher block, you can cut and finish it yourself. Secure the countertop to the cabinet frames using appropriate brackets or L-brackets from underneath, allowing for some expansion and contraction if using wood. Ensure the countertop is perfectly level and aligned before final securing.
Step 7: Finish with Trim, Drawers, and Final Touches
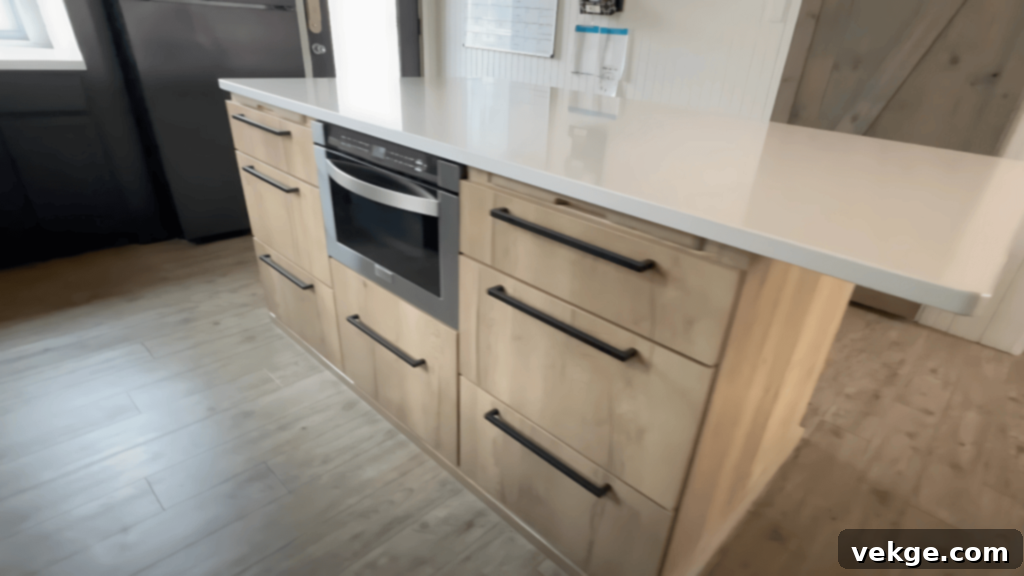
This is where your island truly comes to life. Begin by installing the base trim around the bottom of the island. If your floor has slight variations, cut the trim at an angle to mask any unevenness, creating a seamless, custom look. Use a miter saw for precise corner cuts. Secure the trim with finish nails and wood glue.
Next, construct your drawer boxes and attach them to the previously installed soft-close drawer slides. Then, attach the drawer fronts. A great trick for perfect placement is to use carpet tape to temporarily secure the drawer front in position before permanently attaching it with screws from the inside. Repeat this process for all cabinet doors, installing European hinges for soft-close functionality and easy adjustment. Use a hinge jig for consistent and precise placement.
Finally, add your chosen hardware: drawer pulls, handles, and any internal storage organizers you desire. Apply your chosen finish, whether it’s paint, stain, or a clear coat, ensuring it matches your existing kitchen cabinetry. Fill any nail holes with wood putty, sand smooth, and then clean the entire island thoroughly. These final touches will elevate your DIY island to a professional-grade masterpiece.
For a more detailed visual walkthrough of the process, check out this excellent DIY Kitchen Island tutorial:
Tips for a Successful Kitchen Island Build and Enhanced Functionality
Building a kitchen island is a significant project, and a few expert tips can make all the difference, ensuring not only a successful build but also maximum functionality and longevity. Here’s how to master your kitchen island construction, address common challenges, and integrate premium features.
Advanced Features to Maximize Utility
Elevate your custom kitchen island by incorporating innovative features that enhance convenience, efficiency, and entertainment. Thinking beyond basic storage can transform your island into a truly dynamic hub:
- Mobile Islands with Locking Casters: For kitchens that need flexibility, adding heavy-duty locking casters allows you to easily move the island for extra floor space, deep cleaning, or reconfiguring your workspace for different tasks. Choose casters designed for heavy loads.
- Built-in Sinks with Dedicated Plumbing: A secondary prep sink on your island can dramatically improve workflow, offering an additional station for washing vegetables, filling pots, or quickly cleaning small items without crowding the main sink. Ensure proper plumbing lines are routed during the planning phase.
- Integrated Electrical Outlets and USB Charging Stations: Essential for modern kitchens, built-in outlets provide convenient power for blenders, mixers, or even a coffee machine. Include USB ports for easy phone and tablet charging, making your island a true tech-friendly zone. Plan for these during the wiring step.
- Built-in Wine Cooler or Beverage Refrigerator: For those who love to entertain, a compact wine cooler or beverage fridge neatly tucked into the island offers easy access to drinks, freeing up space in your main refrigerator.
- Breakfast Bar Overhang for Seating: Extend your countertop with an overhang (typically 12-15 inches deep) to create a comfortable breakfast bar or casual dining area. This instantly adds versatile seating for quick meals, homework, or socializing. Ensure adequate support for the overhang.
- Integrated Waste Management: Design a pull-out cabinet that houses a trash can and recycling bin, keeping waste out of sight but easily accessible during food prep.
Troubleshooting Common Issues During Installation
Even with careful planning, challenges can arise. Knowing how to address them quickly will keep your project on track:
- Uneven Floors: This is a common culprit for wobbly islands. Use plenty of shims (plastic or wood) under your base frame. For larger discrepancies, consider using adjustable furniture legs hidden beneath the base trim, which allow for fine-tuning the height of each corner. Always check with a level during every step.
- Cabinet Alignment and Leveling: It’s crucial that all cabinet boxes are perfectly level and plumb before securing the countertop. Continuously use a level horizontally and vertically. Small adjustments with shims between cabinet boxes or under the base can correct slight misalignments. Secure cabinets to each other with screws through the stiles and blocking.
- Island Stability for Heavy Countertops: If you’re installing a heavy countertop like granite or quartz, ensure the island is incredibly stable. Secure the base directly to the floor joists with long lag screws and metal brackets for enhanced stability. Cross-bracing within the cabinet framework also helps distribute weight and prevent sagging over time.
- Preventing Lateral Movement and Sagging: To stiffen the overall structure, install cross-bracing (strips of wood) between cabinet frames, especially across wider sections or underneath areas without full cabinet backs. This prevents the island from swaying or twisting, ensuring it feels solid for years to come.
- Ensuring Permanent Joints: While screws provide strong mechanical fasteners, adding construction adhesive along with screws for permanent joints (like connecting cabinet boxes or securing the base frame) creates an even stronger, more durable bond that is less likely to loosen over time due to daily use or changes in temperature/humidity.
Where to Buy Materials for Your DIY Kitchen Island
Sourcing the right materials is key to the success and quality of your DIY kitchen island. Depending on your budget and desired finish, you’ll likely visit a variety of suppliers. Here’s a breakdown of where to find everything you need:
- Home Improvement Stores (Home Depot, Lowe’s):
- What to buy: Your go-to for foundational materials. Find high-quality plywood (¾-inch for cabinet boxes, shelves, and side panels), various types of screws (wood screws, pocket hole screws), essential tools (drills, saws, levels, measuring tapes), 2×4 lumber for the base frame, and a wide selection of trim wood and molding. They also offer a range of paints, stains, and clear coats for finishing.
- Why they’re great: Convenient, often have sales, and offer a broad selection of basic construction materials and tools. Staff can often provide basic project advice.
- IKEA:
- What to buy: If you’re looking for a simpler approach to cabinet construction, IKEA kitchen cabinet frames (like the SEKTION series) are an excellent, cost-effective option for the core of your island. You can then customize the fronts and finishes.
- Why they’re great: Affordable, modular, and easy to assemble, saving you time on building custom cabinet boxes. You can often integrate their drawer systems directly.
- Local Woodworking Stores or Lumberyards:
- What to buy: For premium materials like Red Oak (or other hardwoods for face frames, trim, and custom accents), specific types of plywood (e.g., cabinet-grade birch plywood), and specialty trim profiles not found at big-box stores. They may also carry butcher block countertops in various wood species.
- Why they’re great: Offer higher quality wood, more variety, and expert advice. The staff are often woodworkers themselves and can provide invaluable insights.
- Online Suppliers (Amazon, Wayfair, CabinetParts.com, etc.):
- What to buy: The best place for specialized components like high-quality soft-close drawer slides (e.g., Blum Tandem Plus, Accuride), European hinges, unique cabinet hardware (pulls and handles), internal drawer organizers, and advanced electrical components (USB outlets, pop-up outlets).
- Why they’re great: Vast selection, competitive pricing, and the convenience of home delivery for items that might be hard to find locally.
- Stone Dealers and Countertop Fabricators:
- What to buy: If you’re opting for a high-end countertop like a quartz slab, granite, or marble, these specialists are essential. They will help you select the slab, template your island for an exact fit, and professionally install the heavy material.
- Why they’re great: Expertise in stone selection, fabrication, and safe installation. They ensure a perfect, durable, and beautiful countertop finish.
By leveraging these different sources, you can balance cost, quality, and specialized needs to create the perfect custom kitchen island.
Conclusion: Your Dream Kitchen Awaits
Building your own kitchen island is more than just a home improvement project; it’s a transformative undertaking that empowers you to create a space perfectly tailored to your lifestyle. As I’ve experienced firsthand, this DIY journey is one of the smartest upgrades you can make, offering not only significant financial savings but also the immense satisfaction of crafting something truly unique.
You’re not merely adding a piece of furniture; you’re designing a functional hub that enhances every aspect of your kitchen experience. Imagine the joy of having abundant storage that neatly organizes all your kitchen essentials, a spacious prep area that makes cooking a delight, or a cozy spot for morning coffee and casual conversations. When you learn how to build a kitchen island, you’re not just following a set of instructions; you’re taking creative control of your living space and molding it to fit your exact needs and aesthetic preferences.
I understand that tackling a project of this scale can seem daunting. Every expert started somewhere, and with this detailed guide, you have all the knowledge and confidence to begin. Take it one step at a time, celebrate each small victory, and embrace the learning process. The pride you’ll feel every time you use your custom-built island will be an incredible reward, reminding you of your ingenuity and effort.
Don’t let a cramped kitchen hold you back any longer. Your dream kitchen, complete with a perfectly designed island, is within reach. If you’re ready to continue your home transformation journey, be sure to check out my other DIY kitchen ideas to keep the momentum going and unlock even more potential in your home!
