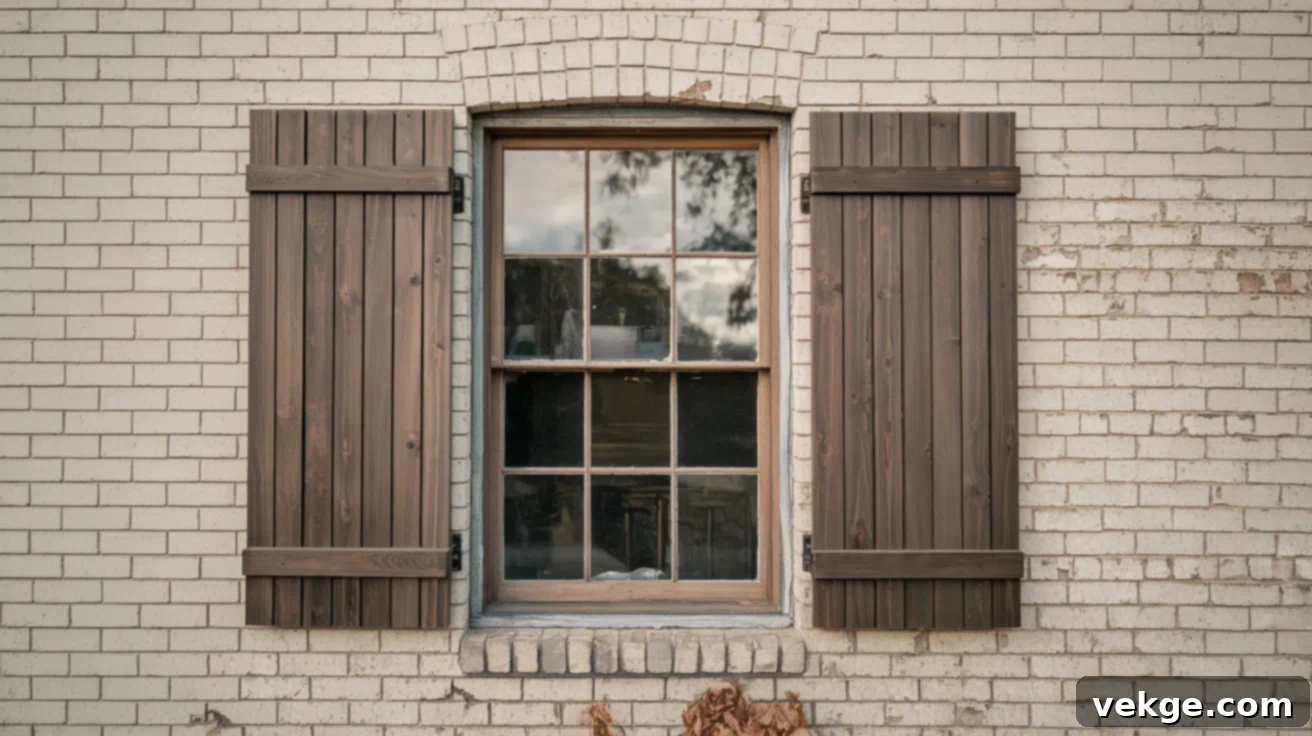
DIY Board and Batten Shutters: A Comprehensive Guide to Building and Installing Your Own Exterior Shutters
Have you ever looked at your home’s exterior and felt like your windows were missing a touch of warmth or character? You’re certainly not alone. Many homeowners seek ways to enhance their curb appeal and add a distinctive, personalized touch to their property. Building your own board and batten shutters is an incredibly rewarding DIY project that achieves just that—adding significant charm, texture, and style without requiring a professional budget.
This detailed guide is crafted from real-world experience, outlining the exact steps I followed and refined to create custom shutters that perfectly complement my home. I’ll walk you through every critical part of the process, from selecting the right lumber and making precise cuts to assembling the panels, applying protective finishes, and securely mounting them to your home. Beyond the construction, you’ll also discover valuable tips on choosing the perfect finish, ensuring proper installation, and implementing long-term care to guarantee your shutters not only look fantastic but also stand strong against the elements for years to come.
Embarking on this project is more than just a home improvement task; it’s an opportunity to invest your time and creativity into a tangible upgrade that elevates your home’s aesthetic. The sense of pride you’ll feel every time you pull into your driveway, admiring the custom shutters you built with your own hands, is truly unparalleled. Let’s start transforming your windows!
What Are Board and Batten Shutters?
Board and batten shutters are a classic and timeless style of exterior window covering, characterized by their elegant simplicity. Fundamentally, they consist of several vertical wooden planks (the “boards”) joined together and stabilized by horizontal or diagonal crosspieces (the “battens”). Typically, you’ll see three or four vertical boards aligned side by side, firmly held in place by two or more battens secured across their back.
This distinct design exudes a clean, traditional, and often rustic look, making them incredibly versatile. They are a quintessential feature of charming cottages, provide an authentic touch to modern farmhouses, and can even lend a sophisticated, organic feel to contemporary architectural styles. Their enduring popularity lies in their ability to add architectural interest and depth to any facade.
While the core design remains consistent, board and batten shutters offer various stylistic interpretations. Some designs feature subtle open gaps between the vertical boards, creating a lighter, more airy appearance. Others are constructed with solid, closed panels for maximum coverage and a more substantial feel. You can also choose between simple, flat-panel shutters or opt for those with a full outer frame, which adds an extra layer of structure, depth, and a more finished look. Understanding these variations allows you to select a style that perfectly aligns with your home’s existing aesthetic and your personal preference.
Essential Materials and Tools You’ll Need
To successfully build sturdy, visually appealing board and batten shutters that are designed to endure outdoor conditions, gathering the right materials and tools beforehand is crucial. Here’s a comprehensive list of everything you’ll need to get started:
- Table Saw or Circular Saw: Essential for precision ripping (cutting along the grain) and crosscutting (cutting across the grain) your lumber to the correct dimensions for both the vertical boards and horizontal battens. Safety is paramount when using these tools.
- Drill: Necessary for driving screws to assemble the shutter components and for creating pilot holes to prevent wood splitting.
- Hammer Drill: Absolutely required if your shutters will be mounted onto hard masonry surfaces like brick or concrete, as it can penetrate these materials effectively.
- Router (Optional, but Recommended): For chamfering or rounding over the edges of your boards. This step adds a professional, finished look and helps prevent splintering, enhancing both aesthetics and durability.
- Clamps: Indispensable for holding boards and battens firmly in place while the wood glue sets, ensuring strong, tight bonds during assembly.
- Measuring Tape: Accuracy is key in woodworking. A reliable measuring tape ensures all your cuts and component sizes are precise, leading to well-fitting shutters.
- Sander or Sandpaper (120 and 220 grit): Vital for achieving a smooth, even surface on all your wood pieces. Starting with 120-grit removes imperfections and tool marks, while finishing with 220-grit prepares the wood for optimal stain or paint absorption.
- Paintbrush or Rag: For the clean and even application of wood stain, sealers, or paint.
- Walnut or Dimensional Lumber (e.g., 1×6 or 1×4): The primary material for the shutter body. Walnut offers exceptional durability and a beautiful natural grain for a premium look, while treated dimensional lumber (like cedar or redwood, or even pressure-treated pine if properly sealed) provides a more budget-friendly and weather-resistant option.
- Outdoor-Rated Wood Glue: Crucial for creating strong, lasting bonds between the battens and vertical boards. Ensure it’s designed for exterior use to withstand moisture and temperature changes.
- Exterior Wood Screws (Stainless Steel or Coated): Essential for securing the battens to the vertical boards. Always choose screws explicitly rated for outdoor use to prevent rust and corrosion, which can stain the wood and compromise structural integrity.
- Dark Walnut Stain or Desired Exterior Stain/Paint: Adds color and richness to your shutters, allowing them to complement your home’s exterior palette. Consider a stain that offers UV protection.
- Outdoor Oil Finish or Clear Exterior Sealer: Provides crucial protection against harmful UV rays, moisture, and general weathering. This layer significantly extends the life and beauty of your shutters.
- Hinges and Pintles: Even if your shutters are decorative, using traditional, sturdy hinges and pintles offers an authentic, functional appearance that greatly enhances their curb appeal.
- Concrete Anchors or Masonry Screws: Specifically for mounting shutters onto brick, concrete, or stucco walls, ensuring a secure and long-lasting attachment.
- Standard Fasteners (for wood siding): If mounting to wood siding or trim, appropriate exterior-grade screws or lag bolts will be needed.
Step-by-Step Guide: Building Your Own Board and Batten Shutters
This five-step guide is designed to be beginner-friendly, walking you through the entire process from initial wood selection to final installation. It’s also easily adaptable, allowing you to customize sizes, styles, and finishes to perfectly match your home’s unique character.
Step 1: Choose and Cut Your Boards
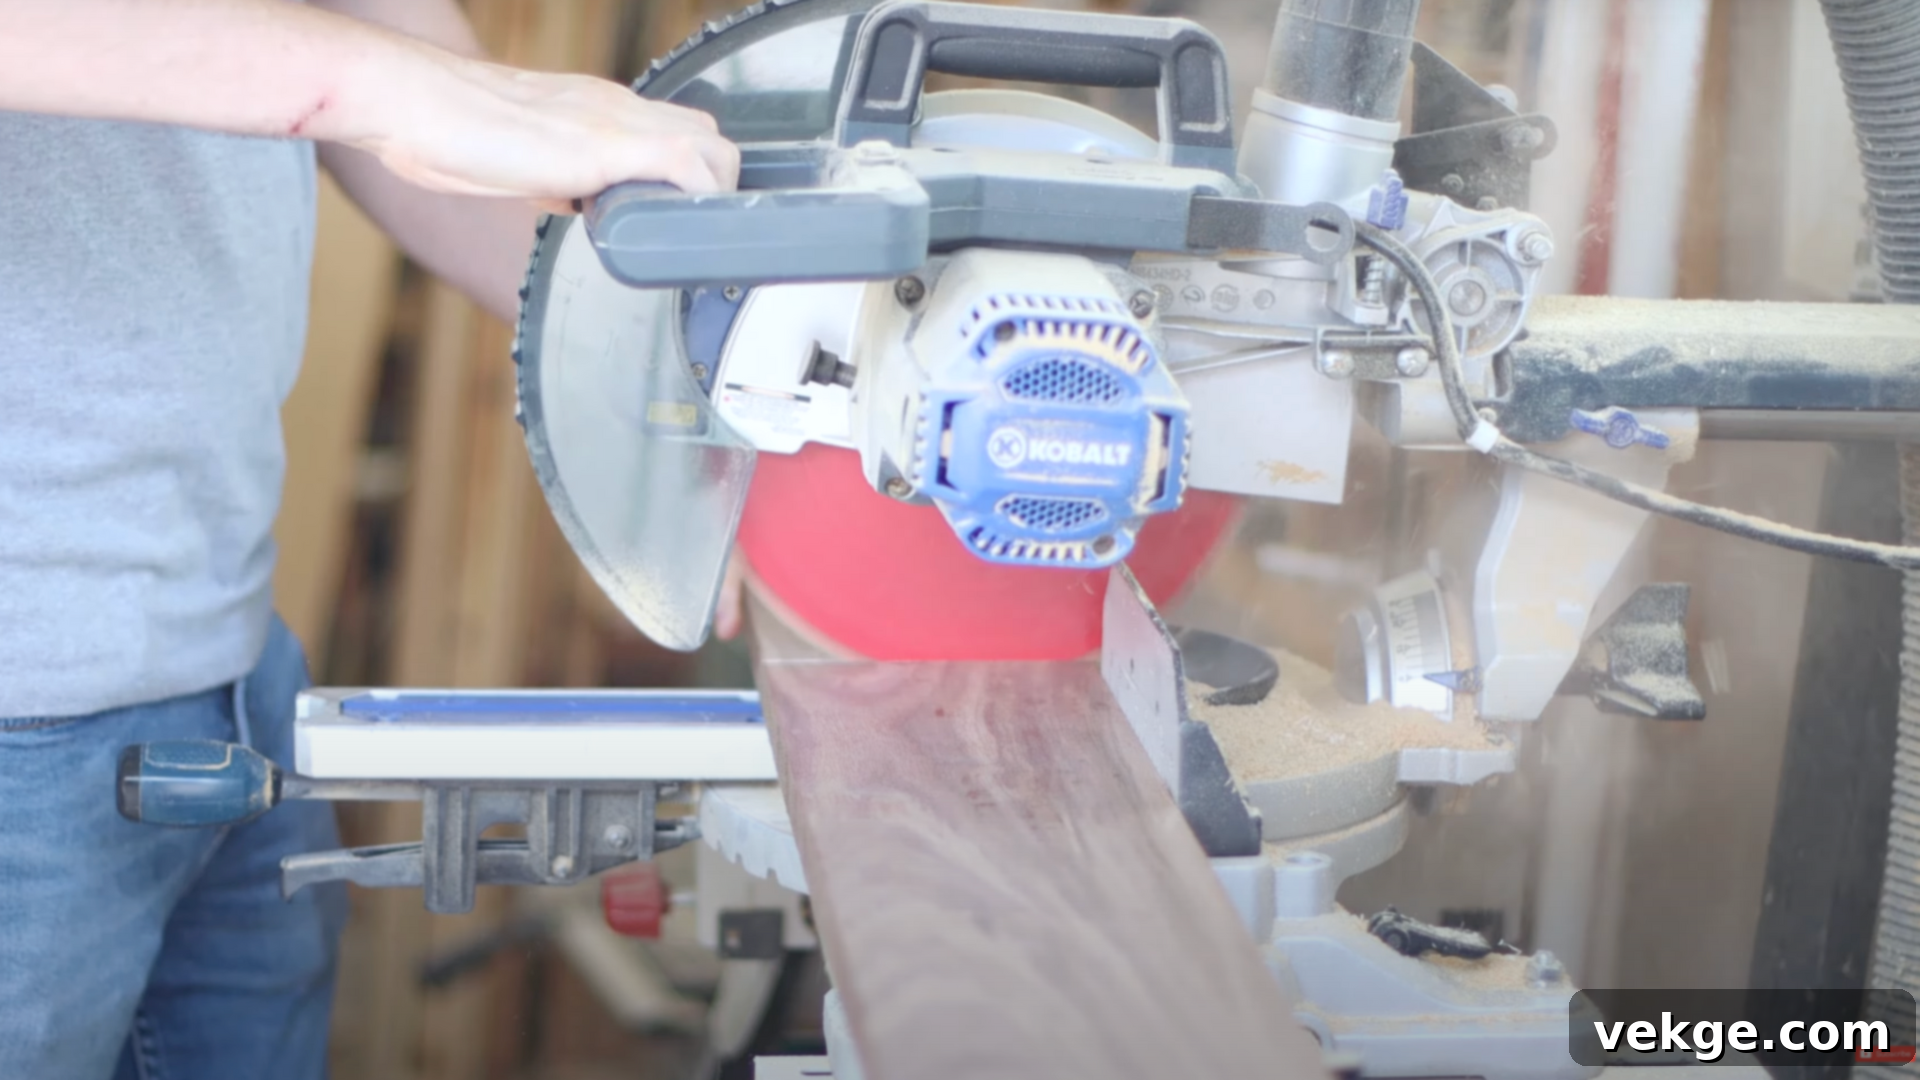
Begin by carefully selecting your lumber. For a premium, durable hardwood option, walnut is an excellent choice known for its stability and beautiful grain. Alternatively, consider using dimensional lumber such as 1×6 or 1×4 cedar, redwood, or even pressure-treated pine (properly dried) for a more budget-friendly yet still weather-resistant solution. The key is to choose wood that is straight, free of significant knots, and suitable for exterior use.
Once selected, cut your vertical boards to the precise height required for your windows. A common width for each vertical board is around 5¼ inches, which you can achieve by ripping raw 1×6 lumber (which typically measures 5.5 inches wide) to size. Lay out three or four of these vertical boards side by side, allowing for small, consistent gaps between them to create the desired overall shutter width. Once you have the full layout, measure and cut two horizontal battens per shutter to span across these vertical boards, ensuring they are long enough to provide ample support without protruding excessively.
Step 2: Chamfer and Sand Each Piece
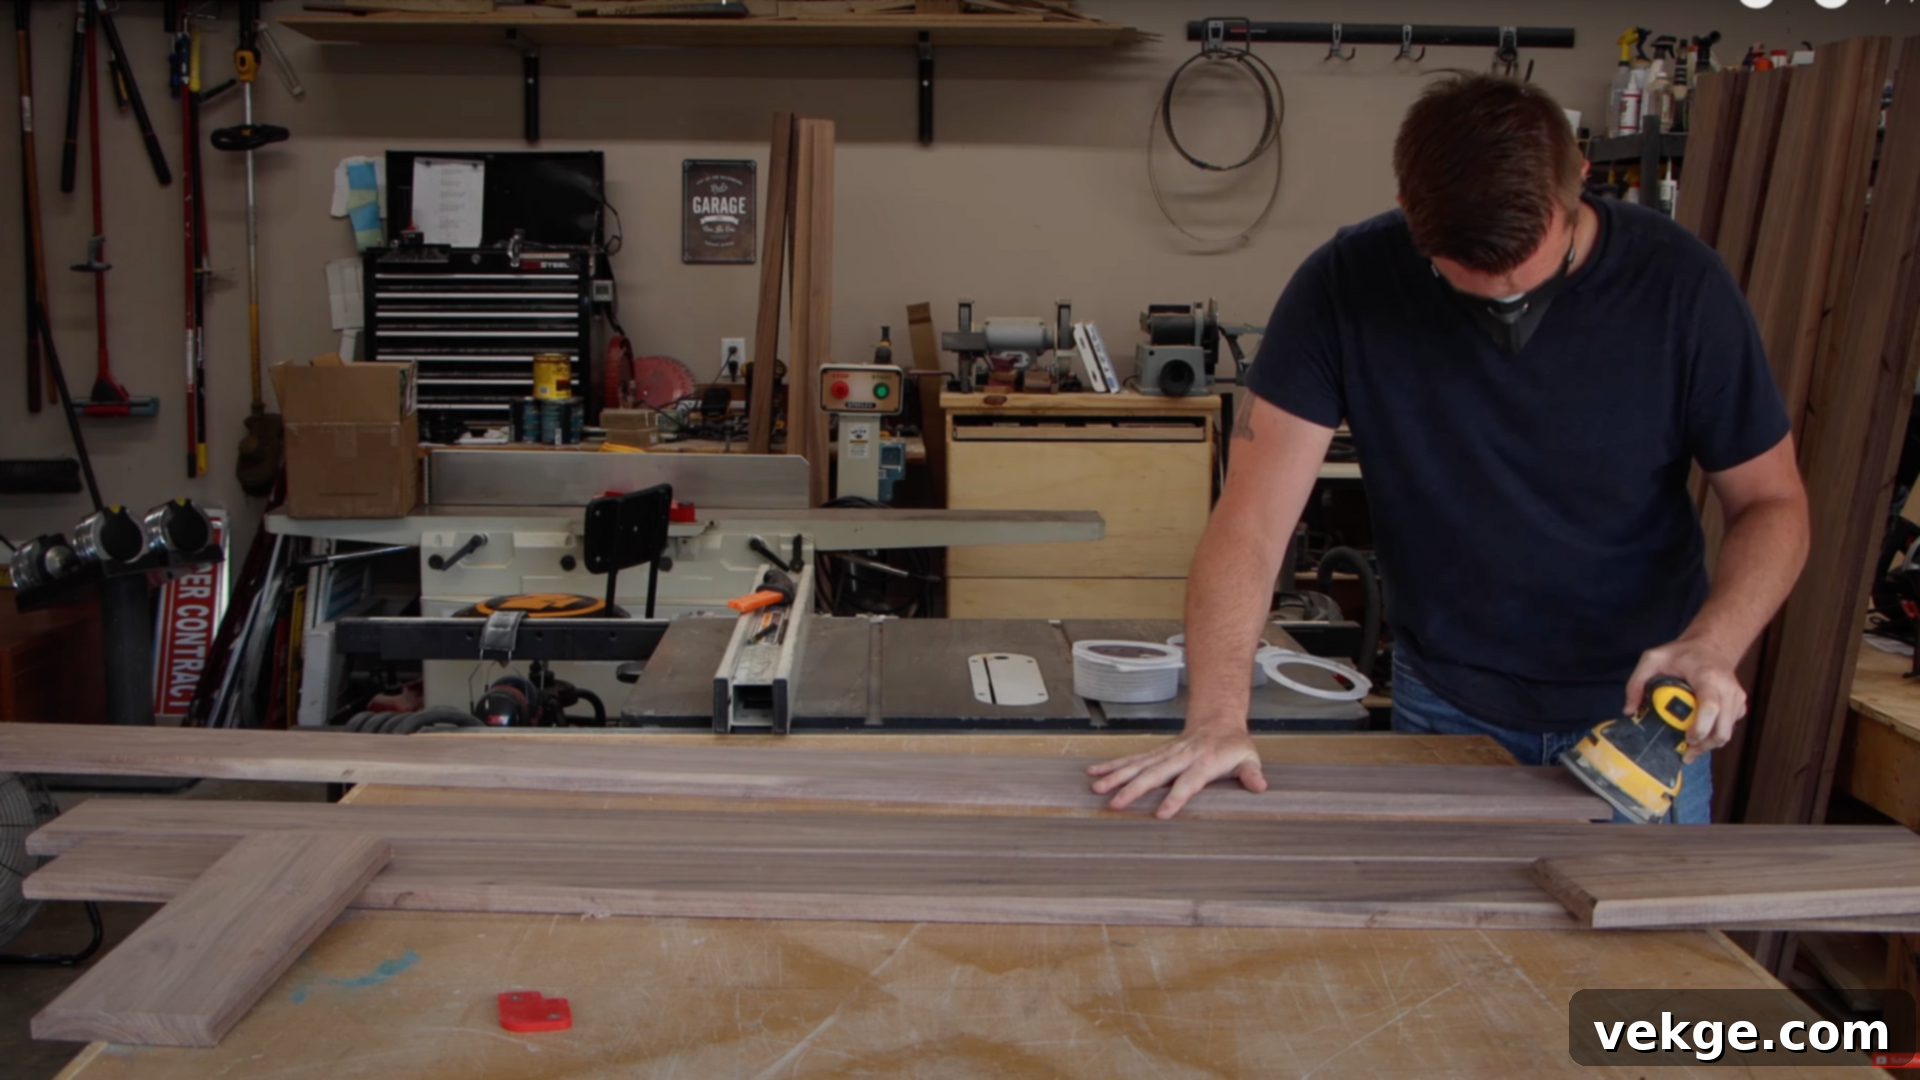
For a truly refined and professional appearance, use a router with a chamfer bit to slightly bevel all the exposed edges of your vertical boards and battens before assembly. This not only adds a decorative touch but also helps prevent splintering and makes the edges more resistant to wear. If you don’t have a router, a block plane or even sandpaper can create a subtle eased edge.
Following this, meticulously sand each individual piece. Start with 120-grit sandpaper to smooth out any saw marks, router imperfections, or rough spots. Then, progress to a finer 220-grit sandpaper to achieve a silky-smooth finish. This thorough sanding is crucial, as it prepares the wood to absorb stain or paint evenly, resulting in a much more beautiful and durable final finish. Ensure all dust is removed after sanding before proceeding.
Step 3: Assemble the Shutters
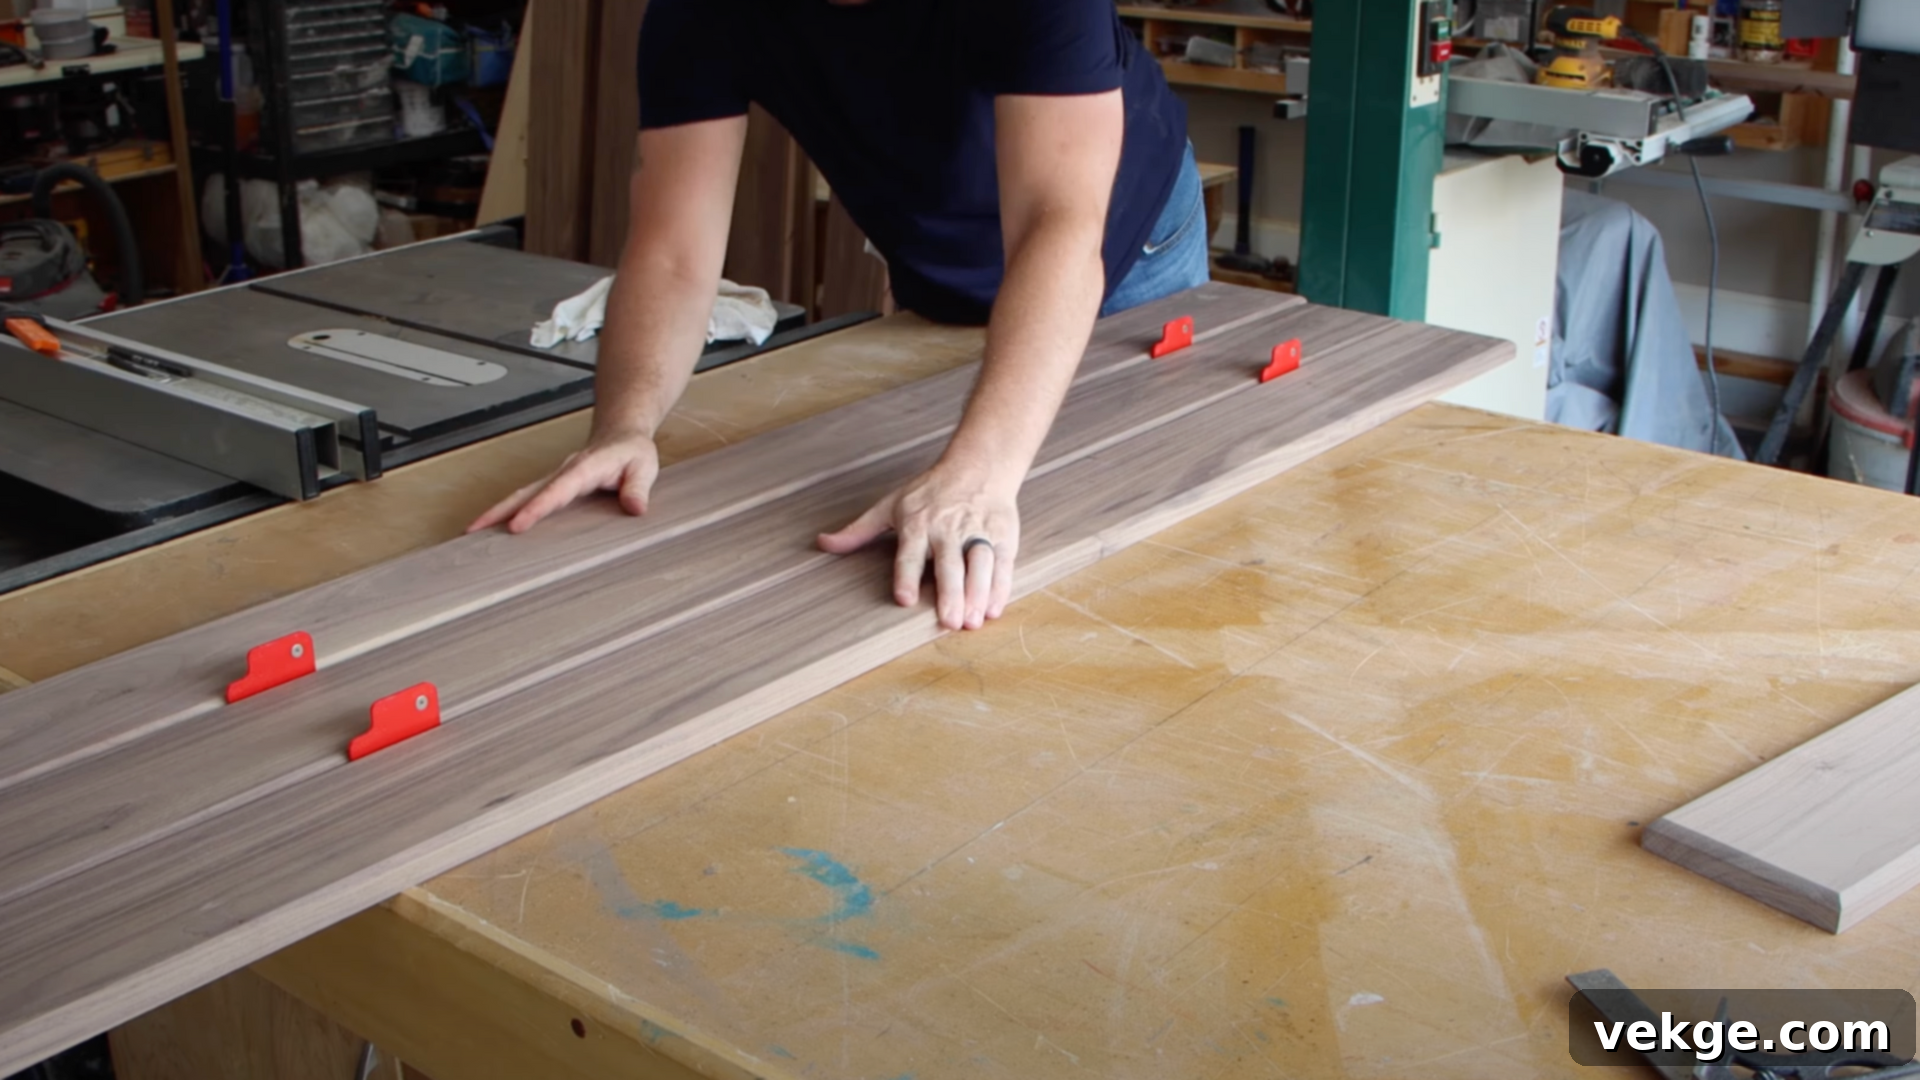
With your boards prepped, it’s time for assembly. Lay your vertical boards face down on a flat, clean surface, maintaining the small, even gaps you determined in Step 1. Position your horizontal battens across the back of the vertical boards, typically one near the top and one near the bottom, about 6-8 inches from each end. Apply a generous bead of outdoor-rated wood glue to the surfaces of the battens where they will contact the vertical boards. Distribute the glue evenly for maximum adhesion.
Once the battens are in place, use clamps to apply firm, even pressure, ensuring the battens are pulled tightly against the vertical boards. While the glue is still wet (or after it has partially set, depending on the glue’s instructions), drive exterior-grade wood screws through the back of the vertical boards and into the battens. Pre-drilling pilot holes for your screws is highly recommended to prevent the wood from splitting, especially near the ends. Crucially, ensure your screws are short enough so they do not protrude through the front face of the shutters. Allow the glue to cure completely according to the manufacturer’s instructions before moving on.
Step 4: Stain and Seal for Weather Protection
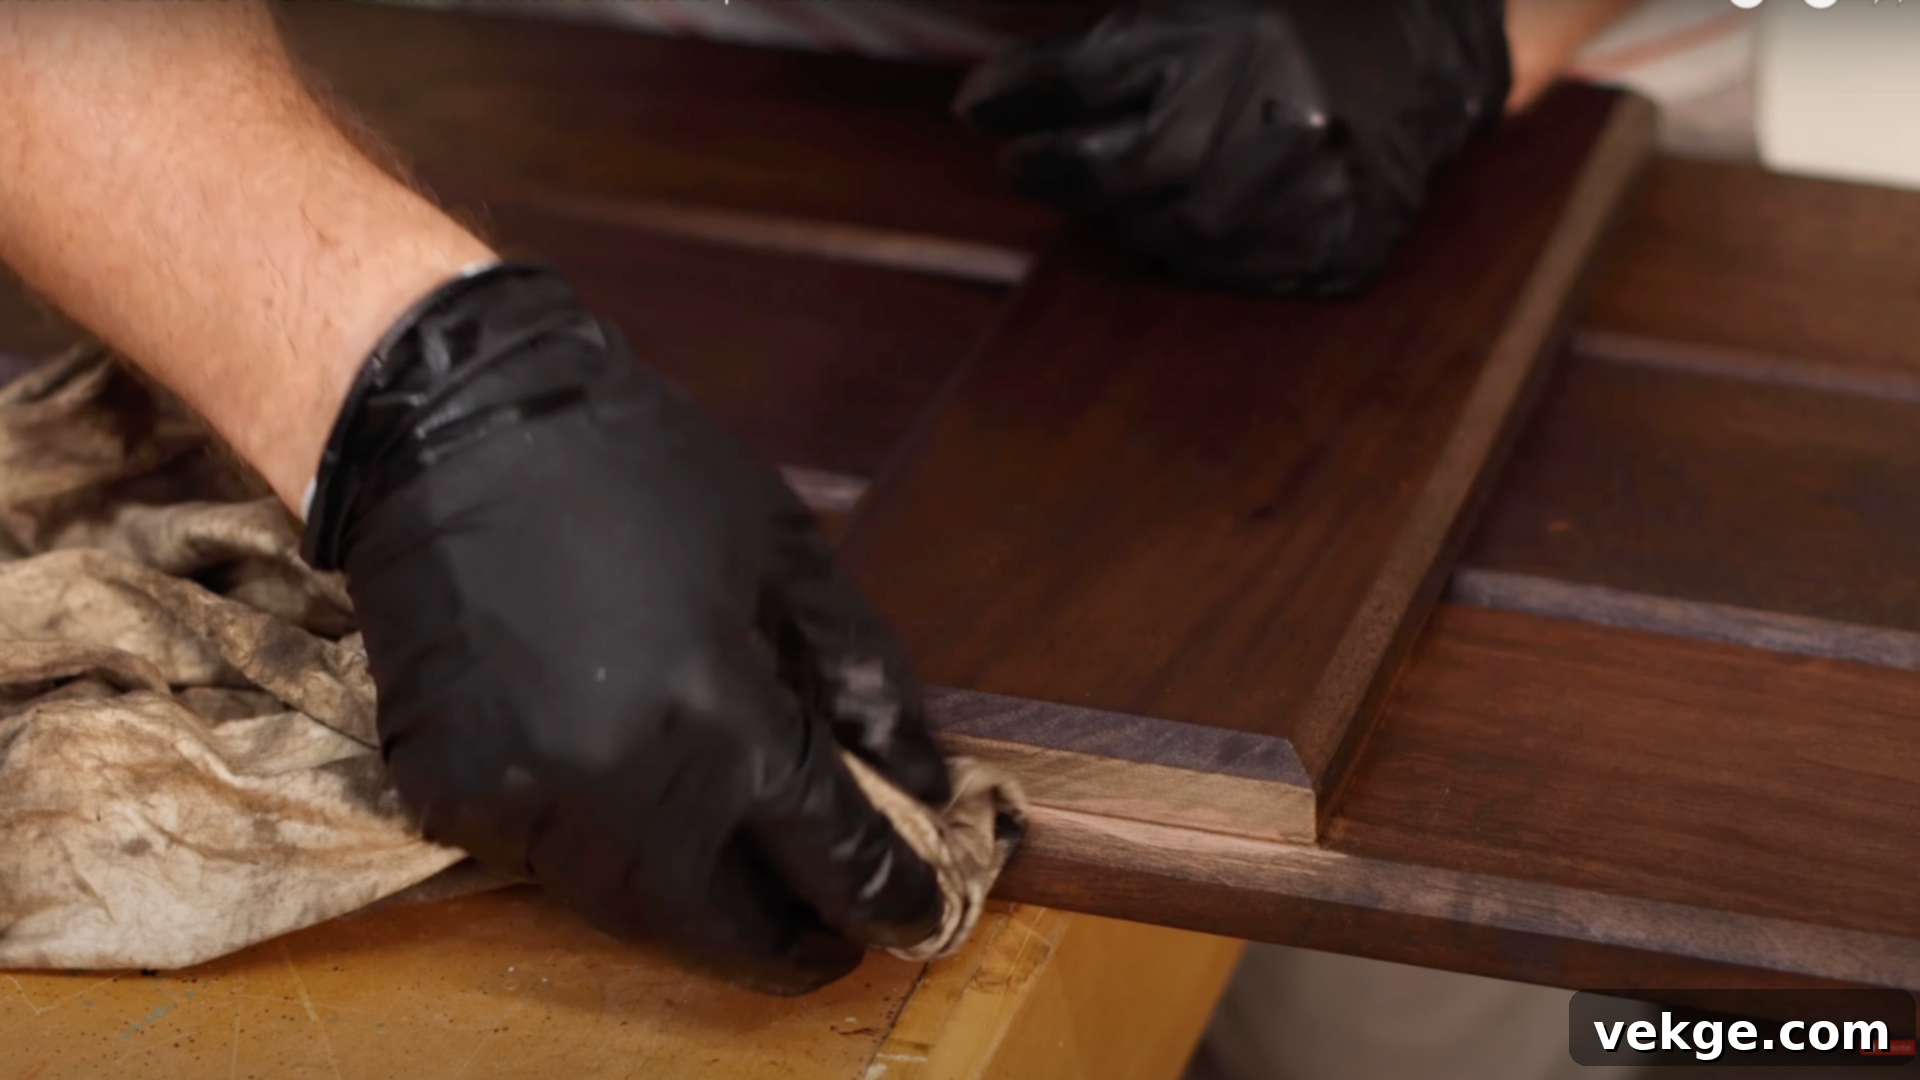
Now that your shutters are assembled, it’s time to protect and beautify them. Choose your desired exterior stain or paint. For a rustic, rich look, a dark walnut stain (as demonstrated in the original video) can beautifully complement brick or light-colored siding. Apply the stain evenly with a paintbrush or rag, working in the direction of the wood grain. Allow it to penetrate and dry completely, typically for 24-48 hours, or as recommended by the product manufacturer. Multiple coats may be applied for a deeper color.
Once the stain is dry, apply a high-quality, outdoor-rated oil sealer or clear finish. This protective layer is vital for shielding the wood from harsh UV rays, preventing moisture absorption, and guarding against rot and mildew. Apply it according to the product instructions, ensuring all surfaces, including edges and end grains, are thoroughly coated. This step is critical for extending the life and maintaining the appearance of your shutters. Remember to reapply this protective finish periodically over time, as part of your regular maintenance, to ensure continuous protection against the elements.
Step 5: Mount the Shutters to the Wall
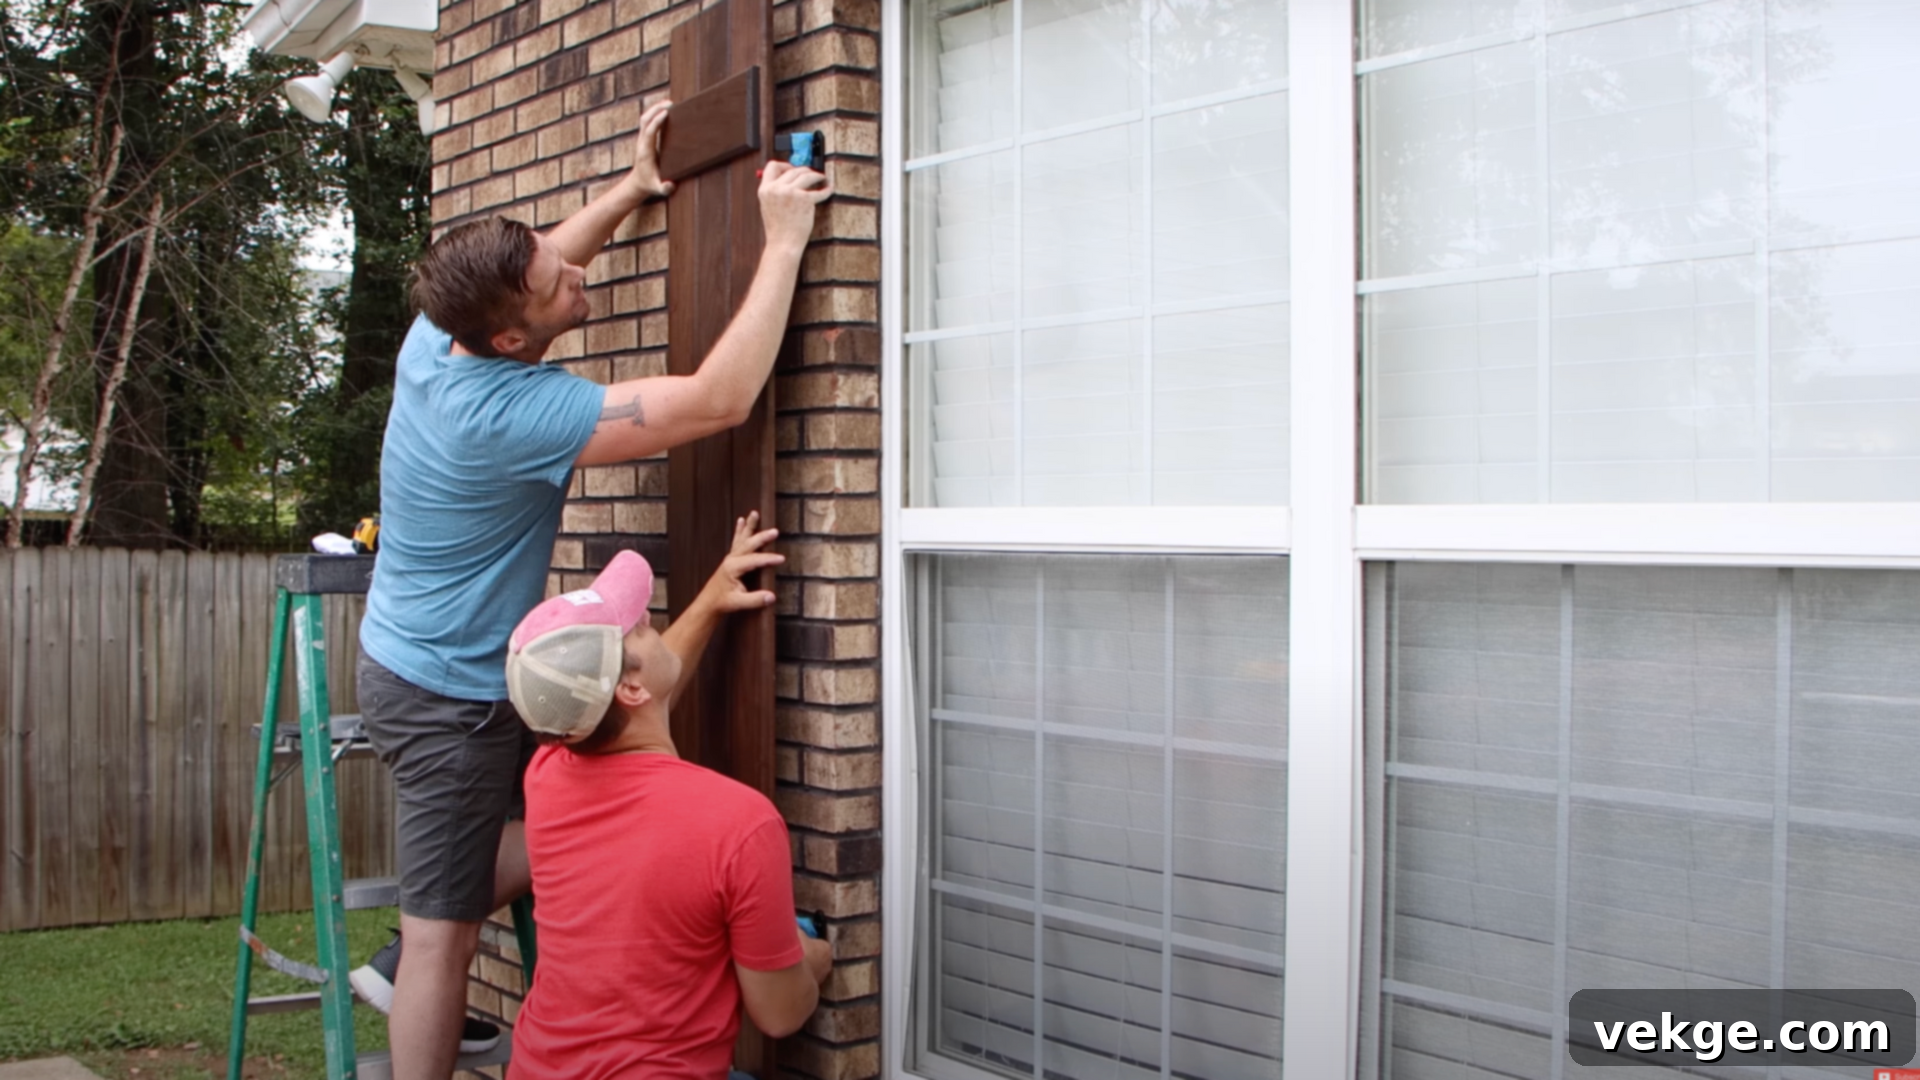
The final step is to securely mount your beautiful new shutters to your home. Even if your shutters are primarily decorative, attaching traditional hinges and pintles will give them an authentic, “working” look that significantly enhances their charm. Begin by temporarily taping the pintle (the stationary part that attaches to the house) and hinge (attached to the shutter) together. Position them accurately on your shutter and against your window frame to mark the precise drilling locations for the pintles on the wall and the hinges on the shutter.
If you are mounting your shutters onto a brick, stone, or concrete wall, a hammer drill is essential. Drill the marked holes to the appropriate depth and width for your concrete anchors or masonry screws. For wood siding or trim, standard exterior-grade screws or lag bolts will suffice, often requiring pre-drilled pilot holes. Once the holes are ready, secure the pintles to the wall using the appropriate fasteners. Then, attach the hinges to your shutters. Finally, carefully hang the shutters by aligning the hinges with the pintles, ensuring they are level and securely in place. Take a step back and admire your handiwork!
For a visual walkthrough and deeper understanding, you can check out the YouTube video that inspired this guide:
Finishing Your Board and Batten Shutters: Aesthetics and Protection
Once your shutters are expertly constructed, the finishing process is where you truly bring your vision to life. The right finish not only protects the wood from harsh weather conditions but also dictates the overall style and personality of your new exterior feature.
Paint, Stain, or Clear Sealer: Choosing Your Finish
- Paint: Offers full, opaque coverage, allowing for a vibrant splash of color that can dramatically alter your home’s facade. However, paint requires careful surface preparation and can be prone to peeling, chipping, or fading over time, necessitating periodic reapplication.
- Wood Stain: Designed to penetrate the wood fibers, stain highlights and enhances the natural grain and texture of the wood while providing excellent protection against UV damage and moisture. Stains come in a wide array of colors, from transparent tints to semi-transparent and solid options, offering versatility in achieving your desired look while still appreciating the wood’s inherent beauty.
- Clear Sealers (or Outdoor Oil Finishes): These finishes protect the wood without significantly altering its natural color or grain. They are perfect for those who want to showcase the inherent beauty of the wood, providing a barrier against the elements and UV rays. A clear oil finish, like the one recommended, deeply nourishes the wood while offering robust weather resistance.
It’s generally recommended to apply your chosen finish after all sanding is complete but before the shutters are exposed to the elements. While you can stain or paint before or after assembly, applying it to individual pieces before assembly helps ensure coverage in tight corners and edges, sealing the entire piece more effectively for long-term durability. Always ensure the wood is clean and dry before applying any finish.
Styling Ideas to Complement Your Home
Your choice of finish and overall design can profoundly influence the character of your shutters and, by extension, your entire home. Consider these styling ideas:
- Rustic Farmhouse: Achieve this look with a dark, rich stain (like dark walnut or ebony) on rough-sawn or subtly textured wood. This emphasizes the natural imperfections and robust character of the lumber.
- Coastal Charm: Opt for soft, muted tones such as crisp white, pale blue, seafoam green, or a weathered gray paint. These colors evoke a breezy, beachside feel and pair beautifully with light-colored siding or natural stone.
- Classic Cottage: Embrace a whimsical and inviting aesthetic with pastel tones—think sage green, light yellow, or soft lavender. A semi-transparent stain that allows some wood grain to show through adds to the traditional charm.
- Modern Minimalist: For a sleek, contemporary home, consider bold choices like matte black, deep charcoal gray, or even a natural clear finish on high-quality wood like cedar. Clean lines and minimal hardware will complete this sophisticated look.
- Traditional Elegance: A deep, rich stain that matches your front door or trim can create a cohesive and timeless appeal. Consider classic browns, mahogany tones, or even a dark forest green.
The best results come from selecting a look that harmonizes with your home’s existing color palette, architectural style, and surrounding landscape. Take samples, test colors, and visualize how the shutters will integrate with your overall exterior design.
Common Mistakes to Avoid During Your DIY Shutter Project
Even small errors in a woodworking project, especially one destined for the outdoors, can lead to significant problems down the line, affecting both the aesthetics and longevity of your shutters. Being aware of these common slip-ups can save you time, effort, and money:
- Skipping Pre-Drill Holes: This is a frequent oversight that can lead to disastrous results. Driving screws directly into wood, especially near ends or edges, can cause the wood to split and weaken the crucial connections between boards and battens. Always pre-drill pilot holes slightly smaller than your screw diameter to guide the fastener and prevent splitting.
- Forgetting to Seal Edges and End Grains: Wood naturally absorbs and releases moisture, with edges and end grains being the most vulnerable points. Unsealed edges act like sponges, rapidly absorbing moisture, which leads to premature warping, swelling, cracking, and ultimately, rot. Ensure every surface, especially the ends of your boards and battens, receives thorough coats of your protective finish.
- Using Non-Weather-Resistant Screws: Standard interior-grade screws are not designed for outdoor exposure. They will quickly rust and corrode when exposed to moisture, not only compromising the structural integrity of your shutters but also staining the surrounding wood with unsightly rust streaks. Always opt for stainless steel or specifically coated exterior-grade screws that are resistant to rust and corrosion.
- Insufficient Drying Time for Finishes: Rushing the finishing process by not allowing stains or sealers to fully cure between coats or before exposure to weather can lead to sticky surfaces, uneven color, and reduced protective qualities. Always adhere to the manufacturer’s recommended drying and curing times.
- Inaccurate Measurements: Even a slight discrepancy in measurements can result in shutters that don’t fit properly in your window opening or appear crooked. Measure twice, cut once, and double-check your dimensions throughout the cutting and assembly phases.
Maintenance Tips for Long-Lasting Board and Batten Shutters
Maintaining your DIY board and batten shutters doesn’t require extensive effort, but consistent, minor attention each year can significantly prevent damage, preserve their beauty, and extend their lifespan. A little preventative care goes a long way:
- Inspect Annually for Fading or Cracking: Make it a habit to visually inspect your shutters once a year, ideally in the spring or fall. Look for signs of UV damage (fading color), peeling or blistering finish, small cracks in the wood, or any tell-tale water stains. Addressing these issues early can prevent more significant problems.
- Clean Off Dirt and Buildup: Over time, dust, pollen, spiderwebs, and environmental grime will accumulate. Use a soft-bristle brush, a damp cloth with mild soap (like dish soap diluted in water), or even a gentle spray from a garden hose to periodically clean off surface dirt and buildup, especially around joints and crevices where grime tends to collect. Avoid harsh chemicals or high-pressure washers, which can damage the finish and wood.
- Reapply Finish as Needed: The protective finish is your shutters’ first line of defense. When the wood starts to look dull, feel dry to the touch, or if you notice the finish wearing thin, it’s time for reapplication. Lightly sand the affected areas with 120-grit sandpaper to create a good surface for adhesion, then reapply your outdoor oil or sealer according to the product instructions. The frequency will depend on your local climate and the type of finish used, but typically every 2-5 years.
- Tighten Loose Hardware: Annually check all hinges, pintles, and mounting screws. Outdoor elements and the natural expansion and contraction of wood can cause hardware to loosen over time. Tighten any screws or bolts to ensure everything remains securely fastened to the wall and that the shutters hang properly.
- Look for Moisture Damage: Pay close attention to the bottom edges and corners of your shutters, as these areas are most prone to water collection and retention. Check for softness, discoloration, or signs of mold/mildew. Good drainage around your windows can also help minimize this risk.
Conclusion: Enjoy Your Custom Board and Batten Shutters
Completing your own DIY board and batten shutters is more than just another home project; it’s an experience that leaves you with a profound sense of accomplishment and a renewed excitement for future creative endeavors. You haven’t just installed a functional or decorative element; you’ve crafted something beautiful, meaningful, and built to last, all with your own two hands and careful attention to detail.
Every piece of advice and every step detailed in this guide has been designed to help you navigate the process smoothly, bypassing common pitfalls and avoiding those minor mistakes that can often derail a project. The result is a set of custom shutters that perfectly reflect your style and add an unparalleled touch of character to your home’s exterior, truly making it stand out in the best possible way.
By following the simple maintenance tips—keeping your shutters clean and conducting a quick annual inspection—you’ll ensure they continue to enhance your home’s curb appeal and serve you well for many seasons to come. This project is a testament to the power of DIY, proving that with the right guidance, you can achieve professional-quality results and create lasting beauty.
If this project has ignited your passion for hands-on home improvement, know that the possibilities are endless. There’s a whole world of crafting and building waiting to be explored. Feel free to explore other detailed, hands-on guides I’ve shared to find your next rewarding project!
