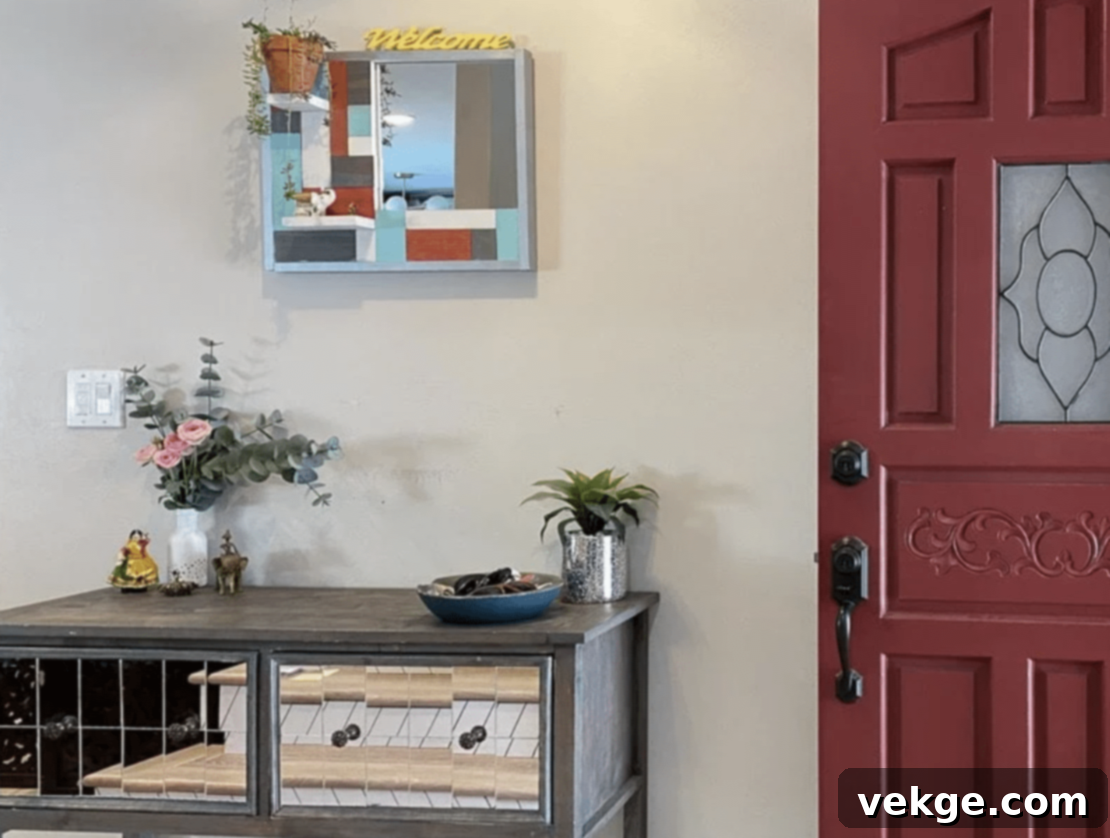
Transform Your Walls with DIY Sleek Cement: A Modern Home Makeover Guide
Dreaming of a home that truly stands out, reflecting your unique style without breaking the bank? Fancy wall treatments often come with hefty price tags, leaving many to settle for less. But what if you could achieve a sophisticated, high-end look that’s also incredibly budget-friendly and easy to create? Enter the world of DIY cement walls.
Trendy, durable, and surprisingly simple to execute, a sleek cement wall can instantly elevate any room. This comprehensive guide will walk you through every step, showing you how to craft an impressive cement wall that will not only wow your guests but also fill you with immense DIY pride. Forget expensive tools or years of experience; with our detailed instructions, transforming your space into a modern sanctuary is well within your reach.
From gathering the essential materials to mastering the art of application and adding those crucial final touches, we’ve got you covered. By the end of this article, you’ll possess all the knowledge and confidence required to infuse any room with this cool, contemporary aesthetic. Are you ready to roll up your sleeves and embark on an exciting home transformation journey?
Why a Sleek Cement Wall is the Ultimate Home Upgrade
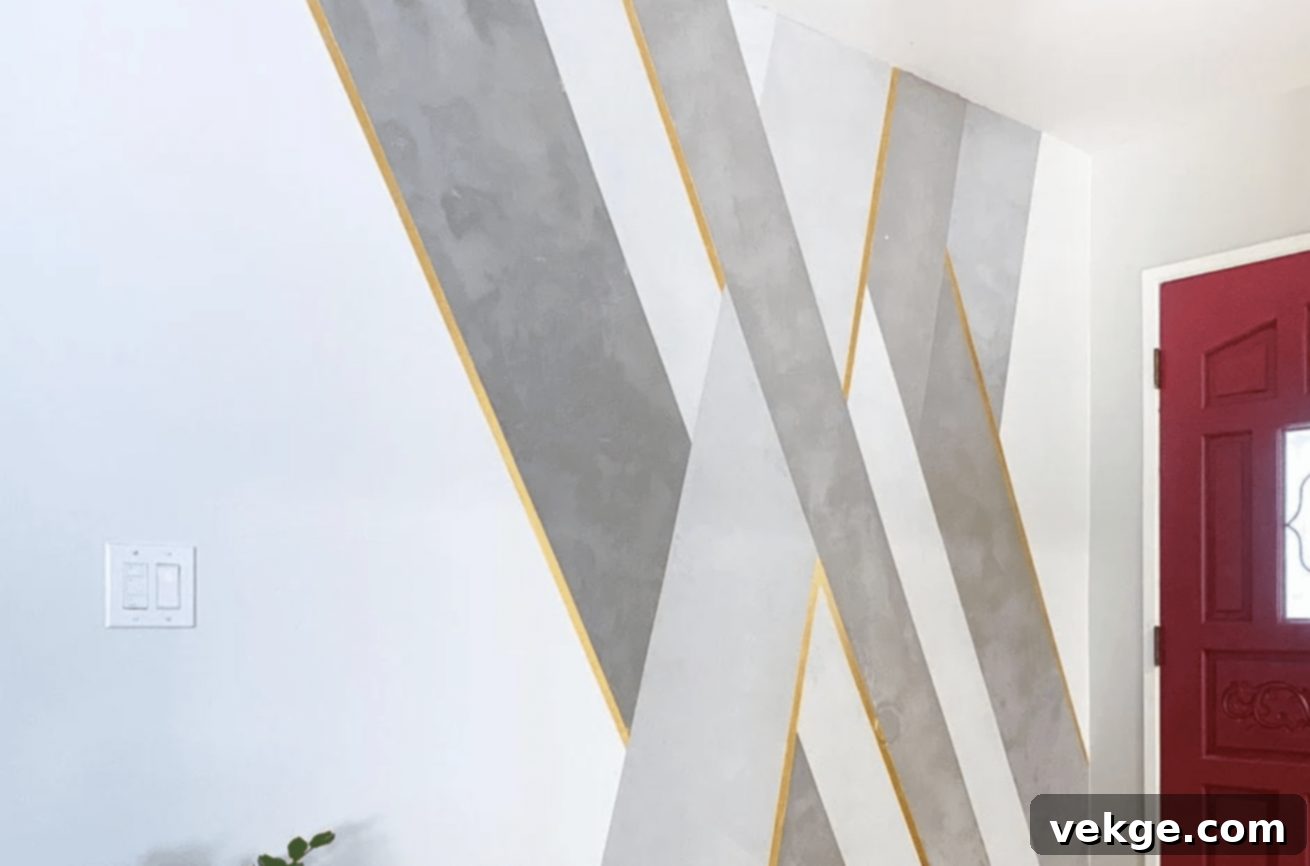
The allure of cement walls in modern home design is undeniable, and their popularity continues to soar. Far from just a utilitarian material, concrete brings an urban edge and a versatile aesthetic that complements various interior styles. Here’s a deeper dive into why a DIY sleek cement wall might be the perfect addition to your living space:
-
Visually Striking and Unique Appeal
Unlike conventional paint jobs or wallpapers, a cement wall makes a powerful statement. Its raw, industrial charm and distinctive texture naturally draw the eye, creating a captivating focal point in any room. Each cement wall develops its own unique patterns and subtle variations, ensuring that your creation is a one-of-a-kind masterpiece, truly setting your home apart.
-
Exceptional Durability and Longevity
Cement is renowned for its incredible strength and resilience. Once properly applied and sealed, your cement wall will be incredibly tough, standing up to daily wear and tear with remarkable ease. It’s far less prone to scuffs, scratches, or fading compared to painted surfaces, ensuring its striking appearance lasts for years to come. This makes it an ideal choice for high-traffic areas or homes with active families.
-
Unbeatable Budget-Friendliness
Compared to other high-impact wall treatments like intricate plasterwork, stone cladding, or designer wallpapers, cement is remarkably cost-effective. The primary materials – cement mix, water, and basic tools – are relatively inexpensive, allowing you to achieve a luxurious, modern aesthetic without the luxury price tag. This DIY project empowers you to create significant visual impact on a modest budget.
-
Versatility to Complement Any Style
One of the most surprising aspects of a cement wall is its incredible stylistic flexibility. While often associated with modern or industrial decor, its neutral palette and organic texture allow it to seamlessly integrate into almost any design scheme. Whether your home boasts a minimalist, rustic, bohemian, or even a classic aesthetic, a cement wall can act as a sophisticated backdrop, enhancing rather than clashing with your existing decor.
-
A Truly Unique, Handcrafted Finish
No two DIY cement walls will ever be exactly alike. The subtle imperfections, the way the light catches the texture, and the slight variations in color create a depth and character that mass-produced finishes simply cannot replicate. This handcrafted quality infuses your space with authenticity and personality, making your home feel truly bespoke.
-
Minimal Maintenance Requirements
Once your cement wall is fully cured and sealed, it requires very little upkeep. Unlike painted walls that may need regular touch-ups, a sealed concrete surface is easy to clean and maintain. A simple wipe-down with a damp cloth is usually all it takes to keep it looking fresh and pristine, freeing up your time for other pursuits.
We’ve witnessed the transformative power of cement walls in diverse settings – from chic urban living rooms and serene bedrooms to bustling modern kitchens and stylish bathrooms. They effortlessly introduce a cool, urban, and sophisticated vibe to any space, serving as a fantastic showcase for your creativity and DIY prowess!
Essential Materials and Tools for Your DIY Cement Wall
Before diving into the application process, assembling the right materials and tools is crucial for a smooth and successful project. Having everything at hand will ensure efficiency and a high-quality finish. Here’s a detailed list of what you’ll need:
| Material/Tool | Purpose/Use | Pro Tip / Further Detail |
|---|---|---|
| Cement mix (e.g., skim coat, microcement, or patching compound) | Forms the base material for the cement wall. Choose a mix designed for thin applications and good adhesion to vertical surfaces. | For a smoother, more refined finish, consider a high-quality skim coat or microcement product. Regular concrete mix is too coarse for this application. Ensure it’s suitable for interior use. |
| White concrete pigment (optional) | Used to lighten the tone of the cement or create accent variations. | Liquid pigments mix more easily and uniformly. Test a small batch first to achieve your desired shade, as dry pigments can be tricky to blend. |
| Painter’s tape (high-quality, low-tack) | Protects edges, baseboards, door frames, and adjoining surfaces from cement splatter. | Invest in good quality painter’s tape to prevent bleed-through and ensure clean lines. Remove tape before the cement fully cures for crisp edges. |
| Trowel (stainless steel, various sizes) | Spreads the cement smoothly across the wall surface and creates texture. | A flexible stainless steel trowel (e.g., 10-14 inches) is essential. A smaller margin trowel is useful for tight spaces. Keep it clean during use. |
| Putty knife / Spreading knife | Helps transfer cement from the mixing container to the trowel and apply in smaller, controlled amounts. | Useful for scooping, detailing, and working in corners. A 4-6 inch flexible blade is versatile. |
| Mixing container (large, sturdy bucket) | Holds the cement mix and water for thorough mixing. | A 5-gallon bucket is typically sufficient. Ensure it’s clean before use to avoid contamination. |
| Drill with mixing paddle attachment | Ensures a consistent, lump-free cement mix. Manual mixing is possible but more strenuous and less effective. | A heavy-duty drill is recommended. Mix thoroughly but avoid over-mixing, which can introduce too much air. |
| Respirator / Dust mask | Protects your respiratory system from inhaling cement dust and fine particles during mixing and sanding. | Always wear a high-quality respirator (N95 or better) when handling dry cement powder. Safety first! |
| Safety glasses / Goggles | Shields your eyes from splashes and dust particles. | Essential for eye protection during all stages, especially mixing and application. |
| Rubber gloves | Protects your hands from the caustic nature of cement and keeps them clean. | Wear durable, chemical-resistant gloves. Cement can dry and irritate skin. |
| Drop cloths / Plastic sheeting | Shields the floor, furniture, and nearby areas from spills, splashes, and dust. | Use heavy-duty drop cloths or plastic sheeting to thoroughly protect your workspace. Tape them down securely. |
| Fine-grit sandpaper (e.g., 180-220 grit) and sanding block | Used for smoothing out rough spots and refining the texture after drying. | A sanding block provides even pressure. Ensure the cement is fully dry before sanding. |
| Clean cloths / Sponges | For cleaning the wall surface, wiping tools, and cleaning up spills. | Have several on hand. Damp cloths are good for initial wall cleaning, dry ones for dust removal after sanding. |
| Primer (optional but recommended) | Improves adhesion of the cement mix to the wall surface, especially on painted walls or drywall. | Use a high-quality acrylic bonding primer specifically designed for plaster or concrete overlays. This step significantly reduces the risk of peeling. |
| Water source and measuring cup | For precise mixing of cement and water. | Accurate measurement is key to achieving the correct consistency. Have a consistent water source nearby. |
Meticulous Preparation: The Foundation of a Flawless Finish
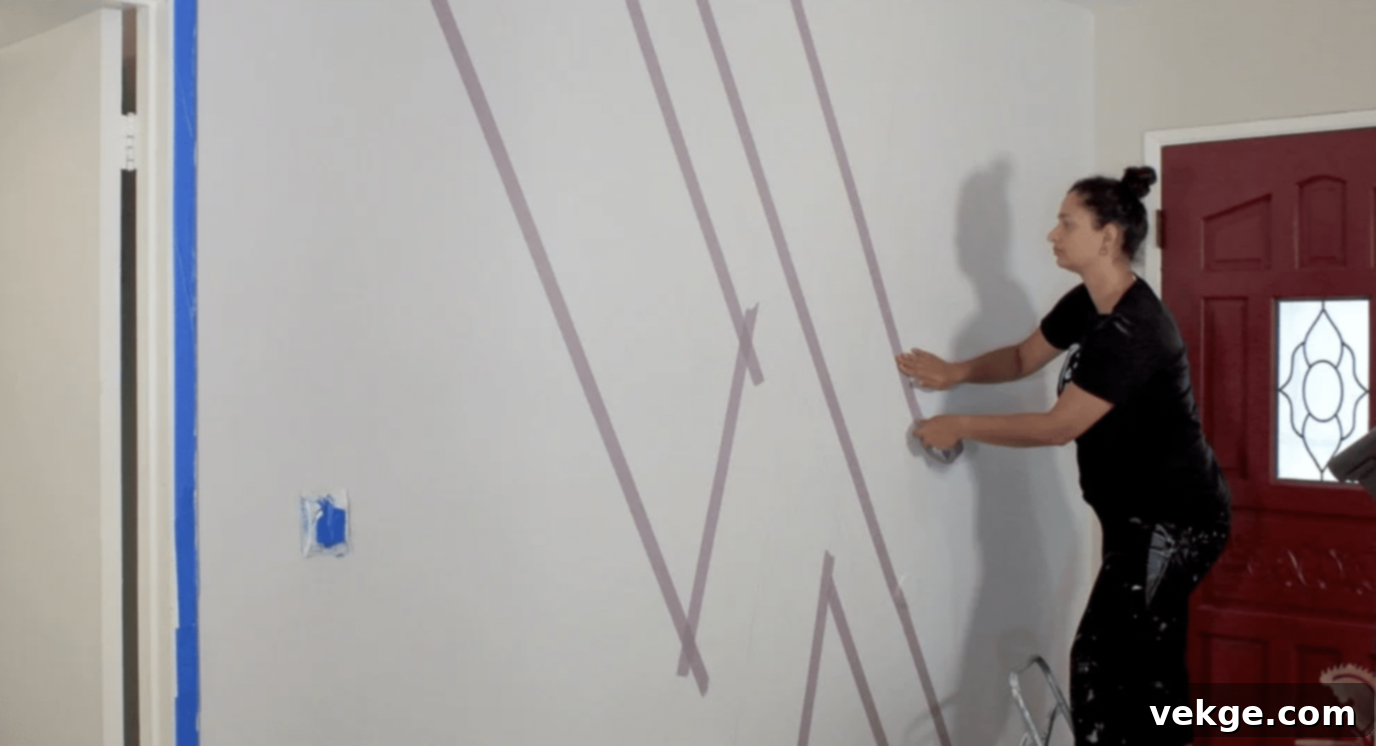
Before any cement touches your wall, thorough preparation is paramount. This stage, though often overlooked, is the most critical for ensuring the longevity and flawless finish of your DIY cement wall. Investing time here will save you headaches later.
-
Clear the Space Completely
Begin by moving all furniture, decor, and anything else away from the wall you plan to transform. If an item cannot be moved, cover it completely with plastic sheeting. You’ll need ample room to work freely, apply cement without obstruction, and minimize the risk of accidental splatters.
-
Remove Obstructions and Ensure Safety
Unscrew and carefully remove all outlet covers, light switch plates, and any other fixtures attached to the wall. Store these small parts in a labeled bag or container to avoid losing them. Crucially, turn off the power to these outlets and switches at your home’s circuit breaker to ensure electrical safety throughout the project.
-
Protect Your Surroundings Meticulously
Lay heavy-duty drop cloths or plastic sheeting across the entire floor area adjacent to the wall, extending outwards sufficiently to catch any drips or debris. Secure the edges with painter’s tape to prevent slipping. Use high-quality painter’s tape to meticulously mask off all baseboards, door frames, window trims, and any adjoining walls you don’t intend to cover. This creates sharp, clean lines and protects surrounding surfaces.
-
Inspect and Repair the Wall Surface
Run your hand over the entire wall surface, feeling for any bumps, holes, cracks, or loose paint. Any imperfections on the underlying wall will likely show through your finished cement layer. Use a putty knife or trowel to scrape off loose paint or wallpaper. Fill any holes or cracks with spackle or joint compound, sanding them smooth once dry. For significant imperfections, a light skim coat of joint compound across the entire wall might be necessary to ensure a perfectly flat foundation. The goal is a uniform, sound, and stable substrate.
-
Clean and Prime for Optimal Adhesion
Thoroughly clean the wall with a damp cloth to remove any dust, grease, or grime. Allow the wall to dry completely before proceeding. For best results and to ensure superior adhesion, apply a high-quality acrylic bonding primer, especially if you’re working over painted drywall. This primer creates a textured surface that the cement mix can grip onto, preventing future peeling or delamination. Follow the primer manufacturer’s instructions for application and drying time.
Remember, a clean, dry, smooth, and properly primed wall is your absolute best friend for this project. Take your time during preparation; it’s the bedrock upon which your stunning new cement wall will be built, and getting it right will undeniably pay off in the long run.
Mastering the Mix: Preparing Your Cement for Application
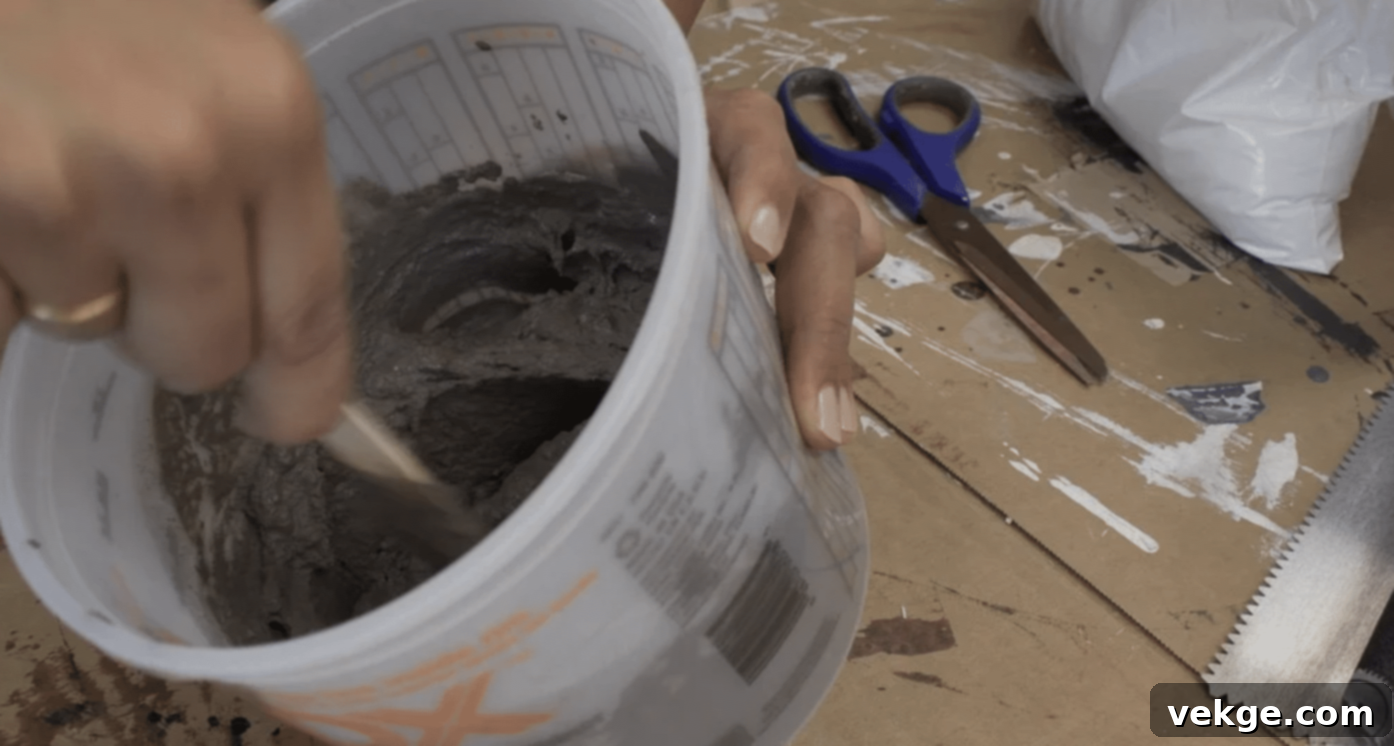
Now that your workspace is perfectly prepared, it’s time for the exciting step of mixing your cement. Achieving the correct consistency is vital for ease of application and the final look of your wall. This isn’t just about stirring; it’s about creating the perfect “batter” for your wall’s transformation.
-
Always Read the Manufacturer’s Instructions
This cannot be stressed enough. Every brand and type of cement mix (be it skim coat, microcement, or a patching compound designed for vertical applications) will have specific instructions regarding water-to-mix ratios, mixing times, and recommended tools. Adhering to these guidelines is crucial for optimal performance, adhesion, and curing.
-
Assemble the Right Mixing Tools
You’ll need a large, sturdy mixing container (typically a 5-gallon bucket), a measuring cup for water, and most importantly, a heavy-duty drill equipped with a spiral mixing paddle attachment. While manual mixing is an option for small batches, a power mixer ensures a much more consistent, lump-free, and thoroughly hydrated mix, which is essential for a smooth application.
-
Add Water Gradually and Cautiously
Start by adding slightly less water than the package directions suggest into your mixing bucket. Then, slowly add your dry cement mix while the drill mixer is running on a low speed. Continue to add small amounts of water, a little at a time, until you achieve the desired consistency. It’s always easier to add more water than to correct an overly wet mix by adding more dry powder, which can lead to inconsistencies.
-
Mix Thoroughly for a Homogeneous Blend
Continue mixing for the duration recommended by the manufacturer (typically 3-5 minutes), ensuring there are absolutely no dry pockets or lumps. Scrape down the sides of the bucket periodically to incorporate all material. The ideal consistency should resemble thick pancake batter or smooth peanut butter – it should be spreadable but not runny, holding its form when scooped onto a trowel. If it’s too thick, it will be hard to spread; too thin, and it will drip and won’t adhere properly to the wall.
-
Achieving a Smoother Finish or Custom Tone
If you desire an exceptionally smooth finish, ensure you’re using a very fine-particle cement mix (like a true microcement or a finely ground skim coat). For custom tones, this is the stage to incorporate your white concrete pigment or other concrete colorants. Add pigments incrementally, mixing thoroughly after each addition, until you reach your preferred shade. Remember to mix enough for the entire project, as it’s difficult to perfectly match batches.
-
Perform a Quick Consistency Test
Before applying to the wall, scoop a small amount of the mixed cement onto your trowel and hold it horizontally. The cement should stick firmly to the trowel without slumping or dripping. This indicates it’s ready for application.
Always remember to wear your respirator and gloves during the mixing process to protect against dust and skin irritation. Proper ventilation is also key. Getting the mix right is a foundational step – master this, and you’re well on your way to a stunning cement wall!
Transforming Walls: Applying Your Cement-Look Finish
With your wall prepped and your cement perfectly mixed, it’s time for the most visually rewarding part: applying the layers. This process is less about perfection and more about building character and achieving an authentic, handcrafted aesthetic.
1. The First Layer: Establishing Your Foundation
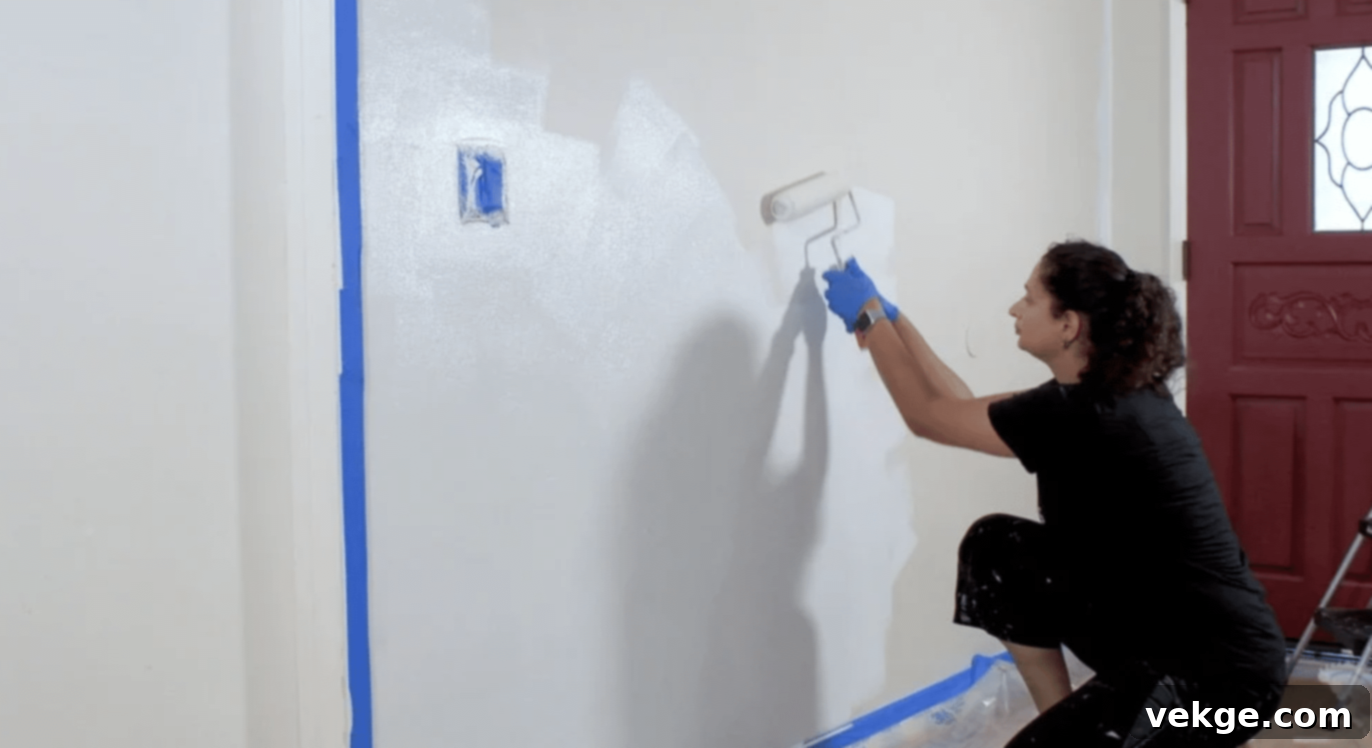
This initial coat is all about creating a consistent base for your subsequent layers. Don’t strive for absolute perfection, as minor imperfections at this stage will contribute to the unique character of your finished wall.
-
Load Your Trowel: Using your putty knife, scoop a moderate amount of mixed cement onto the bottom edge of your larger trowel. Aim for a manageable amount that won’t overwhelm you.
-
Begin Application: Starting from one corner of the wall, hold your trowel at a slight angle (around 20-30 degrees) to the wall. Press the cement firmly onto the surface and spread it upwards and outwards in smooth, sweeping motions. Work in relatively small sections, roughly 2×2 feet, to prevent the cement from drying too quickly.
-
Aim for Thin, Even Coverage: The goal for this first layer is thin, uniform coverage that fully conceals the underlying wall. You’re not trying to build up significant thickness yet. A layer about 1/16 to 1/8 inch thick is ideal. Ensure there are no bare spots.
-
Embrace Imperfections: Don’t be concerned about trowel marks, slight ridges, or minor bumps at this stage. These ‘imperfections’ are what give a cement wall its authentic, industrial charm. They will add depth and texture to the final look. If you encounter any large, obvious lumps, gently smooth them out.
-
Work Systematically: Continue working across the wall, overlapping your sections slightly to ensure seamless coverage. We often find it’s easier to maintain consistency by working from top to bottom or side to side in a methodical manner.
-
Allow to Dry: Once the entire wall is covered with the first layer, allow it to dry sufficiently. Depending on humidity and the type of mix, this can take anywhere from 4 to 8 hours, or until it is firm to the touch and no longer tacky.
Working in sections helps manage the drying time, ensuring you can smooth out each area before the cement sets. This layer is your blank canvas; get it right, and the rest will flow smoothly.
2. Creating Texture and Distinctive Style
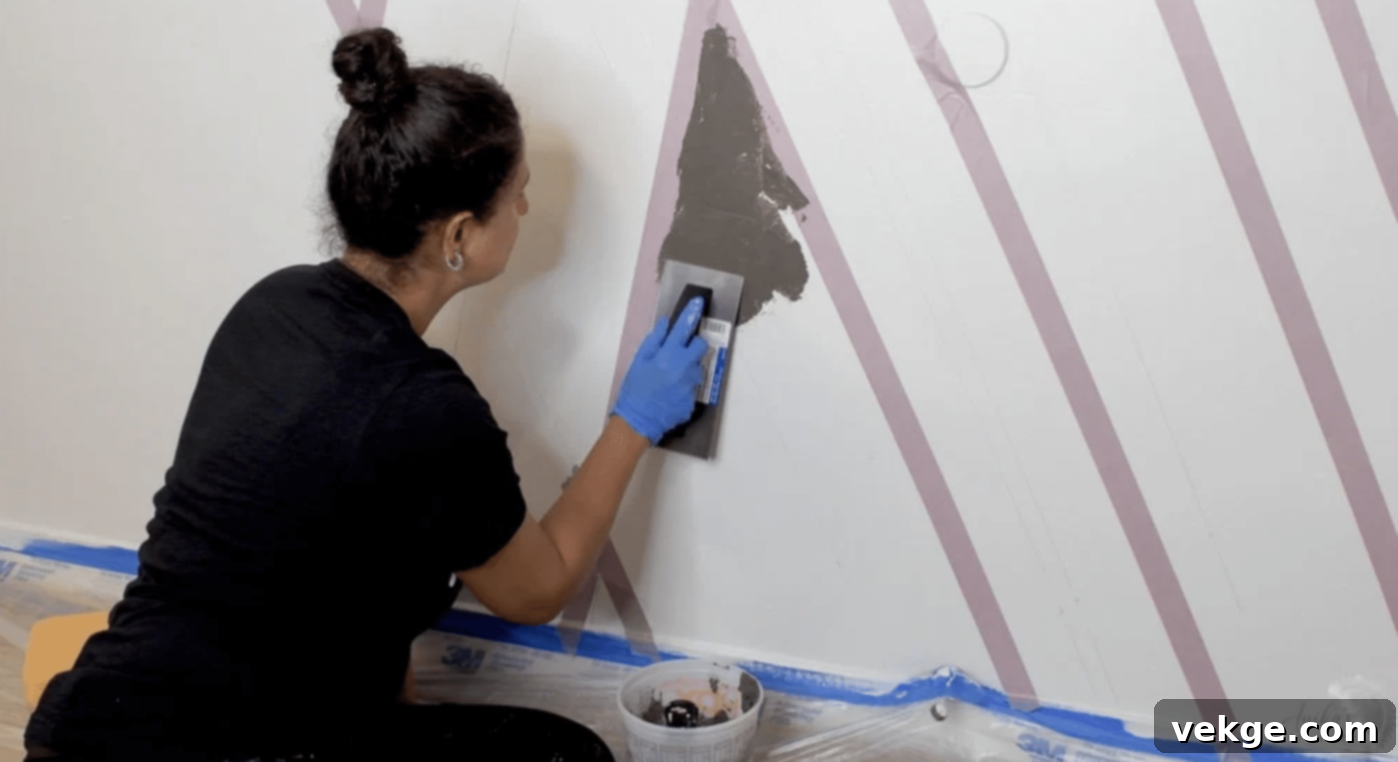
This is where your artistic vision truly comes to life! The second layer allows you to refine the texture and imbue your wall with its unique personality. You have complete control over the final aesthetic, whether you prefer a super-smooth, polished look or a richly textured, rugged finish.
-
Plan Your Desired Look: Before applying, decide on your preferred texture. Do you envision a sleek, minimalist surface, or a more rugged, industrial feel with visible trowel marks?
-
For a Smoother Finish: If a polished, near-seamless look is your goal, apply the second layer very thinly. Use your trowel with light, consistent pressure, employing long, overlapping strokes to minimize visible lines. As the cement begins to set slightly, you can go back over it with a clean, damp trowel to burnish and further smooth the surface.
-
For Textured Charm: To achieve a more dynamic, textured appearance, experiment with various trowel techniques. Try short, choppy strokes, swirling patterns, or even light dabbing motions. You can create subtle peaks and valleys, or drag the edge of your trowel through the wet cement to create distinct lines and furrows. Don’t be afraid to vary the pressure to achieve different effects.
-
Mix and Match Techniques: Feel free to blend different strokes. You might apply a base with smooth vertical strokes and then add subtle horizontal texture in specific areas to create visual interest. The beauty of DIY cement is its forgiving nature – if you don’t like a texture, you can usually smooth it out and reapply while it’s still wet.
-
Embrace Your Inner Artist: Light, feathered touches with the edge of your trowel can create delicate, organic patterns, mimicking natural stone. Use your tools creatively to sculpt the surface. Remember, this is your wall, and there’s no single “right” way to texture it.
-
Step Back Frequently: Periodically step away from the wall to observe your work from a distance. This helps you assess the overall effect of your texture and make adjustments as needed. What looks great up close might appear too busy or too flat from across the room.
This is truly the stage where your unique style comes to life. We adore how each cement wall emerges with its own distinct character, a testament to the individual’s touch. That’s what makes your finished wall genuinely special!
3. The Final Layer or Accent: Adding Depth and Refinement
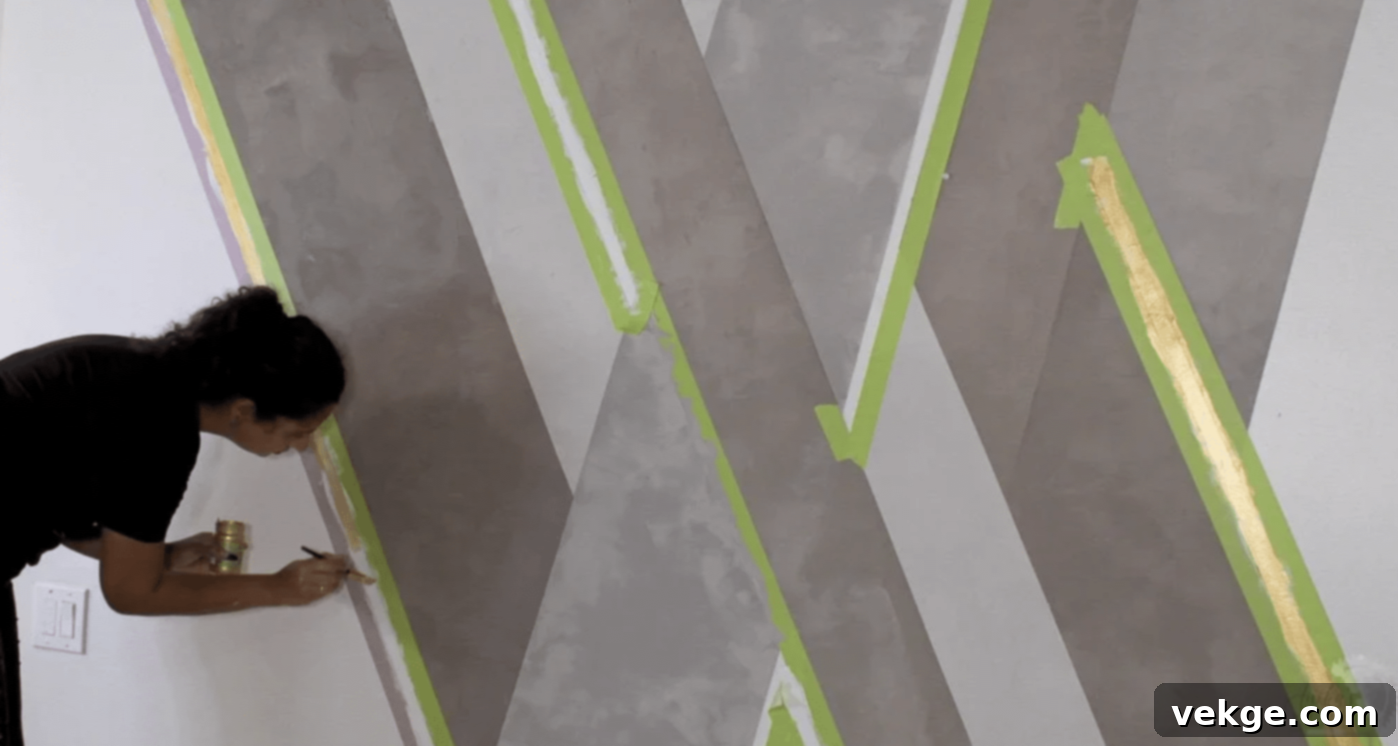
After your initial textured layer has had sufficient time to dry (typically 12-24 hours, depending on conditions and mix type), it’s time to assess and apply the final touches. This layer can serve multiple purposes: achieving full opacity, deepening the texture, or introducing subtle color variations for an accentuating effect.
-
Thoroughly Inspect the Wall: Take a good look at your wall. Is the coverage uniform? Are there any spots that appear too thin or uneven? Does the texture meet your expectations? This assessment will guide your approach for the final layer.
-
Determine if a Third Coat is Needed: For very dark underlying walls, or if you desire a deeper, richer cement color and texture, a third, very thin coat might be beneficial. This also offers an opportunity to subtly refine or enhance existing textures.
-
Prepare a Fresh Batch: Mix a new, fresh batch of cement, adhering to the same consistency guidelines as before. If you plan to introduce an accent color, this is where you’ll mix in your chosen pigment.
-
Introduce Subtle Color Accents (Optional): For a sophisticated two-tone or variegated effect, consider mixing a small amount of white concrete pigment (or another suitable colorant) into a portion of your fresh cement batch. Apply this lighter mix very sparingly and strategically over the existing layers, blending gently with your trowel. This technique can create beautiful marbling or cloud-like effects, adding incredible depth.
-
Apply with Precision and Purpose: Whether it’s a uniform final coat or an accent layer, apply the cement thinly and evenly, using the same trowel techniques you practiced earlier. For accenting, use very light pressure and quick strokes to deposit and blend the colored mix without completely obscuring the layers beneath.
-
Experiment with Patterns for Visual Interest: Don’t be afraid to get creative. You could try subtle vertical or horizontal stripes with the lighter mix, or dab it on with a sponge for a mottled effect. The key is subtlety – you want to enhance, not overpower, the existing texture.
We often find that this final layer truly brings the wall to life, adding a layer of depth and sophistication that completes the transformation. It’s the stage where your initial vision truly shines through and solidifies into a stunning reality.
4. Polishing and Sealing: The Essential Finishing Touches
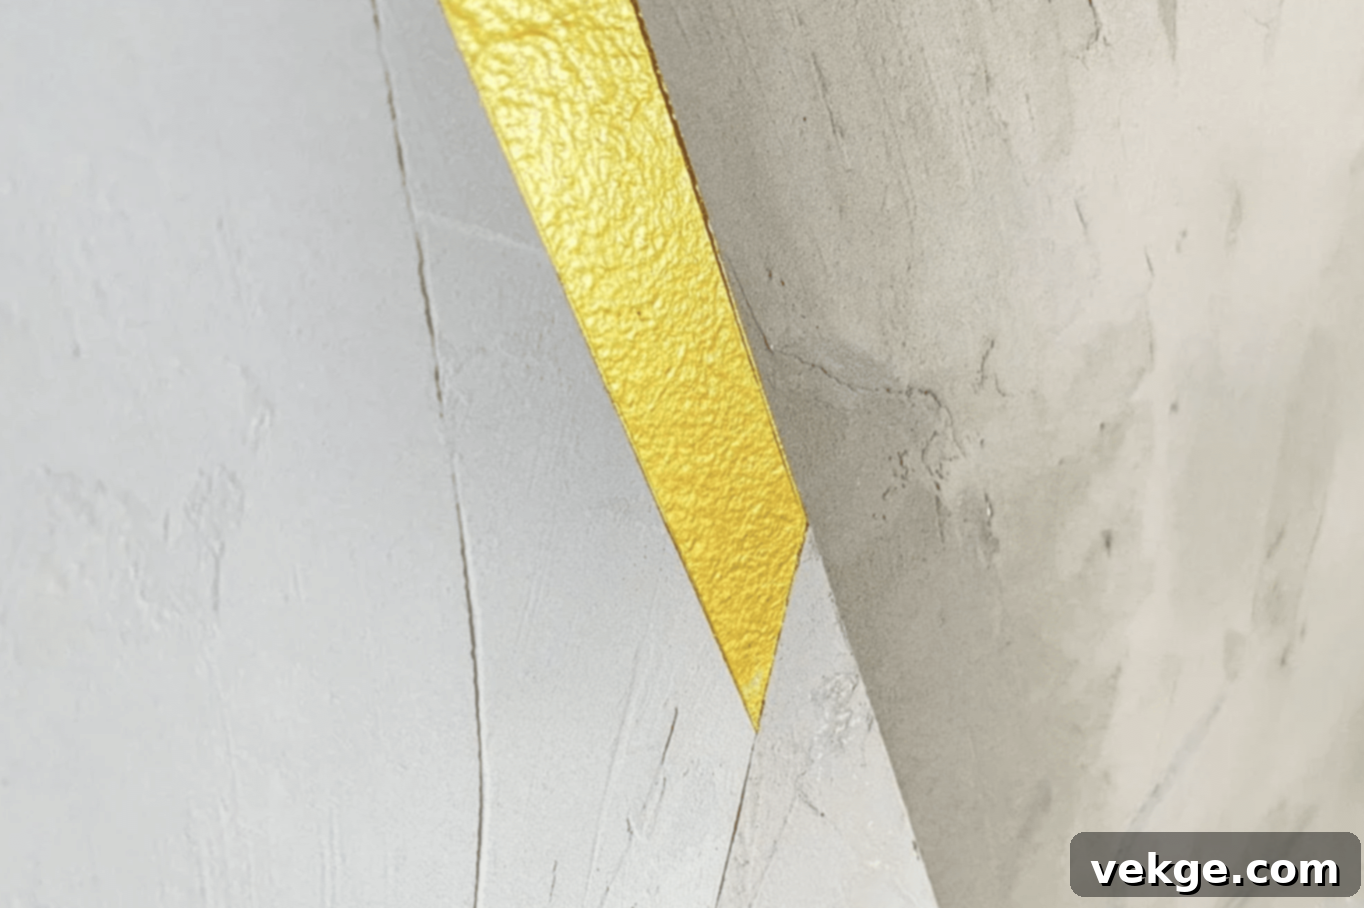
After all your hard work, the final steps of polishing and sealing are crucial. Not only do they enhance the aesthetic appeal of your cement wall, but they also provide essential protection, ensuring its durability and ease of maintenance for years to come. This is where your masterpiece truly gets its lasting shine.
-
Allow for Full Curing Time: Before proceeding with any sanding or sealing, it’s absolutely vital to allow your cement wall to cure completely. This usually takes at least 24-48 hours, but can extend up to 72 hours or more depending on the specific product, thickness of application, and environmental conditions (humidity, temperature). Rushing this step can lead to a less durable finish and problems with sealer adhesion.
-
Inspect for Rough Spots: Once fully dry, run your hand over the entire surface of the wall. Feel for any sharp edges, prominent ridges, or unwanted bumps that might have formed during application. This tactile inspection will guide your sanding process.
-
Gentle Sanding for Refinement: Using fine-grit sandpaper (e.g., 180-220 grit) attached to a sanding block, gently smooth out any rough spots or high points. The goal is to achieve a comfortable, tactile surface without removing too much texture, unless a perfectly smooth finish is desired. For a smoother look, you might use progressively finer grits. Wear your respirator during sanding to avoid inhaling dust.
-
Thorough Dust Removal: After sanding, the wall will be covered in fine cement dust. Use a dry, clean cloth or a vacuum cleaner with a brush attachment to meticulously remove all dust particles from the surface. Any residual dust will interfere with the proper adhesion of the sealer, potentially leading to a cloudy finish or peeling.
-
Select and Apply Your Sealer: Choosing the right sealer is key. For a natural, matte, or slightly satin look, opt for a water-based penetrating sealer. For a more dramatic, glossy finish that enhances color and depth, a topical, acrylic-based sealer might be preferred. Always choose a sealer designed for concrete or masonry surfaces and suitable for interior use.
Apply the sealer evenly using a roller or a wide brush. It’s almost always better to apply two thin, even coats rather than one thick coat. Allow the first coat to dry completely (check manufacturer’s instructions for drying times, typically 2-4 hours) before applying the second. Ensure there are no puddles or drips, as these will dry unevenly.
-
Final Curing of Sealer: Allow the sealed wall to fully cure according to the sealer manufacturer’s guidelines, which can range from 24 hours to several days, before putting furniture back or exposing it to heavy use.
This sealing step is incredibly satisfying as it not only protects your investment of time and effort but also deepens the color and truly brings out the nuanced beauty of your cement wall, leaving it looking sleek, professional, and built to last.
Wrapping Up Your DIY Cement Wall Masterpiece
Congratulations! You’ve successfully navigated the exciting journey of transforming a plain wall into a stunning, sleek cement masterpiece. We’ve meticulously walked you through every critical step, from the initial, vital preparation and precise cement mixing, through the artistic application of multiple layers, to the essential final stages of polishing and protective sealing. You now possess the comprehensive know-how and practical insights to confidently tackle this impactful home improvement project.
Always remember, the inherent beauty of a DIY cement wall lies in its individuality. Each subtle texture, every unique trowel mark, and the nuanced variations in shade tell a distinct story of your craftsmanship and personal touch. Don’t chase unattainable perfection; instead, embrace and celebrate the organic character and authentic imperfections that make your wall truly one-of-a-kind. It’s these very qualities that give a cement wall its genuine charm and sophisticated appeal.
So, what’s your next step? Perhaps you’re already envisioning which other rooms in your home could benefit from this modern, industrial facelift. Or maybe you’re itching to gather your tools and get started on this rewarding project right away. Whatever you decide, we are incredibly excited for you to experience the satisfaction that comes from creating something so impactful with your own hands.
We believe in the power of shared knowledge and inspiration. If you have any questions or encounter specific challenges during your project, please don’t hesitate to post them in the comments section below. Our community is here to help! And most importantly, if you do create your own stunning cement wall, we would absolutely love to see it! Share your photos, tips, and experiences to inspire fellow DIY enthusiasts on their own creative journeys.
Happy DIY-ing, and immerse yourself in the modern elegance of your magnificent new sleek cement wall!
