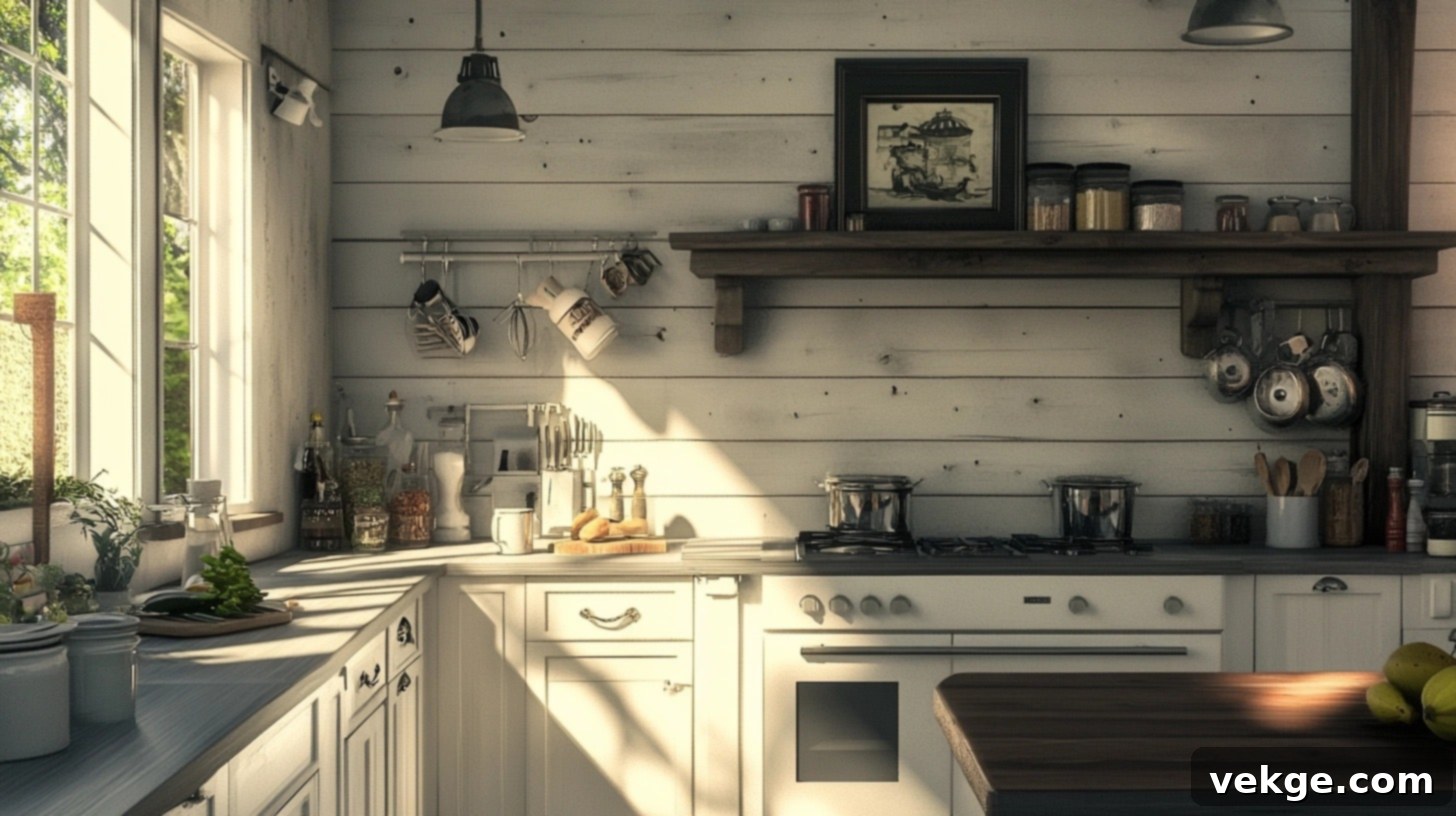
Transform Your Kitchen with a Shiplap Backsplash: The Ultimate DIY Guide & Design Ideas
A shiplap backsplash offers a wonderfully clean, fresh, and timeless aesthetic that seamlessly complements almost any kitchen style, from rustic farmhouse to sleek modern designs. Its versatile nature and distinctive charm make it a popular choice for homeowners looking to add character and warmth to their culinary spaces.
This comprehensive guide will walk you through everything you need to know about incorporating shiplap into your kitchen. We’ll cover how to select the perfect boards, master the DIY installation process, and ensure your shiplap remains beautiful for years to come with effective sealing and maintenance strategies. You’ll learn the secrets to achieving a professional finish while saving money compared to other backsplash options.
We’ll explore the visual impact of laying boards horizontally versus vertically, guide you on choosing colors that enhance your kitchen’s existing palette, and provide essential tips for keeping your walls looking their absolute best. Get ready to discover how this classic wood style can bring enduring elegance and a personalized touch to your kitchen.
What is a Shiplap Backsplash?
At its core, shiplap refers to wooden boards designed to fit together with overlapping joints, creating a tight and secure seal between each piece. Historically, this ingenious method was employed in constructing ships and barns, primarily to effectively keep water out and provide sturdy, weather-resistant surfaces. Today, shiplap has been beautifully repurposed for interior home decoration, becoming a cherished element in various spaces, especially kitchens, bathrooms, and living areas where its distinctive texture and lines add significant visual interest.
Modern shiplap boards typically feature a unique rabbet (a groove or notch) cut into their edges. When these boards are interlocked, this groove creates a slight, uniform gap, often referred to as a “reveal,” between the panels. This design is what gives shiplap its signature look, producing subtle shadow lines that introduce depth, texture, and a sense of architectural detail to your walls. While traditional shiplap is celebrated for its natural wood grain and rustic appeal, contemporary versions offer a broad spectrum of finishes to suit diverse design preferences:
- Classic White Painted Finish: Provides a bright, airy, and clean aesthetic, perfect for modern farmhouse or minimalist designs.
- Weathered Gray Look: Evokes a coastal or vintage feel, adding character and a sense of history.
- Natural Wood Tones: Celebrates the organic beauty of wood, bringing warmth and an earthy charm.
- Dark Stained Varieties: Offers a more dramatic and sophisticated statement, ideal for contemporary or industrial-inspired kitchens.
- Custom Colors: Shiplap can be painted any color, allowing for endless customization to match your specific decor.
Common Places You’ll Find Shiplap in Homes
The versatility of shiplap extends beyond just the kitchen backsplash. Its ability to add texture, character, and a touch of rustic elegance makes it a popular choice throughout the home:
- Kitchen Backsplashes: A primary focus, providing a clean and inviting backdrop.
- Bathroom Walls: Offers moisture resistance when properly sealed, adding spa-like serenity.
- Living Room Accent Walls: Creates a focal point and adds architectural interest.
- Bedroom Feature Walls: Enhances comfort and visual appeal, often behind headboards.
- Laundry Rooms: Brings a fresh, organized feel to a utilitarian space.
- Mudrooms and Entryways: Durable and stylish, perfect for high-traffic areas.
- Ceilings: Adds unexpected texture and can make a room feel cozier or more expansive depending on orientation.
Horizontal Shiplap vs. Vertical Shiplap: Which Direction is Right for Your Kitchen?
The orientation of your shiplap boards – whether installed horizontally or vertically – profoundly influences the perception and atmosphere of your room. Far beyond just creating different patterns, the direction of these wooden boards can strategically alter how a space feels, making it appear wider, taller, cozier, or more structured, depending on your design goals.
Horizontal Shiplap
Horizontal shiplap involves boards that run from side to side across your wall. When installed in this manner, the parallel lines naturally draw the eye horizontally, creating an expansive visual effect. The result is a look that is both simple and captivating, with the subtle shadow lines between each board adding depth and visual interest without overwhelming the space. This orientation is a classic choice for a reason, effortlessly enhancing the perception of width.
Key Benefits of Horizontal Placement:
- Expands the Room: Makes spaces, especially smaller ones, feel significantly wider and more open.
- Creates a Sense of Calm: The long, flowing lines contribute to a more serene and continuous visual flow.
- Natural Eye Flow: Aligns with our natural tendency to scan a room from left to right, making it feel intuitive and balanced.
- Versatile in Small Spaces: Particularly effective in tight kitchens or bathrooms where maximizing perceived space is crucial.
- Straightforward Installation: Often considered easier for DIY enthusiasts due to fewer complex cuts, especially in longer runs.
Common Uses for Horizontal Shiplap:
- Living room walls and accent features
- Kitchen backsplashes, particularly in galley kitchens
- Bedroom headboard walls for a grounding effect
- Entryways and hallways to widen the path
- Small bathrooms and powder rooms
- Home offices for a classic, sophisticated backdrop
Vertical Shiplap
In contrast, vertical shiplap runs from the floor to the ceiling, with the boards standing upright. This arrangement generates strong vertical lines that naturally guide the eyes upward, creating an immediate sense of height and grandeur. The characteristic shiplap shadow lines are still present, but their up-and-down pattern offers a distinct visual statement that can feel more formal or contemporary, depending on the context.
Key Benefits of Vertical Placement:
- Increases Perceived Ceiling Height: Makes ceilings appear significantly higher, transforming compact rooms.
- Adds a Formal Touch: The upward lines can lend a more elegant and structured feel to a space.
- Unique Visual Statement: Less common than horizontal shiplap, offering a fresh and distinctive look.
- Ideal for Narrow Spaces: Can make a narrow space feel taller and less confined.
- Highlights Architectural Features: Excellent for emphasizing fireplace surrounds, accent walls, or tall windows.
Best Places to Use Vertical Shiplap:
- Bathrooms, especially in shower surrounds or behind vanities
- Narrow hallways and stairwells to enhance verticality
- Small reading nooks or built-in alcoves
- Behind beds to create a dramatic feature wall
- Fireplace surrounds, extending up to the ceiling
- Powder rooms for an elevated, boutique feel
When deciding between horizontal and vertical, consider the existing dimensions of your kitchen and the overall aesthetic you wish to achieve. Both orientations can create a stunning shiplap backsplash, but the right choice will enhance your space in the most impactful way.
DIY Guide to Install a Vertical Shiplap Backsplash in Your Kitchen
Installing a shiplap backsplash is a rewarding DIY project that can dramatically update your kitchen’s look. This guide focuses on a vertical installation, a popular choice for adding height and elegance. Always remember safety first: wear protective eyewear and use appropriate tools for each step.
Materials and Tools Needed
Before you begin, gather all necessary supplies and tools to ensure a smooth and efficient installation process.
| Category | Items Needed |
|---|---|
| Materials | Shiplap Boards (measure your area and add 10-15% for cuts), 1.5-2 inch Finish Nails (galvanized or stainless steel for moisture resistance), White Wood Putty or Spackle, Paintable Caulk, Wall Trim (for top edge, e.g., quarter round or flat stock), Primer (if painting), Paint (to match your cabinets or desired color) |
| Tools | Spirit Level (or laser level), Nail Gun (cordless is convenient), Miter Saw (for straight cuts), Jigsaw (for intricate cuts around outlets/countertops), Tape Measure, Pencil, Stud Finder, Utility Knife, Caulk Gun, Sanding Sponge (fine-grit), Safety Glasses, Dust Mask |
Step-by-Step Installation Process
Step 1: Prepare Your Workspace and Walls
Before any cutting or nailing, clear your kitchen counters and protect them with drop cloths. Remove any existing backsplash or wallpaper, and clean the wall surface thoroughly. Ensure the wall is dry and free of debris. Use a stud finder to mark the locations of wall studs; this will help secure your boards more effectively.
Step 2: Establish Your Starting Point and First Boards
For vertical shiplap, it’s often best to start at the least conspicuous corner or against the longest wall that won’t require immediate complex cuts (like around a window). Position your first full shiplap board against the wall. Do not nail it yet. This board will set the alignment for the entire project, so accuracy is paramount.
Step 3: Ensure Perfect Vertical Alignment
Using your spirit level or laser level, meticulously check that the first shiplap board is perfectly plumb (straight up and down). Mark its position lightly with a pencil. This step is absolutely crucial; any deviation here will compound across subsequent boards, resulting in a crooked installation. Make any necessary adjustments before securing.
Step 4: Secure the Shiplap Boards
Once your first board is perfectly aligned, secure it to the wall using your nail gun. Aim to nail into studs whenever possible for the strongest hold. If a nail doesn’t hit a stud, angle your nail gun slightly (up and down) for cross-nailing, which provides a more secure grip in the drywall. Place nails at the top, middle, and bottom of each board, ensuring they penetrate through the shiplap and into the wall structure. Continue adding boards, interlocking the overlapping joints, and ensuring a snug fit. Periodically check for plumbness as you progress.
Step 5: Measure and Mark for Cuts Around Countertops
As you approach the countertop area or other obstructions, you’ll need to make precise cuts. Take a scrap piece of shiplap and use it as a template to measure the exact depth and width needed for any notches or cutouts. Mark the full piece of shiplap based on this template, double-checking your measurements before cutting. “Measure twice, cut once” is the golden rule here.
Step 6: Cutting Outlets and Notches
For electrical outlets, light switches, or complex countertop contours, use a jigsaw. This tool allows for precise, intricate cuts needed to accommodate these features. Carefully trace the outline of the obstruction onto the shiplap board and cut along your marks. Dry-fit each cut piece before permanently attaching it to ensure a perfect fit. Remember to turn off power to outlets before working near them.
Step 7: Fill Nail Holes and Caulk Seams
After all the shiplap is securely installed, it’s time for the finishing touches. Use white wood putty or spackle to fill in all visible nail holes. Allow the putty to dry completely according to manufacturer instructions, then lightly sand the patched areas smooth with a fine-grit sanding sponge. Next, apply a thin bead of paintable caulk along any seams where the shiplap meets the countertop, cabinets, or ceiling. This creates a seamless, professional appearance and helps seal out moisture.
Step 8: Add Finishing Trim
To give your shiplap backsplash a polished, finished look, install a small piece of decorative wall trim (like quarter-round or a simple flat stock) across the top edge of the shiplap, where it meets the upper wall or cabinets. You can also add trim around windows or exposed edges. Miter saw cuts at corners will create clean joints. Secure the trim with smaller finish nails.
Step 9: Prime and Paint the Shiplap
If you’ve opted for a painted shiplap, begin by applying a high-quality primer. This step is crucial for ensuring even paint adhesion and preventing wood tannins from bleeding through. Once the primer is dry, apply two thin coats of your chosen paint, matching it to your cabinets or desired kitchen aesthetic. Use a brush for the grooves and a roller for the flat surfaces for a smooth, consistent finish. Let each coat dry thoroughly.
With these steps, your kitchen will soon boast a beautiful, custom-installed shiplap backsplash that adds character and charm!
Useful Maintenance Tips for Your Shiplap Backsplash
A shiplap backsplash is durable and relatively easy to maintain, but proper care is essential to keep it looking pristine, especially in a high-traffic area like the kitchen. Here’s how to ensure your shiplap remains a beautiful focal point.
Routine Cleaning for Lasting Beauty
Consistent, gentle cleaning is key to preventing buildup and maintaining your shiplap’s fresh appearance.
- Tools Needed: A soft microfiber cloth or sponge, a bucket of mild dish soap and warm water, and a soft-bristled brush (like a toothbrush for grooves).
- Daily Care: For everyday dust and light splatters, a quick wipe down with a dry, soft cloth is usually sufficient.
- Weekly Deep Clean: For a more thorough clean, dampen a soft cloth with a mild soap and water solution. Gently wipe down the shiplap surface. Pay special attention to the small gaps between the boards, using a soft brush to dislodge any trapped grime. Always follow up immediately by drying the surface completely with a clean, dry cloth to prevent moisture damage or water spots.
- Avoid Harsh Cleaners: Steer clear of abrasive cleaners, scouring pads, or harsh chemical sprays, as these can damage the paint, sealant, or wood finish.
Addressing Spills and Stains Promptly
The kitchen is prone to spills, so knowing how to act quickly will protect your shiplap.
- Immediate Action: When spills occur, blot them immediately with a clean, dry cloth. Do NOT rub, as this can spread the stain further into the wood or finish.
- Plain Water First: For most fresh spills, start by gently dabbing the area with a damp cloth and plain water. Pat dry thoroughly.
- Grease and Oil Marks: For stubborn grease spots, create a thick paste using baking soda and a small amount of water. Apply the paste to the stain, let it sit for 10-15 minutes, then gently wipe it away with a damp cloth and dry.
- Food Stains: A diluted solution of white vinegar (1 part vinegar to 2 parts water) can be effective for food-based stains. Apply sparingly to a cloth, dab the stain, and rinse with plain water before drying.
- Always Test: Before applying any cleaning solution, always test it on an inconspicuous area of the shiplap to ensure it doesn’t cause discoloration or damage.
Protection Against Moisture and Humidity
Moisture is the biggest enemy of wood. Proper sealing is paramount, especially for a kitchen backsplash.
- Initial Sealing is Crucial: During installation, ensure all exposed sides and edges of the shiplap boards are sealed. Use a high-quality clear polyurethane or a marine-grade wood sealer. This creates a protective barrier against moisture penetration.
- Application: Apply multiple thin coats of sealant, allowing each coat to dry completely according to manufacturer instructions before applying the next. Pay extra attention to the gaps and ends of the boards.
- Regular Inspection: Annually, inspect your shiplap backsplash for any signs of wear in the sealant, such as dullness, peeling, or cracking. Reapply sealant as needed, following the product guidelines, especially in areas prone to high moisture like behind the sink or stove.
- Ventilation: Ensure good ventilation in your kitchen, especially when cooking, to minimize humidity and steam buildup, which can slowly degrade wood and sealant over time.
Repairing Minor Damage
Even with the best care, minor damage can occur. Knowing how to address it quickly can prevent bigger issues.
- Identify Issues: Regularly check for water spots, small cracks, chips, or loose boards.
- Clean the Area: Before any repair, clean the damaged area thoroughly and allow it to dry.
- Minor Fills: For small holes or hairline cracks, use wood putty or a wood filler that can be sanded and painted/stained. Apply, let dry, and sand smooth.
- Matching Finish: If your shiplap is painted, match the paint color precisely. If it’s stained, choose a stain that blends well with the existing finish. For a seamless look, you might need to paint or stain the entire board or a larger section.
- Re-seal After Repair: After any repair that involves sanding or applying filler, always re-seal the fixed area, and potentially the entire board, to ensure it maintains its moisture protection and consistent finish.
- Replacing Boards: In cases of extensive damage or warping, it might be necessary to carefully remove and replace individual shiplap boards. This is why it’s always a good idea to keep a few extra boards from your original purchase.
By following these maintenance tips, your shiplap backsplash will continue to be a beautiful, durable, and cherished feature in your kitchen for many years.
13 Unique Shiplap Backsplash Ideas to Compliment Your Kitchen
Shiplap backsplashes are incredibly versatile, offering endless possibilities for customization. Here are 13 unique ideas to inspire your kitchen transformation, blending classic charm with contemporary flair.
1. Transitional Kitchen with Black Cabinets and Vertical Shiplap Walls
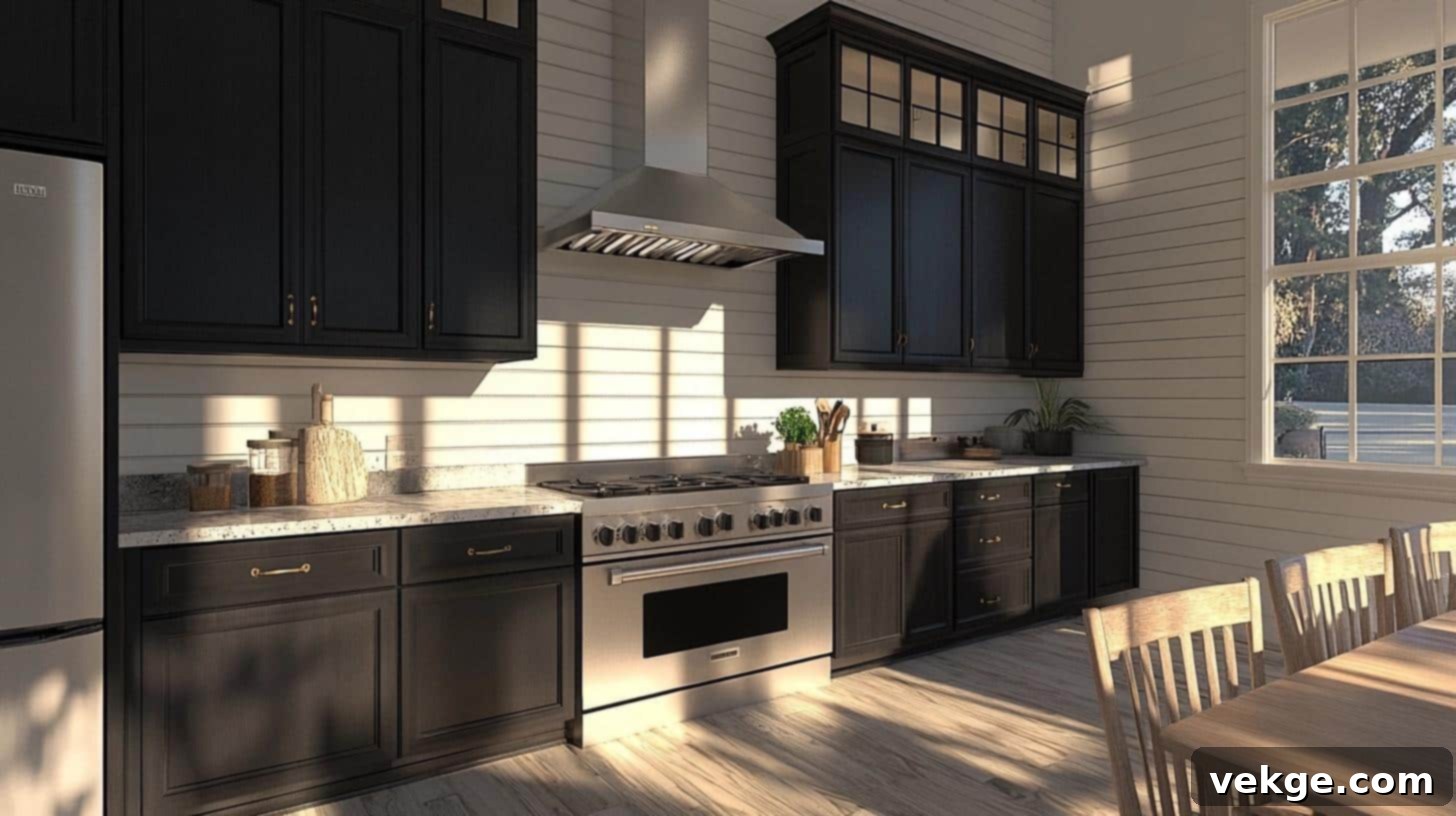
Elevate your kitchen’s style with a sophisticated contrast: sleek black cabinets paired with bright, vertical shiplap walls. This design masterfully merges modern, clean lines with traditional textures, creating a striking and exceptionally sophisticated space. The vertical orientation of the shiplap not only adds an impressive sense of height and depth but also makes the entire area feel larger and more open, all while maintaining an elegant, timeless appeal. This bold yet refined aesthetic is perfect for homeowners who desire a kitchen that makes a powerful design statement.
2. Gray Shaker Cabinets with Yellow Subway Tiles and White Shiplap Backsplash
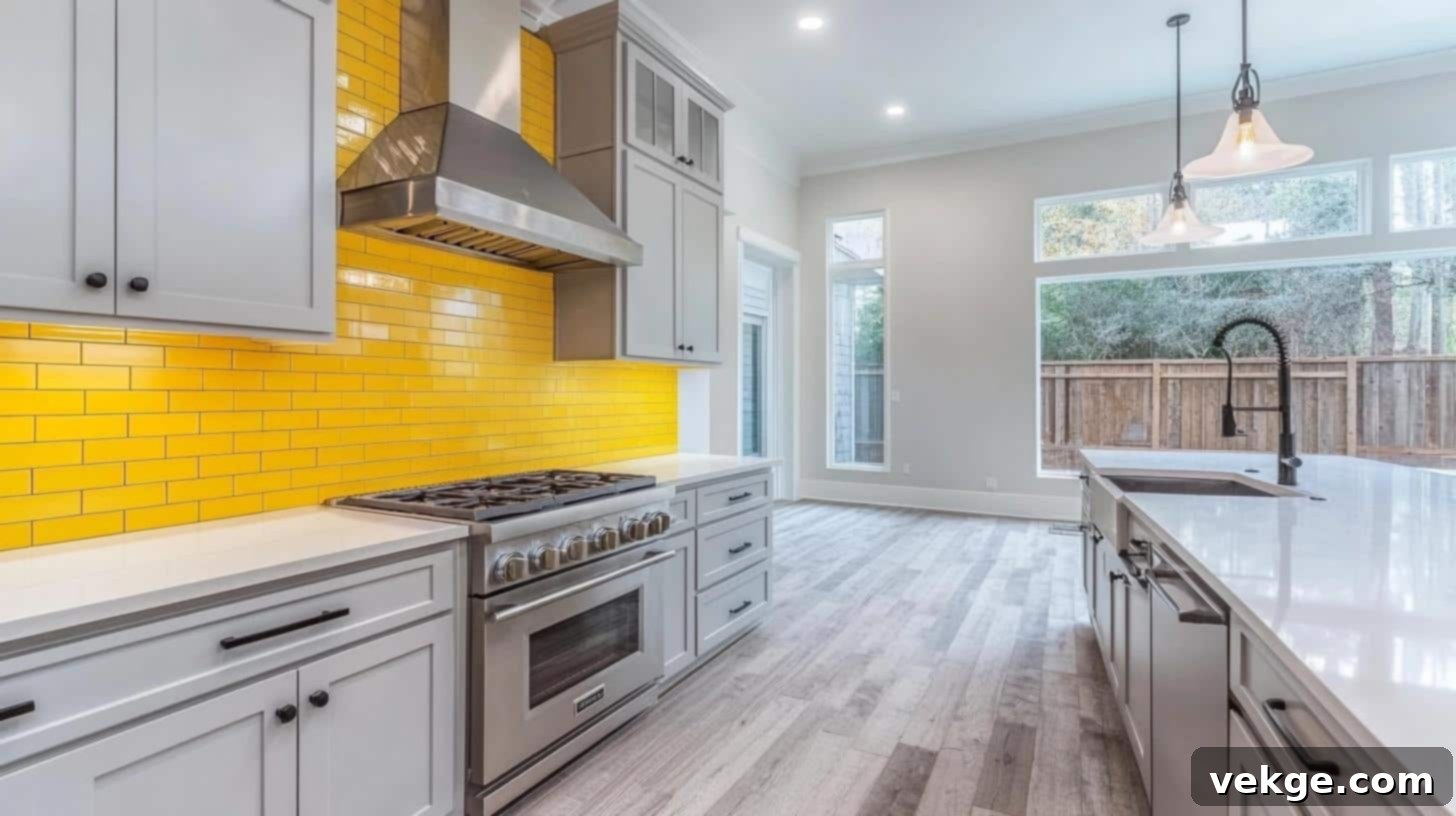
This vibrant design combines the understated elegance of classic gray shaker cabinets with the bright, cheerful energy of yellow subway tiles, all harmonized by a serene white shiplap backsplash. This thoughtfully chosen color palette introduces warmth and lightness, significantly enhancing the kitchen’s welcoming atmosphere and spacious feel. The unexpected pop of yellow from the tiles invigorates the space, creating a lively focal point without overwhelming the senses. It’s a perfect blend of modern and classic, with a playful twist.
3. Cherry Kitchen Cabinets with Wood Countertop and Shiplap Kitchen Backsplash
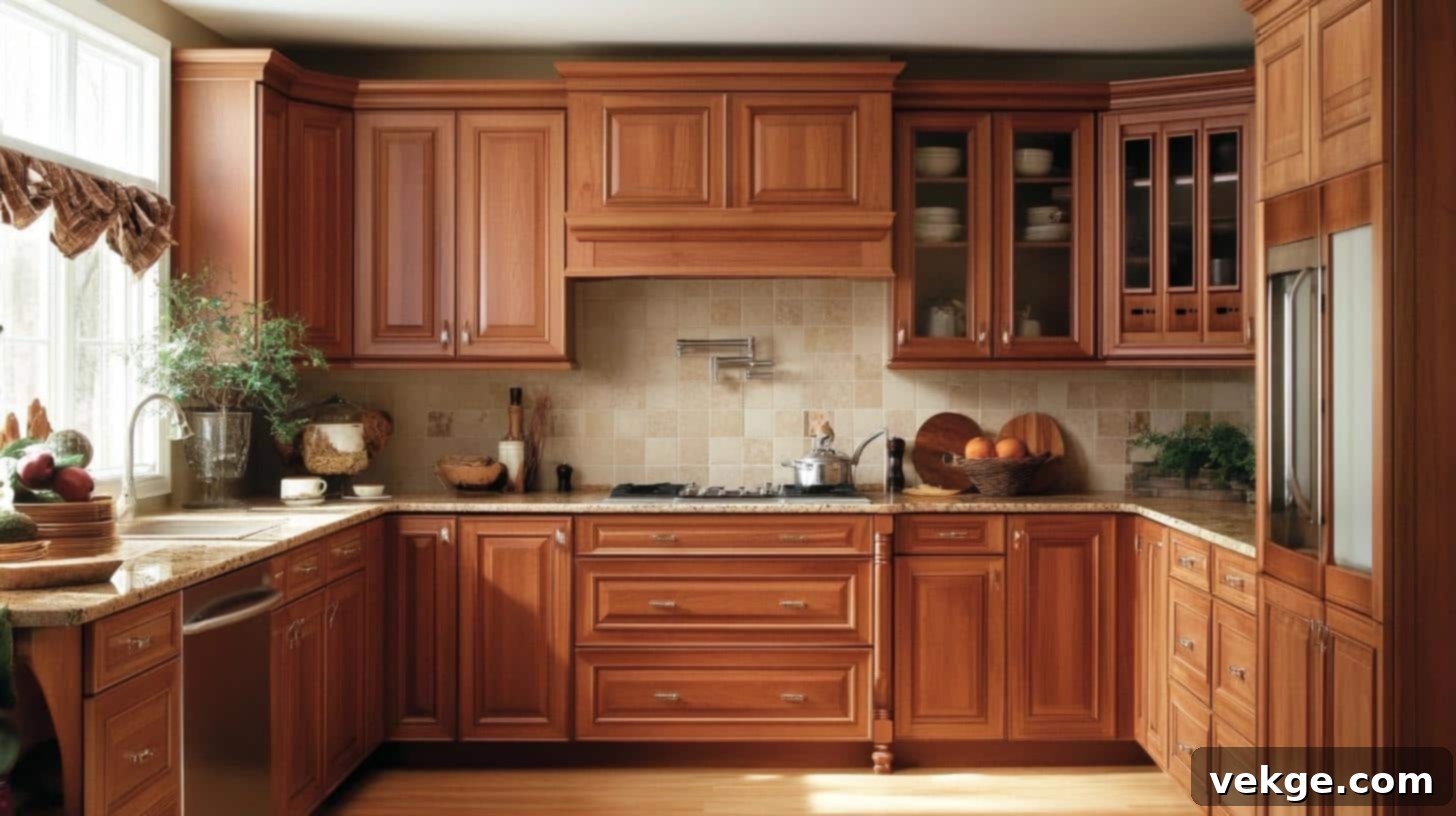
For a truly cohesive and inviting kitchen, combine rich cherry wood cabinets and a sturdy wood countertop with a complementary shiplap backsplash. This natural combination exudes genuine warmth and rustic charm, crafting an inherently homey and inviting kitchen environment. The consistent use of various wood elements introduces a beautiful sense of continuity and natural flow throughout the space, solidifying the kitchen’s role as the central, most comfortable gathering spot in the home. It’s an ideal choice for those who love a traditional or farmhouse aesthetic.
4. Rustic Shiplap Backsplash
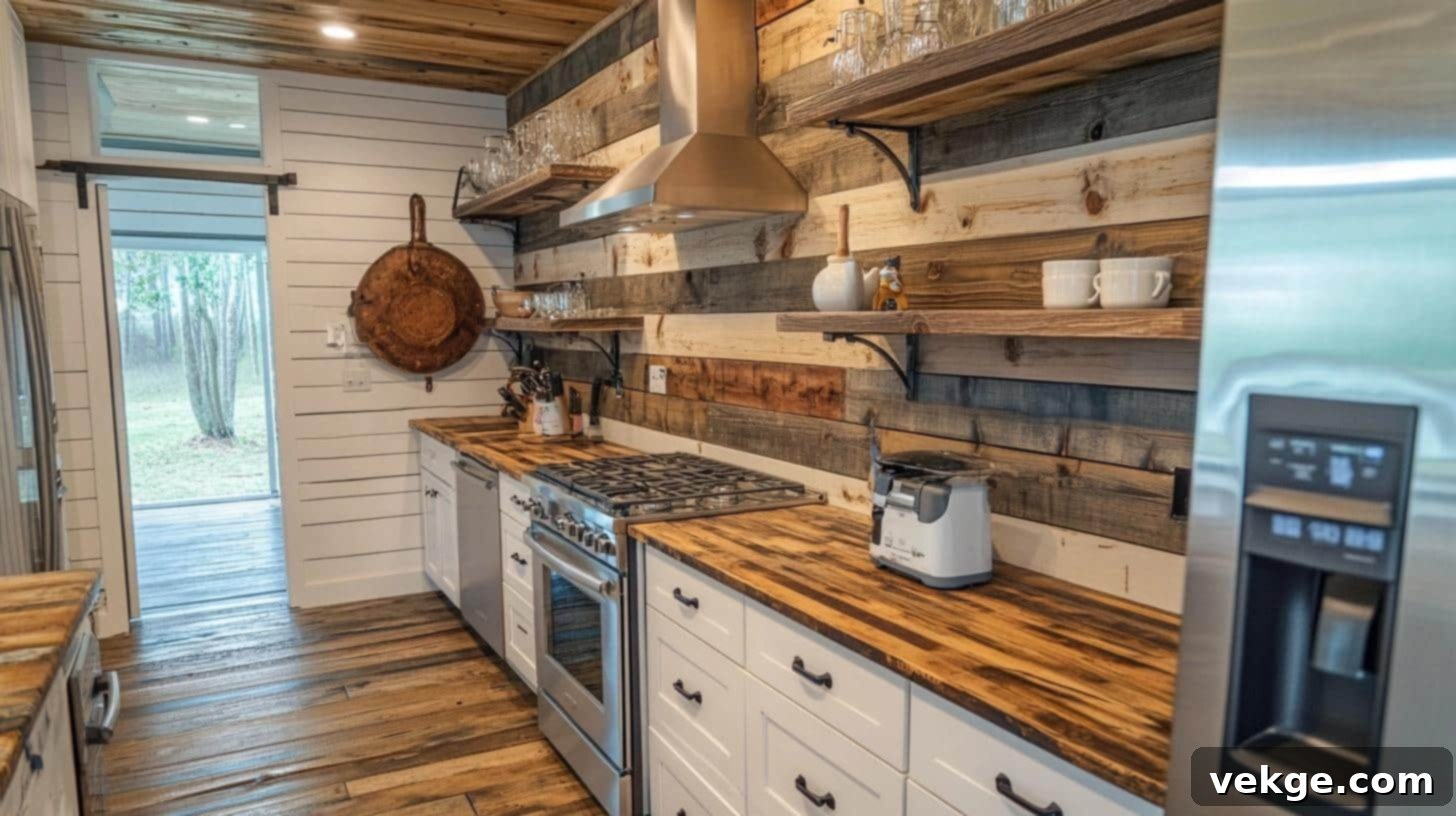
Embrace a charming rustic aesthetic with a shiplap backsplash that proudly showcases natural, unfinished, or lightly distressed wood finishes and their inherent imperfections. This style infuses a rugged, organic beauty into any kitchen, creating a warm, earthy backdrop that beautifully complements both modern appliances and traditional kitchen setups. The authentic texture and pronounced grain of the wood give it an undeniable organic feel, making it the perfect foundation for a warm, welcoming, and lived-in kitchen atmosphere.
5. Bright Neon Shiplap
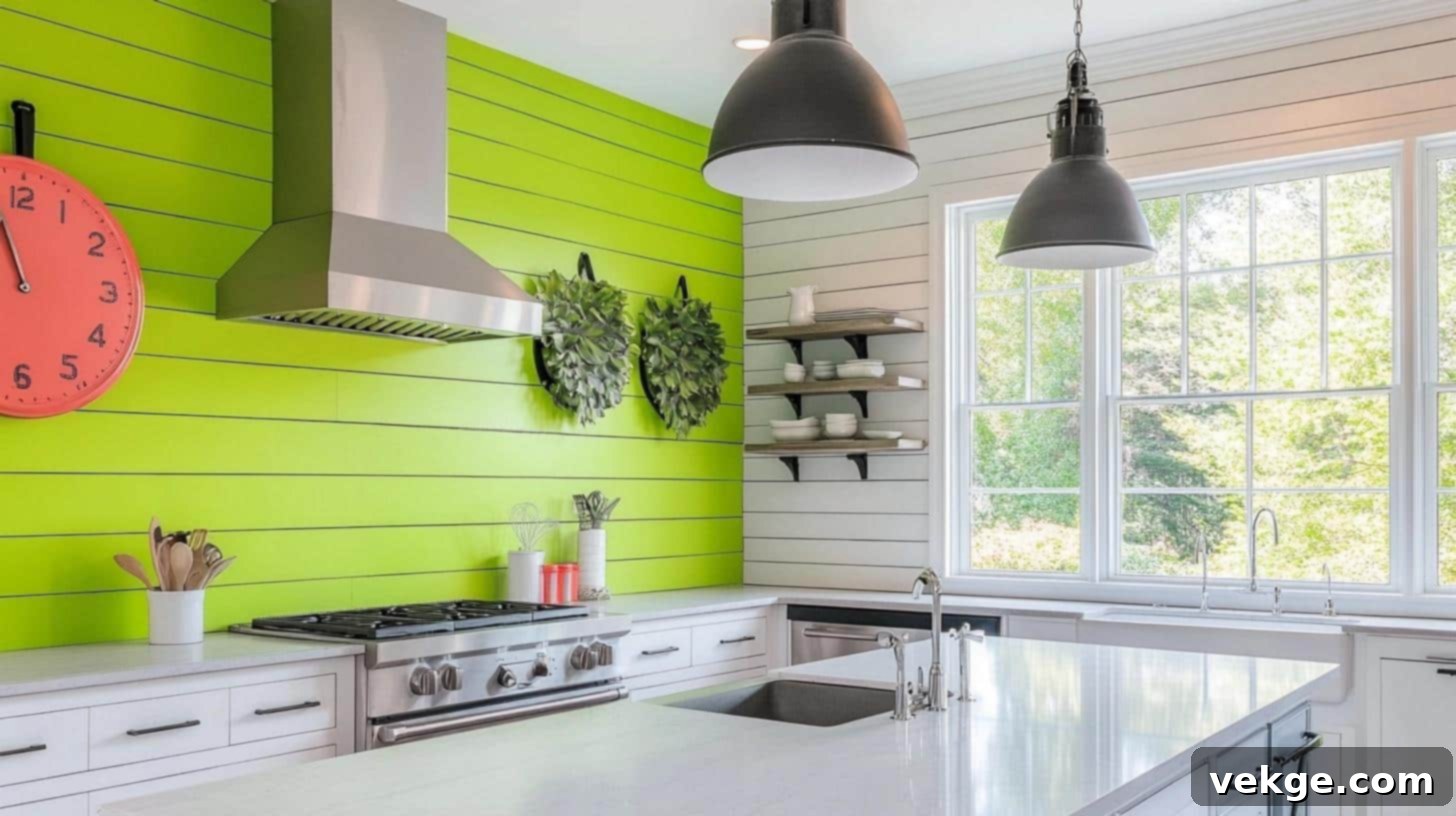
Dare to be different with a neon-colored shiplap backsplash to introduce a vibrant, unmistakably contemporary flair to your kitchen. These bold, electric hues dramatically transform the space, immediately drawing the eye and serving as a striking, dynamic focal point. Ideal for truly modern and avant-garde kitchens, this style injects a playful, high-energy vibe that enlivens the entire room, making it not just functional but a genuine piece of expressive art. It’s the perfect choice for those unafraid to make a daring and unforgettable style statement in their culinary domain.
6. Beach Style Home Bar with Black Shiplap Backsplash and Gray Countertops
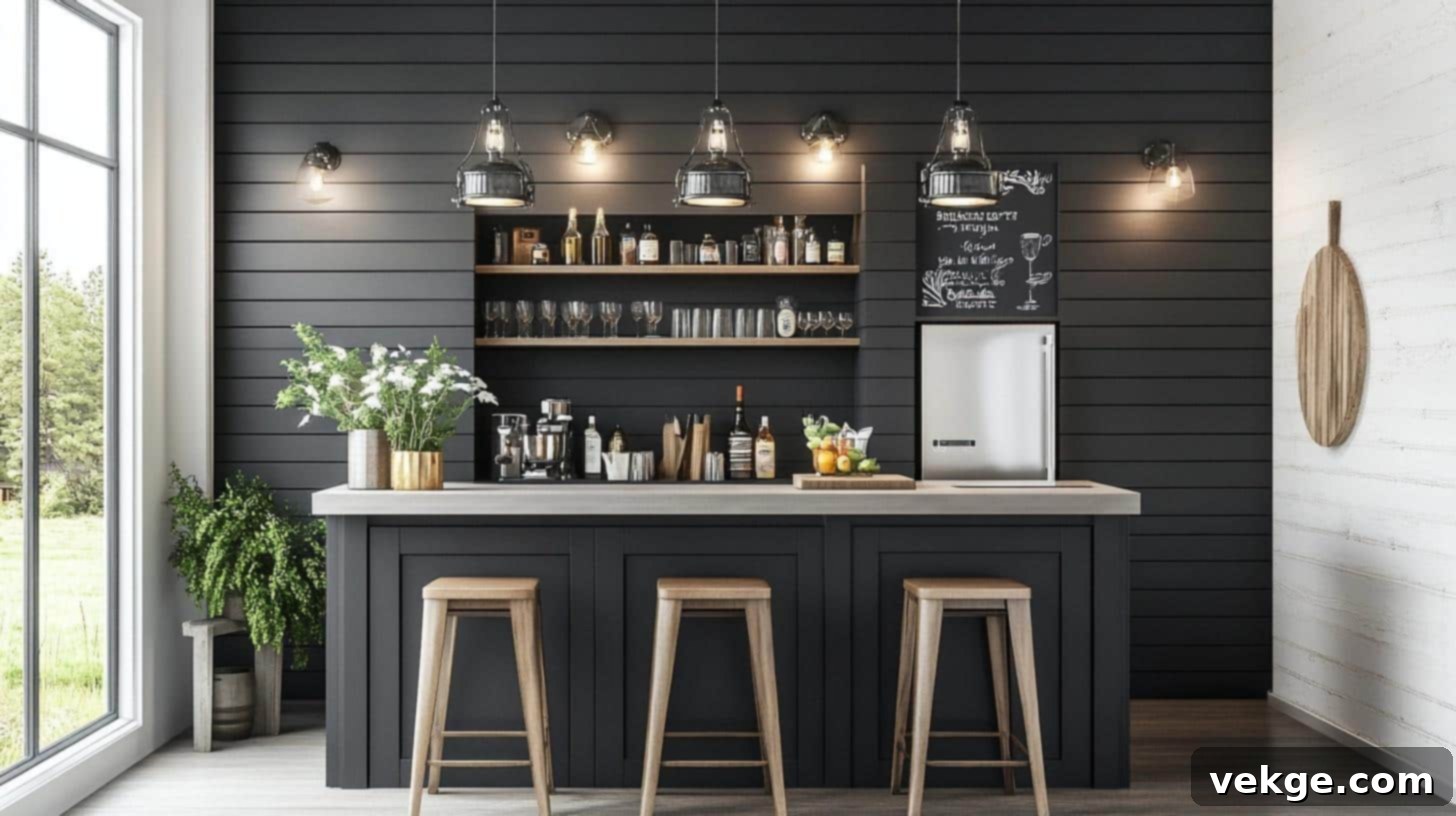
Create a sophisticated beach-style retreat right within your home with a striking black shiplap backsplash complemented by sleek gray countertops. This design skillfully creates a bold yet elegant contrast, setting the perfect mood for a relaxed yet refined entertainment area. The dark shiplap adds an unexpected touch of contemporary sophistication, while the lighter gray countertops ensure the space remains airy and open, evoking the cool, serene vibes of a coastal escape. This combination is both chic and inviting.
7. Stained Glass Shiplap
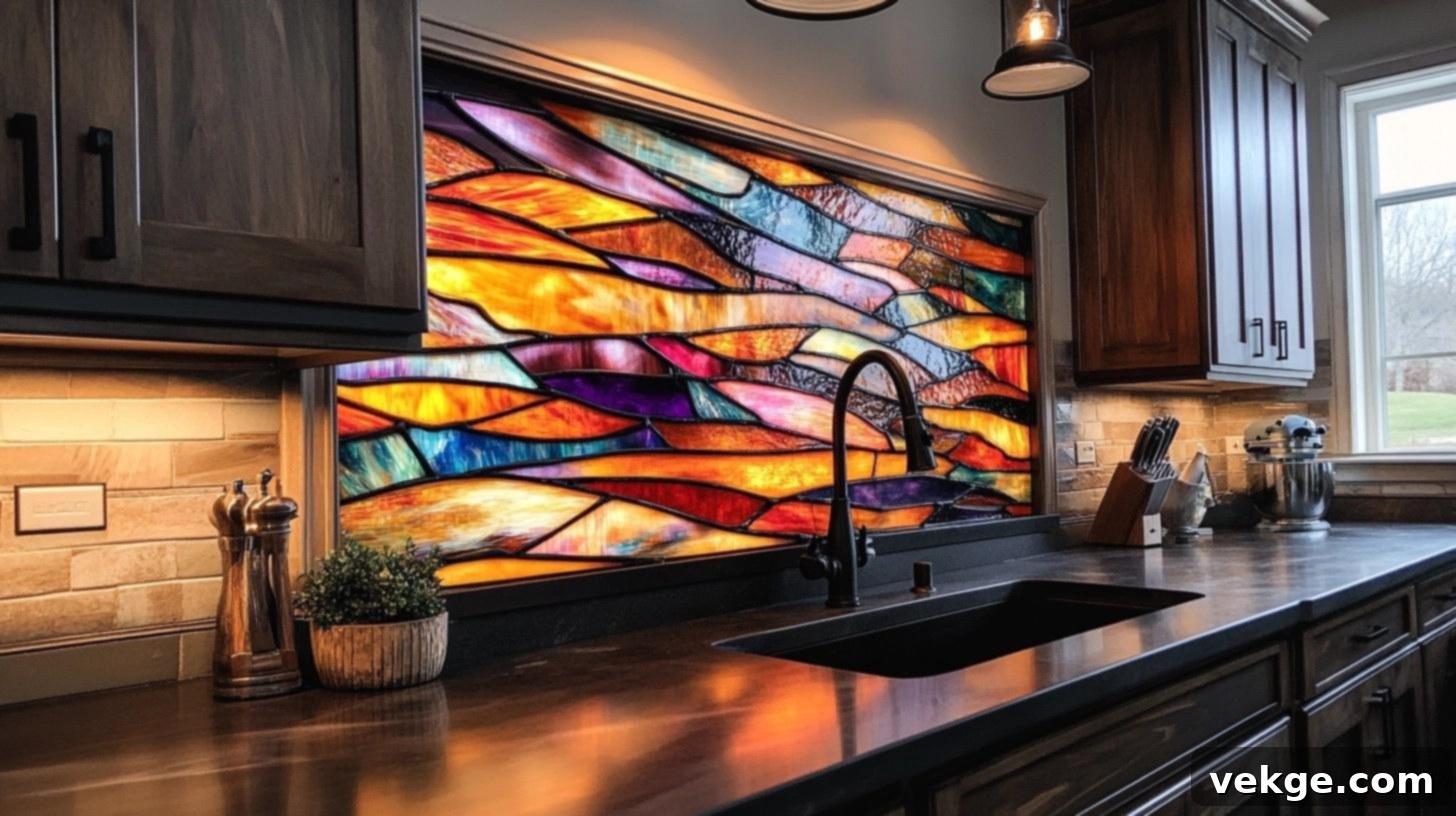
Infuse your kitchen with artistic elegance by choosing a stained glass shiplap backsplash. This unique blend intertwines traditional wood shiplap with vibrant, colorful glass elements, creating a captivating visual display. The design not only introduces a rich palette of color but also plays beautifully with light, reflecting artfully throughout the kitchen. It’s an exquisite choice for those who deeply appreciate handcrafted artistry and wish to integrate such a unique, decorative element into their home décor. This backsplash transforms your kitchen into a dynamic, visually captivating, and truly personal environment.
8. Shaker Cabinets Finished Off with an Off-White Shiplap Backsplash
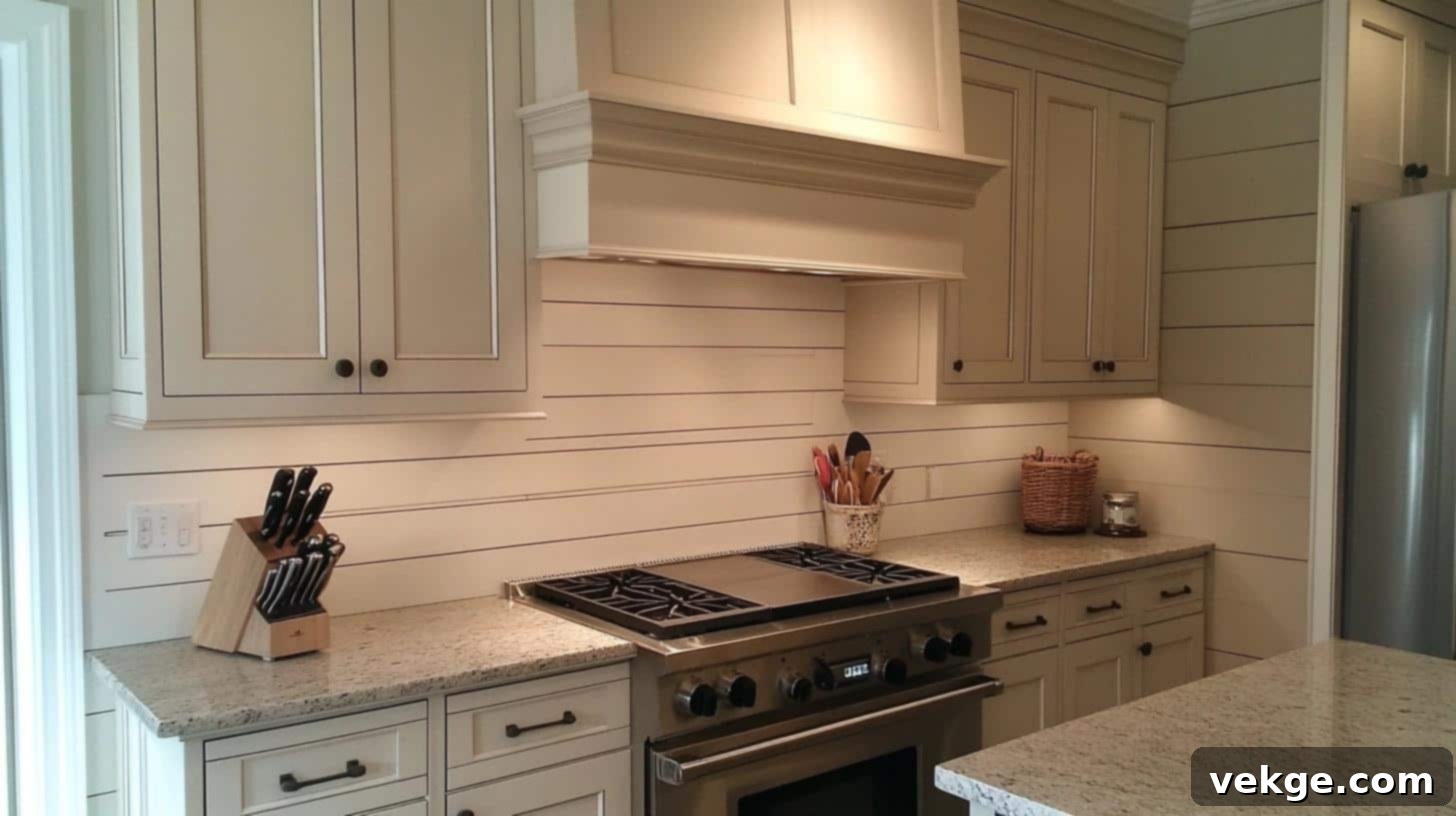
Achieve a timeless and effortlessly clean kitchen design by pairing classic shaker cabinets with a soft off-white shiplap backsplash. This harmonious combination delivers an instant fresh and airy feel, making your kitchen appear noticeably brighter and more expansive. The subtle, warm hue of the off-white shiplap also masterfully creates a soft, inviting ambiance that perfectly complements the sturdy, no-nonsense structure of shaker cabinetry. It’s a versatile choice that suits both traditional and modern farmhouse aesthetics.
9. Two-Tone Shiplap
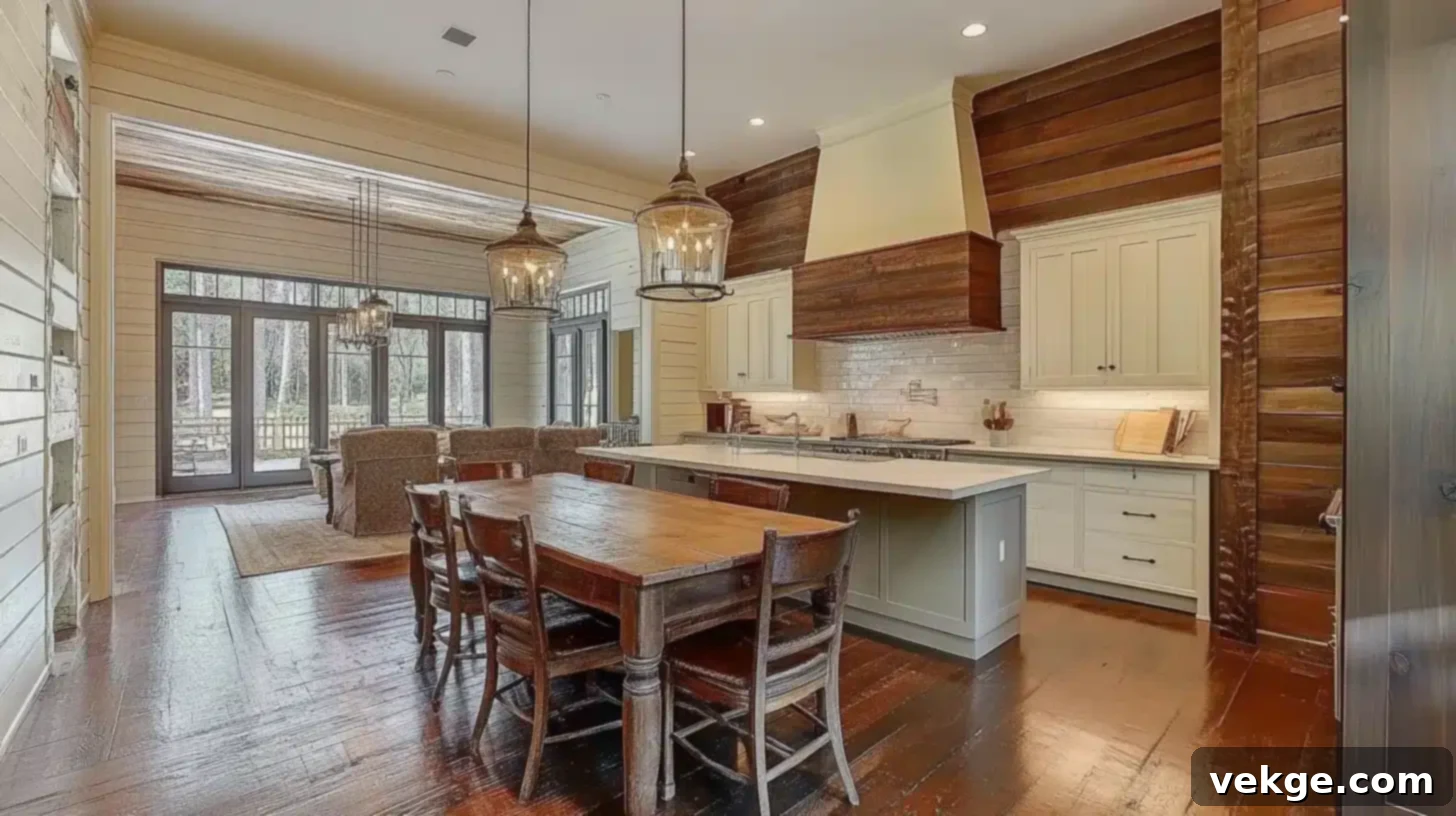
Introduce compelling visual interest and a dynamic aesthetic to your kitchen with a two-tone shiplap backsplash that creatively features contrasting colors. This innovative design element can be meticulously tailored to perfectly match your existing color scheme, offering a custom-designed look that is both refreshingly unique and undeniably stylish. It represents an excellent way to integrate a personalized touch and artistic flair into your kitchen while simultaneously maintaining a modern and vibrantly engaging space. Consider complementary colors or varying shades of the same color for sophisticated depth.
10. Metallic Finish Shiplap
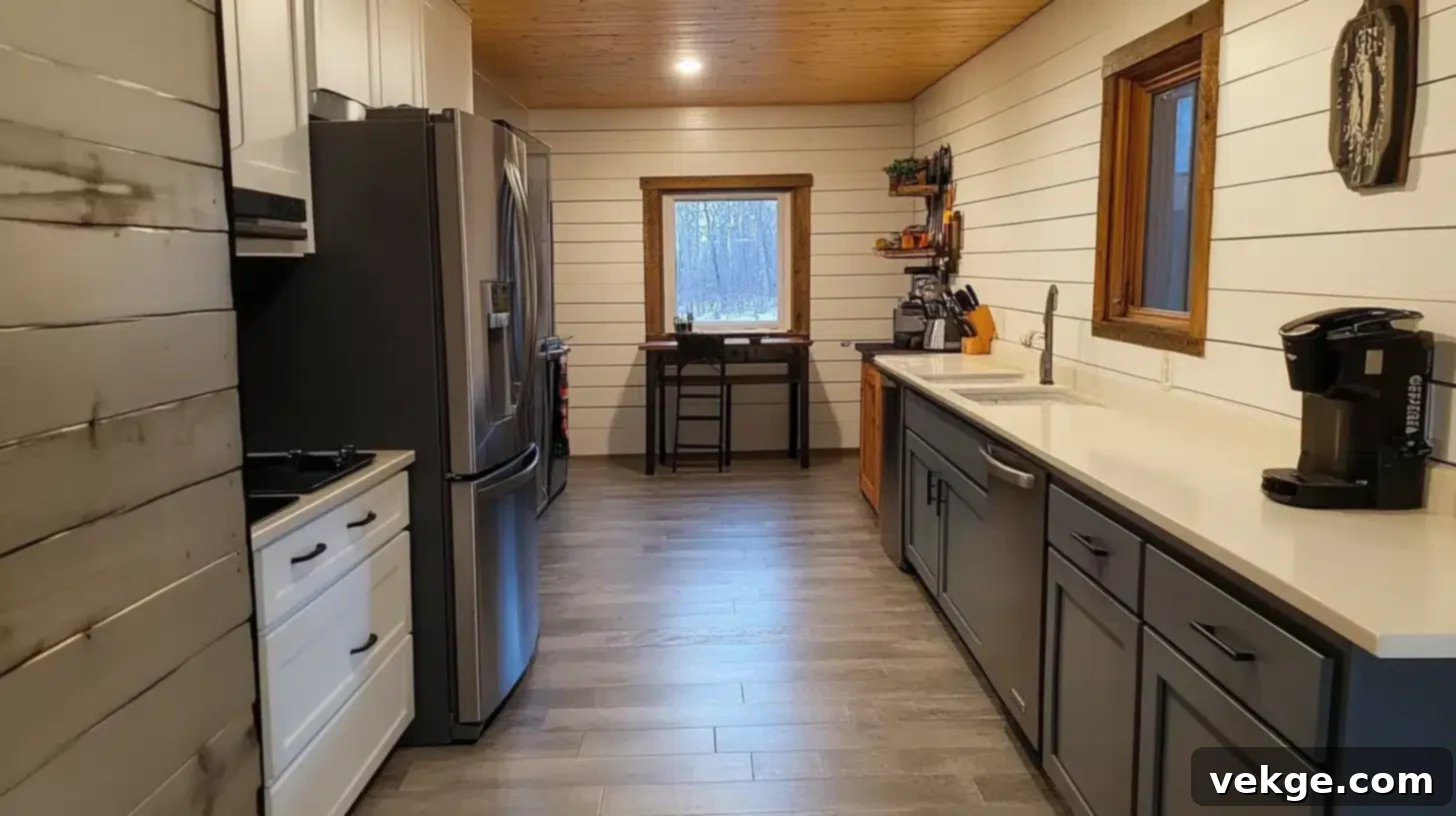
Grant your kitchen an immediate modern upgrade with a metallic finish shiplap backsplash. This luxurious option not only beautifully reflects light, adding an element of sparkle and brilliance, but also injects a distinct touch of glamour and sophistication into your culinary space. This eye-catching backsplash is perfectly suited for those aiming to infuse a bit of opulence and contemporary shine. The versatile metallic finish complements both light and dark cabinetry equally well, providing a highly adaptable option for any design aesthetic seeking an elevated look.
11. Chevron Pattern Shiplap
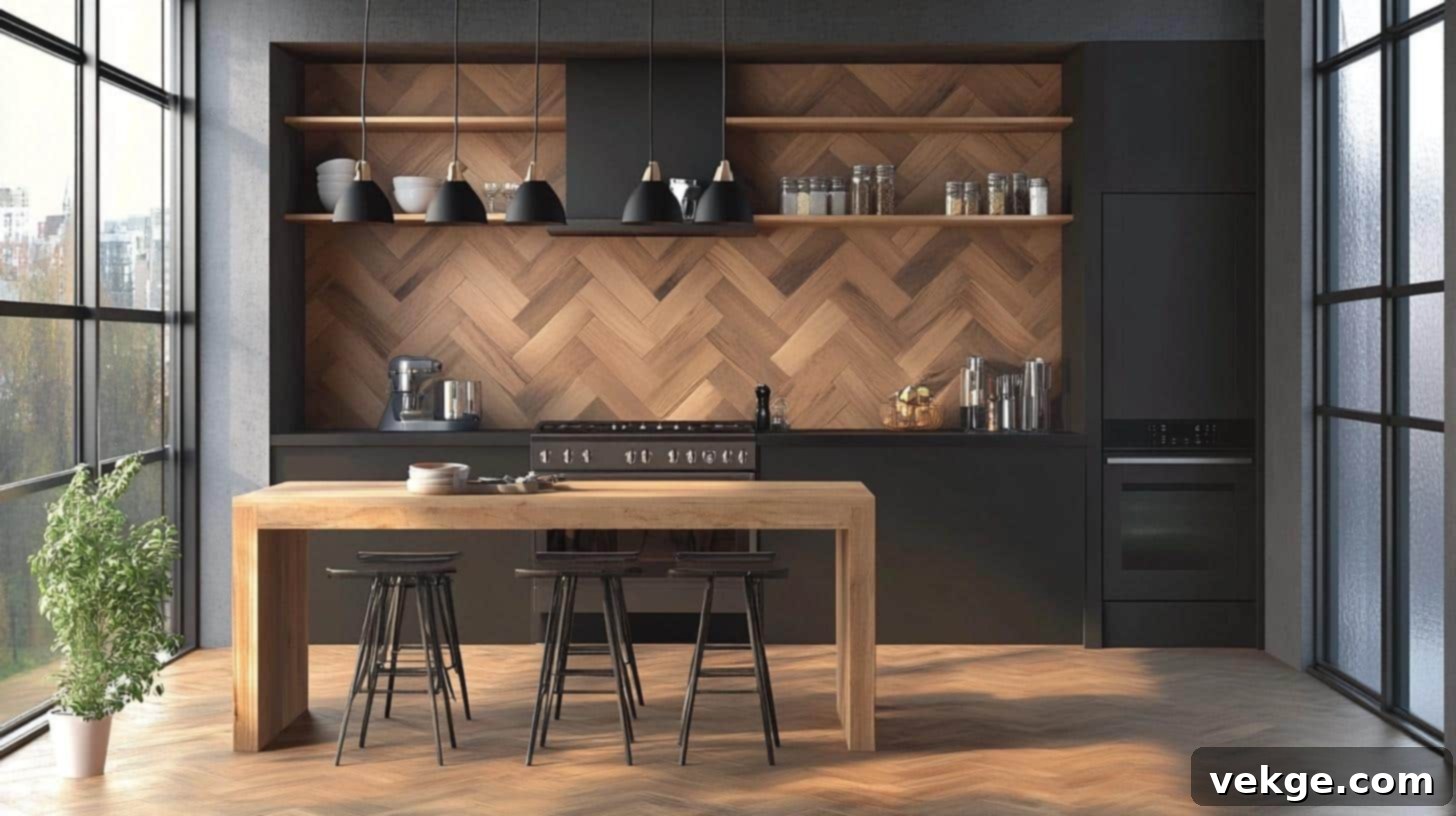
For a truly contemporary and visually dynamic backsplash, incorporate a chevron pattern with your shiplap boards. This geometric arrangement creates a striking sense of movement and introduces a modern artistic twist to the kitchen’s overall design. The chevron pattern not only significantly enhances visual depth but also serves as a bold, contemporary artistic flair. It’s an exceptional choice for anyone looking to add a statement piece that immediately captures attention and garners admiration, transforming a simple backsplash into a work of art.
12. Embossed Shiplap
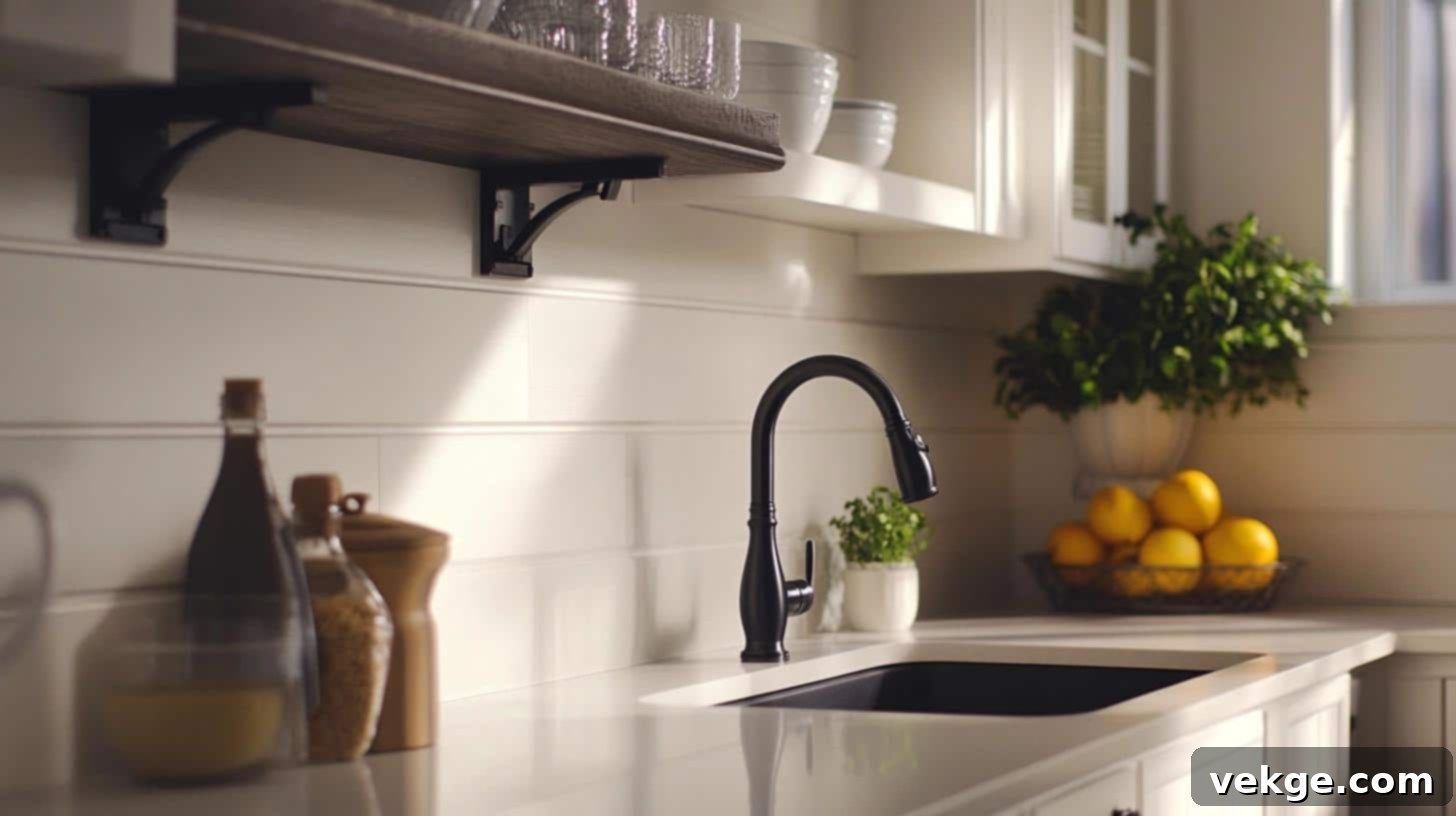
Opt for an embossed shiplap to introduce rich texture and sophisticated depth to your kitchen backsplash. The raised, tactile patterns on these boards catch light and shadow in intriguing ways throughout the day, constantly adding an element of dynamic interest and refined elegance. This detailed and intricate approach to shiplap allows for a more decorative and elaborate backdrop, effectively enhancing both modern and traditional kitchen designs with its unique visual and tactile appeal. It’s perfect for adding subtle luxury and dimension.
13. Mosaic Shiplap
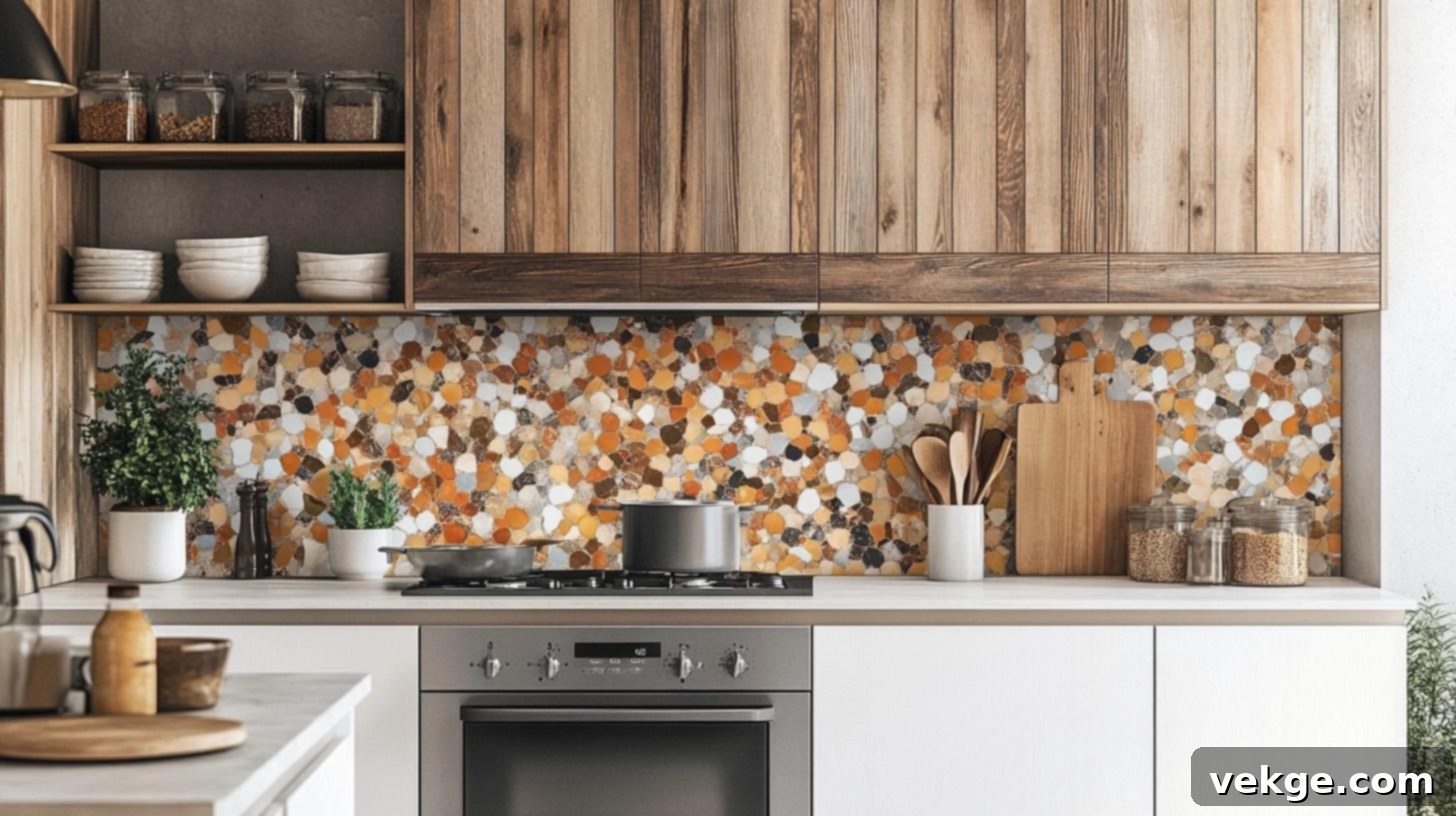
Craft a truly unique and captivating kitchen backsplash by creating a mosaic effect with shiplap pieces. This creative application involves combining different colors, textures, or even various wood stains to form an artistic composition. This inventive use of shiplap injects a highly personalized and artistic touch into your cooking space, ensuring it stands out as an undeniable focal point. It’s the perfect choice for those who cherish one-of-a-kind designs that eloquently reflect their personal style and culinary creativity, making the kitchen truly their own masterpiece.
Outstanding Benefits of Choosing a Shiplap Backsplash for Your Kitchen
Beyond its aesthetic appeal, a shiplap backsplash offers several practical advantages that make it an excellent choice for any kitchen renovation or update.
1. Simple, Timeless Good Looks
Shiplap possesses an inherent ability to instantly add warmth, texture, and a welcoming feel to your kitchen. The clean, crisp lines of the individual boards create a tidy, effortlessly put-together look that remarkably works well with virtually any kitchen style – from the rustic charm of a farmhouse to the minimalist elegance of a contemporary design. The subtle, consistent gaps between the boards add just enough architectural detail to make your walls visually interesting without appearing overly busy or distracting, creating a sense of serene continuity.
2. Kind to Your Wallet and Budget-Friendly
When comparing kitchen backsplash options, shiplap often stands out as a significantly more budget-friendly alternative to traditional tile, stone, or glass. The cost of shiplap boards per square foot is typically much lower than most tiling materials. Furthermore, the installation process for shiplap is generally less complex and time-consuming than laying intricate tiles, often requiring fewer specialized tools. This makes it a prime candidate for a DIY project, allowing many homeowners to save substantial amounts on professional installation fees, making a beautiful kitchen transformation surprisingly accessible.
3. Exceptional Versatility and Easy to Change
The adaptability of a shiplap backsplash is one of its greatest strengths. You have immense creative freedom to achieve the exact look you desire. Want a bright and airy kitchen? Paint your shiplap a crisp white. Craving a bold statement? Choose a deep, dramatic color. The beauty is that if your style evolves or you simply want a refresh, you can easily repaint your shiplap backsplash to match new decor trends or your updated preferences. Moreover, shiplap boards offer flexibility in orientation – they can be installed horizontally to expand the visual width of your room or vertically to add perceived height, allowing you to tailor the visual impact to your specific space.
Cost Comparison: Shiplap vs. Tile Backsplashes
Understanding the financial investment is a crucial part of any home renovation project. Here’s a comparative look at the costs associated with shiplap versus basic and high-end tile backsplashes, highlighting why shiplap often emerges as the more economical choice, particularly for DIY enthusiasts.
| Backsplash Type | Material Cost (per sq ft) | DIY Potential | Professional Installation Cost (per sq ft) | Total Estimated Cost (for a typical kitchen, approx. 30 sq ft) |
|---|---|---|---|---|
| Shiplap | $5 – $10 | High (Basic carpentry tools, moderate skill) | $5 – $15 (if hired, but often DIY) | $150 – $450 (DIY) / $300 – $750 (Pro) |
| Basic Ceramic/Subway Tile | $3 – $15 | Medium (Requires tile cutter, trowel, grout float, moderate skill) | $8 – $25 | $330 – $900 (DIY) / $600 – $1200 (Pro) |
| High-End Tile (e.g., Marble, Glass, Designer) | $15 – $50+ | Low (Specialized tools, high skill, prone to breakage) | $15 – $50+ | $450 – $1500+ (DIY) / $900 – $3000+ (Pro) |
As the table illustrates, shiplap presents a compelling economic advantage. Its lower material cost, combined with high DIY potential, makes it an attractive option for budget-conscious homeowners. Even if you opt for professional installation, shiplap often remains more affordable than many tiled alternatives. This cost-effectiveness, without sacrificing style or durability, solidifies shiplap’s position as a smart choice for modern kitchen makeovers.
Conclusion: Embrace the Enduring Appeal of a Shiplap Backsplash
A shiplap backsplash stands out as an exceptionally versatile, visually appealing, and cost-effective solution for anyone looking to transform their kitchen. Its inherent charm lies in its ability to blend rustic character with modern sensibility, creating a focal point that is both timeless and fresh.
With an impressive array of design possibilities, from the understated elegance of a classic white finish to the bold statement of a metallic or neon hue, shiplap allows for unparalleled customization. This adaptability ensures you can create a unique aesthetic that perfectly reflects your personal style and complements your home’s overall decor.
Beyond its aesthetic virtues, shiplap offers significant cost savings, particularly appealing to DIY enthusiasts who can achieve professional-looking results with moderate effort and basic tools. This combination of beauty, durability, and affordability makes shiplap an intelligent investment for any kitchen upgrade.
Whether your dream kitchen features natural wood tones, a vibrant pop of color, or a subtle, textured backdrop, shiplap makes it possible to achieve your vision with ease and within budget. We encourage you to explore the endless possibilities and make a lasting impact with this functional, stylish, and endlessly charming kitchen upgrade. Your kitchen deserves a backsplash that is as practical as it is beautiful.
FAQ (Frequently Asked Questions) About Shiplap Backsplashes
Is Shiplap Safe Behind the Stove?
Yes, shiplap can be safely installed behind a stove, provided it is properly sealed and maintained. The key is to use a high-quality, heat-resistant sealant (such as a polyurethane or marine-grade varnish) that creates a durable barrier against heat, moisture, and grease. Additionally, ensure there is adequate distance between the shiplap and any open flames or high-heat elements from your stove, adhering to local building codes and appliance manufacturer guidelines regarding clearances for combustible materials. Regular cleaning to remove grease buildup is also crucial for safety and longevity.
Can You Install Shiplap in a Bathroom?
Absolutely, shiplap is a popular and excellent choice for bathrooms, especially for creating a spa-like or modern farmhouse aesthetic. However, due to the high moisture and humidity levels in bathrooms, proper installation and sealing are even more critical. Opt for water-resistant wood species or MDF with a moisture-resistant core. Apply multiple coats of a high-quality, water-resistant sealant to all sides and edges of the shiplap boards before installation, paying particular attention to the joints and any areas that will be directly exposed to water, like around sinks or in shower surrounds. Ensure proper ventilation in your bathroom to help manage humidity.
How to Make a Shiplap Backsplash Waterproof?
Making your shiplap backsplash effectively waterproof involves a multi-step sealing process. First, ensure the shiplap boards are clean and dry. Then, apply multiple thin coats of a clear, high-performance waterproof sealant, such as a polyurethane finish, an epoxy coating, or a marine-grade wood sealer. It’s crucial to cover all surfaces of the boards, including the front, back, and especially the edges and the small gaps (reveals) between boards where moisture could penetrate. Allow each coat to dry completely according to the manufacturer’s instructions before applying the next. For areas directly behind a sink or stove, consider an additional coat or a more robust product. Regular inspection and reapplication of sealant every few years will maintain this protective barrier.
