Shed on Skids: Your Ultimate Guide to Building a Movable, Flexible, and Affordable Storage Solution
If you’re looking for a practical, adaptable, and cost-effective solution for your backyard storage needs, a shed on skids might be the perfect fit. This type of shed foundation offers remarkable flexibility, allowing you to easily reposition your structure if your needs change or if you decide to move it to a different part of your property.
Having assisted numerous friends and family in constructing their own skid-mounted sheds, I’ve seen firsthand how these structures simplify the entire building process. They are incredibly practical, especially when you need a straightforward, flexible, and easily movable storage option without the permanence or complexity of traditional foundations.
In this comprehensive guide, we’ll delve deep into what a shed on skids entails, explore the compelling reasons why it’s a worthwhile consideration for your next project, and provide a detailed comparison with more permanent foundation types. You’ll gain simple, actionable tips on how to build, effectively anchor, and even move your skid shed. By the end, you’ll feel completely prepared and confident to either select a pre-built shed on skids or embark on building one that perfectly suits your specific space, budget, and storage requirements.
What is a Skid Foundation?
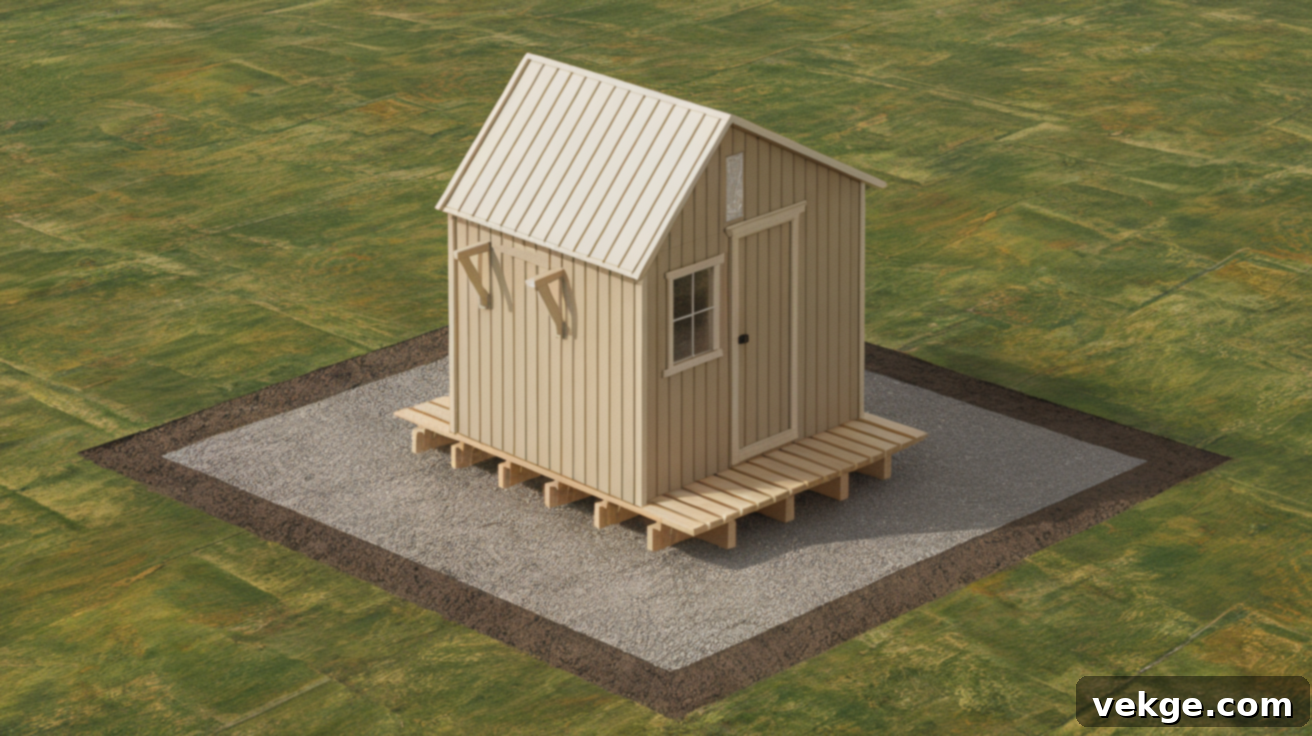
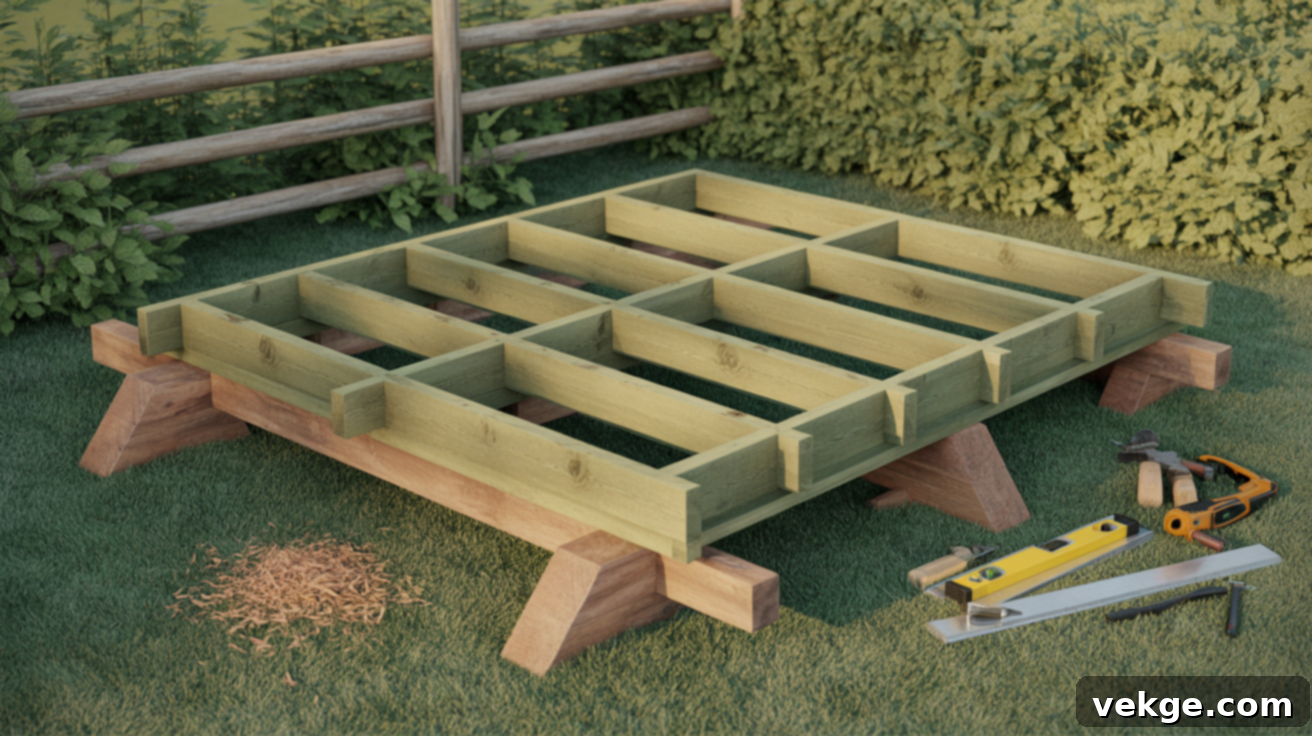
A skid foundation, also commonly known as a skid base, is a ground-level base designed to support a shed without the need for extensive digging, concrete pouring, or permanent footings. It’s fundamentally constructed using robust, treated wood beams (skids) that are laid directly on a prepared, compacted ground surface. These long lumber beams typically run lengthwise beneath the entire structure of the shed, forming the primary support system onto which the floor joists are then attached.
The entire structure usually rests on a layer of gravel or firmly packed soil. This strategic placement not only enhances drainage by preventing water from pooling directly around the wood but also minimizes direct soil-to-wood contact, which is crucial for preventing rot and extending the lifespan of the foundation. The skids are carefully spaced to evenly distribute the shed’s weight across its width, ensuring stability and preventing localized pressure points.
The lumber chosen for skids is specifically selected for its durability and inherent resistance to ground contact and moisture. Often, it’s pressure-treated wood, rated for direct ground burial, which forms a sturdy yet non-permanent frame that does not rely on piers, footings, or a continuous concrete slab.
How a Skid Foundation Supports Your Shed
The ingenious design of a skid foundation ensures that each skid beam maintains continuous contact with the ground along its entire length. This fundamental characteristic allows the shed’s weight to be distributed remarkably evenly across a larger surface area, as opposed to being concentrated at specific, isolated points like with pier or block foundations. This uniform weight distribution is key; it significantly reduces the pressure exerted on the soil beneath, thereby minimizing the risk of the shed settling unevenly or shifting over time.
Once the skids are properly positioned and leveled, the floor joists are fastened securely across them, typically perpendicular to the skids. This cross-structure provides a solid and stable surface for the shed’s floor, which in turn supports the walls, roof, and all the contents within. Because the skids run continuously beneath the full footprint of the floor, they offer an unparalleled, uninterrupted support system capable of handling both the vertical load of the shed and any minor ground movement or seasonal changes without compromising structural integrity.
Why Skid Foundations Are Popular for DIY Builds
For the avid do-it-yourselfer, a skid foundation presents an empowering opportunity to build on your own terms, without the typical complexities or delays associated with more traditional construction methods. You won’t find yourself waiting on contractors for specialized groundwork or needing to rent expensive, heavy machinery.
The setup process for a skid foundation is remarkably straightforward and intuitive, allowing you to allocate more of your time, energy, and focus on the actual shed structure itself rather than getting bogged down in intricate groundwork. It’s an ideal choice when you’re eager to start building promptly, utilizing readily available supplies that are easy to transport, handle, and assemble with basic tools.
Furthermore, the inherent flexibility of a skid foundation is a huge advantage during the construction phase. You can easily adjust, fine-tune, or even reposition the skids as needed before you permanently attach the floor frame. This adaptability provides a critical margin for error and customization, making the entire DIY shed-building experience far more forgiving and enjoyable.
Essential Materials You’ll Need for Your Skid Foundation
Before you begin the exciting process of building your shed on skids, it’s crucial to gather all the necessary materials. Selecting the right components ensures your skid foundation will be strong, stable, and resilient against the elements for many years to come.
1. Pressure-Treated Skids: The Backbone of Your Foundation
- 4×4 Lumber: Ideal for smaller, lighter sheds (e.g., 6×8 or 8×10 feet) where the overall weight will be minimal.
- 4×6 Lumber: A common and versatile choice for average-sized backyard sheds (e.g., 10×12 or 10×16 feet), offering a good balance of strength and cost.
- 6×6 Lumber: Recommended for larger, heavier sheds (e.g., 12×20 feet and up) or those intended to store very heavy equipment like ATVs or riding mowers, providing maximum stability.
- Crucial Note: All skid lumber must be rated for ground contact. Look for labels like “Ground Contact” or “GC” to ensure it’s treated to resist rot and insect infestation when in direct contact with soil.
2. Alternative Skid Material (If Needed for Customization or Strength)
- 2×6 or 2×8 Boards for Gang-Nailing: If larger dimension lumber (like 6×6) is unavailable or too costly, you can create stronger skids by gang-nailing multiple smaller boards together. For example, three 2×6 boards nailed together can form a sturdy 6×6 equivalent.
- Structural Nails or Screws: Use hot-dipped galvanized or exterior-grade screws (3-inch minimum) to securely fasten these layers together, creating a solid, composite beam.
- Staggered Boards: For maximum strength and to prevent a single seam from weakening the skid, stagger the butt joints of the individual boards when gang-nailing.
3. Floor Framing Lumber: Creating Your Shed’s Base
- Pressure-Treated 2×6 or 2×8 Joists: These boards will run perpendicular to the skids and form the grid for your shed floor. The choice between 2×6 and 2×8 depends on your shed’s size and intended load; 2x8s are generally preferred for larger sheds or if you anticipate heavy use.
- Joist Hangers (Optional but Highly Recommended): These metal connectors provide superior strength and easier installation for attaching floor joists to rim joists, especially if you’re building a full floor frame on top of the skids.
- Appropriate Fasteners: Use 3-inch hot-dipped galvanized common nails or exterior-grade deck screws (such as #9 or #10, 3-inch minimum) to securely fasten joists to skids and rim joists.
4. Floor Decking: The Surface of Your Shed
- 3/4-inch Exterior-Grade Plywood: This is the standard for shed flooring, offering excellent strength and weather resistance. Look for grades like CDX (C-D exposure 1).
- Tongue-and-Groove (T&G) Panels (Optional for Added Strength and Sealing): T&G plywood panels interlock, creating a tighter, stronger, and more seamless floor that resists moisture better.
- Galvanized Screws or Ring-Shank Nails: Use 2-inch minimum galvanized screws or ring-shank nails to secure the decking to the floor joists. Ring-shank nails offer superior holding power against wood movement.
5. Base Preparation Materials (Optional but Highly Recommended for Longevity)
- Gravel or Crushed Stone: A 2-4 inch layer of crushed gravel (e.g., 3/4-inch clean stone or ¾-inch minus for better compaction) creates an excellent drainage bed, preventing moisture buildup under the skids.
- Landscape Fabric: Laid beneath the gravel layer, landscape fabric helps to suppress weed growth, preventing vegetation from growing up around and through your skid foundation.
- Ground Anchors or Stakes: Essential for securing your shed against wind uplift and shifting. Options include rebar pins, auger-style ground anchors, or concrete anchors with metal straps, depending on your soil type and local wind conditions.
How to Build a Shed on Skids: A Step-by-Step Guide
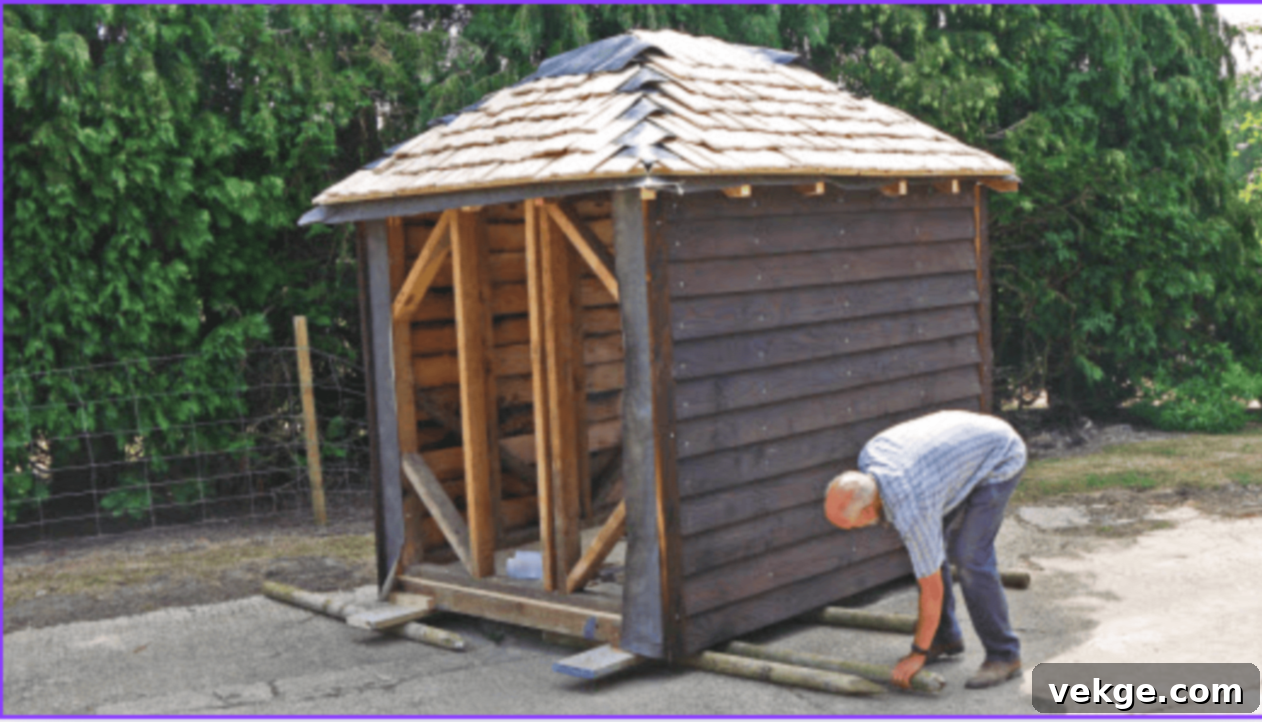
Building a shed on skids is a rewarding DIY project that doesn’t require advanced construction skills. By following these clear, sequential steps, you can construct a stable, durable, and lasting foundation for your shed. Each phase is manageable, provided you plan thoroughly and execute one step at a time.
Step 1: Choose and Thoroughly Prepare Your Site
The success of your shed on skids begins with the right location. Select a spot in your yard that is naturally flat and exhibits excellent drainage properties. Avoid low-lying areas where water tends to collect. Once the ideal location is identified, the preparation begins:
- Clear the Area: Start by completely clearing away all existing grass, topsoil, rocks, and any roots. You’re aiming for bare, undisturbed earth. This can be done with a shovel, hoe, and rake.
- Level the Surface: Use a long, straight 2×4 board and a spirit level to check the area for high and low spots. Dig down high spots and fill in low spots with compacted soil or sand until the entire footprint of your shed is as level as possible. A tamper tool can help achieve proper compaction.
- Improve Drainage with Gravel (Highly Recommended): For superior drainage, especially in areas prone to moisture or heavy rainfall, excavate an additional 2 to 4 inches of soil. Fill this excavation with compacted crushed gravel or clean stone. This gravel base significantly reduces moisture buildup, provides a stable, uniform surface, and helps keep your skids dry, greatly extending their lifespan. Consider adding a layer of landscape fabric beneath the gravel to prevent weed growth.
Step 2: Accurately Set the Skids in Place
With your site meticulously prepared, it’s time to position the skids, which are the primary load-bearing components of your foundation:
- Lay the Skids: Carefully place your pressure-treated skids directly onto the prepared and leveled ground or gravel pad. Ensure they run lengthwise, parallel to the longest dimension of your shed. The spacing of the skids is critical and should correspond to your shed’s design. For a typical 10×12 shed, three skids are usually sufficient, spaced approximately 40 inches apart, with one at each edge and one in the center. Larger sheds may require more skids, spaced evenly.
- Achieve Perfect Level: This is a crucial step for the structural integrity of your entire shed. Use a long level (a 4-foot level is minimum, but a 6-foot or longer is better) or a string line stretched taut across the top of the skids to check that all skids are perfectly level with one another, both along their length and across the width of the shed.
- Adjust and Shim: If any skid is not level, you will need to adjust it. For low spots, add small amounts of compacted gravel or use composite shims (never wood shims as they will rot) underneath the skid until it is perfectly level. For high spots, carefully remove material from underneath the skid until it sits correctly. Recheck level frequently as you make adjustments.
Step 3: Build and Deck the Floor Frame
Once the skids are securely and levelly in place, you can construct the floor frame and add the decking:
- Install Floor Joists: Begin by attaching rim joists to the ends of the skids to create a perimeter frame. Then, install the internal floor joists across the skids, typically spaced 16 inches on center. This standard spacing provides optimal support for the flooring. Secure each joist to the skids using 3-inch galvanized nails or exterior-grade deck screws. You can toe-nail them directly or use metal hurricane ties for extra strength.
- Apply Floor Decking: After all the joists are firmly in place, cover them with 3/4-inch exterior-grade plywood. Start in one corner and work your way across, ensuring each sheet is properly aligned and flush with its neighbors. Stagger the seams of adjacent sheets to enhance the overall strength of the floor. Fasten the plywood sheets to every joist using 2-inch galvanized screws or ring-shank nails, placed every 6 inches along the edges and every 10-12 inches in the field.
Step 4: Anchor Your Shed on Skids
Anchoring is essential to prevent your shed from shifting, uplifting, or sliding due to strong winds, uneven settling, or accidental bumps:
- Choose Your Anchoring Method:
- Rebar Pins: Drive lengths of rebar (typically 2-3 feet long, 1/2 or 5/8 inch thick) directly through pre-drilled holes in the skids and deep into the ground. Bend the top of the rebar over the skid for added security.
- Ground Anchors with Metal Straps: Auger-style ground anchors are screwed into the earth and then connected to the skids or the shed’s floor frame with heavy-duty metal strapping or cables. These are particularly effective in sandy or loose soils.
- Concrete Anchors: For sheds placed on a gravel pad over concrete blocks or a small concrete footer, expansion anchors can be used to secure metal straps to the concrete, which then connect to the skids.
- Strategic Placement: Secure both ends of each skid, and for larger sheds, add additional anchors in the middle of longer skids to ensure uniform resistance.
- Wind Resistance: In areas known for high winds or hurricane activity, consider employing additional strapping, bracing, or specialized tie-down kits that connect the shed’s walls directly to the foundation. This prevents the entire structure from lifting off the skids during severe weather conditions.
Shed on Skids vs. Other Foundation Types: A Comprehensive Comparison
Choosing the right foundation is a pivotal decision that impacts your shed’s durability, cost, and ease of construction. Let’s compare skid foundations with other common base types to help you make an informed choice that best suits your specific shed, budget, available tools, and local environmental conditions.
Skid Foundation vs. Gravel Pad
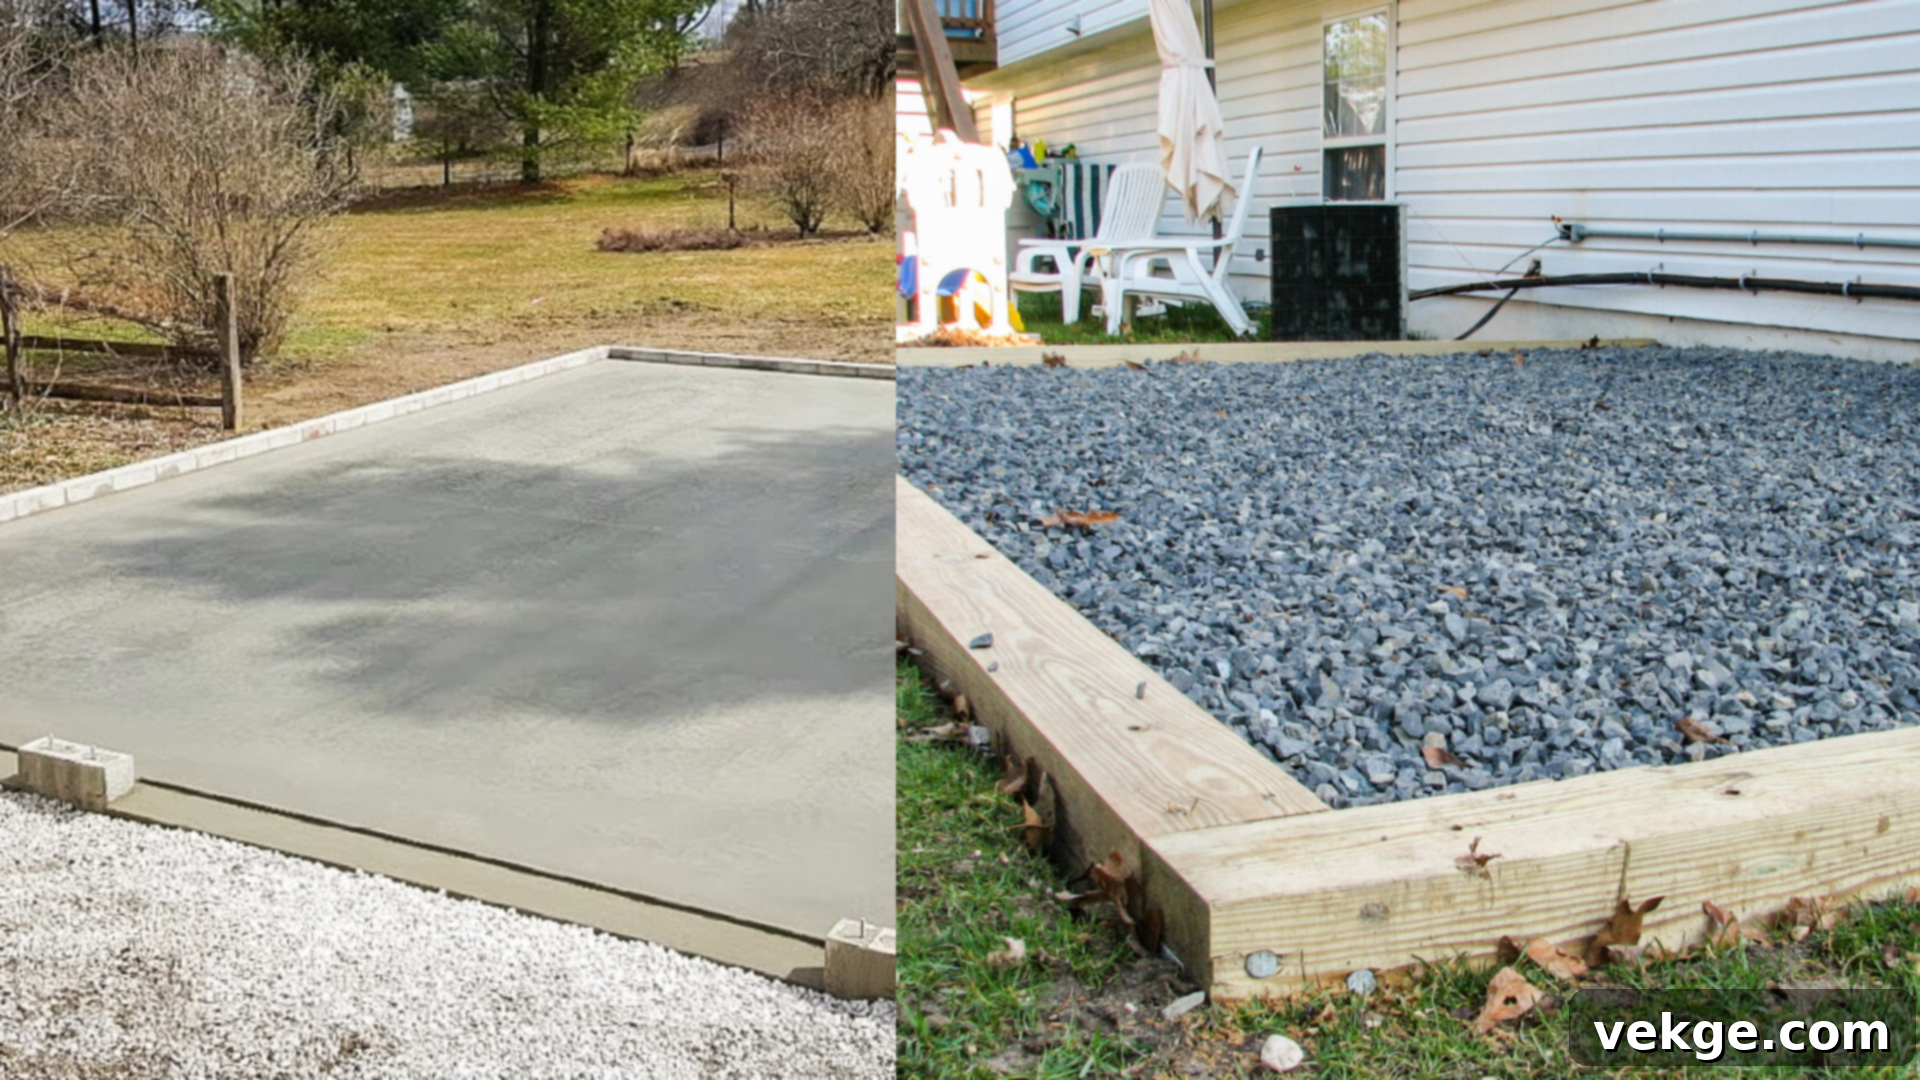
A well-constructed gravel pad offers exceptional drainage and a remarkably stable, level surface, making it an excellent choice for sheds of all sizes, especially larger or heavier structures. The main distinction is that a gravel pad does not directly support the structure itself; rather, it provides an ideal, well-drained surface upon which another foundation type, such as a floor frame built on skids or concrete blocks, can rest.
Preparing a gravel pad requires more time and effort than simply leveling the ground for skids. It typically involves excavating the area, laying landscape fabric, filling with several inches of compacted gravel, and often necessitates edging (such as treated lumber or paver stones) to contain the stone. Skid foundations, conversely, are part of the shed’s direct support structure, acting as both the base and a component of the floor frame.
While skid foundations are generally faster to construct initially, they can be prone to shifting or settling over time, particularly on soft or poorly compacted soil, if not placed on a firm, well-drained base like a gravel pad. In fact, many builders choose to combine the two, placing their skid foundation directly on top of a prepared gravel pad to achieve the best of both worlds: the portability of skids with the superior drainage and stability of gravel.
Skid Foundation vs. Concrete Slab
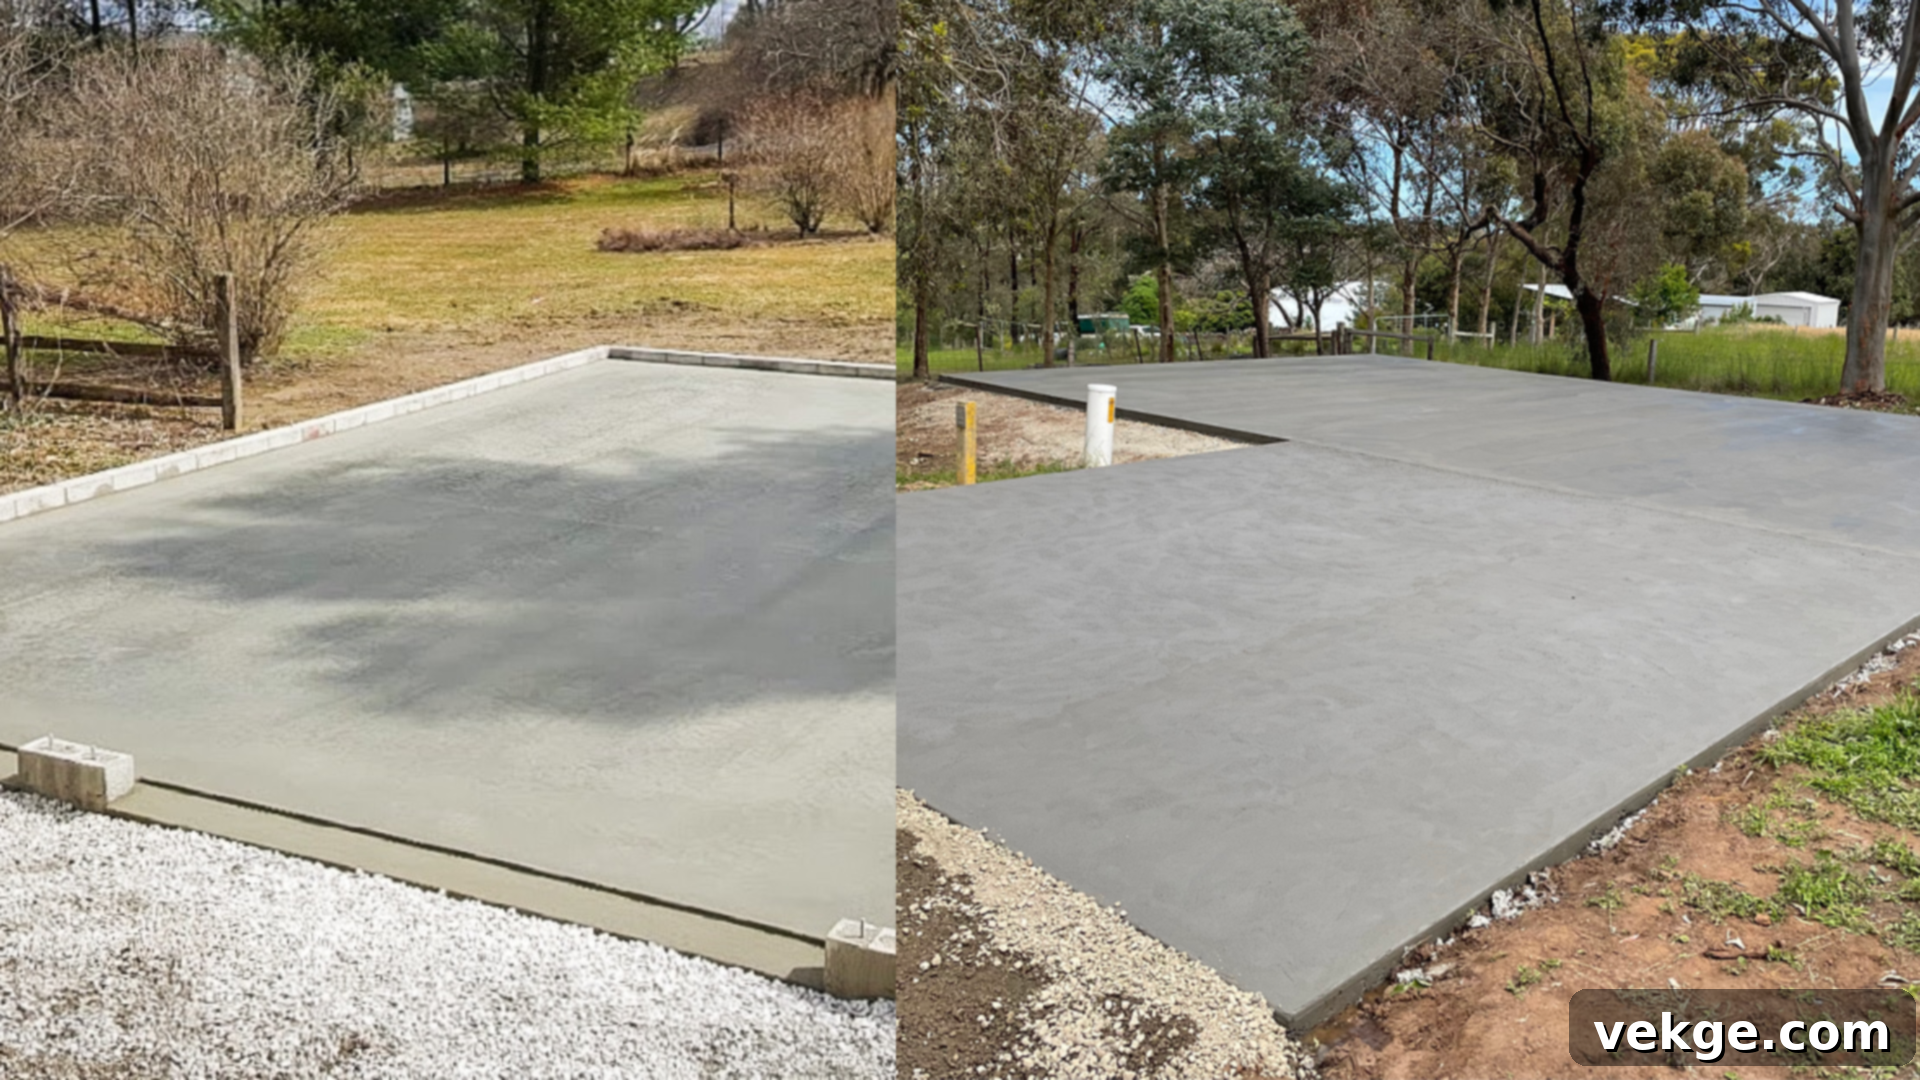
A concrete slab represents the pinnacle of permanence and durability for shed foundations. It is the ideal, long-term choice for sheds that will house heavy machinery, vehicles, or serve as a workshop with frequent, intense use. A concrete slab provides an absolutely smooth, perfectly level, and incredibly robust base that is impervious to shifting, sinking, or rotting over decades.
However, the advantages of a concrete slab come with significant trade-offs. It is considerably more expensive due to material costs (concrete, rebar, forms) and labor. The installation process is far more involved and time-consuming, typically requiring professional excavation, forming, pouring, and finishing, which often necessitates specialized tools and expertise. Once poured, a concrete slab is, by its very nature, permanent and cannot be moved or easily adjusted.
In contrast, a skid foundation is a quicker, much more budget-friendly, and significantly easier option for DIY enthusiasts. While it doesn’t offer the same level of permanence or load-bearing capacity as a concrete slab, it performs exceptionally well for small to medium-sized storage sheds. When speed of construction, flexibility, and affordability are higher priorities than maximum long-term strength or permanent placement, a skid foundation clearly outweighs the benefits of a concrete slab.
Skid Foundation vs. Concrete Blocks
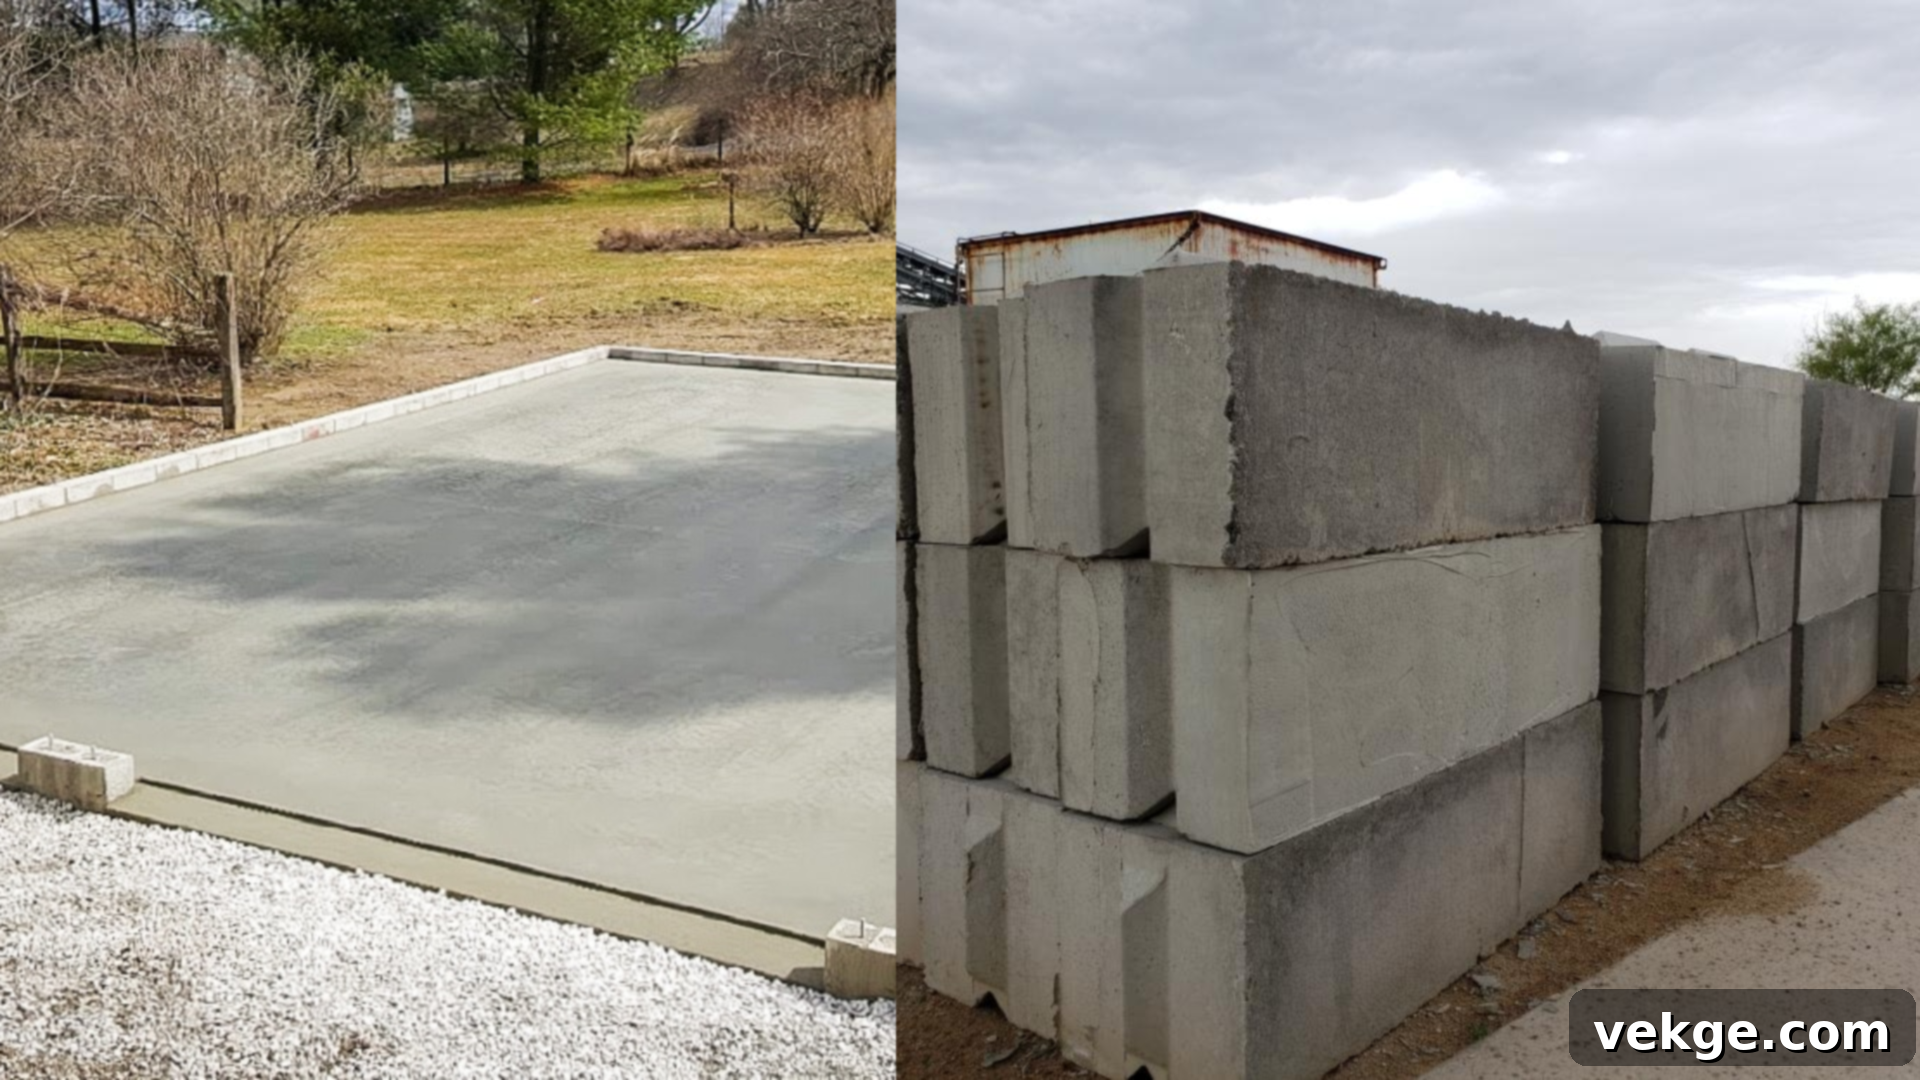
Using concrete blocks (typically solid patio blocks or concrete piers) is a common method to elevate sheds above ground level, particularly for smaller structures or those needing improved airflow underneath. This approach is generally more affordable than a full concrete slab and provides excellent ventilation, which can help prevent moisture buildup and rot in the shed’s floor system.
However, building a stable foundation with concrete blocks demands meticulous attention to precise placement and careful leveling, especially on ground that isn’t perfectly flat. Each block must be individually leveled and supported, often requiring extensive shimming with composite shims or gravel to ensure a uniform plane. If the ground settles unevenly, individual blocks can shift, leading to an unlevel shed floor and potential structural stress.
Skid foundations offer a more forgiving and beginner-friendly alternative. The continuous contact of the skids with the ground (or gravel pad) makes leveling easier across a broader area, as you’re adjusting a few long beams rather than many individual points. While concrete blocks may offer slightly better protection from ground moisture by raising the entire structure higher, skids are simpler to position and adjust during initial setup. Crucially, a skid-mounted shed retains its portability, allowing you to reposition the entire structure later if your needs or landscape design change – a significant advantage over a block foundation that essentially creates multiple fixed points of support.
Comparison Table: Shed Foundation Types at a Glance
Use this convenient table to compare common shed foundation types side-by-side. This quick reference can help you determine which option best suits your budget, skill level, desired timeline, and the specific requirements of your shed project.
| Foundation Type | Durability | Cost | Build Time | Tools Needed |
|---|---|---|---|---|
| Skid Foundation | Moderate (Excellent with gravel base) | Low | Fast (1-2 days for foundation) | Basic hand tools (level, shovel, saw, drill) |
| Gravel Pad | High (Excellent drainage & stability) | Medium | Moderate (2-3 days for prep) | Shovel, rake, tamper, wheelbarrow, edging tools |
| Concrete Slab | Very High (Permanent & Robust) | High | Slow (3-7 days, including cure time) | Forms, mixer, trowel, rebar cutters, specialized finishing tools |
| Concrete Blocks | High (Good airflow, but prone to shifting if not meticulously leveled) | Medium-Low | Moderate (2-3 days for meticulous leveling) | Level, shovel, string line, tamper, shims |
Permits and Local Regulations You Should Know Before Building
Before you enthusiastically break ground on your new shed, it’s absolutely critical to understand and adhere to your local building codes and regulations. Permitting requirements can vary significantly from one municipality or county to another, with some areas having strict guidelines for even small structures, while others are more lenient.
When You May Not Need a Permit for Your Shed
In many jurisdictions, smaller sheds fall under specific exemptions and may not require a formal building permit. A common threshold for exemption is typically around 100 or 120 square feet in footprint (e.g., a 10×10 or 10×12 shed). Beyond size, other factors often include:
- No Electrical Wiring: If the shed will not be wired for electricity.
- No Plumbing: If there are no plans to install water lines or drainage.
- Not a Habitable Space: If the shed is strictly for storage and not intended for use as a living space, office, or workshop that requires heating/cooling.
- Height Restrictions: Some areas have height limits (e.g., 10-12 feet) beyond which a permit is required.
However, even if your shed seems to meet these criteria, it is an absolute necessity to always double-check with your local building department or planning office. A quick phone call or visit can save you significant headaches, fines, and potential demolition orders down the line.
Temporary vs. Permanent Sheds: How Skids Factor In
Sheds constructed on skids are frequently regarded as “temporary structures” by local authorities. This classification stems from the fact that they do not utilize permanent footings, are not anchored directly into concrete, and are designed to be movable. The ability to relocate the shed is often the key differentiator.
If your shed can be physically moved (even if it takes significant effort), isn’t permanently attached to the ground with concrete foundations, and doesn’t require utility hookups, it may fall under a more relaxed set of rules or even qualify for a temporary structure permit, which can be easier and less expensive to obtain than a full building permit. Nonetheless, always consult your area’s specific definition of a “temporary structure” to ensure your project complies and to avoid any unforeseen surprises or violations.
Crucial Check: Local Zoning Laws and Codes
Even if your shed is exempt from a building permit, it is almost certain to be subject to local zoning laws and homeowner’s association (HOA) rules. Zoning codes dictate various aspects of property use and development, including:
- Setback Distances: These regulations specify the minimum required distance your shed must be from property lines, fences, main dwelling, other structures, or public easements.
- Height Limits: Maximum allowable height for accessory structures.
- Placement Rules: Restrictions on where on your property the shed can be located (e.g., only in the backyard, not in the front yard).
- Aesthetics: Some HOAs or historic districts may have rules regarding exterior finishes, colors, or architectural style.
Failing to comply with zoning laws can lead to severe consequences, ranging from fines to forced relocation or removal of your shed. To prevent costly mistakes and ensure a smooth project, make it a priority to contact your local planning or zoning office (and your HOA, if applicable) before you start any construction. Provide them with your proposed shed size, location, and foundation type, and they can offer definitive guidance.
Is a Skid Foundation the Right Choice for Your Shed? Pros and Cons
Before committing to a skid foundation, it’s wise to weigh its distinct advantages against its potential drawbacks. This section outlines the key pros and cons, allowing you to determine if this versatile foundation type is truly suitable for your specific shed project and long-term needs.
| Pros of a Skid Foundation | Cons of a Skid Foundation |
|---|---|
| Cost-Effective: Significantly less expensive than concrete slabs or even complex block foundations, saving on material and labor costs. | Potential for Settling: May sink or become unlevel over time, especially on soft, poorly drained, or perpetually wet soil if not properly prepared. |
| Rapid Setup: The foundation can often be constructed and ready for shed assembly within a single day, accelerating project completion. | Less Stable on Slopes: Not ideal for significantly sloped or highly uneven ground, as extensive leveling and potential terracing would be required. |
| DIY-Friendly: Requires minimal digging, specialized equipment, or advanced construction skills, making it accessible for most homeowners. | Limited for Large Structures: Not typically designed for very large, multi-room, or multi-story sheds that demand extreme rigidity and a permanent connection to the ground. |
| Portability: Offers the unique advantage of easy relocation or adjustment of the entire shed later, ideal for renters or changing property layouts. | Requires Anchoring: Essential to anchor the skids to the ground to prevent the shed from shifting, sliding, or uplifting during strong winds or storms. |
| Versatile for Small to Mid-Sized Sheds: Perfectly suited for typical backyard storage, garden sheds, or utility sheds ranging from small to moderately large. | Wood-to-Soil Contact: Even with pressure-treated wood, direct and prolonged contact with soil can still lead to rot or insect damage if not properly maintained or placed on a gravel bed. |
| Ideal for Temporary or Seasonal Structures: Its non-permanent nature often aligns with local codes for temporary structures, potentially avoiding complex permits. | May Not Meet Permanent Code: In some areas, due to its movable nature, it may not satisfy building codes for permanent structures, especially if utilities are involved. |
Essential Maintenance Tips for Your Skid-Mounted Shed
To ensure your shed on skids remains in excellent condition, stable, and rot-free for many years, proactive annual maintenance is key. Following these simple steps will significantly extend the life and functionality of your investment:
- Utilize Ground-Rated Pressure-Treated Wood: From the outset, ensure all skids are made from wood specifically rated for ground contact (e.g., UC4A or higher). This type of treatment provides superior protection against moisture damage, rot, and insect infestation.
- Maintain Clear Perimeters: Regularly clear away any soil, grass, mulch, leaves, or other organic debris that accumulates directly against or under the skids. This material can trap moisture, promote rot, and create pathways for insects. Maintain at least a 6-inch gap around the base of the shed.
- Conduct Annual Inspections: Dedicate time once a year (ideally in the spring) to thoroughly inspect all visible wood components of the skids and the bottom of the floor frame. Look for any signs of rot (soft, discolored, or crumbling wood), warping, or insect activity (e.g., sawdust trails, boreholes, ant nests).
- Apply Wood Preservatives or Insect Repellents: If you notice any exposed, untreated cuts in the pressure-treated wood, or if you simply want an extra layer of protection, apply a clear wood preservative or an appropriate insect repellent designed for exterior wood. Reapply every few years as recommended by the product manufacturer.
- Verify Levelness: Over time, ground conditions can change, potentially causing one side of your shed to settle slightly. Use a long level or a string line stretched diagonally across the base of the shed to check that it remains level. Unevenness can lead to sticking doors, window issues, and structural stress.
- Re-level as Needed: If you discover that your shed has settled, you can gently lift the low side using a hydraulic jack (placed on a sturdy block of wood for stability). Once lifted, carefully add or adjust the gravel, crushed stone, or composite shims underneath the skid until it is level again. Lower the jack slowly and recheck.
- Replace Damaged Skids: Should you find a skid that is significantly rotted or damaged beyond repair, it can be replaced. This process involves carefully lifting the shed off the damaged skid (using multiple jacks if necessary), removing the old beam, and sliding a new, properly treated skid into its place. Ensure all connections are re-secured.
- Ensure Fastener Security: Periodically check that all screws, nails, and other fasteners connecting the floor frame to the skids, and the decking to the joists, remain tight and secure. Wood can expand and contract with moisture changes, potentially loosening fasteners over time. Tighten screws or replace loose nails as required.
Common Mistakes to Avoid When Building Your Shed on Skids
While building a shed on skids is relatively straightforward, a few common errors can compromise its longevity, stability, and performance. By being aware of these pitfalls and taking proactive steps to avoid them, you can ensure your shed foundation lasts longer and performs better in all weather conditions:
- Building Directly on Unprepared Soil: This is perhaps the most frequent and detrimental mistake. Placing skids directly on bare, uncompacted soil without a proper gravel base will almost guarantee moisture entrapment. This leads to accelerated rot in the skids, provides an inviting environment for termites and other pests, and can cause the shed to settle unevenly or sink into the ground over time, leading to a host of structural issues.
- Using Untreated Lumber for Skids: Another critical error is opting for non-pressure-treated lumber or lumber not rated for ground contact for the skids. Untreated wood, when in contact with the ground, will rapidly absorb moisture, making it highly susceptible to fungal decay (rot) and infestation by wood-boring insects within just a few years. Always invest in high-quality, ground-contact-rated pressure-treated lumber for any component that touches the ground.
- Failing to Properly Anchor the Shed: Many DIY builders overlook the importance of anchoring, particularly for “temporary” structures. An unanchored shed on skids is vulnerable to shifting, sliding, or even completely overturning during strong winds, severe storms, or even minor seismic activity. Always use appropriate ground anchors, rebar pins, or hurricane ties to firmly secure the shed to the ground, especially in regions prone to high winds.
- Neglecting to Level the Foundation: A common oversight is not meticulously leveling the skids before building the floor frame and walls. A foundation that isn’t perfectly level will result in an uneven shed floor, leading to aesthetic problems like crooked walls and doors that stick or don’t close properly. More critically, it creates long-term structural stress on the entire shed frame, which can lead to warping, racking, and premature failure of joints and fasteners over time. Invest the time in Step 2 to achieve a perfectly level base.
Conclusion: Embrace the Flexibility of a Skid-Mounted Shed
A shed on skids offers an unparalleled blend of freedom, functionality, and cost-effectiveness, all without the significant fuss and permanence often associated with traditional construction. It stands as a supremely smart option if you prioritize flexibility, desire an easier and quicker setup process, and appreciate the invaluable ability to relocate your storage structure later if your needs or property layout evolve.
Now that you’re equipped with a foundational understanding of skid foundations – from what they are and why they’re beneficial, to how to build, maintain, and compare them against other options – you can approach your shed project with enhanced clarity and significantly reduced stress. Whether your plan involves constructing a shed from scratch or simply placing a pre-built kit, you now possess the knowledge to choose options that genuinely work for real-life scenarios.
Through my experience helping countless others, I’ve personally witnessed the immense utility and adaptability of these skid-mounted sheds across diverse backyards and through all seasons. They simply make practical sense when you require a storage solution that can keep pace with your evolving needs and provides tangible value without the permanent commitment.
If this guide has proven helpful and inspired your next project, I encourage you to explore my other shed tips and backyard DIY blogs – you might just discover your next exciting venture waiting there!
