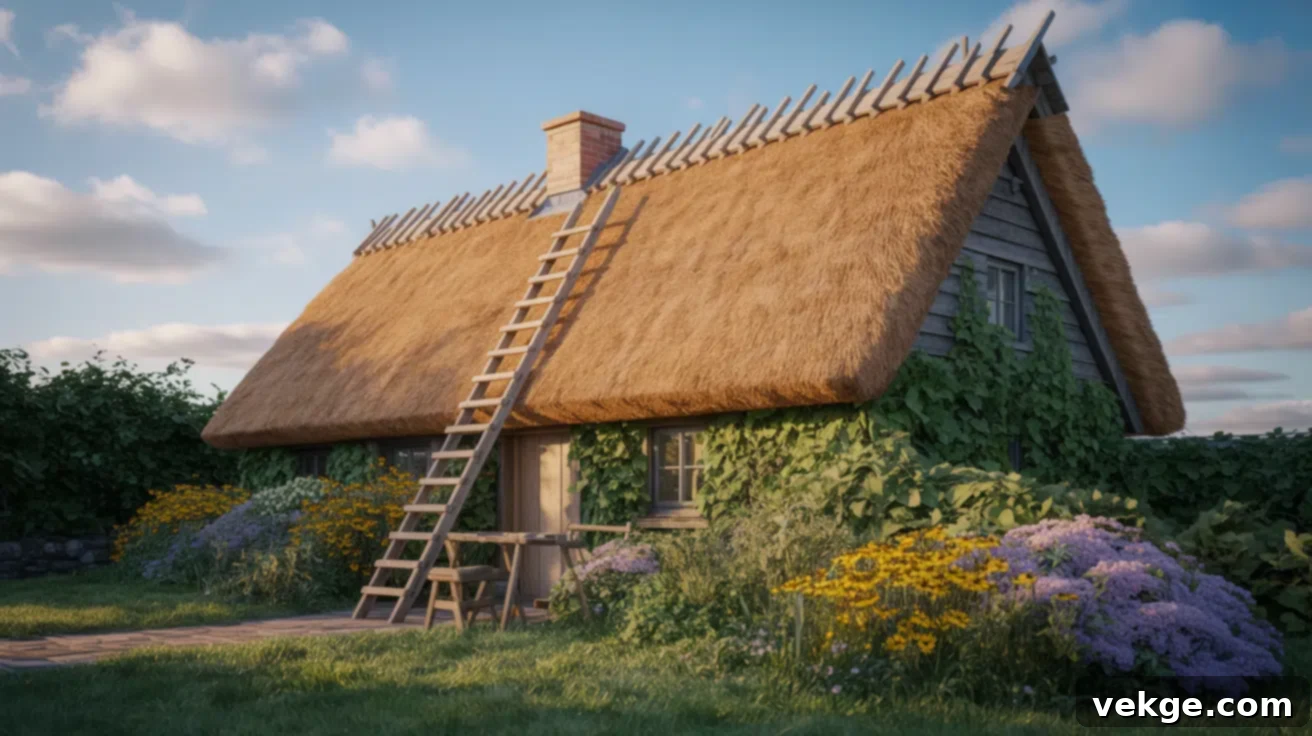
The Enduring Charm of Thatched Roofs: A Comprehensive Guide to History, Installation, and Modern Appeal
Have you ever paused to admire a building crowned with a thatched roof and wondered about its story? These iconic roofing structures, with their distinctive appearance and natural materials, have graced dwellings for centuries, providing not just shelter but also an undeniable aesthetic appeal. Far from being a relic of the past, this age-old technique is experiencing a remarkable resurgence, finding its place in contemporary eco-conscious architecture and sustainable design.
From ancient villages to modern, environmentally friendly homes, thatched roofs offer a unique blend of historical charm, excellent insulation, and minimal environmental impact. Their comeback is a testament to their enduring practicality and beauty, proving that some traditions are simply too good to fade away.
In this comprehensive guide, we will delve into the rich history of thatched roofs, explore the intricate process of their construction, examine the compelling advantages and potential challenges they present, and discuss their growing relevance in today’s design landscape. Join us as we uncover why a thatched roof might just be the perfect, timeless choice for your next project, blending heritage with modern sustainability goals.
The Rich History and Evolution of Thatched Roofs
The story of thatched roofs is as old as human civilization itself, deeply intertwined with the development of early settlements and the ingenuity of using readily available natural resources. Across various cultures and continents, thatching emerged as a primary roofing method due long before manufactured materials became commonplace.
In Europe, the practice of thatching flourished, becoming particularly prominent among the Celtic and Germanic tribes. These communities masterfully utilized local materials like reeds, straw, and heather to create durable and effective shelters. The construction of a thatched roof was often a communal effort, a significant social event where entire villages would gather for “thatching bees.” During these events, skilled artisans would guide the community in building new roofs or re-thatching existing ones, fostering a strong sense of cooperation and shared heritage. This collective approach not only ensured the timely completion of essential housing but also passed down crucial skills and knowledge through generations, solidifying thatching as a cornerstone of rural life.
However, the advent of the Industrial Revolution in the 18th and 19th centuries marked a significant decline in thatching. Mass production made materials like slate, clay tiles, and metal much more accessible, affordable, and, crucially, less labor-intensive to install. Thatching began to be perceived as an outdated and less sophisticated method, primarily relegated to agricultural buildings or the homes of the less affluent.
Yet, the 20th century witnessed a remarkable revival of interest in thatching. As society began to grapple with the environmental consequences of industrialization and mass consumption, there was a growing desire to reconnect with sustainable practices and natural building methods. This renewed appreciation for eco-friendly construction, combined with a recognition of thatching’s unique aesthetic and thermal properties, has propelled it back into the spotlight. Today, thatched roofs are celebrated not just for their historical significance but also for their impressive environmental credentials and timeless beauty, making them a sought-after feature in both conservation projects and cutting-edge sustainable designs.
Building a Thatched Roof: A Detailed Step-by-Step Guide
Constructing a thatched roof is an art form that demands precision, patience, and a deep understanding of natural materials. It involves the careful layering of organic resources and the application of traditional installation techniques to ensure the roof is not only visually stunning but also incredibly durable, waterproof, and an excellent insulator. While rewarding, this process is intricate, requiring attention to detail at every stage.
Essential Tools and Materials Needed for Thatching
Before embarking on the intricate journey of thatching, it’s crucial to gather all the necessary tools and materials. Proper preparation helps ensure a smooth, safe, and efficient installation process, preventing delays and allowing the artisan to focus on the craftsmanship.
- Thatching Material:
- Water Reed (Phragmites australis): Highly durable, long-lasting, and offers excellent weather resistance.
- Combed Wheat Reed: A tidy, straight straw with a smooth finish, known for its longevity.
- Long Straw: A traditional, more rustic option that provides a softer, shaggier appearance.
- Fasteners:
- Wooden or Metal Spars (Sways): Used to secure bundles of thatch to the roof structure.
- Twine or Wire: For binding bundles and securing them to the roof battens.
- Structural Components:
- Eave Wads: Pre-bound bundles of thatch used to create the initial eave line.
- Hazel/Willow Rods: Flexible rods used for securing the ridge and other decorative elements.
- Ridge Rolls: Specialized bundles for creating the protective cap at the roof’s peak.
- Netting: Often used over the ridge to provide extra protection and prevent bird damage.
- Specialized Thatching Tools:
- Thatching Needles: Long, curved needles used to pull twine or wire through bundles.
- Leggett (Wooden Bat): A flat wooden tool used to tap, compact, and dress the thatch, creating a smooth and even surface.
- Shears: For trimming and shaping the thatch.
- Safety Equipment:
- Ladder and Scaffolding: Essential for safe access to all parts of the roof.
- Protective Gear: Gloves, masks (especially when working with dusty materials), and eye protection are vital for personal safety.
Step 1: Prepare the Roof Frame
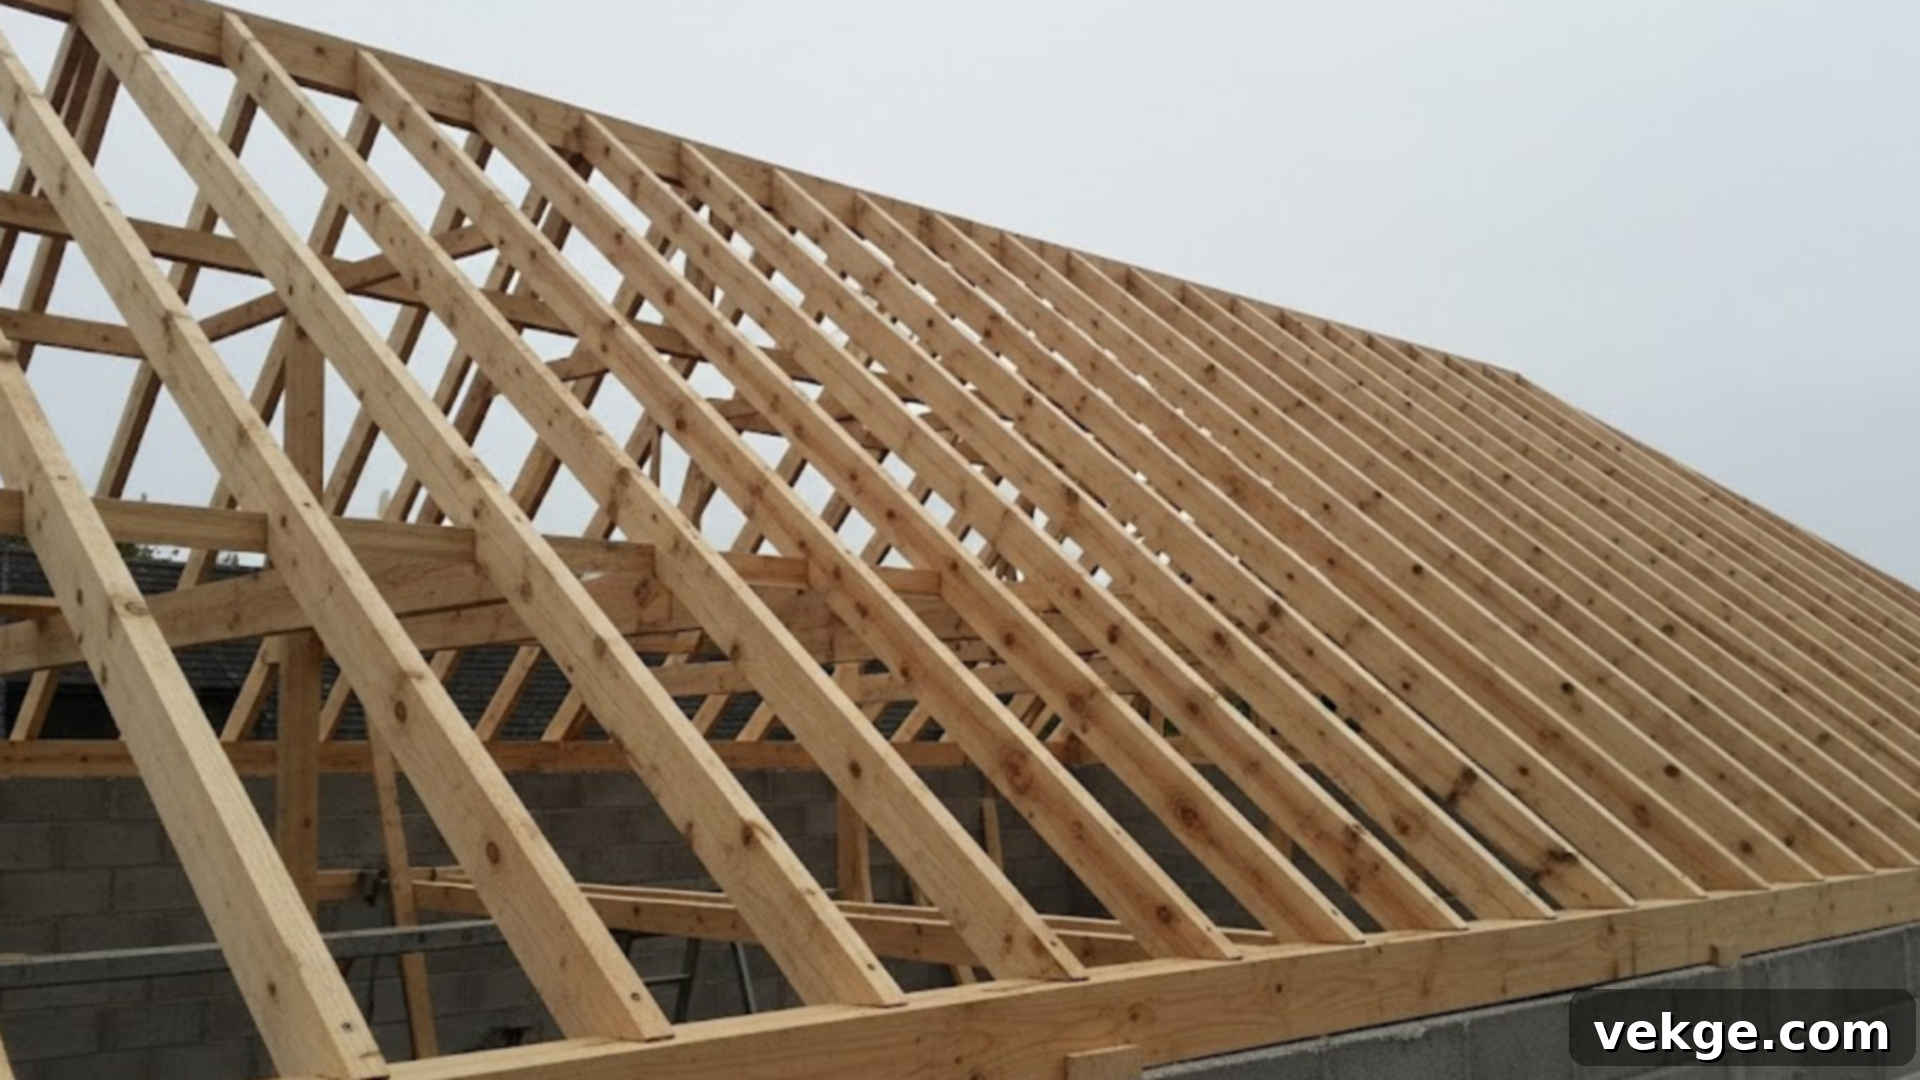
The structural integrity of the entire roof hinges on a meticulously prepared frame. Begin by conducting a thorough inspection of the existing roof structure or ensuring the new framework is built to exacting standards. The timber frame must be exceptionally sturdy, completely dry, and entirely free from any signs of rot, insect damage, or structural weakness. Rafters should be precisely and evenly spaced to support the uniform layering of thatch, which is crucial for both aesthetic appeal and structural performance. Battens, which are horizontal strips of wood, must be securely nailed or tied into place, providing the anchor points for the thatch bundles.
A solid and well-prepared framework is not merely a foundation; it is absolutely essential for the long-term support and stability of the heavy thatch layers. It also ensures proper water drainage, preventing moisture accumulation that can lead to deterioration, and guarantees an even distribution of the considerable weight of the thatch across the entire roof surface. Any compromise at this stage can lead to significant problems down the line, affecting both durability and weatherproofing.
Step 2: Apply the Base Layer of Thatch
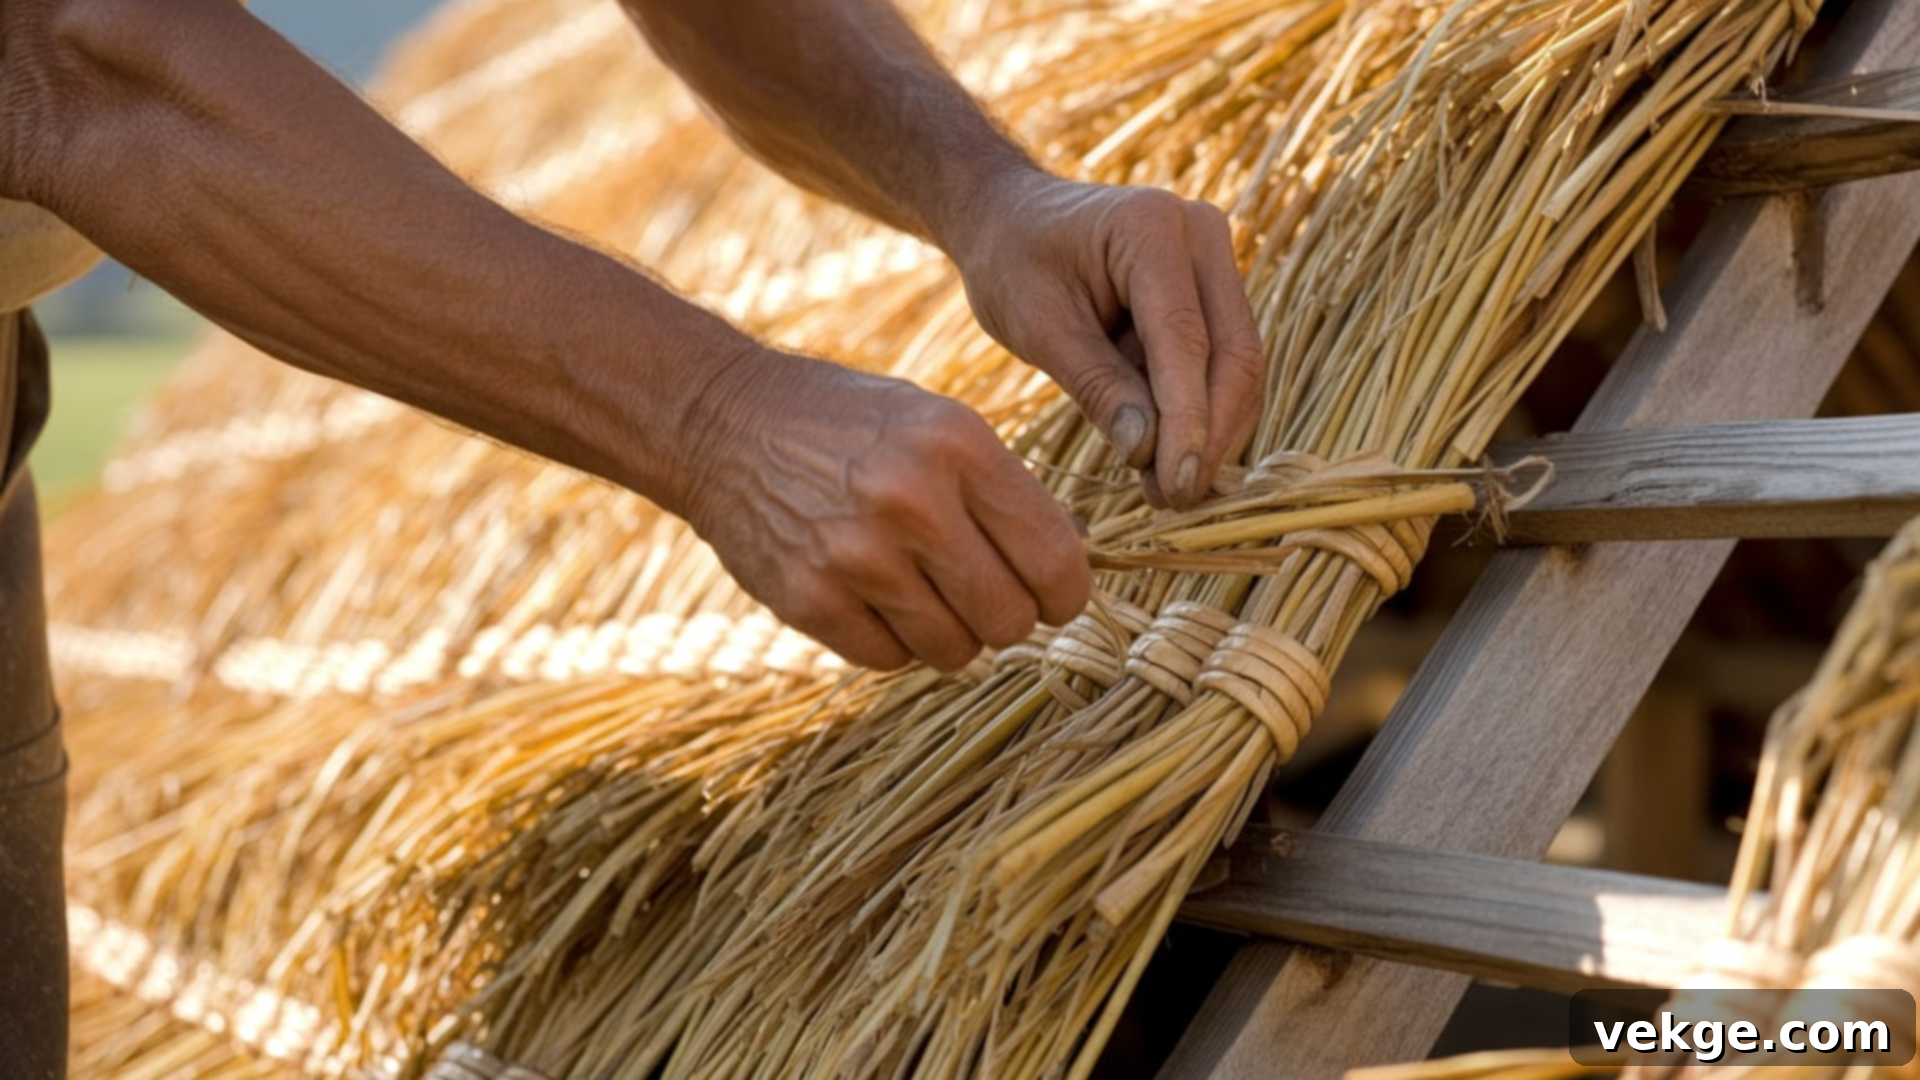
With the frame prepared, the next critical step is to apply the first bundles of thatch, traditionally known as eave wads, to the lowest edge of the roof. These initial bundles are far more than just a starting point; they are crucial for establishing the precise pitch of the roof and creating the all-important drip edge. The drip edge is designed to effectively guide rainwater away from the building’s walls, preventing saturation and potential damage. Each bundle must be secured tightly to the battens using strong twine or wire, woven through with specialized thatching spars.
This meticulously laid base layer serves multiple vital functions. Visually, it sets the aesthetic tone for the entire roof. Functionally, it establishes the foundation for all subsequent layers, ensuring they shed water efficiently. Moreover, it plays a critical role in preventing water from seeping behind the thatch and reaching the underlying roof structure, protecting against moisture ingress and maintaining the integrity of the building.
Step 3: Layer Additional Thatch Upward
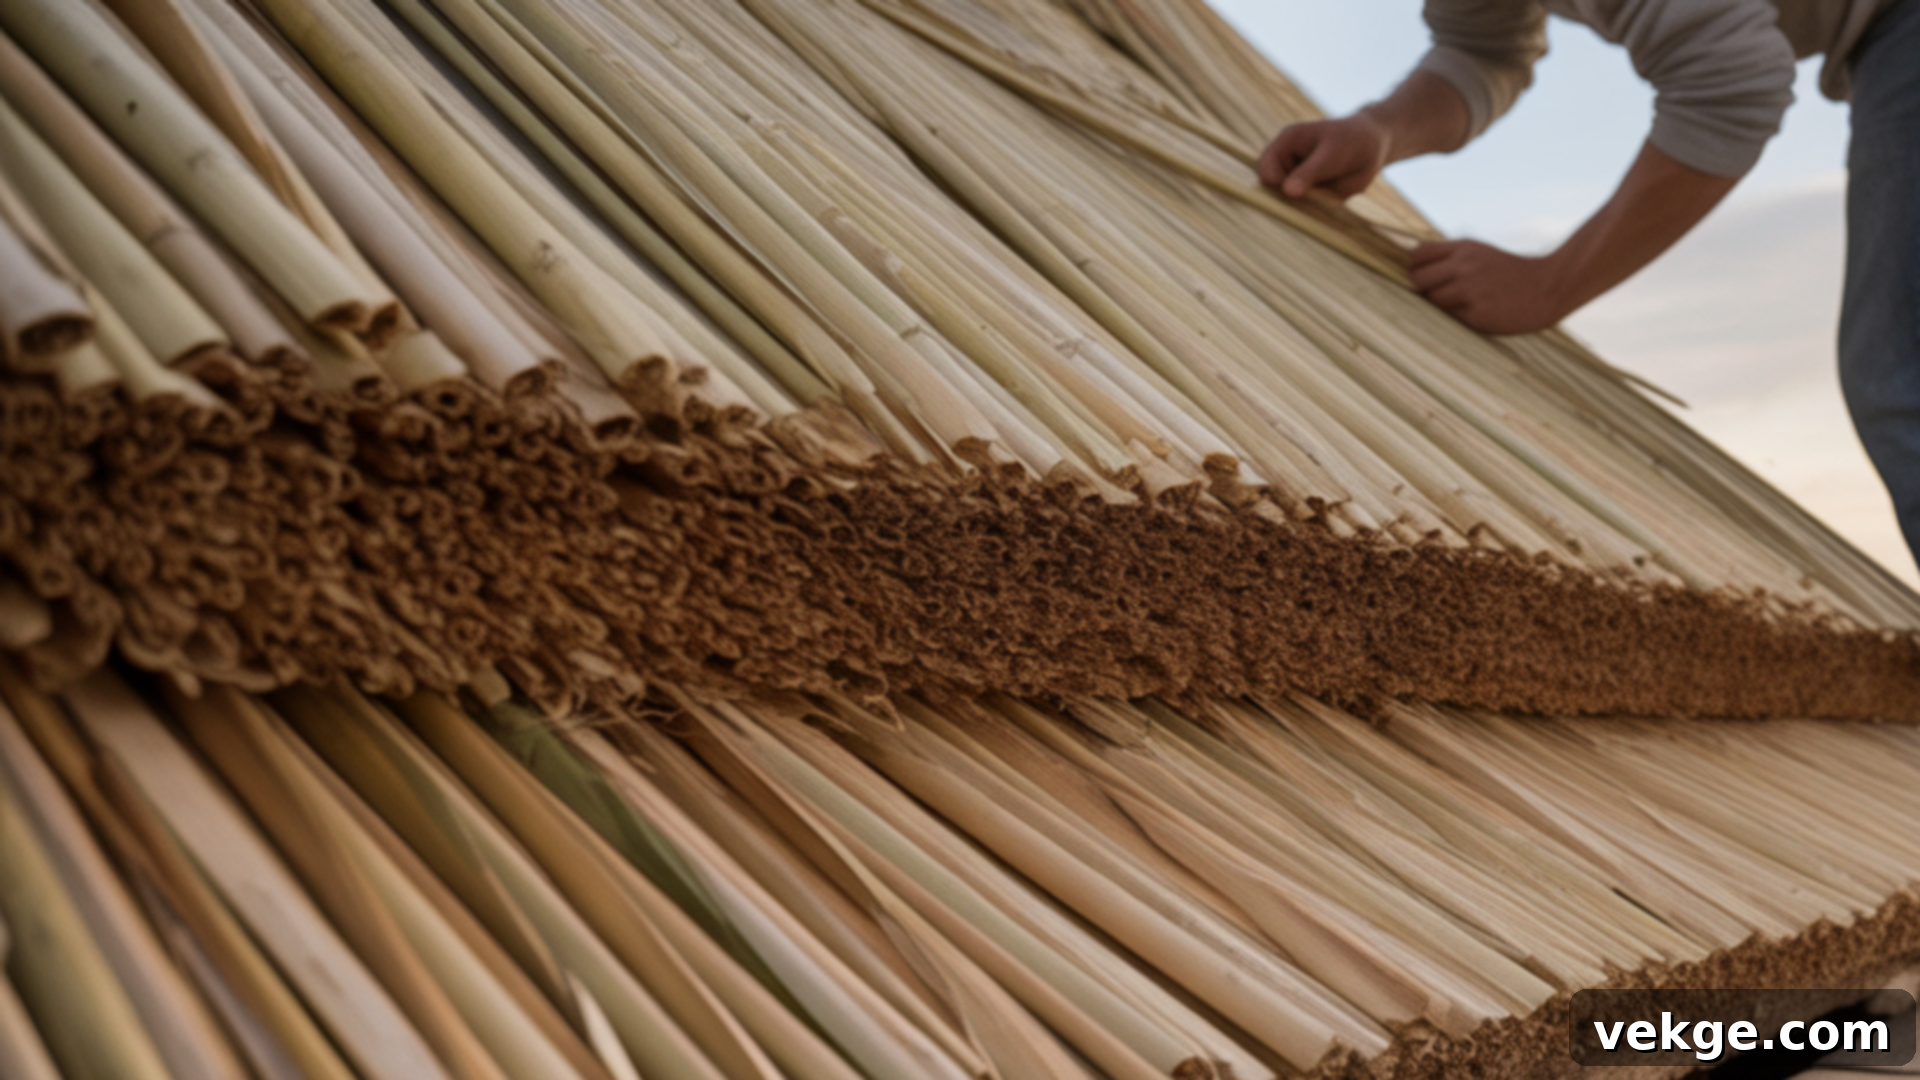
Following the base layer, the thatcher continues to add bundles of thatch, working meticulously row by row, progressing upward towards the roof’s ridge. Each new layer is carefully positioned to overlap the one beneath it, creating a tightly compacted, shingle-like surface that is both resilient and highly effective at shedding water. This overlapping technique is fundamental to a thatched roof’s waterproof properties.
Consistency in both the overlap distance and the thickness of each bundle is paramount. This uniformity ensures not only adequate rainwater runoff, preventing water from penetrating the layers, but also guarantees optimal thermal insulation. The natural materials must be pressed firmly and evenly into place, eliminating gaps and maximizing the roof’s density, which directly contributes to its durability and insulating capabilities. Throughout this stage, experienced thatchers periodically step back to assess the symmetry, evenness, and overall thickness of the thatch, making adjustments as needed to ensure a perfect finish before proceeding with the subsequent layer.
Step 4: Fix and Secure the Thatch
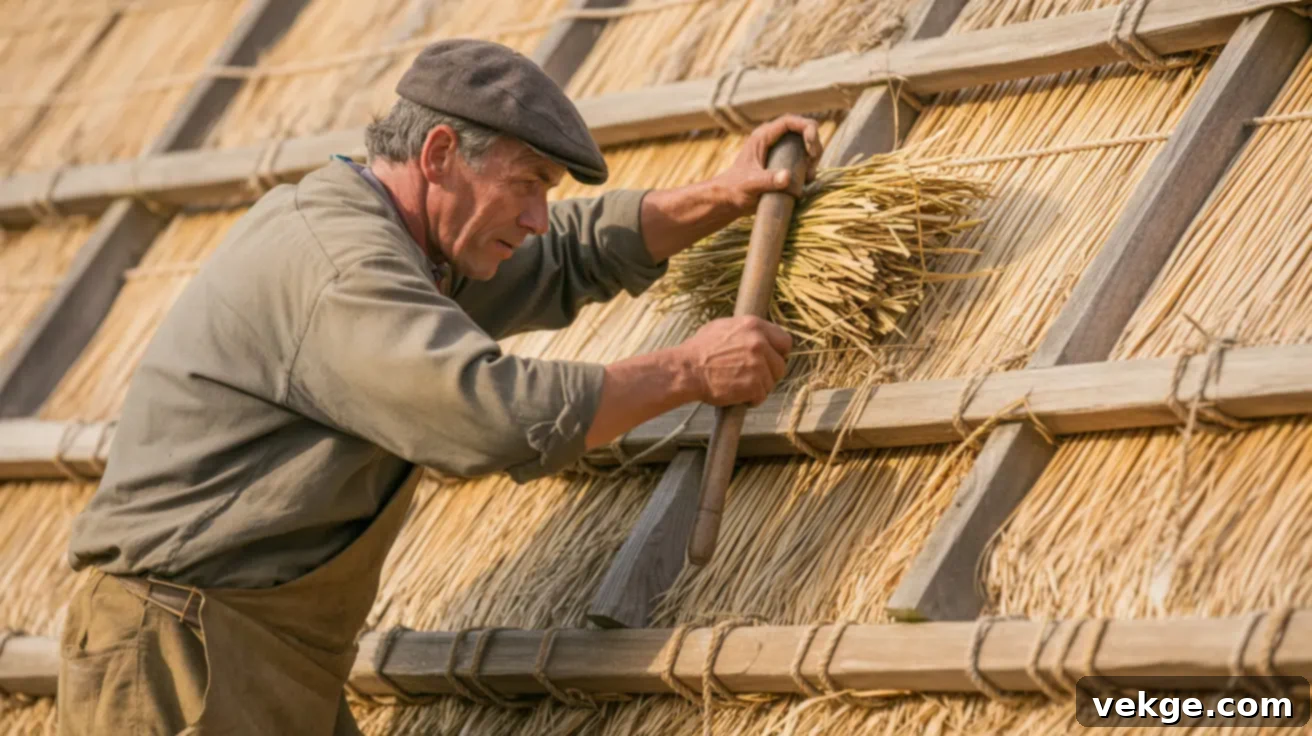
As each bundle of thatch is laid, it must be meticulously fixed and secured to the underlying roof structure. This is typically achieved using sturdy wooden or metal thatching spars, which are carefully driven into the battens, anchoring the thatch firmly in place. In some cases, wire may also be incorporated for additional reinforcement, particularly in areas prone to high winds or heavy weather. Once secured, a specialized wooden bat, known as a leggett, comes into play. The leggett is used with rhythmic taps to compact and “dress” the bundles, evening out the surface and ensuring the material is densely packed. This process is not just about aesthetics; it’s fundamental to the roof’s performance.
Properly fixed and compacted thatch significantly reduces the risk of wind damage, preventing bundles from being lifted or dislodged during storms. More importantly, it helps maintain a consistently watertight seal throughout the entire roofing structure, preventing moisture penetration and extending the overall lifespan of the roof. This labor-intensive step is crucial for transforming loose bundles of straw or reed into a unified, resilient, and weather-resistant covering.
Step 5: Shape and Cap the Ridge
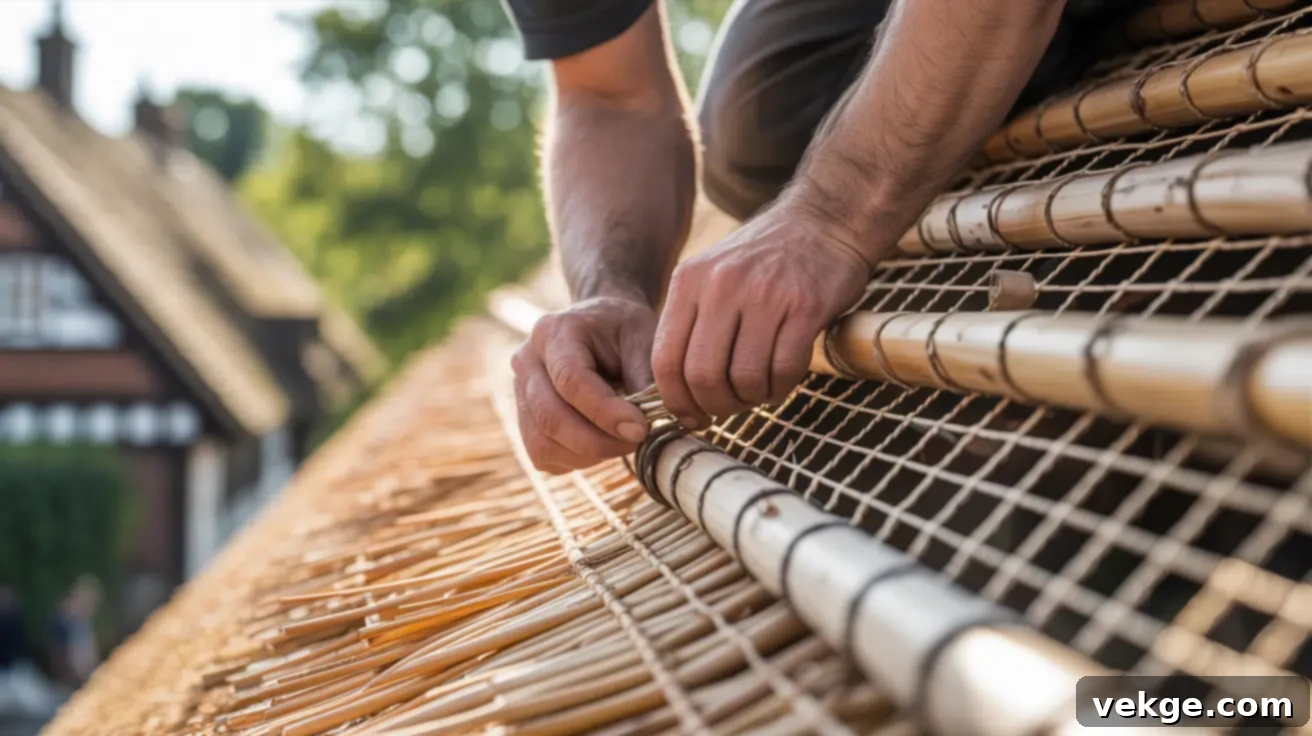
The ridge is arguably the most exposed and vulnerable part of a thatched roof, making its construction and capping exceptionally important. This final stage involves constructing the ridge using either traditional block or flush methods, depending on the desired aesthetic, regional traditions, and the type of thatch material used. Specially prepared bundles of thatch are meticulously laid horizontally across the very peak of the roof, interlocking with the main body of the thatch. These ridge bundles are then secured firmly using specialized netting, often reinforced with flexible hazel or willow rods, which are pushed through the thatch and tied down to the structure below.
The ridge not only completes the visual composition of the roof but, more critically, provides robust protection to the uppermost joints and layers from direct exposure to the elements, including rain, wind, and UV radiation. Careful shaping of the ridge is essential, as it contributes significantly to both the roof’s overall durability and its distinctive, often decorative, finish. A well-executed ridge can extend the lifespan of the entire roof and enhance its architectural beauty.
Step 6: Final Checks and Finishing Touches
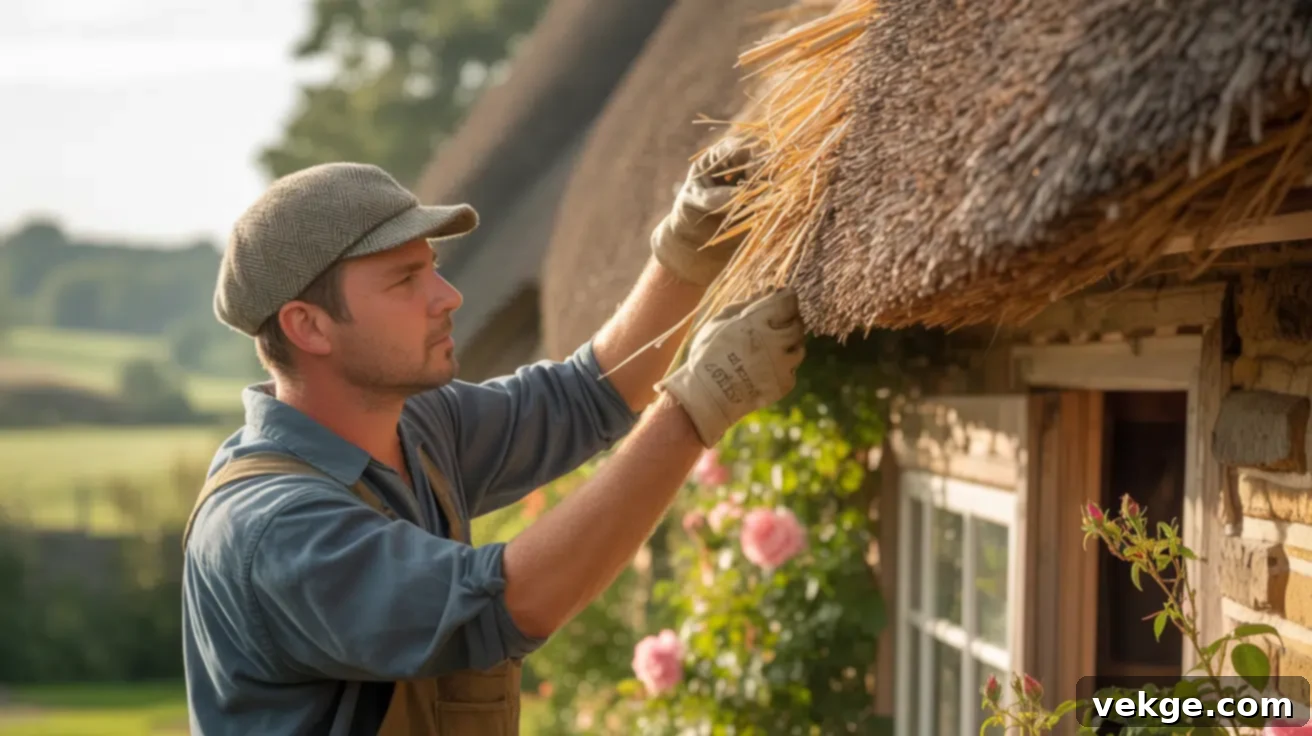
Once the main body of the thatching and the ridge are complete, a thorough and meticulous final inspection is indispensable. This stage ensures that no detail has been overlooked and that the roof is perfectly prepared to withstand the elements. The thatcher carefully scrutinizes the entire surface, looking for any loose bundles, inconsistencies in thickness, or exposed gaps that could compromise the roof’s integrity. Specialized shears are used to precisely trim any stray ends and tidy up the edges, giving the roof a clean, professional finish.
Crucially, the proper overhang is checked at the eaves to ensure that water will flow off efficiently and away from the building’s walls. A well-executed final inspection at this stage is not merely a formality; it is a critical step that can significantly extend the roof’s lifespan, enhance its weatherproofing capabilities, and substantially reduce the need for premature maintenance or costly repairs. It guarantees the thatched roof performs optimally and retains its aesthetic beauty for decades to come.
DIY vs. Professional Thatched Roof Installation
Deciding whether to attempt thatching your roof yourself or to engage a professional thatcher is a significant decision. It depends heavily on your existing experience, access to specialized tools, the complexity of the roof design, and your long-term expectations for the roof’s performance and longevity.
| Criteria | DIY Installation | Professional Installation |
|---|---|---|
| Skill Level Required | Extremely High: Requires extensive practical experience in roofing, exceptional hand-tool skills, and a deep understanding of traditional thatching techniques and material properties. This is not a beginner-friendly project. | Expert: Handled by highly trained, certified thatchers who have typically undergone years of apprenticeship and possess specialized knowledge of various thatch materials, structural requirements, and regional styles. |
| Cost and Time Investment | Lower Material Cost, Significantly Longer Time: While you save on labor, sourcing quality materials can still be costly. The learning curve and manual labor mean the project could take several weeks to many months, potentially impacting daily life. | Higher Upfront Cost, Quicker Completion: Professionals charge for their expertise and labor, making the initial investment higher. However, they complete projects efficiently (typically a few days to several weeks), ensuring quality and often providing guarantees. |
| Quality and Durability | Variable: Unless you are already a highly skilled thatcher, the quality may vary, potentially compromising durability and weather resistance, leading to shorter lifespan and earlier repairs. | Superior: Professional installation ensures adherence to best practices, optimal material compaction, correct pitch, and proper ridge construction, maximizing the roof’s lifespan and weather resistance. |
| Safety Risks | High: Working at heights with heavy materials and specialized tools carries significant safety risks, especially for those without professional training and equipment. | Managed: Professionals are trained in working safely at heights and use appropriate scaffolding and safety gear, minimizing risks. |
How Long Does a Thatched Roof Last? Factors Influencing Longevity
The lifespan of a thatched roof is a common question, and the answer is that it varies significantly. Several factors play a crucial role, including the type of material used, the quality of the original installation, local climate conditions, the roof’s pitch, and, most importantly, the level of ongoing maintenance it receives. On average, a well-constructed and diligently maintained thatched roof can provide reliable shelter for an impressive 25 to 40 years, sometimes even longer.
Here’s a closer look at the longevity of the most common thatching materials:
- Water Reed (Phragmites australis): Renowned for its exceptional durability and resistance to rot, water reed is often considered the most long-lasting thatching material. When properly harvested, installed, and maintained, a water reed roof can easily last up to 40 years or more. Its natural structure is dense and provides outstanding resistance to water penetration and wear, making it an excellent choice for insulation and longevity.
- Combed Wheat Reed: Similar in durability to water reed, combed wheat reed offers a smooth, neat finish. Its lifespan typically falls in the range of 30-40 years, benefiting from its dense structure and water-shedding properties.
- Long Straw: This traditional material, often associated with a softer, more undulating appearance, typically lasts around 25-35 years. Long straw roofs require more frequent maintenance compared to water reed due to its less dense composition. However, it remains a charming and often more cost-effective option for many.
- Palm Thatch: Commonly utilized in warmer, tropical climates, palm thatch generally has a shorter lifespan, usually around 20-30 years. Its longevity is particularly dependent on its exposure to harsh weather conditions, intense sun, and humidity, which can accelerate deterioration compared to cooler, drier climates.
Regardless of the material, regular and proactive maintenance is the single most critical factor in maximizing a thatched roof’s lifespan. Annual inspections, prompt repairs of any damage, and re-thatching of worn areas can significantly extend the roof’s life. Neglect, conversely, can lead to much faster deterioration, especially in vulnerable areas most exposed to the elements, such as the ridge, eaves, and valleys.
Pros and Cons of Thatched Roofs: A Balanced Perspective
Thatched roofs offer a captivating blend of historical charm and modern sustainability, but like any roofing material, they come with a unique set of advantages and challenges. Understanding these aspects is crucial for anyone considering this distinctive option.
| Feature | Pros of Thatched Roofs | Cons of Thatched Roofs |
|---|---|---|
| Superior Insulation Properties | Provides exceptional thermal performance, acting as a natural insulator. This keeps homes refreshingly cool in summer by deflecting heat and wonderfully warm in winter by trapping it inside. The thick layers of thatch create numerous air pockets that significantly slow heat transfer. | Requires highly specialized and often intensive regular maintenance, particularly at the ridge which is the most exposed part of the roof. This can involve skilled labor and recurring costs over the roof’s lifespan. |
| The natural insulating qualities lead to a significant reduction in energy costs by stabilizing indoor temperatures and decreasing the reliance on artificial heating and cooling systems, contributing to a lower carbon footprint for the dwelling. | Frequent and thorough inspections are needed, ideally annually, to identify and address any potential issues like wear, damage, or pest activity before they escalate into major problems. This requires vigilance from the homeowner. | |
| Environmental Benefits & Sustainability | Made entirely from renewable, biodegradable, and locally sourced natural materials such as straw, reed, or heather. This makes them one of the most eco-friendly roofing options available, minimizing environmental impact. | Leaks can, and often do, develop over time, especially if the thatch layers become thin or are improperly laid. While initially small, these can be challenging to locate and repair without professional help. |
| The materials used for thatching require minimal processing and transport, significantly reducing their embodied energy and overall carbon footprint compared to manufactured roofing materials. This supports sustainable building practices. | If left unattended, even minor leaks can cause significant structural damage to the underlying roof timbers, leading to expensive repairs and potentially compromising the safety of the building. | |
| Utilizing local thatching materials and skilled labor supports local economies and preserves traditional crafts, contributing to cultural heritage and community resilience. | Thatched roofs can be more susceptible to fire risks compared to other roofing materials, though modern treatments and building practices have greatly mitigated this concern. Fire-retardant sprays and strict safety codes are often required. | |
| Aesthetic Appeal & Property Value | Adds immense visual interest, unique character, and a rustic, picturesque charm to buildings. Each thatched roof is handcrafted, giving it an individual personality that cannot be replicated by conventional roofing. | The natural materials can attract various wildlife, including birds looking for nesting sites, rodents, and insects like wasps. This necessitates ongoing pest control measures to maintain the roof’s integrity and appearance. |
| Due to its uniqueness, historical connection, and artisanal craftsmanship, a well-maintained thatched roof can significantly increase property value, making a home stand out in the market. | Initial installation costs for a thatched roof are typically higher than for conventional roofs, due to the specialized skills and labor-intensive nature of the work, which can be a barrier for some homeowners. | |
| Cultural Heritage and Customization | Preserves and promotes traditional building methods and craftsmanship, connecting modern structures with centuries of architectural history and contributing to the conservation of heritage sites. | Neglected roofs, or those that receive deferred maintenance, can quickly deteriorate, leading to significantly more costly and extensive repairs down the line than if issues were addressed promptly. |
| Offers extensive customization options in terms of material choice, shape, and decorative elements (e.g., ridge patterns), allowing for truly unique and personalized designs that reflect individual taste or regional styles. | Deferred maintenance inevitably shortens the overall lifespan of the roof, forcing earlier and more frequent re-thatching or major repairs than would be necessary with proper care. |
How to Maintain a Thatched Roof: Essential Practices for Longevity
Proper and consistent maintenance is not just an option; it is absolutely crucial for extending the lifespan of a thatched roof and ensuring it continues to perform its vital functions of insulation and weatherproofing effectively. Neglecting maintenance can lead to premature deterioration, costly repairs, and a significantly reduced lifespan. Here are some practical and essential tips for maintaining the beauty and functionality of your thatched roof:
- Regular Inspections: Make it a habit to conduct thorough annual inspections of your thatched roof. Pay close attention to areas most exposed to the elements, such as the ridge, eaves, and any valleys or dormer junctions. Look for signs of damage, thinning thatch, loose bundles, water penetration, or the presence of moss and algae. It’s also wise to inspect the underside of the roof from the attic for any signs of dampness or light penetration. After any severe weather, a quick visual check can help identify immediate issues.
- Re-thatching: Over time, certain areas of the thatch will naturally thin or wear down due to weather exposure. When the thatch depth becomes insufficient, it’s essential to add a new layer, known as “dressing” or “re-thatching.” This process restores the roof’s original insulation and weatherproofing capabilities. A skilled thatcher can assess which areas require attention, often localized to the ridge or eaves, rather than a full roof replacement.
- Promptly Repairing Leaks: The moment you suspect or identify a leak, no matter how small, it must be addressed immediately. Small leaks can quickly escalate, leading to significant structural damage to the underlying timber frame and battens if left unattended. Professional thatchers have the expertise to locate and repair leaks without disturbing large sections of the roof.
- Cleaning and Clearing Gutters (if applicable) and Overhanging Branches: While many thatched roofs don’t have traditional gutters (designed to shed water directly to the ground), if your specific design includes them, regular clearing of gutters and downpipes is vital. Blockages can cause water to back up and sit on the thatch, leading to accelerated deterioration. Additionally, keep any overhanging tree branches trimmed back, as they can cause excessive shade, encourage moss growth, drop debris that traps moisture, and even scrape against the thatch, causing physical damage.
- Pest Control: Thatched roofs, being made of natural materials, can be attractive to various wildlife, including birds, rodents (like mice and squirrels), and insects. Birds may pull at the thatch for nesting material, while rodents can burrow into it. Use physical barriers like fine mesh netting, especially over the ridge, to deter birds. For rodents, humane trapping or professional pest control services may be necessary. Ensure any treatments are safe for the thatch and the environment.
- Protective Treatments: Consider applying fire-retardant and water-repellent treatments as needed. Modern fire retardants can significantly reduce the flammability of thatch, enhancing safety. Water-repellent treatments can help maintain the roof’s efficiency in shedding water, especially in very damp climates, though these are typically applied by professionals and their long-term effectiveness can vary. Always consult with a professional thatcher before applying any chemical treatments.
Common Mistakes to Avoid When Installing or Maintaining a Thatched Roof
Installing a thatched roof is a highly specialized craft, and even seasoned builders can overlook critical details if they lack specific thatching experience. Avoiding common mistakes is paramount to ensuring the roof’s longevity, maximizing its performance, and significantly reducing future maintenance costs. Awareness of these pitfalls can save considerable time, effort, and expense.
- Incorrect Roof Pitch: One of the most critical errors is failing to maintain the correct roof pitch. Thatched roofs typically require a steep pitch, ideally between 45–55°, to ensure proper and rapid water runoff. Shallower slopes allow water to pool on the surface, increasing the risk of moisture penetration, accelerated deterioration, and ultimately, leaks. This fundamental design element must be correct from the outset.
- Using Subpar or Unsuitable Materials: The quality of the thatch material directly impacts the roof’s lifespan and performance. Using low-quality, inadequately dried, or unsuitable types of straw or reed will lead to rapid degradation and premature roof failure. Always source high-quality, mature, and properly prepared materials from reputable suppliers. Each type of thatch (water reed, combed wheat, long straw) has specific properties that must match the roof design and climate.
- Neglecting Regular Inspections and Maintenance: A thatched roof is a living roof that requires ongoing care. Neglecting yearly checks and failing to inspect the roof after severe storms are significant mistakes. Small issues like loose bundles, moss growth, or minor pest activity can quickly escalate into major, costly problems if not addressed promptly. Proactive maintenance is key to preventing significant damage and extending the roof’s life well beyond its average expectancy.
- Improper Installation Techniques: This is perhaps the most critical mistake. Poor layering, inadequate compaction, or improper securing of the thatch bundles fundamentally weakens the roof’s structure and weatherproofing. Thatched roofs are built layer by layer, with each layer dependent on the precision of the one beneath it. Always engage experienced, certified thatchers who apply traditional, proven techniques to ensure the roof is structurally sound, watertight, and aesthetically pleasing. DIY attempts without proper training are highly discouraged.
- Ignoring the Ridge: The ridge is the roof’s crowning glory but also its most exposed and vulnerable area. It is subjected to the harshest weather conditions, making it prone to faster wear. Ignoring the ridge, or delaying its regular maintenance and re-thatching, is a common error. The ridge often requires more frequent attention than the main body of the thatch, and its integrity is vital for the overall weatherproofing of the entire roof.
- Insufficient Fire Protection: While modern thatched roofs are much safer than their historical counterparts, they are inherently more vulnerable to fire than many other roofing materials. Failing to apply appropriate fire-retardant treatments or not adhering to local safety codes and regulations is a critical mistake. Implementing proper fire prevention measures, including spark arrestors on chimneys and considering internal fire barriers, is essential for safety and peace of mind.
Conclusion: Embracing the Timeless Appeal of Thatch
Thatching stands as a testament to sustainable, time-tested roofing methods, brilliantly combining beauty, practicality, and environmental responsibility. Its journey from ancient shelters to its celebrated status in contemporary architecture highlights its enduring value. Whether you are undertaking the restoration of a historic building, embarking on the design of an innovative eco-friendly home, or simply exploring alternative roofing options, thatching presents a compelling and unique choice.
While the initial investment in a thatched roof may be higher, and it certainly requires a commitment to regular, skilled maintenance, the long-term benefits are substantial. These include exceptional thermal performance, significant energy savings, a minimal carbon footprint, and an unparalleled aesthetic that imbues any property with character and charm. For many, these advantages make a thatched roof a wise and deeply rewarding investment.
So, as you envision your next building project, take a moment to consider the profound practicality, sustainable nature, and undeniable beauty of thatched roofs. They offer more than just shelter; they offer a connection to history, a commitment to the environment, and a distinct architectural statement. If you’re interested in exploring further aspects of sustainable architecture, unique design ideas, or other eco-friendly living and building solutions, be sure to delve into my other blogs for additional insights and inspiration.
Frequently Asked Questions About Thatched Roofs
How do I find a qualified thatcher for my project?
Finding a qualified thatcher is crucial for the success and longevity of your thatched roof. We recommend looking for certified professionals through reputable local or national roofing organizations and trade associations that specialize in traditional building crafts. Many countries have specific Guilds of Master Thatchers or similar bodies that maintain lists of accredited professionals. Additionally, seek specialists with extensive experience in traditional roofing methods and ask for references or portfolios of their previous work to ensure their expertise aligns with your project’s needs.
Can thatching be combined with modern building materials for enhanced performance?
Absolutely, thatching can be successfully combined with modern materials to enhance durability, fire resistance, and overall structural performance. Contemporary homes often integrate thatched roofs with advanced underlying structures, fire-retardant sprays, and even non-traditional base materials like metal or slate in specific sections of the roof. This innovative approach allows designers to leverage the unique aesthetic and thermal benefits of thatch while meeting modern building codes and maximizing safety and longevity. For instance, incorporating modern insulation beneath the thatch can further boost energy efficiency.
How long does it typically take to install a thatched roof?
The installation time for a thatched roof can vary significantly depending on the size and complexity of the roof, the type of thatch material used, the number of experienced thatchers working on the project, and weather conditions. Generally, a full thatching project for an average-sized residential property can take anywhere from a few weeks to a couple of months. This timeframe includes the necessary preparation of the roof frame, the meticulous gathering and conditioning of materials, and the intricate, labor-intensive installation process itself. Larger or more complex roofs, such as those with multiple dormers or intricate ridge designs, will naturally require more time.
