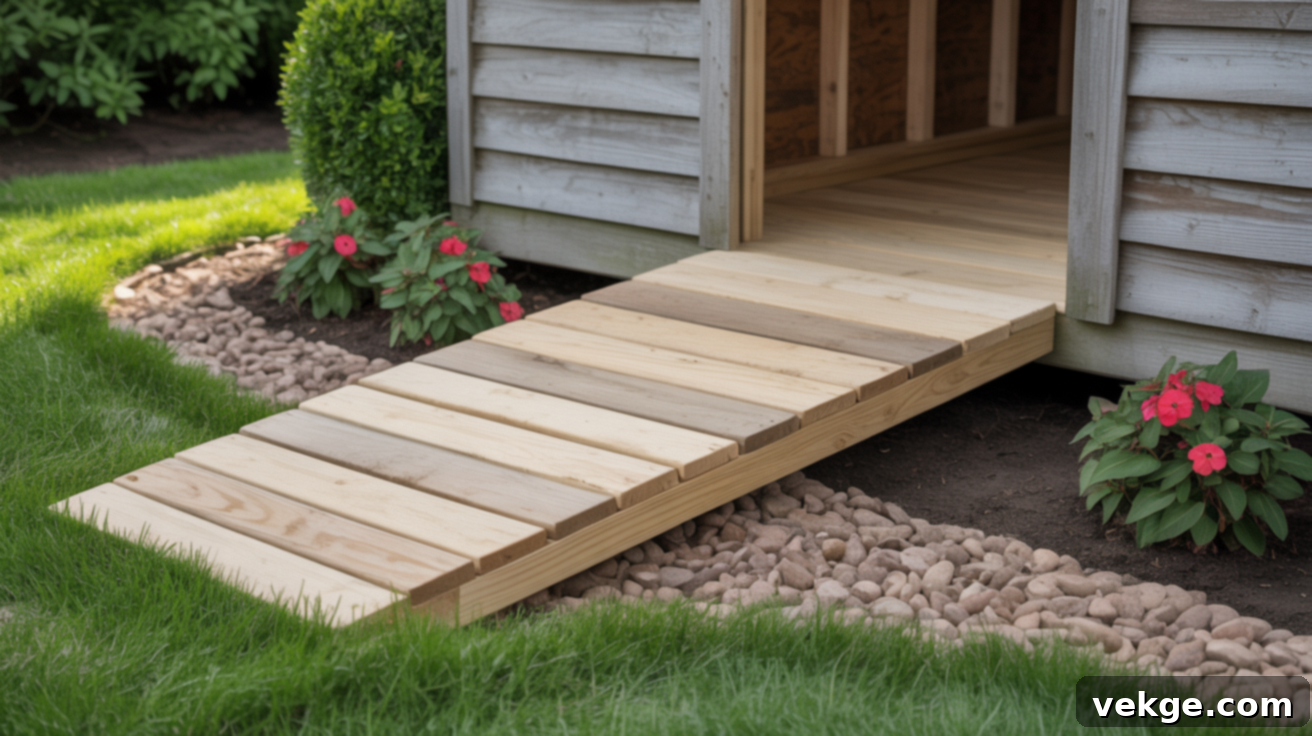
Build Your Own Durable Shed Ramp: Easy DIY Plans for Safe Storage Access
Picture this: You’re trying to maneuver your heavy lawnmower, wheelbarrow, or those bulky storage bins into your shed, and you hit that annoying step. It feels less like storage and more like a weightlifting session, often leading to strained backs or scraped knees. We’ve all been there, and that seemingly small hurdle can indeed be a real pain point in your daily routine.
This is precisely where a well-designed shed ramp becomes an indispensable upgrade. It’s far more than just a convenient add-on; it transforms the accessibility of your storage space, making the movement of heavy, awkward items significantly easier, safer, and far more efficient. No more wrestling with equipment or risking damage to your shed’s threshold.
In this comprehensive guide, we’ll walk you through simple, yet incredibly effective, DIY shed ramp plans that are proven to work. You’ll gain a clear understanding of the essential tools required, learn how to meticulously plan your ramp for optimal performance and safety, and receive precise, step-by-step instructions on how to build it from start to finish. Our goal is to empower you to construct a robust and reliable ramp that serves your needs for years to come.
Are you ready to stop battling with your storage shed and instead enjoy seamless access? Let’s delve into the compelling reasons why a shed ramp is a worthwhile investment and precisely how you can build one right, ensuring both durability and ease of use.
Why a DIY Shed Ramp Is a Smart and Worthwhile Investment
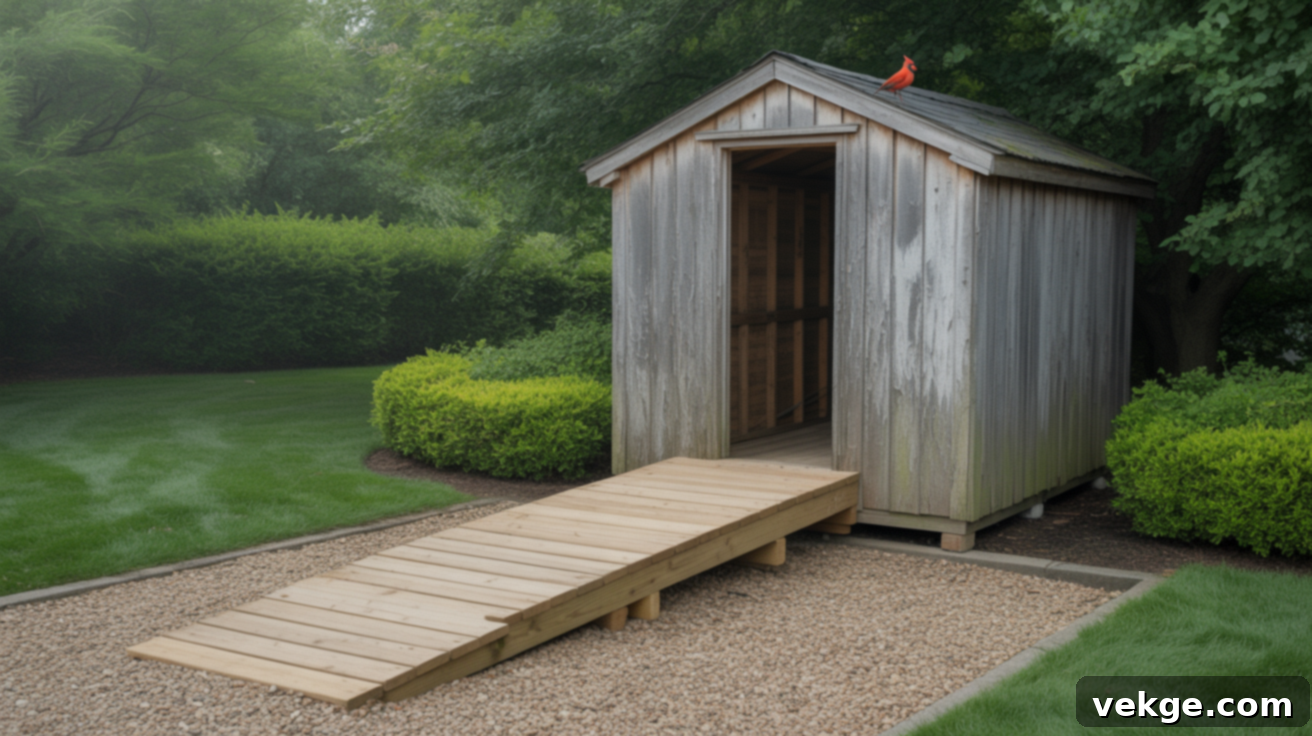
A shed ramp isn’t merely a matter of convenience; it’s a strategic upgrade that enhances the functionality, safety, and longevity of your outdoor storage solution. If your shed features a raised floor – even if it’s just a few inches off the ground – a ramp dramatically improves access, making the entire process smoother and considerably safer for everyone. This often overlooked addition can significantly impact your efficiency and physical well-being.
The primary benefit lies in its ability to eliminate the physical strain associated with lifting or forcing heavy items over a threshold. Imagine effortlessly rolling in your lawn mower, a fully loaded wheelbarrow, or cumbersome storage bins, rather than struggling to hoist them. This ease of movement not only saves your back but also prevents potential accidents and damage to your valuable equipment. A good ramp ensures that you can utilize your shed’s full storage potential without the hassle.
Beyond personal convenience, a robust ramp also offers crucial protection for your shed itself. The bottom edge of your shed, often subjected to repeated impact and wear from items being dragged or lifted over it, can suffer significant damage over time. A ramp acts as a protective buffer, preserving the integrity of your shed’s entrance and extending its overall lifespan by preventing rot and structural degradation caused by constant abrasion.
Furthermore, with the right design and appropriate material selection, a shed ramp can perform reliably in all weather conditions, whether it’s pouring rain, heavy snow, or dry ground. Its versatility ensures year-round accessibility, removing any seasonal limitations from your storage use. A properly built ramp, constructed with attention to detail and quality materials, is a low-maintenance solution that will serve you faithfully for years, making your shed an even more valuable and accessible asset on your property.
Essential Materials and Tools for Building Your Shed Ramp
Before you embark on the rewarding journey of building your shed ramp, gathering the correct tools and selecting the right lumber is paramount. This initial preparation ensures that your ramp will not only be safe and structurally solid but also endure for many years to come, providing reliable service without constant repairs. Investing in quality materials and tools from the outset will save you time and effort in the long run.
Tools You’ll Need:
- Measuring Tape: Crucial for accurate measurements of ramp length, precise joist spacing, and making exact board cuts.
- Circular Saw or Handsaw: Essential for cleanly cutting joists, the ledger board, and all decking boards to their required sizes. A circular saw offers speed and precision, while a handsaw is suitable for smaller projects or if power tools are unavailable.
- Speed Square: An invaluable tool that helps you mark and trace accurate angles for your cuts quickly, eliminating the need for complex slope calculations.
- Shovel: Used to effectively clear and level the ground precisely where the ramp base will be established, ensuring a flat and stable foundation.
- Torpedo Level and 4-foot Level: These are vital for checking the ground slope, ensuring the ramp frame is perfectly level, and verifying the consistency of your incline.
- Power Drill with Screwdriver Bits: A necessity for efficiently driving structural screws to secure the main frame and deck screws to fasten the decking boards.
- Oscillating Tool (Optional): Highly useful for fine-tuning and trimming any thin, overhanging board edges, providing a clean and professional finish.
- Soil Tamper or Compactor (Manual or Powered): Essential for thoroughly compacting the gravel and soil beneath your ramp, creating a dense, stable, and long-lasting base.
- Marker or Pencil: For clearly tracing all cut lines and precisely marking screw spacing before drilling.
- Safety Gear: Always wear gloves, safety glasses, and ear protection when operating power tools for cutting or drilling to prevent injuries.
Materials You’ll Need:
- (1) Ledger Board (2×4 or 2×6, typically 64″ long): This is the anchor piece that securely fastens the entire ramp frame to your shed structure. A 2×6 offers more robust attachment if your shed allows.
- (5-7) Joists (2×4 or 2×6, typically 48″ long): These form the core structural frame of your ramp, bearing the primary load. Using 2x6s provides significantly more strength and rigidity, especially for heavier loads like riding mowers. The exact number depends on your chosen width and joist spacing.
- (1) Bottom Support (2×6 or 2×8, typically 64″ long): An optional but highly recommended component that adds considerable strength to the ramp’s base and provides a consistent drop, complementing the top cut of your joists.
- Decking Boards (2x4s or 5/4 deck boards, cut to 64″): These boards create the visible, walkable, and drivable top surface of your ramp. You’ll likely need 10–12 boards, depending on your preferred spacing and ramp length.
- White Gravel or Crushed Stone: Used to create a crucial moisture-resistant and stable base layer beneath the ramp, preventing direct soil contact and promoting drainage.
- Thompson’s WaterSeal or Similar Wood Sealant Spray: Essential for treating all cut ends and exposed wood surfaces to significantly reduce water damage, prevent rot, and extend the lifespan of your ramp.
- Structural Screws (3″ or longer): Heavy-duty screws specifically designed for securing the joists to the ledger board and firmly anchoring the entire ramp assembly to your shed’s frame.
- Deck Screws (2.5″): Specially coated screws for reliably fastening the decking boards to the joists, resisting rust and corrosion in outdoor environments.
- Spray Marking Paint: Useful for clearly outlining the precise area where your ramp will rest on the ground, guiding your excavation and preparation efforts.
Planning Your Shed Ramp: Design for Success and Safety
Before any wood is cut or a single screw is driven, meticulous planning is the foundation of a successful and safe shed ramp. This critical phase involves carefully calculating the correct slope, determining the optimal width, and ensuring adequate support for the loads it will bear. These steps are not just about making the ramp fit; they’re about guaranteeing its stability, longevity, and safe operation for years to come.
Determining the Right Shed Ramp Length and Slope
The first and most crucial measurement is the height of your shed floor from the ground. This “rise” directly dictates the necessary length of your ramp. For safe and comfortable use, particularly when walking or wheeling heavy tools, adhere to the universally recommended 1:12 ratio. This means for every 1 inch of vertical rise, your ramp should extend 12 inches horizontally. This creates a gentle, manageable incline that minimizes effort and reduces the risk of slips or tipping.
While a 1:8 slope is shorter and steeper, often requiring less material, it should only be considered when space is severely limited and the ramp will not be used frequently with very heavy equipment or for mobility access. A steeper incline significantly increases the effort required and the potential for accidents. For example, if your shed floor is 16 inches high, a 1:12 slope would require a ramp approximately 16 feet (192 inches) long. Opting for a 1:8 slope for the same 16-inch rise would shorten the ramp to about 10.5 feet (128 inches), but the increased steepness would be noticeable and more challenging.
How Wide Should Your Shed Ramp Be?
The width of your ramp should be determined by two primary factors: the width of your shed’s entry point and the type of equipment you plan to move over it. Start by accurately measuring your shed door or opening. To ensure ease of use and prevent scraping, always add several inches to each side of this measurement. This extra width is invaluable when steering equipment like lawnmowers, large dollies, or even ATVs, providing crucial maneuvering room.
For instance, if your shed door measures 48 inches wide, building your ramp at least 52 to 56 inches wide would provide a comfortable margin for error. Furthermore, consider potential future uses or bad weather conditions. An adequately wide ramp can prevent accidents by offering more stable footing and space, especially when the surface might be wet or icy. Thinking ahead about the widest items you might ever need to move will save you from future frustrations and potential re-construction.
Ensuring Safe and Adequate Support for Your Shed Ramp
Robust support is absolutely critical for constructing a safe, stable, and long-lasting shed ramp. The primary structural components are the joists or stringers, which should be spaced appropriately to distribute weight effectively. Most residential ramps utilize joists spaced between 12 to 16 inches apart on center. For lighter pedestrian traffic or smaller push mowers, 16-inch spacing with 2x4s might suffice, but for optimal strength and peace of mind, especially with a 2×6 or larger joists, narrower spacing is always better.
If your ramp is designed to carry heavy items such as riding mowers, ATVs, or garden tractors, it is highly recommended to stick to a tighter 12-inch on-center spacing for your joists and strongly consider using 2×8 lumber for stringers for significantly increased strength and rigidity. Additionally, integrating blocking between the joists, typically halfway down the ramp’s length, is crucial. This blocking prevents the joists from twisting, provides lateral stability, and dramatically reduces any noticeable bounce or flex when weight is applied.
For taller ramps or those expected to bear substantial weight, consider establishing secure footings or small concrete pads at the base. These foundational elements prevent the ramp from shifting, settling, or sinking into the ground over time, especially in areas with soft soil or significant freeze-thaw cycles. A properly supported ramp remains steadfast and reliable, regardless of the load or environmental conditions.
Step-by-Step DIY Shed Ramp Construction Guide
With your planning meticulously completed and all materials gathered, it’s time to bring your shed ramp design to life. These detailed steps will guide you through the process of cutting, securely attaching, adequately supporting, and professionally finishing your ramp, ensuring it remains strong, safe, and fully functional for years to come. Follow each instruction carefully to achieve the best results.
Step 1: Prepare a Solid and Level Base for Your Ramp
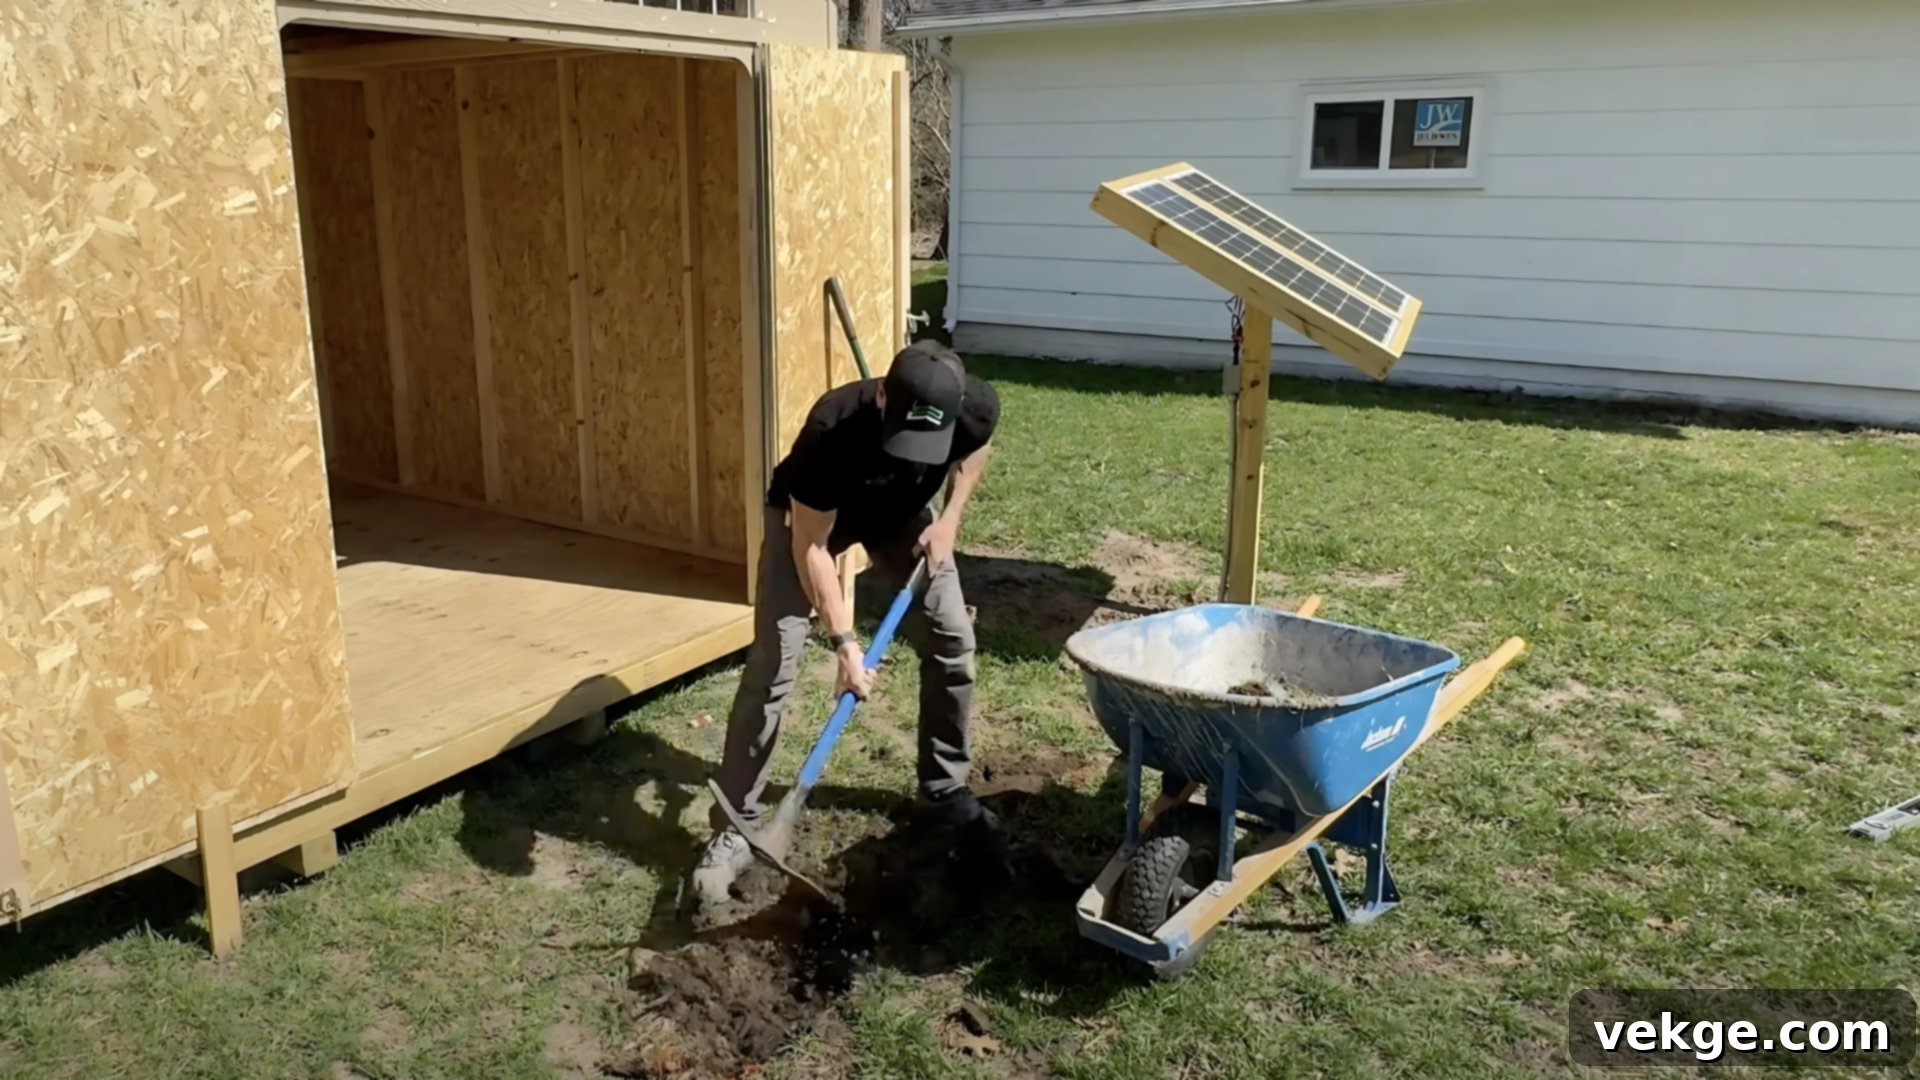
Begin by measuring the precise width of your shed door opening. Use this measurement, along with your planned ramp length, to clearly mark the entire ramp footprint on the ground using spray paint. This outline will serve as your guide. Next, clear away any debris, sod, or loose soil within this marked area. Dig down any high spots and fill in low spots, ensuring the ground is as level as possible from side to side. Once leveled, add a layer of 2-3 inches of white gravel or crushed stone. This layer is crucial for keeping the ramp’s wooden components off direct soil contact, which prevents moisture absorption and promotes excellent drainage. Finally, use a soil tamper or compactor to thoroughly compact the gravel, creating a firm, stable, and well-drained foundation for your ramp.
Step 2: Cut and Securely Place the Ledger Board
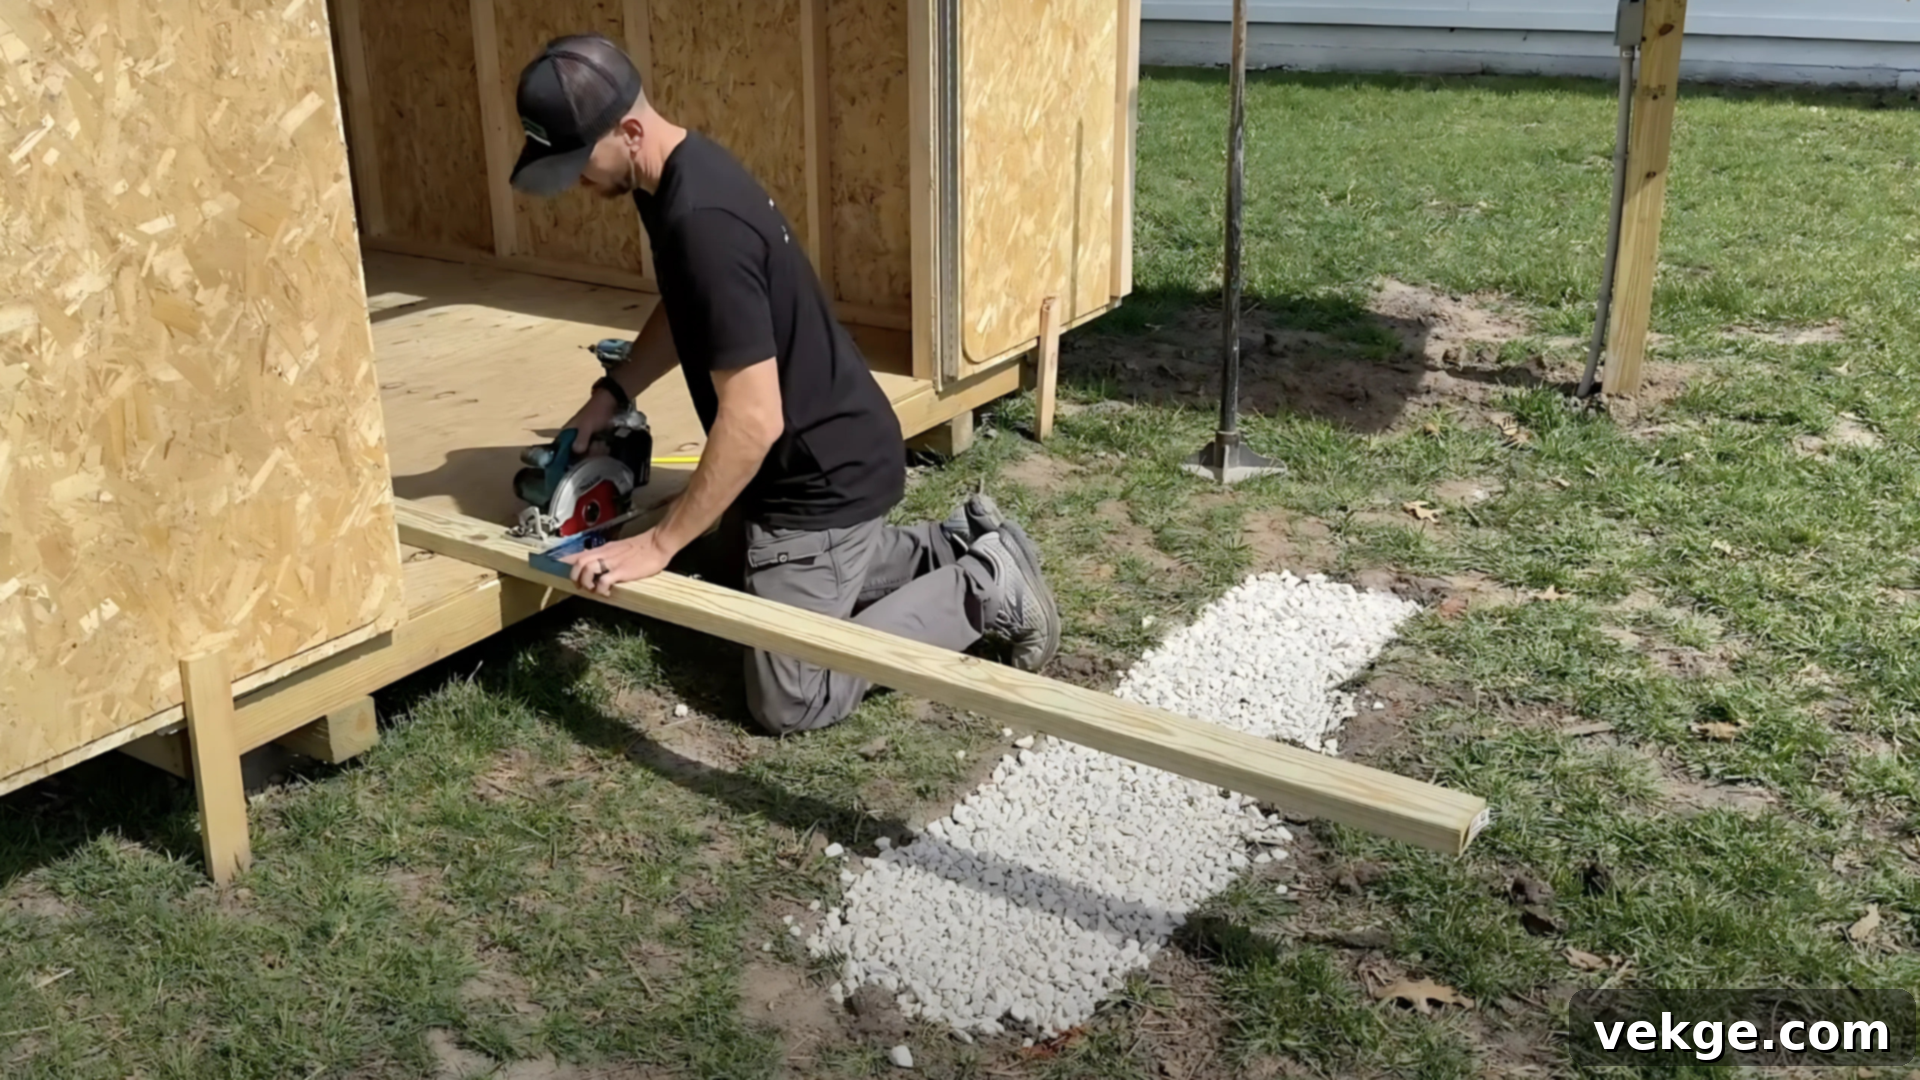
Take your 2×4 (or 2×6) lumber and cut the ledger board to precisely match the planned width of your ramp (e.g., 64 inches). The ledger board is the anchor that will attach your ramp to the shed. Mount this board securely to the shed’s frame, ensuring its top edge is positioned approximately 1.5 inches *below* the level of your shed floor. This specific offset is critical to prevent the ramp from interfering with the shed door’s swing and ensures a smooth transition. Temporarily fasten it in place with a couple of screws, ensuring it is perfectly level. This board will not only support your ramp joists but also provide the critical reference point for marking your slope angles accurately.
Step 3: Cut the Joists with an Easy Angle-Tracing Method
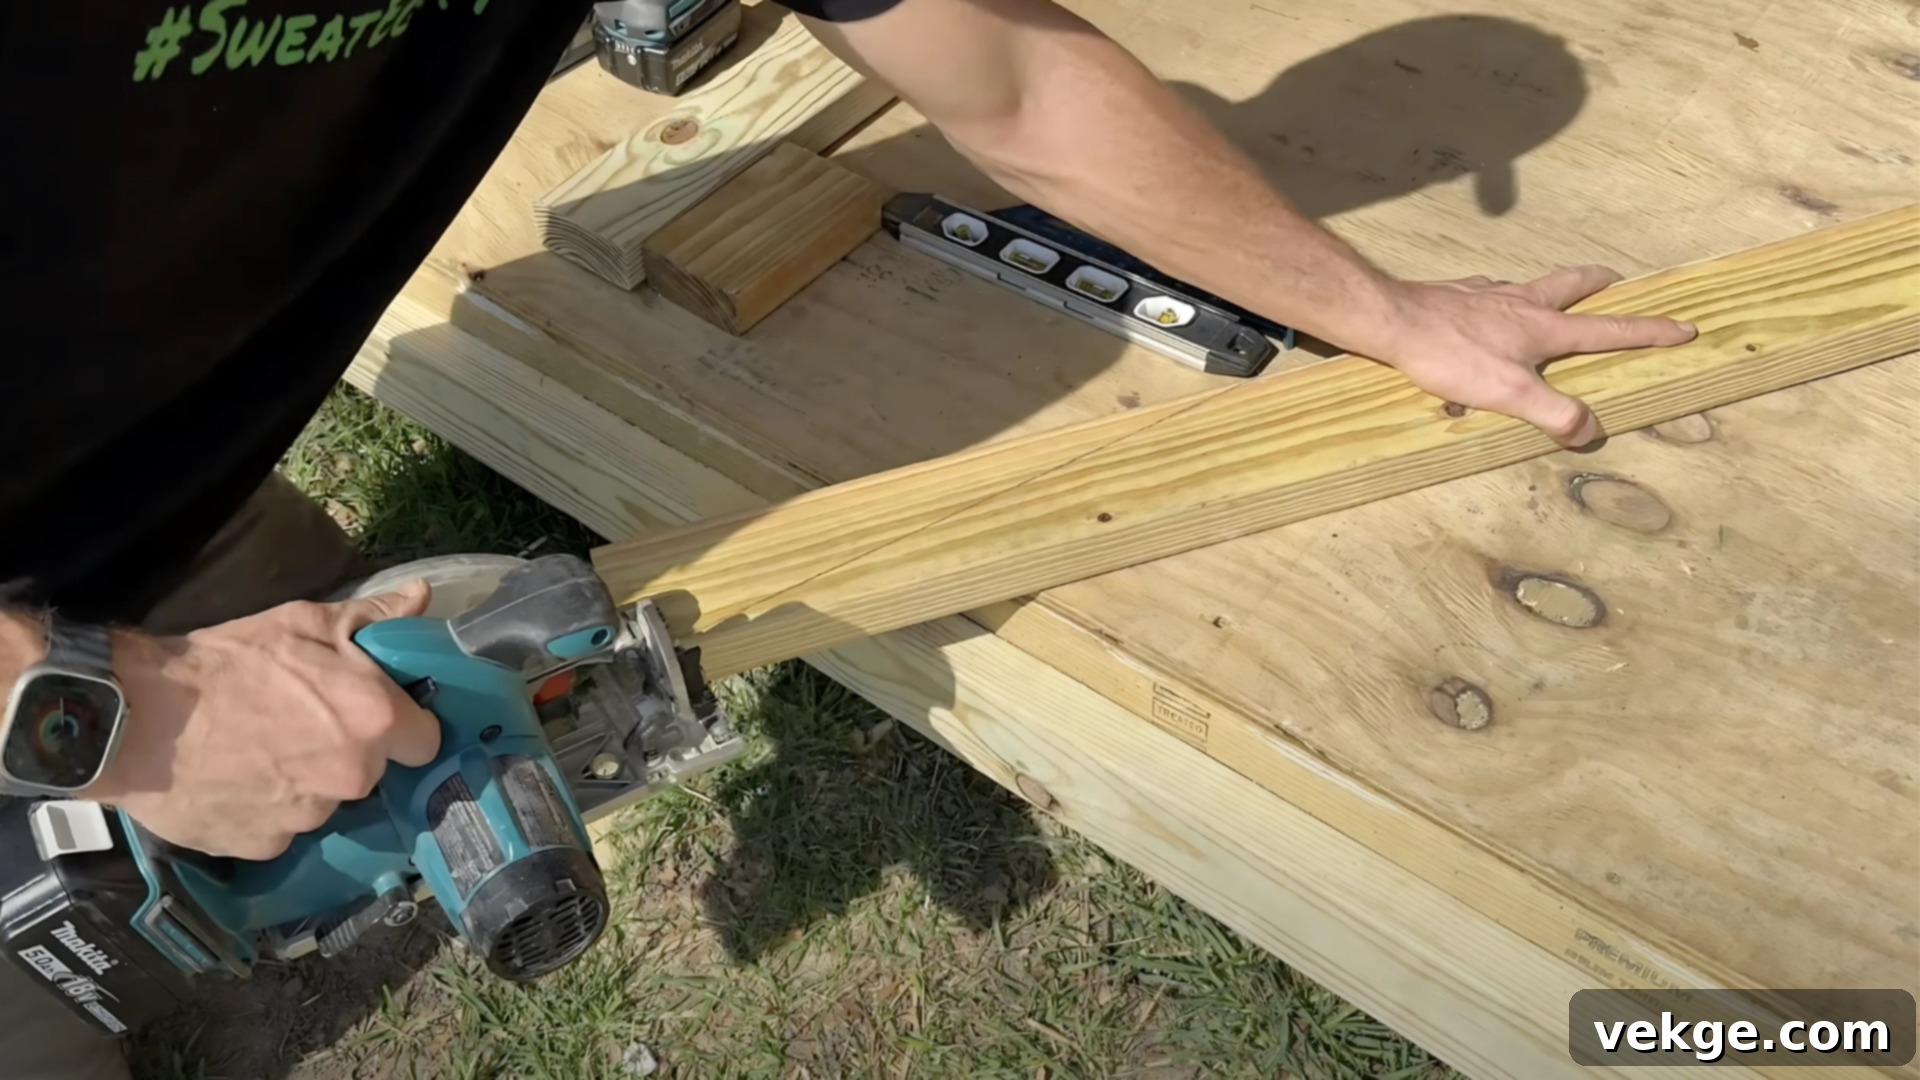
This clever technique allows you to cut your joists without needing complex rise/run angle calculations. Take one of your full-length joist boards (e.g., 48 inches) and position it against the ledger board at the desired slope. Place a scrap 2×4 piece of wood flat on the ground at the ramp’s base. Now, use this scrap 2×4 to trace the exact bottom angle onto your full-length joist. Similarly, ensure the top of the joist is flush with the ledger and trace its angle. Cut this first joist precisely along your traced lines. This completed joist now serves as your perfect template. Use it to mark and cut the remaining four or more joists, ensuring they are all identical. You’ll end up with enough joists to be spaced evenly across the total ramp width, typically 12-16 inches on center.
Step 4: Assemble and Secure the Robust Ramp Frame
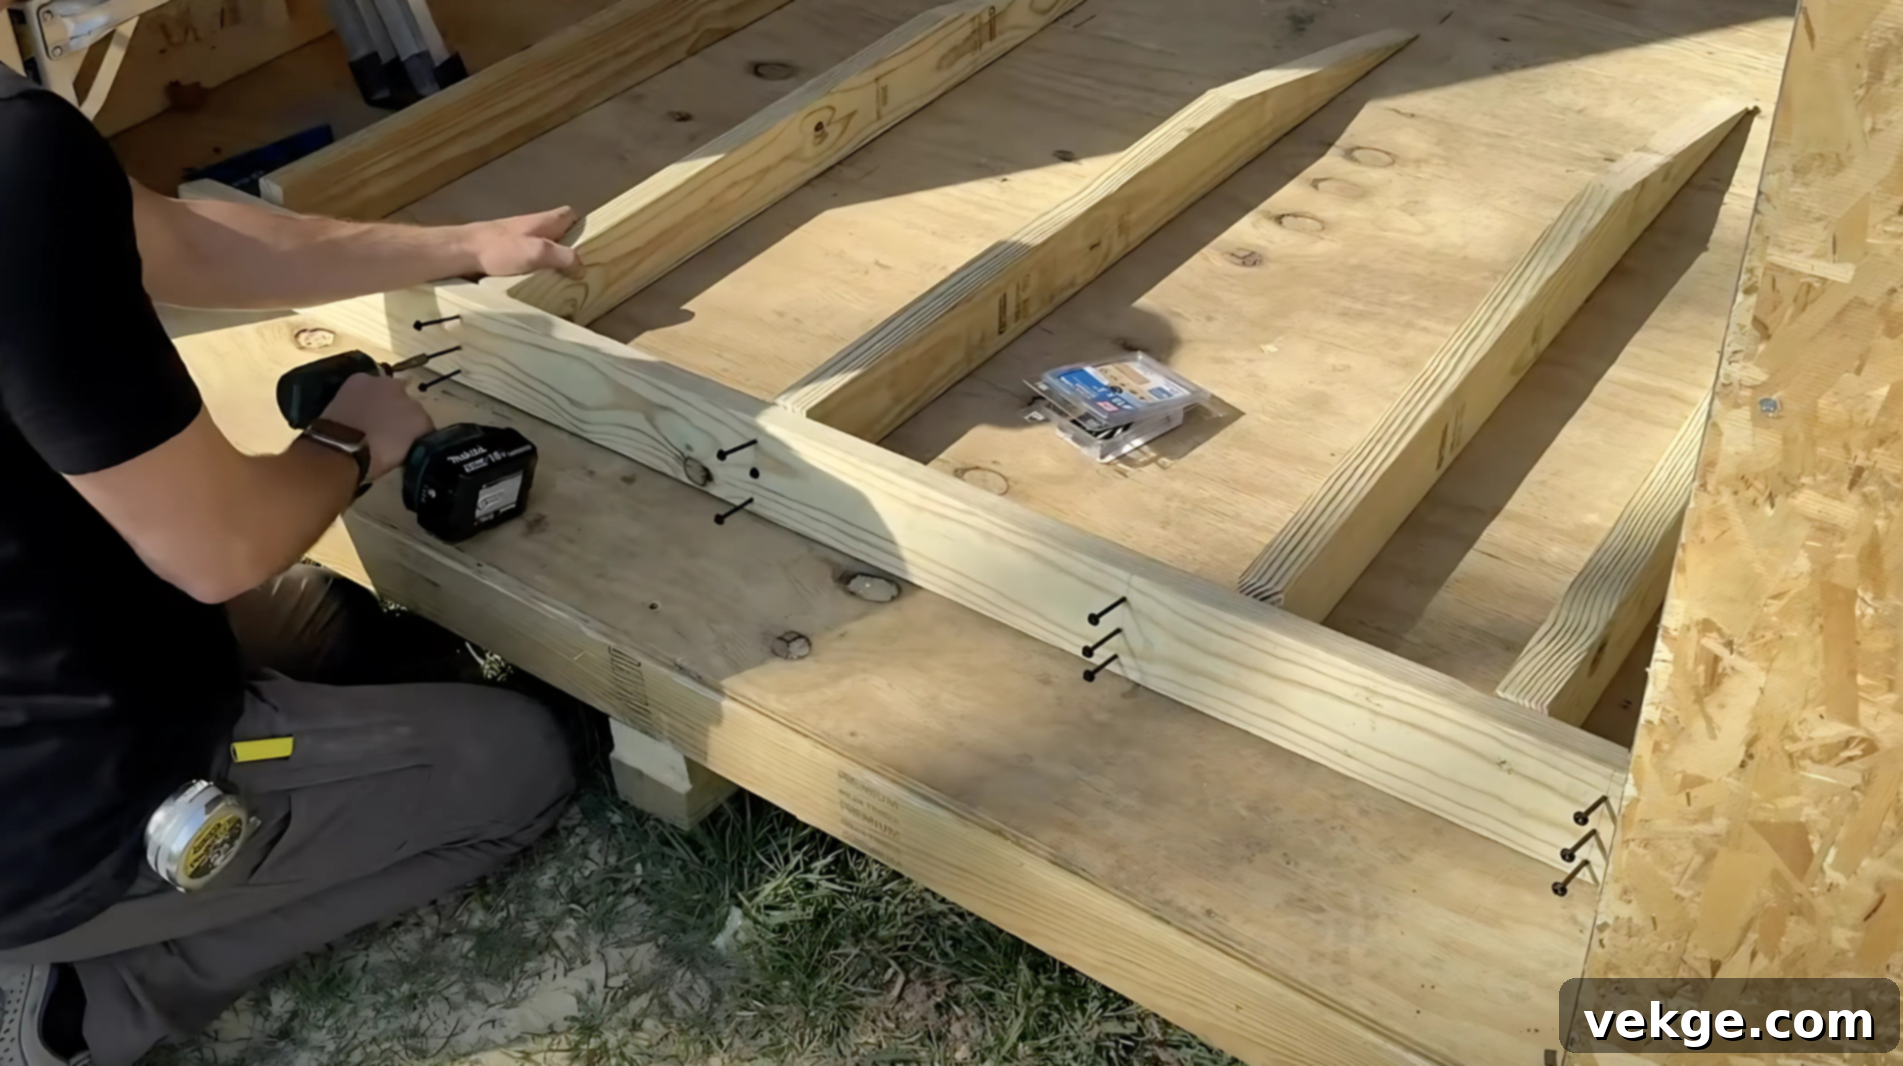
With all your joists cut, it’s time to assemble the main frame. Attach the five or more joists to the ledger board using robust 3-inch structural screws. Maintain your chosen spacing (e.g., 15 inches on center) and ensure the top cuts of the joists align perfectly with the ledger. Once the joists are attached to the ledger, carefully position the entire ramp assembly against the shed, reattaching the ledger board firmly to the shed’s floor frame with additional structural screws, ensuring it is incredibly secure. Periodically check for any direct contact points between the joists and the bare soil, making small adjustments or adding more gravel if necessary to prevent wood-to-ground contact. Verify that everything is perfectly level and square before moving on to the next step, as this frame forms the backbone of your ramp.
Step 5: Install Decking Boards and Apply Finishing Touches
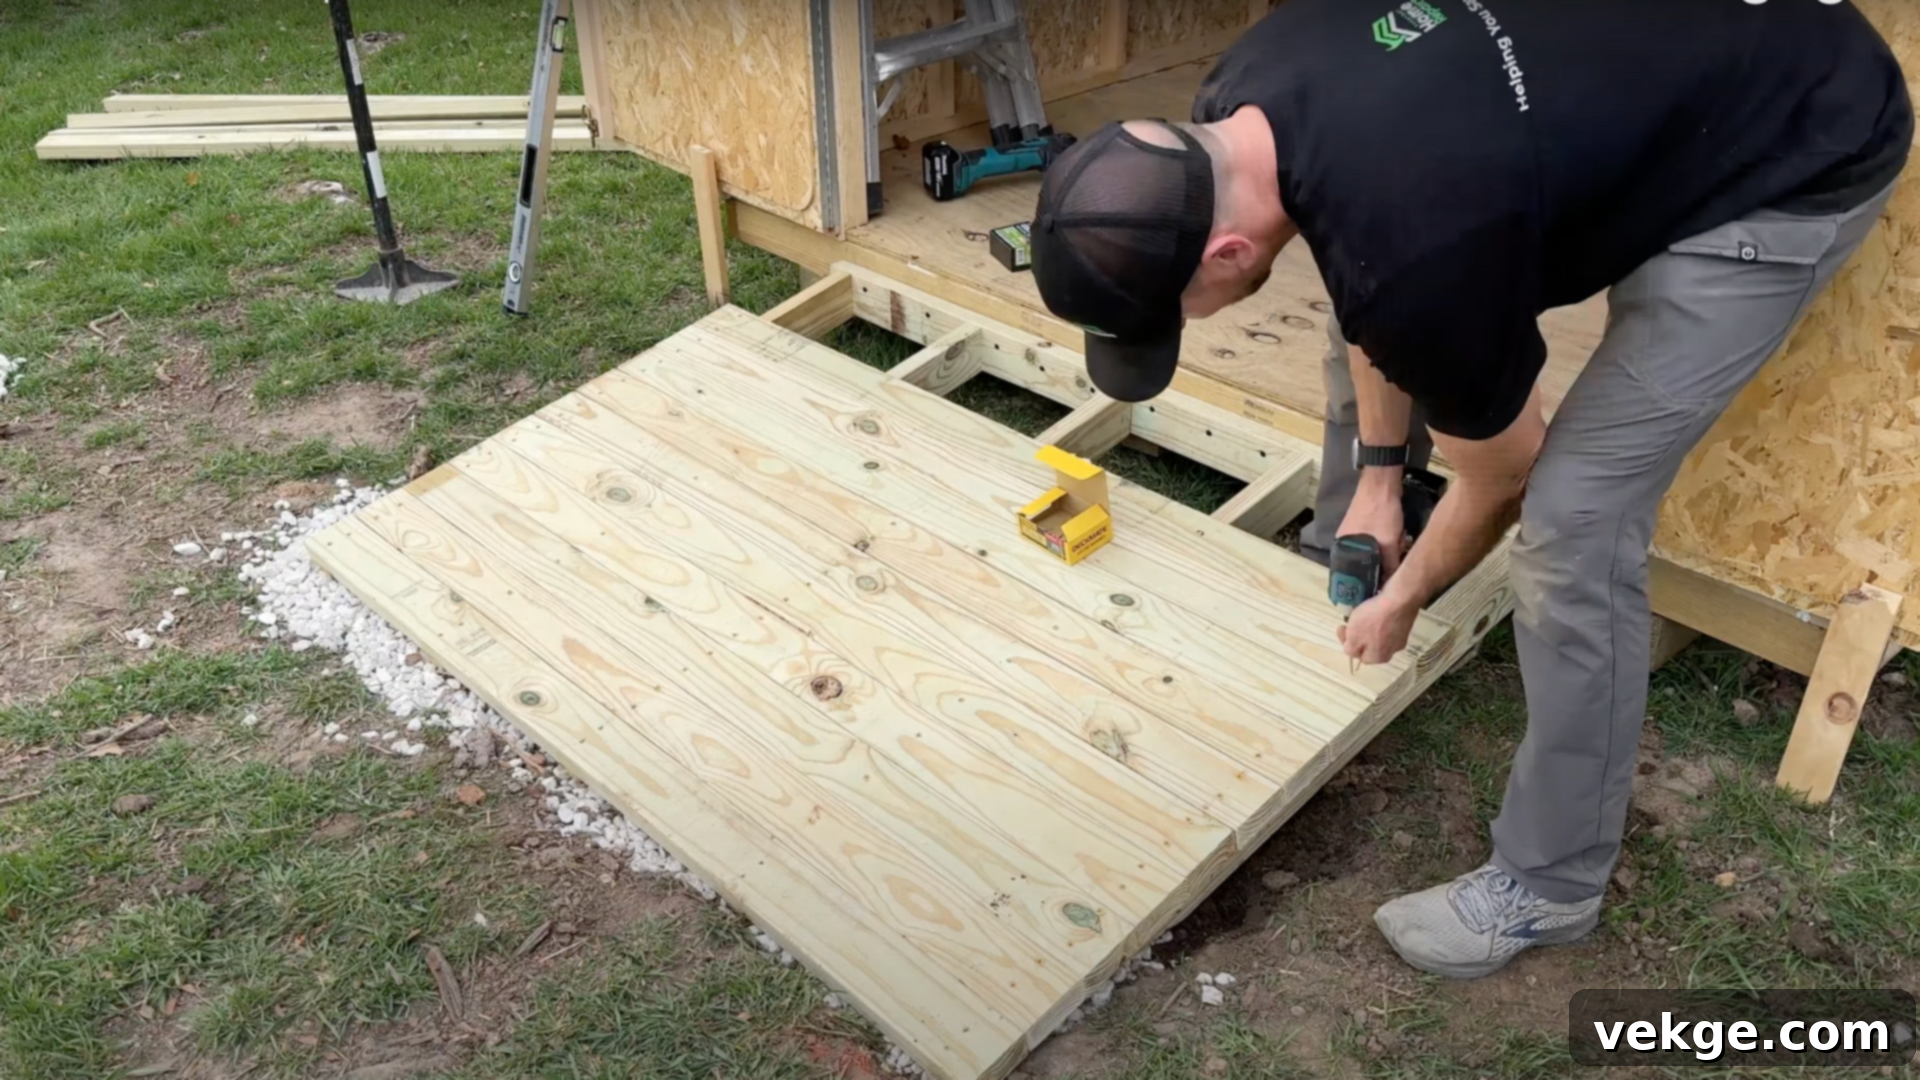
Begin installing your decking boards, starting with the very bottom board at the ramp’s base. Ensure this first board is raised slightly (e.g., 1/2 inch) off the compacted gravel to allow for proper drainage and prevent moisture wicking. Secure it firmly using 2.5-inch deck screws, driving them at a slight angle into the joists for maximum holding power. Proceed to add the remaining deck boards, maintaining a consistent and even spacing between each board (ee.g., a credit card width for drainage and expansion). The last board may need to be trimmed lengthwise to fit perfectly. Once all boards are installed, use your oscillating tool if needed to trim any minor overhangs for a clean finish. Finally, and crucially, liberally apply Thompson’s WaterSeal or a similar wood sealant spray to all cut ends and exposed surfaces of the wood. This step significantly prevents rot and water damage, dramatically extending your ramp’s lifespan. Double-check all screws, confirm the level, and admire your completed, durable shed ramp!
For a more detailed visual walkthrough of the entire construction process, be sure to watch the comprehensive build video here:
Exploring Material Options: What Else Can You Use for Your Shed Ramp?
While traditional pressure-treated lumber is a popular and cost-effective choice for shed ramps, you have a diverse array of other material options, each offering unique benefits in terms of durability, cost, aesthetics, and maintenance requirements. Selecting the best fit for your specific needs and environment can significantly impact the ramp’s longevity and performance.
Composite Deck Boards
Composite boards are engineered from a blend of recycled plastic and wood fibers, making them a highly durable and exceptionally weather-resistant alternative to traditional lumber. Unlike untreated wood, composite decking will not splinter, crack, rot, or succumb to insect damage, making it an excellent choice for regions with high humidity, heavy rainfall, or extreme temperatures. While the initial investment for composite material is generally higher than wood, its low-maintenance nature means you’ll save time and money on sealing, staining, and repairs over many years, making it a cost-effective solution in the long run. If you prioritize a long-lasting, visually appealing, and virtually upkeep-free ramp, composite decking is an outstanding option.
Aluminum Ramps
Aluminum offers a unique combination of being remarkably lightweight yet incredibly sturdy, making it an ideal material for a shed ramp. Its inherent resistance to rust and corrosion ensures it performs exceptionally well in harsh environments, including coastal areas with salt air or consistently humid climates. Many aluminum ramps are available as modular kits, which greatly simplifies the installation process, often requiring minimal tools and expertise. These ramps are particularly well-suited for homeowners who desire a portable, easily adjustable, or semi-permanent solution that is significantly less prone to weather-related damage and degradation compared to wood. Their sleek, industrial look also appeals to some modern aesthetics.
Concrete Slabs
For those seeking the ultimate in permanence and ultra-durability, a concrete slab ramp is an unparalleled choice. Once properly poured and cured, a concrete ramp is impervious to shifting, warping, rot, or insect infestations. It provides an unyielding surface that can withstand immense weight and constant heavy traffic, making it especially useful for sheds that house large, heavy equipment such as riding lawn mowers, all-terrain vehicles (ATVs), or utility vehicles. While the installation process for concrete requires more effort, specialized skills, and is not adjustable once set, its ability to last for many decades with virtually no maintenance makes it a prime contender for a permanent, heavy-duty solution.
Reclaimed Wood
If you’re building your shed ramp on a tighter budget or are committed to sustainable solutions, reclaimed wood presents a practical and eco-friendly option. Often more affordable than new lumber, reclaimed wood also adds a distinctive rustic charm and character to your outdoor setup. However, it’s critically important to thoroughly inspect each piece of reclaimed wood for any existing damage, rot, or insect infestations before use. Furthermore, proper treatment and sealing are essential to enhance its resistance to future rot, bugs, and moisture, ensuring it remains structurally sound. With careful selection, appropriate preparation, and ongoing maintenance, reclaimed wood can indeed provide a sturdy, good-looking, and environmentally conscious shed ramp solution.
Shed Ramp Safety Guidelines: Ensuring a Secure and Stable Structure
A well-constructed shed ramp should do more than just facilitate easier access; it must fundamentally prioritize your safety and the safety of anyone using it. Adhering to a few basic but crucial safety measures during the design and construction phases will ensure you build a sturdy ramp that remains stable, secure, and reliable through all kinds of weather and usage conditions. Neglecting these guidelines can lead to accidents and structural failures.
1. Adhere Strictly to the Correct Slope Ratio
To proactively prevent accidents, especially when maneuvering heavy or bulky equipment, it is absolutely paramount to maintain the ramp slope within a safe and manageable range. The widely recognized standard recommendation for accessibility and ease of use is a 1:12 ratio. This means for every 1 inch of vertical rise from the ground to the shed floor, the ramp should extend at least 12 inches horizontally. This creates a gentle, gradual incline that significantly reduces effort and minimizes the risk of slipping, losing control, or tipping heavy objects. Steeper ramps, such as a 1:8 ratio, are generally only advised for scenarios where space is extremely limited and the ramp will not experience frequent use or bear substantial loads, as they inherently pose a greater safety challenge.
2. Implement an Effective Non-Slip Surface
Even the most meticulously built ramp can become a dangerous hazard if its surface becomes slick due to environmental factors like rain, snow, ice, or mud. To mitigate this risk, it is highly recommended to apply a reliable non-slip surface treatment. Options include robust grip tape, specially formulated sand-infused paint, or textured rubber strips. These additions dramatically enhance traction, significantly helping to prevent slips and falls, particularly during inclement weather. If your shed sees regular use throughout all seasons, incorporating a non-slip surface is a simple yet profoundly impactful upgrade that makes a monumental difference in overall safety.
3. Ensure All Connections Are Secure and Robust
The structural integrity of your shed ramp relies heavily on the strength of its connections. Make certain that the ledger board, which anchors the ramp to the shed, is firmly secured into a solid, structural part of the shed’s frame, not just superficial siding or trim. Always utilize high-quality structural screws that are specifically designed for outdoor use and rated for the loads they will bear when attaching the joists to the ledger and fastening the decking boards. After assembly, double-check that every connection is tightened securely and that there is no wobbling, flexing, or shifting when weight is applied. Loose boards or weak connections represent a significant safety risk, especially when the ramp is under the stress of heavy loads.
4. Securely Anchor the Ramp Base
The base of your shed ramp must rest on a stable and unyielding surface to prevent movement and ensure long-term stability. Avoid placing the ramp directly on bare soil, as this can soften, erode, shift, or promote rot over time, leading to an uneven and potentially dangerous ramp. Instead, ensure the base sits on a compacted layer of gravel, sturdy pavers, or a small concrete pad. Anchoring the base further helps to keep the ramp perfectly level, prevents any rocking or bouncing, and significantly extends its lifespan. This is particularly crucial in regions experiencing heavy rainfall or frequent freeze-thaw cycles, which can otherwise compromise the foundation.
5. Understand and Adhere to Local Building Codes
Depending on your location, some towns and cities may have specific regulations or ordinances regarding the construction and installation of permanent ramps or outdoor structures. Before you begin building, it’s a wise practice to consult with your local municipal planning or building department. Depending on the height, size, or intended use of your ramp, you may be required to follow specific local building codes or even obtain a permit. If the ramp is intended for mobility access or exceeds a certain rise, additional requirements such as handrails, specific width measurements, or specific material fire ratings might be mandated. Being aware of and complying with these codes helps ensure your ramp is not only safe but also legally compliant.
Maintenance Tips for a Long-Lasting Shed Ramp
To ensure your shed ramp remains safe, functional, and in excellent condition for many years to come, regular and proactive maintenance is absolutely essential. Taking a few simple steps throughout the year can prevent premature wear, structural damage, and maintain optimal traction, especially as the seasons change and weather conditions vary.
One of the most critical maintenance tasks is to seal the wood every year. Applying a high-quality weatherproof stain or sealant creates a protective barrier that prevents moisture penetration, significantly reducing the risk of rot, mold growth, and warping caused by rain, snow, and fluctuating humidity. This annual treatment is vital for the longevity of your lumber.
During the colder months, it’s imperative to promptly clear any accumulation of snow and ice from the ramp surface. Allowing snow and ice to linger not only creates an immediate slipping hazard but also contributes to long-term water damage as the moisture thaws and refreezes, potentially compromising the wood’s integrity.
For enhanced safety and traction, especially in wet or icy conditions, consider adding grip tape, anti-slip treads, or a coarse aggregate mixed with paint to the ramp surface. These additions provide a more secure footing and wheel grip, drastically reducing the chances of slips and falls, making the ramp usable in almost any weather.
Regularly inspect all screws and boards for any signs of looseness, warping, cracking, or deterioration. Loose fasteners should be tightened immediately, and any damaged or compromised wooden components should be replaced without delay. Addressing these issues proactively prevents minor problems from escalating into major structural concerns.
Finally, ensure the ramp’s base remains dry and well-drained. Periodically check for any standing water accumulating around or under the base. If you notice pooling, assess your drainage. You might need to add more gravel, create a small French drain, or adjust the surrounding landscaping to divert water away, as consistent moisture at the base can lead to premature rot and instability.
Conclusion: Enjoy the Convenience and Safety of Your New Shed Ramp
Building a shed ramp is much more than just a home improvement project; it’s an investment in convenience, safety, and the long-term utility of your outdoor storage space. No longer will you have to strain your back or risk damaging your valuable equipment or shed. Instead, you’ll enjoy effortless access that makes every task, from storing a lawnmower to organizing bins, significantly easier and more enjoyable.
Now that you’re equipped with these clear, step-by-step DIY shed ramp plans and a comprehensive understanding of the materials, planning, and safety considerations, you have all the knowledge needed to construct a ramp perfectly tailored to your space and specific needs. Remember, the goal isn’t just a fancy structure, but a strong, solid, and incredibly user-friendly ramp that enhances your daily life.
Always prioritize sealing your wood thoroughly and make it a habit to inspect your ramp periodically. This simple maintenance routine will ensure your hard work stands the test of time, enduring through every season and continuing to provide reliable service for many years. With a well-built ramp, your shed transforms from a chore-inducing storage unit into an easily accessible and efficient part of your home.
Eager for more practical tips and projects that can significantly improve your outdoor space? Don’t hesitate to explore other blog posts on our website. You might just discover your next rewarding weekend project, ready to tackle and transform another area of your home!
