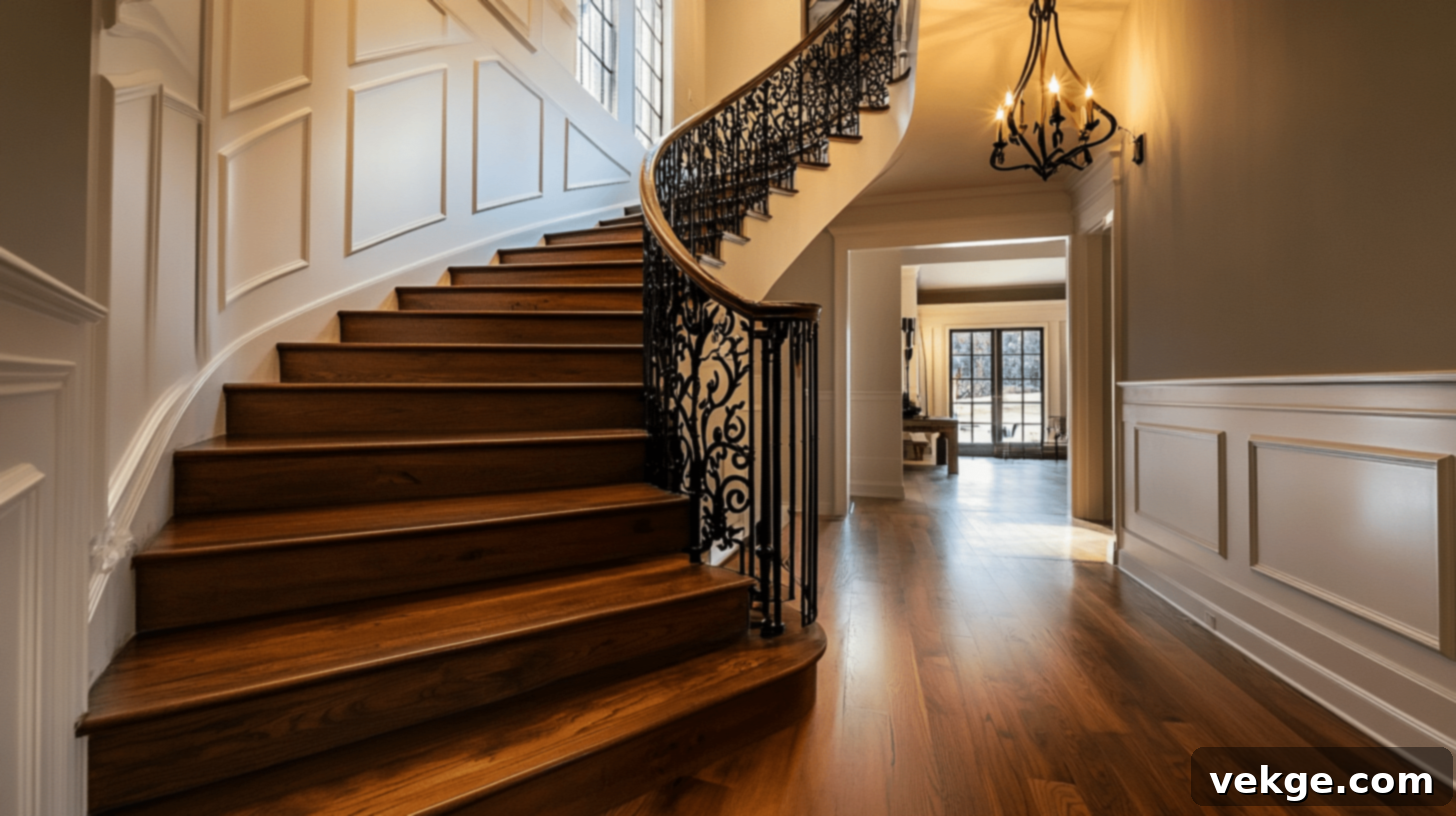
The Ultimate DIY Staircase Renovation Guide: Transform Your Stairs on a Budget
Are you envisioning a fresh, updated look for your home? Often, the staircase, a central feature, is overlooked but holds immense potential for transformation. If your stairs are showing signs of age, wear, or simply don’t match your evolving home aesthetic, you’re in the perfect place. Old, creaky, or carpeted stairs can instantly date your entire house, but the exciting news is that giving them a stunning makeover doesn’t have to be an overwhelming or prohibitively expensive endeavor.
This comprehensive guide is designed to empower you with simple, actionable steps to make your stairs look vibrant, modern, and new again. We’ll walk you through everything from thoroughly assessing your current staircase’s condition to selecting the ideal materials and exploring a variety of makeover ideas that fit any style and budget. Whether your stairs are solid wood begging for a fresh stain or hidden under old carpet, our expert tips will cover painting, adding new components, and enhancing structural elements. Get ready to elevate your home’s appeal and value, achieving gorgeous stairs without breaking the bank.
Why a Staircase Renovation is a Must-Do Home Improvement Project
Your staircase is more than just a functional pathway between floors; it’s a prominent architectural feature that impacts your home’s safety, style, and overall value. Neglecting an aging staircase can lead to various problems, making a renovation a crucial investment. Old stairways often suffer from loose treads, wobbly balusters, or cracked wood, which are not just eyesores but significant safety hazards that can lead to trips and falls. A well-executed staircase renovation directly addresses these concerns, creating a more secure environment for everyone in your household.
Beyond safety, updating your stairs dramatically enhances your home’s aesthetic appeal. A revitalized staircase can become a stunning focal point, catching the eye and leaving a lasting impression on visitors. This aesthetic upgrade translates directly into increased property value, often boosting your home’s market worth by 5-10%. Replacing weak or damaged steps and railings with strong, durable, and stylish materials ensures longevity and a modern feel. Moreover, compared to many other major home renovation projects, a staircase fix is often more affordable while delivering a high return on investment in both enjoyment and resale value. With stairs connecting your living spaces and enduring an average of 10-15 uses daily, ensuring they are not only beautiful but also meet safety standards—like having an ideal riser height of around 7 inches and tread depth of 11 inches—is paramount. A renovation blends these essential safety rules with exquisite design, making your staircase a truly integral and impressive part of your home.
Your Complete Step-by-Step DIY Staircase Renovation Guide
Embarking on a staircase renovation can seem daunting, but with a clear plan and the right tools, it’s a highly rewarding DIY project. This detailed guide will walk you through each phase, ensuring you have the knowledge and confidence to transform your stairs from start to finish. Let’s gather your materials and dive into the process.
Essential Materials Needed for Your Stair Makeover
Before you begin, assembling the right tools and materials is crucial for a smooth and successful renovation. Here’s a comprehensive list of what you’ll likely need, along with why each item is important:
- Wood Stain or Paint: The cornerstone of a visual transformation. Choose a high-quality product in your desired color or finish to dramatically improve your staircase’s appearance. Consider durable floor or porch paint for high-traffic areas, or a rich wood stain to highlight natural grain.
- Sealer or Varnish: Once your paint or stain is dry, a clear protective coating is essential. Apply a strong polyurethane or varnish to the wood surfaces to significantly increase durability, resist scratches, and protect against daily wear and tear, extending the life of your renovation.
- Sanding Supplies: Proper surface preparation is key. You’ll need sandpaper of various grits (e.g., 60-grit for heavy removal, 120-grit for general smoothing, 220-grit for fine finishing), sanding blocks for corners, and potentially an orbital sander for larger, flat surfaces like treads to achieve a perfectly smooth finish.
- Wood Filler: Essential for repairs. Use wood filler or putty to effectively repair cracks, nail holes, gouges, or gaps in the wood. Choose a filler that is sandable and stainable if you plan on staining your stairs.
- Primer: If you intend to paint your staircase, a quality primer is non-negotiable. It creates an ideal base for paint, helping it adhere better, cover old colors more effectively, and ensures a more uniform and durable final coat, especially on previously finished or raw wood.
- Replacement Components: Your renovation plans might involve replacing specific parts. Depending on the extent of your project, you may need new balusters (spindles), handrails, newel posts (main support posts), or even entire treads and risers. Measure carefully before purchasing.
- Safety Gear: Don’t forget safety glasses, dust masks, and gloves. Renovations can be dusty, involve sharp tools, and expose you to fumes, so protecting yourself is paramount.
- Basic Tools: Hammer, pry bar, utility knife, measuring tape, level, caulk gun, brushes, rollers, and drop cloths will be invaluable.
1. Assess and Plan Your Staircase Renovation
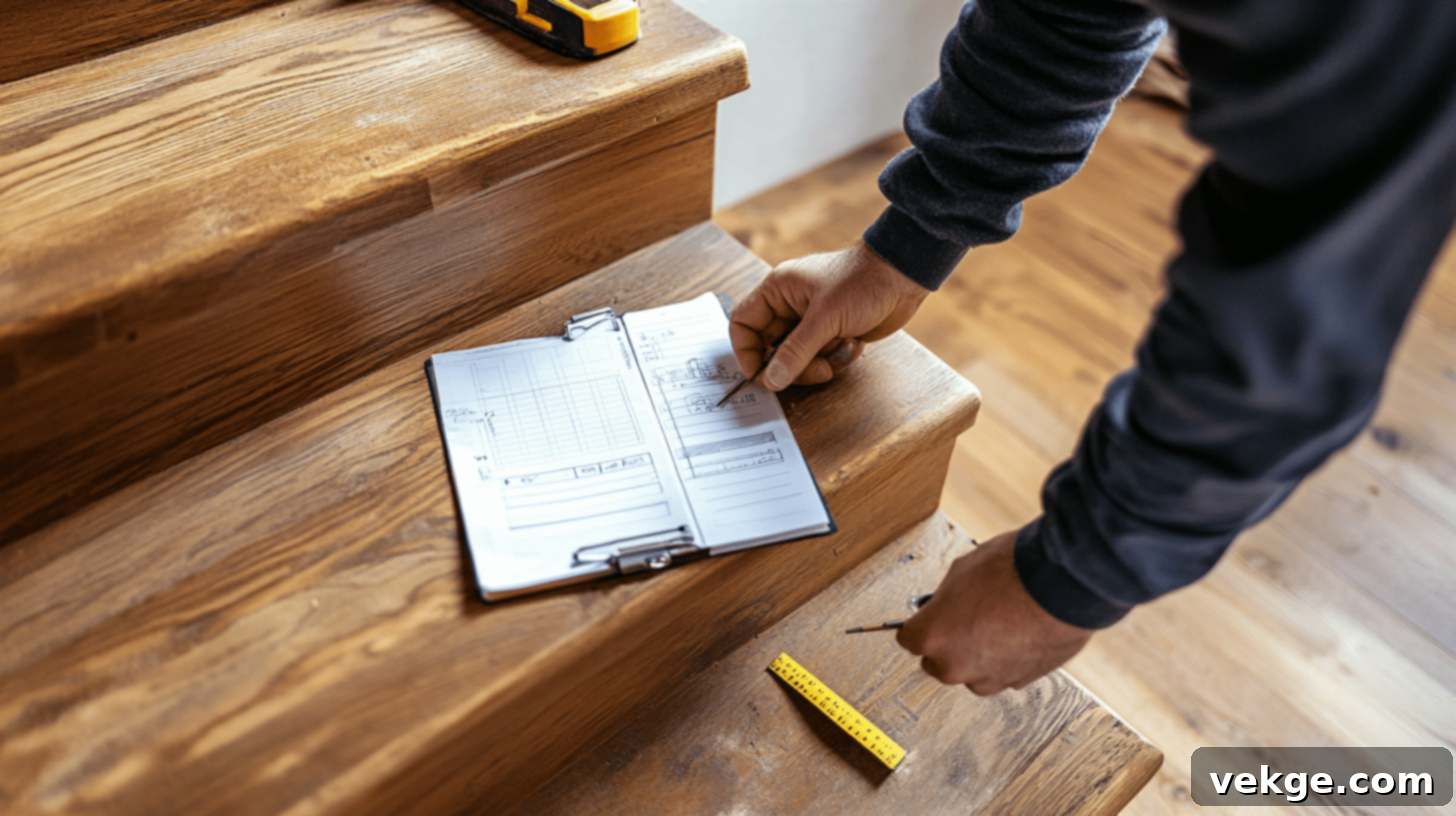
The success of any renovation hinges on thorough assessment and meticulous planning. Before you lift a single tool, inspect your stairs for any existing problems. Look closely for loose boards, splinters, cracked wood, squeaky spots, or wobbly railings and balusters. Mark these areas clearly, as they will require attention early in the process. Consider the overall structural integrity of the staircase. This initial assessment will help you determine the scope of your project—do you need a simple cosmetic update with new paint, or a more involved renovation requiring replacement of components or structural reinforcement?
Think about your desired aesthetic outcome. Do you want a modern, minimalist look, a classic traditional feel, or something rustic? Having a clear vision for the final appearance will guide your material and color choices. Crucially, create a detailed project plan that includes a list of all necessary tasks, a realistic timeline, and a budget. This proactive approach saves significant time, money, and frustration down the line. Additionally, ensure you have all materials and tools on hand before you begin, preventing inconvenient pauses in the middle of your project. Don’t forget to check local building codes, especially if you plan on altering structural elements like handrail height or baluster spacing, to ensure your renovation meets safety standards.
2. Understand Staircase Terminology for Clear Communication
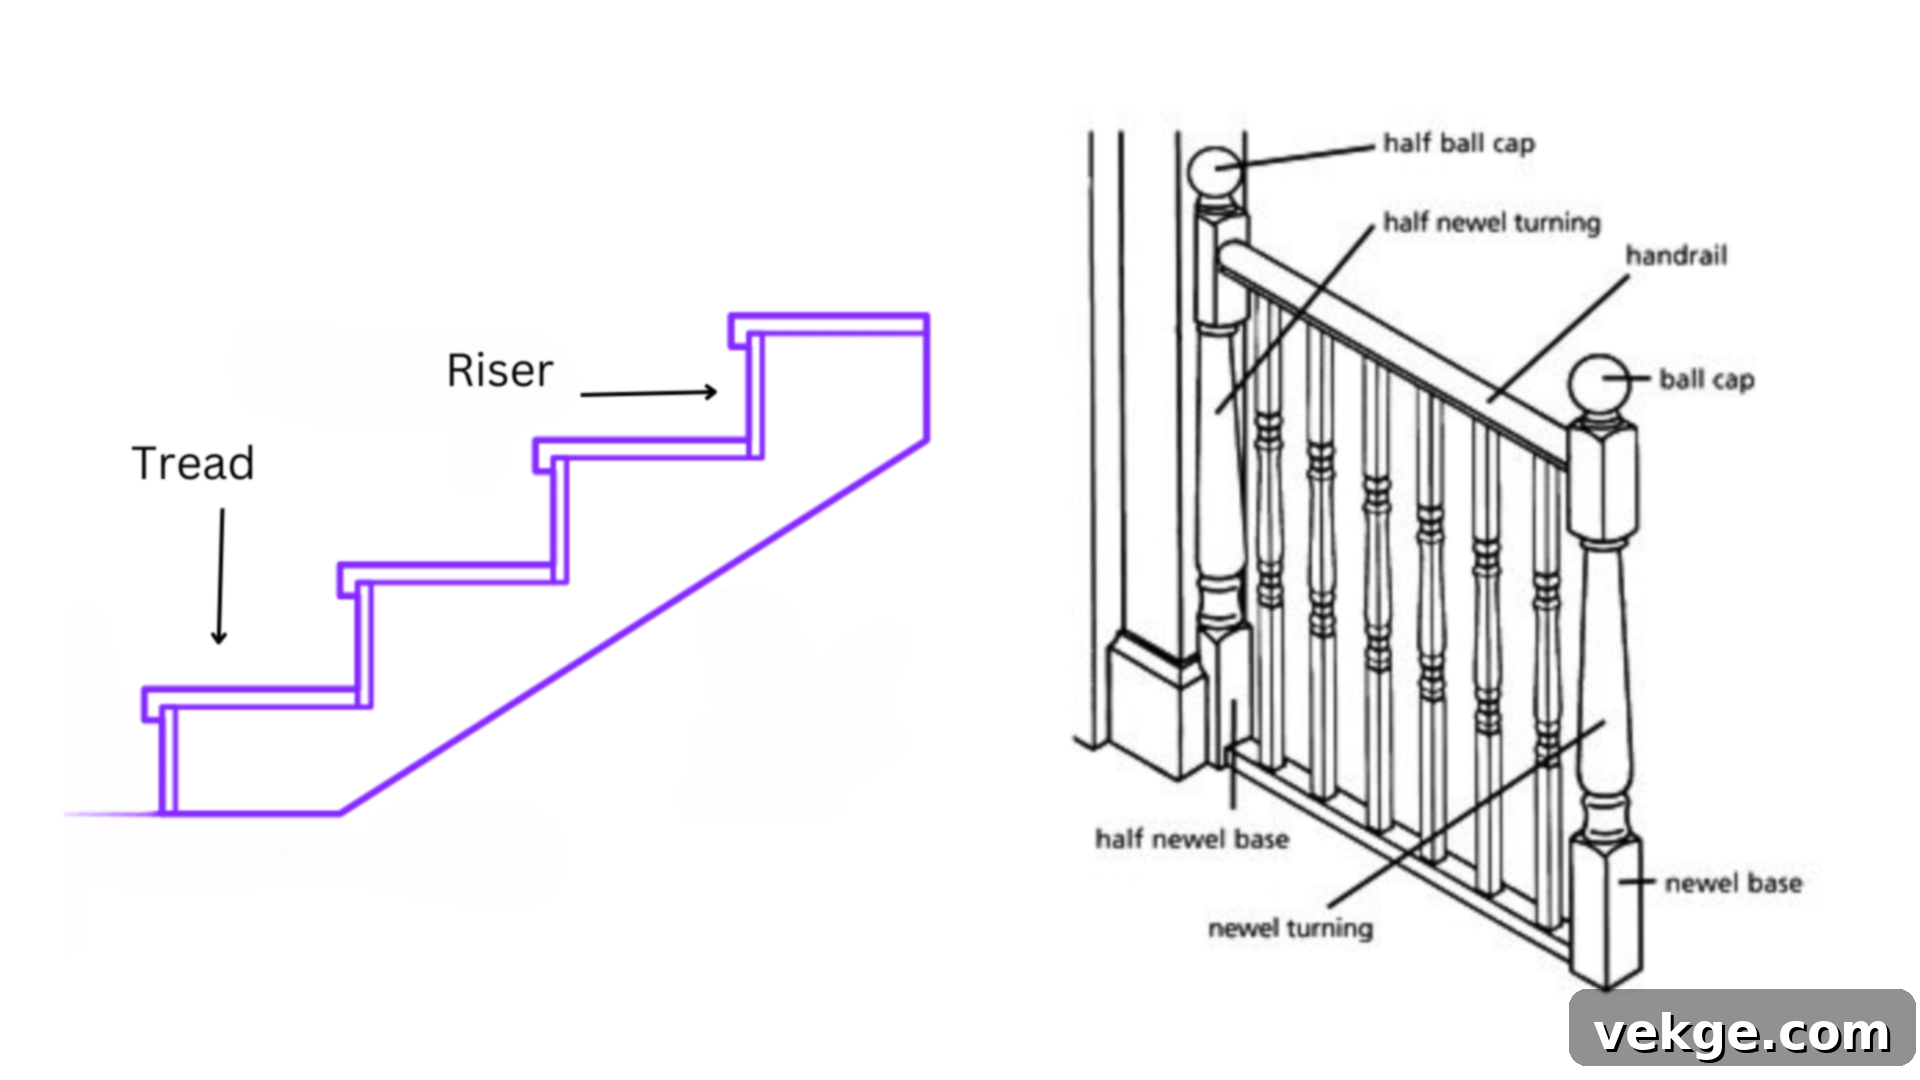
To effectively plan your renovation, purchase the correct supplies, or even communicate clearly with contractors (if you decide to hire one for specific tasks), knowing the names of various stair components is incredibly helpful. These terms form the basic language of staircase design and construction:
- Tread: This is the horizontal, flat part of the stair that you step on. It needs to be durable and slip-resistant.
- Riser: The vertical, upright board between two treads. Risers can be painted, stained, or covered with decorative materials.
- Newel Posts: These are the large, sturdy vertical posts located at the top, bottom, and sometimes at turns or landings of the staircase. They serve as primary supports for the handrail and balustrade system.
- Balusters or Spindles: These are the smaller, vertical posts that run between the handrail and the treads or floor. They provide support and aesthetic appeal, and are crucial for safety by preventing falls.
- Handrail: The rail that you hold onto for support when ascending or descending the stairs. It connects to the newel posts and often to the wall, providing stability and safety.
- Nosing: The edge of the tread that projects beyond the face of the riser below. This is often the part that shows the most wear and tear.
Learning these terms makes planning, shopping for specific parts, and understanding instructions much more straightforward and efficient.
3. Carefully Remove Existing Materials
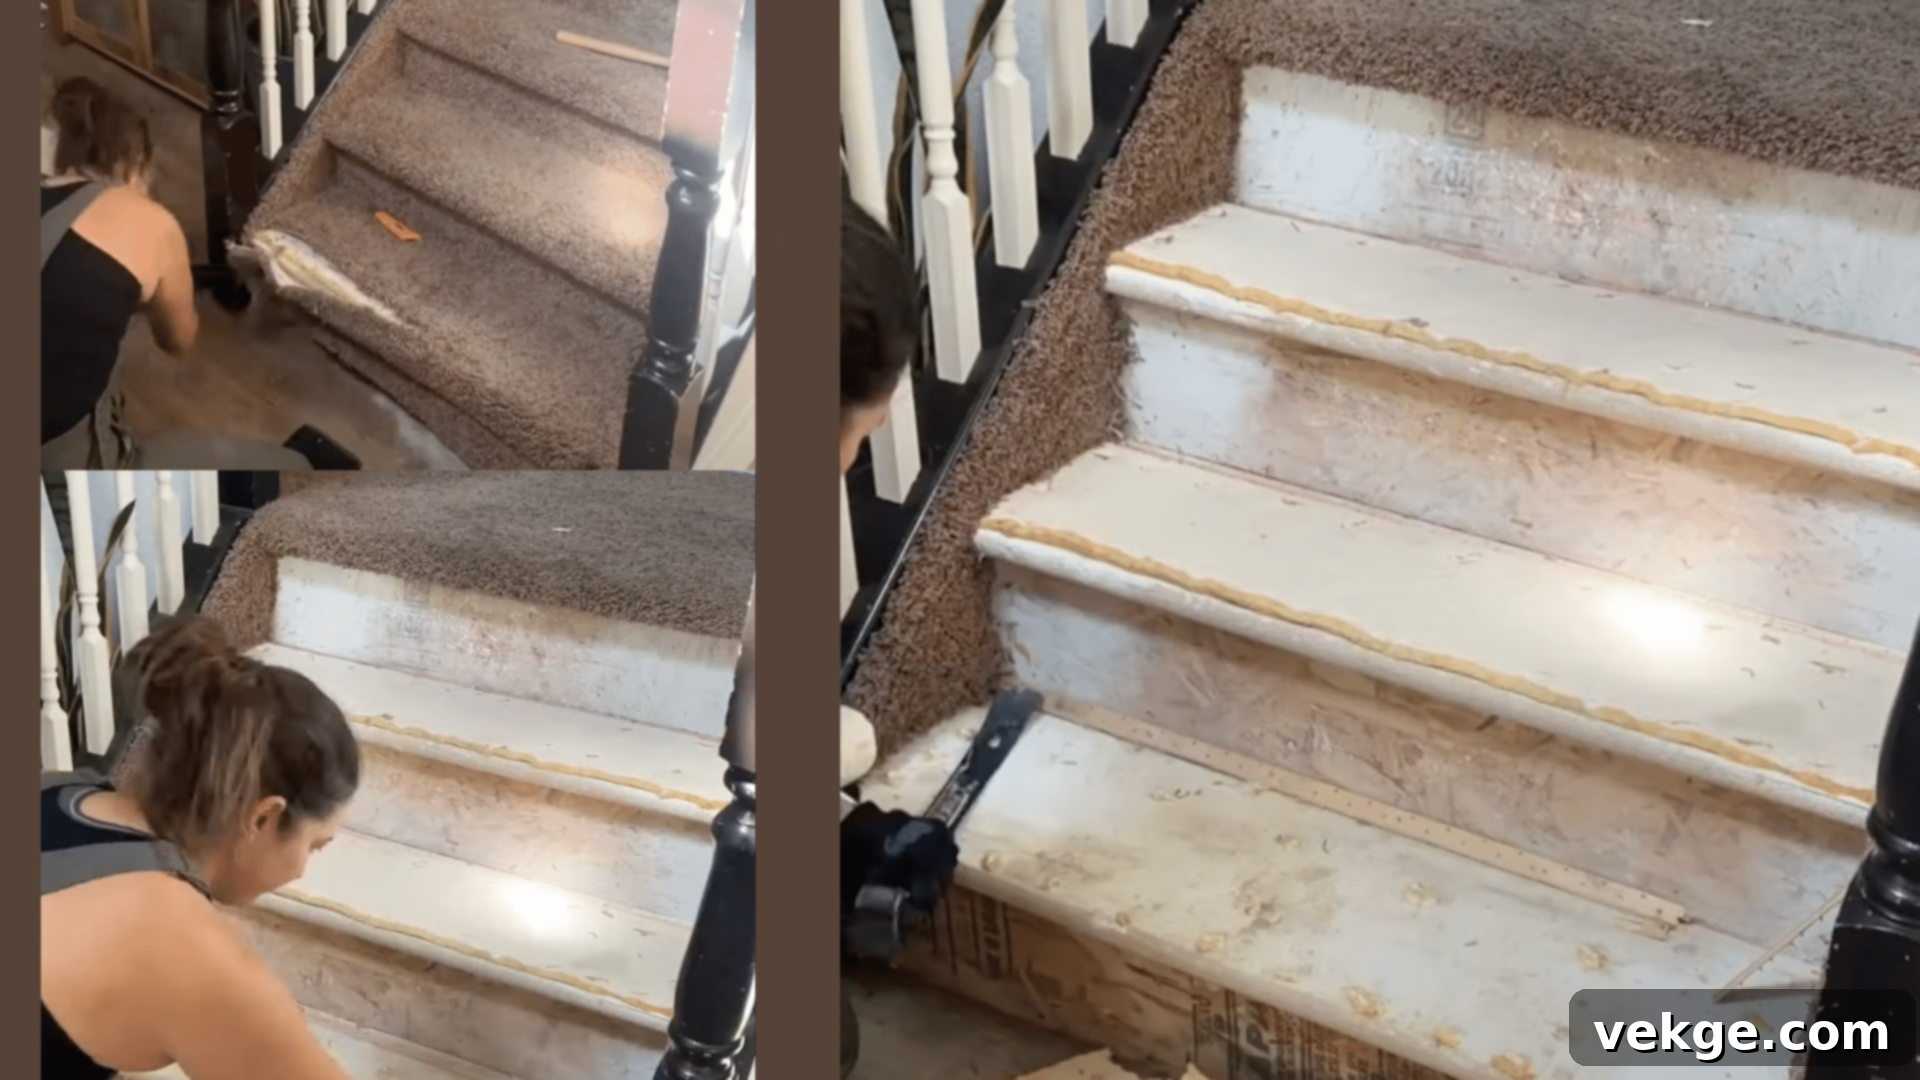
Once your plan is solid, the first active step in most staircase renovation projects is the careful removal of old, worn, or unwanted materials. This phase often involves a bit of demolition and requires patience and attention to safety.
For carpeted stairs, begin by using a utility knife to score and cut the carpet into manageable strips. Then, starting from the top step, use pliers or a carpet puller to firmly grip and pull up the carpet. Be extremely cautious of the numerous staples and tack strips hiding underneath; these can cause nasty cuts if you’re not careful. Use a pry bar to gently lift and remove the tack strips that run along the edges of the treads and risers. Always wear thick gloves and safety glasses during this process.
If your plan includes replacing the front edge or “nosing” of the steps, or even the entire tread, you might need a jigsaw or circular saw to precisely cut off the old nose part or detach the entire tread. If you’re replacing balusters or handrails, you’ll need to carefully dismantle the old ones, often involving unscrewing, prying, or cutting. Throughout this dusty work, always wear appropriate safety glasses and a dust mask to protect your eyes and respiratory system. Take your time during removal to minimize damage to underlying structures that you intend to keep.
4. Prepare the Surface for a Flawless Finish
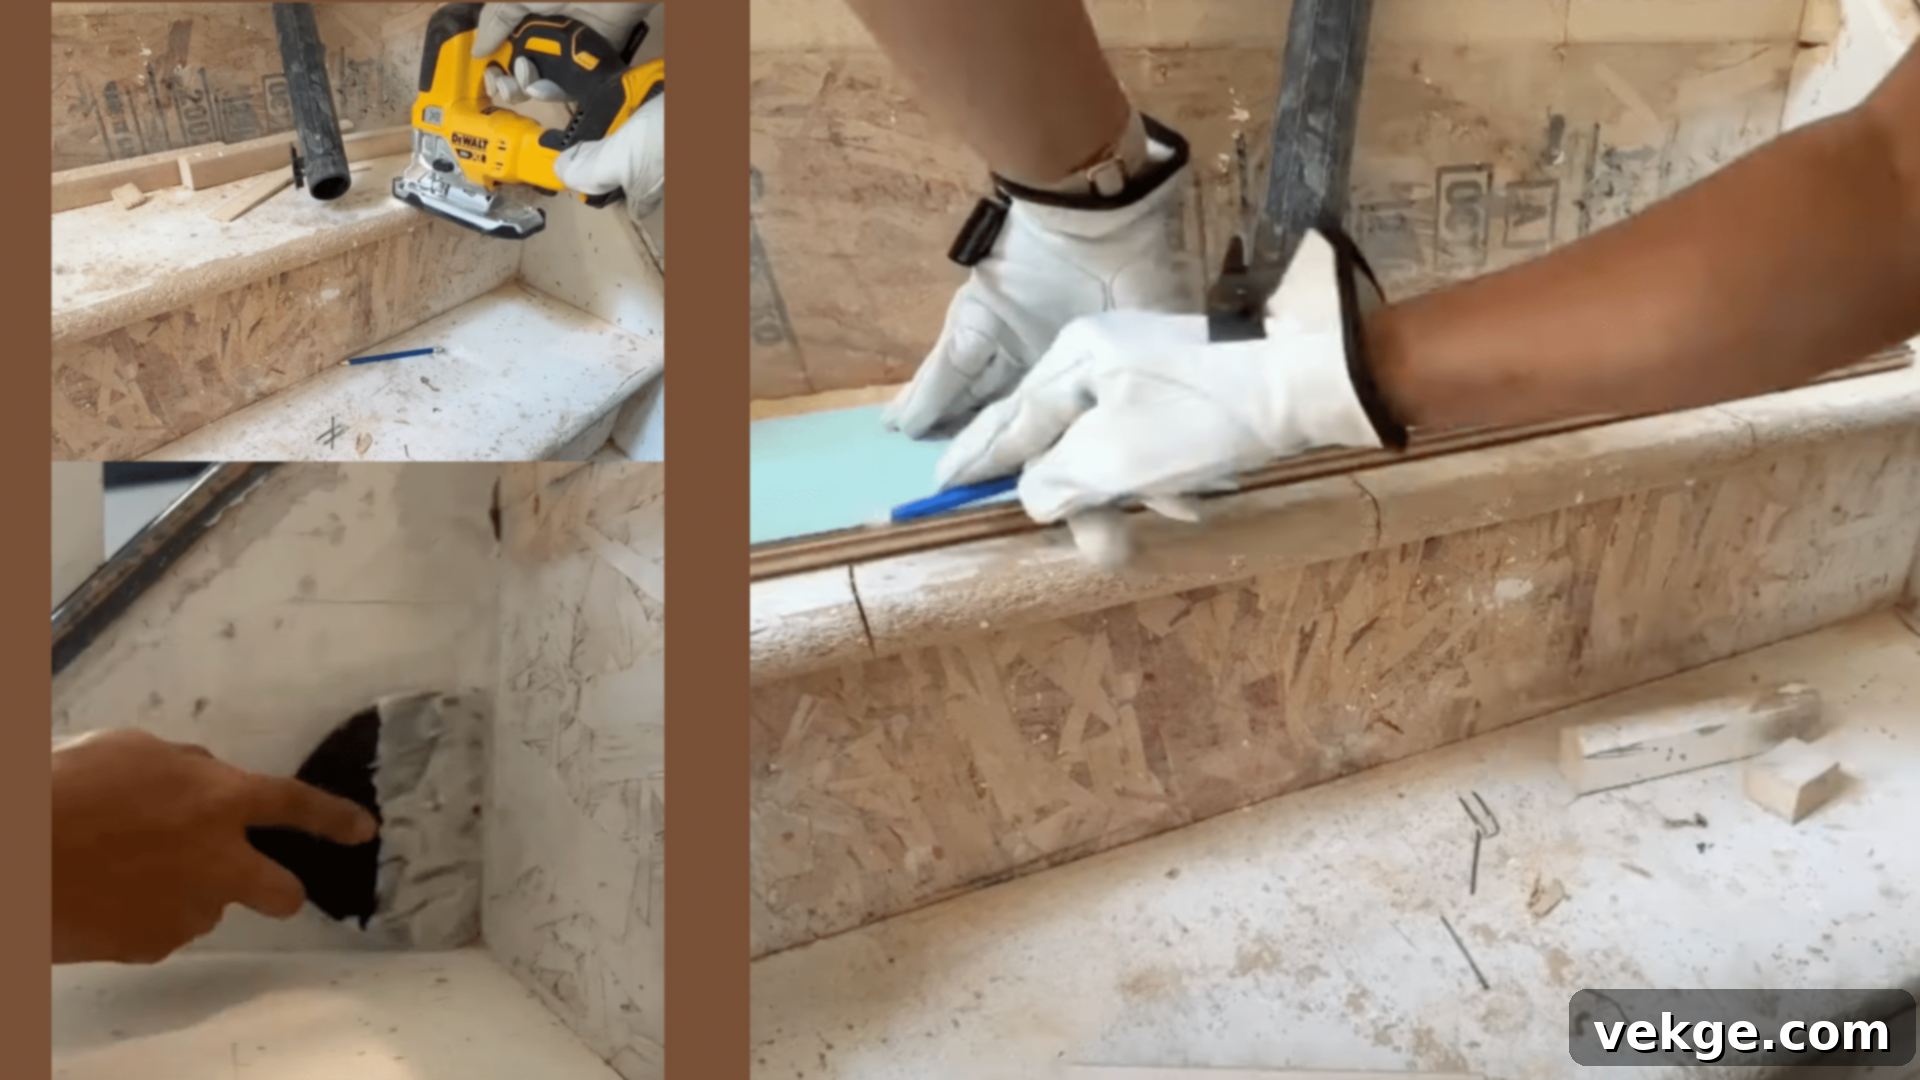
Proper surface preparation is arguably the most critical step, as it directly impacts the quality and longevity of your final renovation. Skimping on this stage will show in the finished product. Begin by thoroughly cleaning all surfaces to remove dirt, grease, and any adhesive residue. Use a degreaser if necessary, and ensure the surfaces are completely dry.
Next, meticulously fill any holes, cracks, or gaps in the wood with a high-quality wood filler or epoxy. Apply the filler according to the manufacturer’s instructions, ensuring it’s slightly overfilled. Allow it to dry completely, which can take several hours depending on the product and humidity. Once dry, sand all the treads, risers, and any other wooden surfaces. Start with a coarser grit sandpaper (e.g., 80 or 100-grit) to remove old finishes, smooth out filler, and address any imperfections. Gradually move to finer grits (150-grit, then 220-grit) to achieve a silky-smooth surface. An orbital sander can speed up work on flat treads, while sanding blocks are great for edges and corners.
After sanding, it’s vital to remove all dust. Use a vacuum cleaner with a brush attachment, followed by wiping down all surfaces with a tack cloth or a damp (not wet) cloth. For uneven spots along the stringers (the sides of the staircase) or where stairs meet walls, use joint compound and a putty knife to create a seamless transition. Allow everything to dry completely before applying primer or paint. A clean, smooth, and dry surface ensures optimal adhesion and a professional-looking finish.
5. Install New Components with Precision
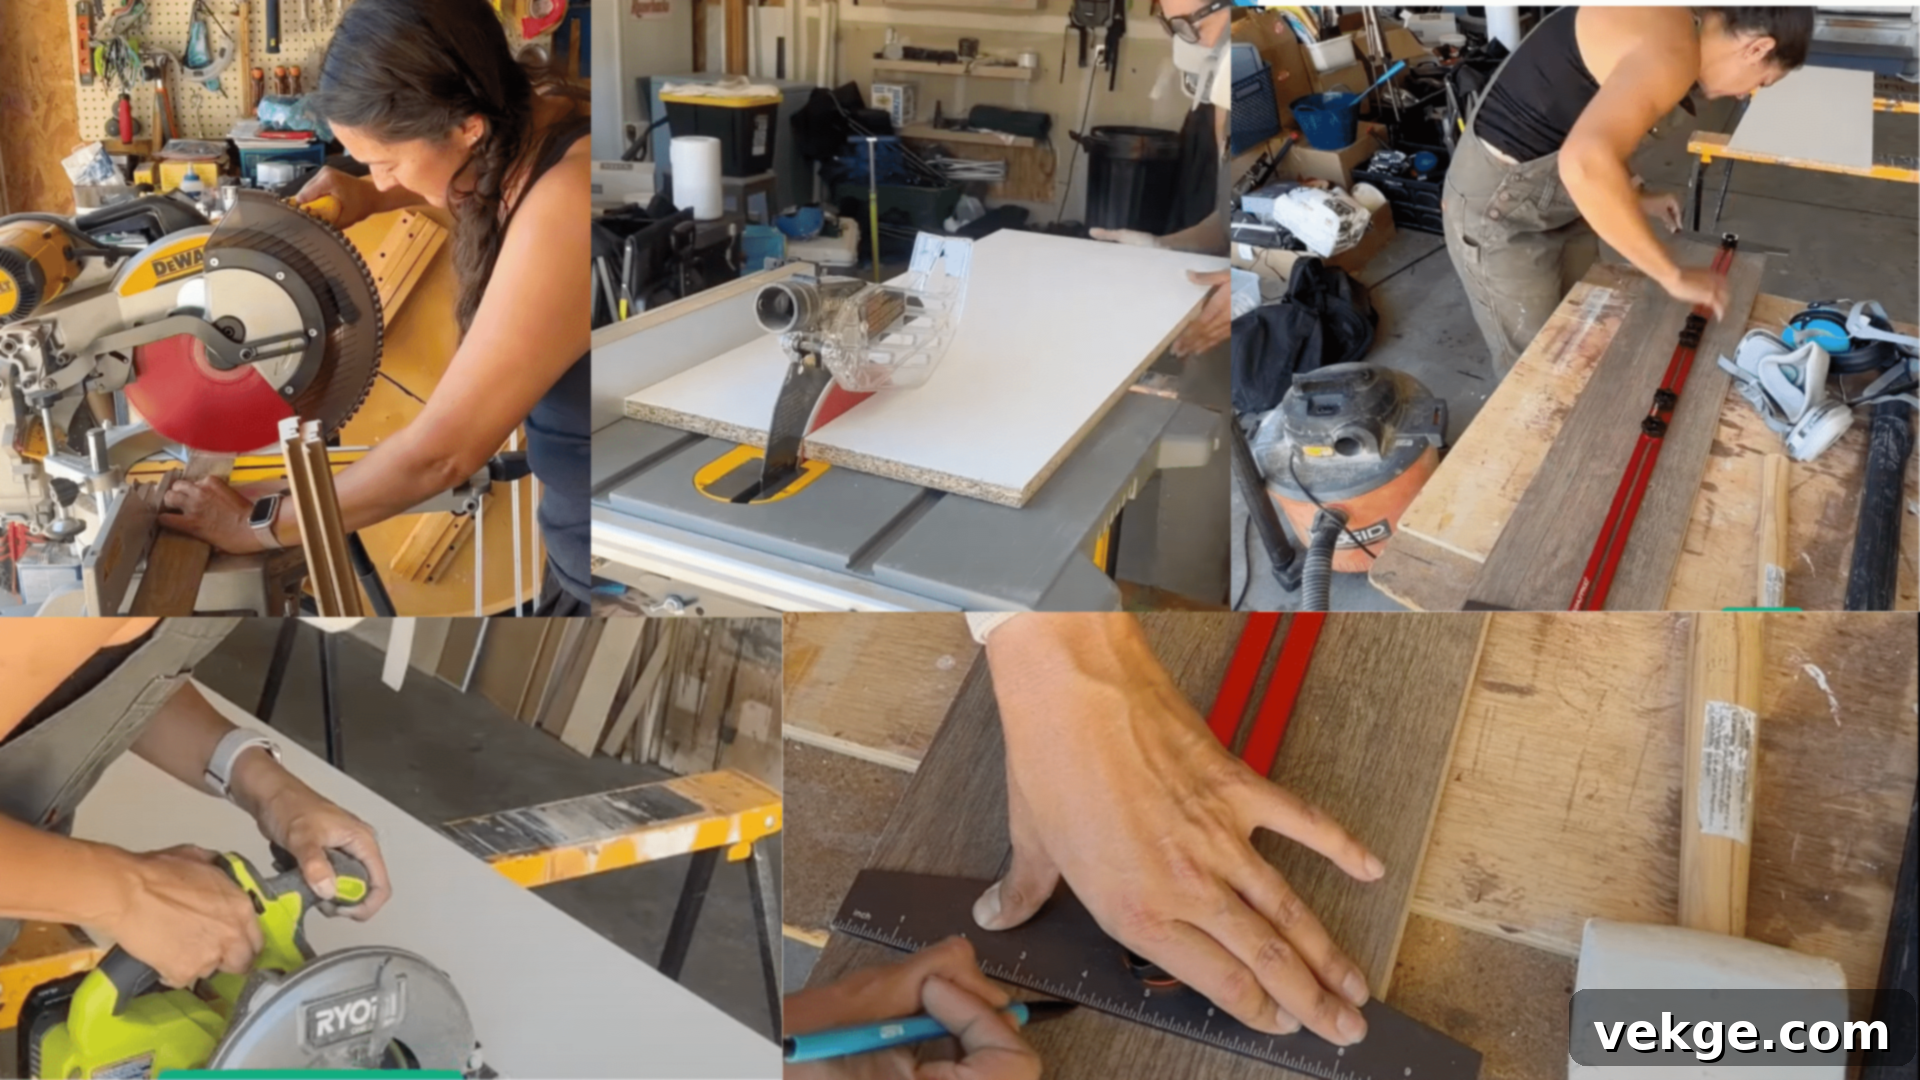
This is where your staircase truly begins to take on its new form. Installing new components requires careful measuring and precise cutting for a professional finish. Remember that individual stairs are often not perfectly uniform, so measure each space separately rather than assuming all risers or treads are the same size. This meticulous approach prevents gaps and ensures a snug fit.
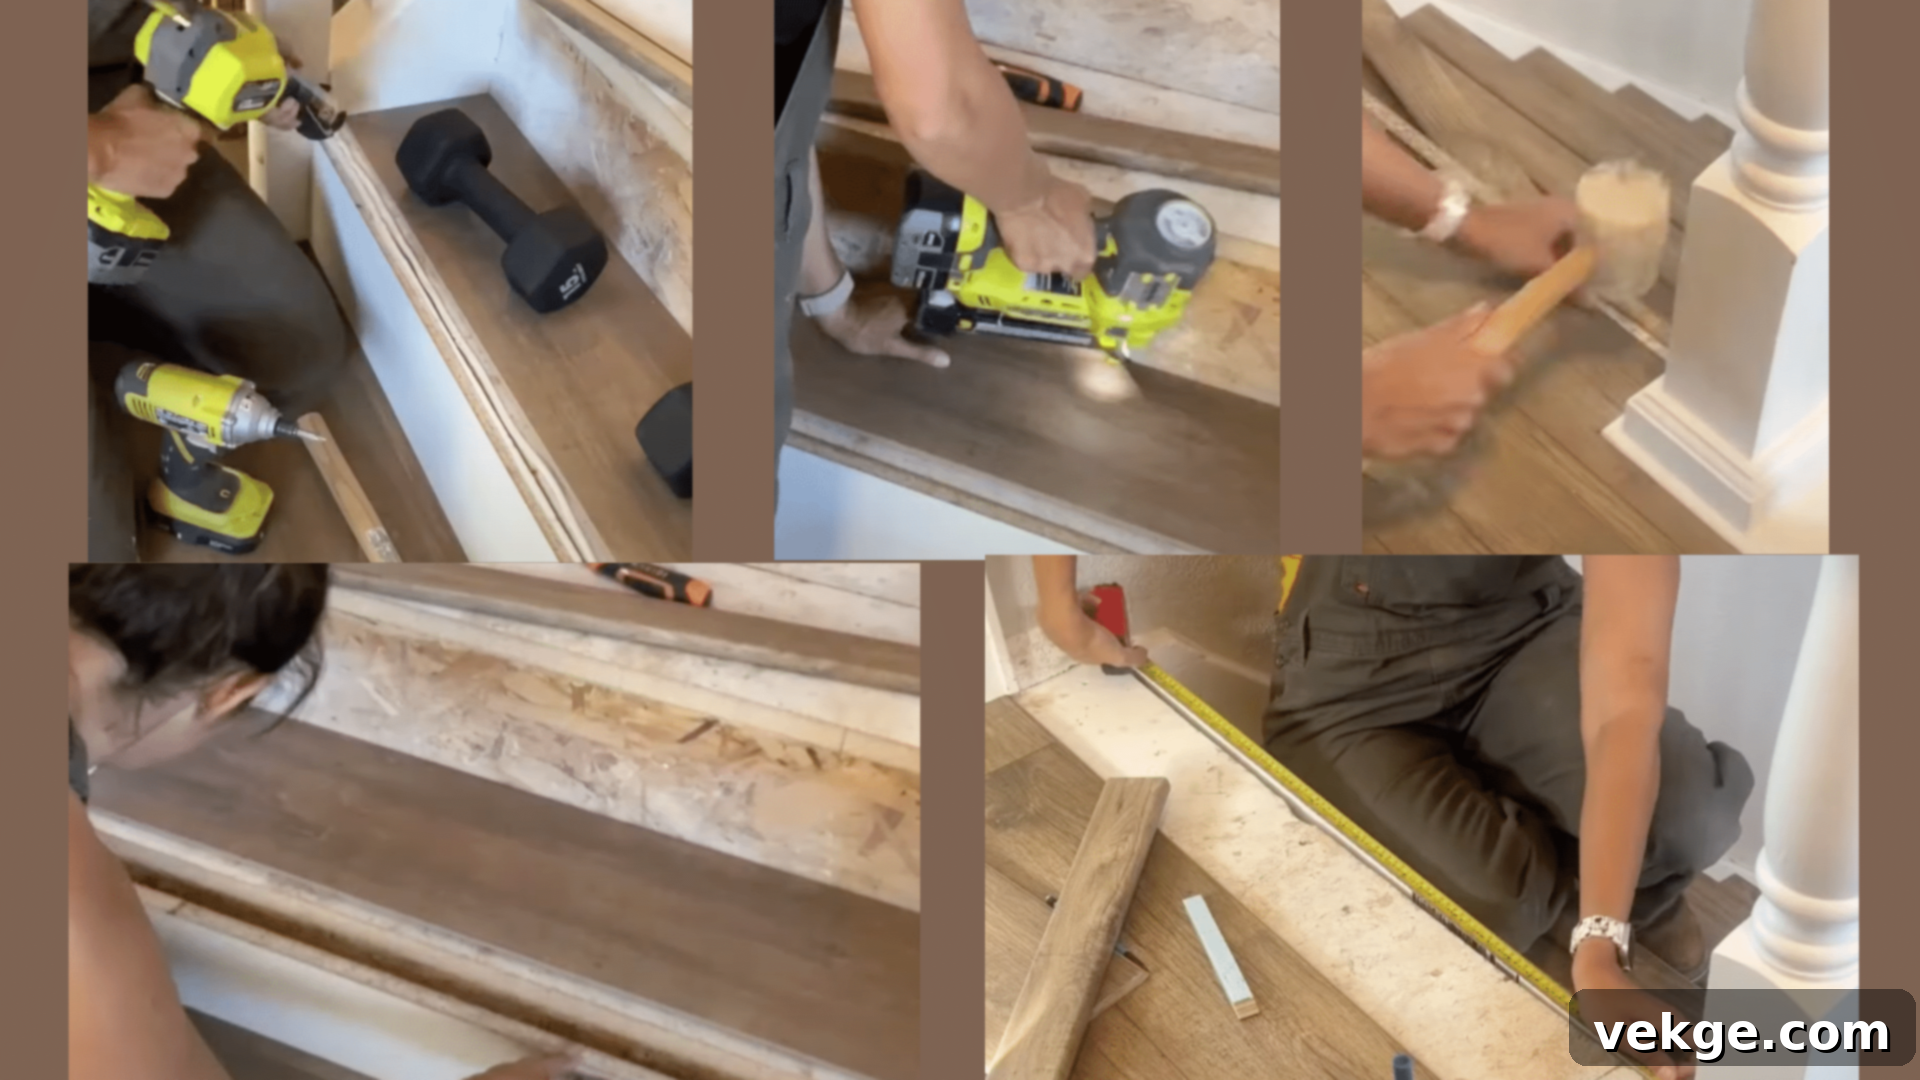
For new risers, cut melamine, MDF, or plywood boards to the exact dimensions. For a cleaner look, consider painting these riser boards before installation. Attach them using construction adhesive and finish nails, ensuring they are level and flush. For treads, especially if they have an intricate shape or curve, it’s highly recommended to create a paper or cardboard pattern first. This template will help you accurately cut your new hardwood, laminate, or MDF treads, accounting for any inconsistencies in the existing structure.
Apply a generous bead of strong construction adhesive to the base of the old tread (or subfloor if completely replacing) and along the top edge of the installed riser. Carefully position the new tread, pressing it firmly into place. Secure it further with finish nails or screws, counter-sinking them for a clean look. Don’t forget to add nose pieces to the front edge of the treads; these are crucial for a finished aesthetic, enhance safety, and protect the leading edge of your new treads, significantly extending their lifespan. Work systematically from the bottom up, ensuring each component is securely fastened and perfectly aligned before moving to the next.
6. Update Structural and Decorative Elements
Updating structural elements like newel posts, balusters, and handrails can have a dramatic impact on both the safety and style of your staircase. You don’t always need to completely replace these components. For instance, an older newel post can be expertly “wrapped” with new MDF boards or decorative wood panels, and then enhanced with elegant trim, giving it a completely new, robust look without the extensive effort of full removal. This method is often more cost-effective and less invasive.
When working on balusters (or spindles), whether you’re replacing them with new wood or iron ones, pay close attention to safety regulations. Building codes typically require balusters to be spaced no more than 4 inches apart to prevent children from falling through. Measure and mark the placement of each baluster carefully before drilling pilot holes. Secure them firmly using strong construction adhesive and screws or specialized baluster fasteners. For handrails, ensure they are securely attached to the newel posts and wall studs using robust brackets and bolts, not just nails, for maximum stability and safety. The height of the handrail is also regulated, usually between 34-38 inches above the leading edge of the stair tread. Always check your local building codes to ensure all your structural and decorative changes meet current safety standards, guaranteeing both beauty and peace of mind.
7. Apply the Finishing Touches for a Professional Look
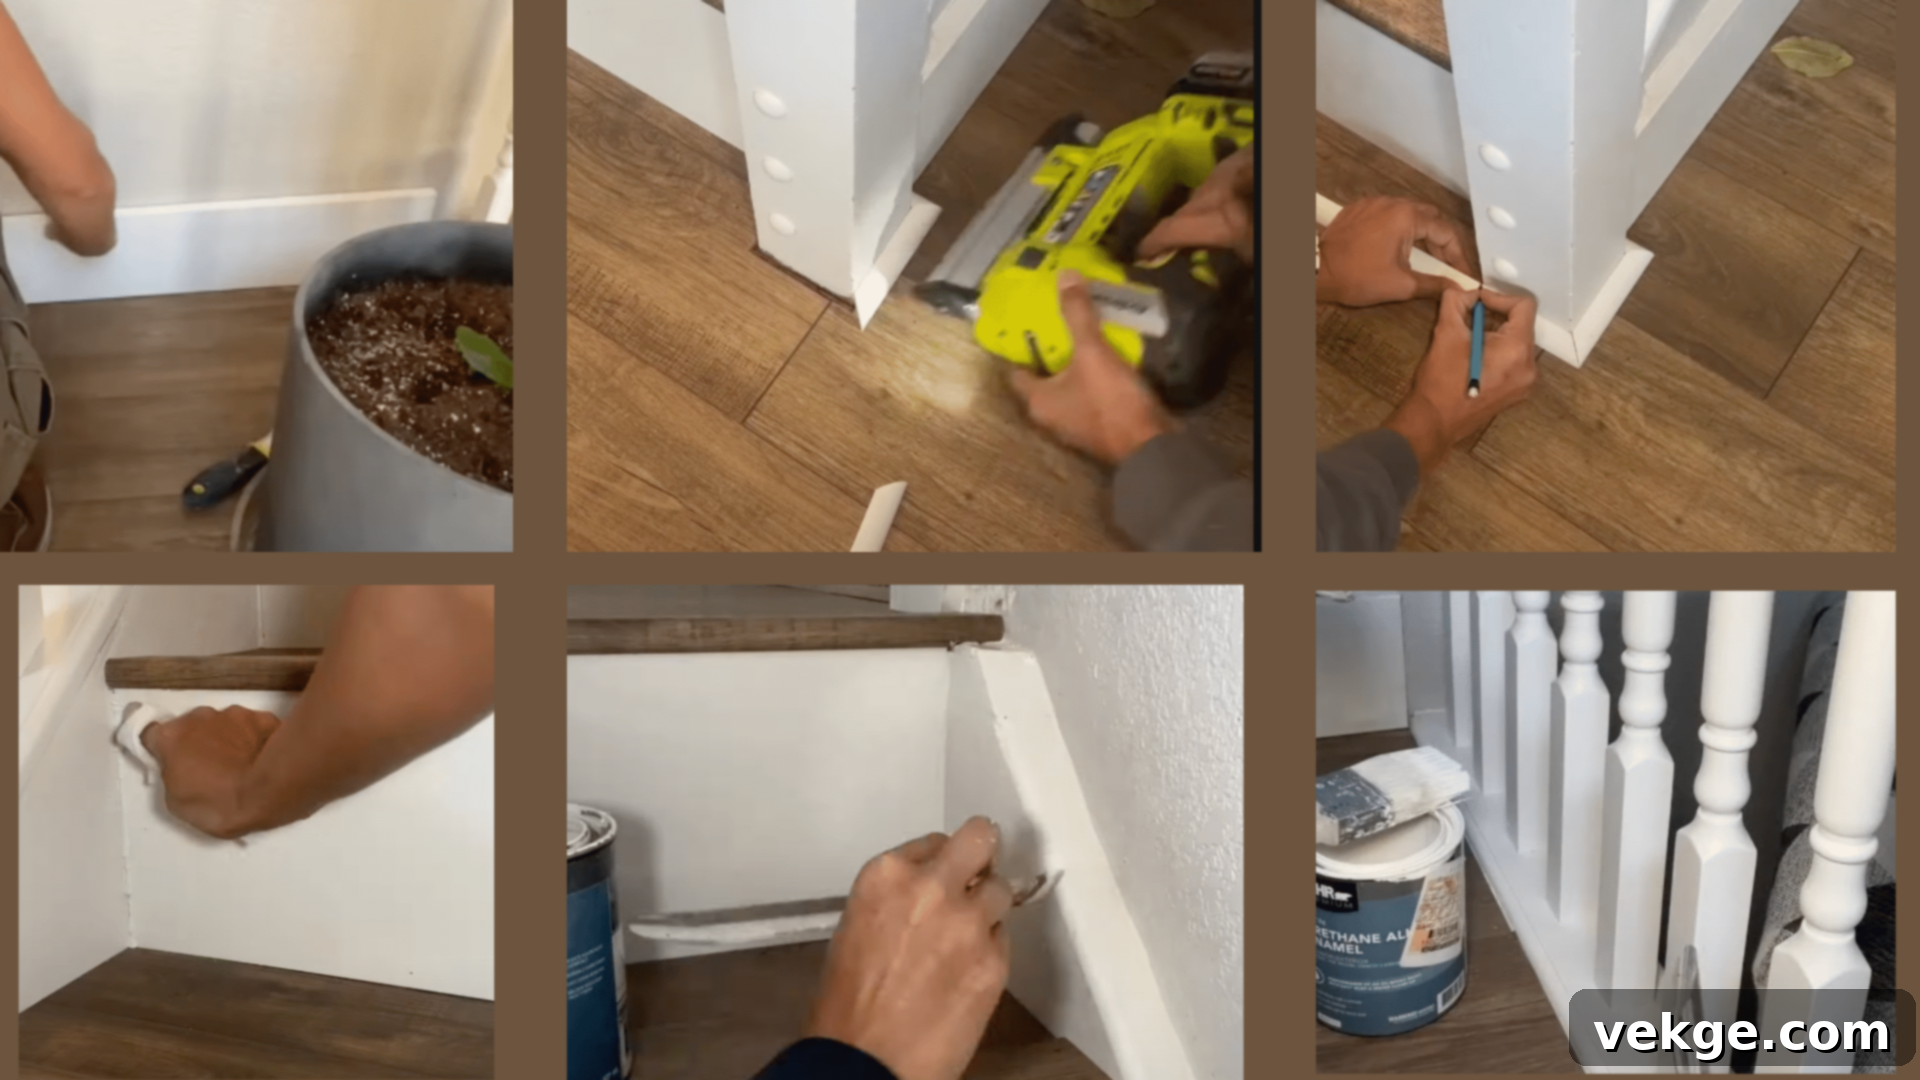
The finishing touches are where your renovated staircase truly comes to life, achieving that polished, professional look. After all the installation and preparation, it’s time for the final aesthetic steps. Start by applying a high-quality primer to all surfaces that will be painted or stained. This creates an even base and enhances adhesion. Once the primer is dry, apply at least two, and preferably three, thin coats of your chosen paint or stain. Ensure each coat dries completely before applying the next, lightly sanding with fine-grit sandpaper (e.g., 220-grit) between coats for optimal smoothness and adhesion. For painted stairs, durable floor paint is recommended due to high traffic.
If safety is a concern, especially in homes with children or elderly residents, consider adding non-slip material to the treads. This can be in the form of transparent non-slip strips, textured paint additives, or elegant stair runners. Finally, apply a clear protective coating, such as polyurethane or varnish, over all painted or stained wood surfaces. This clear coat is essential for protecting your hard work from scratches, scuffs, and spills, ensuring your beautiful new stairs last for years. Use a caulk gun to fill any small gaps between the stairs and the walls, or between individual components. This simple step creates clean, crisp lines and a seamless, high-end finish. Allow all finishes to cure fully before using the stairs – this typically takes at least 24-48 hours, but check product instructions for exact curing times to avoid damaging your freshly renovated surface.
Popular Staircase Makeover Ideas to Inspire Your Renovation
Beyond the structural work, there are numerous creative ways to refresh and enhance your staircase’s aesthetic appeal. These popular makeover ideas can dramatically transform your home’s central feature, often without requiring extensive construction or a massive budget. Explore these options to find the perfect style for your updated space.
1. Paint or Stain Existing Wood for a Fresh Look
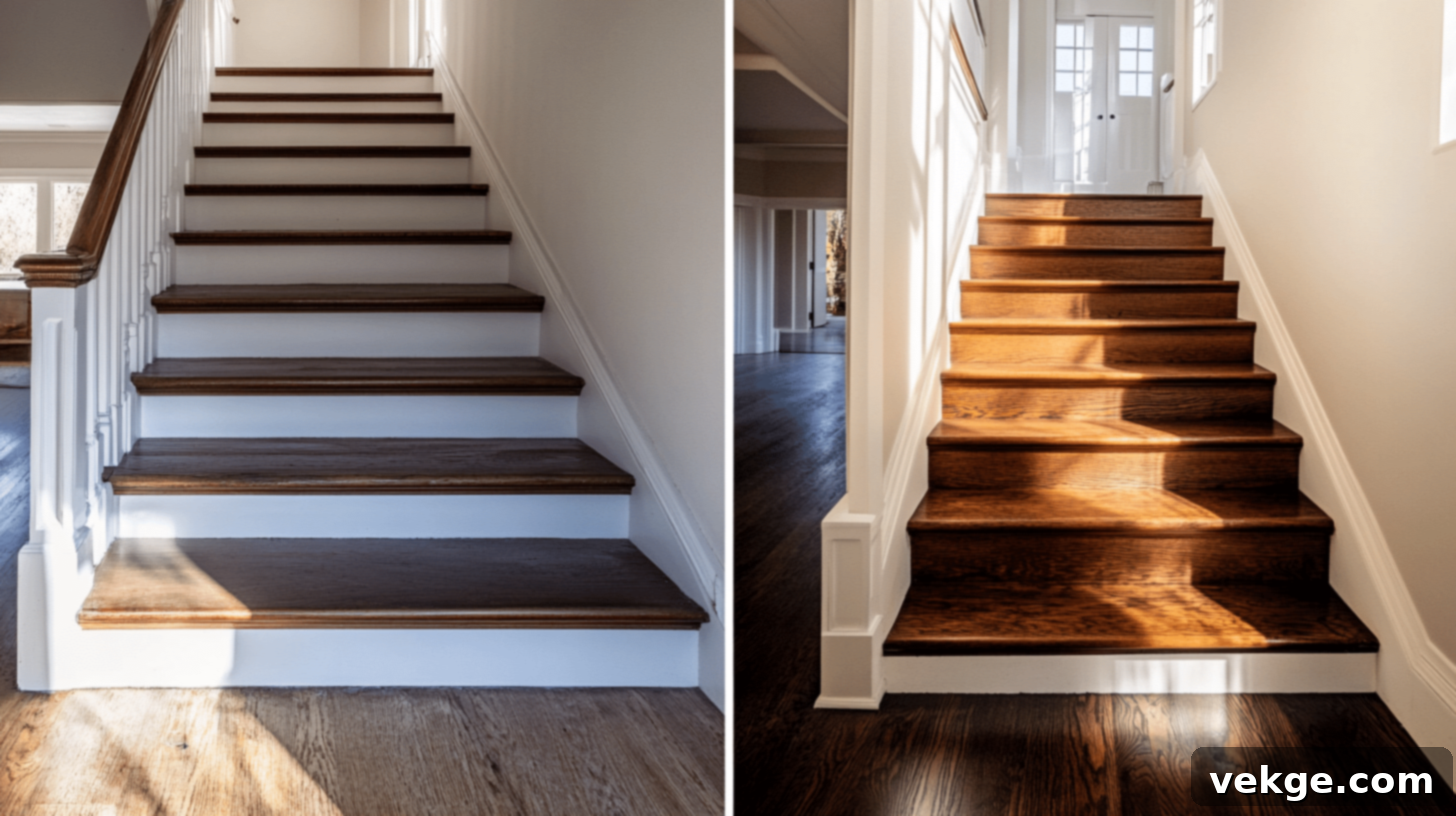
One of the most impactful and cost-effective ways to revitalize your staircase is with a fresh coat of paint or stain. This simple change can make old, tired stairs look brand new. Paint offers an endless palette of color choices, allowing you to match your existing decor or introduce a bold new accent. It’s excellent for hiding minor imperfections, but remember to use a high-durability floor or porch paint that can withstand daily foot traffic, as regular wall paint might chip prematurely. For a timeless and airy feel, consider painting risers a crisp white while staining the treads a rich wood tone. This classic two-tone look brightens the space and highlights the natural beauty of the wood.
Alternatively, staining preserves and enhances the natural wood grain, adding warmth and character. Light colors like white, cream, or soft gray on risers and balusters can make a space feel larger and more open, reflecting light beautifully. Dark browns, charcoals, or deep blues can create a cozy, sophisticated, or dramatic atmosphere. While painting or staining may seem straightforward, achieving professional results requires good preparation—thorough cleaning, sanding, and priming are essential before applying color. Allocate at least two full days for this job, including drying times between coats, to ensure the best, most durable finish.
2. Swap Wood Balusters for Elegant Iron
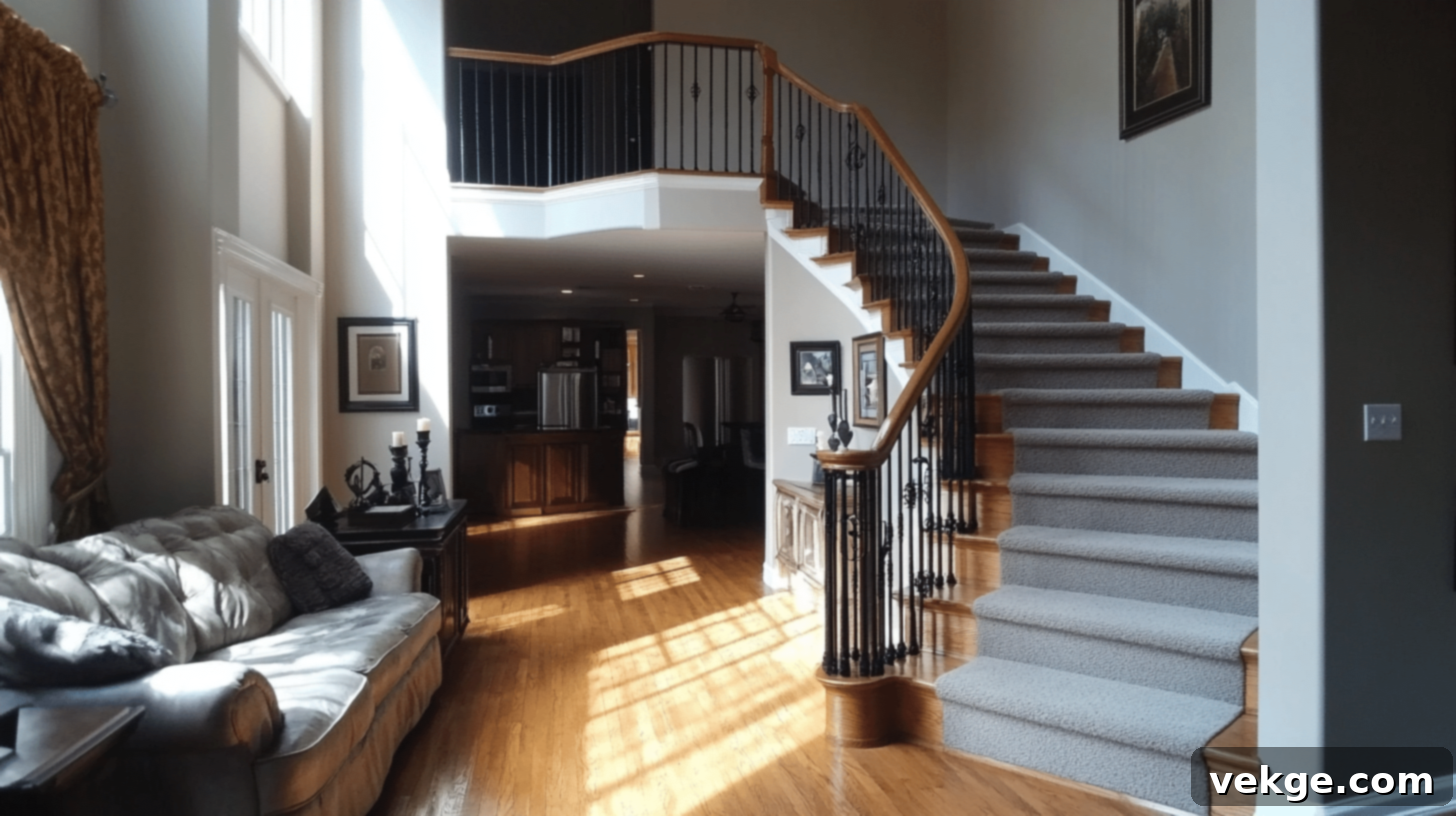
Replacing traditional wooden balusters with sleek, modern iron ones is a fantastic way to instantly update the entire look of your staircase, adding a touch of contemporary elegance or classic grandeur. This change introduces a striking visual contrast and can open up the sightlines, making your entryway feel more spacious and sophisticated. Iron balusters come in various styles, from simple, straight rods to intricate twisted designs, hammered finishes, or decorative scrollwork, allowing you to customize the aesthetic to your taste. Each new iron post will have its individual cost, which can vary significantly based on design complexity and material quality. Additionally, factor in the cost of specialized tools if you plan a DIY installation, such as a metal cutting saw (if balusters need to be trimmed) and strong epoxy or adhesive designed for metal.
The installation process typically involves carefully cutting out the old wooden posts, drilling precise holes for the new iron balusters, and securing them with strong epoxy or specialized connectors. While a DIY approach is possible for the handy homeowner, hiring a professional for this task ensures that the balusters are installed safely, securely, and in compliance with all local building codes, particularly regarding spacing and stability. Simple, straight iron posts are generally more affordable than more elaborate, twisted, or basket-style designs, offering a budget-friendly way to achieve a high-impact transformation.
3. Replace or Refurbish Your Handrails
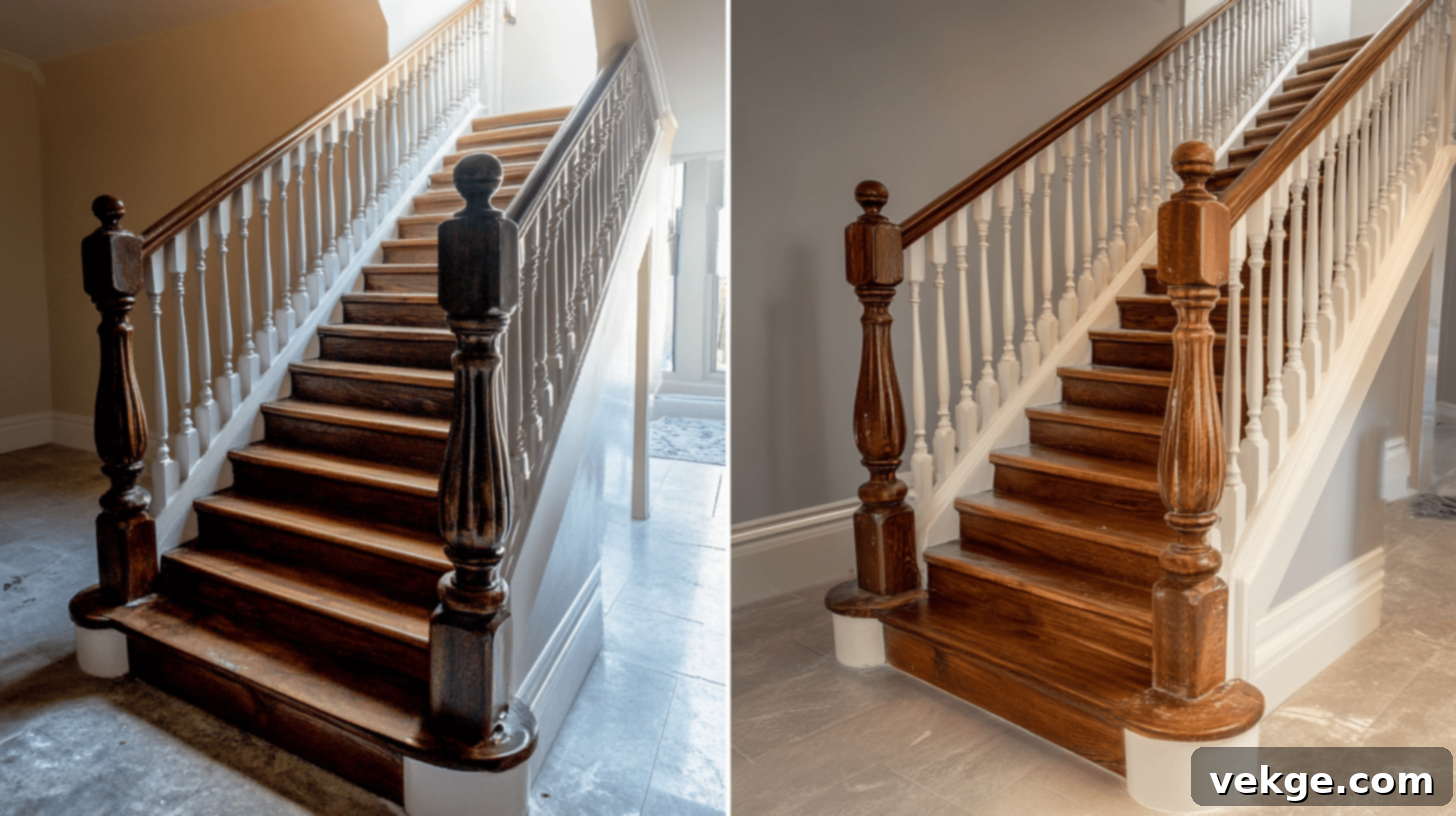
The handrail is a key functional and aesthetic component of your staircase. A new or meticulously fixed-up handrail can profoundly alter the perception of your entire staircase, contributing significantly to its safety and visual appeal. When considering a handrail update, think about the overall architectural style you want to achieve. Straight, clean-lined, square rails often convey a modern, minimalist aesthetic, while gracefully rounded or intricately curved ones lend a more traditional or classic feel to the space. Material choices are also important: wood, metal, or even composite materials each offer distinct looks and tactile experiences.
Strive to match the color and material of your new handrail with other prominent wood elements in your home, such as flooring, trim, or doors, to create a cohesive and harmonious design. Safety is paramount: ensure that new handrails are installed at a consistent height, typically between 34 to 38 inches above the leading edge of the step. Rather than relying on nails, use robust bolts and secure brackets to anchor the handrails firmly into newel posts and wall studs for maximum stability. For continuous handrails that involve joining pieces, use strong wood glue reinforced with wooden dowels or specialized metal connectors to achieve a seamless, extra-strong bond. A well-chosen and securely installed handrail not only enhances the beauty of your staircase but also provides essential support and peace of mind.
4. Add Architectural Trim, Risers, and Carpet Runners
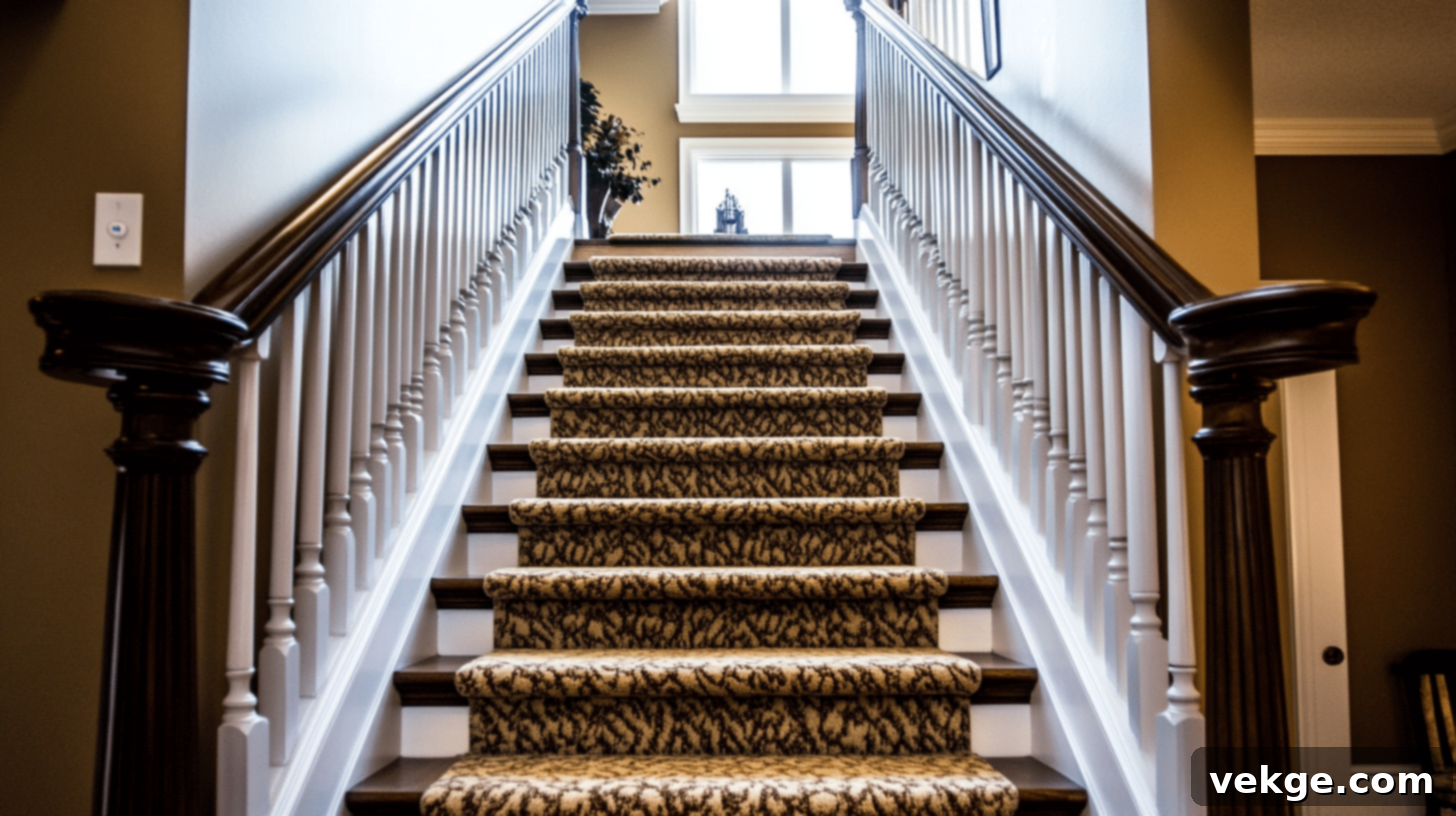
Sometimes, it’s the smaller, more refined additions that make the biggest impact on a staircase’s overall design and functionality. Incorporating architectural trim, updating risers, and adding carpet runners are excellent ways to elevate your staircase without undertaking a full structural overhaul.
For an immediate touch of elegance, consider adding decorative wood trim where the stringers (the sides of the stairs) meet the wall. This could be a simple shoe molding, a more elaborate baseboard, or even a picture frame molding detail on the stringer itself. This trim hides minor imperfections and provides a finished, bespoke look. A perennially popular makeover idea is to paint the upright riser parts a crisp white, while keeping the treads in a natural wood finish or staining them a darker hue. This high-contrast design feels clean, timeless, and brightens the entire staircase. You can also explore more adventurous riser treatments, such as applying decorative wallpaper, stenciling, or even tiling for a truly unique look.
Adding a carpet runner down the middle of wooden stairs offers multiple benefits: it provides comfort underfoot, significantly reduces noise, and adds a layer of safety by improving traction. When selecting a runner, look for durable, flat-weave, washable options with a non-slip backing, especially if you have children, pets, or high foot traffic. Runners are available in countless patterns and colors, allowing you to inject personality and warmth into your staircase design. Secure the runner firmly with specialized carpet rods or by stapling it discreetly along the edges to prevent slipping and ensure a neat installation.
5. Style Up Your Stairs with Thoughtful Lighting and Decor

Beyond the structural elements, the right lighting and decor can dramatically enhance the ambiance, safety, and visual appeal of your renovated staircase. Thoughtful illumination not only makes stairs safer to navigate, especially at night, but also highlights their architectural beauty and any decorative elements you’ve added.
Consider installing wall sconces or recessed lighting at regular intervals along your staircase wall. Positioning them at a consistent height creates a sophisticated, gallery-like effect. For enhanced night-time safety and a touch of modern flair, LED light strips can be discreetly installed under each step or along the handrails. These provide a soft, ambient glow that illuminates the path without being overly bright. Smart lighting systems offer even more control, allowing you to adjust brightness, color, and even schedule lighting to come on automatically.
The wall alongside your staircase presents a wonderful opportunity for decor. Transform it into a personal gallery by hanging cherished family photos, a collection of artwork, or even a mix of mirrors to reflect light and expand the sense of space. For a more casual and eclectic look, use different-sized frames and arrange them organically. If you prefer a more planned and cohesive aesthetic, opt for matching frames and create a grid-like arrangement. Don’t forget the landings: a small console table with a vase of fresh flowers, a decorative plant, or a piece of sculpture can add a welcoming touch. Carefully chosen lighting and decor can turn your functional staircase into a captivating focal point that truly reflects your personal style.
Maintenance Tips for Preserving Your Renovated Stairs
After investing time, effort, and resources into renovating your staircase, proper and consistent maintenance is crucial to preserve its safety, aesthetic appeal, and structural integrity. Regular care prevents costly repairs down the line, significantly extends the lifespan of your beautiful new stairs, maintains your property’s value, and ensures continued safe passage for everyone in your home. Neglected stairs can quickly deteriorate, compromising both their appearance and function. Here are essential tips for maintaining your renovated staircase:
- Regular Cleaning and Inspection Routines: Make it a habit to dust and vacuum your stairs weekly to prevent the buildup of grime and abrasive particles that can scratch surfaces. Monthly, perform a quick visual inspection for any signs of wear, loose components, or damage.
- Addressing Wear and Tear Promptly: Don’t let small issues escalate. Touch up minor paint chips or scratches immediately with matching paint or stain. Re-secure any loose screws in treads, risers, or balusters as soon as they’re noticed. Early intervention saves larger repair efforts.
- Tightening Loose Railings and Balusters: Over time, daily use can loosen fasteners. Every few months, check handrails and balusters for any wobble. Use a screwdriver or wrench to tighten any loose connections, ensuring the staircase remains sturdy and safe.
- Use Proper Cleaning Products: Always use cleaning products specifically formulated for your stair material. For wood, avoid harsh chemicals that can strip finishes; instead, use a pH-neutral wood cleaner. For painted surfaces, a damp cloth with mild soap is usually sufficient.
- Adding New Sealer or Finish: For wooden stairs, the protective sealer or varnish will eventually wear down, especially on treads. Plan to reapply a fresh coat of clear protective finish (like polyurethane) every 2-3 years, or more frequently in high-traffic homes, to maintain protection against scratches and moisture.
- Protecting During Furniture Moves: When moving heavy furniture or appliances, always protect your stairs with thick moving blankets or cardboard to prevent dents, scratches, and scrapes to your newly finished surfaces.
- Preventing Water Damage: Address any leaks or spills immediately. Water can cause wood to warp, swell, or stain, compromising the integrity and appearance of your stairs. Use doormats at entry points to minimize tracked-in moisture.
Wrapping Up Your Staircase Renovation Journey
A staircase renovation is more than just a home improvement project; it’s an opportunity to redefine the character and functionality of your entire living space. With the detailed steps and inspiring ideas provided in this guide, you now have the knowledge and confidence to transform boring, old stairs into a stunning, safe, and standout feature of your house. From the initial assessment and planning to the meticulous finishing touches, every step contributes to creating a staircase that not only looks incredible but also adds significant value and enjoyment to your home.
If you’re new to DIY projects, remember it’s perfectly fine to start small. Begin with a simple yet effective change, such as refreshing the paint or adding new decorative trim. As your skills and confidence grow, you can then tackle more ambitious transformations, like replacing balusters or installing new treads. The key is to take it one step at a time, celebrate your progress, and always prioritize safety. Don’t forget the importance of regular maintenance; even simple cleaning routines and prompt fixes for minor wear and tear will make a profound difference in preserving your hard work and extending the lifespan of your renovated stairs. Your “new” stairs might just become your favorite part of your home, a testament to your vision and effort. Are you ready to embark on your staircase renovation journey? Pick one idea from this guide and try it this weekend. The transformation awaits!
