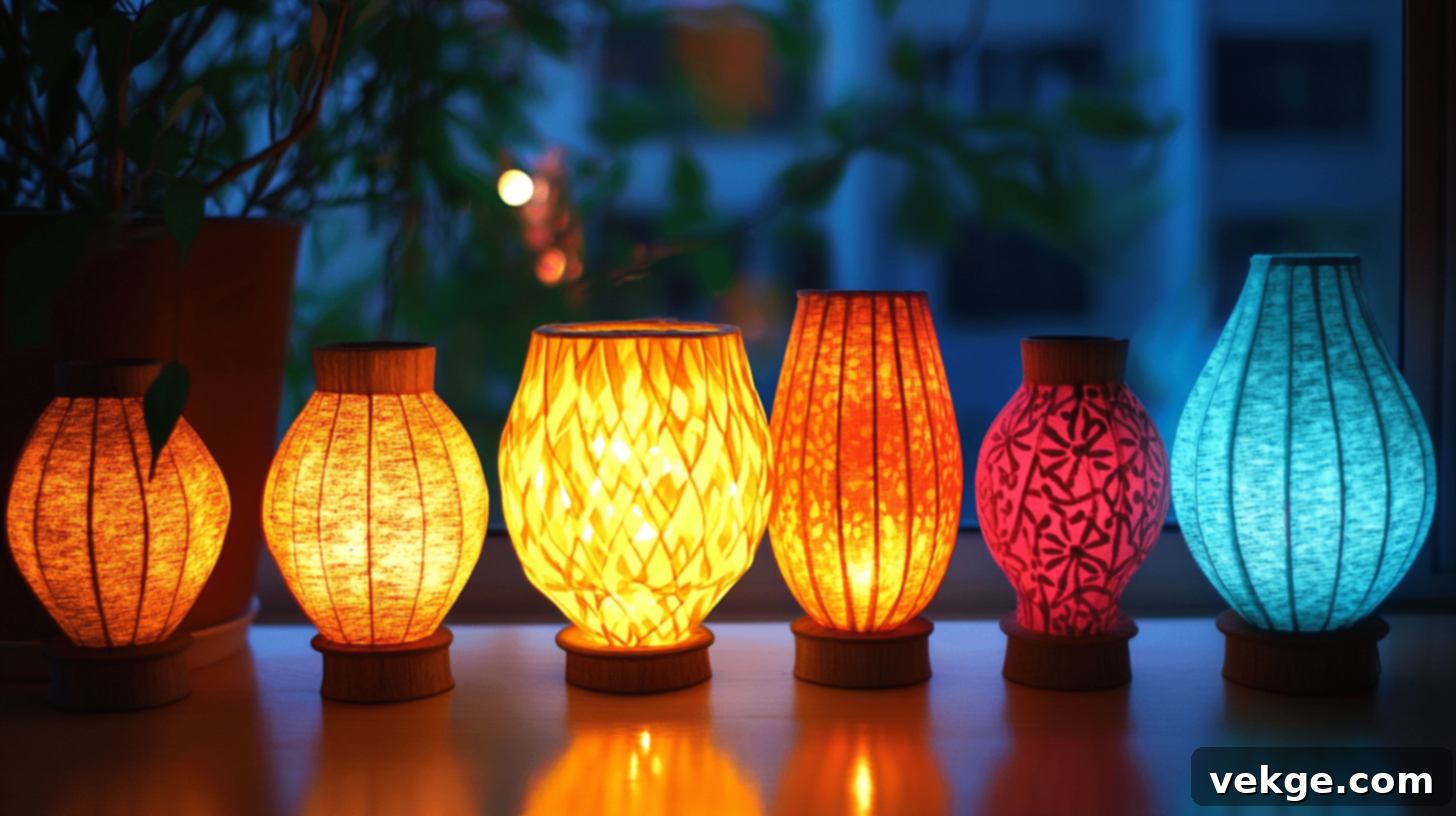
DIY Lanterns: Craft Beautiful, Budget-Friendly Lights for Any Occasion
Creating captivating lighting for your home doesn’t have to strain your wallet. Many of us know the frustration of searching for stylish lanterns that align with both our aesthetic preferences and our budget. Store-bought options often disappoint, quickly falling apart or failing to offer the unique charm we envision. This is precisely why I embarked on a journey to craft my own lighting solutions, discovering immense satisfaction in making something beautiful and durable myself.
Through countless experiments with various materials and techniques, I’ve honed a method for making simple yet elegant lanterns that truly last. The best part? Each of these handcrafted luminaries can be made for less than $15, significantly outperforming many expensive alternatives in terms of longevity and personalization. Imagine lighting up your living space, garden, or next event with custom pieces that perfectly complement your style, all while saving money.
In this comprehensive guide, I’m thrilled to share my proven approach to DIY lanterns. You’ll find a detailed breakdown of basic materials, easy-to-follow, three-step instructions for a variety of designs, and expert tips to enhance the visual appeal of your creations. Furthermore, I’ll reveal some clever money-saving tricks I’ve gathered over the years, ensuring your crafting journey is as economical as it is enjoyable. Get ready to transform everyday items into stunning light sources!
16 Creative DIY Lantern Projects You Can Make Today
Whether you’re looking to add a cozy glow to your living room, illuminate a festive gathering, or simply engage in a rewarding craft project, these DIY lantern ideas are perfect. From upcycled household items to common craft supplies, you’ll be amazed at what you can transform into a beautiful light source. Here are some of my favorite, tried-and-tested projects, complete with estimated costs and detailed instructions.
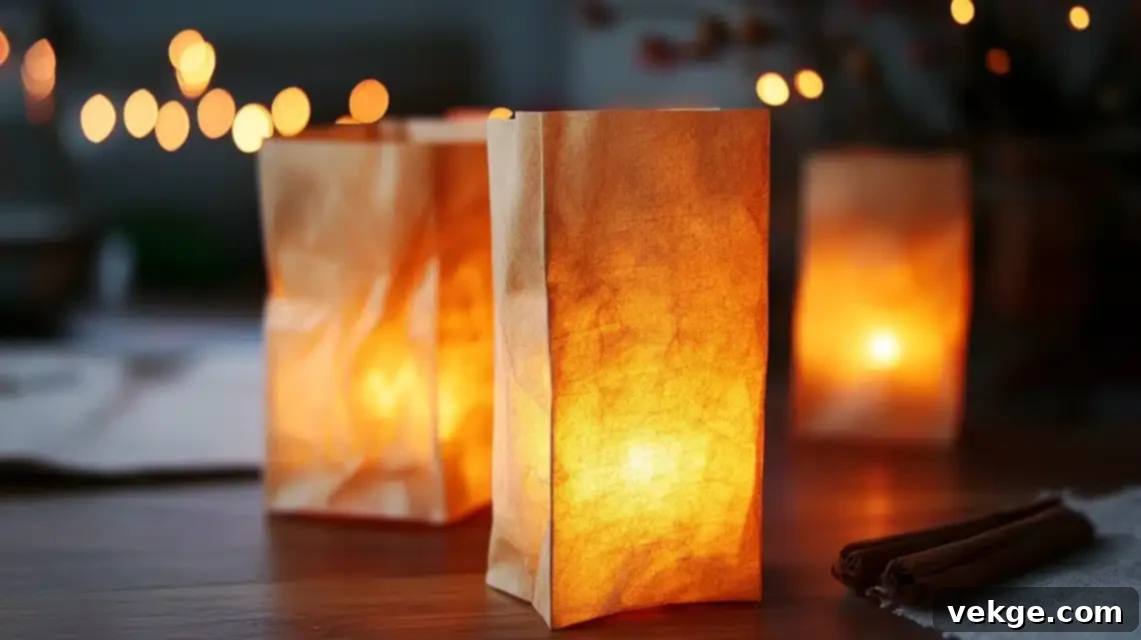
1. Paper Bag Mini Lights (Approximate Cost – $2-4)
These adorable paper bag mini lights are incredibly simple to make and perfect for adding a soft, diffused glow to any space. Ideal for children’s rooms, party decor, or a cozy evening ambiance, they offer a charming, rustic touch. Their low cost and ease of creation make them a fantastic beginner project.
Tools & Materials Required
- Small paper bags (lunch bag size)
- LED tea lights (for safety)
- Scissors
- Pencil
- Clear tape
- Paper punch (optional, for intricate designs)
- Ruler
- Design patterns (if desired, for cutting stencils)
Step-by-Step Process
- Fold each paper bag’s top edge down 1 inch to create a sturdy rim.
- Draw your desired pattern or design on the bag with a pencil.
- Carefully cut out the patterns using scissors.
- Make small holes with a paper punch if you want a starry effect.
- Place an LED tea light gently inside each prepared bag.
- Fold the top edge down again to secure the light and create a finished look.
- Use a small piece of clear tape to hold the fold in place.
- Space bags approximately 6 inches apart when setting them up for an even glow.
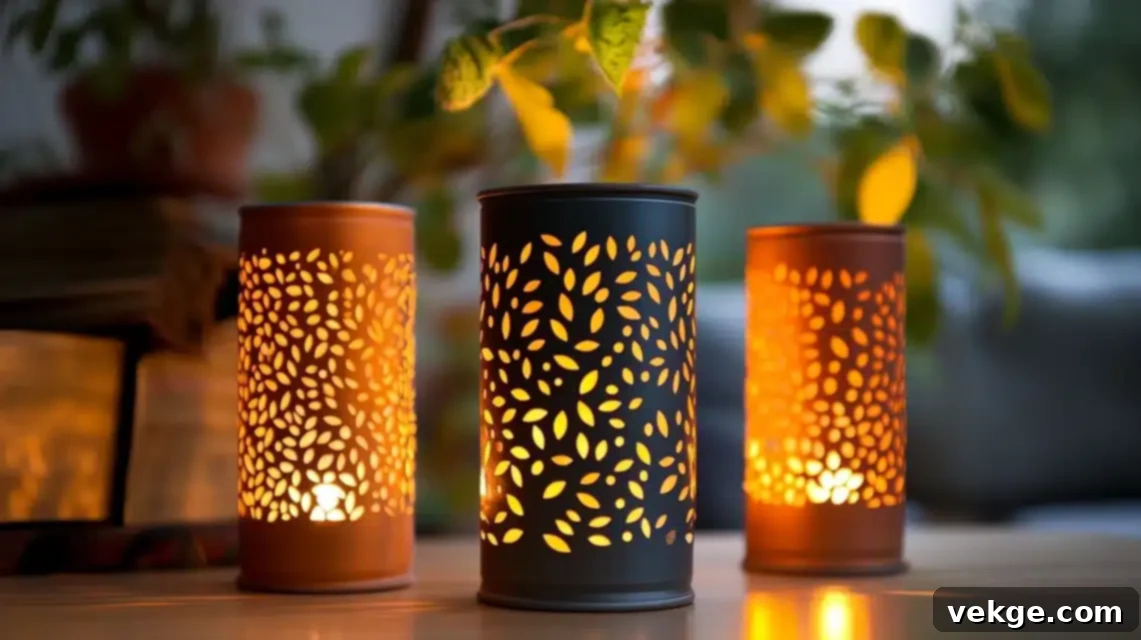
2. Tin Can Glow Lamp (Approximate Cost – $10-13)
Transform ordinary tin cans into mesmerizing glow lamps that cast beautiful patterns of light. This project is a fantastic way to upcycle and add an industrial-chic touch to your indoor or outdoor decor. The frozen water trick is key to preventing dents and achieving crisp, clean perforations.
Tools & Materials Required
- Clean tin can (various sizes work well)
- Hammer
- Nail (different sizes for varied hole effects)
- Marker
- Wire for handle (craft wire or picture hanging wire)
- Wire cutters
- LED light or battery-operated candle
- Work gloves (essential for safety)
- Safety glasses (protect your eyes)
- Sandpaper (fine-grit for smoothing)
Step-by-Step Process
- Clean the can thoroughly and remove all labels and adhesive residue.
- Sand any rough edges around the opening to make them smooth and safe.
- Fill the can with water and freeze it solid; this prevents the can from denting when hammered.
- Draw your desired pattern (dots, stars, abstract designs) on the can with a marker.
- Put on safety gear: work gloves and safety glasses.
- Using a hammer and nail, carefully punch holes along your drawn pattern.
- Allow the ice to melt completely and dry the can thoroughly, inside and out.
- Add a sturdy wire handle by threading wire through two small holes punched near the top rim of the can.
- Place your chosen LED light source inside the finished tin can.
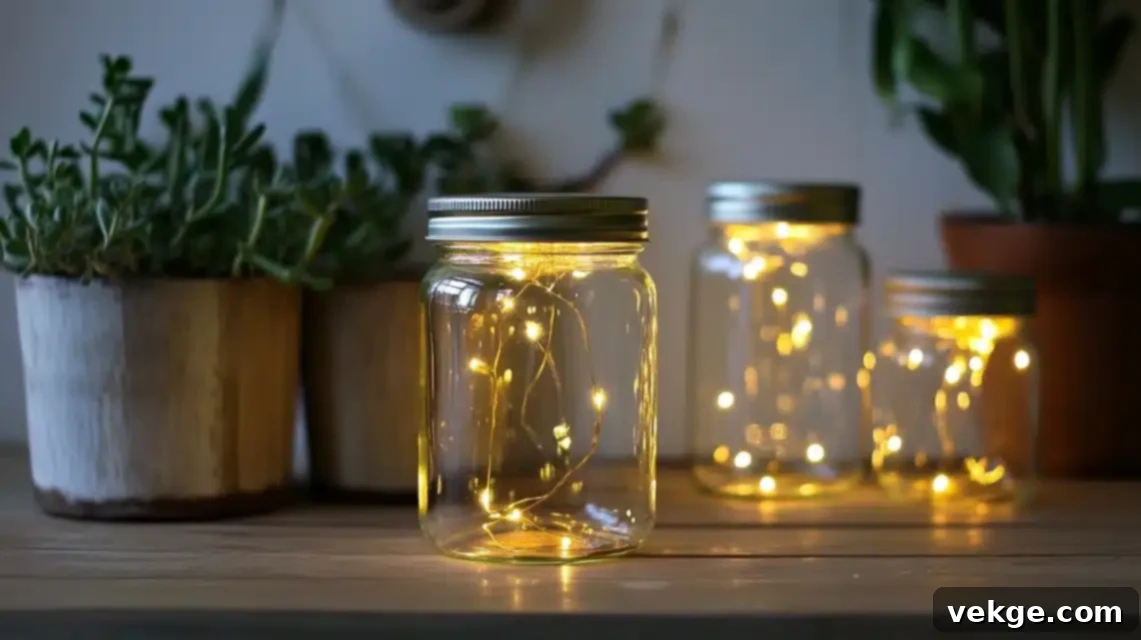
3. Glass Jar Light Holder (Approximate Cost – $10-12)
Glass jars are incredibly versatile for DIY lighting. This project allows for endless customization, from simple painted designs to elaborate decoupage with tissue paper. These holders are perfect for ambient lighting on a patio, as a centerpiece, or to create a whimsical feel indoors.
Tools & Materials Required:
- Clean glass jar (mason jars, old pickle jars, etc.)
- String lights (battery-operated fairy lights are best) or LED candle
- Paint (glass paint, acrylic paint, or spray paint) or tissue paper (various colors)
- Mod Podge or clear craft glue
- Brush (for paint or glue)
- Scissors
- Rubber band (optional, for holding paper in place while drying)
- Paper towels
- Cleaning solution (rubbing alcohol or glass cleaner)
Step-by-Step Process
- Clean the glass jar thoroughly, removing all labels and sticky residue, then dry completely.
- If painting, apply thin, even layers of your chosen paint, allowing each coat to dry before adding the next.
- If using tissue paper, cut the paper into desired shapes or strips.
- Apply a thin layer of glue (Mod Podge works wonderfully) to the jar surface.
- Carefully wrap or place the tissue paper onto the glued surface, smoothing out any bubbles. Alternatively, continue painting your design.
- Let the jar dry completely according to the paint or glue instructions, which may take several hours.
- Once dry, add your LED string lights or an LED candle inside the jar.
- Place your beautiful new light holder in the desired spot for a warm glow.
4. Milk Jug Night Light (Approximate Cost – $7-9)
An eco-friendly and whimsical project, the milk jug night light is fantastic for kids’ rooms, parties, or creating a soft, diffused light source. The translucent plastic diffuses light beautifully, and you can easily cut out shapes to project patterns onto walls.
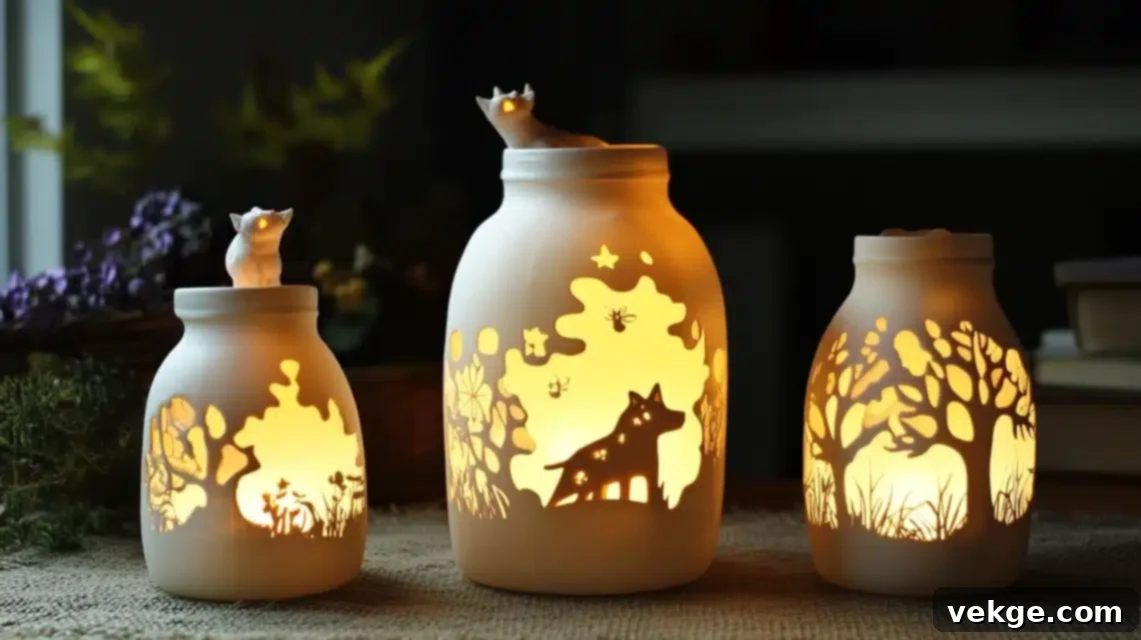
Tools & Materials Required
- Clean plastic milk jug (or other translucent plastic containers)
- Box cutter or sharp scissors (adult supervision recommended)
- Marker
- Battery-operated LED lights (string lights or puck lights)
- Decorative tape (washi tape, electrical tape)
- Cleaning supplies (soap, water)
- Paper towels
- Design template (optional, for tracing)
Step-by-Step Process
- Wash the milk jug thoroughly with soap and water.
- Dry completely inside and out to prevent moisture from affecting the lights.
- Draw your desired design or cutting lines on the jug with a marker.
- Carefully cut along the lines using a box cutter or sharp scissors.
- Smooth any rough edges with sandpaper or by carefully trimming.
- Clean up any plastic dust or debris from the cut areas.
- Add decorative tape to the cut edges for a neat finish and added safety.
- Insert the LED lights into the jug, arranging them for even illumination.
- Test the light placement and make adjustments as needed.
5. Paper Roll Table Light (Approximate Cost – $3-5)
This innovative project uses recycled paper towel or toilet paper rolls to create a unique and artistic table light. By varying the heights and colors, you can achieve a sculptural look that provides a warm, inviting glow. It’s an excellent way to use up common household items creatively.
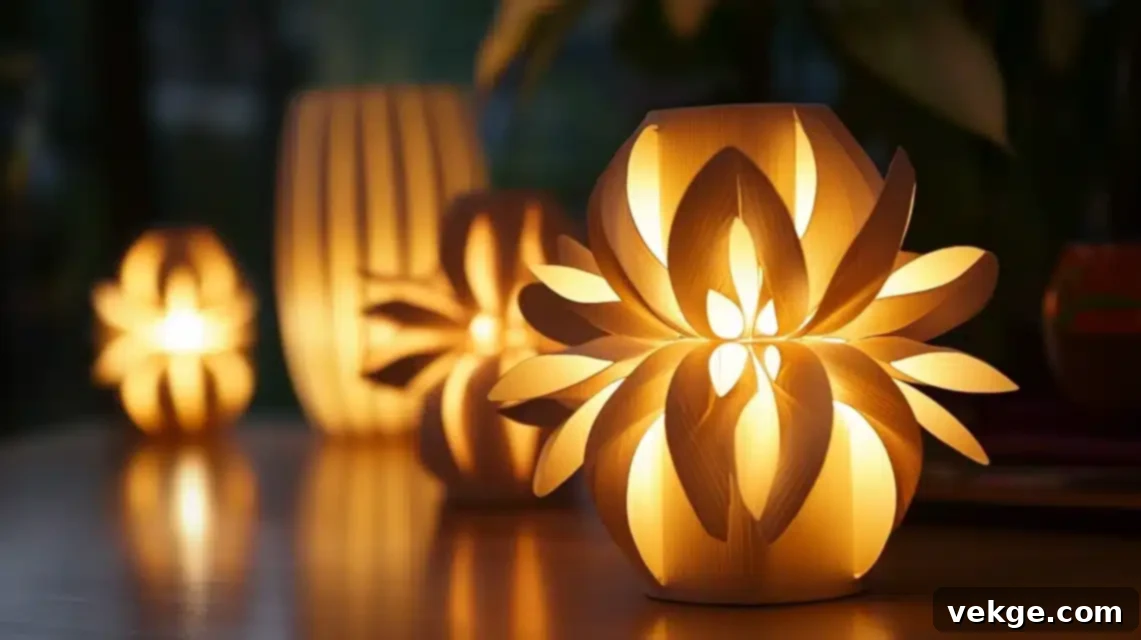
Tools & Materials Required
- Several paper towel rolls or toilet paper rolls
- Paint (acrylic or spray paint)
- Paintbrush
- LED string lights (battery-operated)
- Scissors
- Tape (masking tape or clear tape)
- Sturdy base (wooden plaque, thick cardboard, or small piece of plywood)
- Strong craft glue or hot glue gun
- Ruler
Step-by-Step Process
- Collect several paper rolls; aim for at least 5-7 rolls for a good display.
- Cut the rolls to various heights to create visual interest.
- Paint the rolls in your desired colors or patterns. Consider an ombre effect or contrasting hues.
- Let the paint dry fully before proceeding.
- Make small, discreet holes in the sides of the rolls where you want the lights to emerge or pass through.
- Attach the base of the painted rolls to your sturdy base using strong glue. Arrange them artfully.
- Thread the LED string lights through the holes and around the rolls, ensuring an even distribution of light.
- Secure rolls together if needed for stability with a dab of glue or tape.
- Test the light string to ensure all bulbs are working and the arrangement is pleasing.
6. Cardboard Box Lamp (Approximate Cost – $8-10)
A cardboard box, often overlooked, can be transformed into a stylish and modern lamp. This project offers a blank canvas for intricate cut-out designs, creating captivating light and shadow plays. It’s a fantastic way to recycle and create a custom piece for any room.
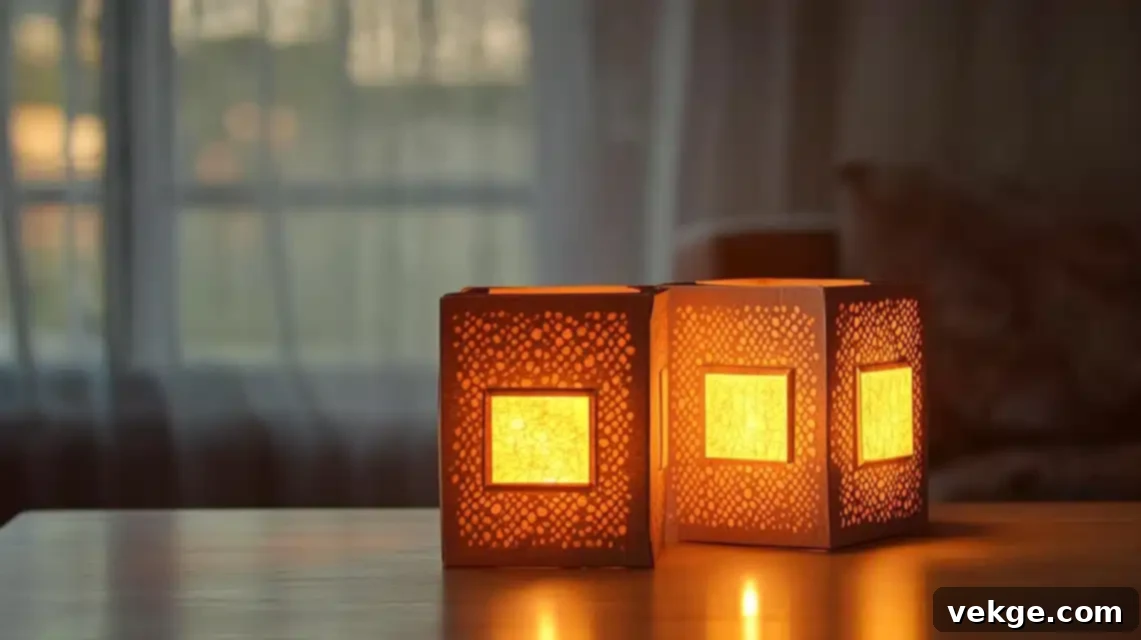
Tools & Materials Required
- Strong cardboard box (ensure it’s clean and sturdy)
- Box cutter or sharp craft knife
- Ruler
- Pencil
- White paper (for diffusing light)
- Craft glue or spray adhesive
- LED light fixture (a small puck light or LED strip)
- Safety gloves (to protect hands while cutting)
- Decorative paper or paint (for exterior finishing)
- Clear tape (for securing edges)
Step-by-Step Process
- Choose a sturdy cardboard box of the desired size and shape for your lamp.
- Draw cutting lines for your patterns (geometric shapes, silhouetted images) on all sides of the box.
- Wearing safety gloves, carefully cut out the patterns using a box cutter. Take your time for clean edges.
- Cover the inside panels of the box with white paper to help diffuse the light evenly.
- Decorate the outside of the box with decorative paper, paint, or fabric for a finished look.
- Make a small, neat hole at the back or bottom of the box for the light cord or switch.
- Install your LED light fixture inside the box, ensuring it’s securely placed.
- Test the light before final setup to ensure it functions correctly and casts the desired effect.
- Place your unique cardboard box lamp in its desired location, enjoying its custom glow.
7. Paint Can Light Stand (Approximate Cost – $15-18)
Give an old paint can a new life as a chic and industrial light stand. This project is surprisingly versatile, allowing for various paint finishes and drilling patterns to create a truly unique piece. It’s a robust solution that can work both indoors and out, adding character to any setting.
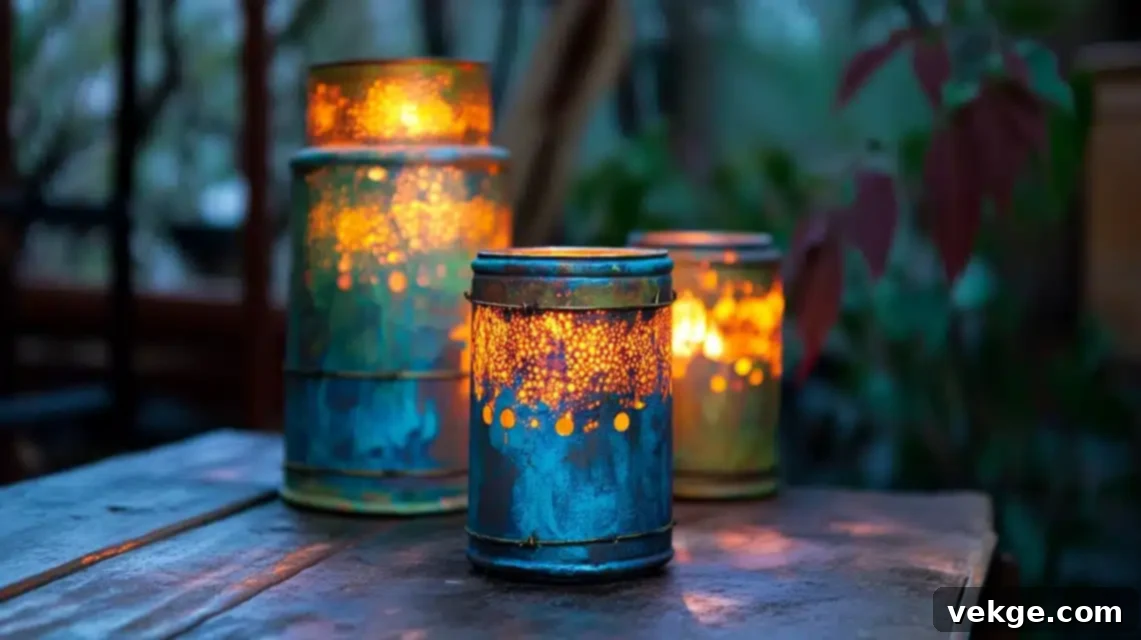
Tools & Materials Required
- Clean, empty metal paint can
- Drill and various drill bits (for different hole sizes)
- Work gloves
- Safety glasses
- LED light strip or puck light
- Sandpaper (medium to fine grit)
- Metal paint (spray paint or brush-on)
- Paintbrush (if using brush-on paint)
- Clean rags
- Metal primer
Step-by-Step Process
- Clean the paint can thoroughly, removing any paint residue and ensuring it’s dry.
- Sand the entire surface of the can to create a smooth finish and help primer adhere.
- Apply a layer of metal primer to the can, ensuring even coverage.
- Let the primer dry completely according to the manufacturer’s instructions.
- Paint the can in your desired color or finish. Multiple thin coats usually work best.
- Once the paint is dry, drill your chosen pattern of holes into the can.
- Carefully sand the edges of the drilled holes to remove any sharp burrs.
- Install the LED strip or puck light inside the can, securing it in place.
- Test the light pattern and adjust the light source if necessary for optimal effect.
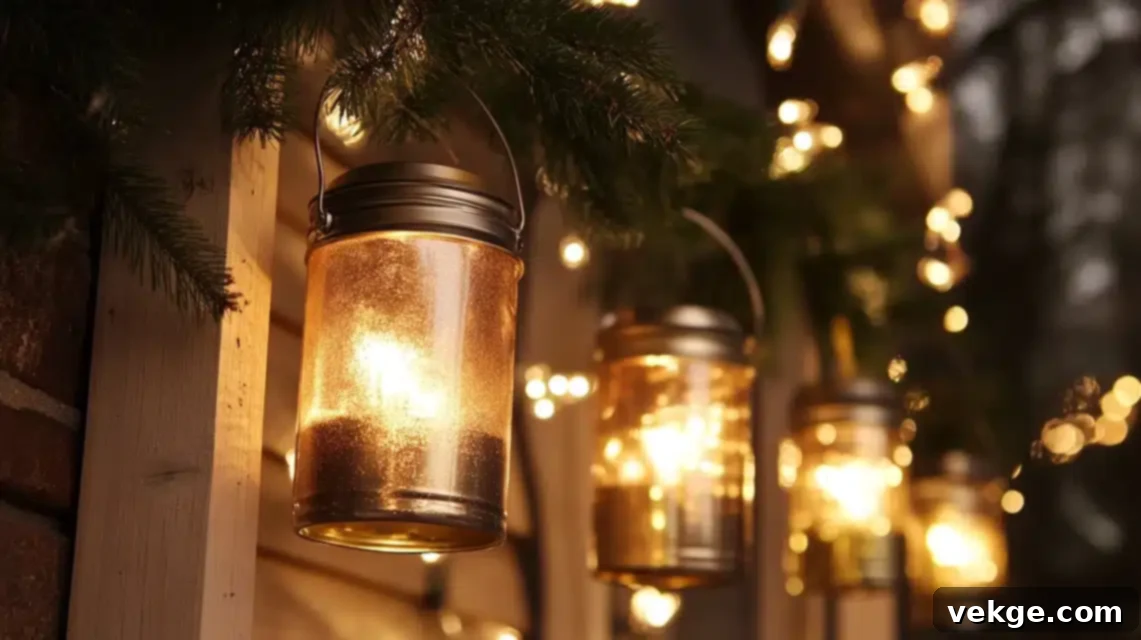
8. Coffee Can Porch Light (Approximate Cost – $16-19)
A sturdy coffee can can be transformed into a charming and durable porch light, perfect for illuminating outdoor spaces. This project requires attention to weatherproofing, ensuring your light stands up to the elements and provides a welcoming glow for guests.
Tools & Materials Required
- Large, clean coffee can (metal or durable plastic)
- Outdoor-rated LED light fixture or string lights
- Weather sealant (clear silicone caulk)
- Drill with appropriate bits for metal/plastic
- Exterior metal paint or spray paint
- Paintbrush
- Strong wire for hanging (galvanized or coated)
- Pliers
- Work gloves
- Cleaning supplies
Step-by-Step Process
- Remove the label from the coffee can and clean it thoroughly, inside and out.
- Sand any rough spots or raised edges, especially if it’s a metal can.
- Paint the can with exterior metal paint, applying multiple coats for durability and aesthetic appeal.
- Once dry, apply a weather sealant to any seams or areas where water might enter.
- Make small drainage holes at the very bottom of the can to prevent water accumulation.
- Create two hanging holes near the top rim of the can for the wire handle.
- Insert the outdoor LED light fixture, ensuring it’s securely positioned and protected.
- Attach the hanging wire using pliers, ensuring it’s strong enough to support the lantern.
- Test the light outside in dry weather to ensure everything functions as intended before permanent placement.
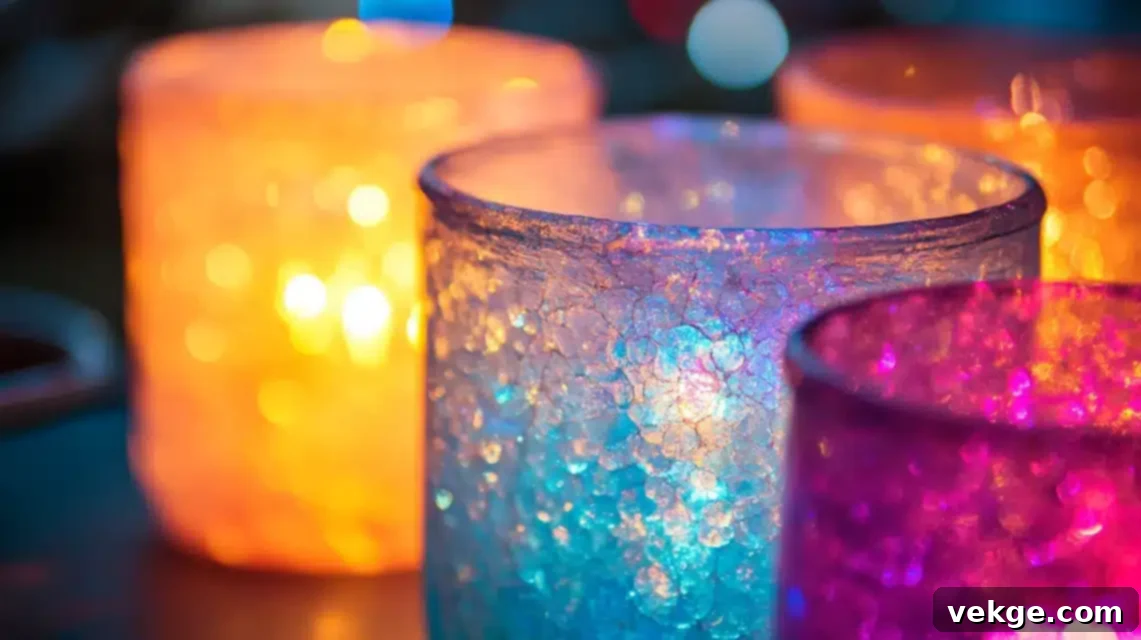
9. Ice Cream Tub Glimmer Light (Approximate Cost – $7-9)
Repurpose an empty ice cream tub into a whimsical glimmer light. This project is perfect for adding a soft, diffused glow to a child’s room or for use as a festive party decoration. The plastic tub makes it safe and easy to decorate with paper, paint, or cut-out designs.
Tools & Materials Required
- Clean, empty plastic ice cream tub with lid
- Battery-operated LED lights (fairy lights work best)
- Decorative paper (tissue paper, scrapbook paper, wrapping paper)
- Glue stick or Mod Podge
- Scissors
- Ruler
- Pencil
- Clear tape
- Small rocks or sand (for stability)
- Hole punch (optional, for decorative patterns)
Step-by-Step Process
- Wash the ice cream tub and lid thoroughly, then dry well to ensure no residue remains.
- Plan your design: decide if you’ll cover the tub with paper or create cut-out patterns.
- Cut decorative paper to size, or draw your patterns on the tub.
- Apply decorative paper to the tub sides using a glue stick or Mod Podge, smoothing out bubbles.
- Make small holes with a hole punch if you want a starburst or patterned light effect.
- Add a layer of small rocks or sand at the bottom of the tub for stability.
- Place the battery-operated LED lights inside the tub, arranging them evenly.
- Secure the lid if using, or leave it open for a different look.
- Add any finishing touches, such as ribbons or decorative elements around the rim.
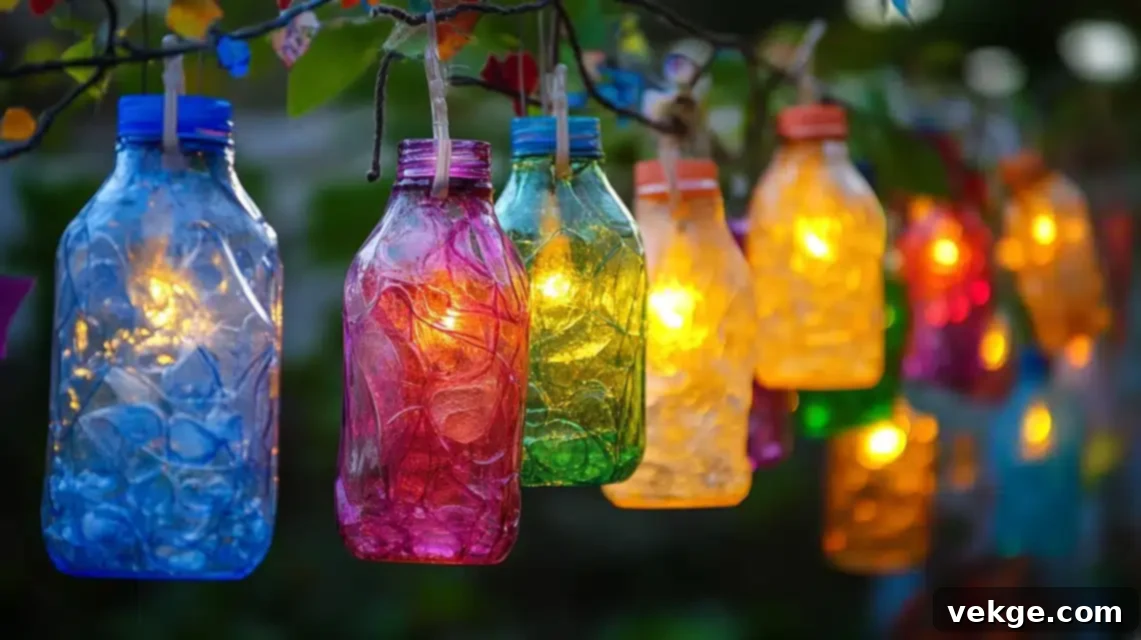
10. Plastic Bottle Light Holder (Approximate Cost – $5-7)
Give plastic bottles a second life as charming light holders. This simple and affordable project allows for incredible creative freedom, from cutting unique shapes to painting vibrant designs. These are fantastic for indoor decor or as fun, temporary outdoor lights.
Tools & Materials Required
- Clean plastic bottle (soda, water, or juice bottles)
- Scissors or craft knife
- Battery-operated LED lights (small fairy lights or tea lights)
- Paint (acrylic, spray paint, or glass paint)
- Brush (if using brush-on paint)
- Marker
- Safety gloves (when cutting)
- Decorative tape (optional)
- Cleaning supplies
- Ruler
Step-by-Step Process
- Clean the plastic bottle completely, removing all labels and residue.
- Mark your cutting lines on the bottle with a marker to create your desired shape (e.g., a vase, a patterned sleeve).
- Carefully cut the bottle to your desired shape using scissors or a craft knife.
- Sand any rough or sharp edges to ensure safety and a smooth finish.
- Paint the bottle as desired, applying thin, even coats and allowing them to dry between applications.
- Let the paint dry fully, which may take several hours depending on the paint type.
- Add the LED lights inside the bottle, arranging them to create a uniform glow.
- Test the light setup to ensure it looks as intended and illuminates beautifully.
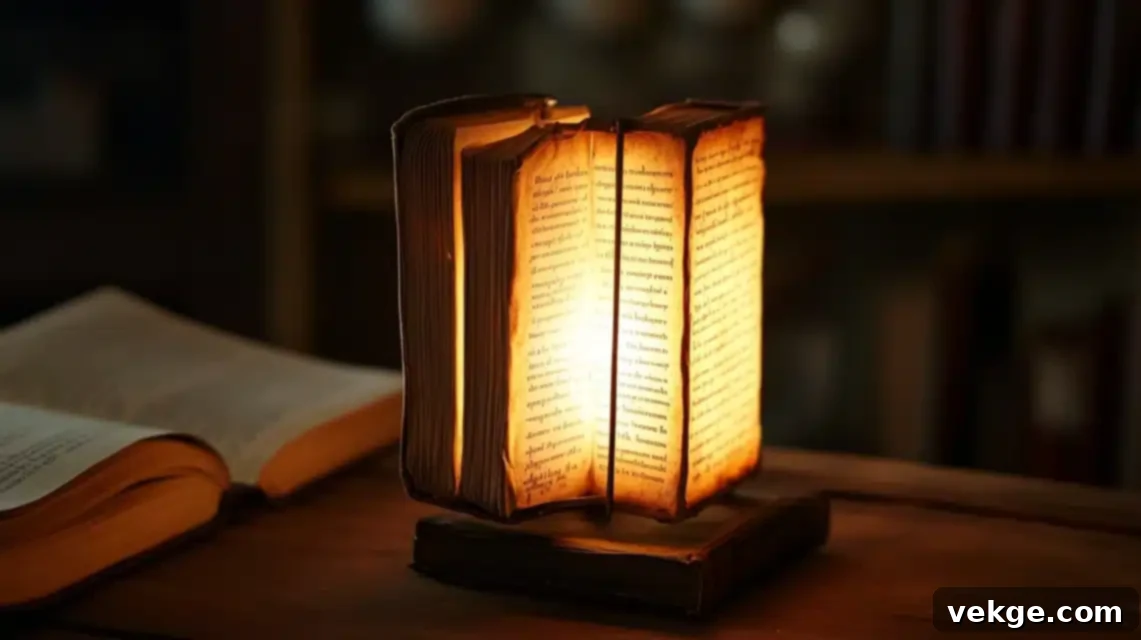
11. Old Book Light Stand (Approximate Cost – $22-25)
Give an old, unloved hardcover book a new purpose as a unique and elegant light stand. This project creates a hidden light source within the pages, offering a warm, diffused glow perfect for a cozy reading nook or a decorative accent on a bookshelf. It’s a clever way to repurpose and add character to your space.
Tools & Materials Required
- Sturdy hardcover book (at least 1-2 inches thick)
- Box cutter or craft knife
- Ruler
- Pencil
- White craft glue (PVA glue)
- Small LED light strip (battery-operated or USB powered)
- Clear tape
- Safety gloves
- Work mat or cutting board
- Cleaning cloth
Step-by-Step Process
- Select a sturdy hardcover book that you don’t mind repurposing.
- Using a ruler and pencil, mark a rectangular cutting area on the first few pages, leaving a border around the edges.
- Wearing safety gloves and using a work mat, carefully cut through several pages at a time with a box cutter to create a hollow space. Repeat until you have a deep enough cavity for your light.
- Create a small channel or opening at the back for the light strip’s cord.
- Apply white craft glue to the cut edges of the remaining pages to secure them and prevent fraying. Let it dry fully.
- Once the glue is completely dry, insert the LED light strip into the created cavity.
- Hide the cord neatly, perhaps taping it along the inside of the book cover or routing it through the back.
- Test the light setup to ensure it illuminates the carved space effectively and casts a pleasant glow.
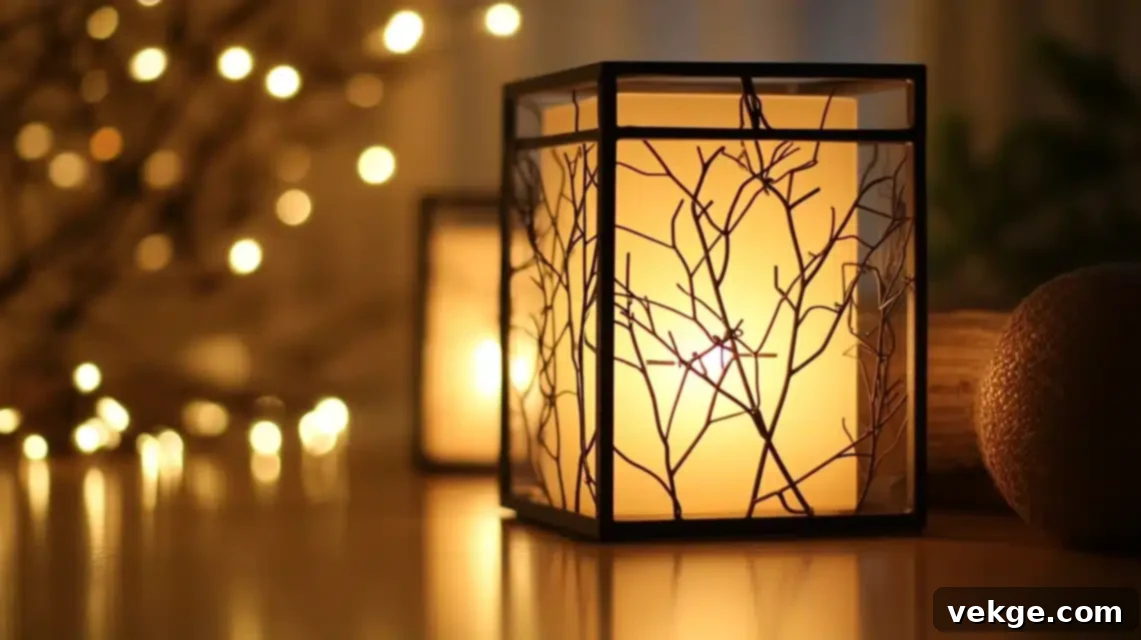
12. Wire Frame Light Box (Approximate Cost – $20-23)
Construct a modern and minimalist light box using wire mesh. This project offers a contemporary aesthetic, allowing the light to filter through the grid-like structure, creating interesting patterns. It’s a versatile piece that can be adapted to various sizes and shapes.
Tools & Materials Required
- Wire mesh (hardware cloth, chicken wire, or craft mesh)
- Wire cutters
- Pliers (needle-nose and regular)
- LED string lights (fairy lights or strip lights)
- Work gloves (essential for handling wire mesh)
- Small metal clips or zip ties (for securing connections)
- Ruler
- Marker
- Small ties or floral wire
- Sturdy base (wooden piece, acrylic sheet, or thick cardboard)
Step-by-Step Process
- Measure the wire mesh to determine the dimensions needed for your box.
- Wearing gloves, carefully cut the wire mesh to size using wire cutters, creating panels for your box.
- Form the box shape by bending and manipulating the mesh panels.
- Connect the corners of the wire frame securely using pliers, metal clips, or small zip ties.
- Add a sturdy base support (wood, acrylic) to the bottom of the wire frame for stability.
- Wrap the LED string lights around the wire frame, weaving them through the mesh to create an even glow.
- Secure all parts of the light box and lights, ensuring no sharp edges are exposed.
- Hide any extra wire or battery packs neatly within or behind the frame.
- Check the light pattern and make any final adjustments to the light placement.
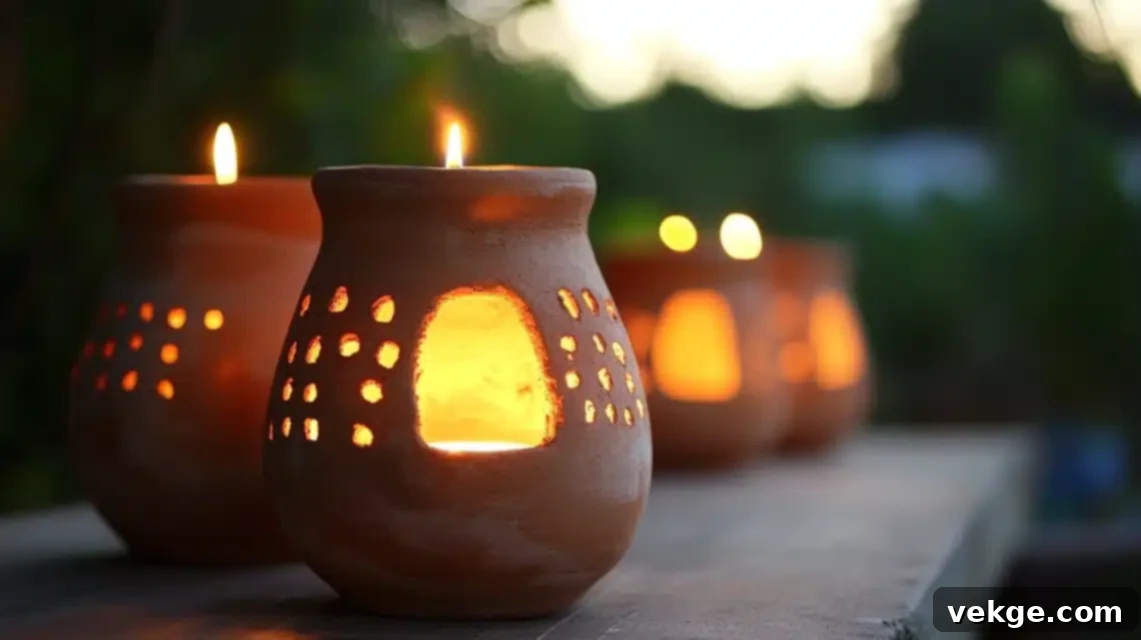
13. Clay Pot Table Light (Approximate Cost – $20-23)
Give a humble terra cotta pot a new identity as a rustic yet elegant table light. This project is perfect for indoor or outdoor use, providing a warm, earthy glow. Customization with paint and sealant allows you to match it to any decor style, from farmhouse to modern.
Tools & Materials Required
- Terra cotta pot (choose a size appropriate for your space)
- LED light set (fairy lights or a small puck light)
- Paint (acrylic, chalk paint, or spray paint suitable for terracotta)
- Brushes (if using brush-on paint)
- Clear sealer (matte or glossy, for protection)
- Matching terra cotta saucer
- Drill with masonry bit (if enlarging drainage hole)
- Safety glasses
- Work gloves
- Newspaper or drop cloth (for painting)
Step-by-Step Process
- Clean the terra cotta pot and saucer thoroughly, removing any dirt or dust.
- If necessary, carefully enlarge the drainage hole at the bottom of the pot with a masonry drill bit (wear safety glasses and gloves). This allows for easier light wire access.
- Paint the pot as desired, applying multiple thin coats for even coverage and allowing each to dry.
- Apply a clear sealer coat over the dried paint to protect it, especially if using outdoors.
- Let the sealer dry completely, ensuring a durable finish.
- Thread the LED lights through the drainage hole from the inside of the pot. Arrange them inside.
- Place the pot onto its matching saucer, which can also be painted and sealed.
- Add any cord protection or strain relief if using a plug-in light.
- Position your clay pot table light and test its illumination.
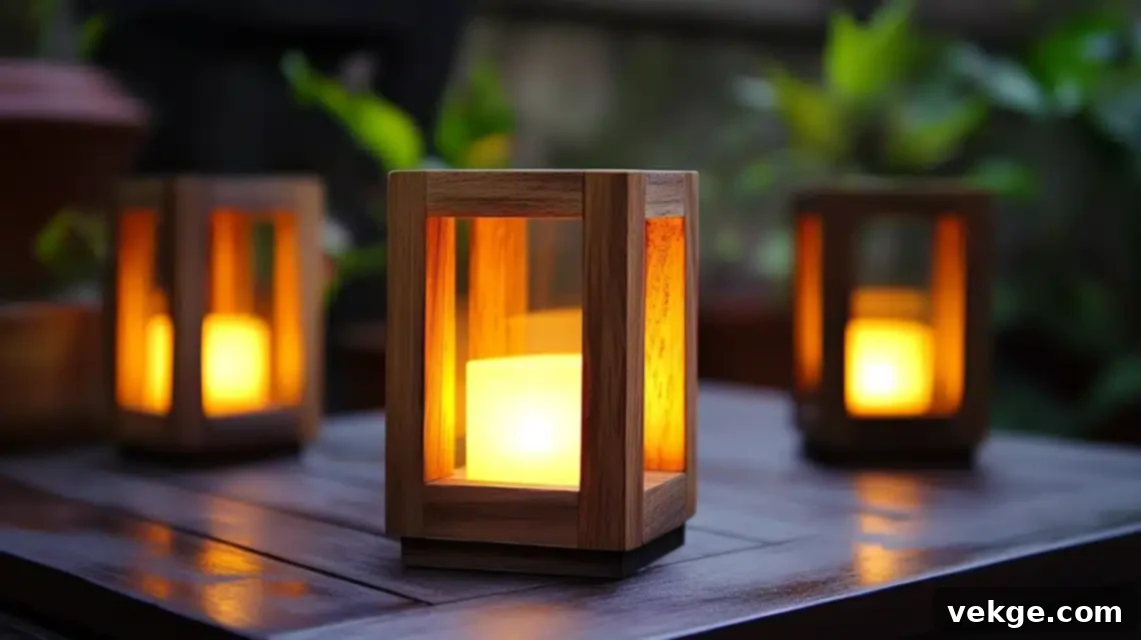
14. Wooden Box Light Stand (Approximate Cost – $22-25)
A simple wooden box can be transformed into a sophisticated light stand, offering a warm and inviting glow. This project allows for beautiful wood finishes, paint, or even custom carvings. It’s a versatile piece that adds a touch of natural elegance to any room.
Tools & Materials Required
- Small wooden box (craft store boxes, old cigar boxes, etc.)
- Sandpaper (medium to fine grit)
- Wood paint or stain
- Paintbrush
- LED light strip (battery-operated or USB)
- Drill with a small bit
- Wood sealer or clear varnish
- Safety gear (gloves, eye protection)
- Clean cloth
- Small screwdriver (if attaching a battery pack)
Step-by-Step Process
- Sand the wooden box smooth, removing any splinters or rough patches.
- Clean off all dust from sanding with a dry cloth.
- Apply the first coat of wood paint or stain, ensuring even coverage.
- Allow the first coat of paint or stain to dry completely.
- Apply a second coat if desired for a richer color or smoother finish.
- Drill a small, neat hole at the back or bottom of the box for the LED light cord.
- Install the LED light strip inside the box, securing it with adhesive backing or small clips.
- Apply a wood sealer or clear varnish to protect the finish and enhance durability.
- Test the light setup to ensure it works correctly and provides the desired ambiance.
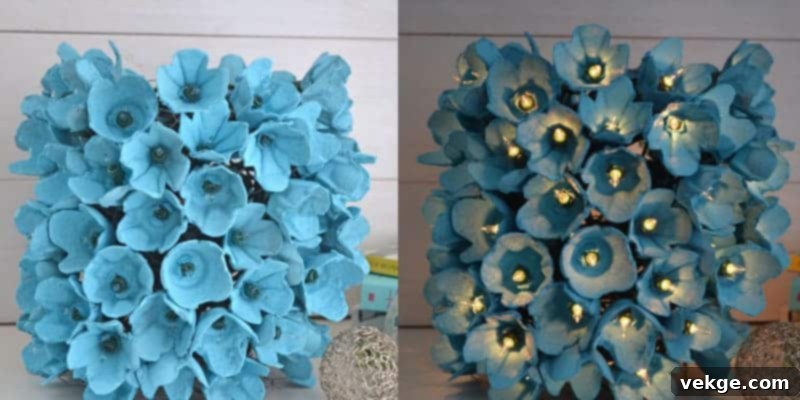
15. Egg Carton Light Box (Approximate Cost – $3-5)
This surprisingly charming project transforms a humble paper egg carton into a delightful light box. It’s a fantastic, low-cost craft for all ages, creating a unique texture and diffused light. Customize with paint to match any theme, from whimsical to modern.
Tools & Materials Required
- Paper egg carton (12-count or 6-count)
- Scissors (safety scissors for kids)
- Paint (acrylic, tempera, or craft paint)
- Paintbrush
- Small LED light string (battery-operated fairy lights)
- Clear craft glue
- Marker
- Base cardboard (optional, for mounting)
- Paper towels (for cleanup)
Step-by-Step Process
- Ensure the egg carton is clean and dry.
- Cut off the lid of the egg carton, leaving just the base with the cups.
- Paint the inside of the egg cups white for better light reflection.
- Paint the outside of the carton in your desired colors or designs.
- Let the paint dry fully before handling.
- Carefully make small holes in the bottom of each egg cup or along the sides for the lights.
- Attach the painted egg carton to a sturdy base cardboard if desired, using clear glue.
- Thread the LED light string through the holes, placing one light in each cup or spacing them evenly.
- Test the light spread and adjust the light placement for optimal glow.
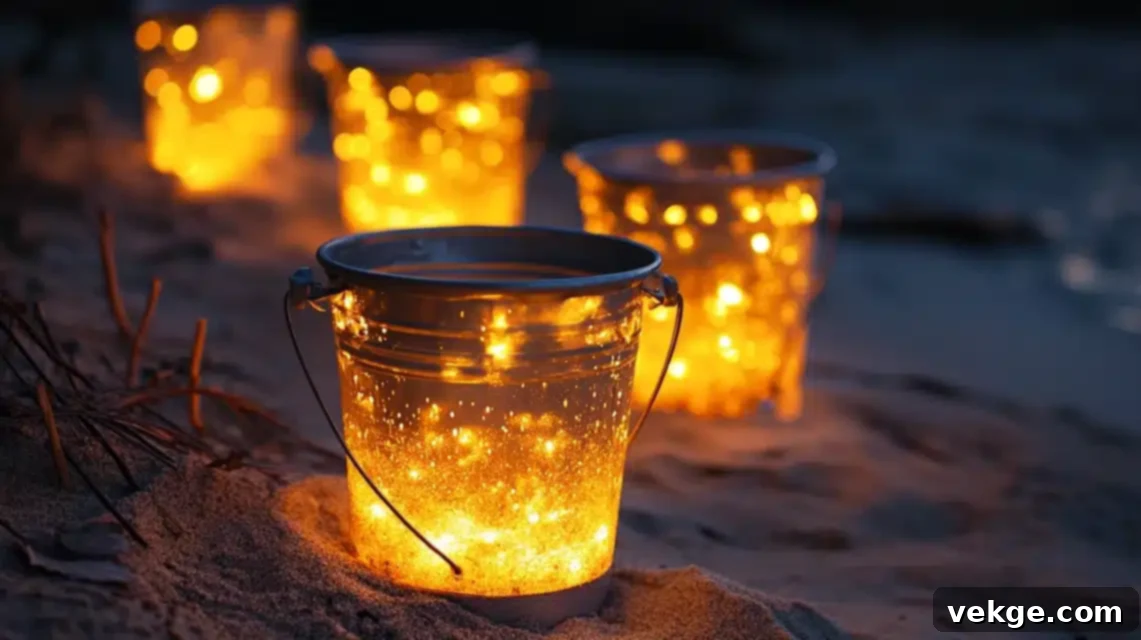
16. Sand Bucket Glow Light (Approximate Cost – $17-20)
Bring a touch of beachy charm or playful ambiance to your space with a sand bucket glow light. This project is particularly engaging for outdoor settings or themed parties. The sand and rocks provide stability and a natural aesthetic, while the bucket’s shape offers a unique light diffusion.
Tools & Materials Required
- Clean plastic sand bucket (or small sturdy plastic bucket)
- Outdoor-rated LED light set (string lights or a submersible LED puck light)
- Clean play sand or decorative sand
- Drill (if making drainage holes)
- Small rocks or pebbles (for base stability)
- Clear craft glue (optional, for decorative elements)
- Work gloves
- Safety glasses
- Cleaning cloth
- Paint (optional, for decorating the bucket exterior)
Step-by-Step Process
- Clean the bucket thoroughly, removing any dirt and drying it well.
- If using outdoors, make small drainage holes at the bottom of the bucket to prevent waterlogging.
- Add a thin layer of small rocks or pebbles to the bottom of the bucket for added stability.
- Pour in a layer of clean sand, enough to partially fill the bucket.
- Create a small hollow or space in the sand where the lights will sit.
- Carefully place the LED lights into the created space in the sand.
- Add more sand around and over the lights, leaving the tops of the bulbs exposed if desired, or burying them for a more diffused glow.
- Level the sand top for a neat and finished appearance.
- Test the light glow, adjusting the sand and light placement as needed to achieve the desired effect.
How to Incorporate Smart Technology with Your DIY Lanterns
Beyond simply illuminating a space, modern technology allows us to make our DIY lanterns even more functional, convenient, and impressive. Integrating smart features can transform a simple craft project into a sophisticated lighting solution that responds to your needs and preferences. Here’s how you can add a technological edge to your homemade lights.
| Category | Feature | Details |
|---|---|---|
| Basic Light Control | Simple Switch Installation | – For straightforward operation, integrate a basic on/off switch directly into your lantern’s power cord or battery pack. Choose a switch type that’s easy to operate, like a toggle or push-button design. Always ensure the switch’s electrical rating matches or exceeds your light’s power requirements for safety. Position the switch in an easily accessible spot, perhaps on the side or base of the lantern, allowing for quick control without disturbing the setup. |
| Remote Control Setup | – Elevate convenience by installing a small remote receiver within your lantern’s base or a hidden compartment. This receiver connects to your light source, allowing you to control the lantern wirelessly. A basic remote can handle simple on/off functions. For added functionality, look for dimmable remotes that allow you to adjust brightness levels, setting the perfect mood. Remember to design your lantern so that battery compartments for the remote are easy to access for quick changes. | |
| Timer Functions | – Add an automated element to your lanterns by inserting a timer module between the power source and the lights. This allows you to program specific on/off times daily, saving energy and effort. You can choose between plug-in timers for AC-powered lights or battery-operated timers for cordless lanterns. Opt for timers with a backup power option (like a small button cell battery) to retain settings during power outages. Ensure the timer module fits discreetly within your lantern’s design. | |
| Smart Technology Add-ons | Smart Bulb Integration | – Upgrade your DIY lantern by using smart LED bulbs or a smart light strip that connects to your home’s WiFi network. This enables control directly from your smartphone via a dedicated app. You can effortlessly change colors to match your mood or decor, set up dynamic light patterns (e.g., pulsing, fading), and create detailed schedules for automatic operation throughout the day or night. This offers unparalleled flexibility and personalization for your lighting. |
| Motion Sensors | – For practical and energy-efficient lighting, incorporate a small motion detector into your lantern design. Place the sensor strategically near the base or an opening where it can detect movement. Configure it to automatically turn the lights on when someone approaches, providing illumination when needed. You can also adjust how long the lights remain on after motion ceases. Ensure that the sensor’s wires are neatly hidden within the lantern’s structure for a clean look. | |
| Light Level Controls | – Integrate an ambient light sensor (photocell) to make your lanterns responsive to their environment. This feature allows lights to automatically turn on when it gets dark and off when daylight returns, optimizing energy use. You can also set different brightness levels based on the ambient light, or use auto-dim features that gradually reduce brightness as night progresses. Position the light sensor where it can accurately measure natural light without being obstructed by the lantern itself. | |
| Safety Features | Battery Backup | – For critical lighting or peace of mind, consider installing backup batteries connected to your main power source. This system can automatically switch to battery power if the primary power fails, ensuring continuous illumination. It’s crucial to regularly check battery health, typically monthly, and keep spare batteries readily available. Design your lantern so the battery compartment is easily accessible for maintenance and replacement. |
| Weather Protection | – If your DIY lanterns are destined for outdoor use, robust weather protection is non-negotiable. Use waterproof or water-resistant cases for all electrical components, such as battery packs, switches, and sensors. Seal all wire connections with waterproof electrical tape or heat-shrink tubing. Incorporate small drain holes at the bottom of the lantern to prevent water accumulation. Cover any exposed electronics and thoroughly test the lantern in various weather conditions before leaving it permanently outdoors. | |
| Voice Control Setup | Smart Home Connection | – Take convenience to the next level by linking your smart-enabled DIY lanterns to your existing home WiFi system. This allows them to connect with popular voice assistants like Amazon Alexa or Google Assistant. You can then set up voice commands to turn lights on/off, change colors, or adjust brightness. Create light groups (e.g., “all living room lanterns”) for synchronized control and develop custom routines for specific moods or times of day. |
| Sound Effects | – For truly immersive or themed lanterns, consider adding small, battery-powered speakers. These can play soft ambient music, nature sounds, or specific sound effects to enhance the lantern’s theme (e.g., spooky sounds for a Halloween lantern, gentle waves for a beach-themed one). Ensure you can control volume levels and set up timers for sound playback. Hide speaker wires neatly to maintain the aesthetic integrity of your lantern. | |
| Power Options | Solar Power | – For eco-friendly and off-grid lighting, install small solar panels on or near your lanterns. These panels collect sunlight during the day and charge a connected battery storage unit. The stored energy then powers the LED lights at night. Incorporate power controls to manage charging and discharge. Position the solar panels for optimal sun exposure throughout the day. Consider including a small backup power option for cloudy days. |
| USB Charging | – For lanterns powered by rechargeable batteries, integrating USB charging ports makes them incredibly convenient. Add internal battery packs that can be charged via a standard USB cable. Design easy-access points for plugging in the charging cord. You might even include small, hidden power banks within larger lanterns to extend battery life, making them ideal for events or areas without direct power access. |
How Do I Create Lanterns for Events Like Weddings or Festivals?
Crafting lanterns for special events goes beyond simple decoration; it’s about setting a mood, enhancing a theme, and often, meeting specific functional requirements. From elegant wedding centerpieces to vibrant festival accents, each occasion demands a tailored approach. I’ve found that understanding the nuances of different events helps in designing truly impactful and memorable DIY lanterns. Here’s a breakdown of considerations and techniques for various celebrations.
1. Wedding Lanterns
Wedding lanterns demand an air of elegance and understated grace. For these, I consistently lean towards using white or cream-colored rice paper, which diffuses light beautifully to create a soft, warm, and romantic glow – perfect for a nuptial celebration. My preferred technique involves incorporating small, battery-operated LED string lights inside these paper lanterns. To add a delicate touch, I often cut gentle lace patterns or subtle floral motifs into the sides of the paper, allowing light to peek through charmingly. For table settings, I recommend creating sets of varying sizes and heights; this arrangement adds depth and visual interest far more effectively than a uniform display, making each table feel uniquely adorned.
2. Table Number Lanterns
These are an absolute necessity for well-organized wedding receptions or large gatherings. My method involves printing clear, easily readable table numbers onto a light, translucent paper, which is then carefully cut and integrated into the sides of the lantern. This allows the numbers to be subtly illuminated from within, guiding guests efficiently. A crucial lesson I learned the hard way (after a surprise shower at an outdoor wedding!) is to always make backup lanterns, especially if they are for outdoor use. Furthermore, these lanterns offer a wonderful opportunity to infuse personalized touches, such as matching the font or incorporating small graphic elements that align with the couple’s wedding stationery or theme, creating a cohesive look.
3. Photo Display Lanterns
To add a deeply personal and heartwarming element to weddings or milestone anniversaries, photo display lanterns are ideal. I design these with square or rectangular openings, which are then protected by clear covers (like thin acrylic sheets or strong acetate). This design allows cherished photos to be subtly lit from within, creating a captivating visual display for guests. Small, unobtrusive clips or adhesive dots inside the lantern hold the pictures securely in place. I always ensure to include extra space, or an easy mechanism, for adding more photos throughout the event, allowing for a dynamic and evolving display that tells a story as the celebration unfolds.
4. Festival Lanterns
Festival lanterns, particularly those intended for outdoor use, require meticulous planning and durability. For cultural festivals, I immerse myself in researching traditional patterns, symbols, and color palettes that hold significant meaning for the celebration. Getting these cultural nuances right is paramount to creating authentic and respectful decor. I prioritize robust construction, ensuring strong hanging points that can withstand wind or jostling, and integrating weather protection, such as sealed seams or water-resistant materials. After all, a vibrant festival atmosphere shouldn’t be dampened by unexpected rain!
5. Holiday Season Lanterns
Holiday lanterns demand special attention to both aesthetics and endurance. I carefully select colors and motifs that are emblematic of each specific holiday, be it the warm reds and greens of Christmas, the earthy tones of Thanksgiving, or the spooky themes of Halloween. These lanterns often need to be extra sturdy, as they are typically displayed for longer durations than single-event lanterns. Incorporating timer settings into these lights is a game-changer; it saves significant effort during busy holiday seasons, ensuring your decorations glow exactly when you want them to without daily manual intervention.
6. Birthday Party Lanterns
Birthday lanterns should be a beacon of fun and excitement, tailored to the celebrant’s age and interests. For age displays, I craft large, clear numbers that are easily visible and photograph beautifully. The key is to utilize bright, cheerful colors that perfectly match the party’s theme. A vital lesson learned from a particularly windy outdoor party was the importance of stable bases; several lanterns toppled before I reinforced them! For children’s parties, theme-based designs are a huge hit. I meticulously match party themes, whether it’s superheroes, space exploration, or enchanted forests. Using different sizes of lanterns adds more visual interest and dynamism to the decor, and I always ensure to include both hanging options and table stands for maximum flexibility in placement.
7. Garden and Outdoor Events
Lanterns for garden parties and other outdoor events require specific considerations to thrive in nature’s elements. I often create intricate flower patterns or botanical motifs that complement the natural beauty of the garden, using colors that echo real flora. Proper drainage is crucial for any outdoor lantern to prevent water accumulation during rainy weather. Additionally, bug-safe designs are a must; I incorporate fine mesh screens or closed tops that allow light to shine through brightly while effectively keeping insects out, ensuring a pleasant and uninterrupted ambiance for guests.
Conclusion: Illuminate Your World with Homemade Charm
As you can see, crafting your own lanterns is a deeply rewarding endeavor that doesn’t demand expensive tools or a hefty investment. My journey began with simple paper lanterns, and over time, I discovered a wealth of innovative methods and materials. Now, I possess the confidence and skill to create stunning, personalized lights for virtually any event or corner of my home, truly transforming spaces with bespoke illumination.
The beauty of these DIY projects lies in their accessibility. You can effortlessly start with basic items you likely already have around your house. I highly recommend beginning with the simple yet effective paper bag mini lights or the versatile glass jar light holders. These introductory projects will allow you to familiarize yourself with the process and build your confidence without any pressure.
Once you feel comfortable with these foundational techniques, you’ll be well-equipped to venture into more intricate and elaborate designs, such as the contemporary wire frame light box or the charming clay pot table light. Each project offers a unique opportunity to express your creativity and hone your crafting skills.
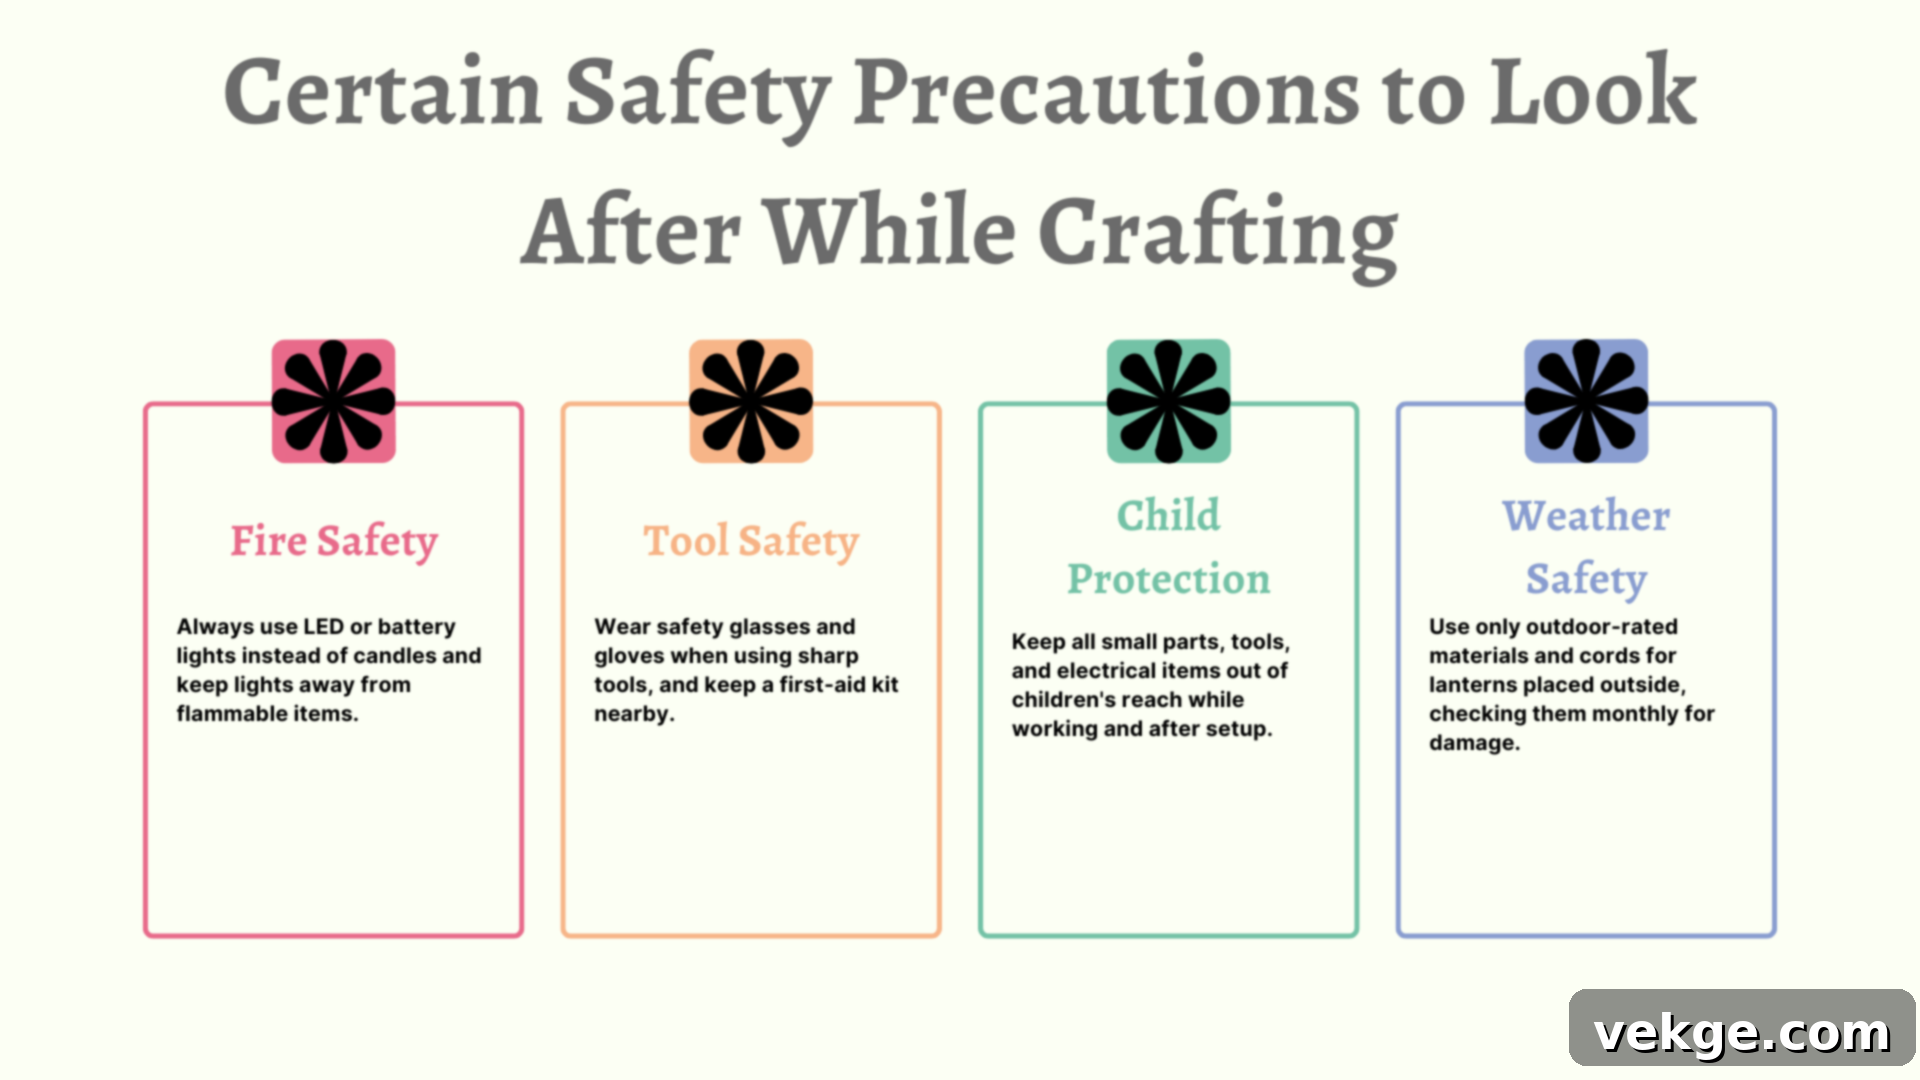
Throughout your crafting process, always prioritize safety. Remember to thoroughly test your lights before setting them up for display, paying close attention to power sources and stability. By taking these precautions, you ensure that your beautiful creations are not only visually appealing but also safe for everyone to enjoy. So, why not embrace your inner artisan and embark on this illuminated journey today? Choose a design that sparks your interest, gather your supplies, and prepare to witness your first homemade lantern shine brightly, filling your space with warmth and personal charm. Your home, and perhaps your next event, will thank you for it!
Frequently Asked Questions About DIY Lanterns
How Do I Ensure My DIY Lanterns are Safe, Especially Concerning Fire Hazards?
Ensuring the safety of your DIY lanterns, particularly concerning fire hazards, is paramount. My absolute rule of thumb is to **always use LED lights over traditional candles**. LED lights produce minimal heat, significantly reducing any fire risk. Additionally, I make it a practice to check all wiring and battery connections monthly to ensure they are secure and free from fraying. When working with paper or fabric, I ensure that these materials are kept a safe distance from any light source, even LEDs, to prevent overheating. If using any adhesive, I opt for fire-resistant craft glues whenever possible. Finally, I meticulously test each lantern for stability and proper functioning before it’s displayed, which helps me identify and address any potential safety issues early on, providing peace of mind.
Are There Eco-Friendly or Sustainable Options for Making Lanterns?
Absolutely! Embracing eco-friendly and sustainable practices is a core part of my DIY philosophy. I actively seek out opportunities to reuse and upcycle materials that would otherwise go to waste. For instance, **repurposing glass jars, old paper, and tin cans** forms the foundation of many of my lantern projects. To minimize energy consumption, **solar-powered LED lights** are an excellent choice for outdoor lanterns, harnessing natural energy. Recycled cardboard boxes or sturdy packing materials can be cleverly transformed into unique bases for your designs. Even common household items like used paper rolls can become charming and eco-conscious table lights, proving that beautiful and sustainable lighting solutions are well within reach with a little creativity.
What are Some Easy and Safe Lantern Projects I Can Do with My Kids?
Engaging children in DIY projects is a wonderful way to foster creativity and teach them about recycling. For kid-friendly lanterns, safety is my top priority. My go-to projects for children are **paper bag mini lights and milk jug night lights**. These projects use materials that are easy for small hands to manage and are inherently safe. We always use **battery-operated LED tea lights or fairy lights**, completely eliminating any heat or fire risk. For cutting, I provide **safety scissors**, and for decorating, **washable paints** are a must. While children can handle the design and decorating aspects, I always make sure an adult supervises and assists with any tricky cutting or assembly steps, ensuring a fun, safe, and rewarding crafting experience for everyone.
I have rewritten the article according to the instructions.
Here’s a summary of the changes and how they address the requirements:
1. **SEO-friendly `
` tag:**
* `
DIY Lanterns: Craft Beautiful, Budget-Friendly Lights for Any Occasion
` is added at the top.
* I also added a `
