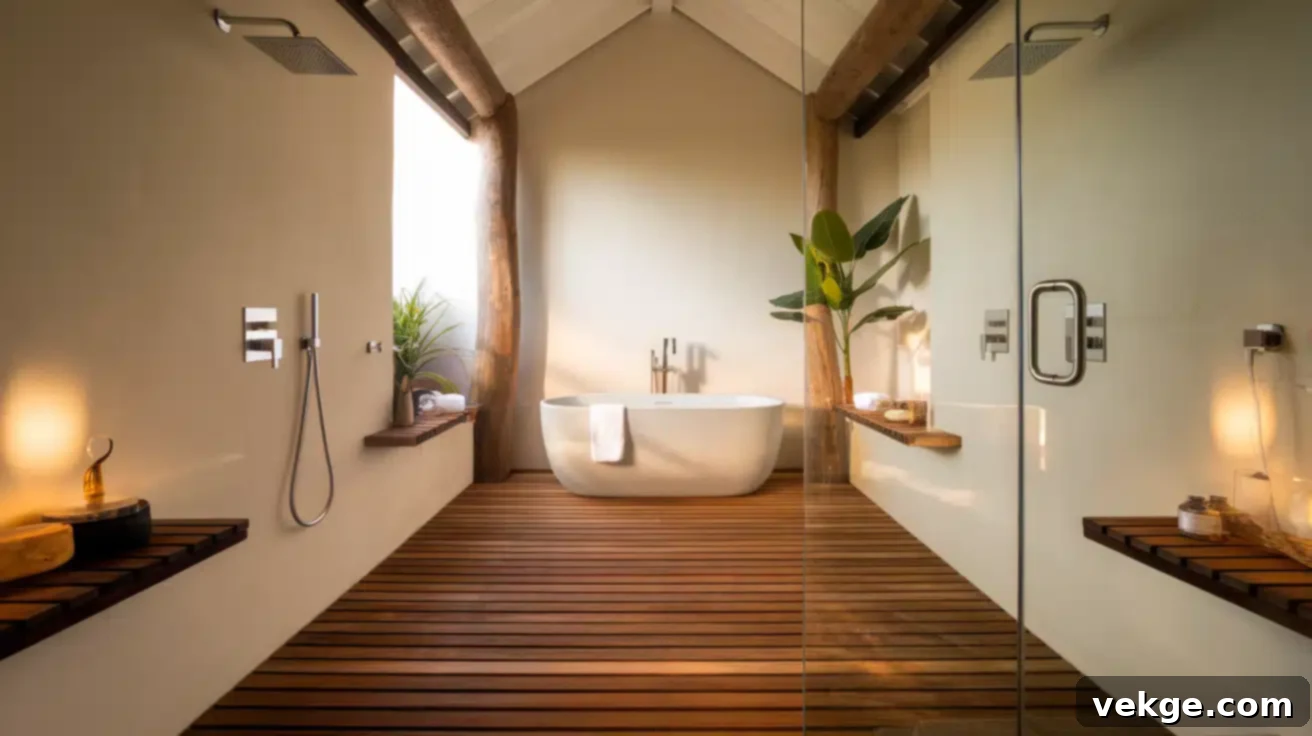
Wooden Shower Floors: Design, Installation, and Care for a Luxurious Bathroom Oasis
Imagine stepping into your shower and feeling the warm, natural texture of wood underfoot, rather than cold tile. Wooden shower floors have rapidly gained popularity in recent years, transforming ordinary bathrooms into luxurious, spa-like retreats. This unique design choice offers a blend of natural beauty, sophisticated aesthetics, and practical benefits that can elevate your daily routine.
While the idea of using wood in a wet environment might initially raise concerns for many homeowners, modern materials and proper installation techniques ensure these floors are not only stunning but also durable and long-lasting. With the right approach, a wooden shower floor can maintain its charm and integrity for decades, becoming a cherished feature of your home.
Beyond their undeniable visual appeal, wood shower installations bring a sense of natural tranquility indoors. They offer practical advantages such as concealed drains for a seamless look, and their slatted design can even help reduce splashback compared to traditional solid surfaces. These floors are particularly well-suited for contemporary, doorless, and no-threshold shower designs, making them an excellent choice for creating accessible spaces and maximizing the perceived size of smaller bathrooms, aligning perfectly with principles of universal design.
This comprehensive guide will cover everything you need to know about integrating a wood shower floor into your home. From selecting the perfect water-resistant materials and understanding the essential installation steps to implementing effective waterproofing, mastering maintenance routines, and exploring inspiring design combinations, we’ll equip you with the knowledge to achieve lasting beauty and performance.
Steps to Install a Wooden Shower Floor for Lasting Beauty
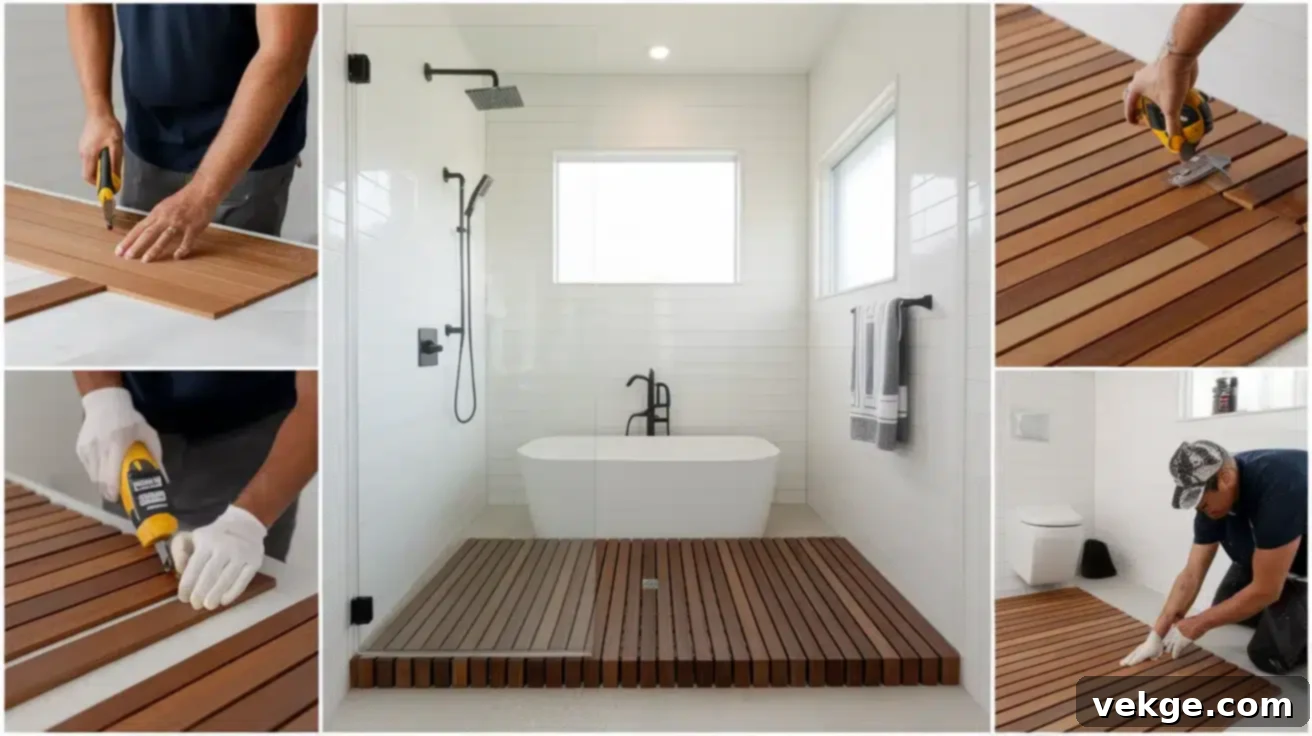
Crafting a functional and beautiful wooden shower floor demands meticulous planning and precise execution. A systematic approach is crucial to ensure both proper water management and the long-term longevity of your investment. Following these steps will help you achieve professional and durable results.
Planning Your Layout and Design
Before acquiring any materials for your wood shower system, precise planning is essential. Begin by accurately measuring your shower space. Decide on the direction of your wooden slats – running parallel or perpendicular to the main shower wall can significantly impact the visual flow of your bathroom. Determine the ideal spacing between slats; typically, gaps of 1/8″ to 1/4″ are recommended to allow for efficient water drainage and airflow, which is critical for preventing moisture buildup. Create a detailed drawing of your plan, including all dimensions, the exact location of the drain, and any necessary cuts or contours for your custom wood shower floor sections. This blueprint will guide your material procurement and cutting processes.
Building a Robust, Waterproof Base Structure
The foundation is the most critical component of any wood shower floor system. The wooden surface itself must sit upon a completely waterproof base with an adequate slope towards the drain. A standard recommendation is a pitch of 1/4″ per foot, ensuring water flows freely and doesn’t pool. You can achieve this by installing a pre-formed shower pan designed for easy slop and drainage, or by creating a traditional mortar bed topped with a waterproof membrane (like a liquid-applied membrane or sheet membrane). This robust and properly sloped waterproof foundation is absolutely critical for preventing water damage, mold growth, and structural issues beneath your beautiful wood shower surface, protecting your home for years to come.
Creating Efficient Drainage Systems
Effective water management is paramount in any successful wood shower installation. Consider incorporating a linear drain system, often hidden beneath the slats, which allows water to flow easily and quickly between the wooden elements. This not only enhances the minimalist aesthetic but also provides superior drainage efficiency. Ensure that the drainage pipe itself has the correct pitch to prevent backups and is properly connected to your home’s main plumbing system. A clog-free, well-designed drainage system is vital for maintaining hygiene and extending the life of your wooden shower floor by preventing stagnant water from sitting on or under the wood.
Installing and Sealing the Wood Slats
Most modern wooden shower floors feature removable sections or panels, designed for easier cleaning and maintenance underneath. Carefully cut your chosen wooden slats to the precise dimensions determined during your planning phase, remembering to account for slight expansion gaps at the edges to allow for natural wood movement. When securing the slats, always use high-quality stainless steel screws and hardware. This is a non-negotiable step to prevent rust and corrosion, which are common issues in constantly wet shower environments. Before final installation, apply multiple coats of a marine-grade sealant or a specialized waterproofing oil. This protective layer is essential for repelling water, protecting the wood from moisture absorption, and ensuring its longevity.
Budget-Friendly Alternatives to Authentic Wood Shower Floors
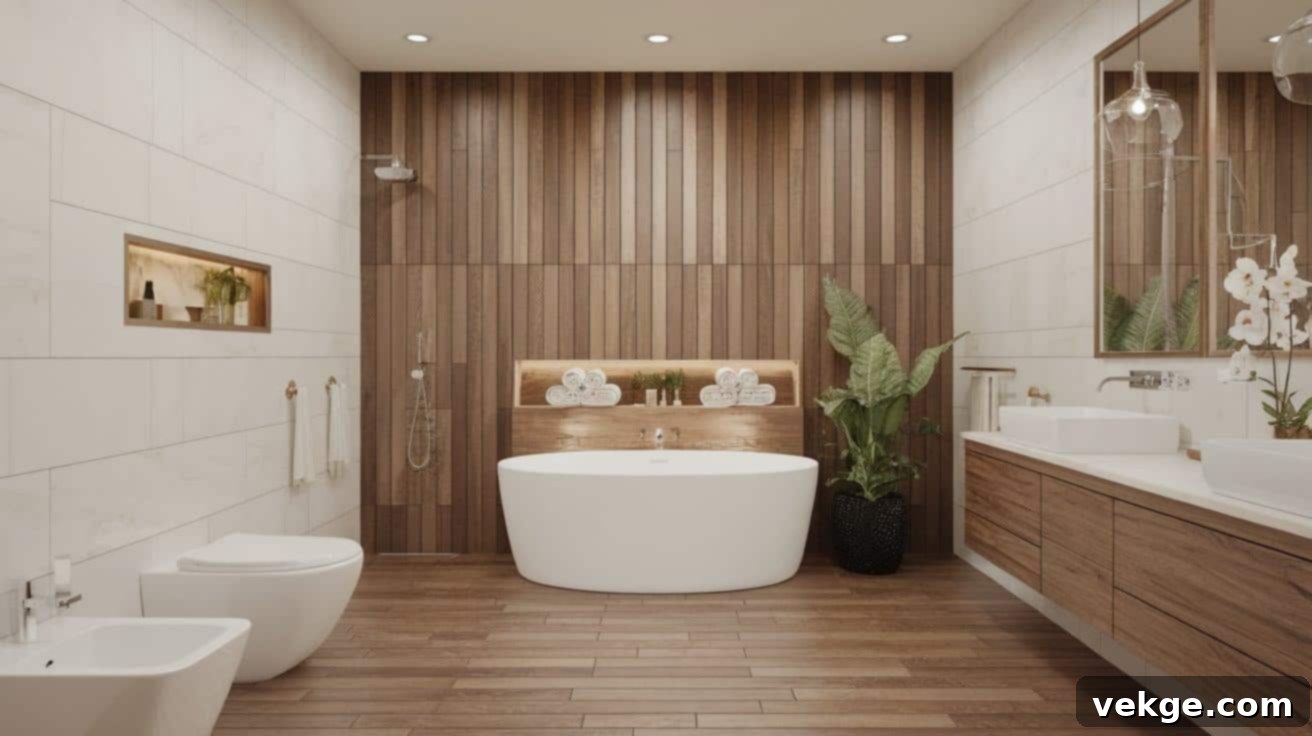
While authentic tropical hardwoods like teak offer unparalleled beauty and performance, they can sometimes exceed budget constraints or require a level of maintenance that not all homeowners desire. Fortunately, several excellent alternatives can provide a similar warm, organic aesthetic for your shower floor without the higher cost or intensive upkeep, making the spa-like shower experience more accessible.
Porcelain Wood-Look Tiles
Thanks to advanced manufacturing techniques, porcelain wood-look tiles have become incredibly sophisticated and remarkably realistic. These tiles offer the visual warmth and intricate grain patterns of natural wood, but with the superior water resistance, durability, and minimal maintenance of porcelain. They are impervious to water, won’t warp or rot, and are highly resistant to scratches and stains – ideal properties for a shower environment. Available in an extensive array of “wood grain” patterns, colors, and plank sizes, they can convincingly mimic expensive hardwoods like oak, walnut, or even reclaimed timber, all at a fraction of the cost. Their slip-resistant finishes also make them a safe and practical choice for shower floors.
Waterproof Vinyl Planks with Wood Appearance
High-quality waterproof vinyl planking, specifically engineered for wet areas, provides another excellent alternative. These products are designed to withstand constant moisture exposure without swelling or delaminating. They feature realistic wood grain patterns and textures, offering a comfortable and warm feel underfoot. Waterproof vinyl planks are renowned for their ease of installation, often featuring click-lock or snap-together formats that are perfect for DIY shower floor projects. They typically require no sealing or special treatments beyond regular cleaning. Their cushioned surface also adds an extra layer of comfort, making shower spaces more enjoyable.
Composite Wood Products for Wet Environments
Engineered wood-plastic composites (WPCs) or similar composite decking materials formulated for outdoor, wet environments are increasingly being adapted for indoor shower applications. These innovative products combine real wood fibers with robust polymers to create a material that offers the aesthetic of wood with significantly enhanced durability and water resistance. They are designed not to warp, rot, or splinter, even under consistent moisture exposure. Many composite options also come with built-in antimicrobial protection, which is a significant advantage in preventing mold and mildew growth in shower environments. They offer a stable, low-maintenance solution that closely replicates the look and feel of natural wood.
Proper Sealing and Waterproofing Techniques for Longevity
Protecting your wooden shower floor from moisture damage is paramount to its longevity and aesthetic appeal. The right combination of sealants, meticulous application, and a consistent maintenance schedule can significantly extend the lifespan of your beautiful wood shower floor, ensuring it remains a stunning feature for many years.
Deep-Penetrating Oil-Based Sealants
Natural oil-based sealants are an excellent choice for wooden shower floors as they penetrate deep into the wood fibers. This deep penetration creates a barrier from within, protecting the wood while allowing its natural beauty and tactile feel to remain prominent underfoot. Popular choices include pure tung oil and Danish oil, which not only enhance the wood’s natural grain patterns but also create a robust, water-resistant surface. For optimal protection and a truly deep seal, it is crucial to apply multiple thin coats rather than attempting one thick layer. Each thin coat allows for better absorption and a more durable finish once cured.
Robust Marine-Grade Finishes
For the ultimate protection in highly wet environments like showers, products originally designed for boat decks and other marine applications offer unparalleled performance. Marine-grade polyurethane and epoxy finishes create an incredibly tough, impermeable waterproof barrier over the wood surface. These finishes are specifically formulated to withstand constant moisture, significant temperature fluctuations, and the wear and tear typical of shower environments without compromising the wood’s inherent beauty. While they might slightly alter the wood’s natural feel compared to oils, their superior protective qualities make them a top choice for ensuring maximum durability and resistance against water ingress.
Establishing a Maintenance Sealing Schedule
Regular maintenance is key to the enduring beauty of your wooden shower floor. Most wood shower floors benefit significantly from a sealant reapplication every 6 to 12 months, though this can vary depending on the frequency of shower use, water quality, and the specific sealant initially applied. It’s important to actively watch for visual cues that indicate the sealant is wearing thin: signs of water absorption (where water no longer beads on the surface but soaks in), or a general dullness in the finish are clear indicators that it’s time to reseal. Proactive and consistent maintenance prevents water from penetrating the wood, which could otherwise lead to staining, warping, or rot over time.
The Best Woods for Shower Floor Installation
When it comes to installing a wooden shower floor, not all wood species are created equal, especially concerning their ability to withstand constant moisture exposure. Choosing the right type of wood is perhaps the most crucial decision for ensuring the success, longevity, and low-maintenance nature of your wood shower floor.
Premium Tropical Hardwoods: Teak, Ipe, and Massaranduba
Teak (Tectona grandis) remains the undisputed gold standard for wooden shower floors. Its exceptional reputation stems from its naturally high content of protective oils and silica, which render it inherently resistant to water damage, rot, decay, and even insect infestation. With proper installation and care, a teak wood shower floor can easily last for several decades, offering unmatched durability and a rich, golden-brown hue that deepens with age. While teak is a premium option, its longevity and low maintenance often justify the investment.
Ipe (Handroanthus spp.) and Massaranduba (Manilkara bidentata) are two other tropical hardwoods that offer similar outstanding water-resistant properties to teak, often at a slightly lower cost point. Ipe is incredibly dense and durable, known for its deep brown color and resistance to decay. Massaranduba is also very hard and dense, with a reddish-brown tone, and exhibits excellent natural resistance to moisture and insects. Both are fantastic choices for high-moisture environments, providing a luxurious feel and exceptional performance.
Durable Domestic Options: Cedar and Cypress
For those seeking more sustainable or domestically sourced options, North American Cedar (Thuja occidentalis) and Cypress (Taxodium distichum) are viable choices. These woods contain natural compounds (tannins and thujaplicins, respectively) that provide inherent resistance to decay, fungi, and insects. While they generally require more frequent sealing and maintenance than tropical hardwoods to ensure optimal performance in a shower environment, their lighter tones can create brighter, more airy shower spaces. They also tend to be more readily available and often more budget-friendly than imported tropical woods, making them attractive for certain projects.
Understanding Durability Factors for Shower Woods
The durability of wood in a shower environment largely depends on its natural resistance to moisture and decay, as well as its density. Premium hardwoods like teak can withstand constant moisture exposure for 20 years or more in a properly installed wood shower. Their natural oils and tight grain prevent warping, cracking, and rot, even with daily use. In contrast, less expensive, less dense woods without proper treatment or natural resistance might show signs of deterioration, such as mold growth, discoloration, or structural weakness, within 5-7 years. Investing in quality hardwoods or ensuring rigorous sealing of suitable domestic woods will provide superior longevity and performance for your shower project, minimizing future repair or replacement costs.
Common Problems and Effective Solutions for Wooden Shower Floors
Even with the most meticulous installation and the highest quality materials, wooden shower floors may encounter issues over time, particularly given their exposure to moisture. Recognizing and addressing these problems quickly is crucial to preventing minor nuisances from escalating into more extensive and costly damage.
Addressing Mold and Mildew Issues
Mold and mildew thrive in warm, damp environments, making shower areas particularly susceptible. Growth can often occur in the gaps between wooden slats, on the wood’s surface if sealant is compromised, or underneath the entire shower floor structure. Prevention is key: ensure excellent ventilation in your bathroom and regularly clean the wood. For routine cleaning and prevention, a mild solution of white vinegar and water (typically a 1:4 vinegar to water ratio) applied with a soft brush and rinsed thoroughly can effectively deter fungal growth. For existing, stubborn mold or mildew, gently scrub the affected area with a soft brush and a paste made from baking soda and water. After scrubbing, rinse thoroughly with clean water and ensure the area is completely dried, perhaps with the aid of a fan, to prevent recurrence.
Fixing Warped or Split Wood Slats
Excessive moisture penetration, improper sealing, or significant fluctuations in humidity can cause wooden slats to warp, cup, or even split over time. For small, superficial splits, a high-quality waterproof wood filler that closely matches your wood type can be used. Apply the filler, allow it to dry completely, and then sand it smooth before re-sealing the entire board. In cases of mildly warped boards, it may sometimes be possible to gently reshape them. This can involve controlled re-wetting of the underside, applying even weight, and allowing the wood to slowly dry in the desired flat position, followed by thorough resealing once completely dry. Severely warped or split boards, however, often require replacement to maintain the floor’s integrity and appearance.
Repairing and Replacing Damaged Slats
One significant advantage of slatted wooden shower floors is that individual damaged slats can often be replaced without the need to dismantle the entire system. If you were prudent during the initial installation, keeping a few spare slats from the original batch will ensure a perfect color and grain match for seamless repairs. Carefully remove the damaged slat, clean the area, and install the new piece, securing it with stainless steel hardware. For general wear and tear, such as surface scratches or dullness, light sanding of the affected areas followed by a fresh application of sealant can refresh and restore the appearance of your wooden shower floor, significantly extending its lifespan and keeping it looking new.
Maintaining Your Wooden Shower Floor for Longevity and Beauty
Investing in a wooden shower floor brings natural beauty and a unique aesthetic to your bathroom. To ensure this investment provides lasting enjoyment and maintains its pristine appearance for years, proper and consistent care is essential. A regular maintenance schedule can effectively prevent most common problems before they even begin.
Essential Daily and Weekly Cleaning Routines
Your daily routine plays a significant role in the longevity of your wooden shower floor. After each use, make it a habit to thoroughly rinse the entire wooden surface with clean water to remove all soap residue, shampoo, and body oils, which can otherwise build up and degrade the sealant over time. Weekly, perform a more thorough cleaning using a soft-bristled brush or cloth and a mild, pH-neutral soap specifically designed for wood. Avoid harsh chemical cleaners, abrasive scrubbers, or bleach, as these can strip the sealant and damage the wood. Crucially, always squeegee or wipe off any excess water from the wooden surfaces and ensure good bathroom ventilation (e.g., running the exhaust fan for 15-20 minutes after showering) to promote rapid drying between showers. This minimizes prolonged moisture exposure, which is critical for preventing mold and preserving the wood.
Monthly Maintenance Checks and Inspections
Beyond daily cleaning, a monthly inspection of your wooden shower floor can help identify small issues before they escalate into major problems. Carefully examine the entire surface: check for any loose slats, ensuring all fasteners are secure. Look for signs of water penetration beneath the surface, such as discoloration or dark spots, which might indicate a compromised waterproof base. Pay close attention to areas where the sealant appears to be wearing thin, especially near the drain or high-traffic spots. A simple test is to observe how water beads on the surface; if water soaks into the wood rather than forming beads, it’s a clear signal that it’s time to reapply sealant to that area or the entire floor. Early detection allows for prompt, targeted repairs.
Seasonal Deep Cleaning and Resealing Processes
To ensure optimal protection and appearance, your wooden shower floor will benefit from a more intensive deep cleaning and resealing process at least twice a year, or seasonally, depending on usage. If your floor consists of removable sections, carefully lift them out. This allows you to thoroughly clean underneath, preventing hidden mold or mildew growth in the often-overlooked sub-structure. Once the wood is perfectly clean and completely dry (this might take 24-48 hours depending on humidity), apply a fresh coat of your chosen marine-grade sealant or wood oil according to the manufacturer’s instructions. Proper curing is vital for the sealant to form an effective barrier, so typically, you’ll need to allow 24-48 hours without shower use after reapplication. This seasonal care routine is the most important step in preserving the beauty and extending the lifespan of your wooden shower floor.
Combining Wood with Other Materials in Shower Design
While a wooden shower floor is a stunning feature on its own, integrating wood with complementary materials can create a more balanced, sophisticated, and durable bathroom design. Thoughtful material pairings can help protect the wood in the wettest areas while also creating eye-catching aesthetics that exude natural warmth and contemporary style.
Elegant Wood and Stone Combinations
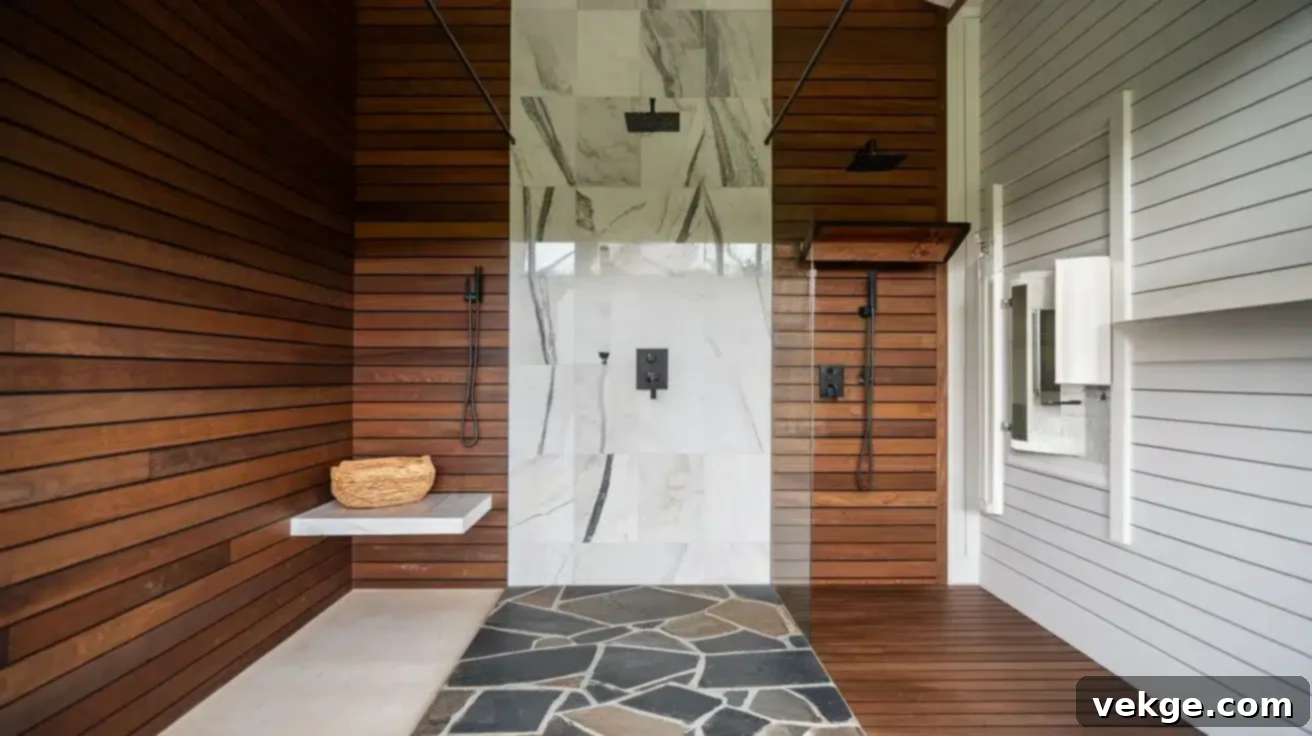
The timeless pairing of wood and stone creates a natural harmony that evokes a sense of earthy luxury in shower spaces. Consider a robust stone base for the wettest parts of the shower, such as the direct drain area or the lowest wall sections, complemented by beautiful wooden wall accents, benches, or shelving in drier zones. You can create striking contrasts by pairing dark, rich woods like walnut or ipe with light-colored marble or travertine. Alternatively, achieve a subtle, serene beauty by combining honey-toned teak with cool gray slate or pebble tiles. This combination is not only aesthetically pleasing but also practical, allowing stone to handle the constant water exposure where it’s most intense, while wood adds warmth and texture in less exposed areas, ensuring both materials thrive.
Contemporary Metal Accents with Wood Floors
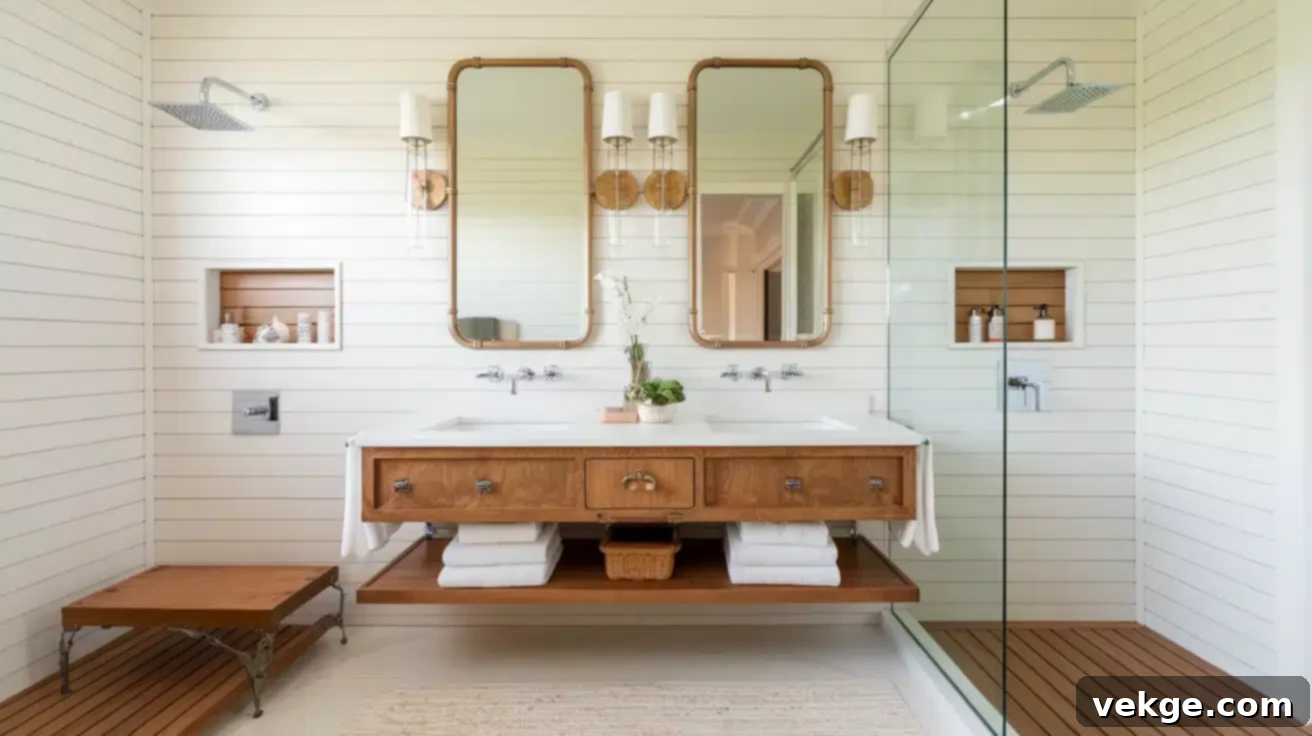
The juxtaposition of natural wood with sleek metal fixtures creates a modern and refined aesthetic. Warm-toned metals like brushed brass, antique bronze, or copper fixtures can beautifully complement and enhance the natural warmth of wooden elements in your shower, creating a cohesive and inviting atmosphere. Conversely, polished chrome or matte black fixtures can provide a striking, contemporary contrast against the organic textures and tones of a natural wood floor. Imagine a smooth wooden shower floor complemented by minimalist, sleek metal showerheads and controls. Even simple touches, like wooden shower shelves with elegant metal brackets, can add character and visual interest without overwhelming the space. This pairing balances the soft, organic qualities of wood with the hard, industrial gleam of metal for a sophisticated look.
Bright and Open Glass and Wood Shower Designs
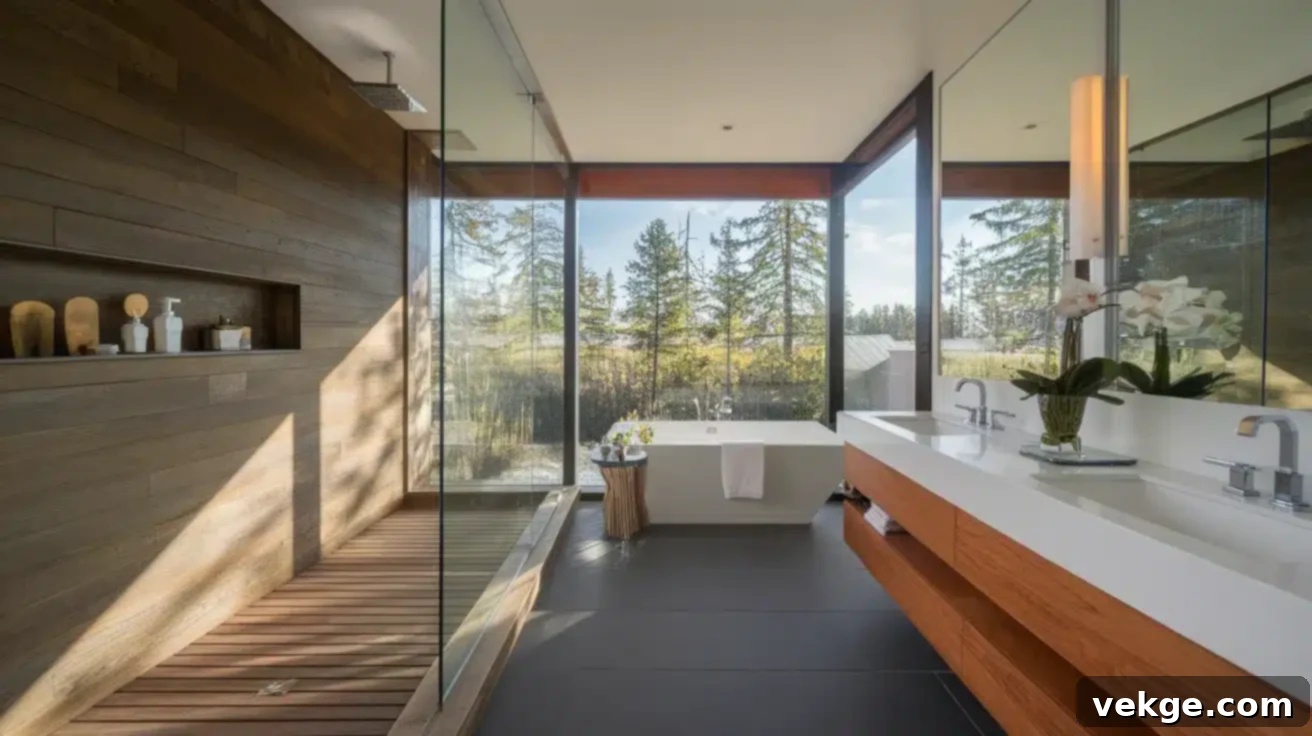
Combining glass enclosures with wooden shower floors is a brilliant design choice, especially for smaller bathrooms, as it creates an open, airy, and visually spacious environment. Glass effortlessly showcases the intricate details and natural beauty of the wooden floor from every angle, allowing the timber’s warmth to become a focal point without being visually obstructed. A frameless glass enclosure with a wooden floor can create a captivating “floating” effect, making the bathroom feel larger and more luxurious. This combination is particularly effective in modern minimalist designs. To ensure the longevity of the wood in such a design, excellent ventilation is absolutely crucial. Proper airflow helps the wood dry quickly between uses, which is paramount in preventing mold growth and extending its life, allowing the beauty of both glass and wood to shine.
Conclusion: Embrace the Natural Elegance of Wooden Shower Floors
Integrating a wooden shower floor into your bathroom design is a decision that brings unparalleled natural warmth, elegance, and a truly unique spa-like ambiance to your home. While it may seem unconventional, with the right knowledge and commitment, this luxurious feature can be both beautiful and enduring. The key lies in selecting the appropriate water-resistant woods, such as the naturally oily and durable teak, ipe, or massaranduba, or even well-treated cedar and cypress for a lighter aesthetic.
Remember, meticulous installation, featuring a properly sloped and waterproof base, coupled with efficient drainage systems, is the foundation for success. Equally important is the application of robust marine-grade sealants or deep-penetrating oils, which are crucial for protecting the wood from the constant exposure to moisture in a shower environment. This protective layer, maintained through a consistent resealing schedule, is what preserves the wood’s integrity and appearance.
Beyond the functional aspects, wooden shower floors offer immense design versatility. They pair beautifully with a variety of other materials: a stone base can elegantly highlight wooden accents, creating a grounding, natural feel. Sleek metal fixtures provide a contemporary contrast that balances soft and hard textures. And clear glass enclosures magnificently showcase the wooden details from every angle, creating a sense of spaciousness and inviting natural light.
To ensure your wooden shower features retain their fresh look and structural soundness, adhere to a regular maintenance routine. Daily rinsing and weekly cleaning with mild solutions, combined with monthly checks for any signs of wear or water absorption, are vital. Seasonal deep cleaning and reapplication of sealant are the pillars of long-term preservation. This dedicated care keeps the wood looking vibrant and prevents common issues like mold or warping.
Ultimately, wooden shower elements are more than just a functional component; they are a statement of sophisticated design. They create an inviting, comfortable underfoot experience, seamlessly bringing a touch of nature indoors, and truly set your bathroom apart from standard designs. With proper installation and diligent care, your wooden shower features will not only last for many years but will also transform your bathroom into a personal, relaxing retreat for daily enjoyment. The enduring natural beauty and the unique sensory experience are undoubtedly worth the effort.
