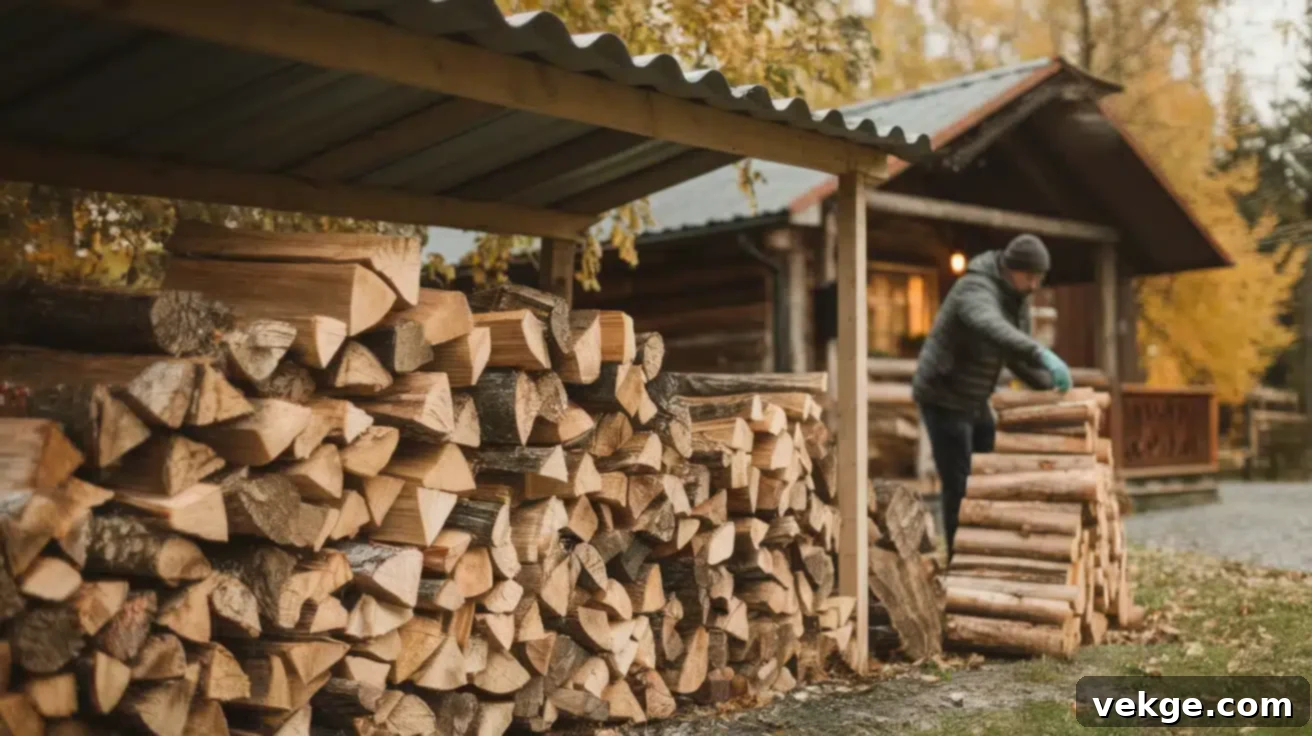
Have you ever found yourself wrestling with damp, stubbornly unlit logs on a cold evening? It’s a frustrating experience, and one that many seasoned homeowners and outdoor enthusiasts know all too well. The secret to warm, crackling fires and effortless heating isn’t just about having enough wood; it’s about storing it correctly.
Proper firewood storage isn’t merely a convenience—it’s an absolute necessity for ensuring your wood seasons effectively, burns efficiently, and remains free from pests and rot. Many people make the common mistake of stacking their wood directly on the ground or leaving it exposed to the elements. This often leads to soggy, moldy logs that refuse to ignite, attracting unwanted insects, and ultimately wasting your valuable fuel.
The good news is that you don’t need expensive commercial solutions or advanced carpentry skills to create excellent firewood storage. From straightforward DIY racks to simple, roofed designs, keeping your firewood dry, seasoned, and readily accessible is much simpler than you might imagine. This comprehensive guide will walk you through various do-it-yourself firewood storage projects that cater to different spaces, budgets, and skill levels. We’ll also share essential tips for optimal stacking, pest prevention, and maintaining your wood in pristine condition throughout the year, guaranteeing a steady supply of perfect fuel for every fire.
DIY Firewood Storage Solutions: Build Your Perfect Log Stack & Keep Wood Dry
Creating your own firewood storage can be incredibly rewarding and cost-effective. These personalized solutions not only save money but also allow you to tailor the design specifically to your needs and the aesthetics of your property. Forget complicated blueprints or specialized tools; the following three projects are designed to be simple, budget-friendly, and require minimal construction expertise, making them perfect for any homeowner looking to improve their firewood management and ensure their wood stays perfectly seasoned.
Simple & Effective DIY Firewood Storage Ideas You Can Build Today
Sometimes, the most brilliant storage solutions are the ones you craft with your own hands. These DIY projects prove that effective firewood storage doesn’t have to be complex or costly. They offer practical ways to protect your wood from moisture and ensure optimal airflow, which is crucial for proper seasoning and efficient burning. Let’s explore some accessible designs that you can tackle this weekend to transform your firewood storage.
1. The No-Tools Firewood Rack: Quick, Easy, and Adaptable for Any Space
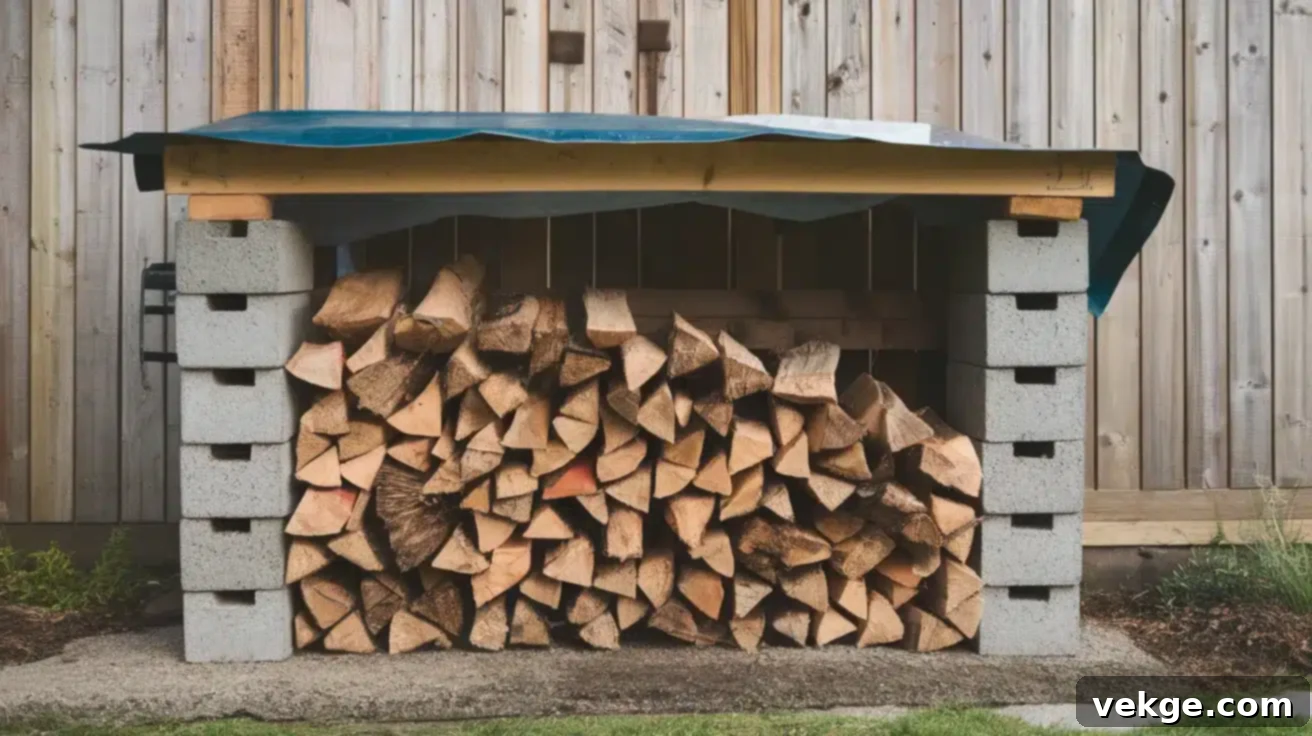
If you’re looking for the fastest and most straightforward way to get your firewood off the ground without picking up a single hammer or drill, this “no-tools” rack is an absolute game-changer. I personally assembled one last fall when an unexpected cold snap hit, and I needed immediate, temporary storage before winter truly set in. It’s incredibly simple, requires no fasteners, and can be easily expanded or disassembled as needed, making it ideal for temporary or flexible storage needs.
What you’ll need:
- Durable concrete blocks (typically 8x8x16 inches, readily available at any hardware store or salvaged from old projects)
- Several 2×4 lumber pieces (the length will determine the depth of your stack; typically 16-24 inches to accommodate standard log lengths)
- A few landscape timbers or long pieces of pressure-treated lumber (for the horizontal supports that bear the weight of your firewood)
The beauty of this design lies in its simplicity—no nails, screws, or power tools are required. It relies on gravity and proper weight distribution to hold everything securely, making it a truly beginner-friendly DIY project.
Step-by-Step Instructions for Your No-Tools Firewood Rack:
- Set the Base: Place two concrete blocks on a level, firm surface, spaced about 4-6 feet apart (depending on the length of your firewood and desired stack size). Ensure they are as level as possible to provide a stable foundation.
- Add Vertical Supports: Lean two 2x4s against the inside holes of each concrete block, creating an “A-frame” like structure on both ends of where your wood will sit. These vertical supports provide stability and contain the stack, preventing logs from rolling off.
- Lay Horizontal Timbers: Carefully lay your landscape timbers or long 2x4s across the concrete blocks, resting them between the leaned 2x4s. These will form the elevated base upon which your firewood will sit, critically keeping it off the damp ground and promoting airflow underneath.
- Stack Your Wood: Begin stacking your firewood neatly between the vertical 2x4s. Remember to leave small gaps for optimal air circulation.
- Expand as Needed: If you require more storage capacity, simply repeat the process. Add more concrete blocks, 2x4s, and landscape timbers to extend the length of your rack indefinitely.
For temporary rain protection, especially during unexpected showers, you can easily throw a heavy-duty tarp over the top of the stack and secure it with a few heavy rocks or bungee cords. This design is perfect for seasonal use, or for those who prefer a flexible storage solution that can be easily put away when not in use.
2. The Covered Firewood Rack: Superior Protection from Harsh Elements
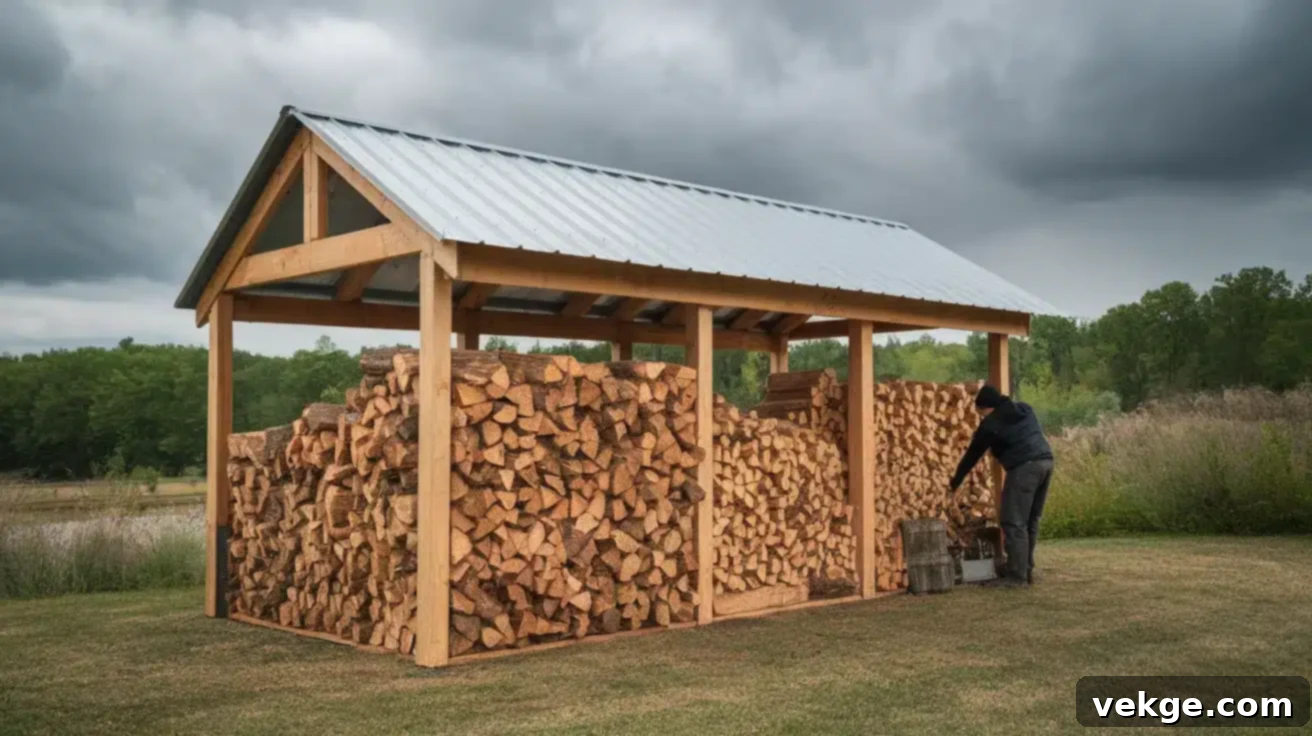
When I relocated to an area notorious for its persistent rain and heavy snowfall, I quickly realized that basic ground-level storage wouldn’t suffice. My wood was constantly damp, leading to smoky fires, frustrating attempts to get them started, and even mold growth. This covered firewood rack became my salvation, offering significantly enhanced protection from moisture and allowing my wood to season properly. The addition of a sloped roof makes all the difference, channeling rain and snow away from your precious fuel, ensuring it stays dry through the harshest weather.
Essential Materials:
- Pressure-treated 2x4s (for durability against rot and insects, as they will be exposed to weather. Essential for the frame.)
- Exterior-grade wood screws (to prevent rust and ensure a strong, lasting structure capable of holding a heavy load)
- Corrugated roofing panels (such as polycarbonate, metal, or asphalt sheeting, specifically designed to shed water efficiently)
- Optional: Post anchors or concrete footings (for more permanent installation, especially in windy areas, adding extra stability)
Building a covered rack involves a bit more construction than the no-tools version, but the investment in time and materials pays off immensely in the quality of your seasoned wood and the convenience of having dry fuel on demand.
Follow These Steps to Construct Your Covered Firewood Rack:
- Build the Frames: Construct two identical or slightly different rectangular frames using your pressure-treated 2x4s. One will form the front of your rack, and the other the back. The back frame should be slightly taller than the front frame to create the necessary slope for the roof.
- Connect with Braces: Use additional 2x4s to connect the front and back frames, forming the depth of your rack. Install horizontal braces at the top and bottom, as well as diagonal bracing, to make the entire structure rigid and strong enough to support a heavy load of wood and the weight of the roof (especially important in snowy climates).
- Install the Sloped Roof: This is the most crucial step for weather protection. Attach purlins (smaller horizontal supports) across the top, extending from the taller back frame to the shorter front frame. Then, securely fasten your chosen roofing panels to these purlins, ensuring they overlap correctly to prevent any leaks. The intentional slope will naturally direct water runoff away from your firewood, keeping it pristine.
- Elevate the Base: Just like with any outdoor storage, ensure the base of your covered rack is elevated off the ground using concrete blocks, bricks, or even small pressure-treated runners. This prevents moisture wicking up into the bottom layer of wood and promotes continuous airflow.
Since building this covered rack, my wood has remained consistently drier, leading to hotter, cleaner-burning fires every time. It’s a worthwhile project for anyone living in a climate with significant rainfall or snowfall, guaranteeing superior protection for your valuable firewood supply.
3. Repurposed Metal Fire Ring Firewood Rack: Stylish & Functional Patio Storage
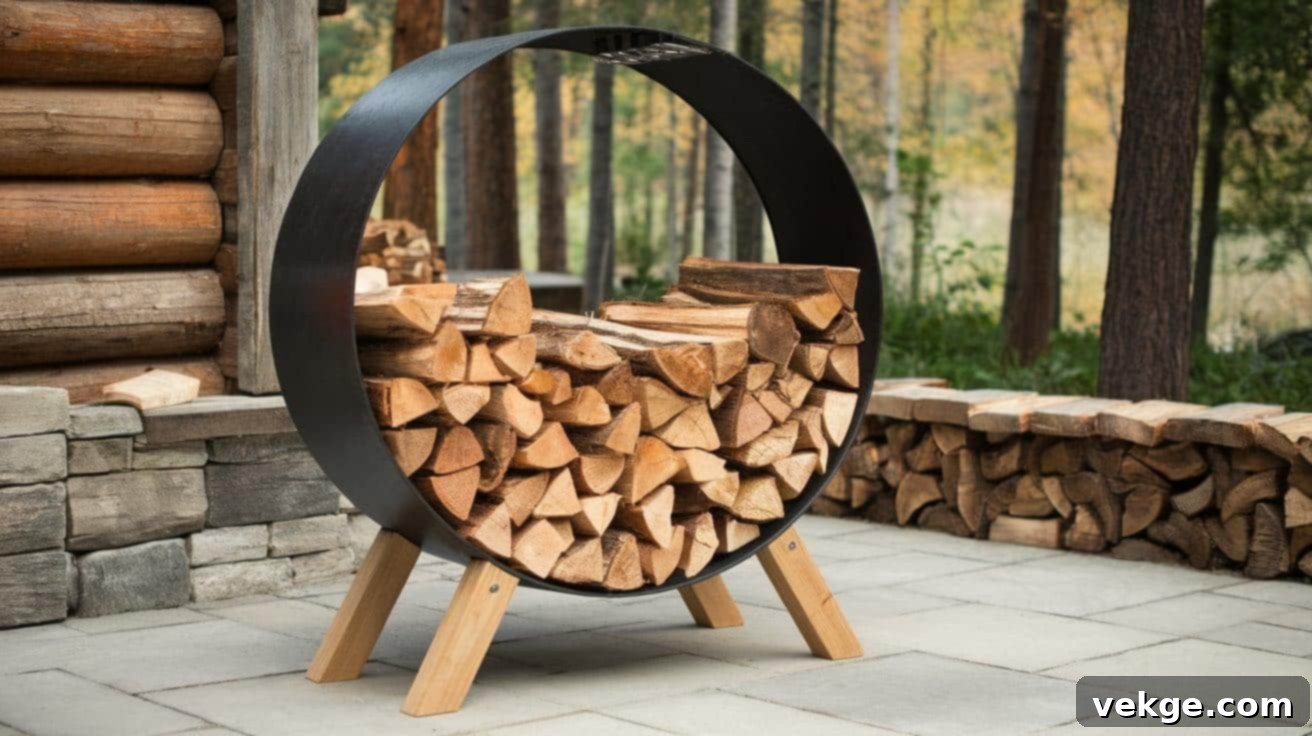
Do you have an old metal fire pit ring, a large metal drum, or a similar sturdy metal circle sitting idle? Don’t let it go to waste! With a little creativity and effort, you can transform it into a unique and attractive circular firewood rack. This design is not only functional for holding a moderate amount of wood but also adds a rustic, stylish touch to your patio, deck, or outdoor fireplace area. It’s often a conversation starter, with friends frequently asking where I purchased mine, never guessing it was a DIY creation!
What you’ll need:
- An old metal fire pit ring, a large metal drum (cut in half lengthwise for a semi-circle design), or a similar sturdy metal circle.
- Metal-specific primer and rust-resistant exterior paint (available in various colors to match your outdoor decor).
- Small wooden legs or sturdy metal feet (e.g., cut pieces of 2×4, or robust metal angles/brackets)
- Screws suitable for metal and wood, or bolts if connecting metal to metal, ensuring strong, lasting connections.
- A drill with appropriate bits for metal (carbide-tipped bits work best for metal).
Step-by-Step Instructions for Your Repurposed Metal Rack:
- Clean and Prep the Metal: Thoroughly clean the metal ring, removing any dirt, loose rust, or debris. A wire brush or sandpaper can be effective for removing stubborn rust. Once clean, apply a metal-specific primer to ensure paint adhesion, followed by a few coats of rust-resistant exterior paint. This will protect the metal from further corrosion and give it a fresh, appealing look.
- Add Elevated Legs: To ensure proper airflow and prevent moisture wicking up from the ground, you must lift the ring. Attach small wooden legs (e.g., 4×4 or 2×4 blocks cut to size) or sturdy metal feet to the bottom of the ring using screws or bolts. Ensure these legs provide at least 4-6 inches of clearance from the ground. This elevation is critical for promoting drying and deterring pests.
- Drill Drainage Holes: This is a crucial step for any outdoor metal container. Drill several small holes (1/4 to 1/2 inch in diameter) in the very bottom of the metal ring, spaced evenly. These holes will allow any trapped rainwater or condensation to escape, preventing the bottom logs from sitting in moisture, which can lead to rot and mold.
- Stack Your Wood: Once assembled, painted, and fully dry, simply stack your firewood neatly within the circular frame. This rack is ideal for holding a weekend’s worth of logs, making it incredibly convenient for frequent use near a fire pit or outdoor fireplace without needing a massive, unsightly pile.
This upcycled solution not only looks fantastic and adds character to your outdoor living space but also serves as an efficient way to keep a small, manageable supply of firewood dry and ready for immediate use, especially in a visible area where aesthetics matter.
Understanding Different Types of Firewood Storage Solutions
Beyond DIY projects, it’s important to understand the various forms firewood storage can take, each designed to meet specific needs regarding capacity, protection, and aesthetics. Choosing the right storage method significantly impacts how well your firewood seasons and burns, ultimately affecting the warmth and efficiency of your fires. Let’s explore some common options that work for different requirements and available spaces.
1. Dedicated Firewood Racks: The Backbone of Efficient Outdoor Storage
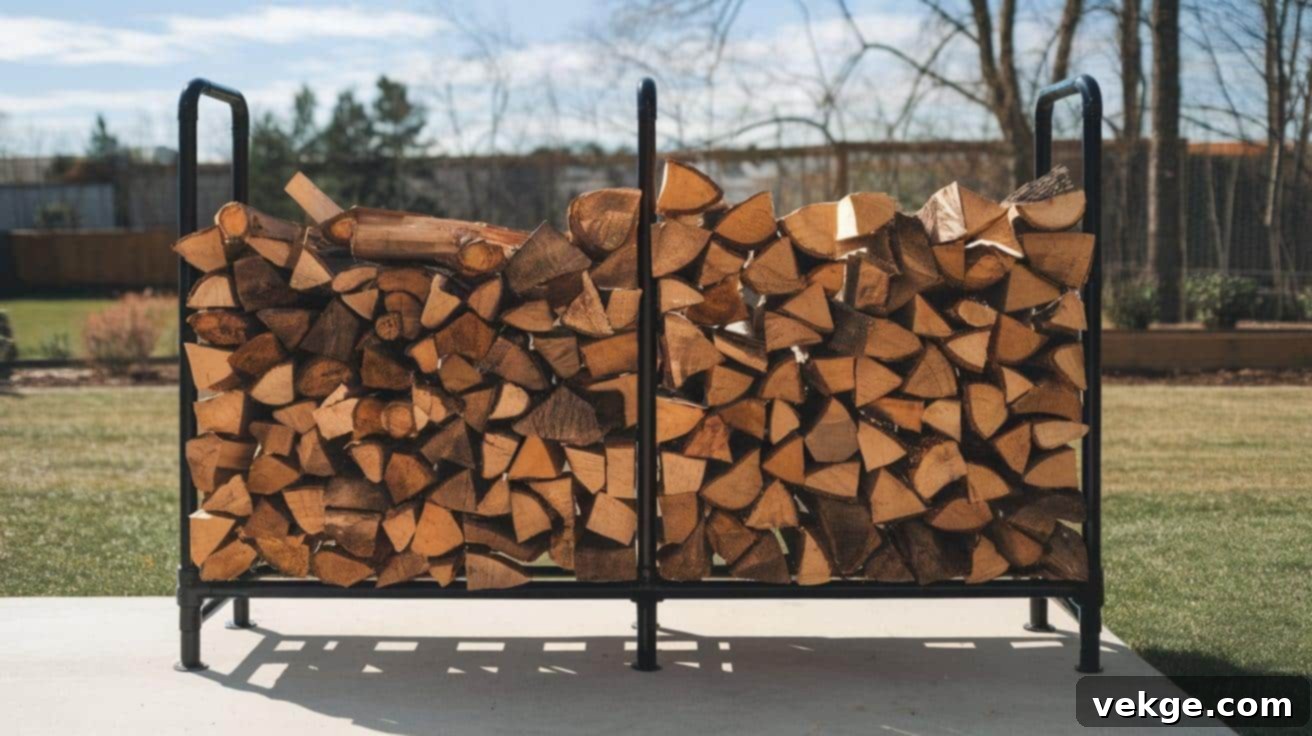
Firewood racks are perhaps the most popular and versatile outdoor storage option. Their primary function is threefold: to lift wood off the damp ground, to keep it neatly organized, and most importantly, to allow for crucial air circulation around the entire stack. This elevation and constant airflow are vital for the seasoning process, which dries out green wood and makes it burn more efficiently, with less smoke, and produce more heat.
You can find commercial metal racks in various sizes and designs, often made from powder-coated steel for durability. Alternatively, as my neighbor did, you can easily construct a simple, effective rack from scrap lumber, old pallets, or even sturdy metal pipes within an hour or two. My neighbor swears by his homemade pallet rack, claiming his wood dries noticeably faster now compared to when he simply stacked it on the ground. When designing or choosing a rack, always look for options that are sturdy enough to bear significant weight, weather-resistant, and, crucially, allow for maximum ventilation on all sides. Some racks come with optional covers, which can add an extra layer of protection from direct rain and snow while still allowing the sides to breathe and the wood to season effectively.
2. Indoor Log Holders: Convenience and Style for Your Hearth
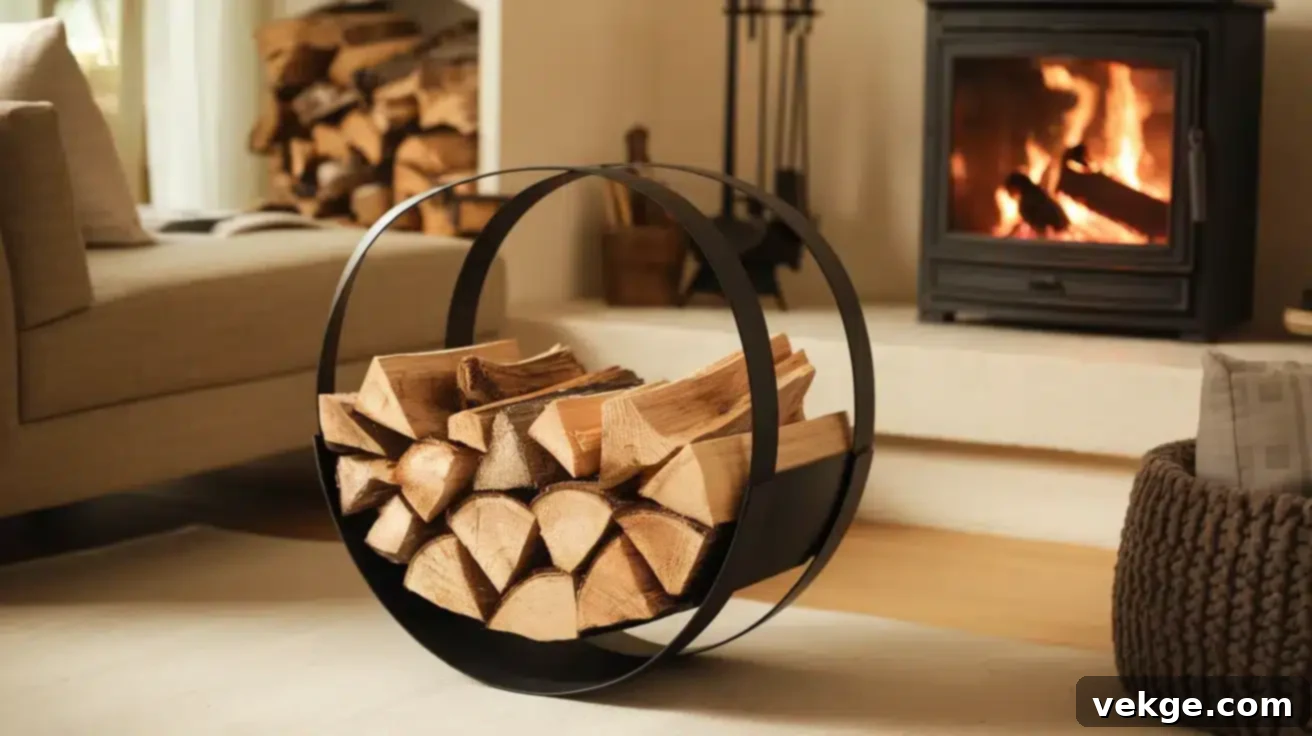
Once your firewood is properly seasoned outdoors, you’ll want a convenient and tidy way to bring a small supply indoors for immediate use. This is where indoor log holders become indispensable. These smaller, often more decorative units sit near your fireplace, wood stove, or outdoor fire pit, keeping a night’s or two’s worth of logs tidy, accessible, and ready to be thrown on the fire. Their primary benefit is convenience, minimizing trips outside in inclement weather.
I absolutely love my indoor log holder because it drastically reduces the number of trips I need to make outside in the freezing cold or pouring rain. Beyond their practical utility, many indoor log holders are designed to be aesthetically pleasing, complementing your living room decor. They come in various materials like elegant wrought iron, sleek steel, or even charming woven baskets, allowing you to choose one that perfectly matches your home’s style. Remember, these are strictly for *seasoned* wood only; bringing green or wet wood indoors can introduce pests, mold, and excessive moisture into your home, which is something you definitely want to avoid.
3. Firewood Sheds: The Ultimate Long-Term Storage Solution for Bulk Wood
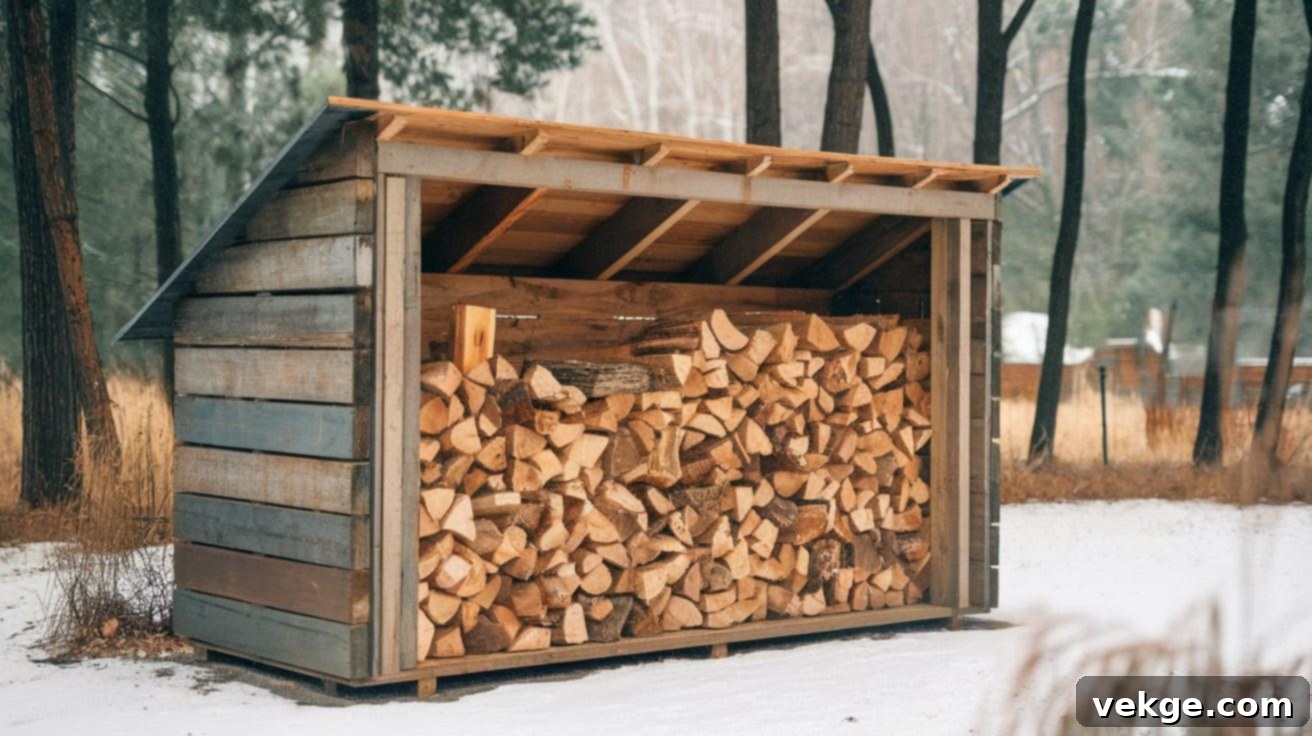
For serious wood burners, homesteaders, or those who heat their homes primarily with wood, a dedicated firewood shed offers the best long-term, high-capacity storage solution. These robust structures are specifically designed to provide maximum protection from rain, snow, and excessive humidity while still ensuring ample airflow for optimal seasoning of large quantities of wood. My dad, who relies heavily on his wood stove in the winter, built a robust firewood shed from leftover fence boards and swears by it; his wood stays perfectly dry all winter long, year after year, ready for efficient burning.
A firewood shed doesn’t need to be an elaborate, airtight structure. In fact, a good shed is quite the opposite. The key features are a sturdy, watertight roof to shed water, a raised floor to prevent ground moisture from wicking up, and importantly, open or slatted sides (or generous vents) that allow air to circulate freely through the entire stack. Some designs incorporate a solid back wall for added protection from prevailing winds or snowdrifts. Whether you build one from scratch using lumber and roofing materials, or purchase a pre-fabricated kit, a well-designed firewood shed is a significant investment that pays dividends in perfectly dry, ready-to-burn wood, season after season, by maximizing seasoning efficiency and minimizing spoilage.
Choosing the Right Firewood Storage Method for Your Needs
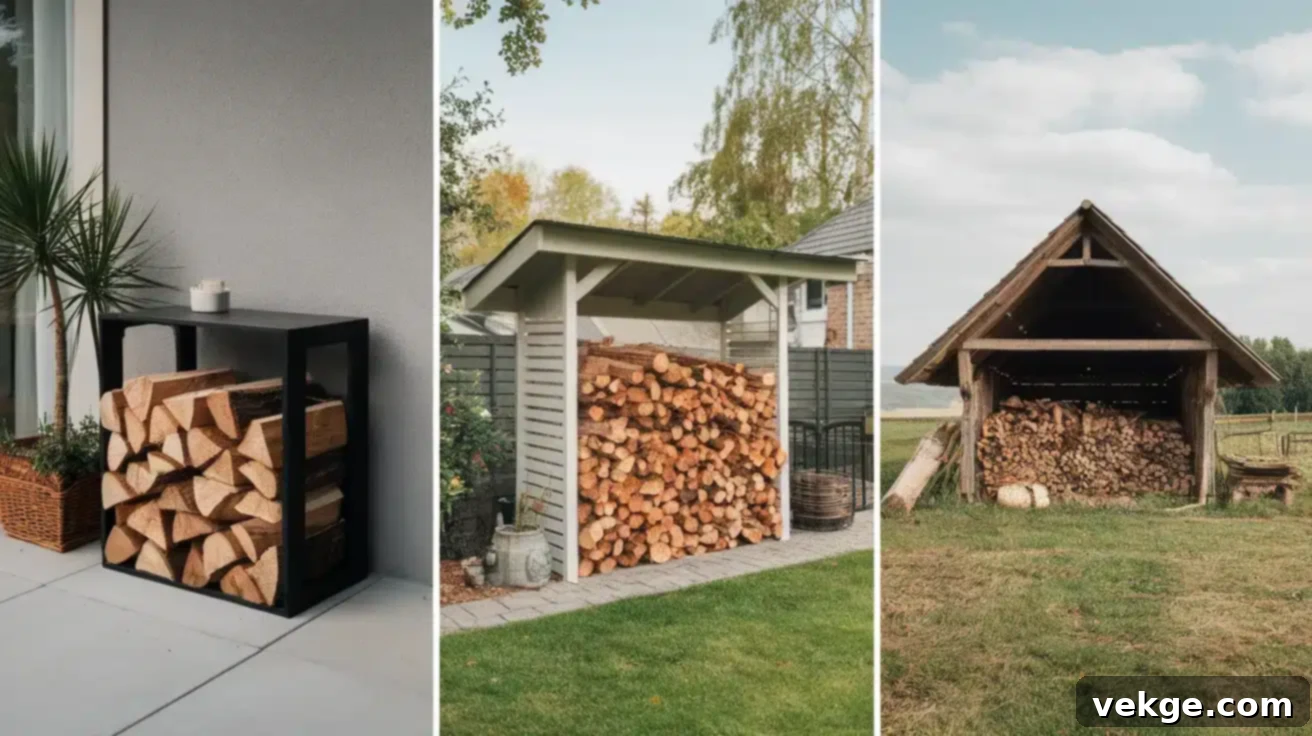
With several effective options available, finding the perfect way to store your firewood requires carefully considering your specific circumstances. A thoughtful approach ensures you select a solution that is not only effective but also practical, aesthetically pleasing, and sustainable for your home and lifestyle. Let’s delve into the critical factors that should guide your decision-making process for optimal firewood management.
Key Factors to Consider: Space, Budget, and Local Climate
Before committing to a particular firewood storage solution, take stock of your available resources and environmental conditions. These three factors are interconnected and will heavily influence the most suitable choice for you:
- Available Space: The size and layout of your yard, patio, or garage play a significant role. A small urban patio might only accommodate a compact metal rack or a repurposed fire ring, whereas a spacious backyard offers the luxury of a full-sized firewood shed. Consider not only the footprint of the storage unit but also the clearance needed around it for adequate air circulation and easy access. Additionally, think about the desired proximity to your home for convenience versus the necessary distance for pest control and fire safety (more on this in the safety section).
- Budget Constraints: Your financial resources will heavily influence your choice. Simple DIY racks made from pallets or concrete blocks can cost next to nothing if you use reclaimed materials. Building a covered rack or a shed, however, will require an investment in new lumber, roofing, and fasteners. While these are often more durable and provide superior protection, commercial racks and sheds also vary widely in price. Setting a realistic budget upfront is crucial. Sometimes, spending a little more upfront on quality materials can save you headaches, wasted firewood, and repair costs in the long run.
- Local Climate Conditions: This is arguably one of the most critical factors. If you live in an area prone to heavy rainfall, persistent humidity, or significant snowfall, robust protection is non-negotiable. A simple open rack might suffice in a very dry climate, but regions with a lot of precipitation demand a roofed structure like a covered rack or a full shed. I learned this the hard way when my first open wood pile quickly became saturated after a week of spring rains, rendering much of it useless and difficult to burn. Always factor in average rainfall, snow accumulation, and prevailing winds when planning your storage. Adequate ventilation becomes even more paramount in humid environments to prevent mold, mildew, and fungal growth.
Comparison of Firewood Racks, Indoor Holders, and Sheds
To help you weigh your options and make an informed decision, here’s a quick comparison highlighting the strengths and ideal uses for each common type of firewood storage:
| Feature | Firewood Racks (Open/DIY) | Indoor Log Holders | Firewood Sheds (Covered) |
|---|---|---|---|
|
Typical Cost |
Low ($20-100 for materials, or potentially free with reclaimed items) |
Low to Medium ($30-150 for aesthetic appeal and convenience) |
Medium to High ($100-500+ depending on size, materials, and complexity) |
|
Weather Protection |
Limited (requires tarp for top protection, sides generally exposed for airflow) |
Complete (sheltered inside your home, safe from all outdoor elements) |
Good to Excellent (roofed, raised floor, open/slatted sides for optimal airflow, designed for long-term outdoor use) |
|
Storage Capacity |
Medium (typically 1/4 to 1 cord, easily expandable by adding more units) |
Small (enough for 1-2 days’ worth of burning, designed for quick access) |
Large (1-4+ cords, ideal for storing an entire season’s supply of wood) |
|
Ease to Build/Assemble |
Very Easy (minimal tools, often simple DIY or pre-made kits) |
Easy (many are pre-assembled or require very simple assembly) |
Moderate (requires basic carpentry skills, tools, and more planning) |
|
Expected Lifespan |
2-5 years (depends heavily on materials, weather exposure, and construction quality) |
5+ years (protected indoors, so materials last longer) |
10+ years (durable construction, use of weather-treated materials for longevity) |
|
Best For |
Small spaces, tight budgets, seasonal wood use, temporary storage, basic seasoning |
Daily convenience, keeping indoor areas clean, aesthetic appeal near a fireplace |
Long-term storage, serious wood users, harsh climates, maximizing wood seasoning and protection |
Essential Firewood Stacking and Storage Best Practices
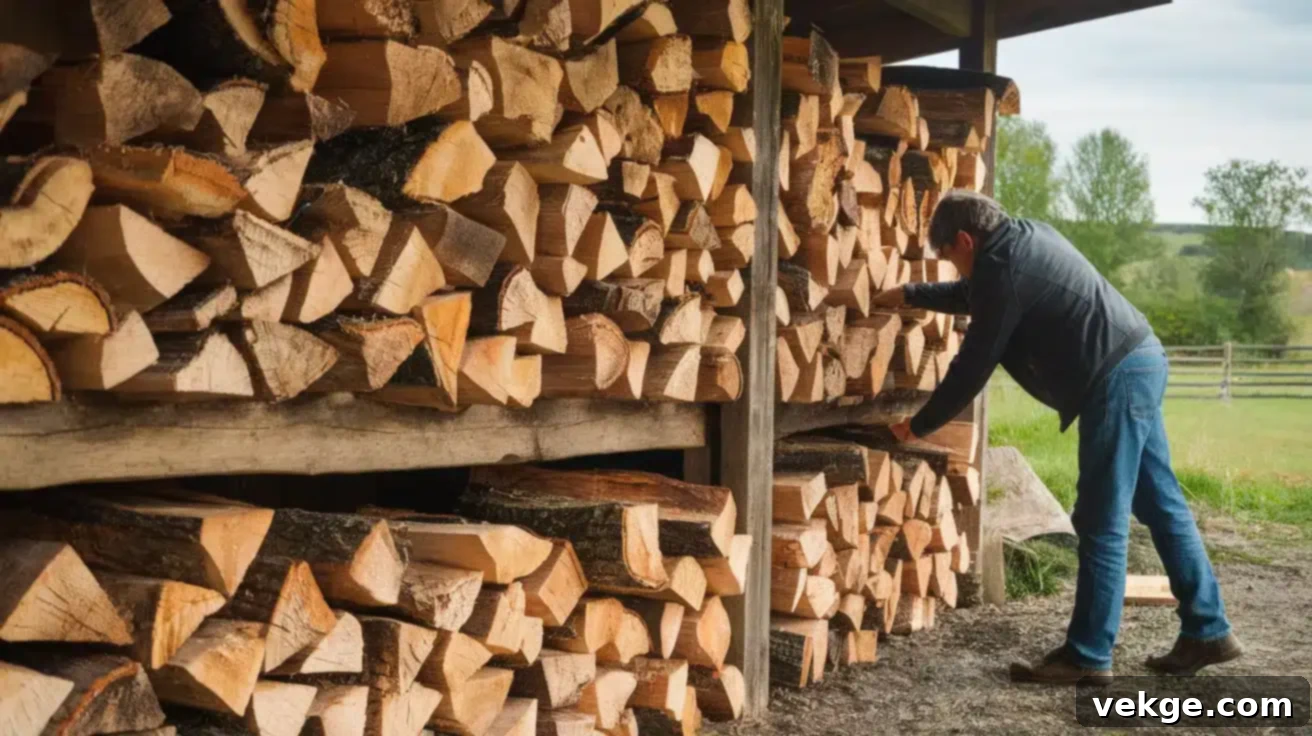
Beyond simply having a structure, how you stack your firewood is just as crucial as where you store it. Proper stacking techniques maximize airflow, expedite the seasoning process, and protect your wood from moisture and pests. Implementing these simple yet effective tips will ensure your firewood stays dry, healthy, and ready to provide efficient heat whenever you need it most, enhancing your overall wood-burning experience.
Mastering Proper Airflow Techniques for Optimal Seasoning
The fundamental goal of stacking firewood is to allow as much air as possible to circulate freely through and around the pile. This continuous airflow is what dries (seasons) the wood, reducing its moisture content and making it burn hotter, cleaner, and more efficiently. Never stack wood too tightly, as this traps moisture, slows down drying, and actively encourages mold and fungal growth. Instead, aim for controlled looseness:
- Leave Consistent Gaps: Ensure small, consistent gaps (about 1 inch) between individual logs as you stack them. Think of it like building a loose brick wall, not a solid, impermeable one. These gaps act as vital channels for air to flow through the entire stack, facilitating evaporation.
- Bark Up for Protection: When stacking logs, especially in the top layers of an uncovered or partially covered pile, try to place them with the bark side facing upwards. The bark acts as a natural, albeit limited, shield, shedding rain and snow more effectively than the exposed cut ends or interior wood, reducing direct moisture absorption.
- Cross-Stacking for a Stable Base: For the very bottom layer, consider cross-stacking a few logs perpendicular to the main stack or creating a small, stable “crib” at the ends of your pile. This creates a stable, elevated platform that allows air to flow underneath the entire pile, preventing ground moisture from wicking up into your bottom logs and initiating rot.
- Exposed Ends to the Elements: Position your stack so that the cut ends of the logs are exposed to the sun and wind. This is where most of the moisture escapes during the seasoning process, so maximizing their exposure will significantly speed up drying time.
- Avoid Overly Tall Stacks: While maximizing space, extremely tall, narrow stacks can be unstable and dangerous. Aim for a height that is easy to manage and less prone to collapse, especially if you have children or pets around.
By prioritizing airflow, you significantly reduce the seasoning time and improve the overall quality of your firewood. Properly seasoned wood will sound hollow when struck, be noticeably lighter than green wood, and have visible cracks or “checks” on its ends, indicating low moisture content.
Strategic Placement for Outdoor Firewood Storage
Where you locate your outdoor firewood storage unit is vital for both drying efficiency and, critically, home safety:
- Maintain Distance from Structures: Always keep your main outdoor woodpile a safe distance from your house, garage, shed, or any other wooden structures. A general rule of thumb is at least 20 feet. This isn’t just a crucial fire safety measure to prevent fire spread; it’s also paramount for pest control, as woodpiles are attractive homes for insects and rodents, which you definitely don’t want migrating into your home’s foundation or walls.
- Maximize Sun and Wind Exposure: Choose a spot that receives ample direct sunlight and is exposed to prevailing winds throughout the day. Sun helps to evaporate moisture, while consistent wind carries it away, drastically speeding up the drying process. My wood dries much faster and more thoroughly in my sunny, south-facing yard compared to the shady, sheltered spot I used to use, illustrating the impact of strategic placement. Avoid deep, perpetually shaded corners where air stagnates.
- Elevated and Well-Drained Ground: Even if you have a rack or shed, ensure the ground beneath is well-drained. Avoid low-lying areas that collect puddles after rain or snowmelt, as this will introduce excessive moisture. A slight natural slope away from the stack is ideal for water runoff.
- Accessibility: Consider how easily you can access the wood, especially during winter. You don’t want to trudge through deep snow or mud every time you need to retrieve logs.
How to Effectively Prevent Pests and Moisture Damage
Keeping your firewood free from pests and moisture damage requires a multi-faceted and consistent approach. These measures not only protect your wood but also your home:
- Elevate Off the Ground: This is a non-negotiable step. Use sturdy pallets, concrete blocks, or dedicated rack bases to lift your wood at least 4-6 inches off the ground. This elevation prevents moisture absorption from damp soil and creates a critical physical barrier against crawling insects like termites, ants, spiders, and other undesirable critters.
- Cover Only the Top: While a roof or tarp is absolutely essential to protect from direct rain and heavy snow, resist the urge to completely wrap or enclose your woodpile with a tarp. Covering the sides prevents necessary air circulation, trapping moisture and creating a perfect, humid breeding ground for mold, mildew, fungi, and insect infestations. Only cover the top, allowing the sides to remain open and exposed to the air for drying.
- Shake and Inspect Logs Before Bringing Inside: Before bringing any logs indoors for your fireplace or wood stove, give them a good shake or knock them together outside. This simple action dislodges any hitchhiking spiders, ants, or other insects that might be sheltering in the bark or crevices. Also, quickly inspect for any signs of mold or excessive moisture.
- Maintain a Clear Surrounding Area: Keep the grass, weeds, and any other vegetation trimmed and clear around your firewood pile. Dense vegetation can hold moisture, reduce airflow, and provide ideal cover for pests, making it easier for them to access your wood. A clear, dry perimeter helps to naturally deter unwanted visitors.
- Rotate Your Stock: If possible, practice “first in, first out” with your firewood. Use the oldest, most seasoned wood first. This prevents logs from sitting for too long and becoming susceptible to decay or deep-seated insect issues.
Firewood Storage Safety: Protecting Your Home and Health
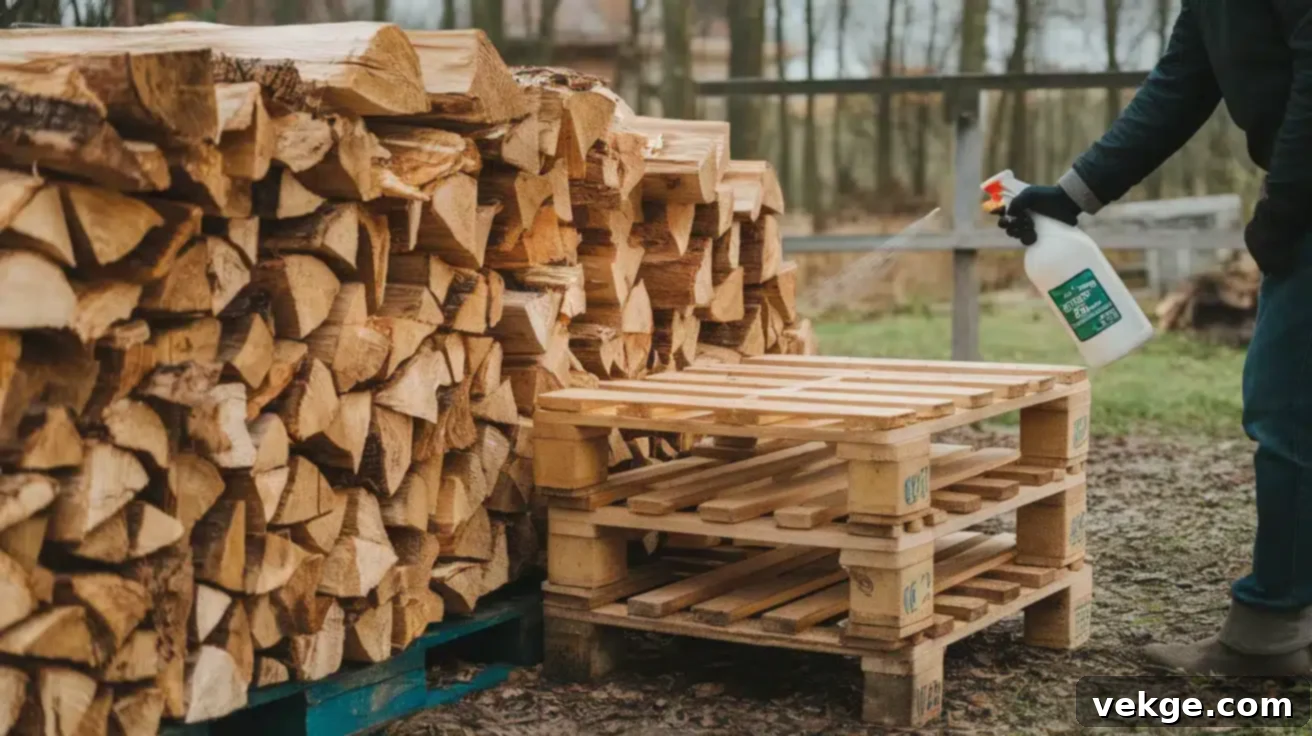
Beyond convenience and wood quality, safe firewood storage is paramount for protecting your home, preventing pest infestations, and ensuring a healthy living environment. A few simple precautions can save you significant trouble, expense, and potential hazards down the road. Thinking ahead about safety measures ensures your cozy fires remain just that—cozy, efficient, and, most importantly, safe.
Optimal Distance for Firewood from Your Home and Other Structures
One of the most crucial safety considerations is the strategic placement of your main outdoor woodpile. It might seem convenient to stack logs right against your house or garage for easy access, but this practice carries several significant risks:
- Pest Infestation: Firewood piles are ideal habitats for a wide variety of insects, including termites, ants (especially carpenter ants), spiders, earwigs, and even rodents. Storing wood directly against your home provides these pests with a direct bridge to enter your living space. I learned this lesson firsthand when I stored a small stack against my garage wall and soon found ants migrating into my kitchen. It’s a hassle you definitely want to avoid!
- Fire Hazard: While properly seasoned firewood is relatively stable, a large, dense stack of wood stored near your home can quickly become a significant fuel source in the event of an outdoor fire, a stray ember escaping your chimney, or even a wildfire. Maintaining a clear space between the woodpile and any structure acts as a critical fire buffer zone.
- Moisture Accumulation and Structural Damage: Stacking wood directly against a structure can trap moisture between the wood and the wall, especially if there’s no air gap. This trapped moisture can lead to mold, mildew, rot, and potential structural damage to your home’s siding or foundation over time.
Therefore, it is strongly recommended to keep your main outdoor woodpile at least 20 feet away from your house, garage, shed, or any other wooden structures. If space is severely limited, aim for an absolute minimum of 10 feet, and ensure there’s absolutely no direct contact with the building’s foundation, siding, or any flammable materials. A slightly longer walk to retrieve wood is a very small price to pay for peace of mind and the long-term integrity and safety of your home.
Proactive Measures to Prevent Mold, Rot, and Insect Infestations
The health of your firewood directly impacts the health of your home and the efficiency of your fires. Wet wood is a prime breeding ground for a host of problems that can quickly diminish the quality of your fuel and create hazards:
- Mold and Rot: Continuously wet or poorly ventilated firewood will quickly develop mold, mildew, and eventually rot. Moldy wood burns poorly, produces significantly more smoke and creosote buildup in your chimney, and can even release allergenic spores into the air when brought inside, potentially triggering allergies or respiratory issues for sensitive individuals. Rotting wood loses its heat value and can become completely unusable.
- Insect Infestations: Damp, decaying wood is an irresistible magnet for various wood-boring insects, termites, carpenter ants, and other pests seeking shelter and food. Once established in your outdoor woodpile, these pests can easily find their way into your home if the pile is too close or if infested logs are brought inside without proper inspection.
To actively prevent these common and costly issues:
- Elevate Your Wood Without Exception: As emphasized before, lift the entire stack off the ground using pallets, concrete blocks, or a dedicated rack. This creates a critical air gap (at least 4-6 inches) and breaks the bridge for ground-dwelling pests while preventing moisture wicking.
- Ensure Ample Airflow: Never completely cover the sides of your woodpile with tarps or solid materials. Air circulation is your best friend against moisture and humidity, which are the primary drivers of mold, mildew, and insect activity. A covered top with open sides is the ideal setup.
- Avoid Dead Air Zones: Don’t stack wood in damp, perpetually shaded areas with poor air circulation. These stagnant conditions are ideal for fungal growth and pest harborage. Choose sunny, airy spots.
- Natural Pest Deterrents (Supplemental): While not a replacement for proper stacking, some people use natural deterrents. For example, spraying your pallets or the ground immediately around your pile with a diluted vinegar solution each spring can help deter some crawling insects. Planting certain herbs like marigolds or chrysanthemums nearby, which are known to repel certain pests, can also offer some supplementary protection.
- Burn Seasoned Wood Only: Make it a strict rule to only bring well-seasoned, dry wood indoors. Wet or “green” wood will burn inefficiently, produce more smoke, and significantly increase the likelihood of introducing pests and excess moisture into your home.
- Store Indoors for Short Periods: Only bring enough firewood inside for 1-3 days of burning at a time. This minimizes the duration any potential pests might have to establish themselves indoors and keeps your indoor air quality better.
By diligently following these safety guidelines and best practices, you ensure that your firewood is not only ready to burn efficiently and cleanly but also poses no threat to the structural integrity or health of your cherished home. Enjoy your fires with complete peace of mind!
Conclusion: Enjoy Warm, Trouble-Free Fires with Proper Firewood Storage
You’ve now armed yourself with all the essential tools, techniques, and insights needed to create your own perfect firewood storage system! We’ve journeyed through simple, budget-friendly DIY racks made with common materials, explored the benefits of robust covered structures for superior weather protection, and even considered repurposing creative solutions for stylish patio storage. We’ve also delved into the crucial factors of space, budget, and climate, alongside best practices for optimal stacking, diligent pest prevention, and, most importantly, comprehensive safety measures.
The true beauty of these customizable solutions lies in their adaptability; you can tailor any project to perfectly match your available resources, skill level, and the specific demands of your local environment. Whether you opt for a quick no-tools rack for temporary needs, a robust covered shelter for year-round protection, or a long-term firewood shed for bulk storage, the effort you invest now will undeniably pay off in the long run.
I can still vividly recall the significant improvement in my quality of life once I transitioned from haphazard, damp piles to organized, proper firewood storage. No more exasperating struggles with soggy, reluctant logs that refused to catch fire, filling my home with smoke. No more unwelcome surprises of insects scurrying out onto my living room floor as I brought in a fresh batch of wood. Instead, there was just the satisfying consistency of clean, perfectly dry, and ready-to-burn wood, always there precisely when I needed it, contributing to countless warm and inviting evenings by the fire.
Ultimately, investing time and effort in a well-designed firewood storage system isn’t just about managing logs; it’s about investing in the joy, efficiency, and safety of your fire-fueled experiences. Whatever design you choose, the satisfaction of a warm, crackling fire, lit effortlessly with properly stored wood, is a reward that truly keeps on giving, enhancing your home and lifestyle season after season.
