Building a raised garden bed can quickly become an expensive endeavor, especially when factoring in the cost of high-quality soil. However, there’s a brilliant, budget-friendly, and remarkably effective method that not only saves you money but also significantly enhances the health and vigor of your plants: the DIY raised garden bed layering technique, widely known as “lasagna gardening.”
Instead of relying solely on expensive store-bought soil, this innovative approach involves strategically layering readily available organic materials such as yard waste and kitchen scraps. Over time, these layers decompose, transforming into a rich, living, and incredibly fertile soil ecosystem that naturally nourishes your plants. This comprehensive guide will walk you through every step of the process: what materials to incorporate, the optimal layering sequence, and crucial mistakes to avoid. By following these principles, you’ll construct a raised bed that boasts exceptional drainage, provides a continuous supply of nutrients to your plants, and miraculously improves in fertility and structure with each passing year.
Mastering DIY Raised Garden Bed Layers: The Ultimate Guide to Lasagna Gardening
Preparing Your Raised Bed: Key Layers for Success
Imagine your raised garden bed as a magnificent lasagna – each carefully placed layer serves a distinct purpose, working in harmony with the others to progressively enrich the soil. The beauty of this method lies in its reliance on free or inexpensive leftover materials, transforming potential waste into valuable garden gold.
1. Base Layer: Drainage, Aeration, and Volume
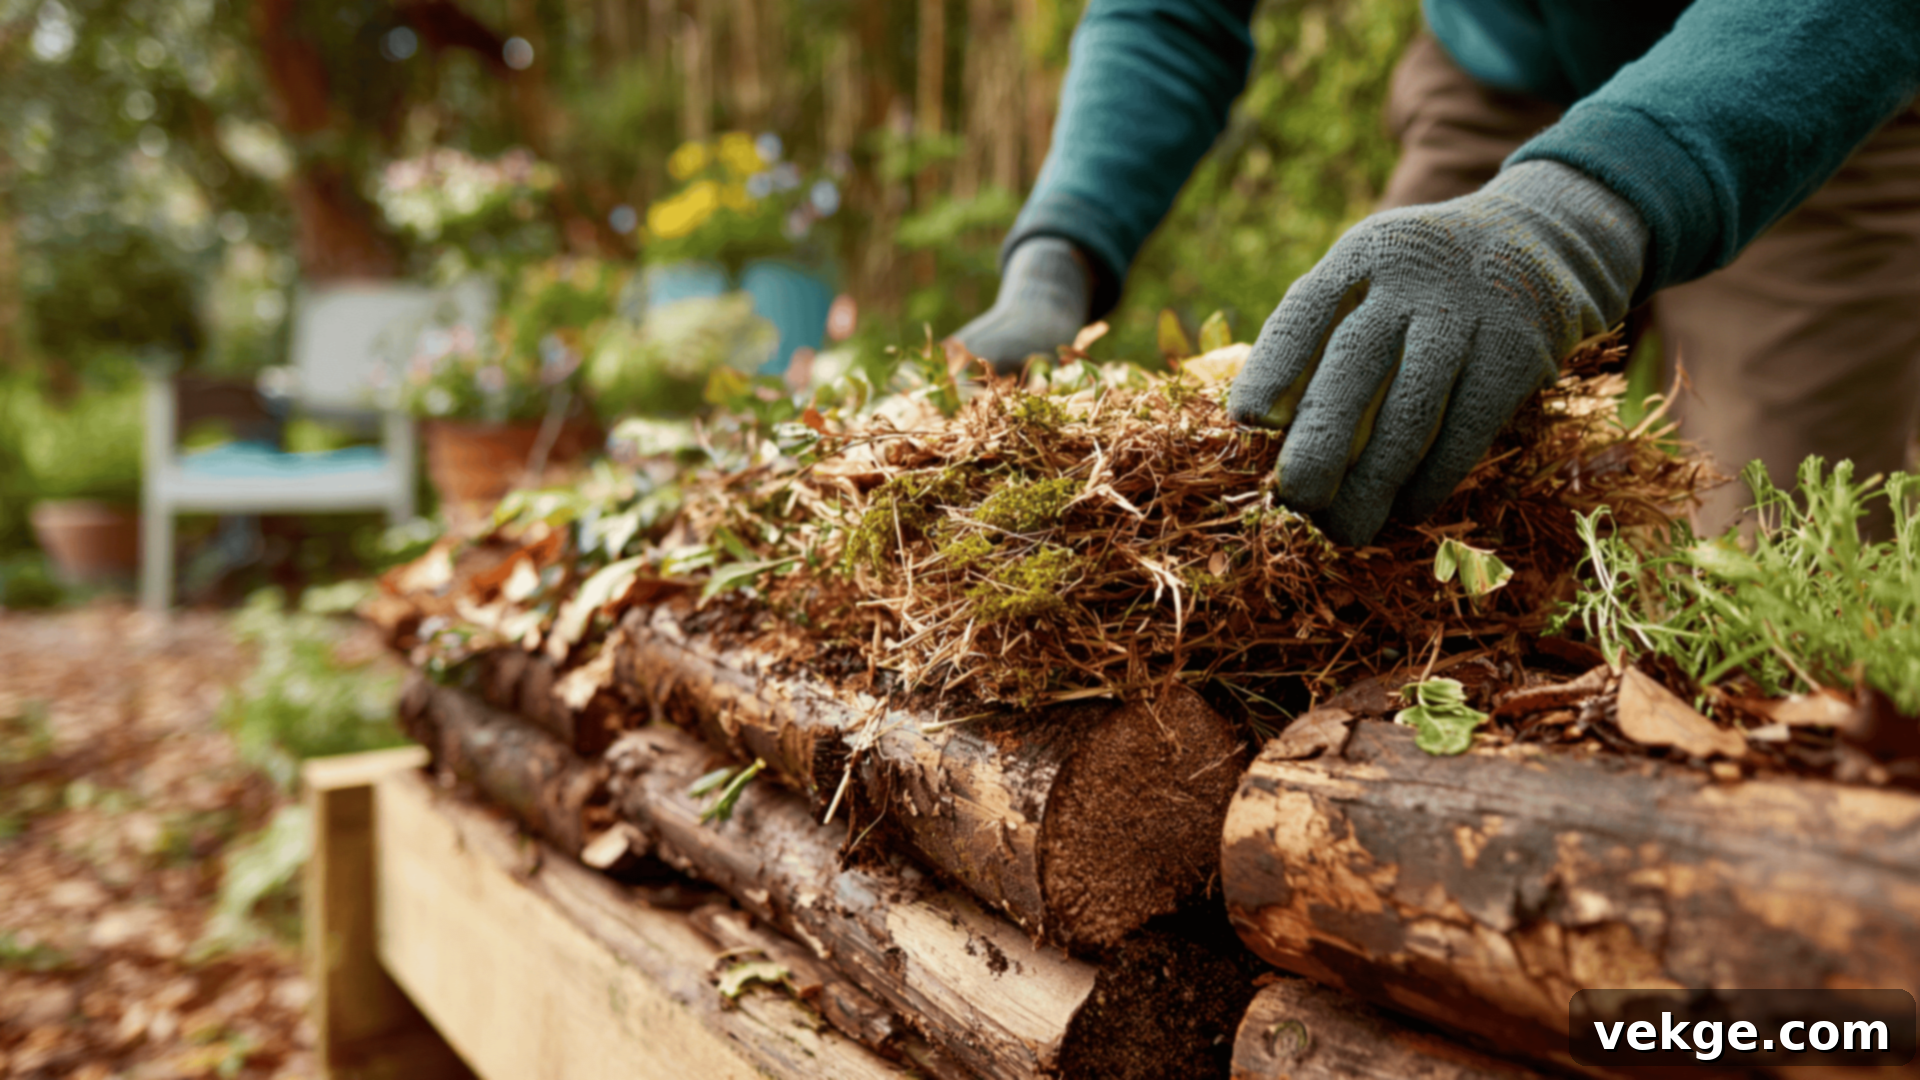
The foundation of a healthy raised bed begins with robust drainage and ample air circulation. Start by incorporating large, natural, woody materials, such as logs and thick branches (ideally 2–6 inches in diameter). These create essential air pockets that facilitate excellent drainage, preventing waterlogging and promoting a healthy environment for beneficial microorganisms. As these larger materials slowly decompose, they also gradually release nutrients into the soil profile for years to come, and importantly, they take up significant volume, reducing the amount of purchased soil needed. Fill any larger gaps between the logs and branches with smaller twigs, bark pieces, and wood chips to stabilize the layer and further enhance airflow.
Before adding this base layer, it’s highly recommended to lay down a generous layer of overlapping cardboard or several sheets of newspaper directly on the ground. This serves as an effective weed barrier, suppressing unwanted growth from beneath the bed. As it breaks down, this cardboard also adds carbon to the soil and provides a feast for earthworms, further improving soil structure and fertility.
2. Middle Layers: Organic Matter and Nutrient Reservoir
Once your robust base layer is in place, it’s time to build the nutrient reservoir with diverse organic materials that break down at varying rates. This dynamic middle section includes materials like straw (ensure it’s straw, not hay, as hay often contains weed seeds), shredded leaves, fresh or dried grass clippings, and additional wood chips. The varied decomposition speeds of these materials ensure a continuous, slow release of nutrients, mimicking the natural processes found in a forest floor. This sustained feeding mechanism reduces the need for frequent fertilization later on.
However, it’s crucial to be selective about what goes into these layers. Absolutely avoid invasive weeds (like bindweed or Japanese knotweed) or any plant material that shows signs of disease, as these can introduce persistent problems or pathogens into your otherwise healthy soil. Similarly, steer clear of chemically treated wood, as it can leach harmful substances into your garden, compromising plant health and food safety.
3. Top Layer: Nutrient-Rich Growing Medium
The uppermost layer is where your plants will initially root, so it needs to be rich, fine-textured, and highly fertile. Create this ideal growing medium using a 50/50 mix of high-quality compost and enriched topsoil. Compost provides a vibrant ecosystem of beneficial microbes, essential trace minerals, and humus, which significantly improves soil structure and water retention. Topsoil offers the foundational mineral content and stability needed for robust root development.
To supercharge this top layer, consider adding supplemental organic amendments. Incorporating 10–20% worm castings will infuse your soil with highly concentrated nutrients, enzymes, and beneficial bacteria, promoting exceptional plant growth. Natural, slow-release fertilizers like kelp meal (rich in micronutrients and growth hormones) or fish emulsion (providing readily available nitrogen) can also be mixed in to give your young plants an excellent start and sustained feeding throughout the season.
DIY Raised Garden Bed Layers: Step-By-Step Guide
Building a layered raised bed, or practicing lasagna gardening, is a straightforward and rewarding project. While the concept is simple, having all your materials and tools prepared beforehand will make the entire process significantly faster and more enjoyable.
Tools Required
Having the right tools on hand will ensure your raised bed construction goes smoothly and efficiently:
- Garden hose: Essential for thoroughly watering down each layer, settling materials, and initiating decomposition.
- Rake or garden fork: Perfect for spreading organic materials evenly, breaking up clumps, and aerating layers.
- Shovel or spade: Necessary for moving soil, compost, and other bulk materials.
- Wheelbarrow or tarp: Invaluable for transporting materials around your garden, minimizing back strain and keeping your workspace tidy.
- Garden gloves: Protect your hands from splinters, thorns, and soil-borne microbes while working.
- Tape measure: For accurately measuring wood pieces and ensuring your bed frame is square and level.
- Saw (for cutting wood): A hand saw, circular saw, or miter saw will be needed to cut your lumber to the desired dimensions for the bed frame.
- Drill and drill bit (for creating pilot holes): Used to pre-drill holes in wood, preventing splitting when screws are inserted.
- Screws (to assemble the bed frame): Long, exterior-grade screws (e.g., deck screws) are recommended for durability and resistance to rust.
Gathering these items before you begin will streamline the entire construction and layering process.
Step 1: Prepare the Ground and Lay the Foundation
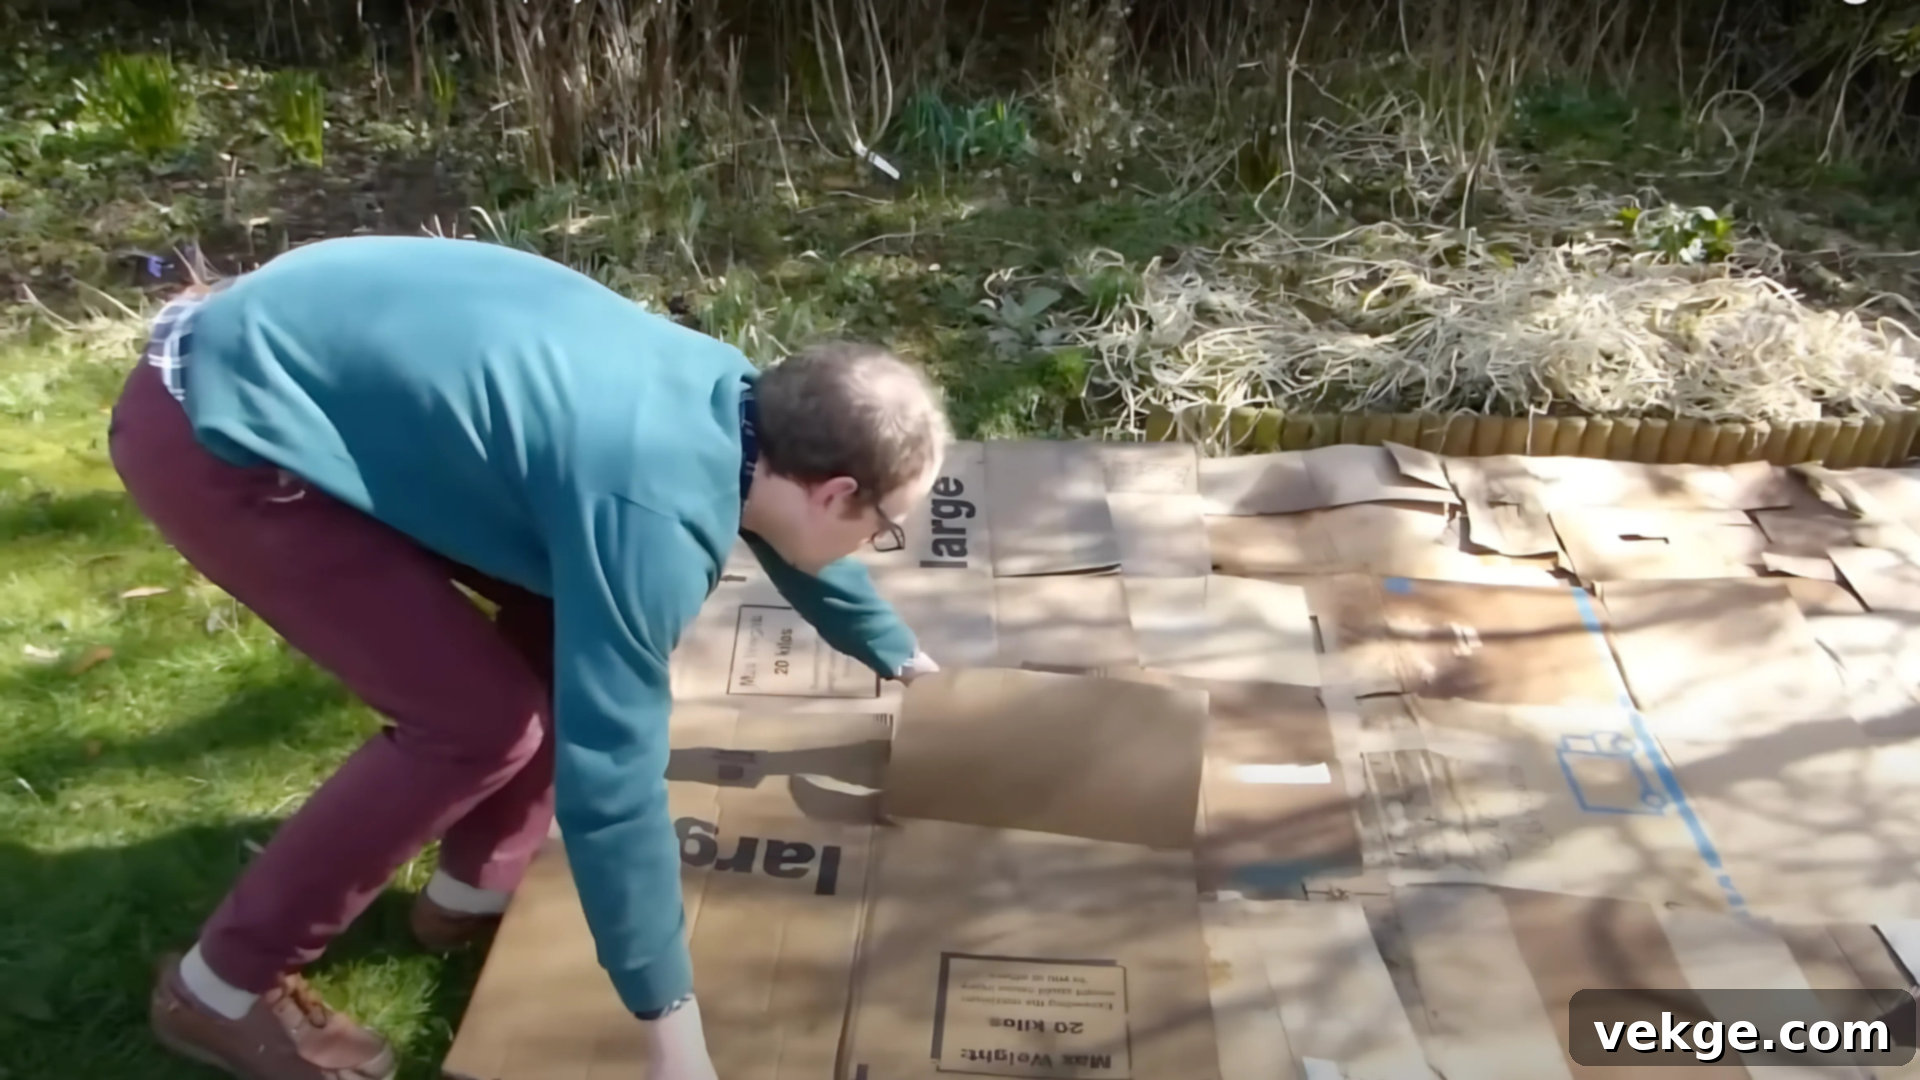
The initial step is to select the perfect location for your raised bed, considering factors like sunlight exposure (most vegetables need 6-8 hours daily), proximity to a water source, and accessibility. Once chosen, clear the area of any debris and level the ground as much as possible to ensure your bed sits stably. If you’re building over an existing lawn or weedy patch, first mow the grass as short as possible. Then, generously lay down a thick layer of cardboard or overlapping sheets of newspaper across the entire footprint of your intended bed. Ensure the edges overlap by at least 6 inches to prevent weeds from sneaking through. It’s vital to remove any tape, labels, or staples from the cardboard, as these materials won’t decompose naturally. Lightly water the cardboard to help it settle, hold it in place, and begin the decomposition process. This cardboard layer acts as an excellent weed suppressor, effectively smothering existing vegetation and providing a clean slate for your garden while slowly adding organic matter to the soil below.
Step 2: Build the Frame
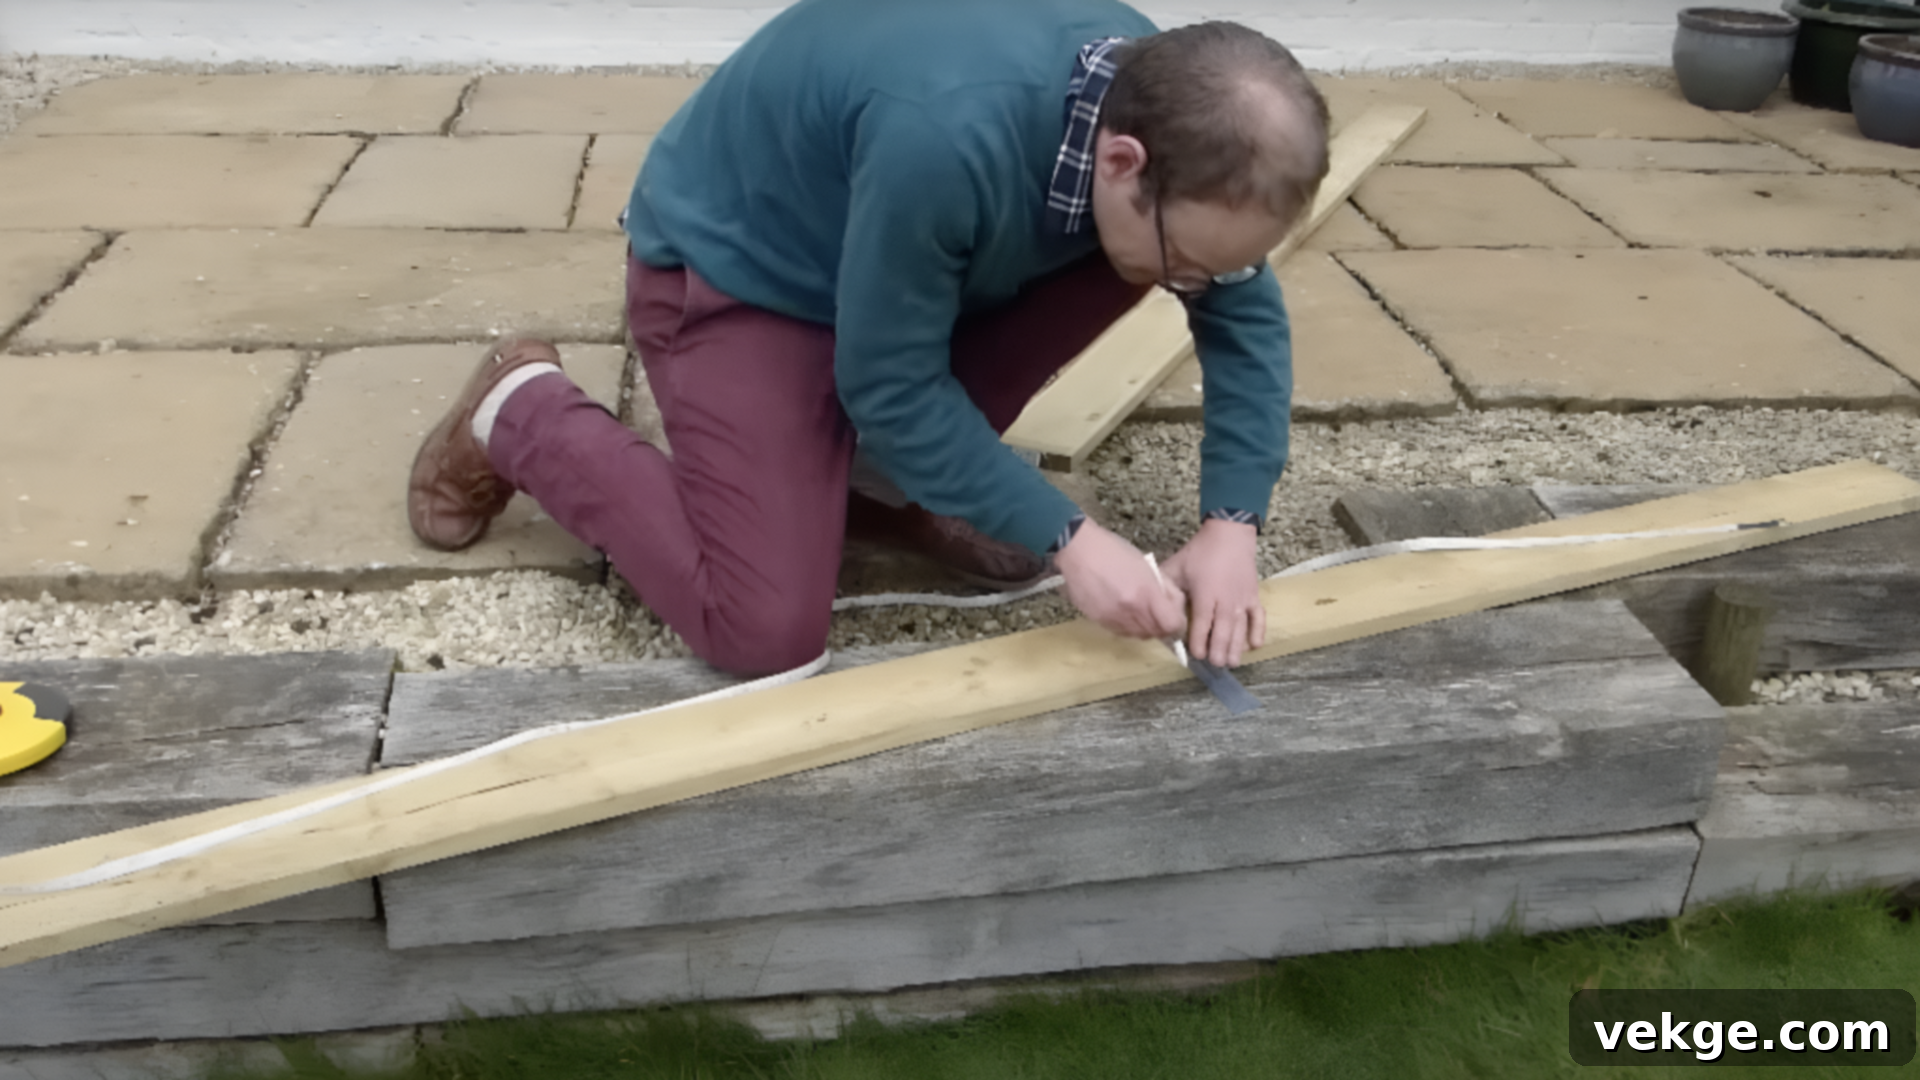
With your ground prepared, it’s time to construct the frame of your raised bed. For a common 4-foot square bed, you might cut two 8-foot pieces of untreated lumber (like cedar or redwood for longevity, or pine for a more budget-friendly option) in half. Mark the halfway point on your planks and pre-drill pilot holes where the planks will overlap at the corners. This prevents the wood from splitting when you insert the screws. Secure the frame by screwing the planks together using long, rust-resistant screws suitable for exterior use. Repeat for the next layer if you’re building a deeper bed. This careful construction creates a snug, sturdy, and durable frame that will reliably hold your soil layers in place without shifting, ensuring your garden lasts for many seasons and provides a stable foundation for healthy plant growth.
Step 3: Add Layers to the Raised Bed (Lasagna Style)
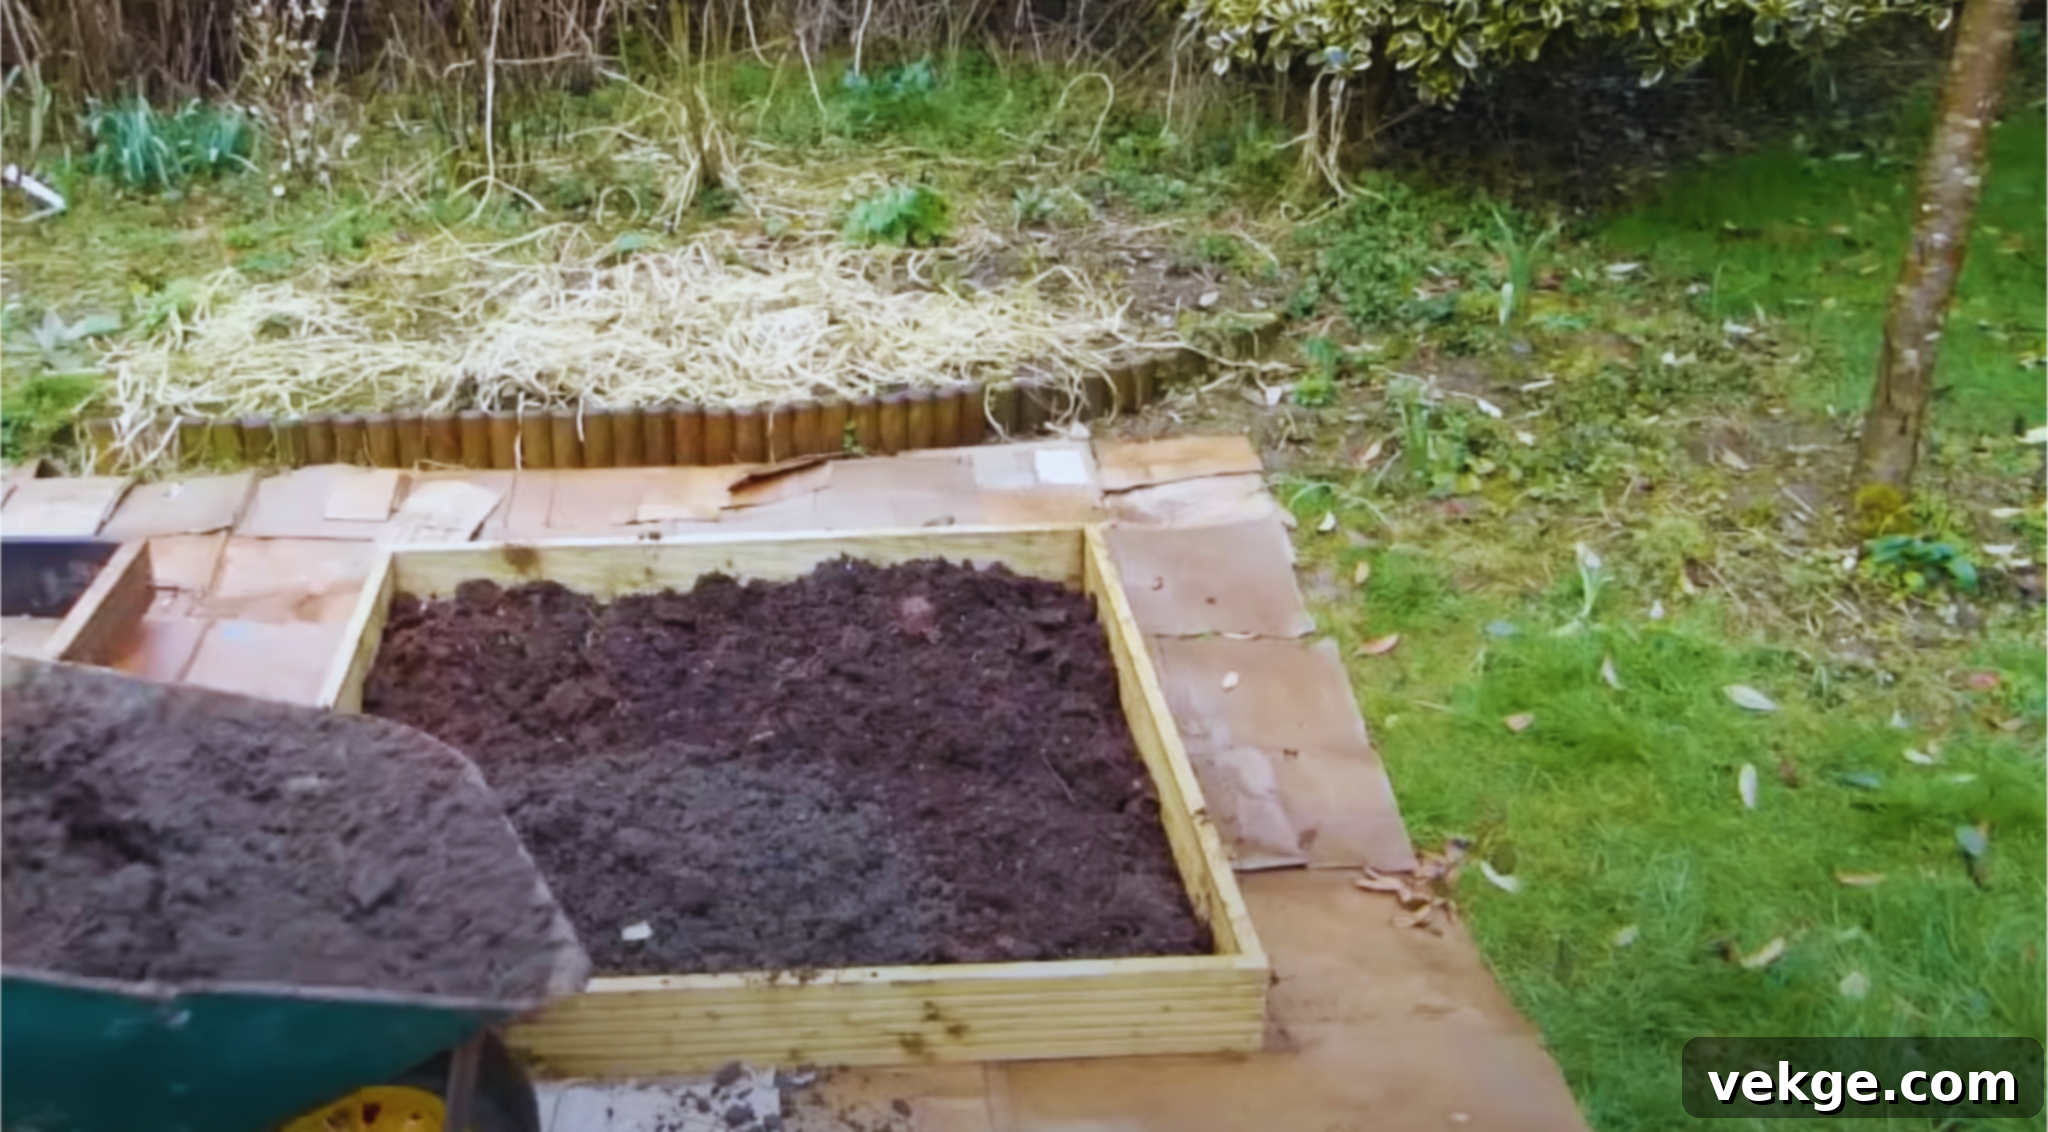
This is the heart of lasagna gardening – layering your organic materials. Think of it as building a living compost pile within your raised bed:
- Base Layer Reinforcement (12-18 inches): Start by filling the bottom 12-18 inches with large woody materials like logs, thick branches, and sturdy twigs. This creates significant air pockets for superior drainage and aeration, which is critical for preventing root rot and promoting a healthy microbial ecosystem. These materials will decompose slowly over years, providing long-term structural integrity and a steady release of nutrients.
- Bulking & Carbon Layer (6-12 inches): Next, add a substantial layer of high-carbon materials that will slowly break down. This includes straw, shredded brown leaves, untreated wood chips, and finely chipped bark. These materials help maintain the bed’s volume as the lower layers decompose and provide a rich carbon source for the soil microbes. Water this layer thoroughly to initiate decomposition and settle the materials.
- Green & Nitrogen Layer (4-6 inches): Now, alternate with a layer of “green” or nitrogen-rich materials. This can include fresh grass clippings, kitchen scraps (fruit and vegetable peels, coffee grounds, tea bags), spent annual plants, and even some aged manure. These materials are quicker to decompose and provide the nitrogen kick needed to fuel the microbial activity that breaks down the carbon layers. Water well after adding this layer.
- Transition Layer (2-4 inches): To facilitate the transition to the finer topsoil, add a layer of partially decomposed compost or well-aged manure. This introduces a robust population of beneficial microbes and a readily available nutrient source, bridging the gap between the coarser organic matter below and the planting medium above.
- Top Growing Layer (6-12 inches): Finally, fill the top 6-12 inches with your nutrient-rich 50/50 mix of high-quality compost and enriched topsoil. This provides a fine, friable texture ideal for planting seeds and young plants. You can also mix in additional organic amendments like worm castings or natural fertilizers at this stage. Ensure this layer is thoroughly mixed and evenly distributed, providing a healthy and welcoming environment for your plants to thrive immediately.
Remember to water each layer thoroughly as you add it. This helps to compact the materials, eliminate air pockets, and activate the decomposition process. The goal is a bed that is fully packed but not overly dense, providing both support and excellent drainage.
Step 4: Final Touches and Initial Hydration
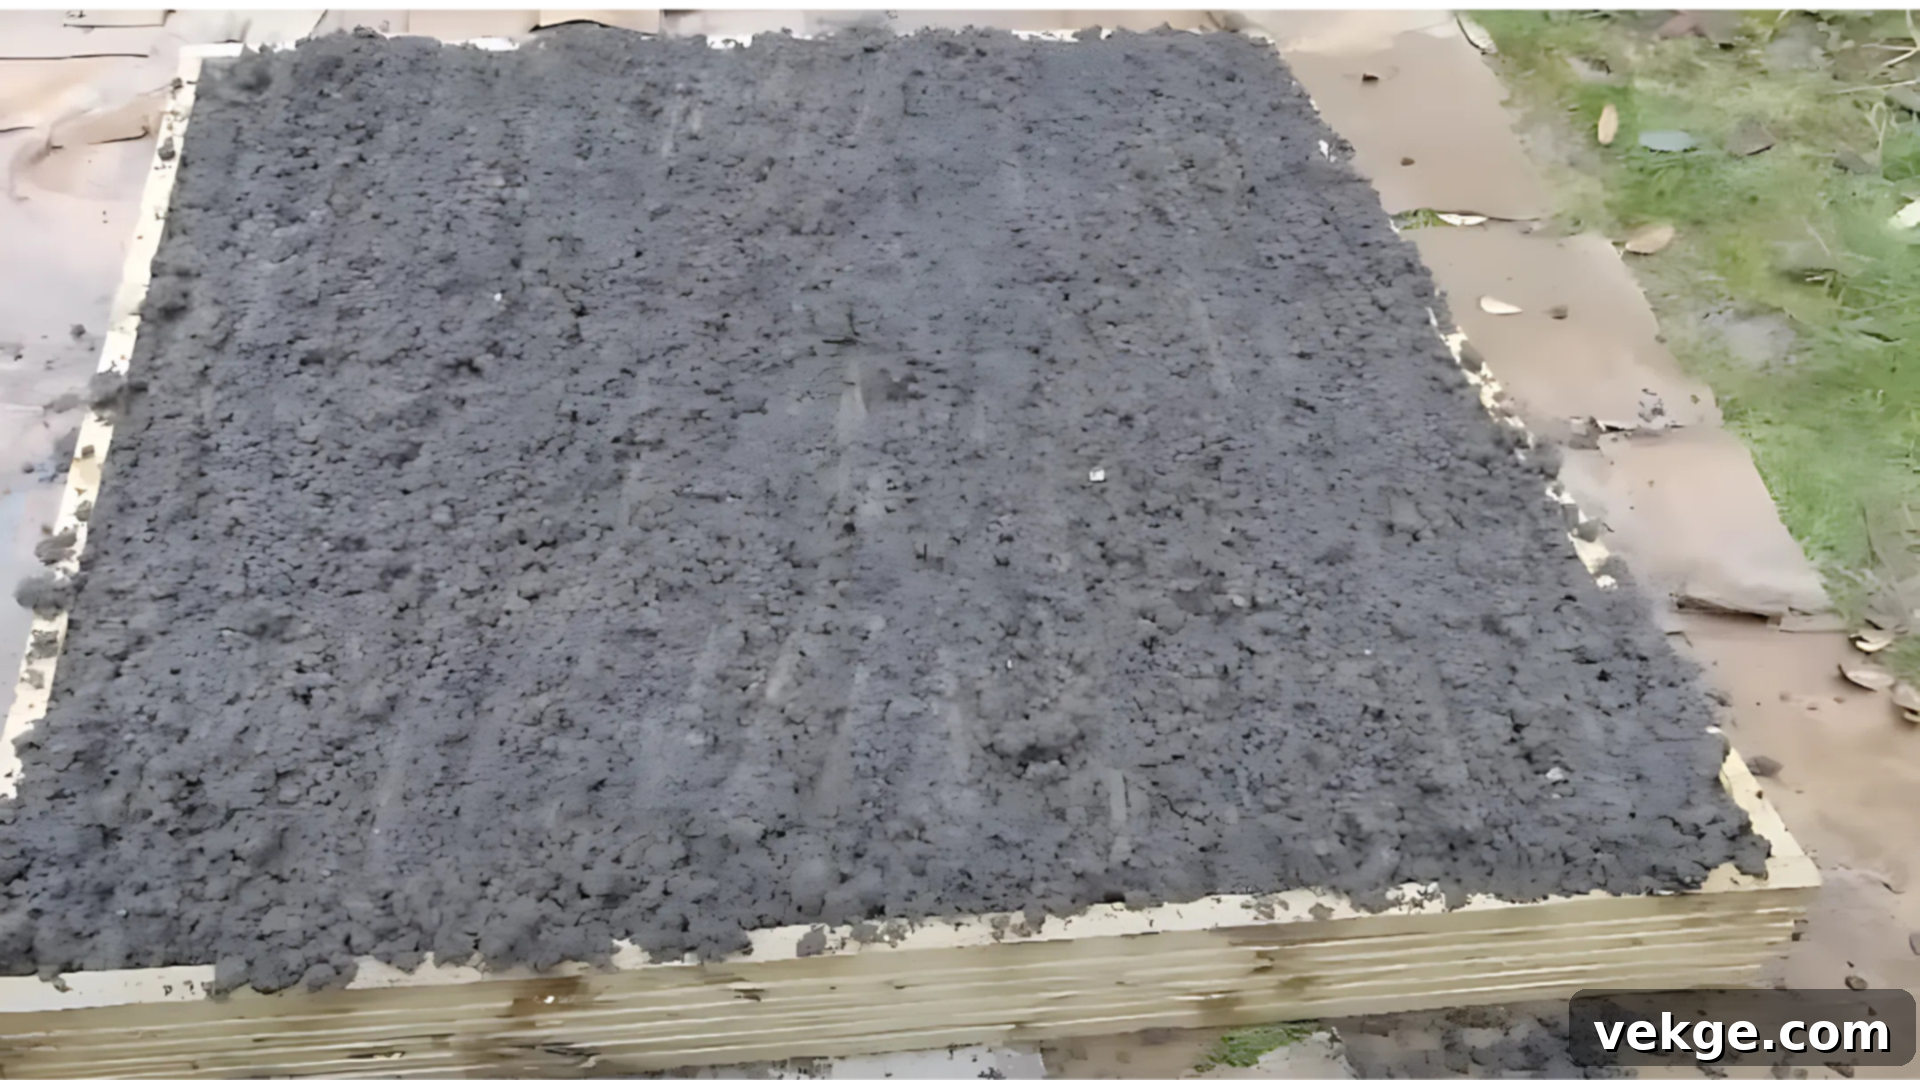
Once all your layers are carefully placed, it’s time for a critical final step: a thorough watering. Use a garden hose with a gentle spray nozzle to deeply saturate the entire bed. This initial watering is crucial for several reasons: it helps settle the layers, eliminate any remaining air pockets, and fully moisten the organic materials, kickstarting the decomposition process. Observe the bed as you water; if any areas settle more than others, gently rake and add a little more topsoil mix to ensure an even, level surface for planting. Allow the water to slowly percolate through all the layers. Once the layers are properly hydrated and settled, your DIY raised garden bed is almost ready for planting. Consider adding a layer of organic mulch (like straw, wood chips, or shredded leaves) to the top surface. Mulch helps to retain soil moisture, suppress weeds, regulate soil temperature, and further enrich the soil as it breaks down, setting the stage for strong, vibrant plant growth.
For a more detailed walkthrough of the visual process, check out the video below:
Before Planting: Wait Time and Soil Testing
After all the effort of constructing and layering your DIY raised garden bed, the hardest part for many enthusiastic gardeners isn’t the physical labor, but the patience required for the bed to properly settle. Understanding the optimal timing and assessing your soil conditions will save you from disappointing harvests, wasted effort, and potential plant stress.
How Long to Let Layers Settle
While the immediate urge might be to plant right away, giving your newly layered bed some time to settle is highly beneficial. Ideally, allow the layers to settle and stabilize for 2-4 weeks before planting. This period allows the organic materials to begin decomposing, for initial nutrient release to occur, and for the overall soil structure and moisture levels to become more consistent. For plants with deeper root systems, such as tomatoes, peppers, or root vegetables, an even longer wait of 4-6 weeks is recommended. This extended settling time ensures the internal environment of the bed is robust and stable enough to support demanding crops. If you’re building your bed in the fall, letting it settle over the entire winter is an excellent strategy, as the natural freeze-thaw cycles and microbial activity will create perfectly conditioned soil, ready for spring planting.
DIY Soil Testing Tips
Even with the best layering, understanding your soil’s characteristics is key to plant success. Basic DIY soil tests can provide valuable insights:
- pH Level: Use readily available pH strips or an inexpensive digital pH meter (typically around $15-20) to check your soil’s acidity or alkalinity. Most vegetables and flowers thrive in a slightly acidic to neutral pH range of 6.0 to 7.0. If your soil pH is below 6.0 (acidic), you can raise it by adding agricultural lime. If it’s above 7.5 (alkaline), you can lower it by incorporating elemental sulfur or peat moss.
- The “Squeeze Test” for Drainage and Texture: Grab a handful of moist soil from the top layer and gently squeeze it. If the soil crumbles easily when you open your hand, it indicates good drainage and a healthy balance of sand, silt, and clay. If it forms a tight, sticky ball that doesn’t break apart, your soil may have too much clay and could benefit from additional organic matter (like compost) or coarse sand to improve drainage and aeration. Conversely, if it falls apart immediately and feels gritty, you might need more organic matter to help with water retention.
- Percolation Test: Dig a small hole (about 12 inches deep) in your bed and fill it with water. Note how long it takes for the water to drain. If it drains very quickly (less than 10 minutes), your soil might be too sandy. If it takes hours, drainage is poor, and more coarse organic matter in the middle layers is needed.
Decomposition Timeline by Material
Understanding how quickly various materials break down helps you appreciate the continuous nutrient cycling happening within your raised bed:
- Grass Clippings: Rapidly decompose within 2-4 weeks, providing a quick nitrogen boost.
- Leaves (shredded): Break down in 4-8 weeks, adding carbon and trace minerals. Whole leaves take longer.
- Straw: Decomposes in approximately 2-3 months, offering carbon and improving soil structure.
- Small Branches/Twigs: Take 3-6 months to break down significantly, contributing to long-term structure.
- Wood Chips: Generally decompose over 6-12 months, slowly releasing nutrients and improving aeration.
- Large Logs: Can take multiple years (6+ months to several years) to fully break down, providing the most long-term structure and nutrients.
This staggered decomposition ensures a steady supply of nutrients and organic matter, improving the soil continuously over time.
Adjusting Raised Bed Layers for Different Needs
Not all plants have identical requirements, and the construction of raised beds can vary significantly. By intelligently customizing your layering approach, you can create the perfect growing environment tailored to the specific needs of vegetables, flowers, herbs, or even shallow raised beds, maximizing their potential.
Customizing Layers: Vegetable, Flower, and Herb Beds
The beauty of lasagna gardening lies in its adaptability. Here’s how to customize your layering based on your garden’s purpose:
| Bed Type | Soil Needs | Layering Tips |
|---|---|---|
| Vegetable Beds | Rich, loose, nutrient-dense soil with excellent drainage, supporting heavy feeders. |
|
| Flower Beds | Good drainage with moderately rich soil. Perennials tolerate slower-decomposing materials. |
|
| Herb Gardens | Fast-draining, moderately fertile soil; often prefer less rich conditions for concentrated flavor. |
|
Raised Beds With Legs or Shallow Space Considerations
When working with raised beds that have legs (often referred to as container gardening) or those with limited depth (under 12 inches), your layering strategy needs significant modification due to weight constraints and reduced decomposition space:
- Raised Beds with Legs (Container Beds): These uplifted beds cannot support the heavy weight of large logs and branches. Instead, opt for lightweight, bulky materials for your base layer. Excellent choices include straw, shredded leaves, small twigs, pine needles, or even crumpled, untreated paper. Coconut coir or peat moss can also serve as excellent lightweight substitutes for heavier organic matter, providing bulk and good moisture retention without excessive weight. You can also place upside-down plastic containers or milk jugs (with caps off) at the very bottom for maximum weight reduction and air pockets.
- Shallow Raised Beds (Under 12 inches deep): For beds that are less than a foot deep, it’s best to skip the large branch and log layer entirely. Focus on creating a layered system with finer, quicker-decomposing materials. Start with 2-3 inches of small organic matter (like chopped leaves, fresh grass clippings, or straw) directly on your cardboard weed barrier. Top this with 4-6 inches of a high-quality, pre-mixed growing medium that combines compost, topsoil, and potentially some perlite or vermiculite for drainage and aeration.
- Very Shallow Beds (6-8 inches): These beds offer minimal space for natural decomposition to occur effectively. They work best when primarily filled with a high-quality purchased potting mix that has been significantly improved with generous amounts of compost. Since there’s less room for the natural breakdown of organic layers to provide nutrients, it’s advisable to incorporate slow-release granular organic fertilizers directly into the potting mix to ensure a consistent nutrient supply for your plants.
What Not to Include in DIY Raised Garden Bed Layers
While lasagna gardening encourages the use of diverse organic materials, incorporating the wrong items can severely compromise your hard work and the health of your garden. A few misguided choices can ruin months of effort and potentially harm your plants. Here’s a detailed look at what to absolutely avoid and the reasons why:
- Treated Wood: Pressure-treated lumber, railway ties, or any wood treated with preservatives (like chromated copper arsenate – CCA, or alkaline copper quaternary – ACQ) contains harsh chemicals that can leach into your soil over time. These chemicals are toxic to plants and can contaminate edible crops, posing significant health risks. Always stick to natural, untreated wood pieces like cedar, redwood, or untreated pine for your bed frame and any woody internal layers.
- Oily Food Scraps & Animal Products: While vegetable and fruit scraps are excellent, avoid adding meat, dairy products, bones, or heavily oiled foods directly into your garden bed. These materials decompose slowly, can attract pests like rodents, raccoons, and flies, and create unpleasant odors and anaerobic (oxygen-starved) conditions that foster harmful bacteria. These types of scraps are best reserved for hot compost piles, where high temperatures can break them down safely and efficiently.
- Invasive Plants & Aggressive Weeds: Never use plant material from known invasive species (such as English ivy, kudzu, bamboo, or certain persistent weeds like bindweed). Even seemingly “dead” plant material or root fragments can contain viable seeds or root sections that will readily sprout and take over your bed, creating a persistent, difficult-to-eradicate problem. Be vigilant about identifying and excluding these plant types.
- Poor Drainage Setups: Avoid using materials that hinder rather than help drainage as base layers. This includes a thick layer of heavy clay soil, fine sand alone (which can compact and create a cement-like layer), or non-permeable plastic sheeting. These materials can create waterlogged conditions, suffocating plant roots, promoting root rot, and killing off beneficial soil organisms essential for a healthy ecosystem.
- Fresh Manure: Uncomposted or “fresh” animal manure (especially from chickens, horses, or cows) is typically very high in nitrogen and can contain high levels of salts. Applying it directly to your plants can “burn” them and introduce harmful bacteria (like E. coli or Salmonella). Always use only well-aged manure (aged for at least 6 months) or commercially composted manure products to ensure it’s safe, stable, and beneficial for your garden.
- Chemically Treated Materials: Be extremely cautious about the source of your organic materials. Avoid using grass clippings from lawns that have been treated with herbicides, pesticides, or “weed and feed” products. Similarly, leaves collected from roadside areas might be contaminated with exhaust fumes, road salt, or other pollutants. Any material exposed to synthetic chemicals can introduce toxins into your garden soil, harming plants and potentially making your produce unsafe for consumption.
Wrapping Up Your Lasagna Garden Journey
By diligently following the DIY raised garden bed layering method, you’ve not only embarked on a journey to create a thriving, nutrient-rich garden but also embraced a truly sustainable and cost-effective approach. You’ve learned how to transform readily available, often free, organic materials into a dynamic, living soil ecosystem. From establishing the crucial base layer of large branches for impeccable drainage and aeration to crafting the fertile top layer with a balanced compost and soil mix, each step plays an essential role in providing your plants with the absolute best environment for robust growth.
This method isn’t just about growing plants; it’s about building soil that improves with age. With a bit of patience during the initial settling period and consistent care, your lasagna garden bed will continue to enhance its structure, fertility, and microbial life with every passing growing season. The satisfaction of cultivating a garden that naturally feeds itself, reduces waste, and yields abundant, healthy produce is unparalleled. Now that you’re equipped with the comprehensive knowledge of DIY raised garden bed layers, you are perfectly ready to roll up your sleeves and build your own. Happy gardening!
If you’re eager for more practical tips on sustainable gardening and engaging DIY projects, be sure to explore other insightful blogs on our website. You’ve got this, and your garden will thank you for it!
