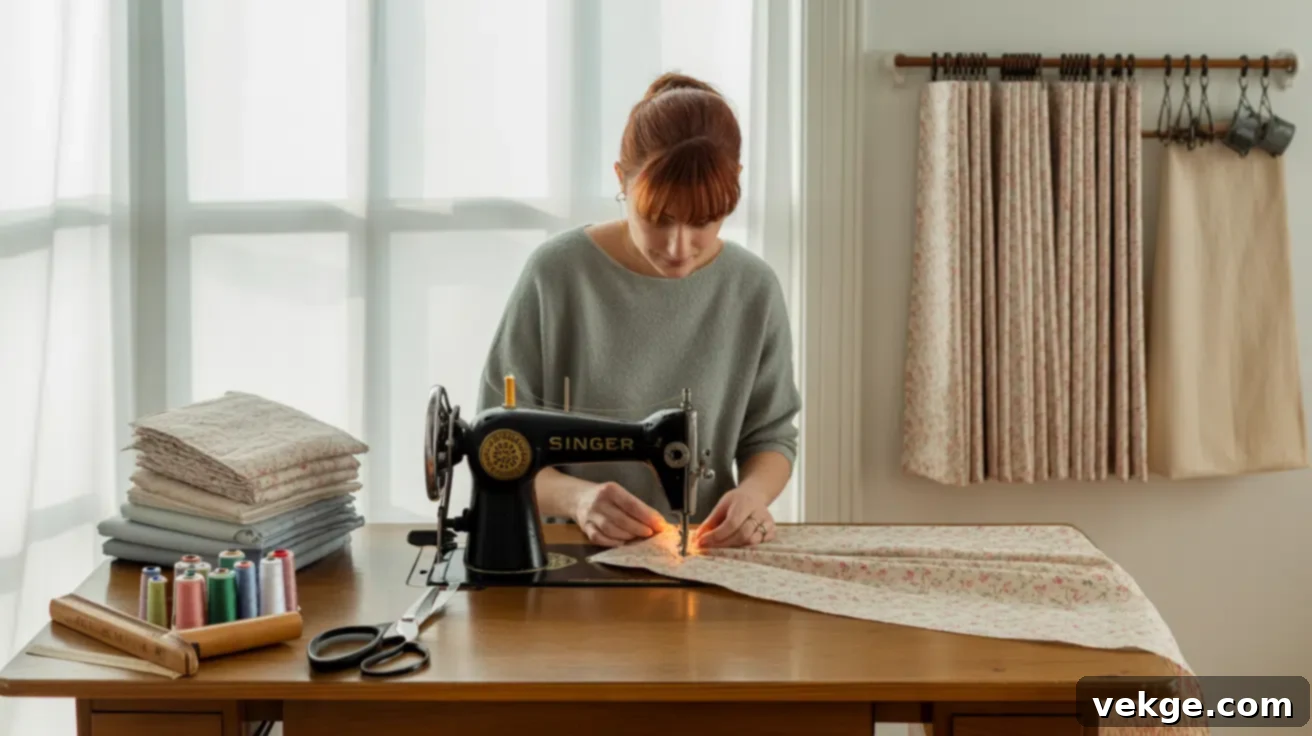
DIY Curtains: Your Complete Step-by-Step Guide to Sewing Custom Window Treatments
New curtains have the power to instantly refresh and transform any living space, injecting personality and style into your home decor. However, purchasing custom-made curtains or even ready-made panels can quickly become an expensive endeavor. If you’ve ever wondered how to achieve that perfectly tailored look without breaking the bank, you’ve come to the right place. This guide is dedicated to teaching you how to sew curtains at home, offering a fulfilling and budget-friendly alternative. The best part? You don’t need specialized tools or extensive prior sewing experience to get started on this rewarding home improvement project.
In this comprehensive guide, we will walk you through the entire creative process, making it accessible for even the most novice sewers. We’ll cover everything from selecting the ideal curtain style to gathering all your essential supplies, and then diving into the step-by-step sewing instructions. By the end, you’ll not only have beautiful, custom window treatments but also a newfound skill and immense satisfaction.
You’ll gain the knowledge to craft four popular and versatile curtain styles: classic rod pocket curtains, elegant tab top curtains, sleek back tab curtains, and charming tie top curtains. Additionally, for those who prefer to skip the sewing machine, we’ll cover convenient no-sew and hand-sew methods that yield impressive results. Are you ready to save money and adorn your windows with something truly unique that you made yourself? Let’s dive into the basics and get started with your exciting DIY curtain project!
What You’ll Need to Sew Your Own Curtains
Before you embark on your sewing journey, gathering all the necessary tools and materials is crucial. Having everything laid out and ready will ensure a smoother process, helping you avoid frustrating interruptions, mistakes, or unnecessary delays. Proper preparation is key to a successful and enjoyable sewing experience.
Essential Tools and Materials List for Sewing Curtains
- Sewing Machine: While not strictly necessary for all methods, a basic sewing machine will significantly speed up the process and create more durable seams. Any standard home sewing machine will do.
- Thread: Choose a high-quality polyester thread that closely matches your chosen fabric color. Matching the thread ensures that stitches blend seamlessly into the curtain, giving it a professional finish.
- Fabric Scissors or Rotary Cutter: Sharp fabric scissors are essential for clean, straight cuts. A rotary cutter with a self-healing mat offers even more precision and speed, especially for long, straight lines.
- Measuring Tape: A flexible measuring tape is indispensable for accurate measurements of both your windows and your fabric. Precision here prevents uneven curtain lengths.
- Pins or Clips: Use sewing pins or fabric clips to hold fabric layers together before sewing, ensuring they don’t shift. Clips are particularly good for delicate or thick fabrics where pins might leave holes.
- Iron and Ironing Board: Pressing your fabric at various stages is vital. It helps to smooth out wrinkles, create crisp folds, and set seams, leading to a much more professional-looking final product.
- Fabric Chalk or Marker: These tools allow you to mark cutting lines, fold lines, and seam allowances directly onto your fabric without leaving permanent traces.
- Curtain Fabric: The star of your project! Choose a fabric that complements your room’s decor and serves your functional needs (e.g., light-filtering, blackout, sheer). Consider the drape and weight.
- Curtain Lining (Optional but Recommended): Lining adds body, protects your main fabric from sun damage, provides insulation, and can help block light. It also gives curtains a more luxurious feel.
Optional Curtain Add-Ons for Enhanced Style and Functionality
- Decorative Trim (like pom-poms or ribbon): For adding a personalized touch, a decorative edge, or a pop of color.
- Curtain Weights: Small, weighted disks sewn into the bottom corners of the hem to help the curtain fabric hang neatly and prevent it from billowing.
- Fabric Tie-Backs: To elegantly hold your curtains open during the day, allowing more light into the room.
- Grommets and Grommet Kit: For creating a modern, structured look that slides easily along a rod.
- Fabric Loops or Tabs for Hanging: Used in place of a rod pocket for a more contemporary or custom look, often seen in tab top or back tab styles.
- Fusible Hem Tape (for no-sew options): An excellent alternative to stitching, creating strong, permanent hems with just an iron.
- Contrast Fabric for Design Accents: To create borders, panels, or decorative elements that add visual interest and a custom flair.
How to Sew Curtains: A Comprehensive Step-by-Step Guide for Beginners
Making your own curtains might seem daunting at first, but it’s much easier than it sounds, especially when you break the process down into manageable, simple steps. This detailed guide covers everything you need to know, from preparing your fabric for optimal results to sewing four classic curtain styles that will elevate your home decor. You’ll even learn a no-fail method for achieving perfect seams and hems, ensuring a professional finish every time.
Step 1: Prepare Your Fabric and Sew the Side Seams
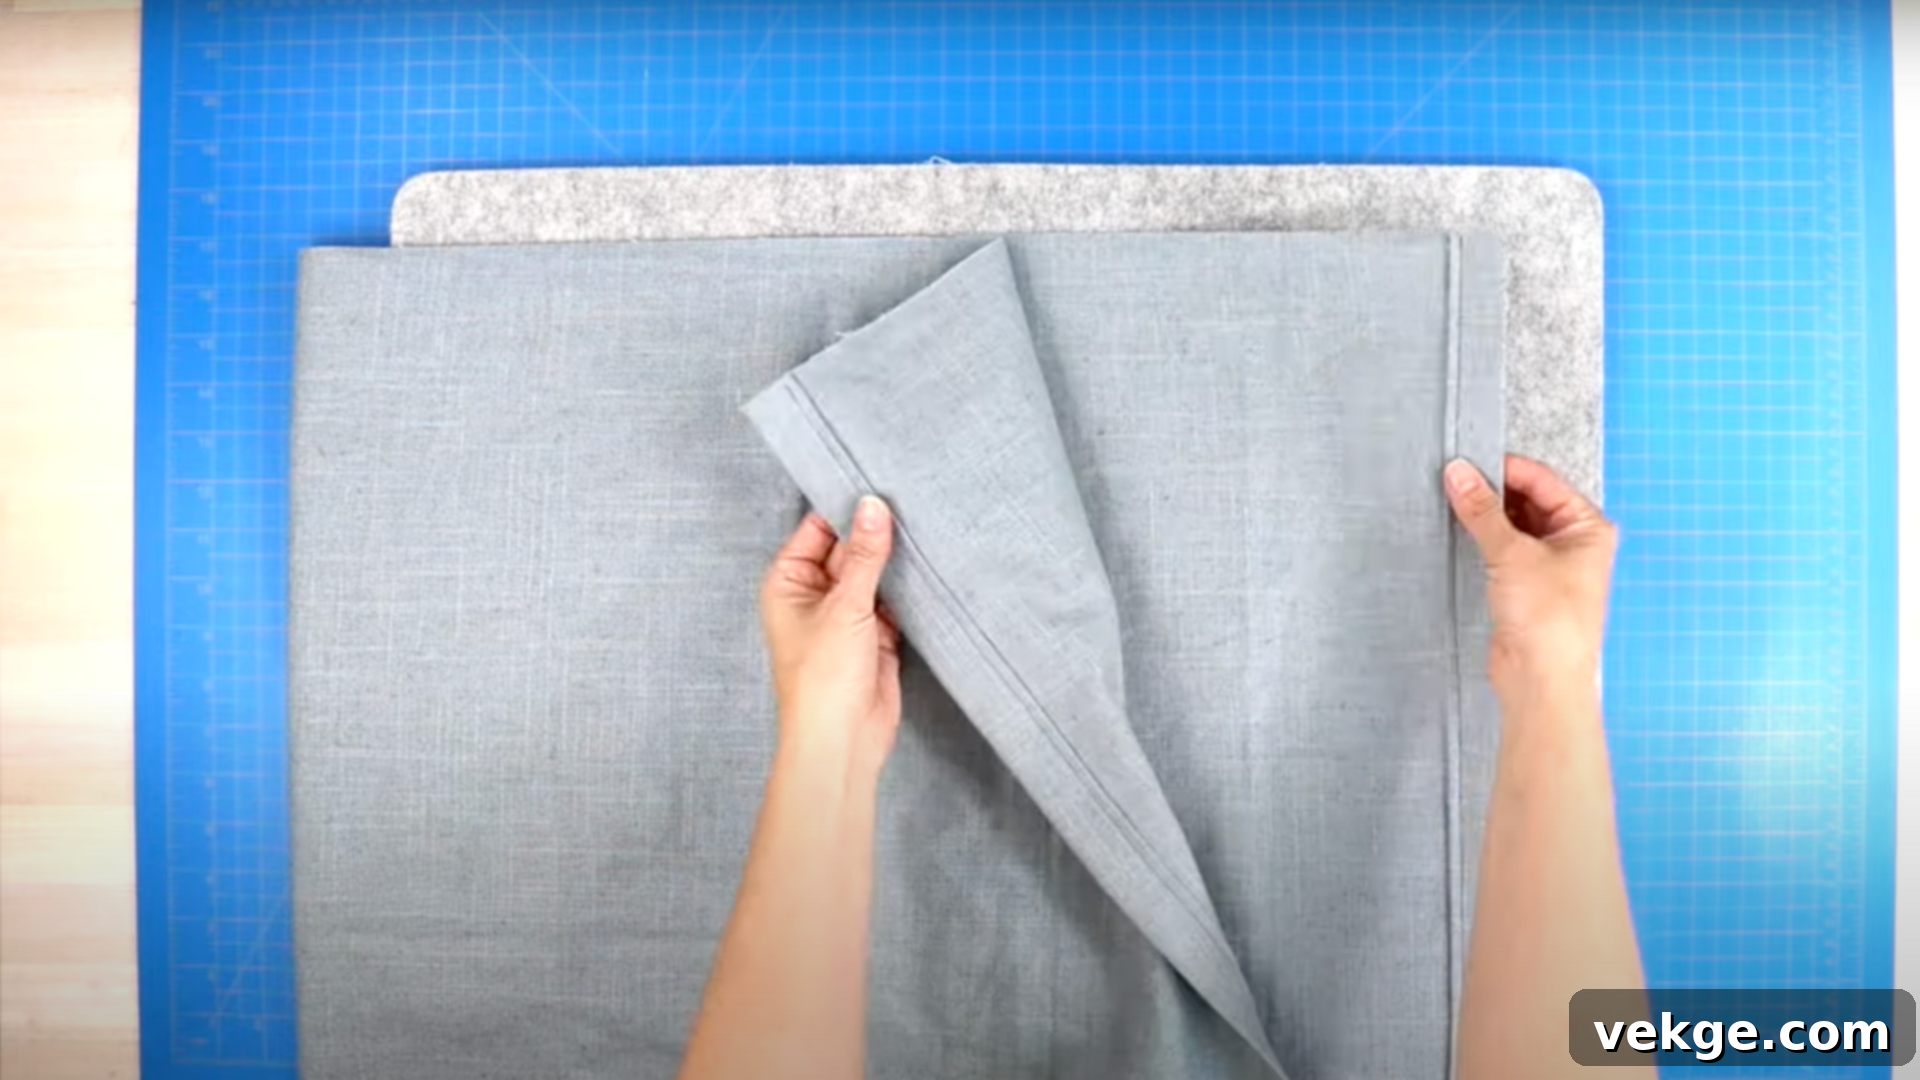
Before any major sewing begins, it’s essential to properly prepare your fabric. Start by pre-washing and pressing your chosen fabric according to its care instructions. This crucial step helps to pre-shrink the material, ensuring your finished curtains won’t shrink after their first wash, and also removes any wrinkles, making it easier to cut and sew accurately. Once pressed, lay your fabric flat and carefully trim the raw edges, ensuring the fabric is perfectly square and straight on all sides. This foundational step is critical for achieving professional-looking results.
Next, focus on the side seams. These seams provide a clean, finished edge to your curtain panels and, most importantly, prevent the fabric from fraying over time. For almost all curtain styles, including rod pocket, tab top, back tab, and tie top, the method for creating neat side seams remains consistent. Simply fold each raw side edge in by about 1 inch, press it flat, then fold it in again by another 1 inch and press. Pin this double-fold hem in place, then stitch close to the inner folded edge. This double-fold technique encases the raw edge completely, creating a durable and polished finish that sets the foundation for a professional-looking result.
Step 2: Plan and Prepare the Bottom Hem
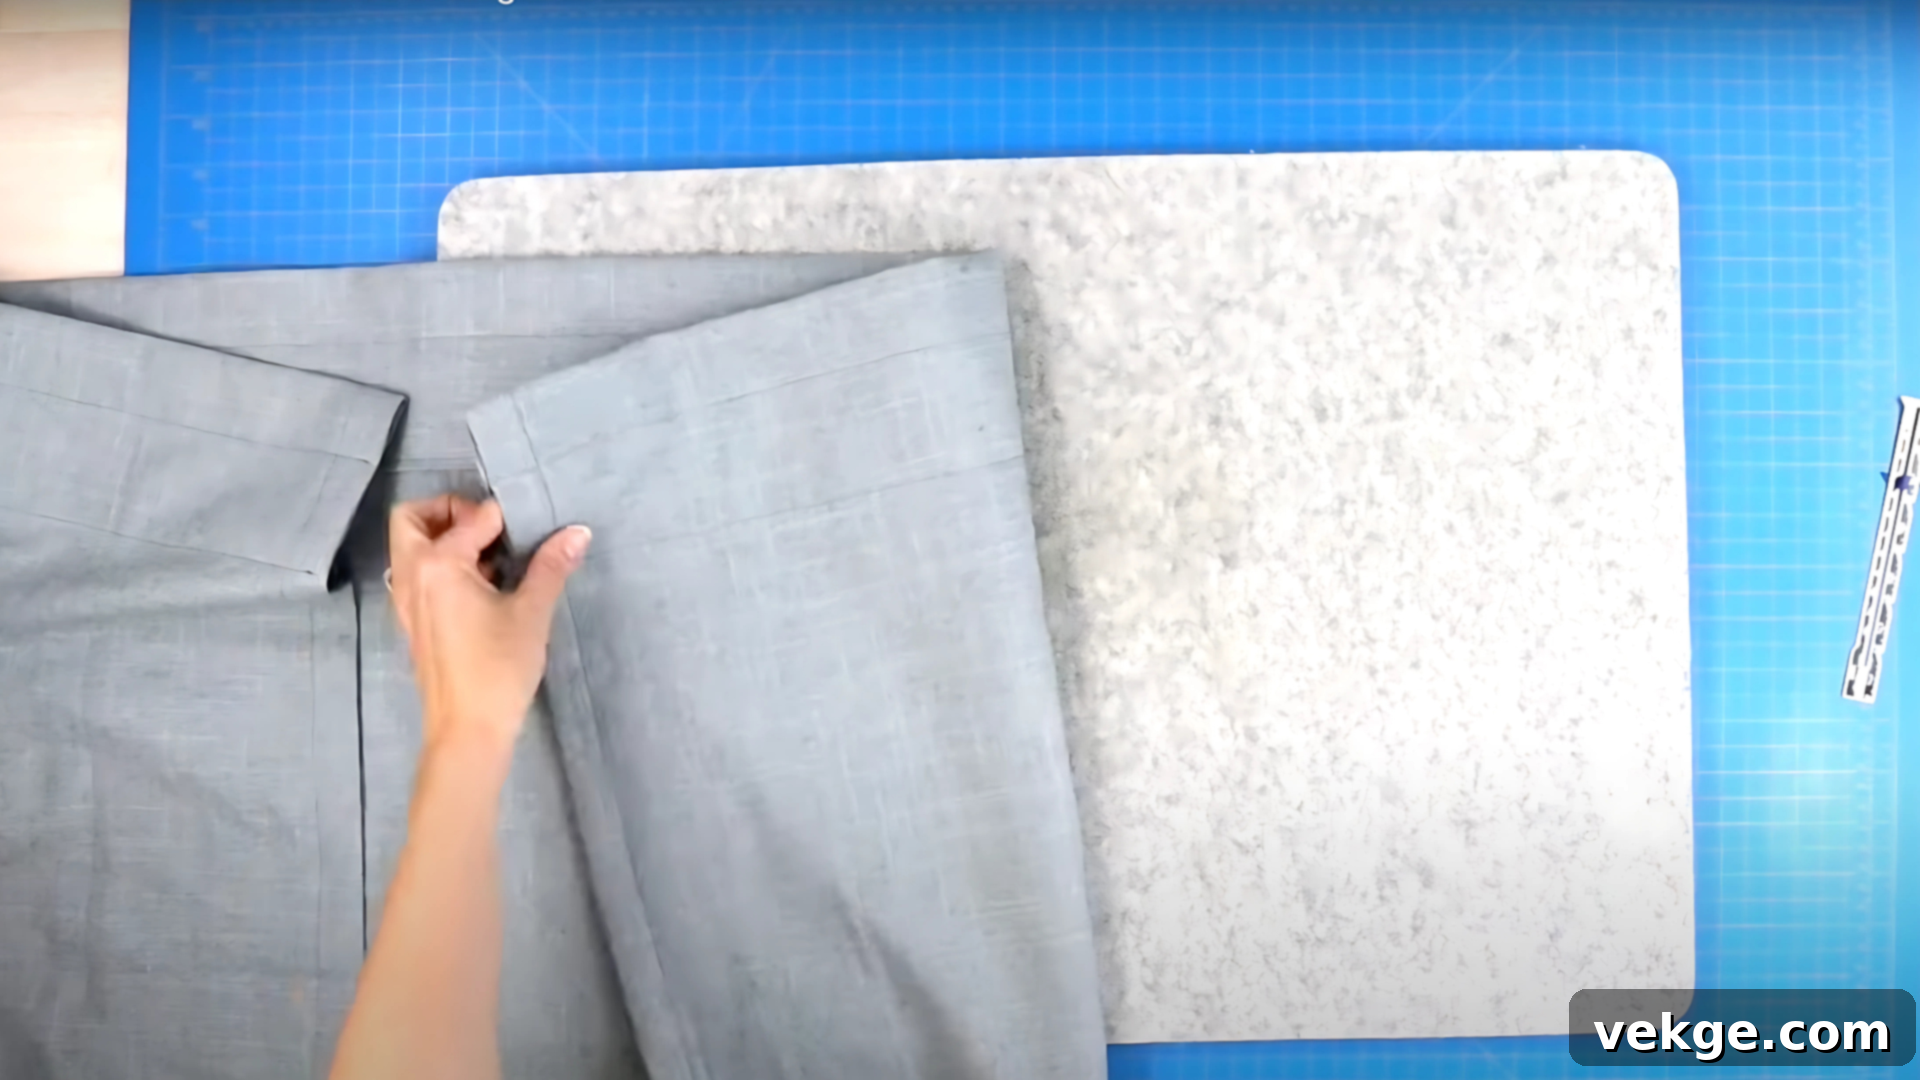
While you’ll actually sew the bottom hem as one of the very last steps, planning for it early in the process is incredibly important. This strategic approach helps you achieve the perfect finished length, especially since different curtain top styles can slightly alter the overall hanging length of your panel. A well-executed bottom hem adds weight to the curtain, helping it hang beautifully straight and look impeccably polished. The weight also assists in preventing the curtain from blowing around excessively when windows are open.
To prepare for your bottom hem, a double-fold hem is generally recommended for its neatness and durability. After you have completed the top portion of your curtain (which determines its final hanging style), temporarily hang your curtain at the window. This allows you to visually determine and mark exactly where you want the curtain to end – whether it’s just touching the floor, puddling slightly, or floating above the windowsill. Once marked, take the curtain down. Fold the bottom raw edge of the fabric up by your desired hem allowance (e.g., 2-4 inches), press it flat, then fold it up again by the same amount. Press this second fold firmly and pin it securely in place. Use a sewing gauge or ruler to ensure the hem is perfectly even across the entire width of the curtain. This meticulous preparation will ensure your curtains hang with elegance and precision.
Step 3: Choose Your Curtain Style and Sew the Top
Now that your fabric is prepped and your side seams are neat, it’s time to select and construct the top portion of your curtain. This choice is critical as it will largely determine the overall look, feel, and functionality of your window treatment, as well as how it hangs on the curtain rod.
Style 1: Rod Pocket Curtains
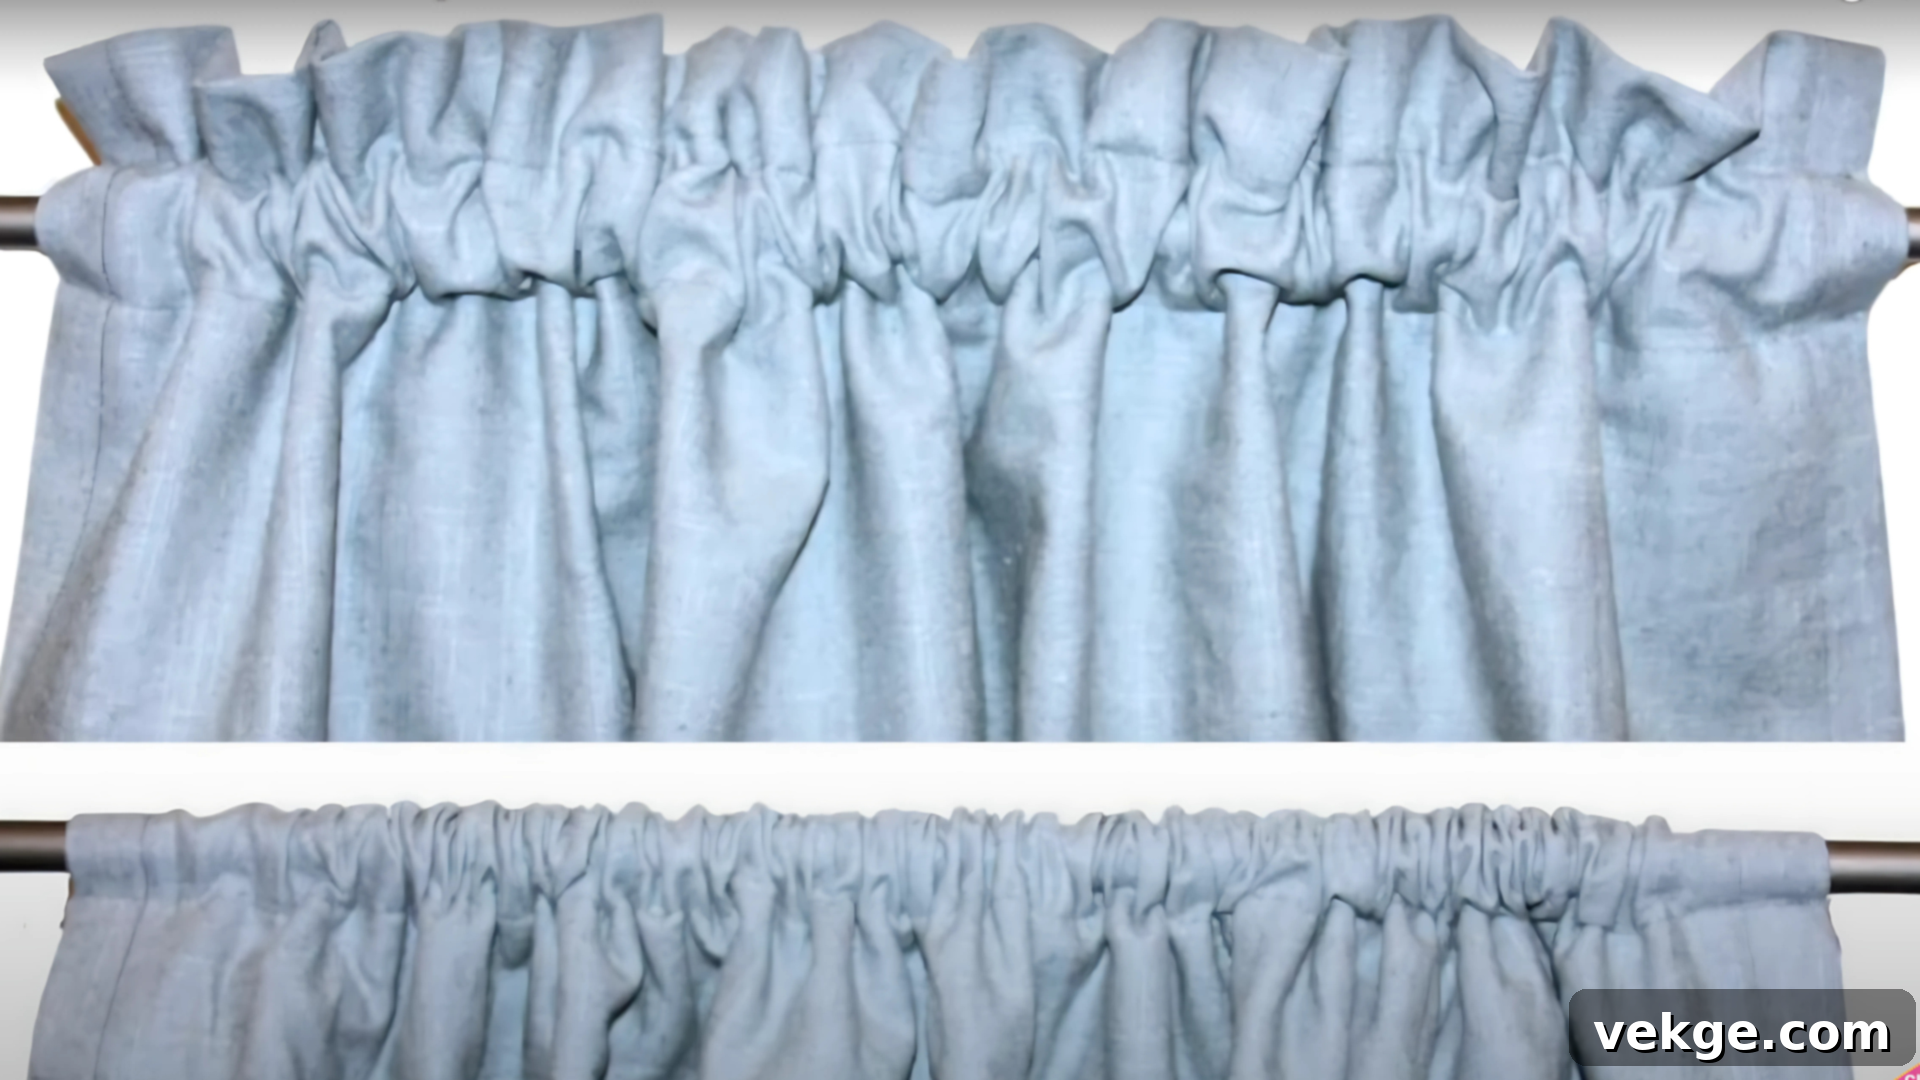
Rod pocket curtains are a timeless and simple choice, offering a relaxed and elegant aesthetic suitable for many rooms. They are particularly great for curtains that won’t be opened and closed frequently, as the fabric gathers directly onto the rod. To sew a rod pocket curtain, begin by folding the very top raw edge of your fabric down by approximately 4 inches towards the wrong side. Press this fold flat to create a crisp line. Then, fold the fabric down again by another 4 inches, pressing firmly once more. This creates a double-fold for added durability and a clean finish. Pin this folded section securely in place. Finally, sew a straight seam along the lower folded edge, close to the edge, to create the enclosed pocket through which your curtain rod will slide. If you desire a gathered look at the very top (often called a ‘heading’ or ‘ruffle’), you can mark 1.5 inches down from the upper edge of the fabric (above your main seam) and sew an additional seam across that line. This creates a small, soft fabric ruffle above the rod, adding a touch of classic charm.
Style 2: Back Tab Curtains
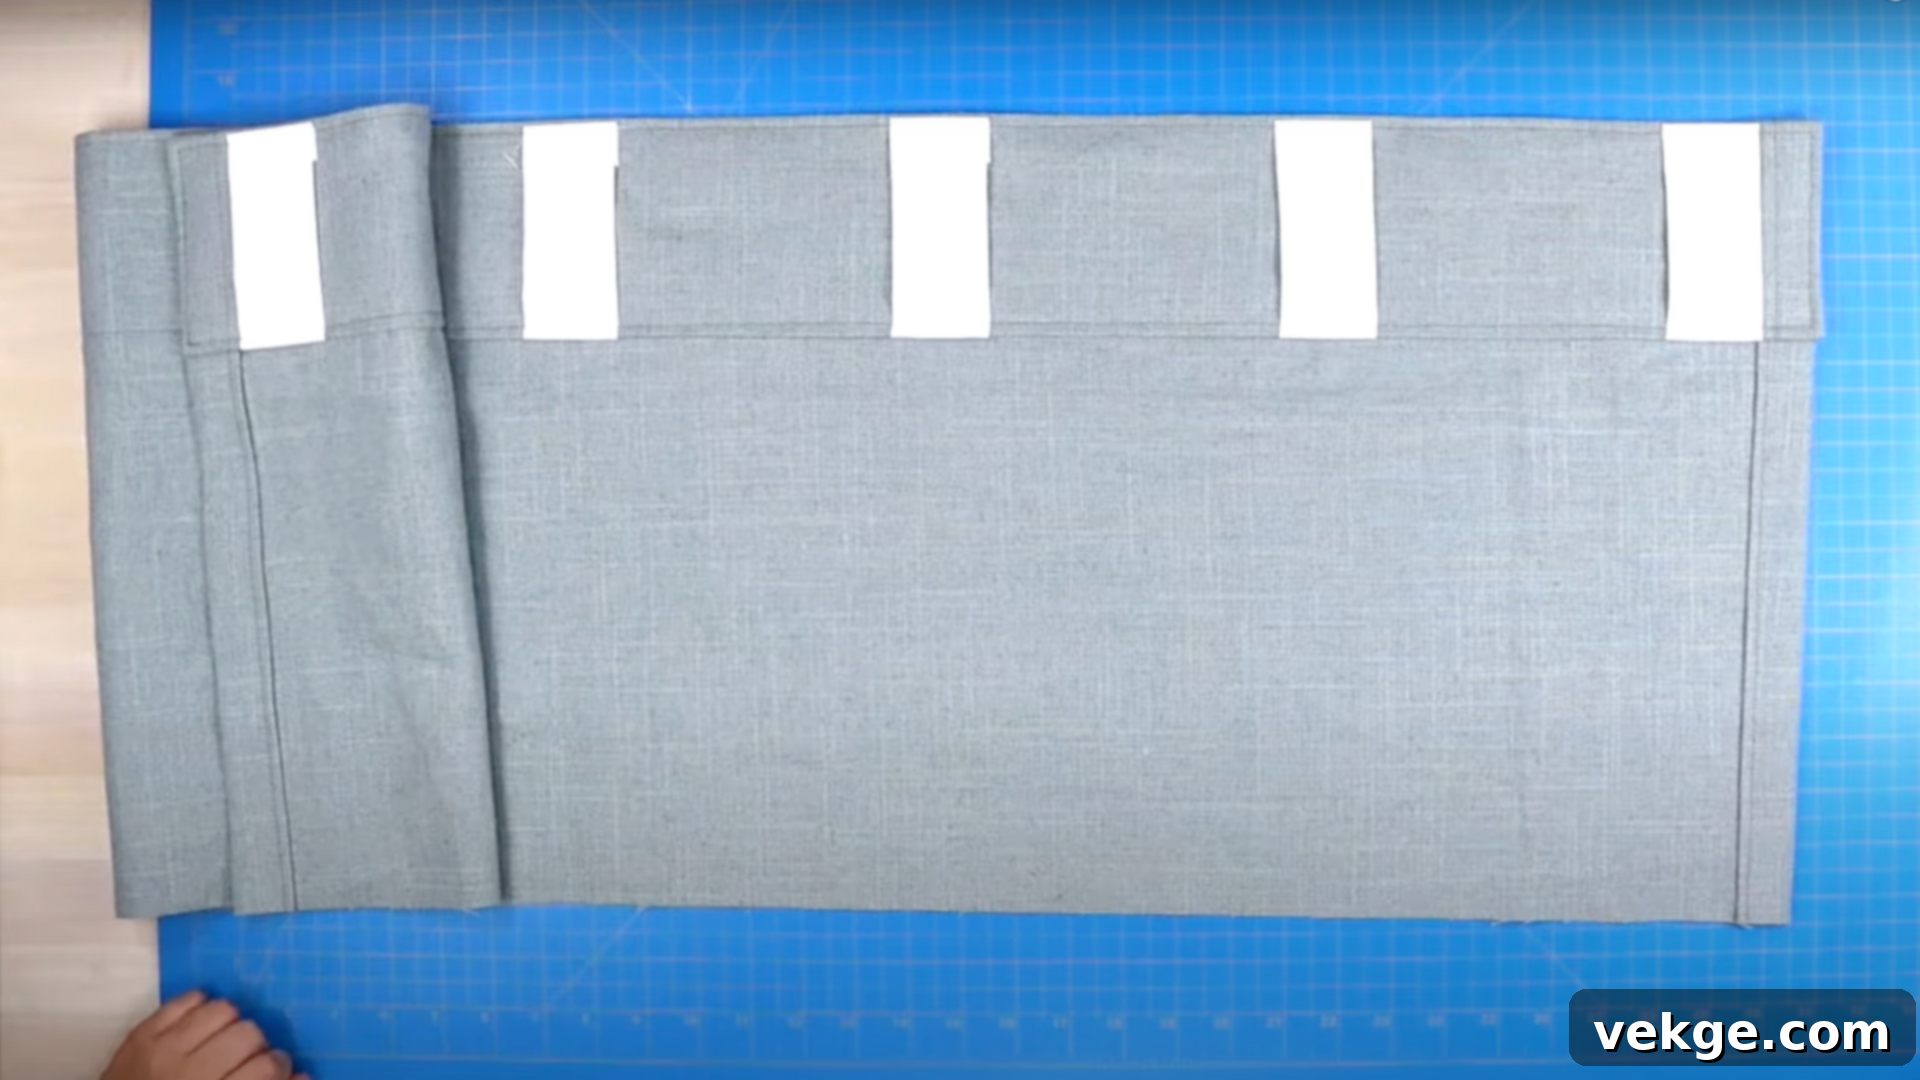
Back tab curtains offer a clean, contemporary, and tailored look, as the curtain rod is discreetly hidden behind the fabric. This creates a beautiful, pleated effect from the front, allowing the fabric to fall in neat, elegant folds. To begin making back tab curtains, you’ll first need to create the tabs themselves. Cut individual fabric strips that are 6 inches high and 4.5 inches wide. For each tab, fold it in half lengthwise with the right sides together, and sew a 1/2-inch seam along the long edge. Turn the tab right side out and press it flat, ensuring the seam is neat. Next, fold each short end of the tab in by 1 inch and press. To attach them to the curtain, first fold the top edge of your main curtain fabric down twice (e.g., 1 inch then 3 inches, or as preferred for your heading), pressing in between each fold to create a crisp header. Evenly space your prepared tabs along this folded header (typically every 6-8 inches), tucking the raw edges of the tabs into the second fold. Pin them securely. Finally, sew a seam along the top of the curtain, ensuring you catch the tabs, and another seam along the bottom edge of the folded header to fully secure the tabs and create a strong, polished finish.
Style 3: Tab Top Curtains
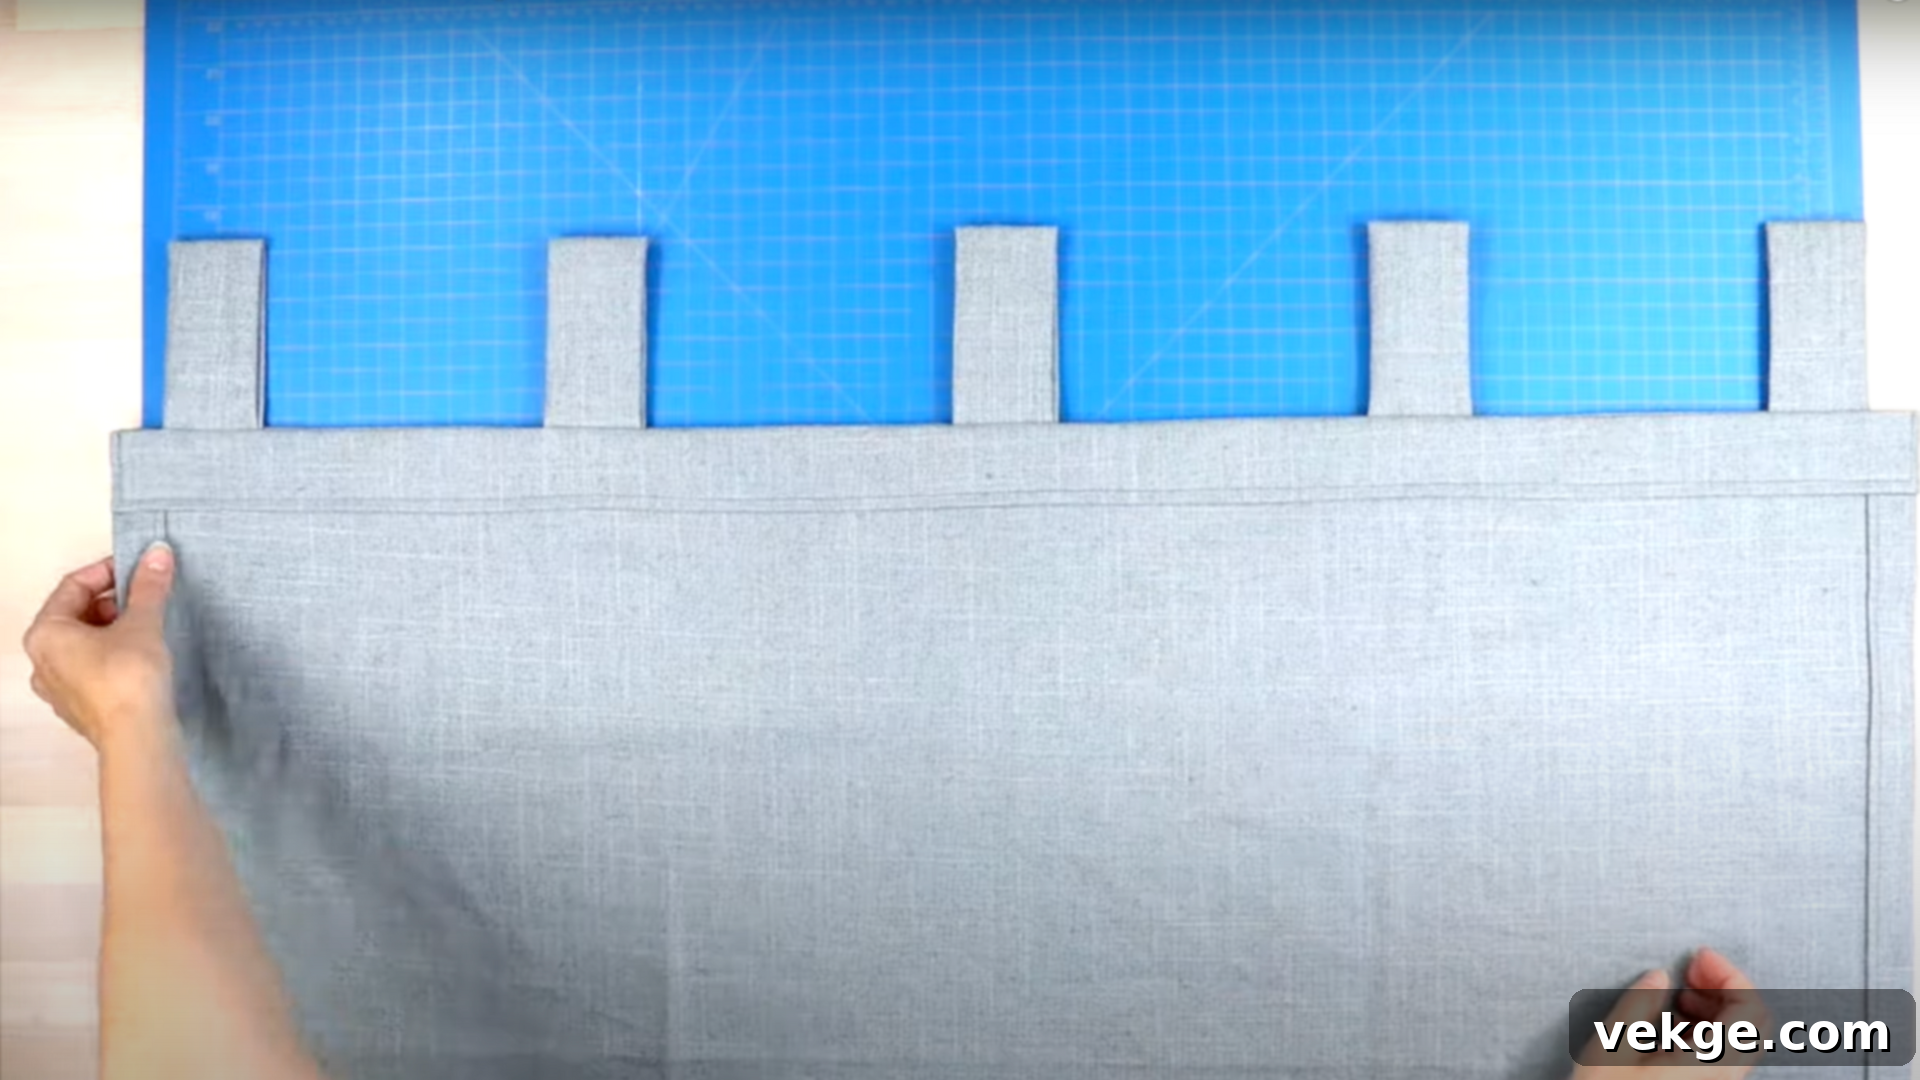
Tab top curtains provide a decorative and often casual aesthetic, with fabric loops visible at the top through which the curtain rod passes. This style is easy to slide open and closed and adds a charming architectural element to your windows. To sew a tab top curtain, start by cutting strips for your tabs. These should typically be 9 inches high and 5 inches wide. For each tab, fold it in half lengthwise with the right sides together and sew a ½-inch seam along the long edge. Turn the tabs right-side out and press them flat and crisp. Next, fold each finished tab in half again, matching the raw edges. Align these raw edges with the very top raw edge of your main curtain fabric. Space your tabs evenly across the width of the curtain, usually every 5 to 6 inches, to ensure a balanced look. Pin them securely in place. Sew a ¼-inch seam across the top of the curtain, attaching all the tabs. To conceal this stitching and provide a clean finish, you can then add a separate back strip of fabric, folding it over the raw edges and the attached tabs, then stitching it down to create a neat header.
Style 4: Tie Top Curtains
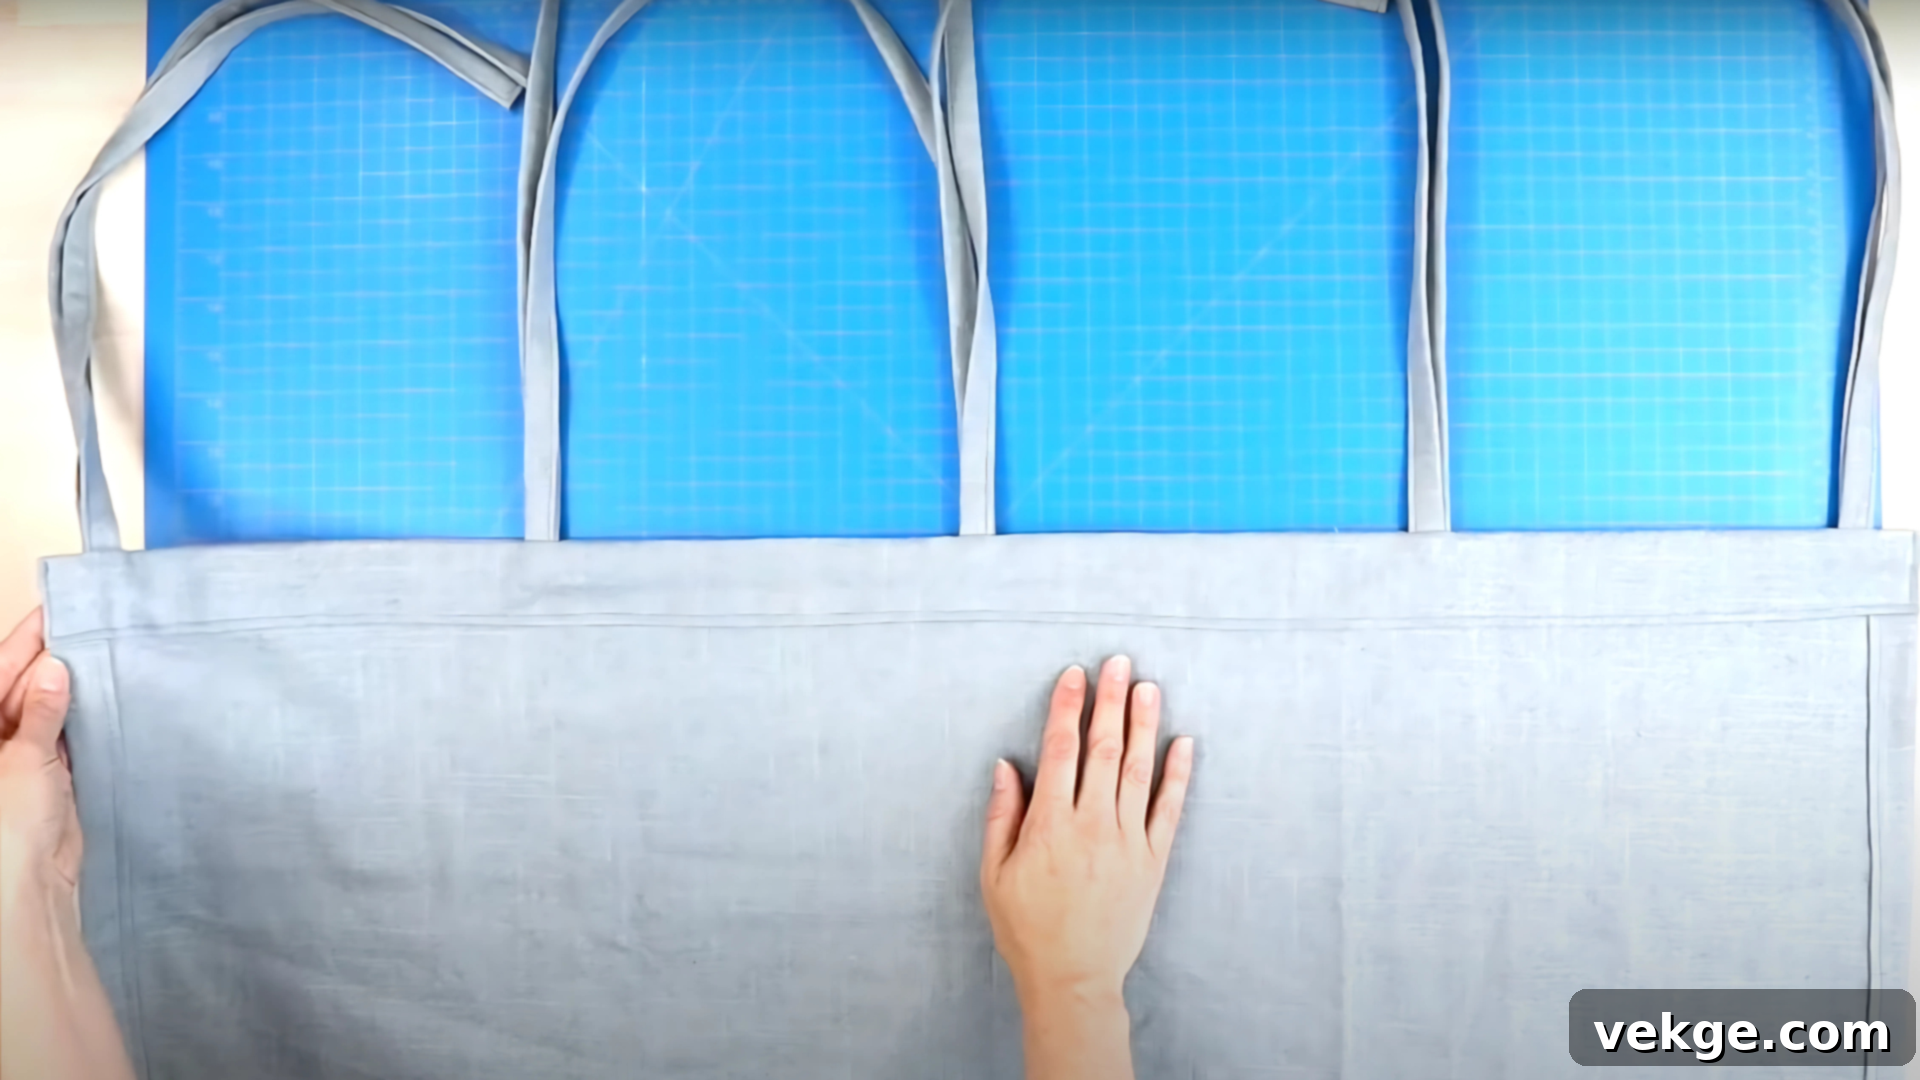
Tie top curtains are beloved for their relaxed, cottage-style charm and their incredible versatility, as the ties allow for easy adjustment of the curtain’s hanging length. This style is perfect for a whimsical or bohemian aesthetic. To create the ties, cut long fabric strips; a good starting size is 2.5 inches high and 21 inches long. You will need two such strips for each tie set (one to tie on the front, one on the back). To form each tie, fold one strip in half lengthwise with the wrong sides together and press. Then, fold the long raw edges toward the center fold and press again, creating a neat, finished strip. Sew along the open edge using a small seam allowance (e.g., 1/8-inch) to secure the folds. Repeat for all tie strips. Next, pair the finished ties together (one for the front, one for the back) and align their raw ends with the very top raw edge of your main curtain fabric. Space them evenly across the width of the curtain. Sew a ¼-inch seam across the top, securely attaching all the ties. Once hung, you simply tie these strips in decorative bows or knots over your curtain rod to achieve your desired height and look.
Still feeling a little unsure or need a visual demonstration? This tutorial might help clear things up and provide extra confidence as you sew:
No-Sew and Hand-Sew Options for Custom Curtains
The beauty of making your own curtains is that a sewing machine isn’t always a prerequisite. If you’re short on specialized tools, pressed for time, or simply prefer a simpler approach, these clever methods will help you achieve beautiful custom curtains with just basic supplies. They are perfect for beginners, renters, or anyone looking for a quick home decor update.
- Use Fusible Hem Tape: This is a fantastic solution for quickly creating neat hems and seams without any stitching. Simply fold the fabric where you need to create a hem or join two pieces, place the fusible hem tape between the layers of fabric, and press firmly with a hot iron. The heat activates the adhesive in the tape, creating a strong bond that holds the fold or seam permanently in place. Hem tape works wonderfully for cotton, linen, and other natural fabrics, and it’s ideal for light to medium-weight curtains. While not as robust as machine sewing for heavy-duty curtains, it’s incredibly quick, easy, and perfect for decorative or light-filtering panels.
- Try Curtain Clips or Rings: For a truly no-sew solution, curtain clips or rings offer ultimate flexibility. Simply cut or fold your fabric to your desired length and width, ensuring the edges are neat (a quick hem tape application can secure raw edges if desired). Then, attach the clips along the top edge of your fabric panel, spacing them evenly. Once the clips are in place, simply slide the rings onto your curtain rod. This method is incredibly versatile, allowing you to easily change fabrics, adjust lengths, and is perfect for renters who cannot make permanent alterations or for anyone who enjoys frequently refreshing their window treatments.
- Hand Sew with Backstitch: If you appreciate the meditative process of hand sewing and want durable seams without a machine, the backstitch is your best friend. This stitch is renowned for its strength and is an excellent choice for creating strong hems and secure edges. Begin by pinning or clipping your fabric folds or seams in place. Then, using a needle and matching thread, create small, even backstitches. Each stitch overlaps the previous one slightly on the underside, forming a continuous, strong line of stitching that closely mimics the look of a machine stitch. While it undoubtedly takes more time than machine sewing, hand sewing gives you complete control over each seam and can be a very satisfying way to craft your curtains.
Common Curtain Mistakes to Avoid for Perfect Results
Even seemingly small errors during the curtain-making process can significantly impact how your finished curtains hang, their overall appearance, and their longevity. By paying close attention to detail during measuring, folding, and sewing, you can proactively avoid these common pitfalls and achieve superior results from the very beginning of your project. A little extra care now will save you frustration later.
Uneven Length
One of the most common and visually frustrating mistakes is having curtain panels that don’t hang evenly. This issue is often caused by cutting or hemming the fabric before accurately checking the final finished length. To prevent this, always hang your curtain panel (even if just temporarily, with pins) at the window after completing the top treatment, but before sewing the bottom hem. This allows you to precisely mark the desired finished length while the curtain is in its natural hanging position. Use a long ruler, a level, or a measuring tape to mark a perfectly straight line across the entire width of the fabric. Press and pin the hem carefully, ensuring it’s consistent. When sewing, go slowly and steadily to maintain a straight seam. Taking this extra moment to verify the length at the window will ensure your curtains hang beautifully and professionally.
Tight Rod Pocket
A rod pocket that is too snug can make it incredibly difficult to open or close your curtains smoothly, leading to frustration and potential damage to the fabric. This common problem occurs when the top fold for the pocket is made too small, or the seam is stitched too high, leaving insufficient space for the rod. To avoid this, always measure the diameter of your curtain rod accurately. When creating your rod pocket, ensure you leave ample extra space – typically at least 1 to 2 inches more than the rod’s diameter – to allow for easy movement and gather. When you sew the seam, stitch closer to the bottom edge of the folded fabric. It’s an excellent practice to slide the actual curtain rod through the newly formed pocket as a test run before finishing the entire panel. This quick check will confirm that your rod pocket is perfectly sized for smooth operation.
Visible or Skipped Stitches
If your stitches appear too prominently, are uneven, or worse, skip altogether, it typically points to an issue with your sewing machine’s tension settings or its setup. These issues can detract significantly from the professional appearance of your handmade curtains. To troubleshoot, always test your stitch settings on a scrap piece of your curtain fabric first. Ensure you’ve chosen a high-quality thread that closely matches your curtain fabric in color, as this helps stitches blend in. When sewing, maintain steady hands and guide the fabric gently; avoid pulling or pushing it forcefully. Go slowly, especially around folds and corners, to ensure consistent stitch formation. If stitch skipping persists, it’s advisable to check your needle (ensure it’s the correct type and size for your fabric, and not bent or dull) and re-thread your machine completely, including the bobbin, before trying again. These small adjustments can make a significant difference in the quality of your seams.
How to Care for Your Custom Curtains Properly After Washing
Once you’ve put in the effort to create beautiful custom curtains, proper care and storage are essential to help them remain in excellent condition for years to come. Following these simple care tips will ensure your curtains last longer, stay wrinkle-free, and look just as fresh and appealing after every wash or seasonal rotation.
- Washing Instructions: Always check the care labels of your chosen fabric and any lining or trim before washing. As a general rule, for cotton or linen curtains, use cold water and a gentle cycle in your washing machine. For more delicate fabrics, or if your curtains have intricate trims or linings, hand washing or spot cleaning specific areas might be the safest option to prevent damage. Avoid harsh detergents or bleach unless explicitly recommended for your fabric.
- Drying and Ironing: To minimize wrinkles and make ironing easier, remove cotton or linen curtains from the washer while they are still slightly damp. Iron them using a low to medium heat setting, moving slowly and steadily. For delicate fabrics like silk or rayon, use a pressing cloth between the iron and the curtain, or flip the panel over and iron on the wrong side to prevent scorching or shine. Alternatively, a fabric steamer works exceptionally well for removing wrinkles once the curtains are already hanging, offering a convenient way to freshen them up without taking them down. Allow curtains to fully dry before rehanging or storing.
- Storage Tips: When not in use, fold your curtains neatly to prevent deep creases. Store them in breathable fabric bags or pillowcases. Avoid storing curtains in plastic bags or containers, as plastic can trap moisture, leading to mildew or discoloration over time. Ensure curtains are completely clean and dry before storing them away for the season.
Frequently Asked Questions About Sewing Curtains
How much fabric is needed for each curtain panel?
To calculate the fabric needed for width, measure the width of your window (or the curtain rod length) and multiply it by 1.5 to 2.5 for desired fullness (1.5 for a less gathered look, 2-2.5 for a fuller, more luxurious gather). Then, add an additional 4-6 inches for side hems (2-3 inches per side). For length, measure from where your curtain rod will sit down to your desired curtain length (e.g., sill, floor, puddled). Add 8-12 inches for the top and bottom hems and any heading allowance (e.g., 4-6 inches for the top pocket/tabs, and 4-6 inches for the bottom hem). Always purchase a little extra fabric to account for pattern matching, mistakes, or shrinkage.
What is the best thread tension for sewing curtains?
A good starting point for thread tension on most sewing machines is a medium setting, typically around 4. However, the ideal tension can vary depending on your fabric type, thread weight, and machine model. Always perform a test on a scrap piece of your actual curtain fabric. If the fabric puckers, or the stitches appear loose and messy on either the top or bottom, adjust the tension dial slightly. Increase the top tension if stitches are loose on the bottom, or decrease it if the top thread is pulling the fabric. Continue adjusting by small increments until your stitches look even and smooth on both sides of the fabric.
Can I use blackout fabric as a lining for my curtains?
Yes, absolutely! Blackout fabric is an excellent choice for curtain lining. It effectively blocks light, which is ideal for bedrooms, nurseries, or media rooms, and also provides significant insulation against heat and cold. Keep in mind that blackout fabric is often thicker and sometimes a bit stiffer than regular lining material. When sewing with it, use a heavier-duty needle (like a denim or sharp needle) and pin it carefully and frequently to your main fabric to prevent slipping or shifting during sewing. It can also add more body and structure to your curtains.
How do I keep curtain panels from twisting or shifting when sewing long seams?
Sewing long, straight seams on large fabric panels can be tricky. To prevent twisting or shifting, always lay your fabric completely flat on a large table or even a clean floor before pinning. Pin frequently along the entire length of your seam, placing pins perpendicular to the seam line every few inches. As you sew, go slowly and steadily, allowing your sewing machine’s feed dogs to pull the fabric through; avoid pulling or stretching the fabric yourself. Keeping the bulk of the fabric supported on the table to the left of your machine also helps reduce drag and ensures a smoother, more even seam.
Do I need to prewash my curtain fabric before sewing?
Yes, it is highly recommended to prewash and iron your curtain fabric before you cut and sew it. This is a crucial step that helps prevent several problems:
- Shrinkage: Most fabrics will shrink slightly on their first wash. Prewashing ensures that your finished curtains won’t shrink unevenly or become too short after they are washed later.
- Dye Bleeding: Prewashing helps to set the dyes and removes any excess color, preventing dye bleeding onto other parts of the fabric or other laundry.
- Removes Sizing: Fabrics often come with a chemical finish called “sizing” that can make them stiff. Prewashing removes this, allowing the fabric to drape naturally and be easier to work with.
Always follow the care instructions for your specific fabric when prewashing.
Final Thoughts: Embrace the Joy of DIY Curtains
Now that you’ve explored the fundamental steps and various styles, sewing your own curtains doesn’t seem quite so tricky anymore, does it? You’re now equipped with the essential tools, a clear step-by-step process, and a selection of stylish options to choose from – all the necessary pieces to embark on your exciting curtain-making journey. Whether you choose to leverage the efficiency of a sewing machine, the meticulous craft of hand stitching, or even opt for the convenience of a no-sew method, you absolutely can create something beautiful and functional that perfectly fits your unique space and personal aesthetic.
Remember, the key to success in any sewing project, especially for beginners, is patience. Take your time with each step. Focus on achieving neat, crisp folds and clean, consistent seams. Double-check your measurements repeatedly before making any cuts or permanent stitches. Trust me, a little extra patience and attention to detail now will make a monumental difference in the quality and satisfaction you derive from your finished curtains. Don’t forget to prewash your fabric first, consider doing a small test run on a scrap piece if unsure, and most importantly, don’t stress about achieving absolute perfection on your first attempt. Enjoy the process of creating something with your own hands!
If this comprehensive guide has helped you gain confidence and inspiration, be sure to explore other DIY home decor and sewing guides I’ve put together. There’s always more to learn and try, and I’m always here to help you transform your house into a home, one handmade project at a time.
