Shiplap vs. Tongue and Groove: The Ultimate Guide to Choosing Your Ideal Wall Paneling
Are you caught in the common dilemma of choosing between shiplap and tongue and groove for your home’s walls or ceilings? It’s a decision many homeowners face, and I understand the feeling of being unsure.
Having guided numerous clients through this exact choice, I’ve witnessed firsthand the confusion that can arise. Both options offer distinct charm and functionality, making it challenging to determine which will best suit your space, aesthetic vision, and budget.
But there’s no need to worry – this comprehensive guide is designed to clarify everything for you. I’ll meticulously walk you through the unique characteristics of each style, highlight their key differences, and provide practical advice on how to select the perfect one for your home renovation project.
By the end of this article, you’ll feel confident and well-informed, ready to make a choice that perfectly aligns with your needs and design preferences.
Understanding The Basics of Shiplap & Tongue and Groove Paneling
Before diving into the specifics, let’s establish a clear understanding of what defines shiplap and tongue and groove, as their fundamental designs dictate their aesthetic and functional differences.
1. Shiplap Basics: Rustic Charm with Distinct Lines
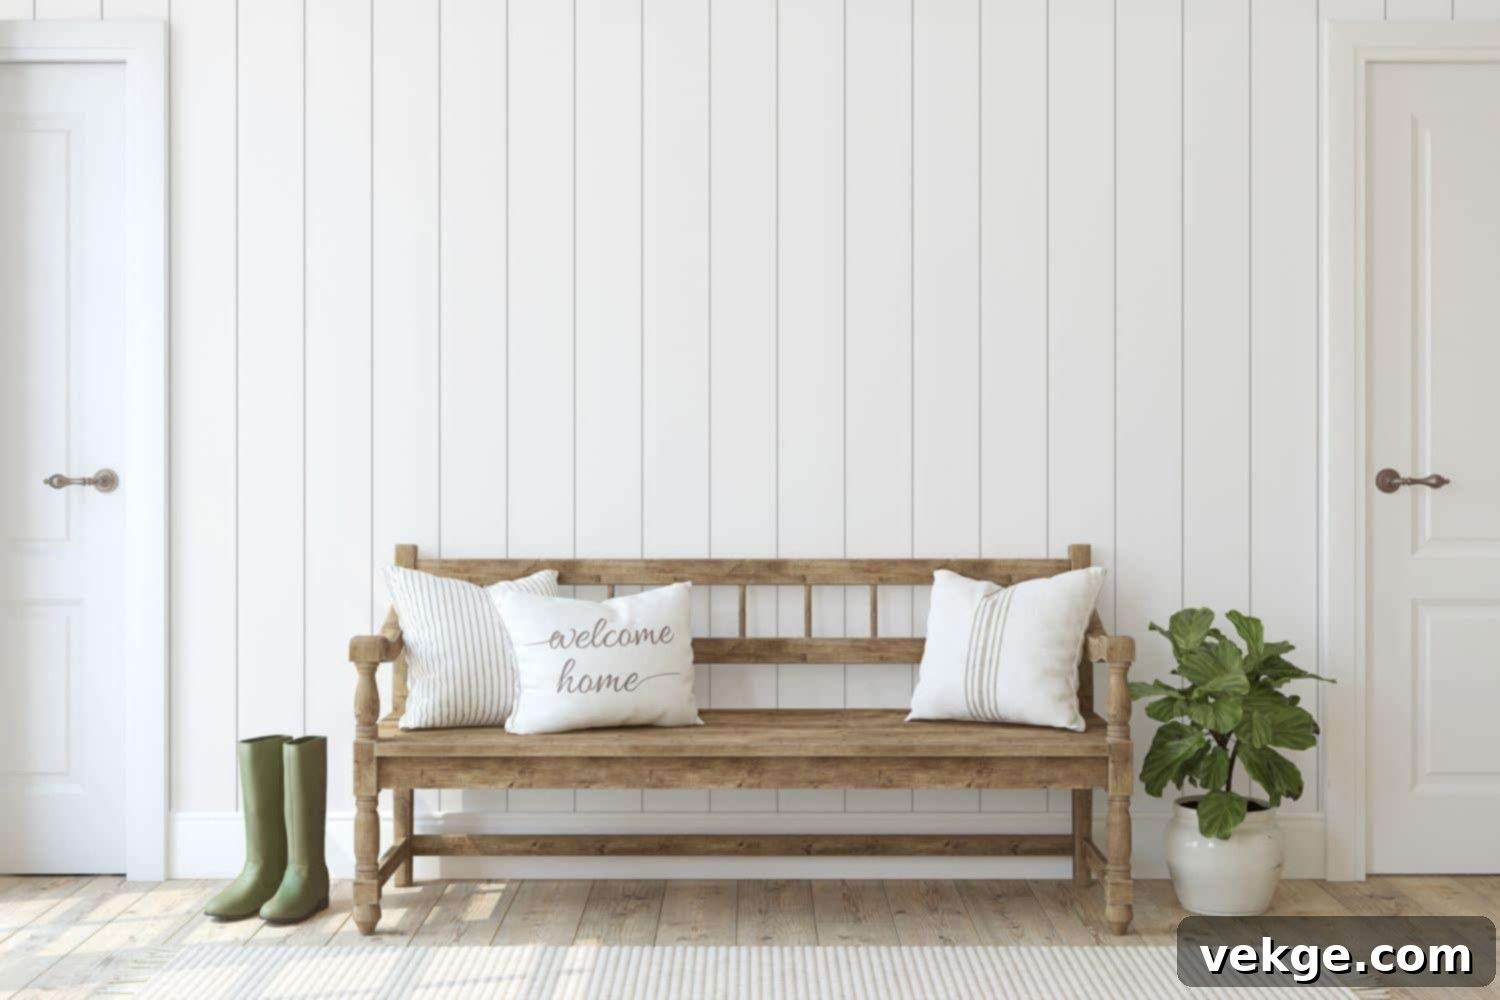
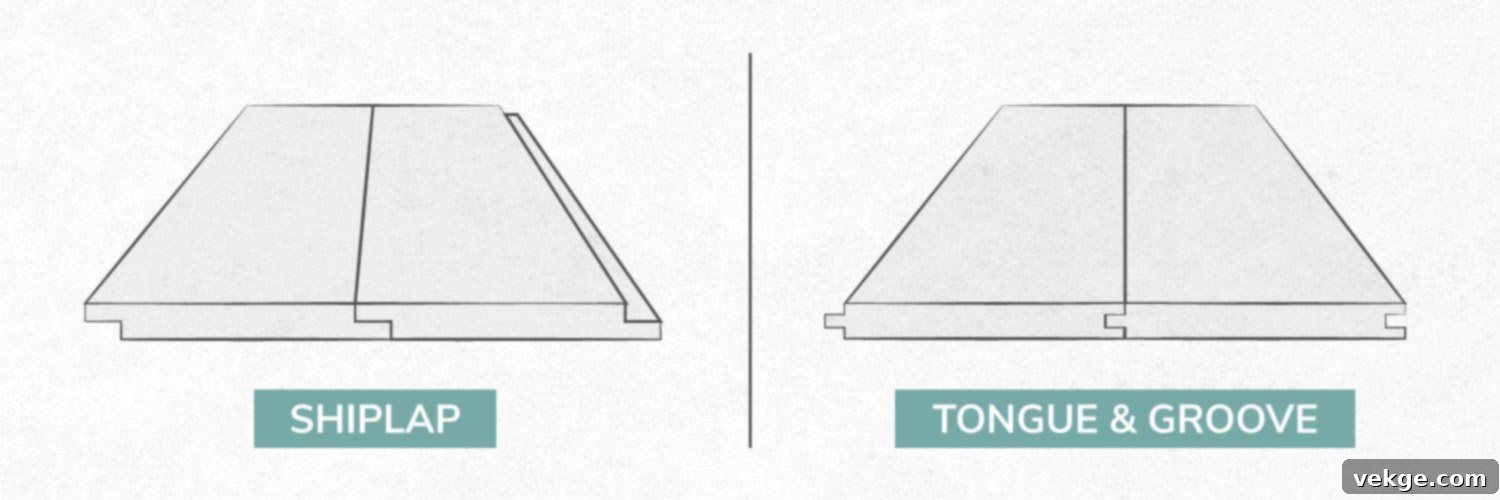
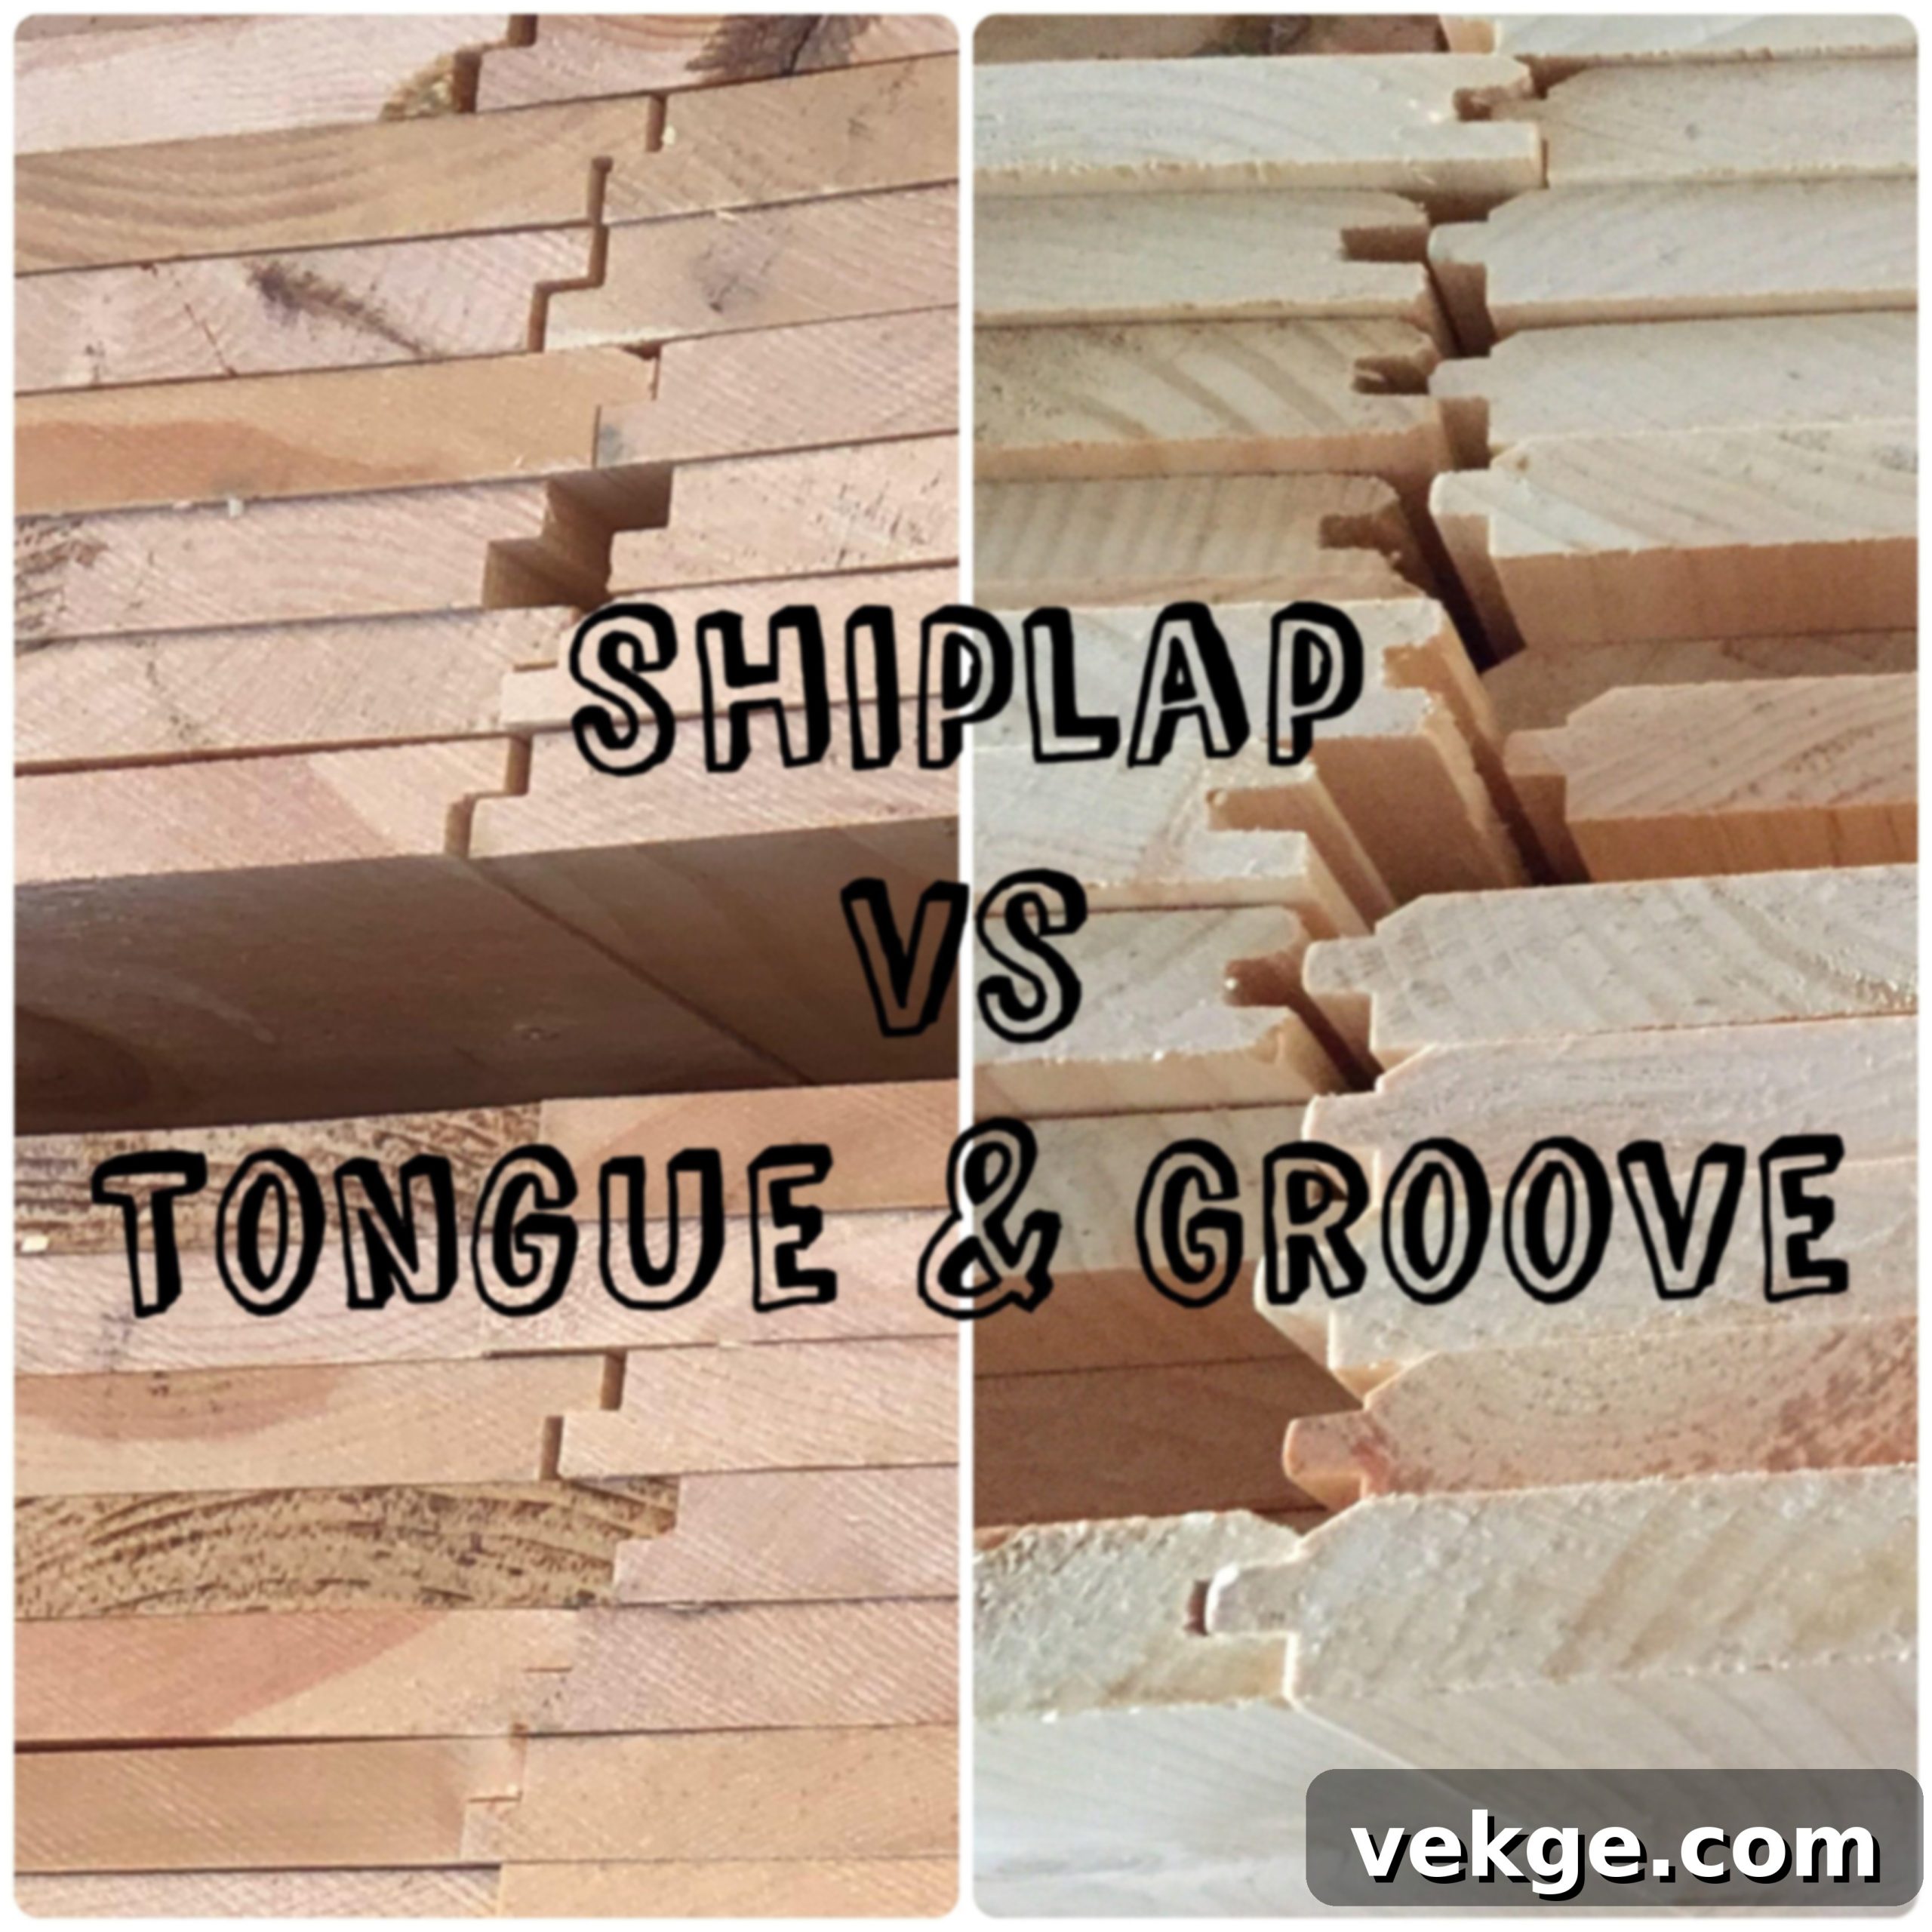
- Shiplap boards are characterized by their unique L-shaped (or rabbeted) cuts on their edges. These cuts allow the boards to overlap slightly when installed.
- When fitted together, these cuts naturally create small, consistent gaps or reveals between the boards.
- These deliberate gaps produce subtle yet striking shadow lines on your walls, adding depth and visual interest.
- The installation involves simply placing these boards side by side, allowing for a slight overlap and the characteristic spacing.
- Shiplap is a versatile option, commonly found in a variety of indoor settings such as bathrooms, living rooms, and bedrooms, where its casual aesthetic is highly valued.
- Based on my experience, shiplap is most frequently utilized on interior walls and ceilings, bringing a touch of farmhouse or coastal charm to any space.
2. Tongue and Groove Basics: Seamless Fit for Durability
- Each individual tongue and groove board is precisely milled with a protrusion (the “tongue”) on one edge and a corresponding recess (the “groove”) on the opposite edge.
- The defining feature of this system is how the tongue of one board slides perfectly and securely into the groove of the adjacent board, creating a tight interlocking connection.
- This interlocking mechanism results in a very clean, nearly gap-free fit between pieces, forming a unified and robust surface.
- Essentially, these boards link together like precise puzzle pieces, forming a solid, continuous panel.
- Their inherent stability and tight fit make them exceptionally well-suited for a wide range of applications, including walls, floors, and ceilings.
- I often recommend and see tongue and groove used in high-traffic areas like kitchens, and especially in outdoor spaces where a more resilient and sealed surface is required.
Main Design Features: Aesthetic Impact on Your Home
Understanding the core design elements helps visualize how each type of paneling will transform your space.
Shiplap’s Signature Look
- **Visible Lines**: Shiplap creates clear, defined horizontal or vertical lines between boards. These lines are a key part of its appeal, offering a consistent pattern.
- **Flat Against the Wall**: The boards typically lay relatively flat against the wall, though the overlapping rabbets add a slight dimension.
- **Casual, Relaxed Vibe**: It naturally lends a casual, cozy, and often rustic or coastal farmhouse look to a room. It feels inviting and unpretentious.
- **Versatile Style**: Shiplap surprisingly adapts to many home styles, from traditional to modern farmhouse, and even minimalist interiors seeking texture.
Tongue and Groove’s Refined Finish
- **Smooth, Sealed Surface**: When properly installed, tongue and groove creates an almost entirely smooth and sealed surface, with minimal visible seams.
- **Seamless Appearance**: The interlocking fit minimizes gaps, resulting in a continuous, elegant, and uniform look that can feel very polished.
- **Clean, Finished Look**: This style delivers a refined, high-quality finish that often suggests bespoke craftsmanship.
- **Suits Diverse Homes**: Its clean lines and tight fit make it suitable for both modern, contemporary homes and more classic, traditional settings, offering great flexibility.
Key Differences Between Shiplap & Tongue and Groove Explained
To make an informed choice, it’s crucial to understand the practical and aesthetic distinctions between these two popular paneling options. Here’s a detailed comparison:
| Key Differences | Shiplap | Tongue and Groove |
|---|---|---|
| Installation Process | • Boards sit on top of each other with small, visible gaps. The overlapping edges simplify alignment, often making it easier for a DIY enthusiast. • Generally considered simpler and quicker to install, potentially requiring fewer specialized tools or extra hands. |
• Boards lock together firmly, requiring precise alignment for a snug fit. This interlocking mechanism can be more intricate than shiplap. • While achievable for DIYers, the installation often benefits from extra hands to hold boards steady and ensure proper interlocking. |
| Weather Protection | • The inherent small spaces between boards mean that shiplap is not ideal for environments where moisture penetration is a significant concern. • Therefore, it is better suited and primarily recommended for indoor applications where it won’t be exposed to the elements. |
• The tight, interlocking fit of tongue and groove creates a significantly stronger seal against moisture, air, and drafts. • This superior weather resistance makes it highly recommended for outdoor use, such as siding, porch ceilings, and in high-humidity indoor areas. |
| Cost Factors | • Typically, shiplap boards and their installation are less expensive. This is partly due to less complex milling and often thinner board profiles. • Requires less wood per square foot because of the overlap, and faster installation times contribute to lower overall project costs. |
• Generally comes with a higher material cost, as the precise milling for the tongue and groove joint requires more wood and a more intricate manufacturing process. • Installation often takes more time due to the need for precise fitting and careful tapping, leading to higher labor expenses. |
| Visual Impact | • Clearly shows distinct, evenly spaced lines between boards, which is its defining characteristic. Each board stands out individually, contributing to a textured wall surface. • Creates a casual, rustic, or often coastal aesthetic, emphasizing individual planks. |
• Presents a smooth, largely continuous look with barely noticeable seams once installed. This creates a more refined and polished appearance. • Offers a seamless, uninterrupted surface that can feel modern, traditional, or even elegant, depending on the wood and finish. |
| Space Requirements | • Because of the overlapping nature, shiplap typically takes up less wall depth compared to the thickness required for a robust tongue and groove joint. • This makes it a suitable choice for most room sizes without significantly encroaching on living space. |
• The interlocking system sometimes requires a slightly thicker board or more specific wall depth considerations, especially for flooring or load-bearing applications. • While usually not a major issue for walls, the structural integrity and fit might be influenced by the underlying wall structure. |
Best Uses for Shiplap & Tongue and Groove: Matching Style to Function
Let me share where each type of board excels, drawing from my hands-on experience installing both styles in a variety of residential and commercial settings. Choosing the right material for the right application ensures both beauty and longevity.
Best Places for Shiplap: Adding Character Indoors
Shiplap’s distinct shadow lines and adaptable aesthetic make it a favorite for adding character to interior spaces.
Indoor Walls
- I find shiplap to be an excellent choice for creating striking accent walls in living rooms, providing a focal point without overwhelming the space.
- It subtly enhances bedroom walls, adding texture and warmth without being too visually dominant, perfect for a serene atmosphere.
- Many of my clients opt for shiplap in home offices, where it delivers a clean, organized, yet visually interesting backdrop that boosts productivity.
- It works wonderfully in dining rooms where you desire subtle patterns and a touch of rustic elegance to complement your decor.
Ceiling Projects
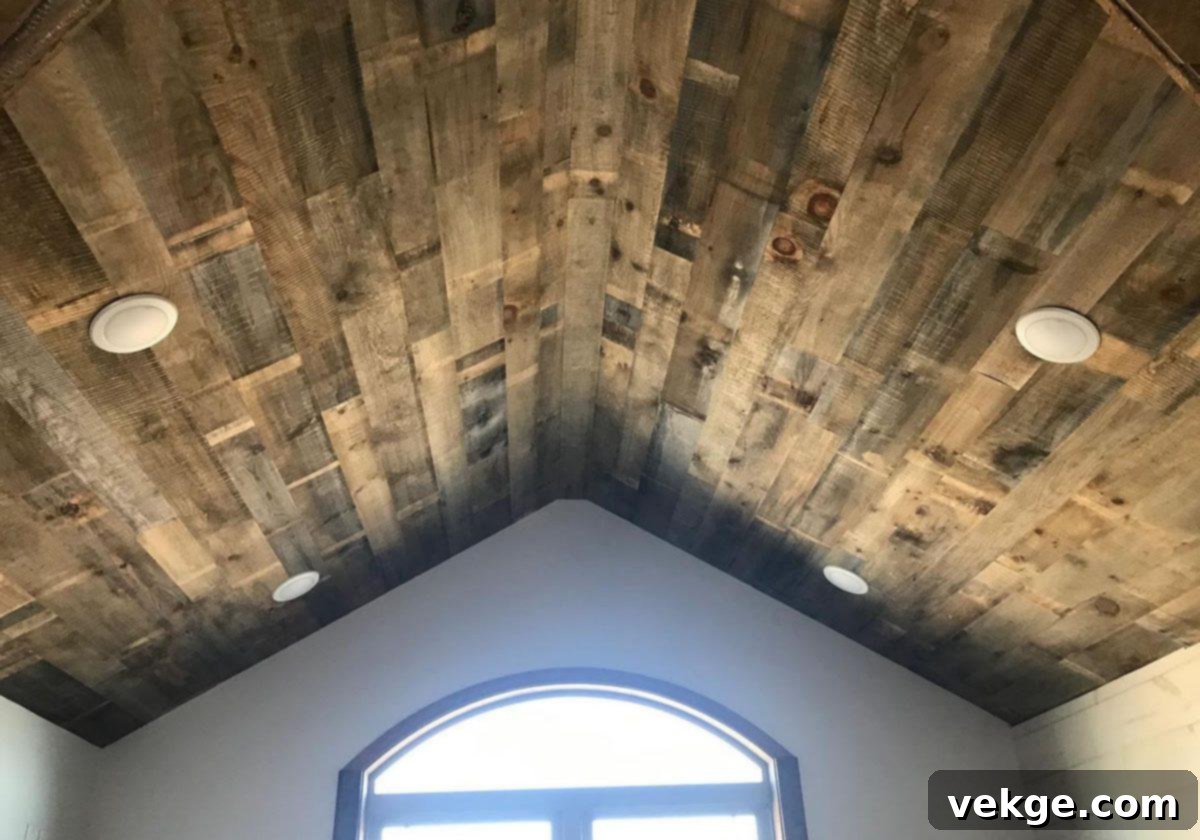
- Shiplap can dramatically transform plain ceilings, making them a design feature rather than an afterthought. It draws the eye upward, creating a sense of grandeur.
- I’ve successfully used it in entryways and hallways to create a welcoming first impression, adding an unexpected element of design.
- It fits particularly well in covered porches or screened-in lanais, extending the home’s interior style to outdoor living spaces.
- Its popularity extends to bathroom ceilings, where it adds a relaxed, spa-like feel, provided the area isn’t excessively wet directly above the shower.
Other Indoor Spaces
- Mudrooms often look much more inviting and put-together with shiplap walls, which also offer a durable surface for high-traffic entry points.
- It works well in dry bathroom areas, such as behind a vanity or on a feature wall, enhancing the room’s design without risk of moisture damage.
- Hallways gain significantly more interest and architectural detail with shiplap, breaking up long, monotonous stretches.
- It makes laundry rooms feel more integrated and stylish, transforming a utilitarian space into something more appealing.
Best Places for Tongue and Groove: Durability Meets Design
Tongue and groove’s robust and tightly-sealed nature makes it ideal for demanding environments and areas requiring a seamless finish.
Outdoor Uses
- I frequently recommend and install tongue and groove on covered decks and patios, where its durability and moisture resistance are highly beneficial.
- It stands up exceptionally well when used for porch ceilings, offering a polished finish that can withstand fluctuating outdoor temperatures and humidity.
- Many of my projects utilize it for exterior siding, providing a solid, weather-resistant barrier that looks fantastic.
- It works great for outdoor kitchen walls, where its ability to resist moisture and create a continuous surface is crucial for longevity and aesthetics.
Wet Areas
- Bathroom walls benefit immensely from tongue and groove, as its tight fit helps keep moisture from seeping behind the boards, making the space drier and more resilient.
- It’s an excellent choice for shower areas (when properly sealed and finished) as it creates a more impenetrable barrier against water.
- Steam rooms or saunas particularly benefit from this tight-fitting style, as it can better manage extreme humidity and temperature changes, preventing warping.
- Pool houses and changing rooms greatly benefit from its superior water resistance, ensuring the interior remains protected and stylish despite constant exposure to dampness.
Floor Applications
- Tongue and groove boards are the standard for creating strong, stable, and beautiful wood floors that can withstand significant wear and tear.
- It works exceptionally well in sunrooms, providing a durable and aesthetically pleasing surface that can handle sunlight exposure without excessive movement.
- Many people choose it for finished basements, where its tight fit helps to prevent moisture issues and creates a comfortable, livable space.
- It stands up admirably to heavy foot traffic in hallways, ensuring a long-lasting and attractive flooring solution for high-use areas.
Cost Comparison According to Various Factors
Understanding the financial implications is a major part of choosing between shiplap and tongue and groove. Here’s a breakdown of typical costs.
| Cost Factors | Shiplap | Tongue and Groove |
|---|---|---|
| Material Costs | • Basic pine: $3 – $7 per sq. ft. (most common, budget-friendly) • Mid-range wood (e.g., cedar, poplar): $8 – $12 per sq. ft. (offers better durability or specific grain patterns) • High-end wood (e.g., redwood, cypress): $13 – $20 per sq. ft. (premium appearance, enhanced natural resistance) • Pre-painted boards: Add +$2 – $4 per sq. ft. (saves labor on painting, convenient) |
• Simple pine: $4 – $9 per sq. ft. (slightly more expensive due to complex milling) • Medium quality wood (e.g., oak, maple): $10 – $15 per sq. ft. (durable, often used for flooring) • Premium wood (e.g., exotic hardwoods, clear cedar): $16 – $25 per sq. ft. (for superior durability, unique aesthetics, or outdoor applications) • Special finishes (pre-stained, custom colors): Add +$3 – $5 per sq. ft. (for a ready-to-install, finished look) |
| Labor Expenses | • Basic installation: $4 – $7 per sq. ft. (straightforward walls, simple patterns) • Complex patterns (e.g., herringbone, intricate angles): $8 – $12 per sq. ft. (requires more precision and time) • Wall prep (repair, cleaning, priming): $1 – $3 per sq. ft. (essential for a smooth base) • Project duration: Typically 1-2 days for a standard room, making it quicker to complete. |
• Standard installation: $6 – $10 per sq. ft. (due to the precision required for interlocking boards) • Tricky areas (corners, curves, uneven surfaces): $11 – $15 per sq. ft. (requires specialized cuts and careful fitting) • Surface prep (ensuring walls are perfectly flat): $2 – $4 per sq. ft. (critical for a seamless fit) • Project duration: Generally 2-3 days for a standard room, as fitting boards is more time-consuming. |
| Extra Costs | • Basic tools (nail gun, saw, level): $100 – $200 (can be rented or purchased for DIY) • Backing materials (furring strips if needed): $1 – $2 per sq. ft. • Paint or stain: $20 – $40 per gallon (if not pre-finished; costs vary by quality) |
• Tools (rubber mallet, tapping block, more precise saw): $150 – $300 (often requires specific tools for proper installation) • Backing materials (underlayment for floors, furring strips for walls): $1 – $2 per sq. ft. • Paint or stain: $20 – $40 per gallon (if not pre-finished, crucial for protection and aesthetics) |
How to Install Them: A Step-by-Step Guide for DIY Enthusiasts
While professional installation ensures the best results, many homeowners choose to tackle these projects themselves. Here’s a simplified guide to get you started, focusing on key steps for each paneling type.
1. Installing Shiplap: A Simpler Approach
Shiplap’s forgiving nature makes it a great choice for those new to wall paneling.
- **Preparation is Key**: Start by finding and clearly marking all wall studs. I always recommend using a stud finder and marking with a pencil. Measure from the bottom up and keep a long level handy to ensure your lines are perfectly straight. Ensure your wall surface is clean and dry.
- **First Board Placement**: Place the first board at the bottom of your wall, ensuring it is perfectly level. This base board is crucial for the entire installation. Secure it by nailing into the studs; I typically use two nails per stud for firm attachment.
- **Layering Up**: Each new board is then placed directly on top of the previous one, with its L-shaped lip or rabbet resting securely on the board below. This overlap naturally creates the signature shiplap gap. Continue this process, working your way up the wall.
- **Maintaining Level**: Consistently check for level as you proceed. Even slight deviations can become very noticeable over a large area. Remember to leave small expansion gaps (about 1/8 inch) at the edges near walls, corners, and ceilings to allow for natural wood movement.
- **Obstacles and Finishing**: Cut precise holes for outlets and light switches before permanently attaching those boards. After all boards are installed, fill any visible nail holes with wood putty. Lightly sand any rough spots or putty before applying your chosen paint or stain for a smooth, professional finish.
2. Installing Tongue and Groove: Precision for a Seamless Look
Tongue and groove installation requires a bit more precision due to the interlocking system, but the result is a beautifully smooth surface.
- **Surface Preparation**: Begin with a completely flat and clean wall surface. Just like with shiplap, meticulously mark all studs on the wall for secure fastening. Uneven walls can make achieving a tight fit challenging.
- **Starting Point**: Place your first board with its groove edge facing the corner or starting point of your wall. Use a level to ensure this board is perfectly straight, as it sets the foundation for the entire project.
- **First Board Fastening**: Secure the first board by nailing through the face near the top edge. These nails will be hidden by the tongue of the subsequent board, creating a clean look.
- **Interlocking Boards**: Slide the tongue of the next board firmly into the groove of the previously installed one. This is where the interlocking magic happens.
- **Ensuring a Tight Fit**: Gently tap the board into place using a rubber mallet and a wood block. The wood block protects the edges of the board from damage while you tap to ensure a tight, gap-free fit.
- **Hidden Nailing**: Secure each subsequent board by nailing through the tongue at an angle into each wall stud. This method, known as “blind nailing,” completely hides the nails, preserving the seamless aesthetic.
- **Continuing Up the Wall**: Continue adding boards, regularly checking for level and tightness. The last board will likely need to be cut lengthwise to fit the remaining space accurately.
Pros & Cons of Shiplap & Tongue and Groove: A Balanced Perspective
Both options offer unique benefits and drawbacks. Weighing these against your priorities will guide your decision.
| Aspect | Shiplap | Tongue and Groove |
|---|---|---|
| Pros | • **Easy Repair**: Single boards can often be replaced or repaired without dismantling the entire wall, making maintenance simpler. • ** forgiving Installation**: Its overlapping nature is more forgiving if walls aren’t perfectly plumb or flat, making DIY projects less stressful. • **Faster & Less Costly Installation**: Generally quicker to install and requires less specialized labor, leading to lower overall project costs. • **Wall Breathability**: The slight gaps allow for some air circulation behind the boards, which can be beneficial in certain climates. • **Customizable Spacing**: Offers flexibility in how tight or wide you set the gaps, allowing for a personalized look. • **Easier Paint Touch-ups**: The distinct lines make it simpler to repaint individual boards or sections without much effort. • **Matches Many Styles**: Adapts beautifully to rustic, farmhouse, coastal, and even contemporary minimalist aesthetics. • **Easier Removal**: If you decide to change your decor, shiplap is typically less destructive to remove from the wall. |
• **Superior Water Resistance**: The tight, interlocking fit forms an excellent barrier against moisture, making it ideal for wet or outdoor environments. • **Smooth, Gapless Appearance**: Creates a clean, continuous, and highly refined surface that can elevate any room’s elegance. • **Boards Lock Securely**: The interlocking mechanism results in a very strong and stable surface, resistant to movement. • **Strong, Sturdy Surface**: Provides a robust and durable finish, especially important for floors or high-traffic walls. • **No Dust Collection in Gaps**: The tight fit means there are no visible gaps for dust, dirt, or debris to accumulate, simplifying cleaning. • **Longer-Lasting Finish**: A seamless surface often holds finishes better and lasts longer without visible wear at the joints. • **Better Insulation**: With fewer air gaps, it can offer slightly better insulation properties, contributing to energy efficiency. • **Versatile Room Settings**: Works well in formal living rooms, modern kitchens, or any setting where a polished, sophisticated look is desired. • **Provides a Finished, Polished Look**: Delivers a high-end, custom-built appearance that enhances property value and appeal. |
| Cons | • **Dust Collection**: The visible gaps between boards can collect dust and debris, requiring more frequent and detailed cleaning. • **Moisture Vulnerability**: Water can more easily seep behind boards in very wet rooms like showers, potentially leading to mold or warping. • **Dirt Accumulation**: Gaps may accumulate dirt and grime over time, becoming unsightly if not regularly cleaned. • **Potential for Warping**: More susceptible to warping or cupping if exposed to significant moisture or humidity without proper sealing. • **Visible Nail Holes**: Unless blind-nailed perfectly, nail holes may be more visible, requiring putty and careful finishing. • **Insect Nests**: The small gaps can potentially become nesting spots for small insects in certain environments. • **Less Formal**: While versatile, its rustic aesthetic might not be ideal for very formal or highly minimalist modern rooms seeking sleekness. • **Shrinkage/Expansion**: Boards may show more noticeable shrinkage or expansion over time, making gaps slightly wider or narrower. |
• **Higher Cost**: Typically involves greater material costs due to precise milling and higher labor expenses because of the intricate installation. • **Installation Difficulty**: May require more skill, patience, and sometimes extra help for proper installation, making DIY more challenging. • **Challenging Repairs**: Repairing a single damaged board can be very difficult, often requiring the removal of multiple adjacent boards. • **Time-Consuming Installation**: The need for precise fitting and tapping makes the installation process slower than shiplap. • **Needs Straight Walls**: Requires very straight and flat walls for a perfect, gap-free fit; imperfections are more noticeable. • **Uses More Wall Depth**: The interlocking joint can sometimes result in a slightly thicker overall wall profile. • **Harder to Find Matches**: If repairs are needed years later, finding an exact match for the unique tongue and groove profile can be challenging. • **Removal Damage**: Removing tongue and groove paneling can often damage the underlying wall structure due to the tight interlocking system. • **Trapped Moisture**: If moisture does breach the seal, it can become trapped behind the boards, potentially leading to more severe issues than with shiplap’s breathability. |
Conclusion: Making the Right Choice for Your Home
Now that I’ve shared all the essential insights and detailed comparisons between shiplap and tongue and groove, which option resonates most with your home’s needs and your personal style?
Both shiplap and tongue and groove paneling are exceptional choices that can add significant charm, character, and value to any space. However, your ultimate decision should be a thoughtful one, carefully weighing your specific requirements and preferences. If you’re drawn to a more casual, rustic, or farmhouse aesthetic, appreciate simpler upkeep, and are working with a tighter budget, shiplap might be the perfect answer for your interior walls and ceilings.
Conversely, for areas that demand superior water protection, a more robust and seamless surface, or a polished, contemporary look, tongue and groove could prove to be the more suitable and durable choice. Take your time to thoroughly consider the specific location where you’ll use the boards—be it a bathroom, an outdoor porch, or a living room accent wall—and prioritize what matters most to you, whether it’s initial cost, long-term durability, visual impact, or ease of maintenance.
Want to delve deeper into other home improvement topics? Feel free to explore my guide on picking the best wood types for indoor projects to further enhance your expertise.
Or, leave a comment below – I’d love to hear which style you picked for your project and the reasons behind your decision!
Frequently Asked Questions About Wall Paneling Choices
Here are answers to some common questions homeowners ask when considering shiplap and tongue and groove:
What is the New Trend Instead of Shiplap?
While shiplap remains a popular choice, board and batten paneling is rapidly gaining traction as a fresh and stylish alternative for wall design. This style features vertical boards with thin strips (battens) covering the seams between wider panels, creating a distinct, architectural look that can range from traditional to modern farmhouse.
Is Tongue and Groove More Expensive than Shiplap?
Yes, tongue and groove paneling typically costs more than shiplap, often ranging from 20-30% higher in price. This increased cost is primarily due to the more complex and precise milling process required to create the interlocking tongue and groove joint, as well as the slightly greater material yield needed for these detailed cuts.
What is V-Groove Shiplap?
V-groove shiplap is a variation of traditional shiplap where the edges of the boards are cut at an angle (chamfered) instead of straight. When these boards meet, they create a distinct V-shaped indent or groove along the seam. This style offers deeper and more pronounced shadow lines compared to standard shiplap’s flatter, straighter gaps, providing a slightly more refined and traditional aesthetic.
