Transform Your Kitchen: The Ultimate DIY Guide to Painting Cabinets for a Fresh New Look
Are you dreaming of a fresh, updated kitchen without the hefty price tag of a full renovation? Look no further than painting your kitchen cabinets. This cost-effective and remarkably transformative project can completely revitalize the heart of your home, breathing new life into tired spaces and creating an entirely new aesthetic. A fresh coat of paint isn’t just a color change; it’s a statement that can brighten, modernize, and personalize your kitchen, making it feel more spacious, inviting, and truly yours.
However, while the idea of a cabinet refresh is exciting, the process itself demands careful planning, meticulous preparation, and a keen eye for detail. This isn’t a weekend job to be rushed; it’s a rewarding endeavor that, when done correctly, yields professional-looking results that can last for years. In this comprehensive, step-by-step guide, we’ll walk you through every stage of kitchen cabinet painting, equipping you with the knowledge and confidence to achieve a stunning kitchen transformation that you’ll be proud to show off.
Gather the Essential Materials and Tools for Your Cabinet Painting Project
Before dipping a single brush into paint, the foundation of any successful cabinet painting project lies in gathering all the necessary high-quality materials and tools. Investing in good supplies will not only make the process smoother but also significantly contribute to a professional and durable finish. Here’s a detailed list of what you’ll need:
- Cleaning Supplies: A heavy-duty degreaser like TSP (Trisodium Phosphate) or a commercial deglossing agent, sponges, and clean rags are essential for thoroughly cleaning your cabinets.
- Sanding Supplies: Sandpaper in various grits (120-grit for initial sanding, 180-grit for subsequent smoothing, and 220-grit for between coats of primer/paint). Consider a sanding block or an orbital sander for larger, flat surfaces. Don’t forget tack cloths to pick up fine dust.
- Repair Materials: Wood filler or putty for patching dings, dents, or holes, and a putty knife for application. Wood glue may also be needed for loose joints.
- Primers: A high-quality primer formulated for cabinets. Options include shellac-based primers (excellent for stain-blocking and adhesion on tricky surfaces), water-based acrylic primers (low odor, easy cleanup), or oil-based primers (strong adhesion, but more fumes).
- Cabinet Paint: Choose a durable paint specifically designed for cabinets or furniture. Acrylic-latex enamels (often called “hybrid” enamels) offer excellent durability, smooth finish, and easier cleanup than traditional oil-based paints. Consider brands known for their cabinet-specific formulas.
- Applicators:
- Brushes: High-quality synthetic angled brushes (1.5 to 2.5 inches) for cutting in corners, detailed areas, and intricate moldings.
- Rollers: Small foam rollers or high-density, low-nap microfibre rollers (4 to 6 inches) for smooth, even coverage on flat surfaces. A mini roller frame and paint tray are also needed.
- Paint Sprayer (Optional but Recommended): For the most professional, factory-smooth finish, a paint sprayer can be a game-changer. If using one, you’ll also need appropriate masks, ventilation, and drop cloths for overspray protection.
- Masking and Protection: Painter’s tape (blue for general masking, green for delicate surfaces or longer adhesion), plastic sheeting or canvas drop cloths to protect floors, countertops, and appliances.
- Hardware Removal Tools: Screwdrivers or a power drill for removing cabinet doors, drawer fronts, hinges, and handles.
- Safety Gear: Dust mask or respirator (especially for sanding and spraying), safety goggles, and gloves.
- Miscellaneous: Buckets for cleaning, stir sticks for paint, a utility knife, and a well-ventilated workspace.
Meticulous Preparation: The Foundation of a Flawless Finish
Skipping or rushing the preparation steps is the most common mistake in cabinet painting. Proper preparation is not just important; it is absolutely crucial for achieving a long-lasting, professional-looking finish. Dedicate ample time to this stage, as it will determine the success and durability of your entire project.
- Empty and Remove: Start by completely emptying all your cabinets and drawers. This is also a great opportunity to declutter and reorganize.
- Disassemble Hardware: Carefully remove all cabinet doors, drawer fronts, hinges, and handles/knobs. Keep all hardware organized, perhaps in labeled plastic bags, to ensure easy reassembly. Label each door and drawer front (e.g., using a number system on a piece of painter’s tape on the back) and its corresponding cabinet opening to remember its exact position later.
- Thorough Cleaning: This is a critical step. Kitchen cabinets accumulate layers of grease, grime, and food splatters over time. Use a powerful degreaser (like TSP or a specialized kitchen degreaser) mixed with warm water and a scrub brush or sponge. Clean every surface of the cabinet boxes, doors, and drawer fronts thoroughly. Rinse with clean water and allow everything to dry completely. Any remaining grease will prevent paint adhesion.
- Light Sanding (Deglossing): Once clean and dry, lightly sand all cabinet surfaces with 120-grit or 150-grit sandpaper. The goal here isn’t to remove the existing finish but to “scuff” the surface, creating a microscopic texture that helps the primer and paint adhere better. For glossy finishes, a deglossing agent can also be used, but light sanding is often more effective. Always sand in the direction of the wood grain.
- Dust Removal: After sanding, thoroughly remove all dust. Use a shop vacuum with a brush attachment, followed by wiping down all surfaces with a tack cloth. Repeat until no dust remains. Dust particles trapped under paint will result in a bumpy, unprofessional finish.
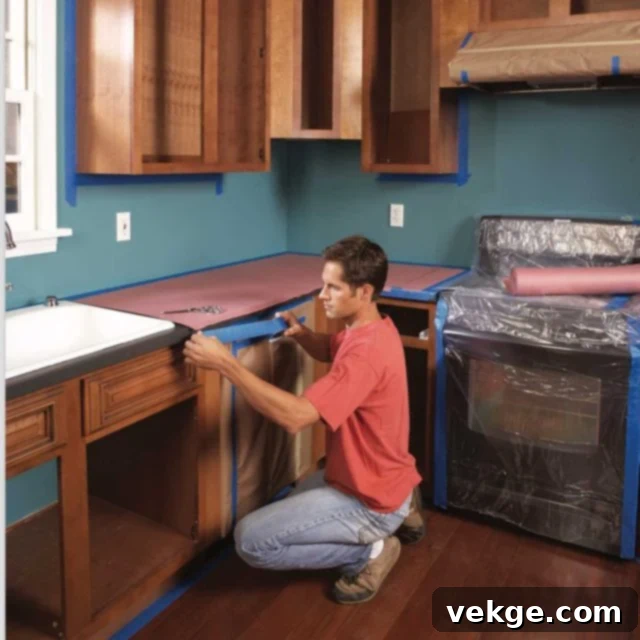
- Protect Your Workspace: Cover countertops, floors, and adjacent appliances with drop cloths or plastic sheeting. Use painter’s tape to meticulously mask off any areas you don’t want painted, such as walls adjoining the cabinet boxes, inside edges of drawers, or cabinet interiors you don’t plan to paint.
Repairing Imperfections and Applying the Essential Primer
With your cabinets meticulously cleaned and sanded, it’s time to address any imperfections and lay down the crucial base layer of primer. These steps are vital for creating a smooth, uniform surface that will hold your paint beautifully.
Repairing and Filling
Inspect every cabinet surface for any dents, scratches, chips, or holes. These small flaws can become glaringly obvious once painted. Use wood filler or a high-quality spackling compound to repair these areas. Apply the filler with a putty knife, slightly overfilling the imperfection. Once dry (check manufacturer’s instructions, usually a few hours), sand the repaired areas smooth with 180-grit or 220-grit sandpaper. Repeat the dust removal process with a tack cloth.

Additionally, check for any gaps or cracks between cabinet sections or where trim meets the cabinet boxes. Use paintable caulk to fill these seams. A smooth, even bead of caulk creates a seamless, professional look. Wipe away any excess immediately with a damp cloth or your finger.
The Importance of Priming
Applying a quality primer is non-negotiable for a professional cabinet painting job. Primer serves several critical functions:
- Adhesion: It creates a strong bond between the cabinet surface and the new paint, preventing chipping and peeling.
- Even Finish: Primer provides a uniform base color, ensuring that the final paint color looks consistent and vibrant, especially when changing from a dark to a light color.
- Stain Blocking: It seals in old stains, wood tannins (which can bleed through light paint colors), and odors.
- Smoother Surface: It helps to fill in minor imperfections and allows for a smoother final paint application.
Apply primer evenly with a high-quality brush or roller, following the manufacturer’s instructions. For optimal adhesion and coverage, two thin coats of primer are often better than one thick coat. Allow each coat to dry thoroughly according to the product’s recommendations (usually 2-4 hours) before applying the next. Lightly sand with 220-grit sandpaper between primer coats for an exceptionally smooth finish, and always wipe away dust with a tack cloth before proceeding.
Choosing the Right Paint and Mastering Painting Techniques
Selecting the right paint and employing proper application techniques are paramount to achieving that coveted, durable, and smooth cabinet finish. Don’t underestimate these steps.
Selecting Your Cabinet Paint and Sheen
When it’s time to choose your paint, always opt for a high-quality product specifically designed for cabinets or trim. These paints are formulated for superior durability, hardness, and resistance to chipping, scuffing, and moisture – all crucial for kitchen environments.
- Acrylic-Latex Enamels (Hybrids): These are often recommended for DIYers due to their excellent durability, low VOCs (volatile organic compounds), easy water cleanup, and smooth finish. Many high-end brands offer hybrid alkyd-acrylic formulations that combine the best properties of oil and water-based paints.
- Oil-Based Enamels: Known for their exceptional hardness and smooth finish, but they have a longer drying time, stronger fumes, and require mineral spirits for cleanup.
Regarding sheen, consider the following:
- Satin: A popular choice, offering a subtle sheen that’s easy to clean and hides minor imperfections well.
- Semi-Gloss: Provides a more reflective surface, making it very durable and easy to wipe down. It can highlight imperfections if the prep isn’t perfect.
- Gloss: The most durable and easiest to clean, but it shows every flaw. Best for highly modern or minimalist designs with perfectly prepared surfaces.
Mastering Painting Techniques for a Flawless Finish
The key to a smooth, factory-like finish is applying thin, even coats and allowing adequate drying time. Good ventilation is also essential.
- Work in a Clean, Controlled Environment: Ensure your painting area is free of dust and debris. If using a sprayer, consider creating a makeshift spray booth with plastic sheeting.
- Starting with Doors and Drawer Fronts: Lay cabinet doors and drawer fronts flat on sawhorses or a workbench. This prevents drips and allows for even application. Start with the back sides first, then flip and paint the front once dry.
- Brush Application: If using a brush, start with recessed areas, detailed profiles, or panel interiors. Use a good quality angled brush. Apply paint in long, even strokes, following the grain of the wood. For a smooth finish, “tip off” the paint by lightly dragging the tip of a dry brush over the wet paint to remove brush marks.
- Roller Application: For flat surfaces, use a high-density foam roller or a 4-6 inch microfibre roller for minimal texture. Load the roller evenly and apply thin coats in overlapping sections. Avoid pressing too hard, which can create roller marks.
- Paint Sprayer Application (Advanced): For the smoothest finish, a paint sprayer is unmatched. Practice on scrap wood first to get a feel for the distance, speed, and overlap needed to avoid drips and achieve an even coat. Always wear a respirator and ensure excellent ventilation.
- Thin, Even Coats: This cannot be stressed enough. Two or three thin coats will always look better and be more durable than one thick, gloppy coat. Allow each coat to dry completely according to the manufacturer’s instructions – this is often longer than “dry to touch.”
- Light Sanding Between Coats: After each coat of paint (and even primer), a very light sanding with 220-grit or finer sandpaper can help to knock down any dust nibs or minor imperfections, creating a glass-smooth surface for the next coat. Always wipe with a tack cloth afterwards.
Adding Details and Accents to Personalize Your Kitchen
Once your cabinets are beautifully painted, you have an exciting opportunity to further enhance their look and personalize your kitchen. Details and accents can elevate the entire space, giving it a designer touch.
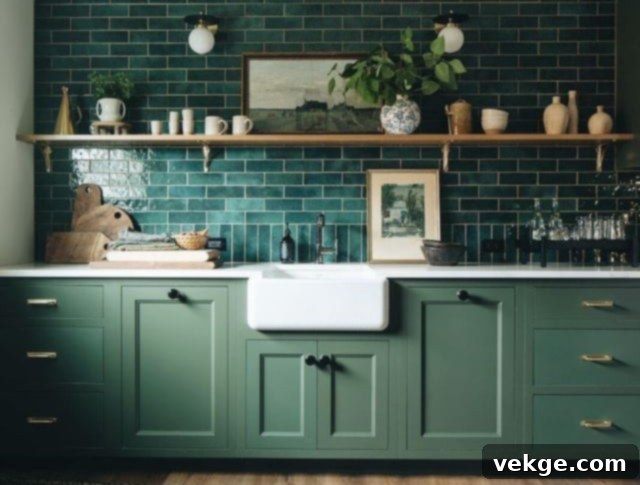
- New Hardware: Simply updating cabinet knobs, pulls, and hinges can dramatically change the style of your kitchen. Choose hardware that complements your new cabinet color and overall aesthetic – from modern brushed nickel to classic bronze or chic matte black.
- Creative Finishes: Beyond a single color, consider techniques like distressing or antiquing to give your cabinets a vintage, farmhouse, or rustic look. Glazes can add depth and character, particularly to cabinets with intricate profiles.
- Two-Tone Cabinets: A popular trend involves painting upper and lower cabinets different colors. For example, dark lower cabinets with lighter upper cabinets can add visual interest and ground the space.
- Open Shelving: If you removed some upper cabinet doors, consider painting the interior of the cabinet boxes and adding decorative items to create open shelving. This can lighten the space and offer opportunities for displaying beautiful dinnerware or decor.
- Under-Cabinet Lighting: Adding LED strip lighting beneath your upper cabinets not only provides functional task lighting but also highlights your newly painted cabinets, creating warmth and ambiance.
- Decorative Molding: If your cabinets lack architectural detail, consider adding crown molding to the top of upper cabinets or trim to the bottom of wall cabinets for a more custom, built-in look.
Reassembling the Cabinets: The Final Touches

You’re almost there! Once your cabinet paint has completely cured – not just dry to the touch, but hard enough to withstand handling without scratching (this can take several days to a week, depending on the paint type and humidity) – it’s time for the gratifying process of reassembly.
- Handle with Care: Even cured paint can be vulnerable. Handle doors and drawer fronts gently to avoid scuffs or chips.
- Reattach Hardware: Using your labeled system, carefully reattach the hinges to the cabinet doors and then to the cabinet boxes. Take your time to ensure everything is aligned correctly and functions smoothly.
- Install Knobs and Pulls: If you’re using new hardware, ensure you have the correct drill bits and templates for consistent placement.
- Adjust Doors and Drawers: Once all doors and drawers are reinstalled, make any necessary adjustments to the hinges to ensure they close evenly, are perfectly aligned, and have consistent gaps between them. Modern European-style hinges offer excellent adjustability.
- Inspect Thoroughly: Double-check that all screws have been tightened securely and that every component is functioning correctly.
Maintenance and Care for Long-Lasting Beauty
To keep your newly painted kitchen cabinets looking their absolute best for years to come, proper maintenance and care are essential. A little effort will go a long way in preserving your beautiful new finish.
- Gentle Cleaning: For regular cleaning, avoid harsh chemicals, abrasive cleaners, or scrubbing pads, which can damage the paint finish. Instead, use a soft cloth dampened with a mild soap and water solution. Gently wipe down surfaces, then wipe dry with another clean, soft cloth.
- Address Spills Immediately: Kitchens are prone to spills. Wipe up any water, food, or grease splatters as soon as they occur to prevent staining or damage to the paint.
- Protect from Heat and Moisture: Be mindful of any excessive heat or moisture that may come in contact with the cabinets. Use vent fans when cooking, and wipe away condensation promptly. Excessive exposure to moisture can lead to paint damage or swelling of the wood.
- Avoid Overloading: While painted cabinets are durable, avoid overloading them with heavy items that could cause undue stress on the hinges or frames.
- Touch-Up Paint: Keep a small amount of your leftover cabinet paint for future touch-ups. Minor chips or scuffs can be easily repaired with a small artist’s brush, making them virtually disappear.
Conclusion: Enjoy Your Renewed Kitchen
Painting kitchen cabinets is more than just a home improvement project; it’s a profound transformation that can breathe new life into your entire home. By diligently following this comprehensive, step-by-step guide, you are well-equipped to achieve professional-looking results and create a kitchen space that is not only visually stunning but also highly functional and deeply inviting.
The keys to a successful cabinet painting project lie in proper preparation, using quality materials, and meticulous attention to detail at every stage. Whether you choose to tackle this rewarding DIY endeavor yourself, or decide to enlist the expertise of a professional painting contractor for that ultimate factory finish, the end result will be a kitchen that feels updated, stylish, and truly reflective of your personal taste.
Embrace the satisfaction of a beautifully renewed kitchen. Enjoy your freshly painted cabinets and the vibrant, refreshed beauty they bring to the heart of your home. This investment of time and effort will pay dividends in daily enjoyment and increased home value.
