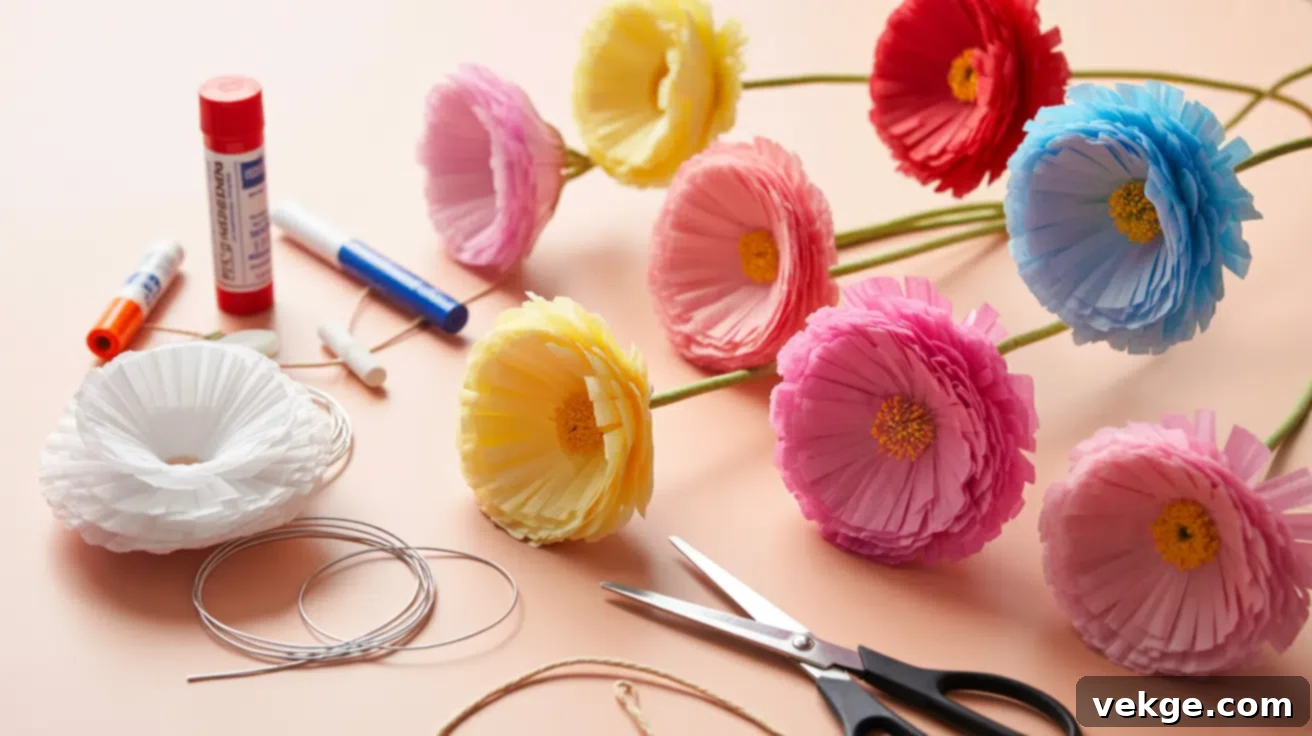
DIY Coffee Filter Flowers: Create Stunning, Budget-Friendly Blooms with Ease
Are you searching for an enjoyable and economical craft project to add a splash of color to your home or special events? Look no further! Coffee filter flowers are a delightful solution that combines simplicity with stunning results. These charming paper blooms are not only incredibly easy to make, but the crafting process itself offers a wonderfully relaxing and creative escape.
Forget about needing expensive materials or advanced crafting skills. All you truly need are a handful of basic supplies – namely, ordinary coffee filters, some vibrant markers or dyes, and a little water – and you’re already well on your way to creating beautiful, handmade artistry. This accessible craft is perfect for beginners, seasoned crafters, and even a fun activity for kids of all ages.
In this comprehensive guide, we’ll take you through every essential step of making gorgeous coffee filter flowers. From transforming plain filters into colorful canvases and skillfully shaping them into delicate petals, to assembling them into breathtaking floral arrangements perfect for brightening tables, adorning walls, or personalizing thoughtful gifts, you’ll master it all. We’ll delve into innovative coloring techniques, discuss various petal designs, and provide expert tips for flawless assembly.
Beyond the basics, we’ll also arm you with practical advice for troubleshooting common crafting hiccups and inspire you with unique design variations to ensure each flower you create truly stands out. Whether you’re planning a fun afternoon crafting session with children, preparing charming decorations for an upcoming party, or simply looking to infuse your space with handmade beauty, you’ve landed in the perfect spot. Let’s gather our supplies and begin this exciting journey into the world of coffee filter flower making!
Why DIY Coffee Filter Flowers Are a Must-Try Craft
The widespread appeal of DIY coffee filter flowers isn’t just a fleeting trend; it’s rooted in several compelling benefits that make them a favorite among crafters of all levels. Their popularity stems from a perfect blend of simplicity, affordability, and immense creative potential, making them an ideal project for countless scenarios.
Unmatched Ease and Accessibility
One of the primary reasons coffee filter flowers have garnered such a loyal following is their incredible ease of creation. You don’t need a specialized art studio or years of crafting experience to produce stunning results. The process is intuitive and forgiving, allowing even absolute beginners to achieve beautiful, professional-looking blooms. This accessibility makes them a fantastic entry point into the world of DIY projects and a wonderful way to boost confidence in your creative abilities.
Budget-Friendly Brilliance
In an age where craft supplies can often be expensive, coffee filter flowers stand out as a wonderfully economical option. The core materials – coffee filters – are incredibly cheap and readily available in almost any grocery store. Coupled with basic coloring mediums like markers or food coloring, and a few common household items like scissors and glue, you can create an entire bouquet for a fraction of the cost of real or store-bought artificial flowers. This makes them perfect for large-scale decorations, classroom projects, or anyone crafting on a tight budget.
Versatility for Every Occasion and Decor Style
Beyond their ease and affordability, coffee filter flowers are remarkably versatile. Their delicate, somewhat translucent appearance mimics the beauty of real flowers, yet they offer the durability and longevity that fresh blooms simply can’t. This makes them suitable for a vast array of applications:
- Home Decor: Brighten living spaces, bedrooms, or nurseries. Arrange them in vases, create garlands, or craft unique wall art.
- Party & Event Decorations: From birthday parties and baby showers to weddings and holiday celebrations, these flowers can be customized in any color scheme to perfectly match your theme. Use them for centerpieces, backdrops, wreaths, or as charming party favors.
- Thoughtful Handmade Gifts: A bouquet of handmade coffee filter flowers makes a deeply personal and lasting gift for Mother’s Day, Valentine’s Day, teacher appreciation, or just to show someone you care.
- Educational & Therapeutic Craft: They are excellent for engaging children in art projects, teaching about colors and shapes, and fostering fine motor skills. For adults, the repetitive and creative process can be incredibly meditative and stress-relieving.
Sustainable Crafting with Reused Materials
Embracing a more sustainable lifestyle is increasingly important, and crafting with coffee filters aligns perfectly with this ethos. By transforming a simple, everyday item that might otherwise be discarded into something beautiful and lasting, you’re participating in eco-friendly crafting. It’s a wonderful way to give new life to common household goods, adding a touch of green consciousness to your artistic endeavors.
In essence, whether your goal is to decorate your home, create memorable gifts, engage in a relaxing hobby, or teach valuable crafting skills, coffee filter flowers present a “go-to” craft that consistently delivers stunning results without breaking the bank or requiring specialized expertise. Let’s explore how to bring these lovely creations to life!
Gather Your Creative Toolkit: Essential Supplies for Coffee Filter Flowers
One of the many joys of making coffee filter flowers is that the supply list is short, inexpensive, and easily accessible. You likely have most of these items already! Here’s a detailed breakdown of what you’ll need to embark on your floral crafting adventure:
Mandatory Materials:
- Basket-Style Coffee Filters: These are the star of our show! Opt for the basket-style (the round, flat-bottomed ones) as opposed to cone-shaped filters. Their larger surface area and natural pleats make them ideal for creating voluminous, realistic petals. While white is standard, natural brown filters can also offer a unique, rustic aesthetic.
- Sharp Scissors: A good pair of sharp scissors is crucial for clean, precise cuts when shaping your petals. Craft scissors work best, but any sharp pair will do. Consider having a smaller pair for intricate details and a larger pair for general cutting.
- Adhesive (White Craft Glue or Hot Glue Gun):
- White Craft Glue (e.g., Elmer’s Glue): Excellent for general adhesion, especially when working with children. It provides a strong bond, but requires drying time.
- Hot Glue Gun and Glue Sticks: For quicker assembly and a more immediate, robust hold, a hot glue gun is a game-changer. It’s especially useful for securing multiple layers of petals and attaching stems efficiently. Just be mindful of safety, especially if crafting with kids.
- Water: Essential for activating and blending your chosen coloring mediums. A small cup or bowl of water will suffice. This is key for achieving that beautiful, watercolor-like effect on your filters.
- Coloring Mediums: This is where the magic happens! You have several fantastic options to choose from:
- Washable Markers: An incredibly popular choice, especially for kids. Simply color directly onto the dry filter, then apply water to spread the pigment. A wide range of colors is available, and they produce beautiful, soft blends.
- Liquid Food Coloring: Offers vibrant, concentrated colors and is great for dip-dyeing. Mix a few drops with water in a shallow dish for an easy, uniform coloring method.
- Watercolor Paints: For artists looking for more control and nuanced color blending, watercolor paints work wonderfully on coffee filters. Their transparent nature creates lovely effects.
- Acrylic Paints (diluted): Can be used, but must be significantly diluted with water to prevent making the filters stiff and difficult to shape.
Optional Enhancements & Tools:
- Pipe Cleaners or Floral Wire: For creating sturdy and flexible stems. Pipe cleaners are excellent for kid-friendly projects, while floral wire (gauge 20-24 is usually good) offers a more professional finish, especially when wrapped with floral tape.
- Floral Tape: This stretchy, adhesive tape is fantastic for wrapping floral wire stems, providing a neat, green finish, and helping to secure multiple elements together, like leaves or additional petals.
- Small Spray Bottle: Useful for gently misting water onto marker-colored filters to achieve a controlled bleed effect, rather than dip-dyeing.
- Paper Towels or Old Newspapers: To protect your work surface during the coloring and drying process.
- Templates (for petal shapes): If you prefer precise, symmetrical petals, simple paper templates can be very helpful.
- Embroidery Floss or Twine: For tying off bases if not using a stem, or for creating garlands.
- Buttons, Beads, or Glitter: For adding decorative centers or sparkle to your finished flowers.
Having these supplies ready before you start will ensure a smooth and enjoyable crafting experience. Now, let’s move on to the exciting part: transforming these simple filters into breathtaking blossoms!
Coffee Filter Flower Crafting: A Detailed Step-by-Step Tutorial
Ready to transform simple coffee filters into enchanting floral works of art? This comprehensive, easy-to-follow guide will walk you through each stage of the process, ensuring beautiful results regardless of your crafting experience. Let’s begin!
Step 1: Prepare Your Coffee Filters – Flattening & Folding
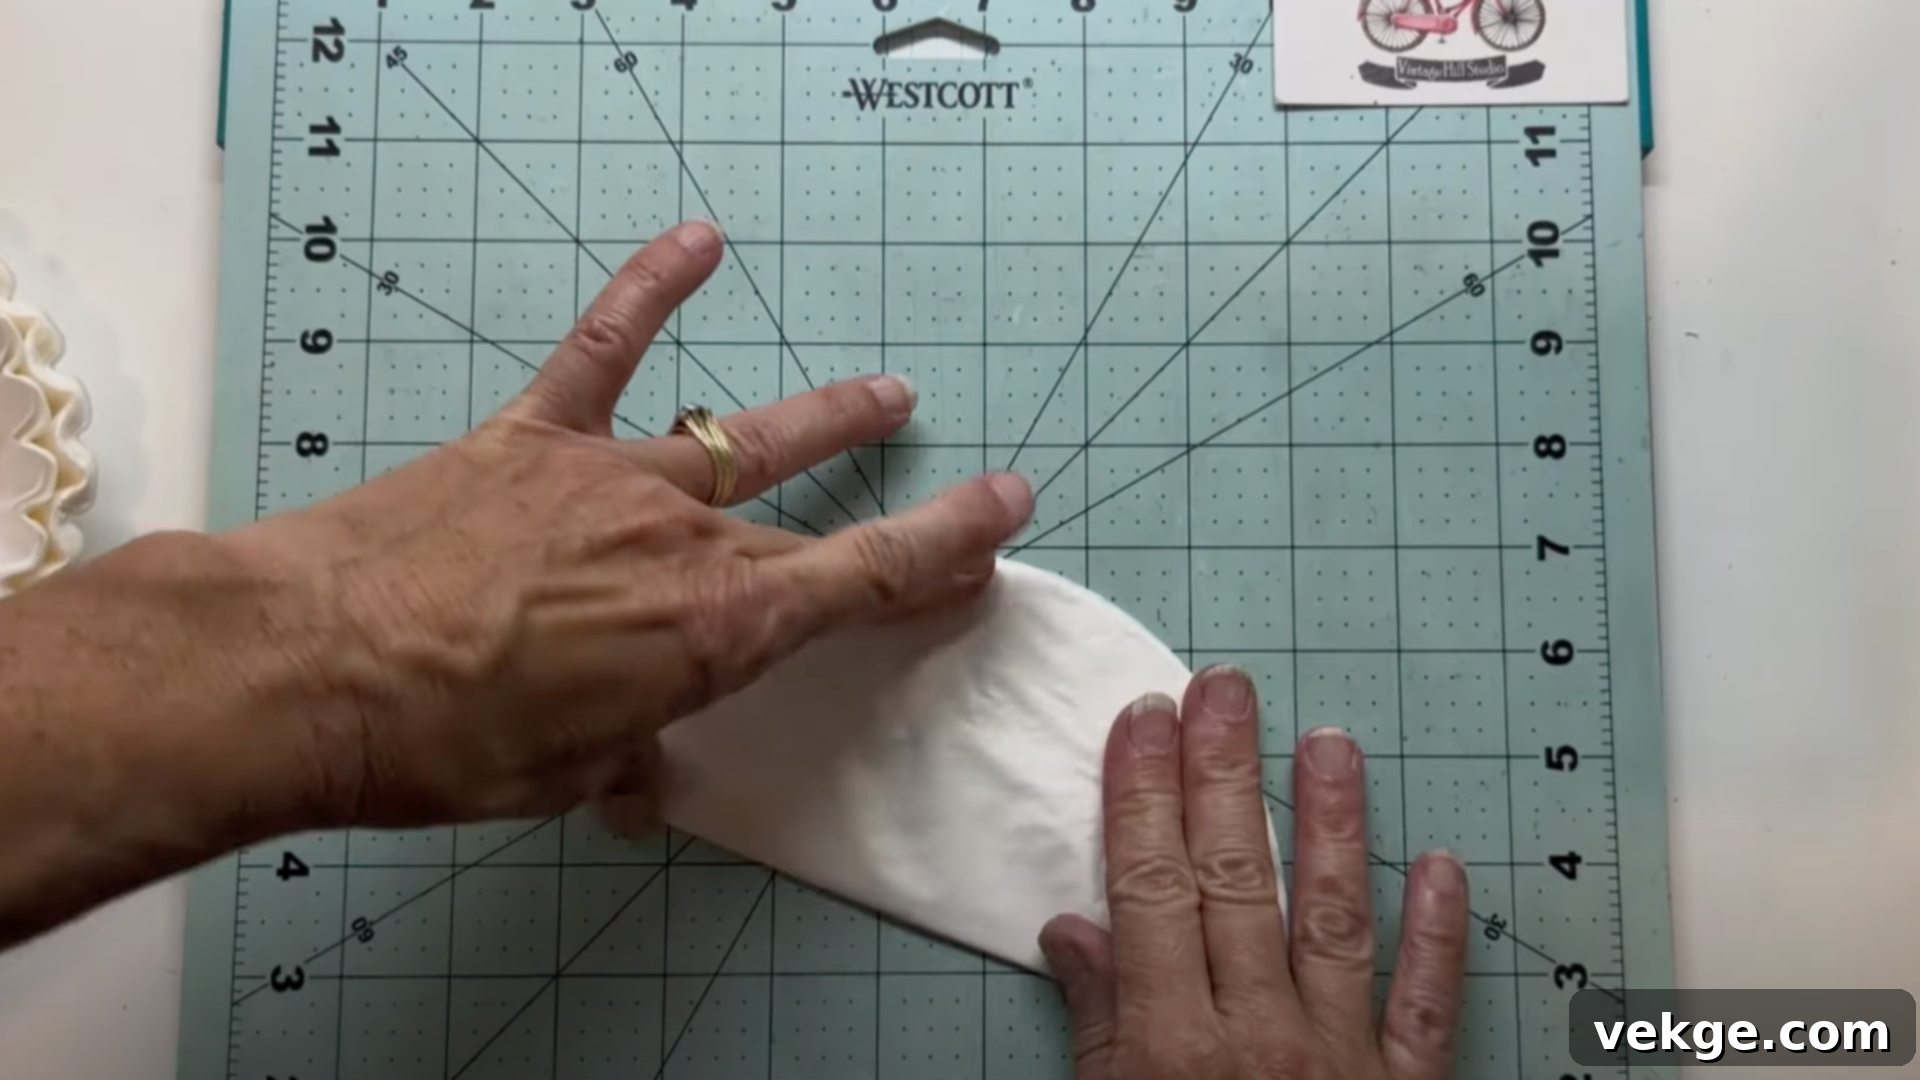
The foundation of a stunning coffee filter flower begins with proper preparation. Start by laying your basket-style coffee filters flat on a clean, dry work surface. Many filters come with pleats or a slightly structured form; gently flatten these with your hands. The goal is to remove any significant creases or bumps that might interfere with even coloring or petal shaping. Apply light, consistent pressure, working from the center outwards, to avoid tearing the delicate material.
Once flattened, your filters are ready for folding. The way you fold them will influence the final petal shape and how many petals you get from a single filter. A common and versatile method is to fold the circular filter in half, then in half again (into a quarter circle), and then once more (into an eighth). For more complex flowers or specific petal arrangements, you might fold it into sixths or even keep some unfolded for larger, individual petals.
Ensure your folds are crisp and aligned, as this precision will lead to more symmetrical and appealing petal cuts later on. If you’re planning to create multiple layers for one flower, try to fold them consistently so they’ll stack neatly. This preparatory step ensures your filters are primed for the next exciting stage: adding color!
Step 2: Infuse Color into Your Filters – The Artistic Touch
This is arguably the most magical part of creating coffee filter flowers! Adding color transforms plain white filters into vibrant canvases. There are several fantastic techniques you can employ, each yielding slightly different and equally beautiful results.
Method A: Marker & Water Blending (The Most Popular)
- Coloring: Using washable markers, generously draw patterns, lines, or solid blocks of color onto your folded or flattened coffee filters. Don’t worry too much about perfection at this stage; the water will do the blending for you. Experiment with different color combinations on a single filter for a variegated look.
- Applying Water:
- Dip-Dyeing: For a soft, blended look, gently dip parts or the entire filter into a shallow dish of water. The colors will magically spread and blend, creating beautiful watercolor effects.
- Misting: For more control, lay the colored filter flat on a protected surface (like paper towels). Use a small spray bottle to lightly mist water over the colored areas. Watch as the colors bleed and swirl together. You can control the intensity by adjusting the amount of water.
Method B: Food Coloring or Watercolor Dip-Dyeing
- Prepare Your Dye: In shallow dishes, mix a few drops of liquid food coloring or concentrated watercolor paint with a small amount of water. Adjust the amount of coloring to achieve your desired shade – more color for vibrant hues, less for pastels.
- Dip & Dry: Dip your folded or unfolded coffee filters into the dye solutions. You can dip the entire filter for a solid color, or just the edges for an ombré effect. Gently squeeze out excess liquid.
Drying Your Colored Filters:
Regardless of the coloring method, proper drying is key. Lay your colored filters flat on a layer of paper towels or an old newspaper. This prevents them from sticking to your surface and absorbs excess moisture. Allow them to air dry completely. This might take a few hours, or even overnight, depending on how much water was used and your humidity levels. Ensure they are fully dry before moving to the cutting stage, as damp filters can tear easily and won’t hold their shape as well.
Step 3: Cut Petal Shapes – Bringing Form to Color
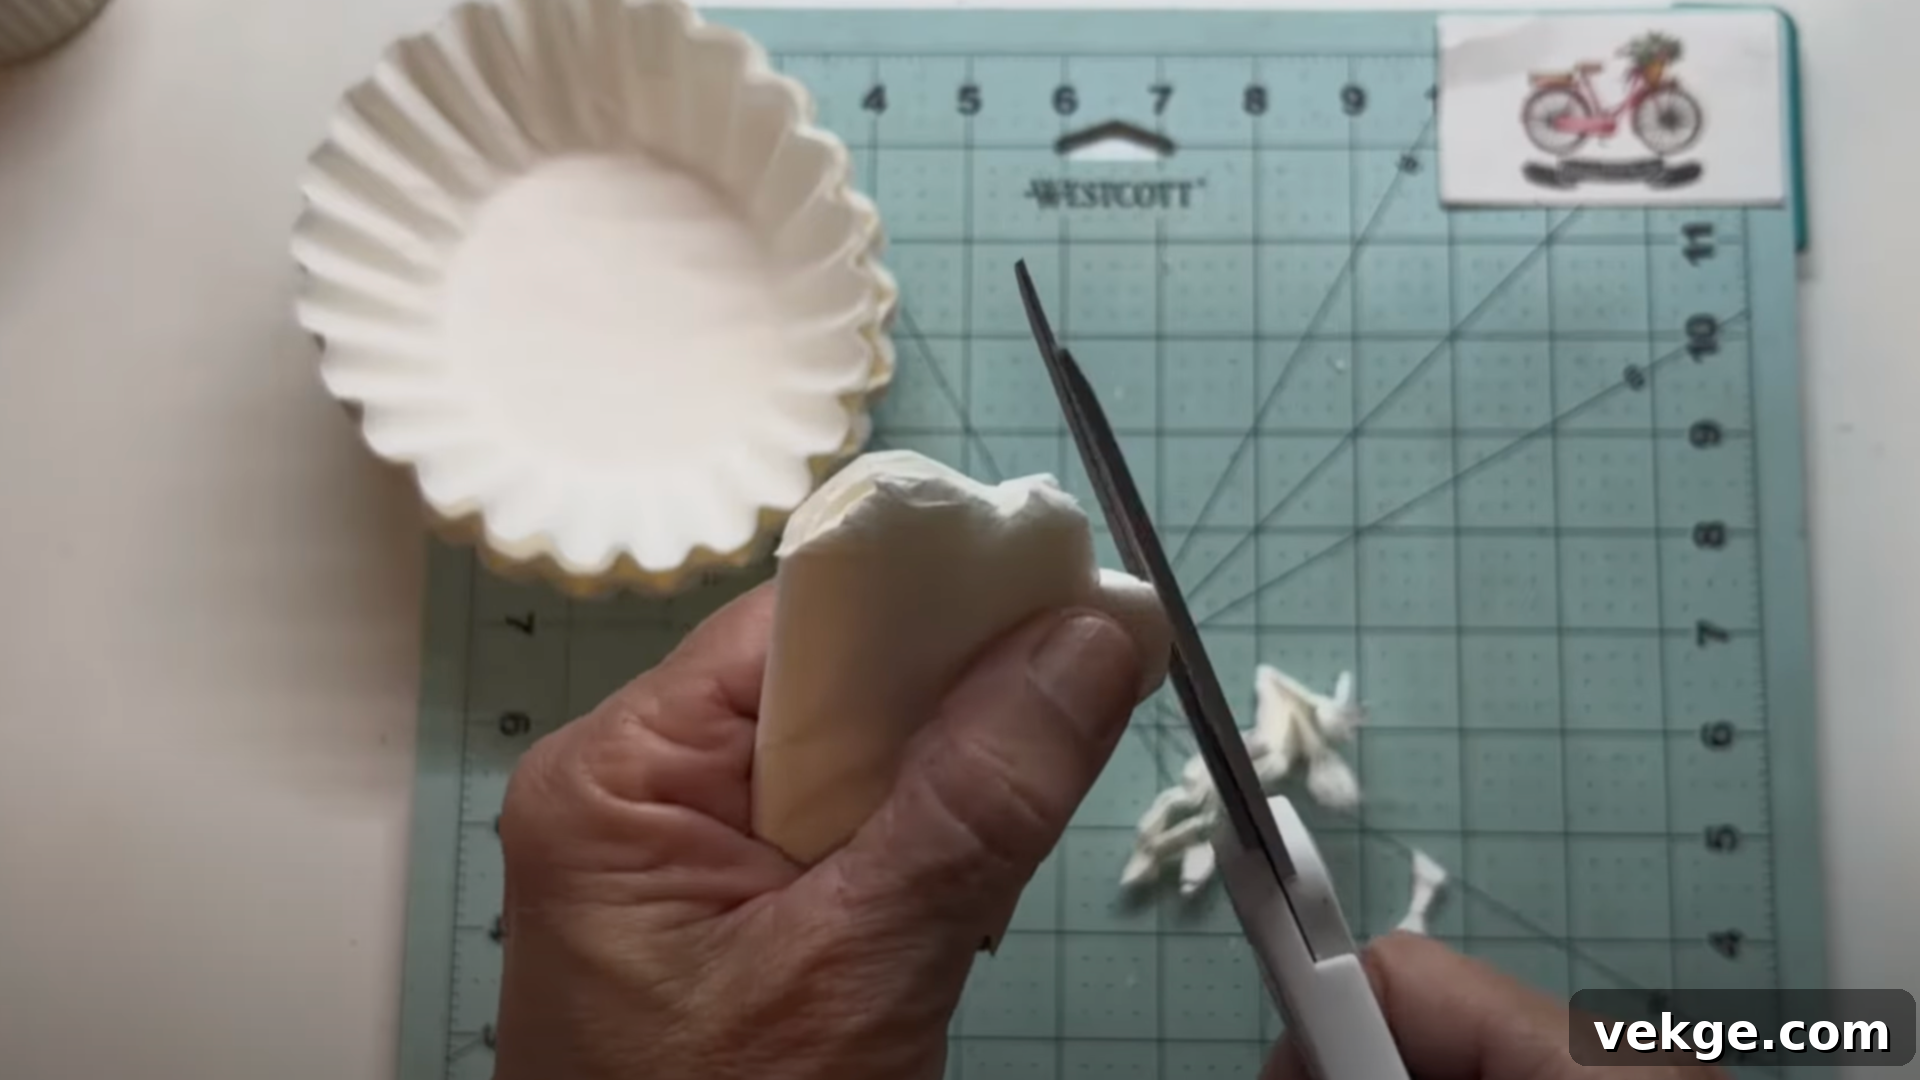
Once your beautifully colored coffee filters are completely dry, it’s time to transform them into delicate petals. Keep your filters folded as you cut; this allows you to create multiple symmetrical petals with a single snip.
- Basic Petal Shape: Holding the folded filter, cut along the open edge (the side opposite the fold point) to create your desired petal shape. You can opt for soft, rounded edges for a classic look, or sharper, pointed tips for a more dramatic, spiky flower.
- Variations: Experiment with different cuts! For a rose, you might want more undulating, wavy edges. For a hydrangea, you’ll cut many small, rounded circles. For a daisy, simply cut a fringe around the edge. Don’t be afraid to freehand your cuts for a more organic, natural appearance. Alternatively, for perfect symmetry, you can create a simple paper template and trace it onto your folded filters before cutting.
- Unfold with Care: After cutting, gently unfold each filter. You’ll now have a complete, multi-layered flower “layer” ready to be assembled. Each layer will typically have 4, 6, or 8 petals depending on how many times you folded the filter.
Remember, the more layers you use, and the more varied your petal shapes and sizes, the fuller and more realistic your finished flower will appear. Cut a good quantity of these petal layers before moving on to assembly.
Step 4: Assemble Your Coffee Filter Flower – Bringing it All Together
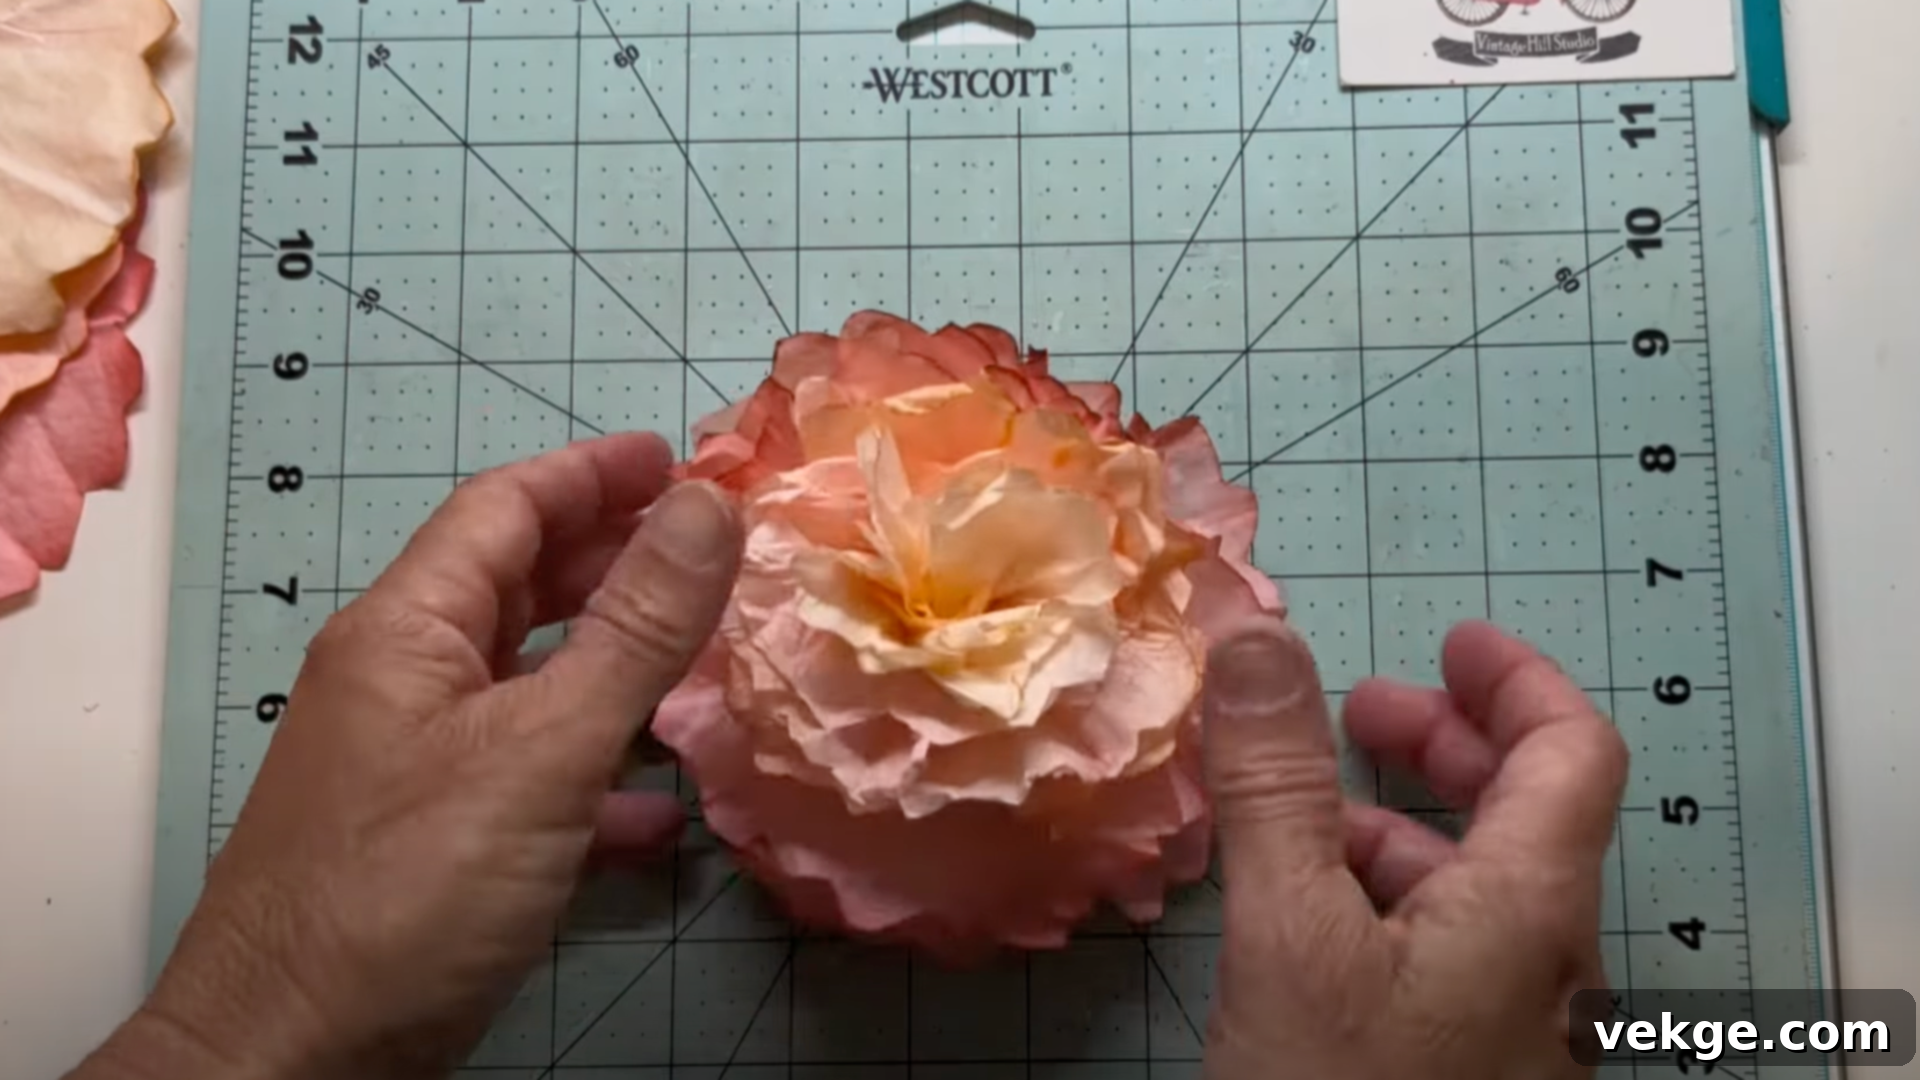
With your vibrant, cut petal layers ready, it’s time for the exciting final step: assembling your flower! This is where your individual layers come together to form a beautiful bloom.
- Layering for Volume: Take 3 to 5 (or even more for a very full flower like a peony or giant bloom) of your colored and cut filter layers. Stack them one on top of the other, ensuring the centers align. For added volume and a more natural appearance, rotate each subsequent layer slightly (about 30-45 degrees) before placing it down. This staggers the petals and prevents them from sitting directly on top of each other.
- Adding a Stem (Optional but Recommended): If you want your flower to have a stem, take a floral wire or a pipe cleaner. Gently poke it through the very center of your stacked filter layers. Once through, bend the wire/pipe cleaner at the bottom and twist it tightly around itself or the base of the flower to secure all the layers. You can add a dab of hot glue at the base to ensure extra stability.
- Securing with Glue: Apply a small amount of white craft glue or a dab of hot glue to the very center of your stacked layers, especially if you aren’t using a stem. This holds all the petals together. If using hot glue, it will set quickly; with white glue, you’ll need to hold it for a moment or let it dry.
- Shaping the Petals: This is where you bring your flower to life! Gently fluff and crinkle each individual petal, bending them outward and upward to create a three-dimensional, natural-looking bloom. You can curl the tips of the petals around a pencil or your finger for added dimension, or gently pinch the base of each petal to give it more structure.
- Finishing Touches: If using floral wire for a stem, you might want to wrap it with floral tape for a neat, green finish. You can also add a decorative button, bead, or a swirl of glitter to the center of your flower for an extra touch of sparkle or detail.
Congratulations! Your handmade coffee filter flower is now complete and ready to adorn any space with its unique charm. This process is highly adaptable, allowing for endless creativity. Feel free to watch the detailed video tutorial below for a visual walkthrough:
Now that you’ve mastered the basic technique, let’s explore some exciting variations to expand your floral repertoire!
Unlock Your Creativity: Diverse Coffee Filter Flower Design Variations
Once you’ve mastered the basic technique, the world of coffee filter flowers opens up to an astonishing array of design possibilities. Don’t limit yourself to one style; experiment with different cutting, coloring, and assembly methods to create a diverse “garden” of paper blooms. Here are a few popular and inspiring variations:
Elegant Coffee Filter Roses
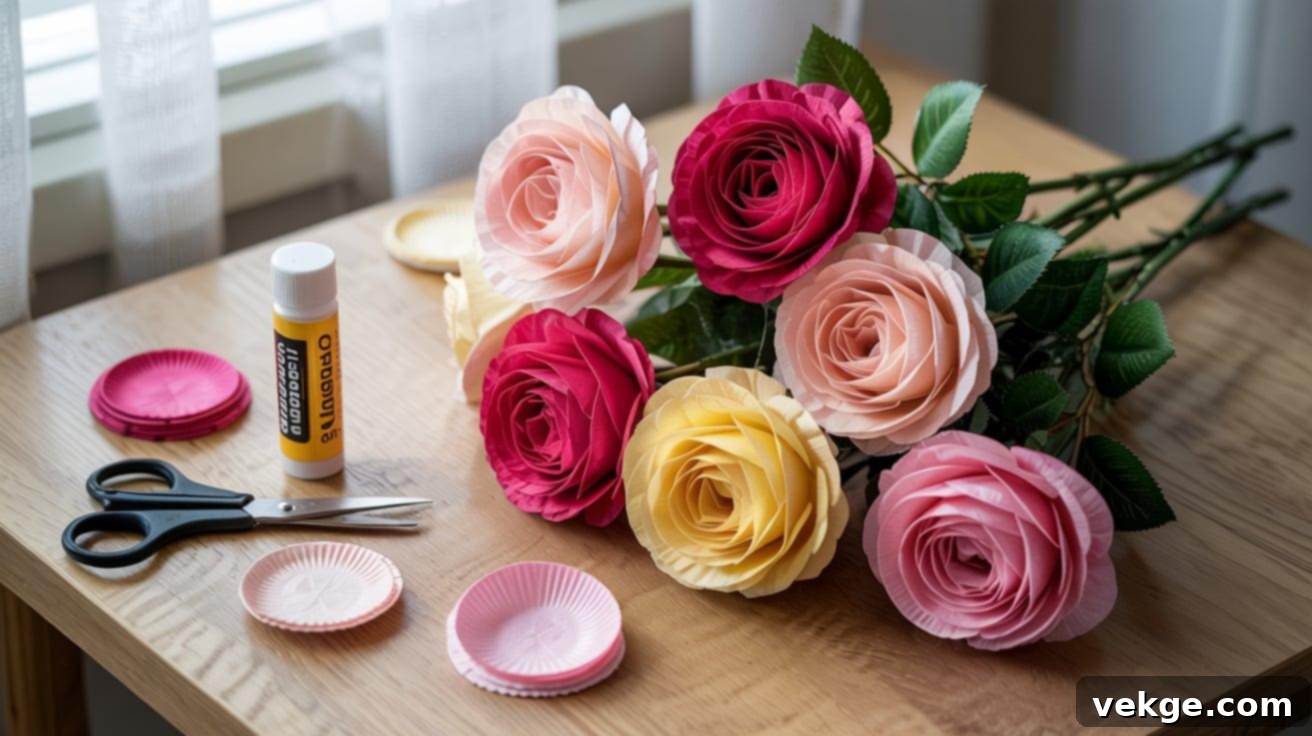
Filters Needed: Approximately 3 to 7 filters per rose, depending on desired fullness.
The classic rose, with its intricate layers and timeless beauty, is a surprisingly achievable design with coffee filters. To craft a captivating coffee filter rose, begin by cutting your colored filters into soft, rounded, slightly irregular petal shapes. For a natural look, aim for a mix of sizes: smaller, tighter petals for the center and progressively larger, wider petals for the outer layers.
Technique:
- The Bud: Take your first (and smallest) petal layer. Roll it tightly into a cone shape to form the central bud of the rose. Secure the base with a dab of glue.
- Layering Petals: One by one, carefully wrap the subsequent petal layers around the central bud. As you attach each layer, gently cup the petals inward or outward to mimic the natural curve of a rose. Add a small dot of glue at the base of each new layer to secure it firmly.
- Shaping: Continue layering, gradually increasing the size of your petals. Gently press the bottoms of all layers together to create a cohesive base. Use your fingers to delicately curl, fluff, and shape the top edges of the petals, giving your rose a lifelike, blossoming appearance.
Color Suggestions: Traditional reds, romantic pinks, delicate creams, or even soft yellows work beautifully for roses. You can also experiment with ombré effects by dipping the outer edges of some petals in a slightly darker shade.
Fluffy Coffee Filter Hydrangeas
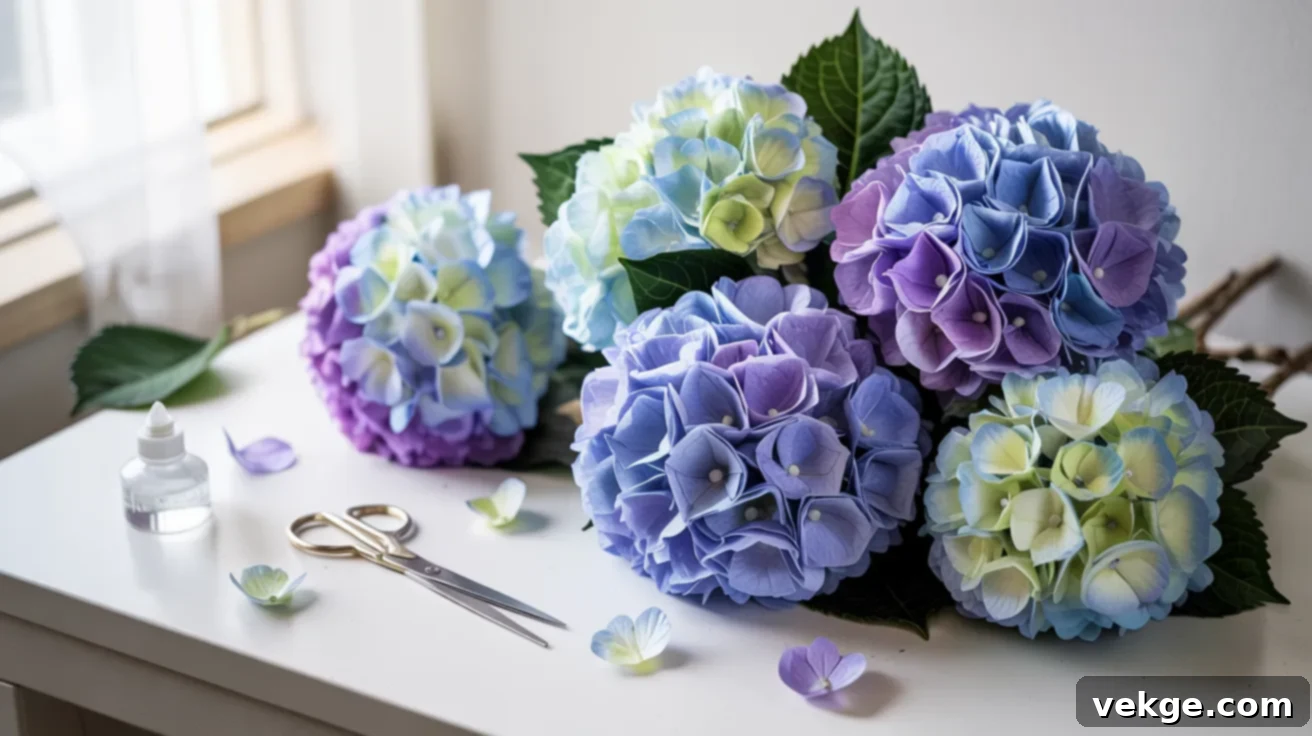
Filters Needed: 4 to 6 filters for a small bunch, or many more for a large, full cluster.
Hydrangeas are known for their voluminous, clustered blooms, and coffee filters are perfect for recreating this lush effect. Instead of large, distinct petals, hydrangeas are made from many small, individual florets.
Technique:
- Small Florets: Take each colored coffee filter and cut it into four to six smaller, roughly circular or squared pieces. These will be your individual hydrangea florets.
- Texturizing: For added dimension, gently crumple each small piece slightly, then partially unfurl it. This gives the “florets” a more natural, textured appearance.
- Building the Cluster: You’ll need a base for your hydrangea. This could be a small paper ball (crumpled newspaper or aluminum foil works), a styrofoam ball, or even a sturdy piece of cardboard cut into a circle. Begin gluing your small, crumpled florets tightly together onto this base. Start from the bottom and work your way up, ensuring each piece slightly overlaps the last to create a dense, rounded, and full bloom, just like a real hydrangea.
Color Suggestions: Soft blues, lavenders, purples, light pinks, or even delicate greens are characteristic of hydrangeas. You can blend two colors on a single floret for a nuanced look.
Cascading Coffee Filter Wisteria
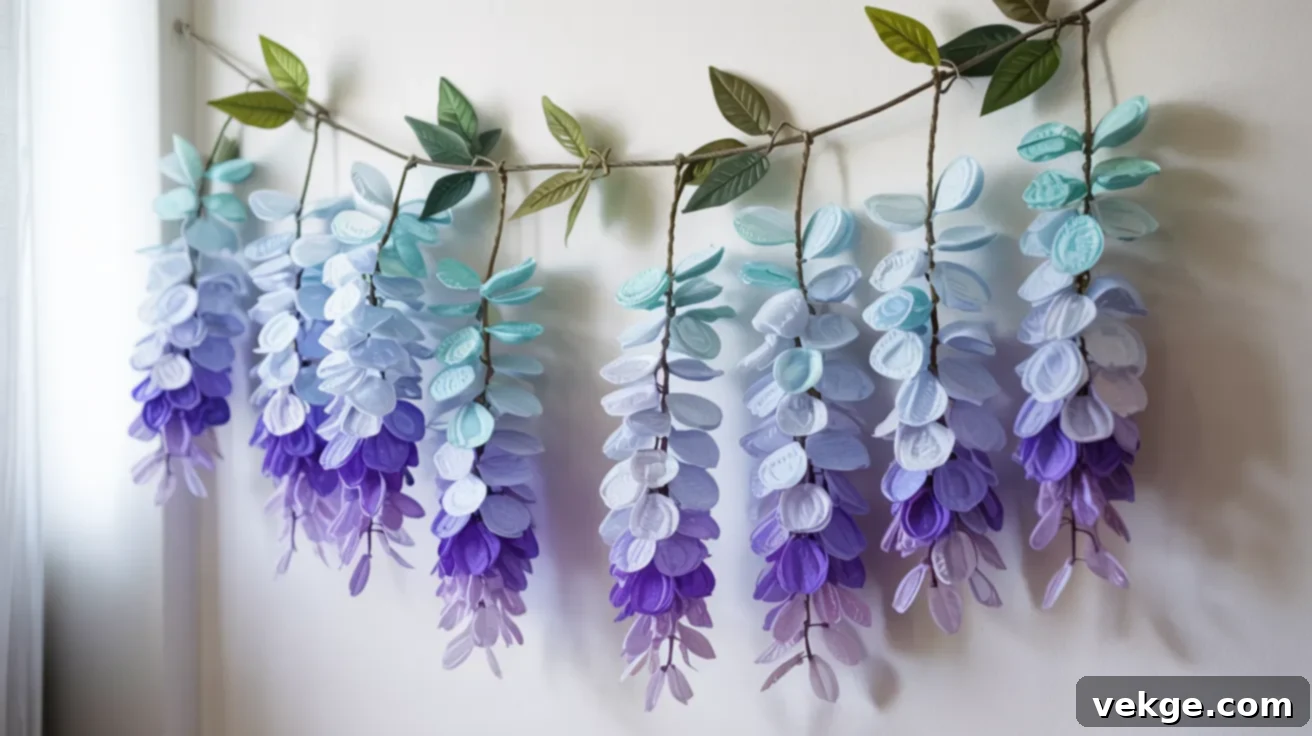
Filters Needed: 8 to 12 filters for a long hanging bunch, or more for multiple strands.
Wisteria is celebrated for its breathtaking, elongated clusters of flowers that gracefully cascade downwards. Recreating this effect with coffee filters offers a unique and dramatic decorative element.
Technique:
- Petal Shapes: From your colored filters, cut many tiny oval or teardrop-shaped petals. These should be relatively small, as they will form the individual flowers within each cluster.
- Assembly: You’ll need a base string, floral wire, or a pipe cleaner to form the central stem of your wisteria strand. Starting from the bottom, begin gluing your small petals along this base. Glue them in slightly overlapping rows, making sure they hang downwards. As you move upwards, you can gradually make the rows of petals slightly shorter or use fewer petals per row, mimicking the tapering shape of a natural wisteria raceme.
- Creating a Display: For a truly impactful display, create several wisteria strands of varying lengths and hang them together. They can be strung from a branch, a curtain rod, or draped elegantly across a mantelpiece or archway.
Color Suggestions: Traditional purples, lavenders, soft blues, or even white wisteria are stunning. Consider creating an ombré effect within a single strand, with darker hues at the top gradually fading to lighter shades at the bottom.
Dramatic Giant Statement Coffee Filter Flowers
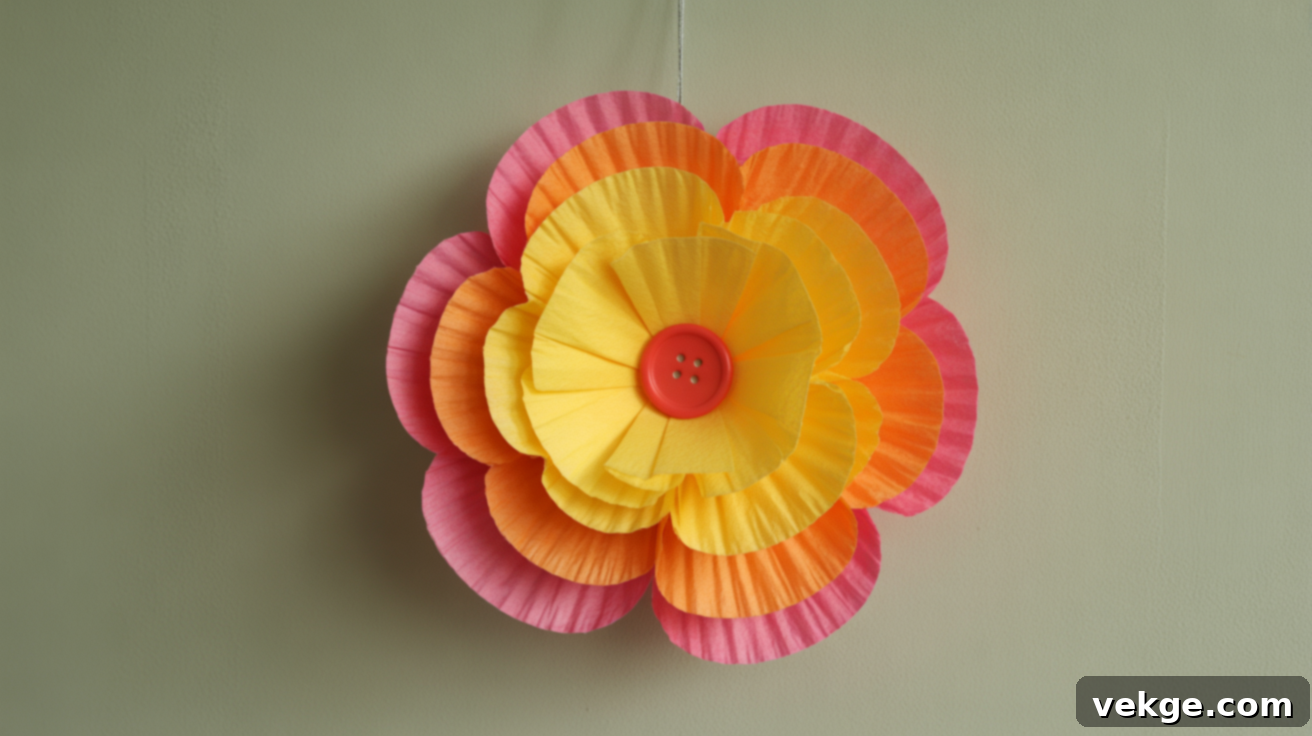
Filters Needed: 8 to 15 filters per flower, depending on desired size and fullness.
Sometimes, bigger is better! Giant coffee filter flowers make a magnificent visual impact and are perfect for wall decorations, photo backdrops, or grand party displays. These aren’t just flowers; they’re art installations!
Technique:
- Large Petal Cuts: Instead of small, delicate petals, cut generously large, bold petal shapes from your colored filters. You can make them broad and rounded, or elongated and pointed for a more dramatic look. Consider making your outer layers much larger than the inner layers.
- Layering for Grandeur: Stack 8 to 15 (or even more) of your large petal layers. Crucially, rotate each successive layer significantly to ensure maximum coverage and a grand, voluminous spread. The more layers you use, the fuller and more impressive your giant flower will be.
- Secure and Center: Glue all the layers firmly together at the very center. To enhance the “statement” aspect, add a large decorative element to the middle. This could be a contrasting color paper circle, a substantial button, a cluster of smaller coffee filter petals, or even a sprinkle of glitter.
- Display: These enormous blooms are usually too large for traditional stems. Instead, attach a loop of string or a picture hanger to the back for easy wall mounting. They look stunning arranged in clusters or as individual focal points.
Color Suggestions: Go bold and vibrant! Bright yellows, hot pinks, fiery oranges, or deep blues can make an incredible impact. Consider metallic accents for extra flair.
With these variations, you’re now equipped to create a diverse and beautiful collection of coffee filter flowers, limited only by your imagination!
Beyond the Bloom: Inspiring Creative Uses for Your Coffee Filter Flowers
The beauty of crafting coffee filter flowers extends far beyond the making process itself. These versatile, handmade blooms offer an incredible array of possibilities for decorating, celebrating, teaching, and gifting. Their delicate appearance, coupled with their durability and customizable nature, makes them a go-to choice for adding a personal and charming touch to virtually any setting or occasion.
Transform Your Home Decor with Handmade Flair
Infuse your living spaces with warmth and personality by incorporating coffee filter flowers into your home decor. Unlike fresh flowers that wilt, these paper blooms offer lasting beauty without the need for water or maintenance.
- Vase Arrangements: Create stunning, colorful bouquets to place in vases on your mantelpiece, coffee table, or bookshelves. Mix and match different flower styles (roses, hydrangeas) and varying stem lengths for a dynamic arrangement.
- Table Centerpieces: Arrange a cluster of these flowers in a decorative bowl or on a tray for an eye-catching centerpiece. For holiday decor, integrate seasonal colors and natural elements like pinecones or berries.
- Wall Art & Garlands: Tape individual flowers directly to a wall in a whimsical pattern, or string them together to create beautiful garlands. These are perfect for brightening a nursery, adding a festive touch to a hallway, or creating a unique backdrop.
- Wreaths & Door Decor: Glue smaller coffee filter flowers onto a wreath form for a charming seasonal or everyday door decoration.
- Pillow Accents: Attach a single, sturdy coffee filter flower to a throw pillow for an instant, removable decorative accent (use a safety pin or light stitching).
Elevate Your Events and Celebrations
For parties, weddings, baby showers, or any special gathering, coffee filter flowers offer a cost-effective yet elegant way to enhance your decor. Their customizable colors mean they can perfectly align with any theme or palette.
- Party Backdrops: Create a breathtaking floral wall by hot-gluing a multitude of giant statement flowers onto a large board or fabric sheet. This makes for a fantastic photo booth background or main event focal point.
- Table Decorations: Use them as charming centerpieces, scatter individual blooms around serving dishes, or adorn place settings for a personalized touch.
- Ceiling & Hanging Decor: String flowers together to create hanging mobiles or delicate garlands to drape from the ceiling, adding a whimsical, ethereal atmosphere.
- Photo Booth Props: Craft oversized flowers or flower crowns that guests can wear for fun, memorable photos.
- Wedding & Bridal Shower Favors: Small, individually crafted coffee filter flowers can be given as thoughtful favors, or used to decorate gift boxes.
Engaging Classroom & Art Projects
Coffee filter flowers are a teacher’s dream craft! They are highly educational, low-cost, and wonderfully engaging for students of all ages, from preschoolers to older children.
- Learning About Colors & Blending: The marker and water technique is a fantastic, hands-on way to teach primary and secondary colors, color mixing, and the principles of chromatography.
- Shape Recognition & Fine Motor Skills: Cutting petals helps develop fine motor skills and introduces various geometric and organic shapes.
- Bulletin Board & Classroom Decor: Students can create a collaborative “garden” for bulletin boards, or make individual flowers to decorate their desks or classroom.
- Seasonal Crafts: Adapt the flowers for different holidays – red and green for Christmas, pastels for Easter, or autumnal shades for Thanksgiving.
- Gift Making: Children can proudly make these flowers as gifts for parents or school staff, fostering a sense of accomplishment and generosity.
Heartfelt Gifts for Mother’s Day, Valentine’s, and Beyond
Nothing says “I care” quite like a handmade gift, and coffee filter flowers are imbued with that special touch. They are perfect for showing appreciation to loved ones.
- Personalized Bouquets: Assemble a small bouquet of exquisitely colored roses or mixed blooms. Add a handwritten tag or card to make it even more special.
- Teacher Appreciation: A single, beautifully crafted flower with a personalized note can be a wonderful way for students to thank their teachers.
- Sympathy or Get Well Gifts: Offer a lasting symbol of comfort and hope that won’t wilt.
- Birthday Presents: Attach a flower to a gift box or use it as part of a unique wrapping.
The longevity of coffee filter flowers means your thoughtful gift will continue to bring joy long after real flowers would have faded. Their handmade charm speaks volumes, making them cherished keepsakes.
Master Your Craft: Essential Tips & Troubleshooting for Coffee Filter Flowers
While crafting coffee filter flowers is generally straightforward and forgiving, a few expert tips can elevate your results and help you navigate common challenges. Follow these pointers for a smoother, more successful, and even more enjoyable crafting experience:
General Crafting Tips for Success:
- Protect Your Work Surface: Always lay down newspaper, a plastic tablecloth, or paper towels before you start coloring. This will protect your table from marker stains and water spills.
- Experiment with Colors: Don’t be afraid to mix and match! Try blending two or three marker colors on a single filter before adding water to create beautiful, multi-tonal effects.
- Control Water Application: For marker-based coloring, a small spray bottle offers more control than dipping. This allows for a gentle spread of color without oversaturation, preventing the paper from becoming too fragile.
- Let Dry Completely: Patience is a virtue here! Ensure your filters are thoroughly dry after coloring before you attempt to cut or assemble them. Damp filters are prone to tearing and will not hold their shape well.
- Layering for Realism: Use varying numbers of layers for different flower types. More layers mean a fuller, more luxurious bloom. Rotate each layer slightly (e.g., 30-45 degrees) when stacking to create a natural, voluminous effect and prevent a flat appearance.
- Shaping is Key: After assembly, take time to gently fluff, crinkle, and curl individual petals. This adds crucial three-dimensional depth and makes your coffee filter flowers look much more lifelike. You can use a pencil or the edge of your scissors to gently curl petal tips.
- Consider Weight for Stems: If making larger flowers with stems, opt for thicker floral wire or multiple pipe cleaners twisted together to provide adequate support and prevent drooping.
Troubleshooting Common Challenges:
- “My filters tore while cutting/shaping!”
- Solution: Small tears can often be discreetly mended with a tiny dab of clear craft glue or a piece of clear tape applied to the back of the filter. For larger tears or if the filter feels too weak, simply add an extra layer of intact filter underneath when assembling to reinforce it. Ensure filters are completely dry before cutting.
- “The colors bled too much and look muddy!”
- Solution: This usually happens from using too much water. For marker blending, try using less water, or misting more gently. If dip-dyeing with food coloring, reduce the concentration of the dye or briefly dip and quickly remove the filter. Also, ensure your colors aren’t directly overlapping too much on the filter before water application if you want distinct blends rather than a uniform muddy shade.
- “My flowers are sagging or crumpling after drying!”
- Solution: This often occurs if filters aren’t dried properly. Always lay them flat on absorbent paper towels or a drying rack immediately after coloring. Avoid drying them in a crumpled heap. If they still sag after assembly, use a small amount of hot glue at the base of the petals to create more rigidity, and ensure your stem is strong enough.
- “How can I make my coffee filter flowers last longer?”
- Solution: To protect your beautiful creations and preserve their vibrant colors and delicate shapes, lightly spray the finished flowers with a clear craft sealant or acrylic spray. Do this in a well-ventilated area. This layer of protection helps prevent fading from sunlight and adds a bit of stiffness, making them more durable and resistant to humidity.
By keeping these practical tips and troubleshooting solutions in mind, you’ll be well-equipped to create stunning coffee filter flowers with confidence and ease!
Your Journey into Coffee Filter Flower Crafting: A Blooming Success!
Congratulations! You’ve now completed a comprehensive journey into the enchanting world of DIY coffee filter flowers. From understanding the simple yet profound joy of this accessible craft to mastering the step-by-step process of preparation, coloring, cutting, and assembly, you’re now equipped with all the knowledge and inspiration to create a magnificent array of paper blooms.
We’ve explored everything from crafting delicate roses and fluffy hydrangeas to creating dramatic giant statement flowers, demonstrating just how versatile and adaptable this craft truly is. You’ve discovered that producing these stunning decorations requires neither expensive materials nor advanced skills – simply a few common household items and a willingness to explore your creativity.
Whether your goal was to find a relaxing activity for a quiet afternoon, design captivating decorations for an upcoming party, or infuse your home with a touch of handmade charm, these coffee filter flowers are the perfect solution. The possibilities are truly endless, whether you choose to craft a single, exquisite bloom or assemble an entire vibrant bouquet to brighten your surroundings.
We sincerely hope this guide has not only taught you the mechanics but also ignited a passion for creating with everyday items. The satisfaction of transforming something ordinary into something extraordinary is immensely rewarding. If you enjoyed this project, we warmly encourage you to continue your crafting adventures!
The world of paper flowers is vast and full of exciting possibilities. Don’t hesitate to explore other creative endeavors, always remembering that inspiration often lies in the simplest of materials. Keep an eye out for more articles and tutorials offering fresh ideas, innovative techniques, and further ways to unleash your artistic potential using what you already have. Happy crafting, and may your spaces always be filled with beautiful, handmade blossoms!
