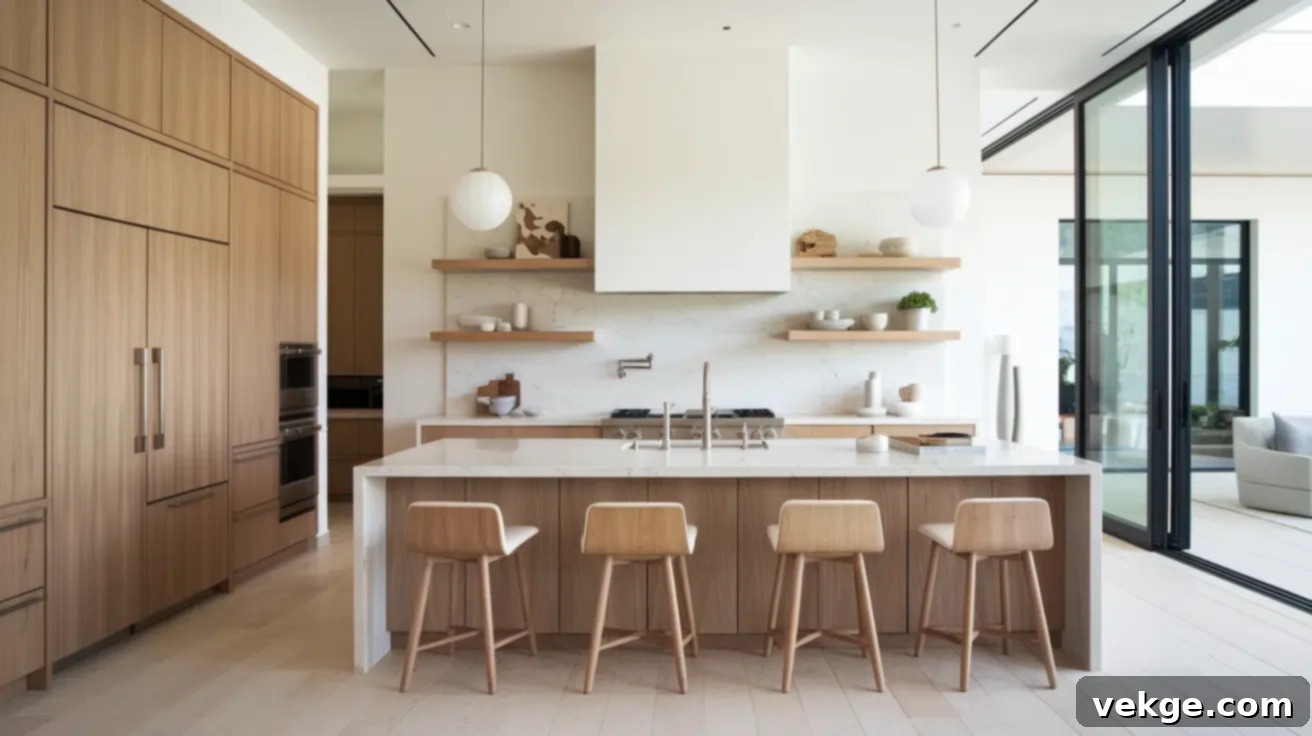
How to Modernize Oak Kitchen Cabinets: The Ultimate Guide to a Stylish Kitchen Makeover
Are your oak kitchen cabinets making your kitchen feel trapped in a bygone era? If those warm, often orange, tones and prominent wood grain are giving your space an outdated vibe, you’re certainly not alone. Many homeowners face this common design challenge, wanting a fresh look without the astronomical cost of a complete kitchen overhaul. Replacing cabinets can be incredibly expensive, leading many to wonder what other options exist.
This comprehensive guide is your go-to resource for transforming your oak kitchen cabinets into a modern marvel, all without the need for a costly, full-scale renovation. We’ll walk you through budget-friendly strategies like painting, staining, and swapping out hardware. You’ll also discover clever design tricks, expert color recommendations, and crucial advice on when to tackle a project yourself or when it’s best to call in a professional.
If you’re ready to infuse your kitchen with a contemporary update that won’t break the bank, you’ve landed in the perfect spot. Let’s explore the most impactful updates that will revitalize your kitchen’s aesthetic and functionality.
Why Modernizing Oak Kitchen Cabinets is a Smart & Sustainable Choice
Opting to update your existing oak kitchen cabinets is not just a budget-friendly decision; it’s also a highly sustainable one. Rather than contributing to landfill waste by replacing perfectly functional cabinetry, you’re giving your kitchen a new lease on life. Over time, the distinctive orange hues and heavy grain patterns of oak can make a kitchen feel dated. By strategically modernizing these cabinets, you can dramatically enhance the overall aesthetics of your space, significantly increase your home’s market value, and cultivate a more contemporary and inviting atmosphere.
Furthermore, this approach allows you to retain the inherent durability and classic appeal of oak wood while upgrading it with modern finishes, stylish hardware, and thoughtful design elements. It’s a smart investment that delivers a refreshed look and feel for a fraction of the cost and environmental impact of a full tear-out and replacement.
DIY Modernization: Giving Your Oak Kitchen Cabinets a Fresh Look
Embarking on a DIY project to modernize your oak kitchen cabinets can be incredibly rewarding, refreshing your entire space without the burden of an expensive overhaul. This detailed, step-by-step guide will provide you with all the information you need to give your oak cabinets a fresh, contemporary update you’ll love.
Tools and Materials Needed for Your Cabinet Refresh
Before you dive into transforming your cabinets, ensure you have all the necessary tools and materials readily available. Proper preparation will make the entire process smoother and more efficient. Here’s a comprehensive list to get you started:
- Cabinet Paint or Stain: Choose a high-quality product specifically designed for cabinets to ensure durability.
- Primer: Essential for painting, especially on oak, to block tannins and ensure even paint adhesion.
- Sandpaper: Various grits (e.g., 120-grit for initial sanding, 220-grit for fine smoothing) for prepping surfaces.
- New Hardware: Modern knobs, pulls, and hinges can dramatically change the look.
- Paintbrushes and Rollers: High-quality brushes for detailed areas, foam rollers for smooth, even coats.
- Painter’s Tape: To protect surrounding areas and create clean lines.
- Drop Cloths or Plastic Sheeting: To protect floors and countertops from paint or dust.
- Screwdriver: For removing old hardware and installing new.
- Drill: Necessary for installing new hardware, especially if hole placement changes.
- Safety Gloves: Protect your hands from chemicals and paint.
- Ladder or Step Stool: For easy access to upper cabinets.
- Degreaser/Cleaner: To thoroughly clean cabinet surfaces before sanding.
- Tack Cloths: To remove fine dust after sanding.
Step 1: Meticulously Remove Old Hardware
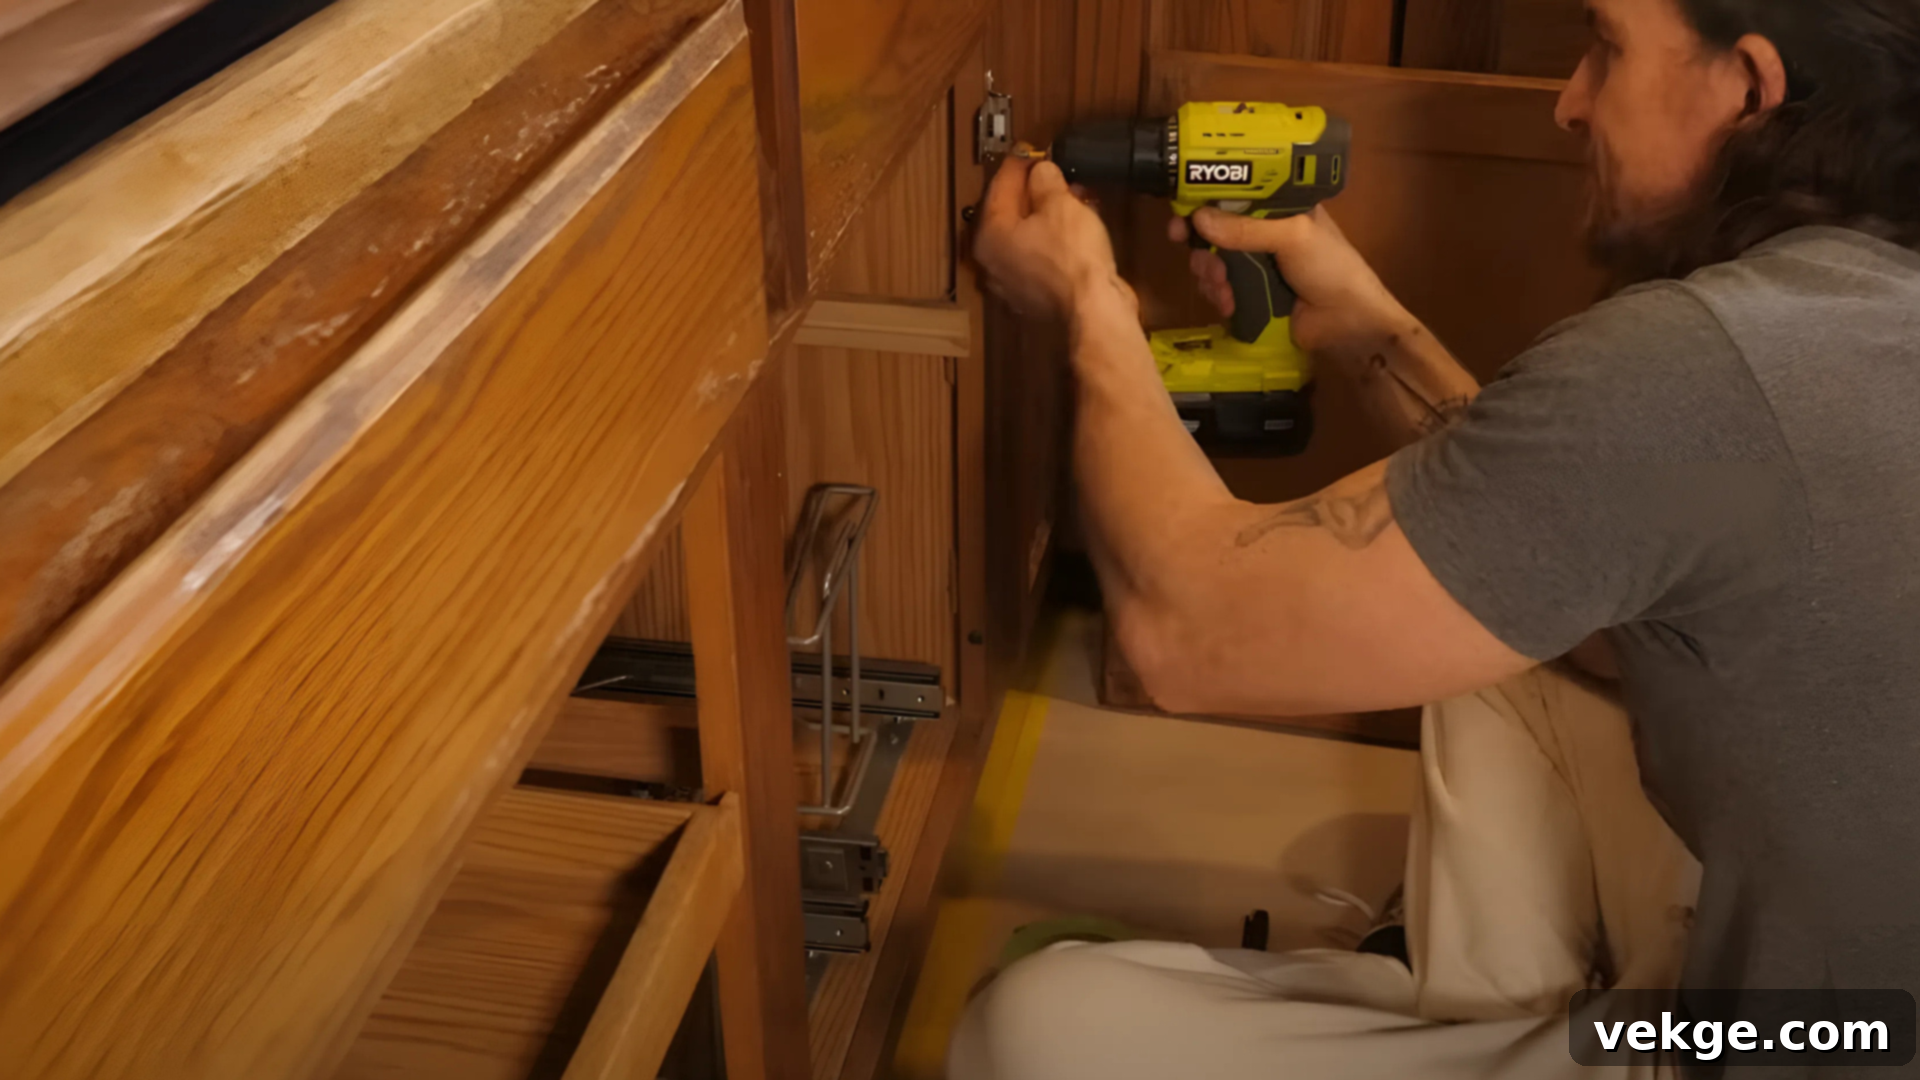
Your first task is to carefully remove all existing knobs, pulls, and any other hardware from your cabinet doors and drawer fronts using a screwdriver. This step is absolutely critical not only for preparing your cabinets for a flawless finish but also for preventing paint or stain from getting onto the hardware. Labeling hardware by cabinet can be helpful if you plan to reuse it or want to remember its original placement. You might choose to save the old hardware for other repurposing projects or simply discard it if you’re committed to a completely new look. This seemingly simple action lays the essential groundwork for achieving a truly modernized aesthetic.
Step 2: Thoroughly Clean and Prep Cabinet Surfaces
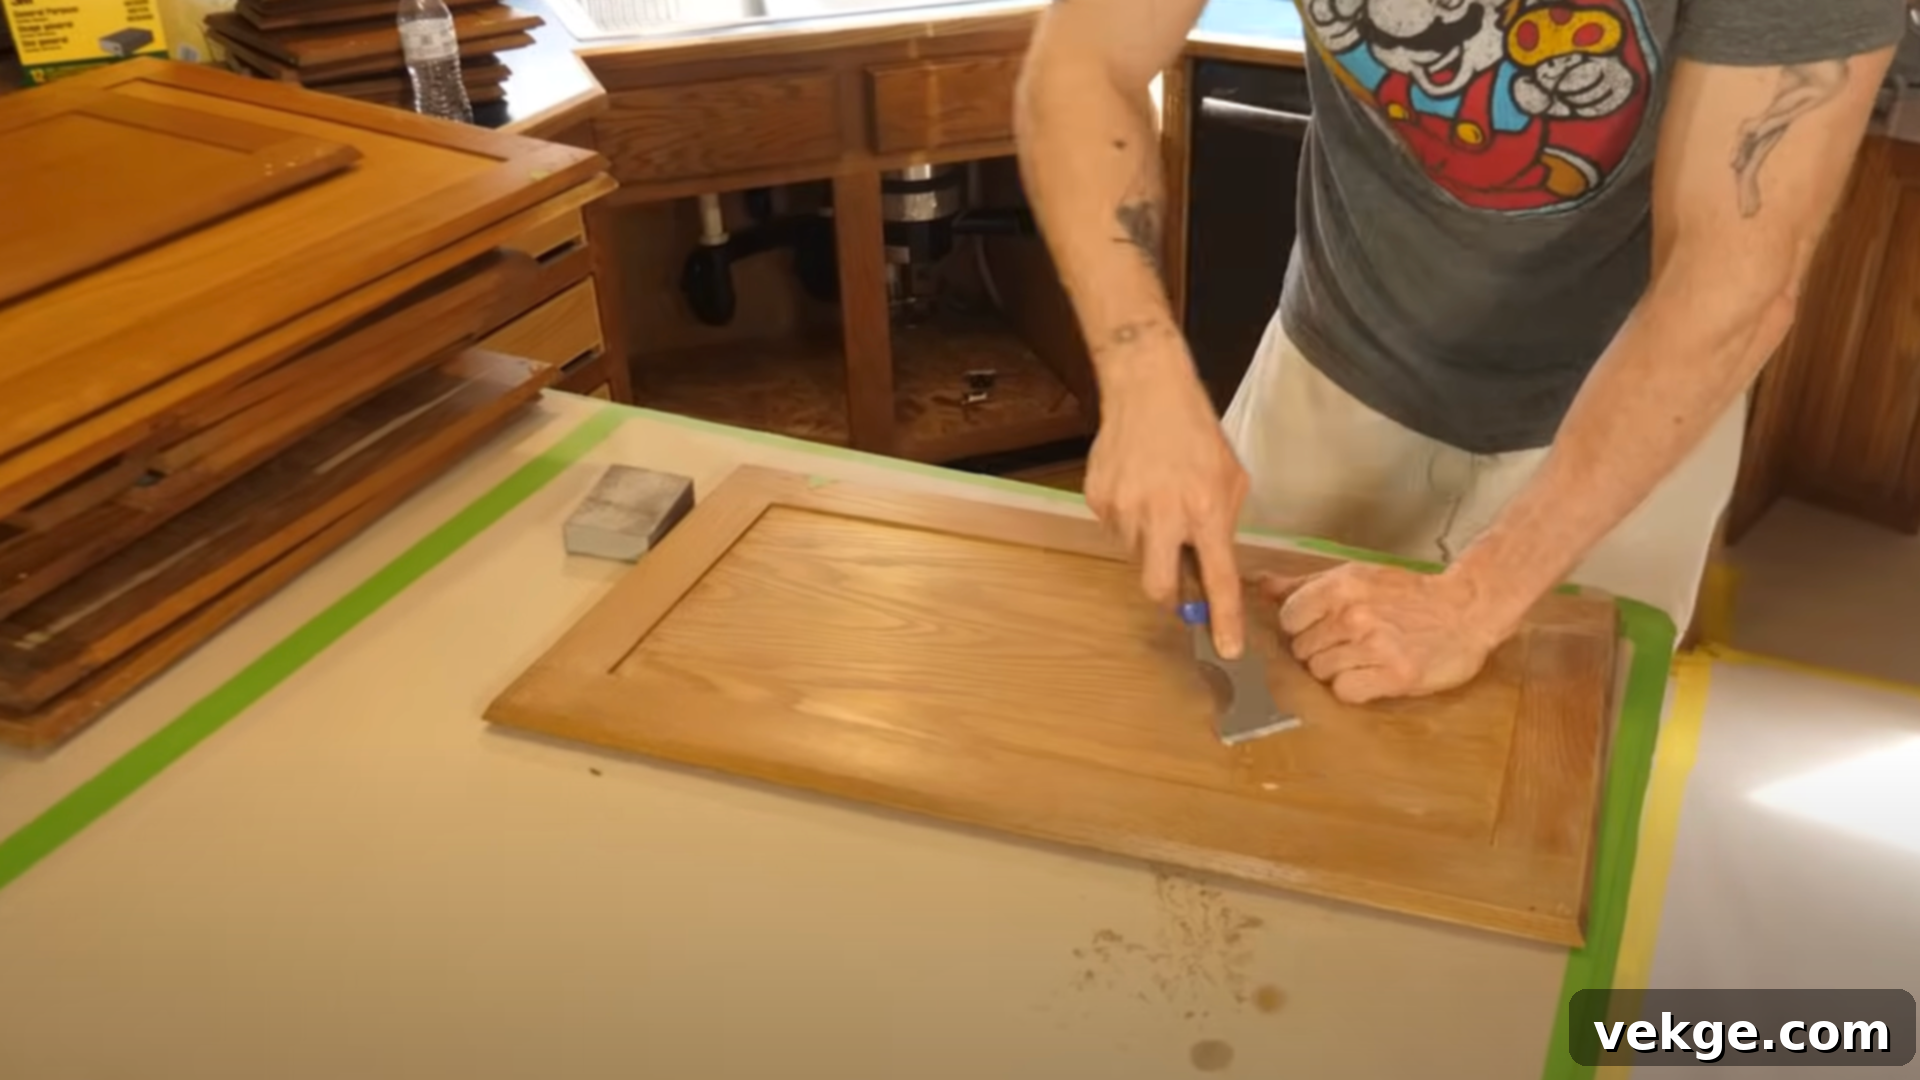
Next, it’s time for a deep clean. Thoroughly scrub all cabinet surfaces with a powerful degreaser or a mild cleaner to completely eliminate any accumulated grease, dust, and grime that can impede paint adhesion. Once the cabinets are sparkling clean, lightly sand the surfaces with 120-150 grit sandpaper. This step is crucial for smoothing out any old finishes, removing minor imperfections, and creating a “tooth” for the primer or stain to adhere to, which is especially important for glossy or previously sealed oak. After sanding, meticulously use a tack cloth or a damp microfiber cloth to wipe away every speck of dust. A perfectly clean and smooth surface is paramount for achieving a professional, long-lasting finish in your cabinet modernization project.
Step 3: Apply High-Quality Primer (If Painting)
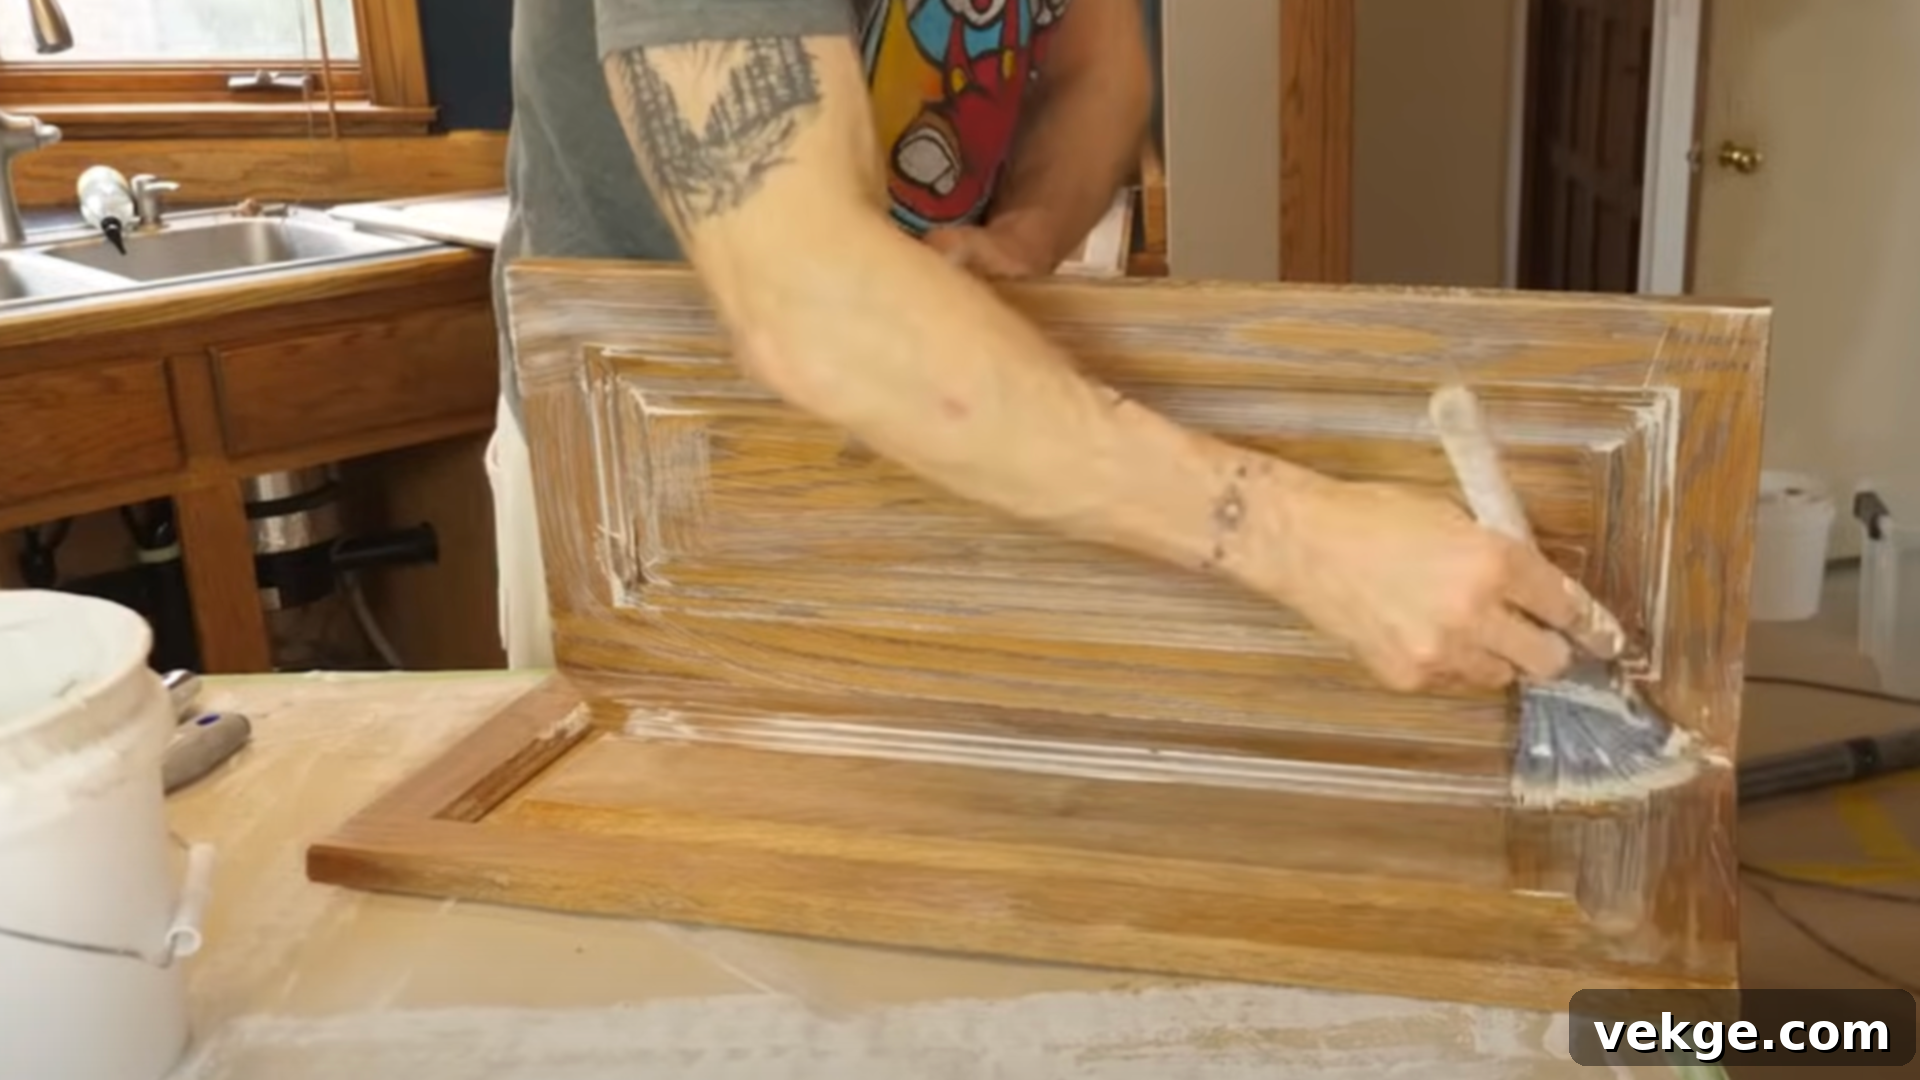
For those planning to paint their cabinets, applying a high-quality primer is an indispensable step. A good primer, especially one designed for stain-blocking, will seal the wood, prevent the oak’s natural tannins from bleeding through (which can cause yellowing), and create a perfectly smooth, even base for your chosen paint. This ensures superior adhesion, better coverage from your paint, and ultimately a more durable and attractive finish. Apply one to two thin coats, allowing each coat to dry completely according to the manufacturer’s instructions. Proper drying time is crucial for optimal adhesion and a long-lasting result. Always work in a well-ventilated area and wear appropriate safety gear during this process.
Step 4: Expertly Paint or Stain Your Cabinets
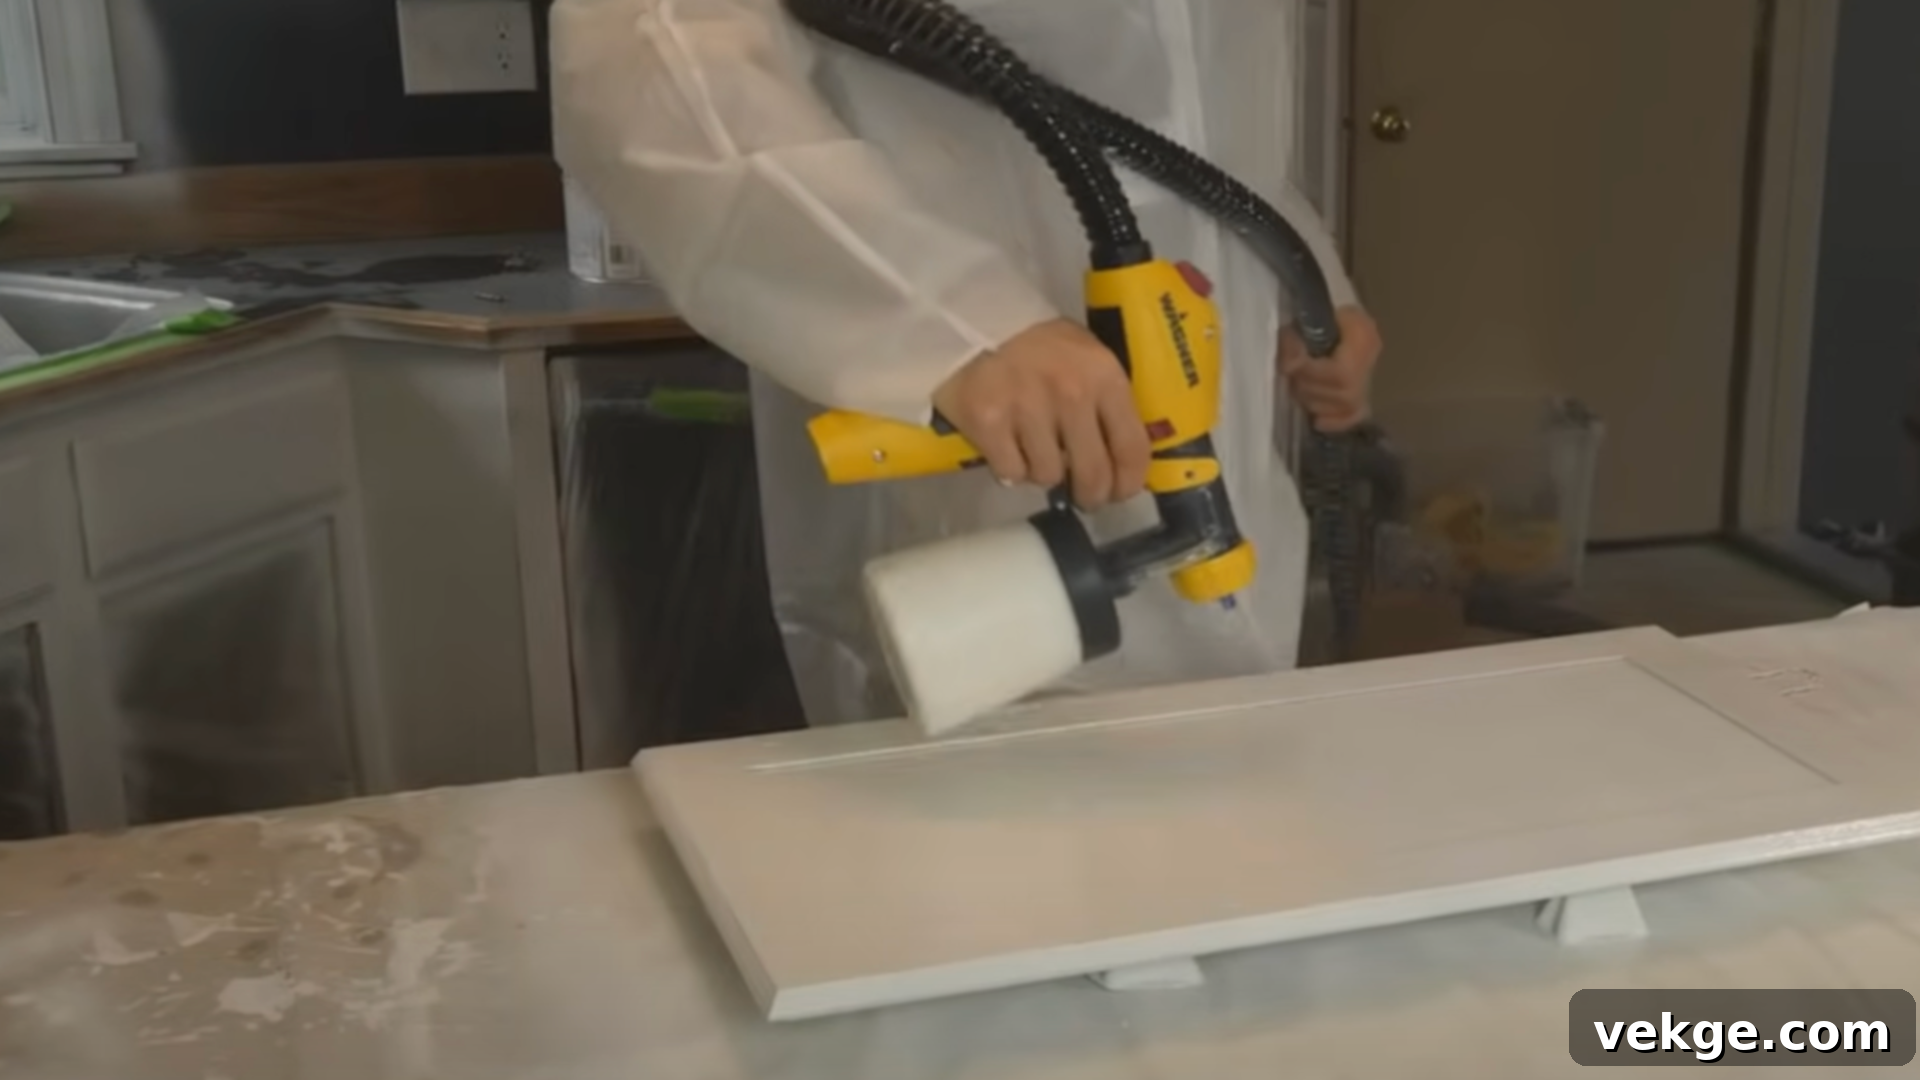
With the primer dry (if applicable), you can now begin the exciting process of painting or staining your cabinets. To achieve a truly modern look, consider a neutral paint color like a soft gray, crisp white, or a muted greige. For those who prefer to keep the wood grain visible, a darker, rich stain such as walnut or espresso can offer a sophisticated and contemporary finish. Apply thin, smooth, and even strokes of paint or stain, working in small sections. For painted cabinets, multiple thin coats are always better than one thick coat, as this minimizes drips and brush marks. Ensure each coat is completely dry before applying the next, lightly sanding with 220-grit sandpaper between coats for an ultra-smooth finish. Utilizing a high-quality paint sprayer can also help achieve a factory-like finish with minimal effort, significantly reducing visible brush strokes.
Step 5: Install Your Stylish New Hardware
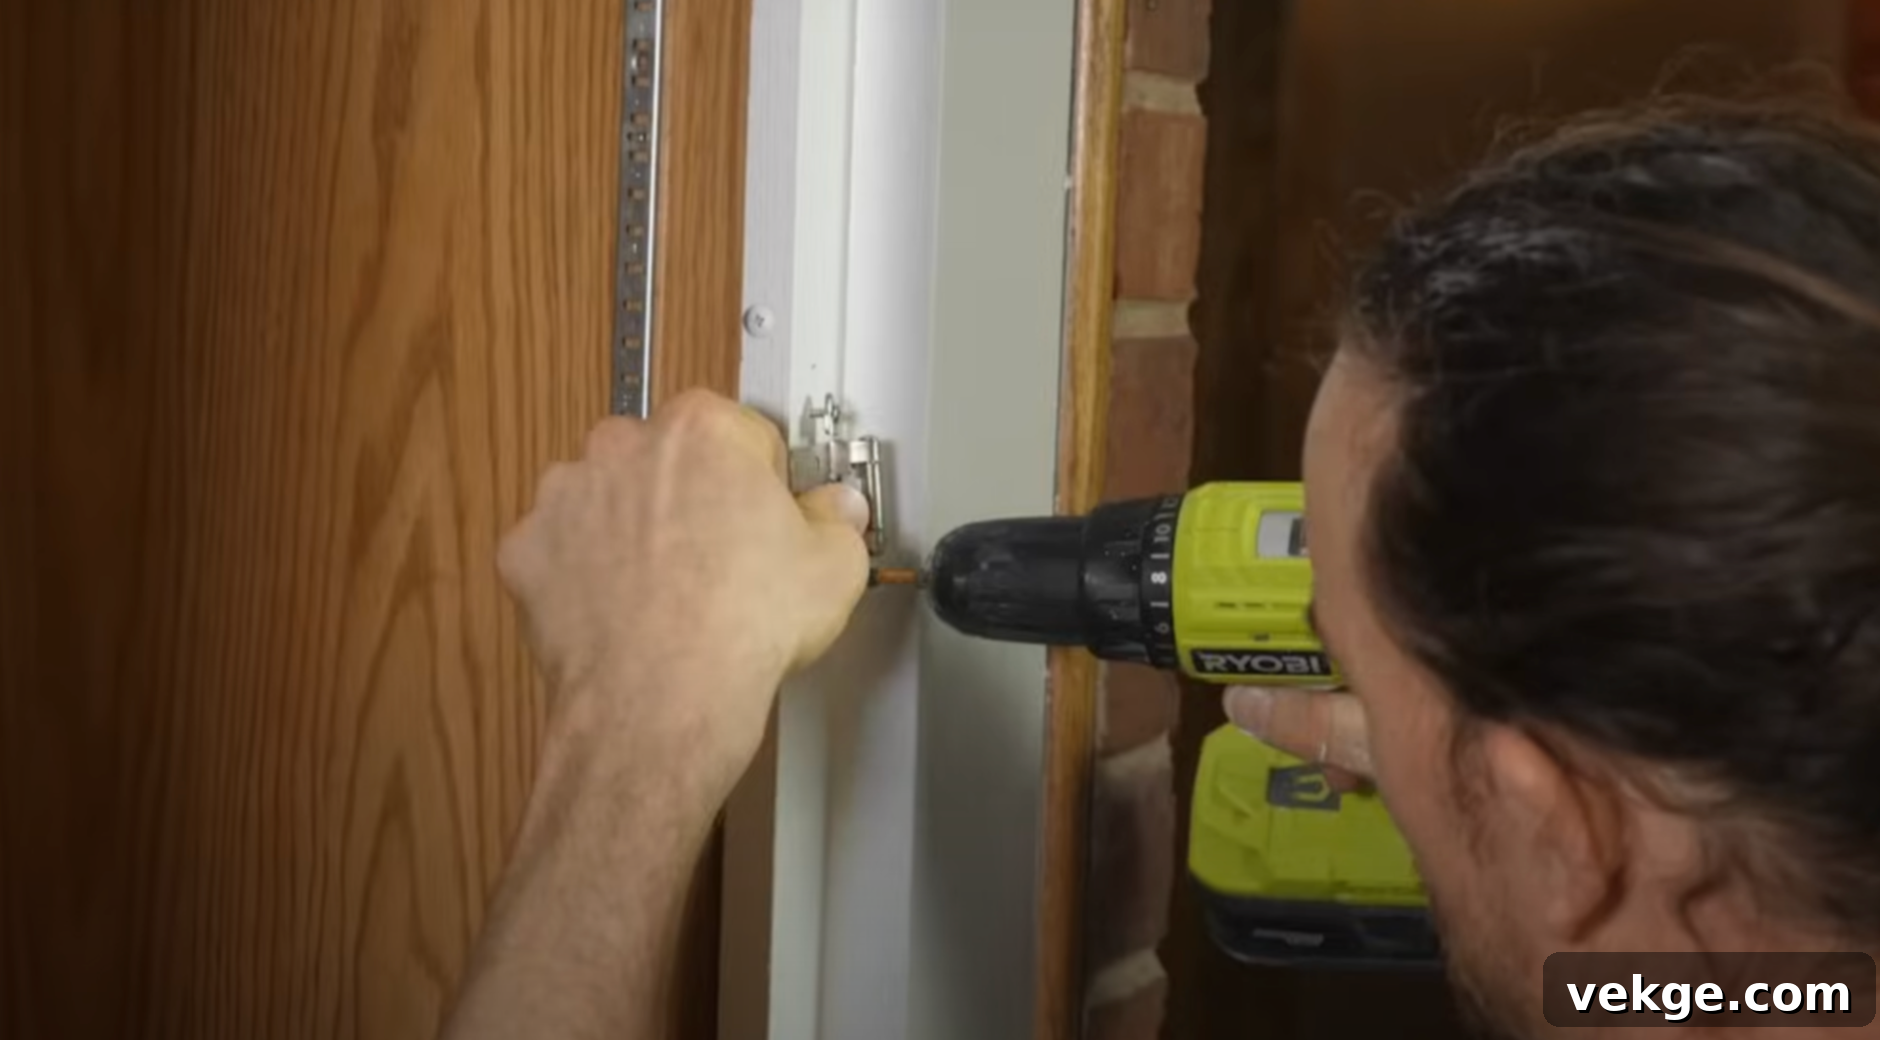
Once your paint or stain has fully cured – which might take several days depending on the product – it’s time to install your chosen new hardware. This step alone can dramatically transform the feel of your cabinets. If your new knobs or pulls require different mounting positions than the old hardware, use a drill with a new template for precise hole placement. It’s often beneficial to fill and sand the old holes before painting if you’re changing the hardware style significantly. Ensure that all hardware is consistently spaced and perfectly aligned across all doors and drawers; this meticulous attention to detail is crucial for achieving a sleek, professional, and modern appearance. Taking your time during this final installation phase will truly elevate the finished look of your modernized kitchen.
Step 6: Final Inspection and Fine-Tuning Adjustments
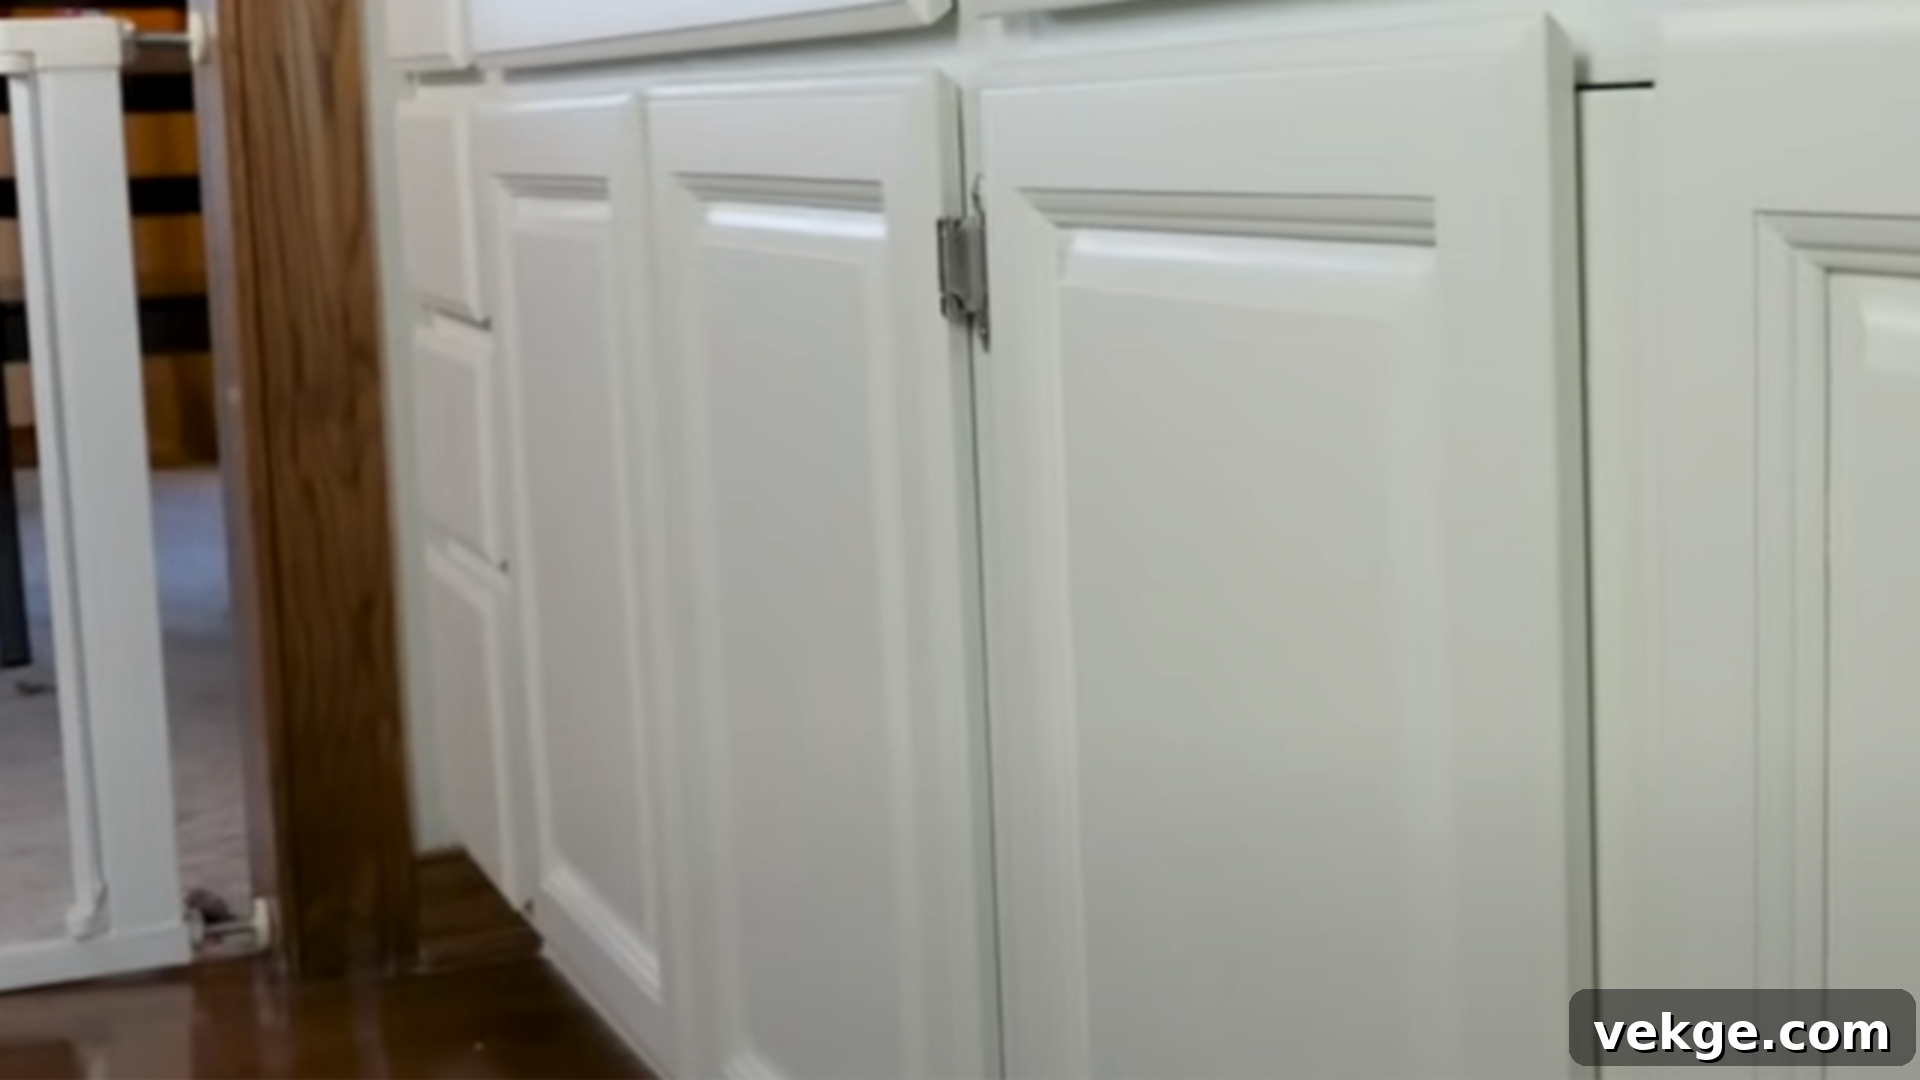
Once your cabinet transformation is complete, take a moment to conduct a thorough final inspection of your handiwork. Carefully check for any minor imperfections, missed spots, or areas that might require a slight touch-up. Ensure all cabinet doors open and close smoothly, and that all hinges are properly aligned and hardware is securely fastened. This step allows you to fine-tune any details and ensure a flawless finish. With everything in its perfect place, your oak cabinets will boast a fresh, modern appearance, significantly enhancing your kitchen’s overall appeal and creating a welcoming, contemporary atmosphere.
Common Mistakes to Avoid When Modernizing Oak Cabinets
While modernizing oak cabinets can be a straightforward DIY project, a few common pitfalls can hinder your progress and impact the final outcome. Being aware of these mistakes can help ensure your updates go smoothly and yield professional-looking results:
- Skipping Essential Surface Preparation: Rushing or neglecting proper cleaning and sanding is perhaps the most common mistake. Failing to thoroughly degrease, clean, and lightly sand the cabinet surfaces can lead to paint or stain peeling, chipping, or appearing uneven within a short period. Always commit to meticulous prep work before opening any cans of primer or paint.
- Choosing the Wrong Paint or Stain Formula: Not all paints and stains are created equal, especially for high-traffic areas like kitchen cabinets. Using standard wall paint or a weak stain can highlight the oak’s strong grain in an undesirable way or simply not hold up to daily wear and tear. Invest in high-quality, durable cabinet-specific paints or stains, and consider modern, neutral tones that complement your home’s aesthetic.
- Overlooking Precise Hardware Placement: Even perfectly painted cabinets can look amateurish with misaligned knobs and pulls. Unevenly drilled holes or hardware that isn’t perfectly horizontal or vertical can detract from an otherwise polished finish. Always use a drilling template or a measuring jig to ensure clean, consistent, and evenly spaced hardware installation across all doors and drawers.
- Ignoring the Impact of Outdated Lighting: Your cabinets might be modernized, but if your kitchen is still lit by old, yellowing fixtures, the entire space can still feel dated. Poor lighting can cast unflattering shadows and fail to highlight your beautiful updates. Upgrade to modern, energy-efficient lighting fixtures (e.g., LED recessed lights, sleek pendant lights, under-cabinet lighting) that provide bright, clean illumination to showcase your refreshed kitchen.
- Rushing the Drying and Curing Process: Patience is a virtue in cabinet painting. Skipping dry times between coats of primer, paint, or stain, or putting doors back on before the finish has fully cured, can lead to smudges, drips, chipped paint, or a less durable surface. Always adhere to the manufacturer’s recommended drying and curing times, even if it means extending the project over several days.
By diligently avoiding these common mistakes, you’ll be well on your way to achieving clean, polished, and lasting results that make your oak cabinets truly look modern and stylish.
Making Oak Kitchen Cabinets Modern Without Painting
If you’re hesitant to paint your oak cabinets but still crave a modern aesthetic, there are numerous effective strategies that can dramatically update your kitchen’s look. Modernizing oak cabinets without painting focuses on enhancing the existing wood’s beauty by updating surrounding elements like hardware, lighting, shelving, and even integrating new cabinet fronts to craft a fresh, contemporary appeal.
Update Cabinet Hardware for an Instant Refresh
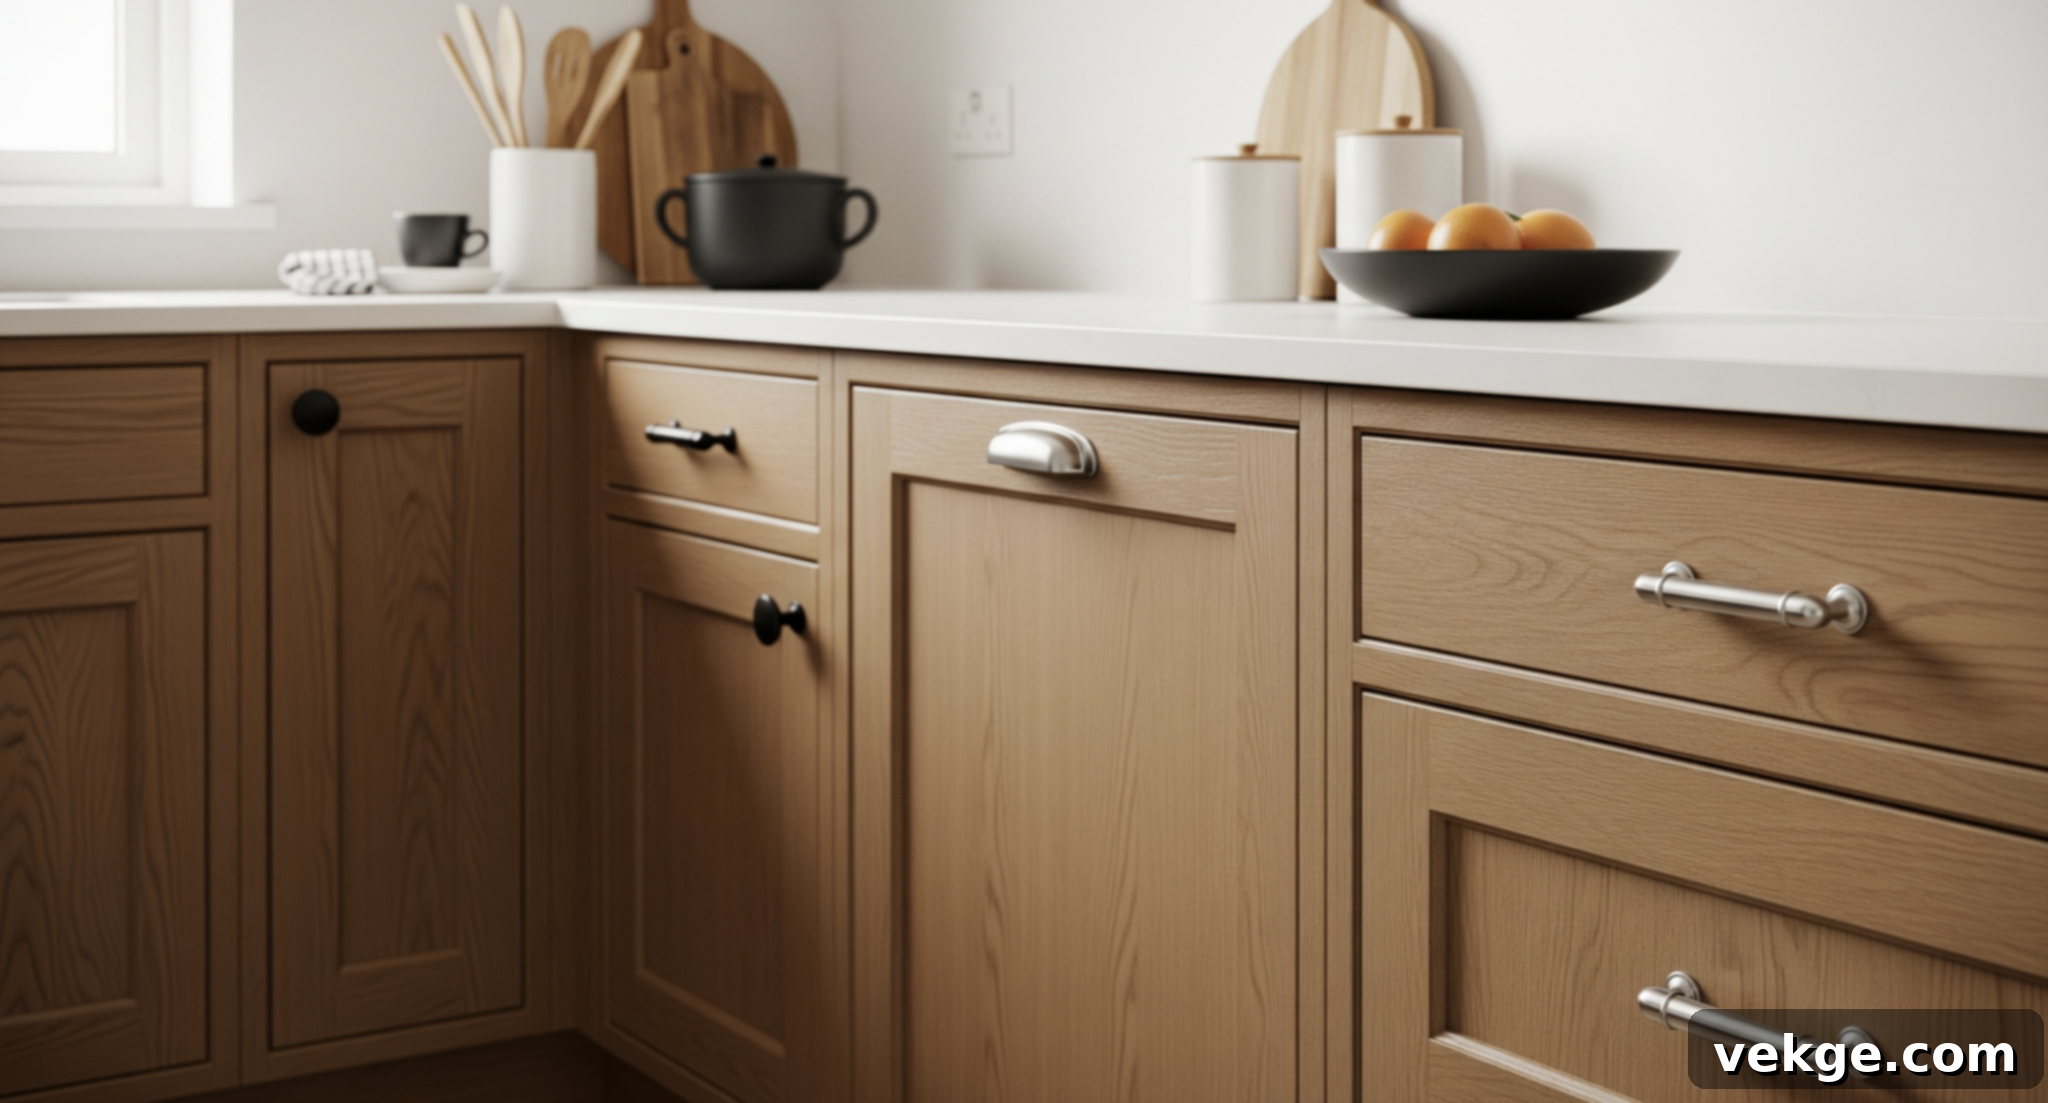
One of the quickest, most impactful, and budget-friendly ways to modernize your oak cabinets without a drop of paint is by replacing outdated hardware. Swap out old, ornate, or brass-toned knobs and pulls for sleek, minimalist designs in contemporary finishes. Options like matte black bar pulls, brushed nickel handles, or polished chrome knobs can instantly elevate the look of your kitchen. Consider oversized hardware for a bolder, more luxurious touch, or subtle cup pulls for a modern farmhouse feel. This simple change alone can transform your kitchen’s aesthetic, making your oak cabinets feel far more current and stylish.
Swap Out Lighting Fixtures for a Brighter, Modern Ambiance
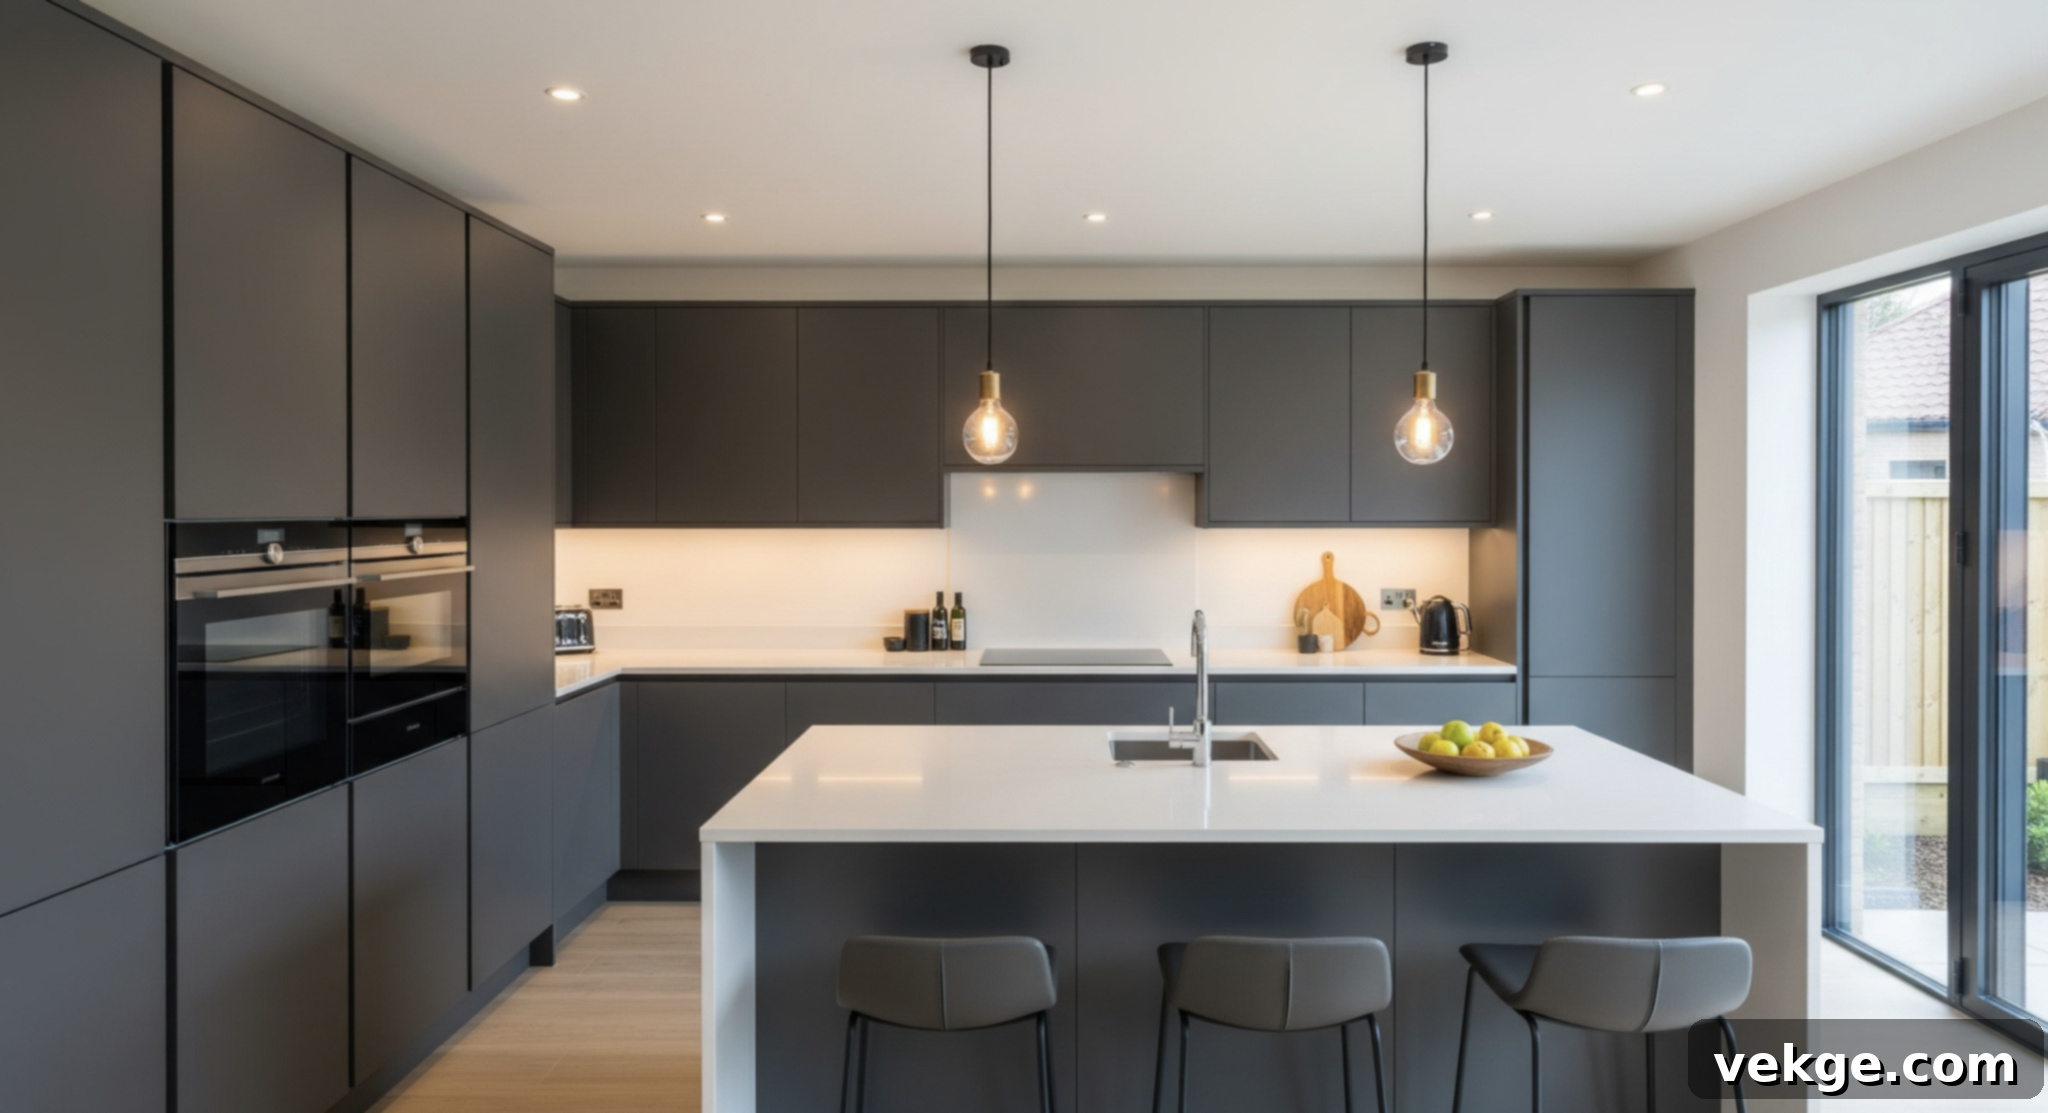
Good lighting can completely transform the perception of a space. Upgrade your kitchen by replacing old, dated lighting fixtures with contemporary, minimalist designs. Consider installing sleek pendant lights over an island or peninsula, energy-efficient recessed lighting for ambient illumination, or even modern under-cabinet LED strips to brighten task areas and highlight your oak cabinetry. Modern lighting fixtures not only significantly improve the kitchen’s functionality and overall mood but also create a fresh ambiance that makes your existing cabinets pop in a more contemporary setting. Choose fixtures with clean lines and simple designs that complement both the warm tones of oak and any other modern elements you incorporate, ensuring a cohesive and sophisticated look.
Incorporate Open Shelving to Create Airiness
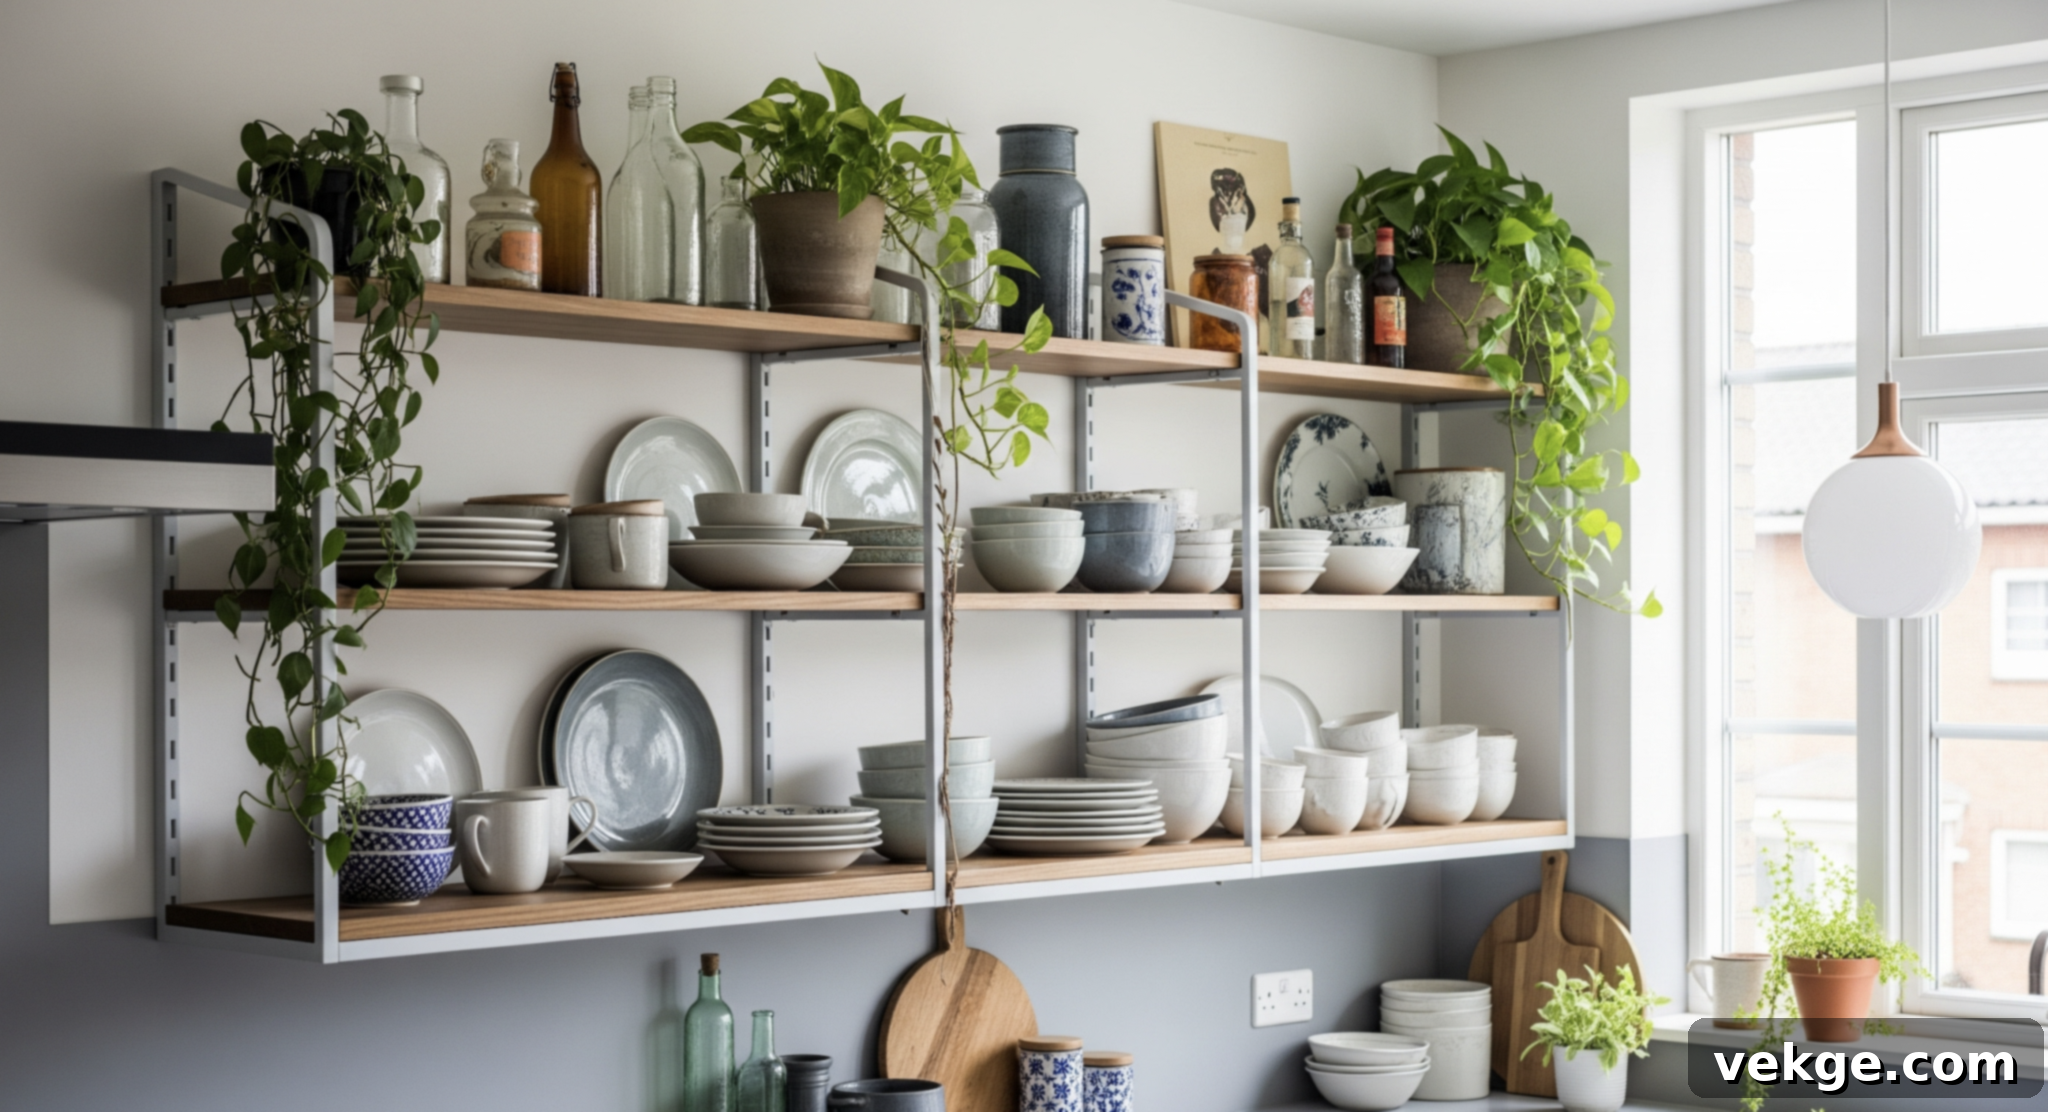
To break up the visual weight of continuous oak cabinetry and create a more expansive feel, consider replacing some of your upper cabinets with chic open shelving. Open shelves instantly make a kitchen feel lighter, airier, and more spacious. They provide an excellent opportunity to display curated collections of stylish dishes, elegant glassware, cookbooks, or decorative plants, adding personality and a modern, lived-in touch to your kitchen. While open shelving offers aesthetic benefits, it’s crucial to maintain organization to avoid a cluttered appearance. For maximum flexibility, opt for adjustable shelves, allowing you to easily rearrange your display based on changing needs or décor. You can choose shelves in a complementary wood tone or a contrasting material like metal or white laminate for an even bolder modern statement.
Install Glass Front Cabinets for Contemporary Elegance
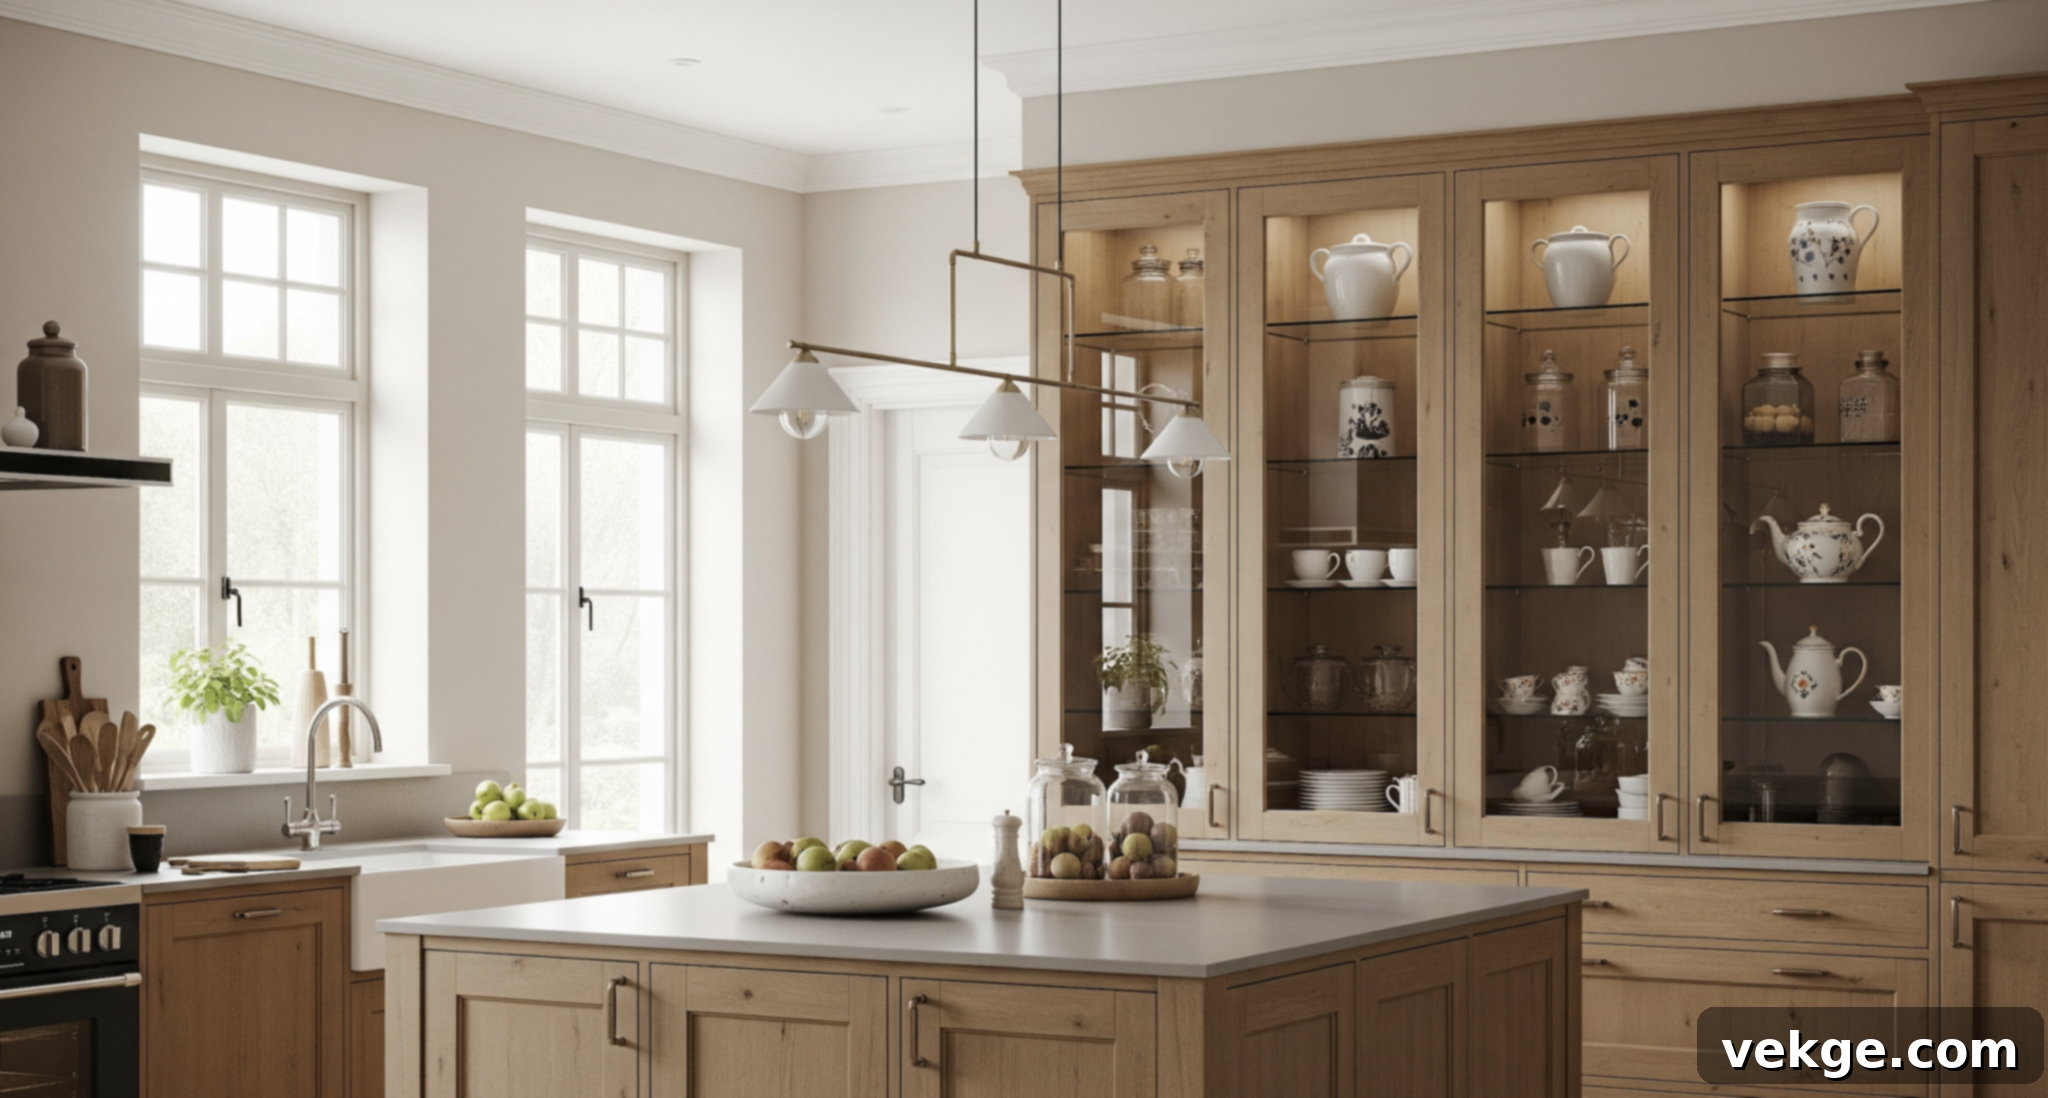
Installing glass-front cabinet doors is an exceptionally effective and simple way to inject a contemporary, sleek design into your existing oak cabinets. This update can be done by replacing solid wood panels with glass inserts or by investing in new glass-front doors. Glass fronts allow you to artfully display attractive items inside, such as fine china, decorative bowls, or even accent lighting, while still maintaining a tidy and modern aesthetic. The transparency of glass panels visually lightens the heavy appearance often associated with traditional oak cabinets, creating a more open and airy atmosphere. For an even more sophisticated look, combine glass-front cabinets with clean, neutral interiors and perhaps add interior lighting to illuminate your displayed items, resulting in a seamless and truly modern kitchen design.
Updating Countertops and Backsplashes for Modern Impact
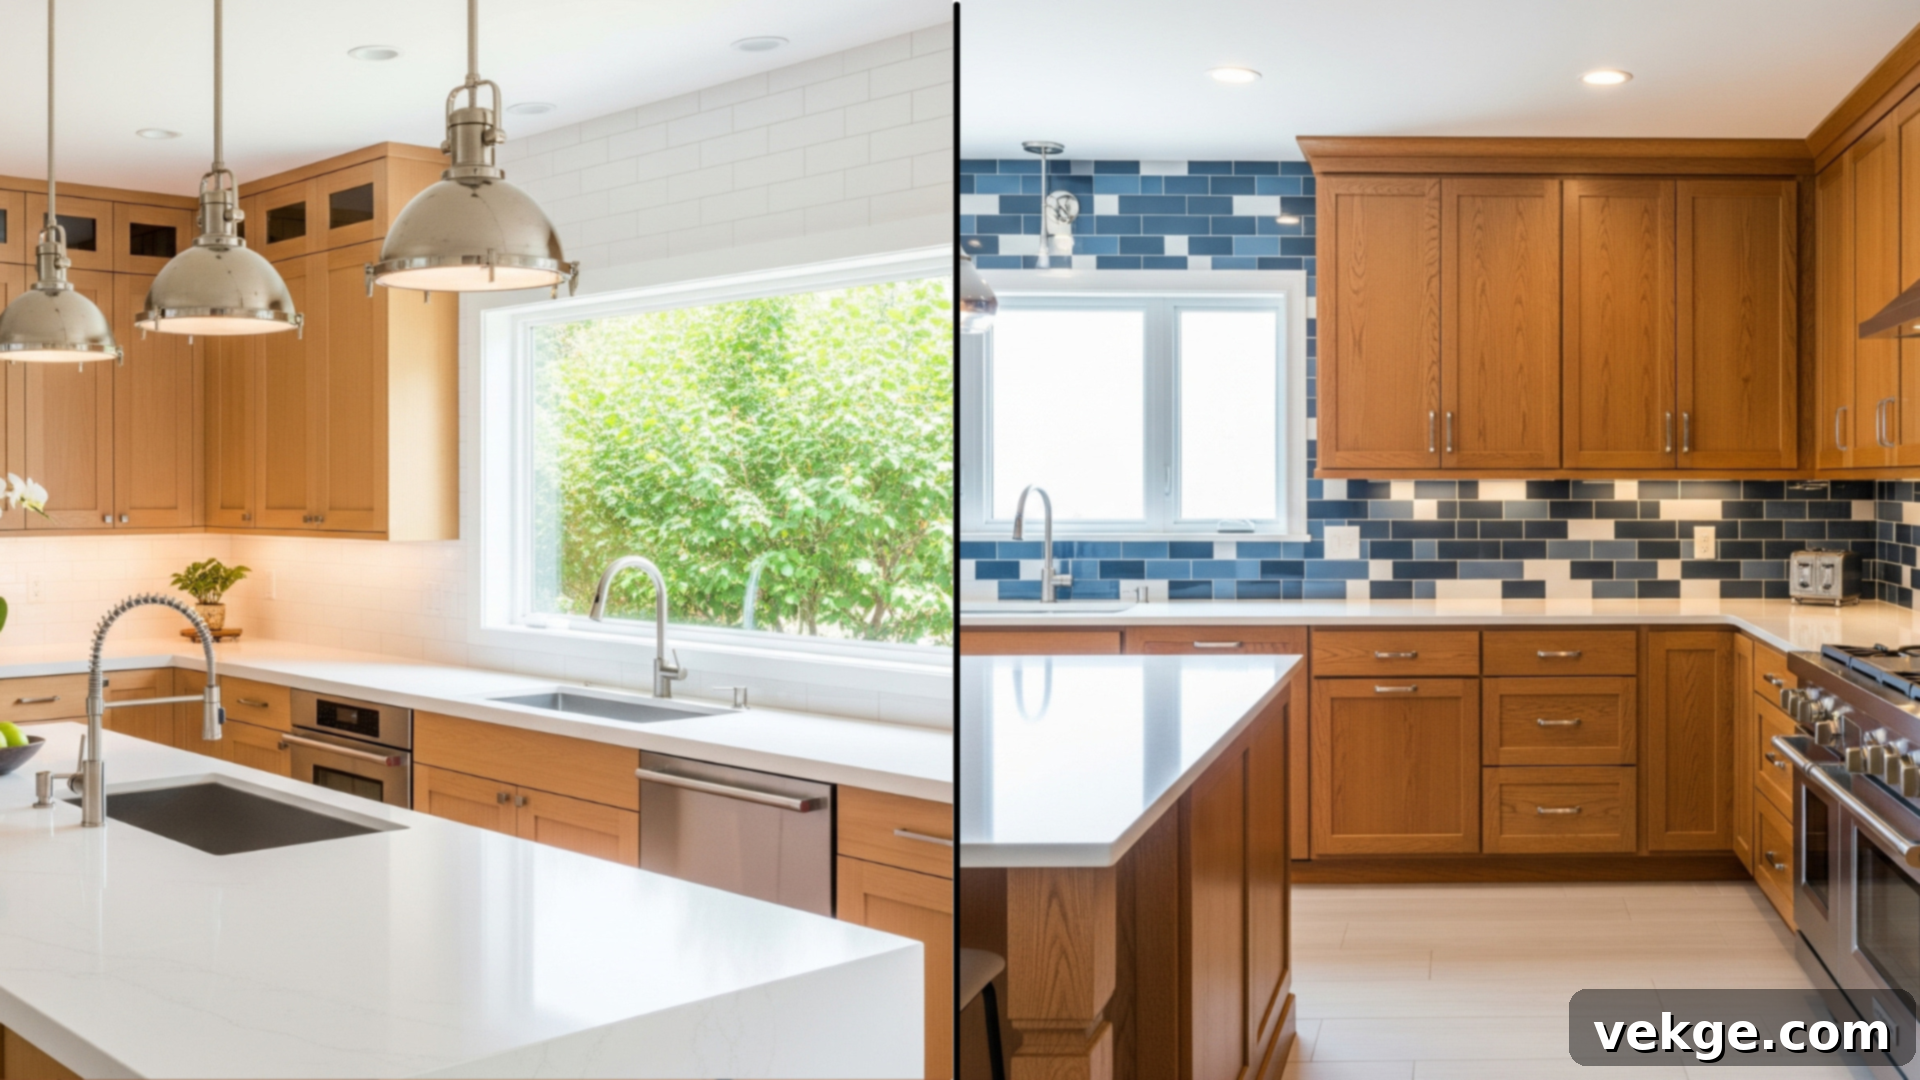
Transforming your kitchen’s countertops and backsplash can have an immense impact on the overall style, instantly pulling your oak cabinets into the modern era. These surfaces serve as a critical backdrop and focal point, creating balance and contrast with the warmth of oak wood.
Pair Oak with Contrasting Countertops for Visual Harmony
To achieve a striking yet harmonious contrast with your oak cabinets, consider upgrading to countertops in shades of crisp white, elegant gray, or deep, dark quartz. These cooler or neutral tones effectively balance the warm, often golden or orange hues inherent in oak, instantly giving your kitchen a more contemporary and fresh feel. Materials like quartz or granite offer not only a sleek aesthetic with clean lines but also exceptional durability and an easy-to-maintain surface, perfect for a modern, busy kitchen. This strategic combination of warm oak with cool, clean countertops brightens the entire space, making it feel more open, expansive, and decidedly modern.
Bold or Geometric Backsplashes for a Dynamic Statement
A carefully chosen backsplash can serve as a stunning focal point, injecting personality and significant visual interest into your kitchen. For a truly modern oak kitchen, consider installing bold, geometric, or classic subway tiles. Large format subway tiles, especially in white, grey, or even black, offer a sleek, timeless look that beautifully contrasts with oak. Geometric patterns, whether subtle or vibrant, can add a dynamic and artistic flair, breaking up the visual expanse and creating a contemporary edge against the natural wood. Select designs and colors that complement the new countertops and the overall style of your kitchen for a cohesive and impactful modern appearance. Whether it’s a subtle texture or a dramatic pattern, a modern backsplash elevates the entire kitchen design.
Best Stain and Paint Colors for Modern Oak Cabinets
The right color choice can fundamentally refresh your oak cabinets and catapult your kitchen into a modern aesthetic. Paint offers a bold, clean change, effectively concealing heavy grain and brightening the space. Conversely, stain allows the natural beauty of the wood to show through, but with a refined and updated feel. Here are some of the best options for both approaches:
Modern Paint Colors to Transform Oak Cabinets
Painting is ideal when you desire a complete transformation, providing a clean slate. These colors are specifically chosen to neutralize unwanted orange undertones and update your kitchen’s style:
- Soft White (e.g., Off-White, Creamy White): This classic choice brightens the entire space, creating an illusion of larger, more open areas. It provides a clean, airy feel and acts as a perfect backdrop for modern décor and contrasting hardware.
- Greige or Light Taupe: A versatile blend of gray and beige, greige offers a sophisticated warmth that softens oak’s strong yellow or orange tones without feeling stark. It creates a serene and inviting atmosphere, pairing beautifully with natural wood accents.
- Sage Green: This earthy, muted green shade introduces a calm, biophilic modern vibe to the kitchen. It pairs exceptionally well with matte black, brushed brass, or subtle gold hardware, offering a refreshing and stylish contrast.
- Charcoal or Graphite Gray: For a bold and dramatic statement, charcoal or graphite gray provides a deep, rich contrast. These dark tones look incredibly striking when paired with lighter countertops (like white quartz) and metallic hardware, lending an industrial-chic or contemporary urban feel.
- Navy Blue: A timeless yet trendy choice, navy blue creates a rich, sophisticated look that adds depth and personality while remaining classically stylish. It works well in various design schemes, from coastal modern to transitional.
- Matte Black: The epitome of modern minimalism, matte black delivers a sharp, refined, and undeniably chic finish. It’s perfect for creating a high-contrast, industrial, or ultra-contemporary kitchen, especially when combined with lighter elements and minimalist hardware.
Popular Stain Colors for an Updated Oak Look
If preserving the natural wood grain is your priority, staining can enhance oak’s character while subtly removing outdated hues. These stains offer a more refined and contemporary take on natural wood:
- Espresso: This deep, dark brown stain effectively hides the heavy, sometimes overwhelming grain of oak, providing a sleek, elegant, and sophisticated finish. It gives the cabinets a richer, more luxurious appearance, akin to cherry or walnut.
- Weathered Gray: A weathered or grayish stain is excellent for cooling down oak’s inherent warm undertones. It creates a rustic-modern, lived-in feel, often seen in Scandinavian or coastal-inspired designs, and can make the wood appear less “yellow.”
- Walnut Tone: A rich, medium-to-dark brown walnut-toned stain subtly tones down the orange in oak while maintaining a warm, natural wood look. It offers a classic elegance that feels updated and pairs well with a variety of modern accents.
- Whitewash or Limed Oak: For a lighter, airier feel, whitewashing or liming the oak lightens the wood considerably while still allowing the natural grain to show through. This technique is ideal for achieving a bright, relaxed, or Scandinavian-inspired aesthetic.
- Natural with Matte Finish: Sometimes, the best update is simply enhancing what’s already there. Applying a natural-toned stain followed by a matte or satin topcoat retains the original color of the oak but updates its texture. This eliminates any outdated gloss, creating a more modern, subtle, and natural appearance that feels effortlessly contemporary.
Whether you choose to completely transform your cabinets with paint or enhance their natural character with stain, opting for soft neutrals, rich darks, or cool-toned finishes will undeniably give your oak cabinets a stylish, modern update that lasts.
Minimizing Clutter and Simplifying Design for a Modern Kitchen
Achieving a modern kitchen aesthetic extends beyond just the cabinets; it also involves embracing a philosophy of simplicity and order. To create a space that is both stylishly contemporary and highly functional, it’s essential to minimize visual clutter and champion clean lines. Here’s how you can cultivate a sleek, organized, and truly modern kitchen environment:
- Maintain a Spotless Appearance: The foundation of a modern kitchen is cleanliness and order. Actively store small appliances, kitchen tools, and less frequently used items out of sight, either in cabinets, drawers, or a pantry. This practice ensures your countertops remain clear and highlights the beauty of your newly updated cabinets and pristine surfaces.
- Avoid Countertop Overload: Resist the urge to display every kitchen gadget or decorative item. Limit visible items on your countertops to only the absolute essentials – perhaps a stylish coffee maker, a minimalistic fruit bowl, or a beautiful set of knives. A clutter-free countertop promotes ease of use during cooking and significantly contributes to a serene, streamlined environment.
- Declutter and Organize Cabinets and Drawers: A modern kitchen functions best when its hidden spaces are just as organized as its visible ones. Invest in drawer organizers, cabinet dividers, pull-out shelves, and pantry systems to keep gadgets, utensils, pots, and pans stored neatly and out of sight. This internal organization makes your kitchen more efficient and reduces the likelihood of external clutter.
- Embrace Simple Lines in Design: When selecting new elements like light fixtures, seating, or decorative accents, opt for designs with clean, geometric lines. Avoid overly intricate or heavy trim, ornate details, and excessive embellishments. Simple, straightforward forms keep the space feeling open, airy, and distinctly modern, preventing it from appearing busy or dated.
- Opt for Minimalistic Features: Go beyond just cleaning and choose design elements that inherently support minimalism. This might involve removing outdated valances above windows, eliminating excess molding or detailed accents from your cabinets (if possible), or selecting flat-panel doors for a truly sleek look. Stripping away unnecessary decorative elements allows your kitchen to feel fresh, expansive, and effortlessly modern.
By consistently following these simple yet impactful tips, you can transform your kitchen into a more modern, functional, and visually appealing space. A clean, clutter-free, and simply designed kitchen enhances both the inviting atmosphere and the practical usability of the room, making it a truly pleasant place for cooking, gathering, and living.
When to Hire a Professional vs. DIY: Making the Right Choice
When embarking on the journey to update your oak kitchen cabinets, some tasks are well within the capabilities of a confident DIY enthusiast, while others are best entrusted to skilled professionals. Understanding this distinction can save you time, money, and potential headaches, ensuring high-quality results. Below is a breakdown to help you decide when to tackle projects yourself and when it’s wiser to bring in an expert:
|
Task |
DIY or Professional? |
Tips & Considerations |
|
Hardware updates |
DIY |
An excellent entry-level project. Perfect for quick, cost-effective updates to modernize cabinets. Requires basic tools and patience for precise alignment. |
|
Painting cabinets |
DIY |
Feasible for homeowners with time, attention to detail, and basic painting skills. Essential steps include thorough cleaning, sanding, priming, and multiple thin coats for a durable, smooth finish. |
|
Installing open shelves |
DIY |
A relatively simple project to add modern style and display space. Requires basic carpentry skills, a level, and sturdy anchors for proper installation. |
|
Cabinet refinishing (sanding, staining, sealing) |
Professional |
While some DIYers tackle this, achieving a truly smooth, even, and long-lasting stain or clear coat on oak often requires specialized equipment (like sprayers) and expertise to avoid blotchiness or streaks. Professional help ensures a durable, factory-like finish. |
|
Electrical work for lighting |
Professional |
Any modifications involving wiring (e.g., installing new recessed lights, moving pendants, adding under-cabinet lighting) should always be handled by a licensed electrician for safety and code compliance. |
|
Installing glass-front cabinets |
Professional |
Cutting existing cabinet panels precisely for glass inserts or installing new, perfectly fitting glass doors can be complex. Best left to a pro to ensure precision, proper fitting, and safety. |
|
Installing backsplashes |
Professional |
While small, simple tile projects can be DIY, achieving straight lines, consistent grout, and seamless integration with countertops requires skill. A professional tiler ensures quality and a polished final look. |
|
Replacing countertops |
Professional |
Measurement, cutting, and installation of materials like quartz, granite, or solid surface countertops require specialized tools and expertise to ensure a perfect fit and finish without costly errors. |
After carefully evaluating these options and honestly assessing your own skills, available time, and budget, you can determine which tasks align with your DIY capabilities and which would benefit from professional expertise. Remember that professional help is particularly invaluable when dealing with electrical work, intricate finishes, heavy materials, or custom installations where precision and safety are paramount.
Maintaining Your Modernized Oak Cabinets for Lasting Beauty
Once you’ve successfully modernized your oak kitchen cabinets, the key to preserving their fresh, stylish appearance for many years lies in consistent and thoughtful maintenance. Regular care not only keeps them looking their best but also extends their lifespan and functionality. Here are essential tips to keep in mind:
- Regular Cleaning and Prompt Touch-Ups: Clean your cabinets regularly with a mild, non-abrasive cleaner and a soft cloth to remove grease, fingerprints, and food splatters. For painted cabinets, a damp cloth is often sufficient. Be vigilant for any small chips or scratches in the paint or stain, and address them promptly with touch-up paint or stain to prevent moisture damage and maintain a pristine look.
- Keeping Hardware Fresh and Secure: Modern hardware plays a significant role in your cabinets’ updated look. Clean knobs and pulls regularly to remove grime and maintain their finish. Periodically check all hardware screws and tighten them as needed to ensure smooth operation and prevent loose handles or sagging doors. Consider updating your hardware again every few years if trends change, or if your current hardware shows signs of significant wear, to effortlessly refresh the aesthetic.
- Avoiding Excessive Moisture and Heat: Oak wood, even when sealed, is susceptible to damage from excessive moisture and heat. Always wipe up spills on cabinet surfaces immediately, especially around the sink area. Use exhaust fans when cooking to reduce humidity and prevent steam from lingering on cabinet doors, which can lead to warping, cracking, or damage to the finish.
- Reapplying Finish or Stain as Needed: Depending on the wear and tear your cabinets endure, you may need to reapply a fresh protective finish or stain every few years. This helps to keep the cabinets vibrant, protect the wood from daily use, and enhance their durability. Consult the manufacturer’s recommendations for your specific paint or stain product regarding reapplication schedules.
- Maintaining Cabinet Doors and Hinges: Periodically inspect cabinet doors for proper alignment and ensure hinges are functioning smoothly. Tighten any loose hinge screws to prevent doors from sagging or rubbing against each other. If hinges become squeaky or stiff, a small amount of lubricant can help restore smooth operation. Replace worn or damaged hinges to maintain full functionality and appearance.
- Promoting Proper Internal Organization: An organized interior reduces wear and tear on cabinet surfaces and hinges. Use drawer dividers, cabinet organizers, and shelving inserts to keep dishes, utensils, and pantry items neatly stored. This not only makes your kitchen more efficient but also prevents items from banging against cabinet interiors, which can cause internal damage over time.
By integrating these regular cleaning, hardware management, moisture prevention, finish maintenance, hinge care, and organizational practices into your routine, your modernized oak cabinets will not only stay stylish but also remain beautiful and highly functional for many years to come.
Conclusion: Your Path to a Modernized Oak Kitchen Awaits
Modernizing your oak kitchen cabinets truly doesn’t have to be an overwhelming or exorbitantly expensive endeavor. With the right strategic updates – whether that’s a fresh coat of paint or stain, a swap of hardware, or an upgrade to your lighting – you possess the power to completely revitalize the look and feel of your entire space. From a full DIY paint project to simply enhancing your existing wood with new design elements, every small change can contribute to a dramatically different outcome.
Now that you’re equipped with a comprehensive understanding of how to make oak kitchen cabinets look modern, take a moment to consider which ideas best align with your personal style, your budget, and the time you have available. Remember, even seemingly minor adjustments can make a significant visual difference and infuse your kitchen with a renewed sense of style and sophistication.
Above all, keep in mind these key takeaways: prioritizing organization, selecting clean and contemporary finishes, and embracing simplicity in design are fundamental principles that will help your kitchen feel fresh, inviting, and truly modern for years to come. Your dream kitchen is within reach!
Hungry for more practical tips and inspiring ideas to update your kitchen and other areas of your home? Be sure to explore other engaging blogs on our website for easy, actionable insights you can start implementing today!
