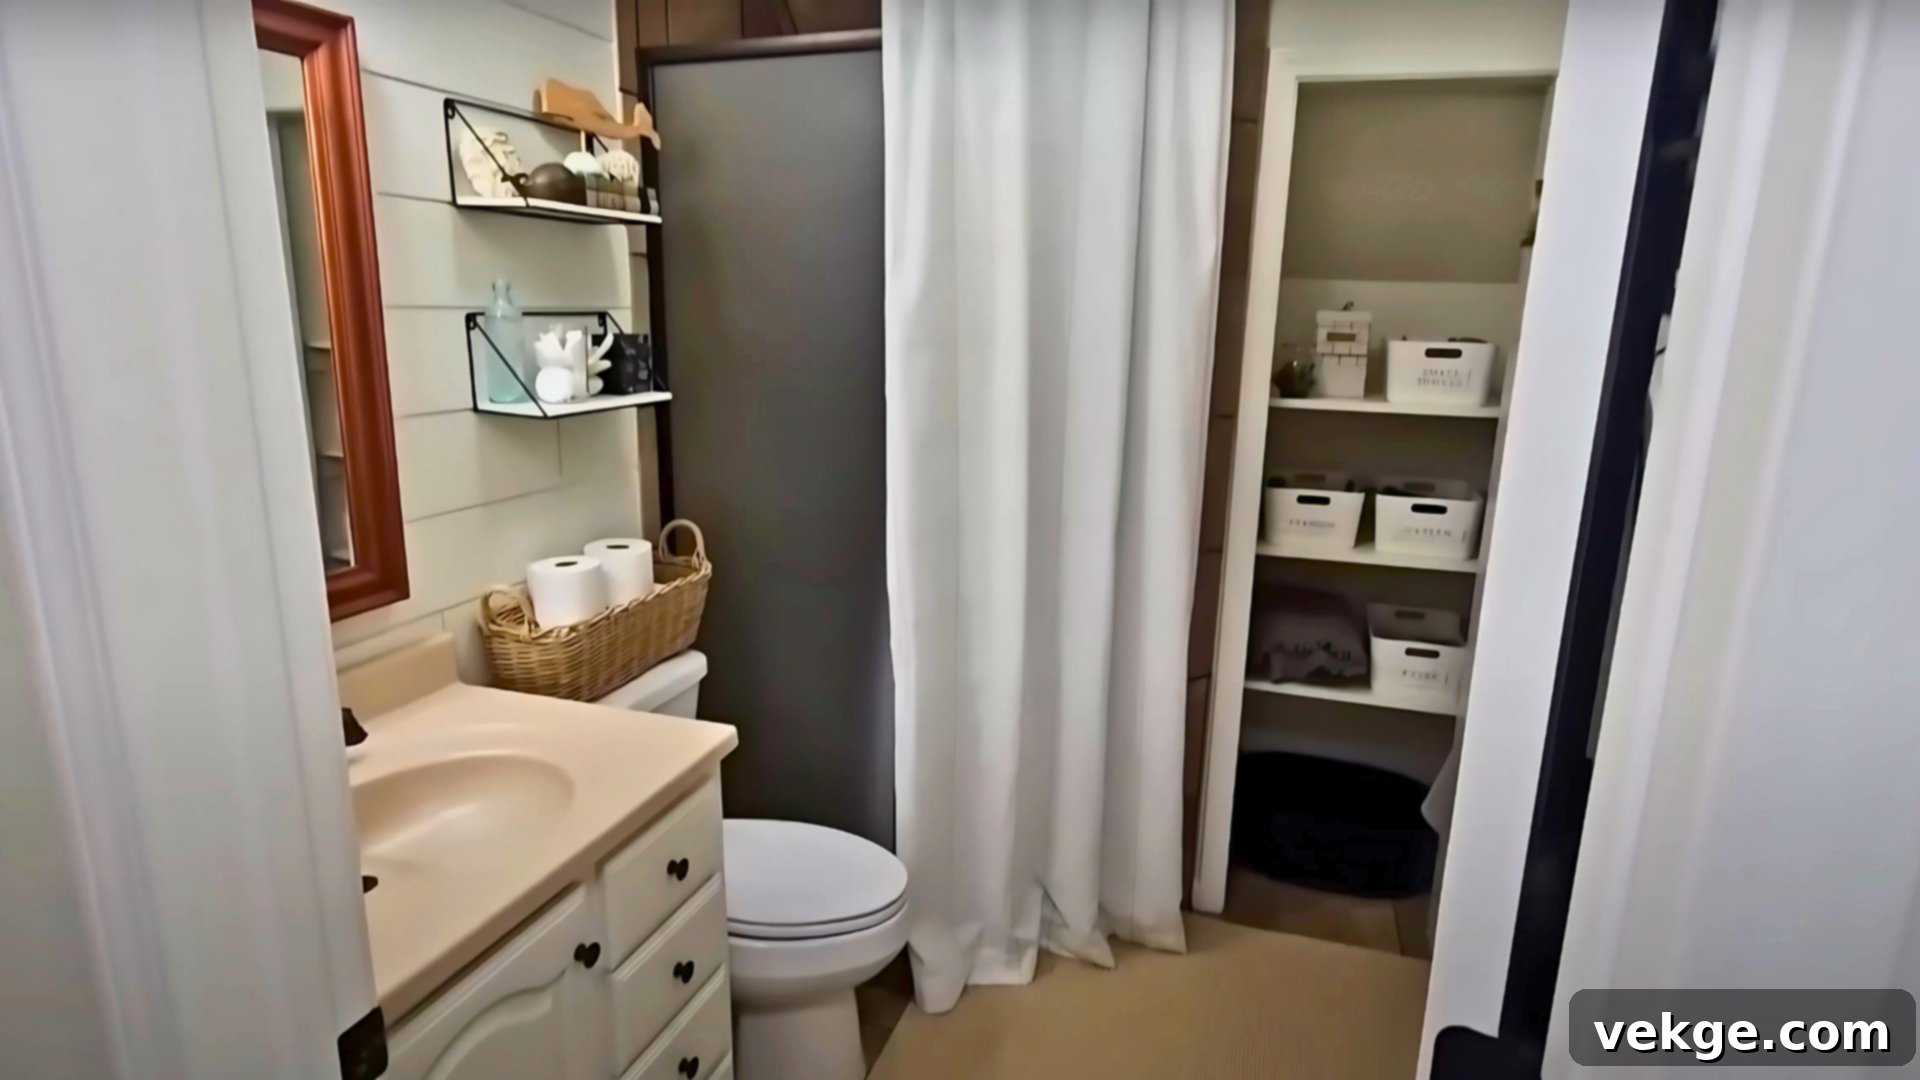
DIY Master Bathroom Makeover: Unlock Light, Function, and Style on a Budget
A master bathroom is more than just a utilitarian space; it’s a sanctuary that can significantly impact your daily routine. If yours currently feels dark, cramped, or simply doesn’t meet your needs, it can be a constant source of frustration. Many homeowners find their master bathrooms feeling outdated, tight, and difficult to truly enjoy, often wishing for more natural light, enhanced functionality, and a more appealing setup without breaking the bank.
The good news is that with a bit of dedicated time, some basic tools, and a willingness to put in the effort, you can absolutely transform this essential space into something fresh, inviting, and highly useful. This comprehensive guide will show you that even the most overlooked corners of your home can be brought back to life, becoming a source of comfort and pride. The goal isn’t necessarily perfection, but rather creating a master bathroom that feels perfectly right for you and your family’s daily rhythms.
Planning Your Dream Master Bathroom Makeover
Before diving into any demolition or purchases, take a crucial moment to thoroughly study your existing space and articulate clear, actionable goals for your master bathroom renovation. If your current bathroom feels perpetually dark, visually crowded, or seems disconnected from the harmonious aesthetic of the rest of your home, rest assured, you’re not alone in these common challenges.
To ensure a successful and manageable project, keep your core plan straightforward and focused: prioritize brightening the room, enhancing its practical functionality, and, critically, staying within a predetermined budget. This disciplined approach means being deliberate and careful in your selection of materials, finishes, and tools right from the very beginning. Thoughtful planning at this stage will save you time, money, and potential headaches down the line, ensuring your DIY master bathroom makeover is both achievable and rewarding.
Evaluating Your Current Master Bathroom Space
Begin by asking yourself honest questions about your bathroom’s current state. Does your bathroom feel excessively heavy and closed-in, perhaps due to dark paint colors or an awkward, inefficient layout? If the current design doesn’t support your daily rituals, it’s a clear sign that a change is needed. Over time, such a space can easily transition from a place for preparation and unwinding into merely a pass-through area, diminishing its potential value and comfort.
Your overarching objective is to meticulously create a space that feels unequivocally clean, remarkably calm, and seamlessly integrated into the overall design of your home, all without resorting to extravagant or over-the-top elements. There’s no need for anything excessively fancy; the aim is simply to achieve a master bathroom that feels effortlessly easy to use, naturally comfortable, and truly serves your lifestyle. This thoughtful evaluation lays the groundwork for a master bathroom that you’ll genuinely love and use every day.
Step-by-Step Guide to Your Master Bathroom Makeover
Embarking on a master bathroom update can seem daunting, but by meticulously breaking it down into clear, manageable steps, the entire process becomes significantly less intimidating and much more achievable. You absolutely don’t need a collection of specialized, expensive tools or an unlimited budget to create a stunning transformation. The key lies in having a well-structured plan that precisely fits your specific needs and resources. This methodical process is designed to keep things simple, allowing you to effectively work with the existing elements and infrastructure you already have, maximizing impact with minimal expense.
Step 1: Deeply Analyze and Plan the Space
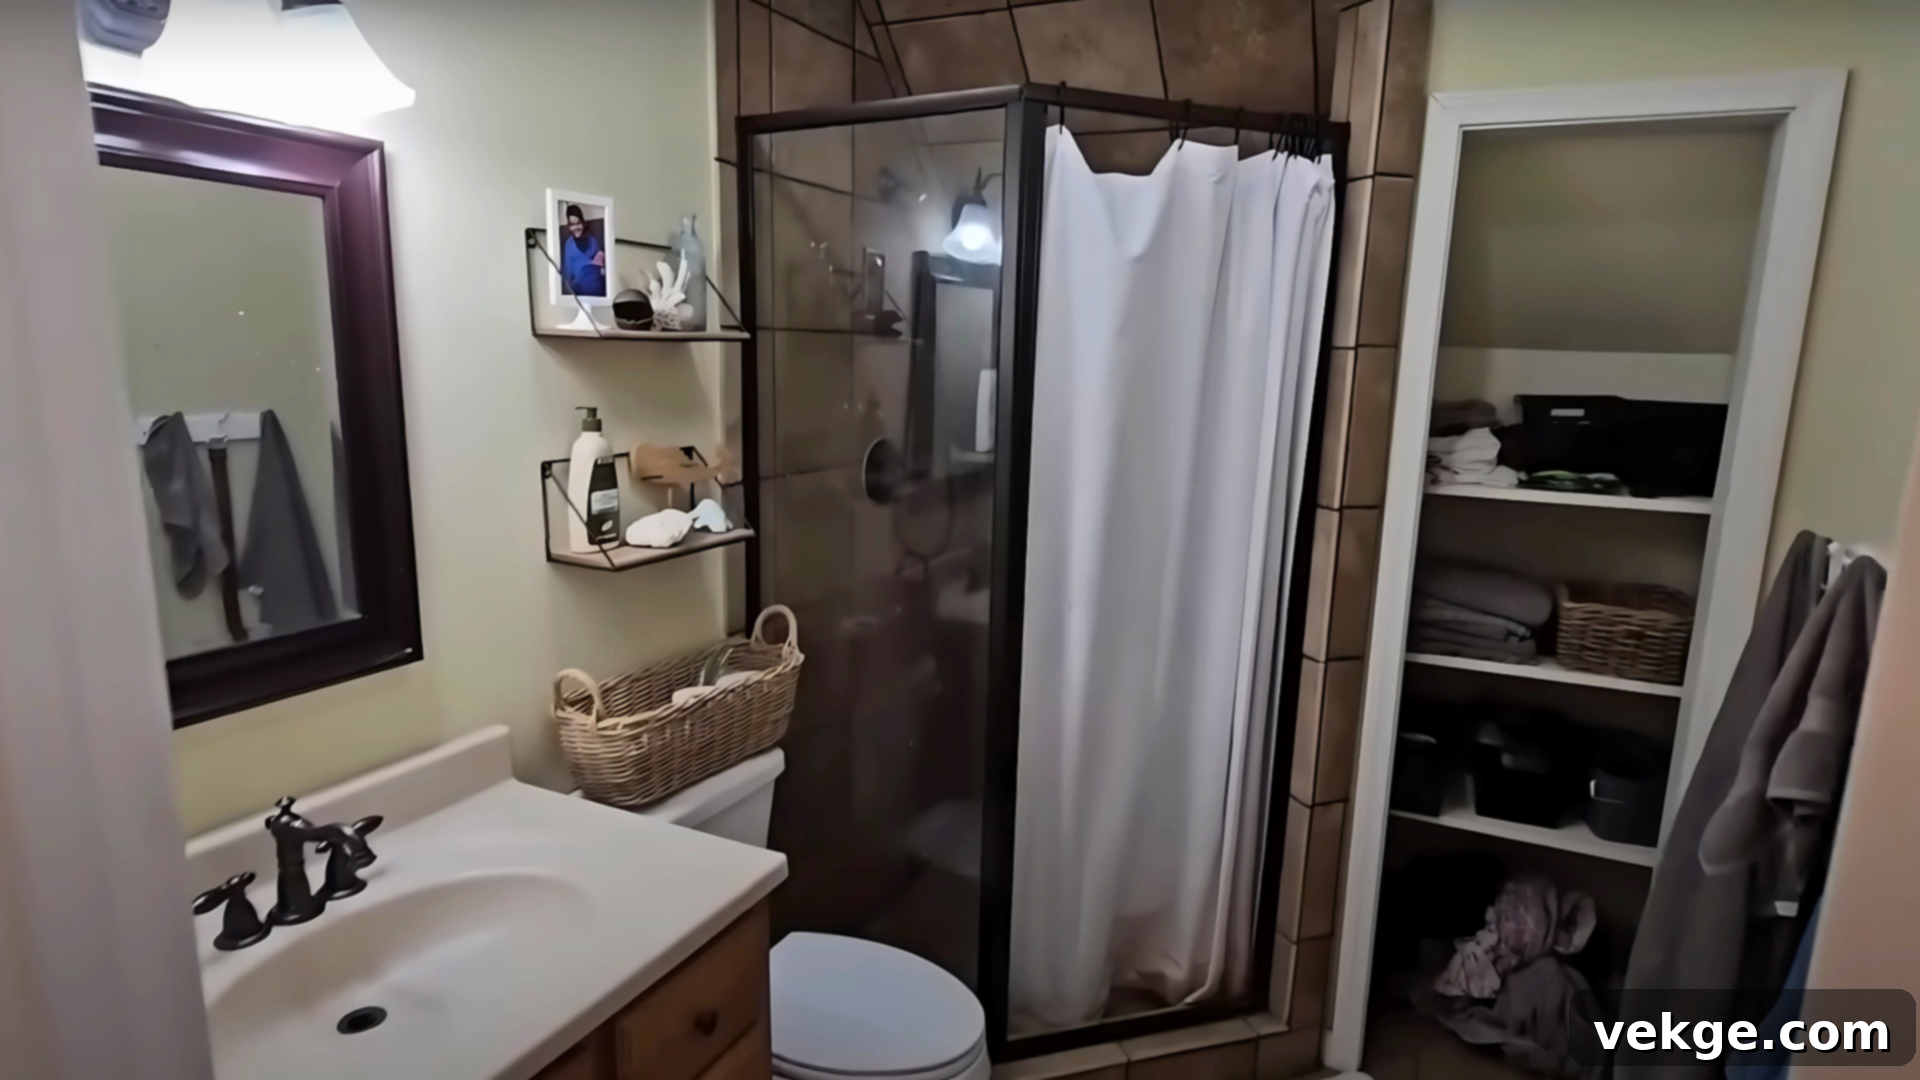
Kickstart your master bathroom renovation by thoroughly examining every aspect of the room. Ask yourself what precisely feels “off” or uncomfortable. Perhaps the layout is uncomfortably tight, making movement awkward, or the lighting consistently feels dim and uninviting, casting shadows where brightness is needed. Consider how this particular space connects, or fails to connect, with the aesthetic and flow of the rest of your home. Do the current colors clash or appear excessively dark compared to adjacent rooms?
Once you’ve identified these critical pain points and aesthetic discrepancies, it’s essential to clearly articulate a few concise, actionable goals. Focus your efforts on making the bathroom noticeably brighter, significantly cleaner, and inherently more useful for your everyday routines. Envision a space where every item has its place and every function is effortlessly supported, ensuring your renovated master bathroom truly enhances your daily life.
Step 2: Thoughtfully Gather All Your Essential Materials and Tools
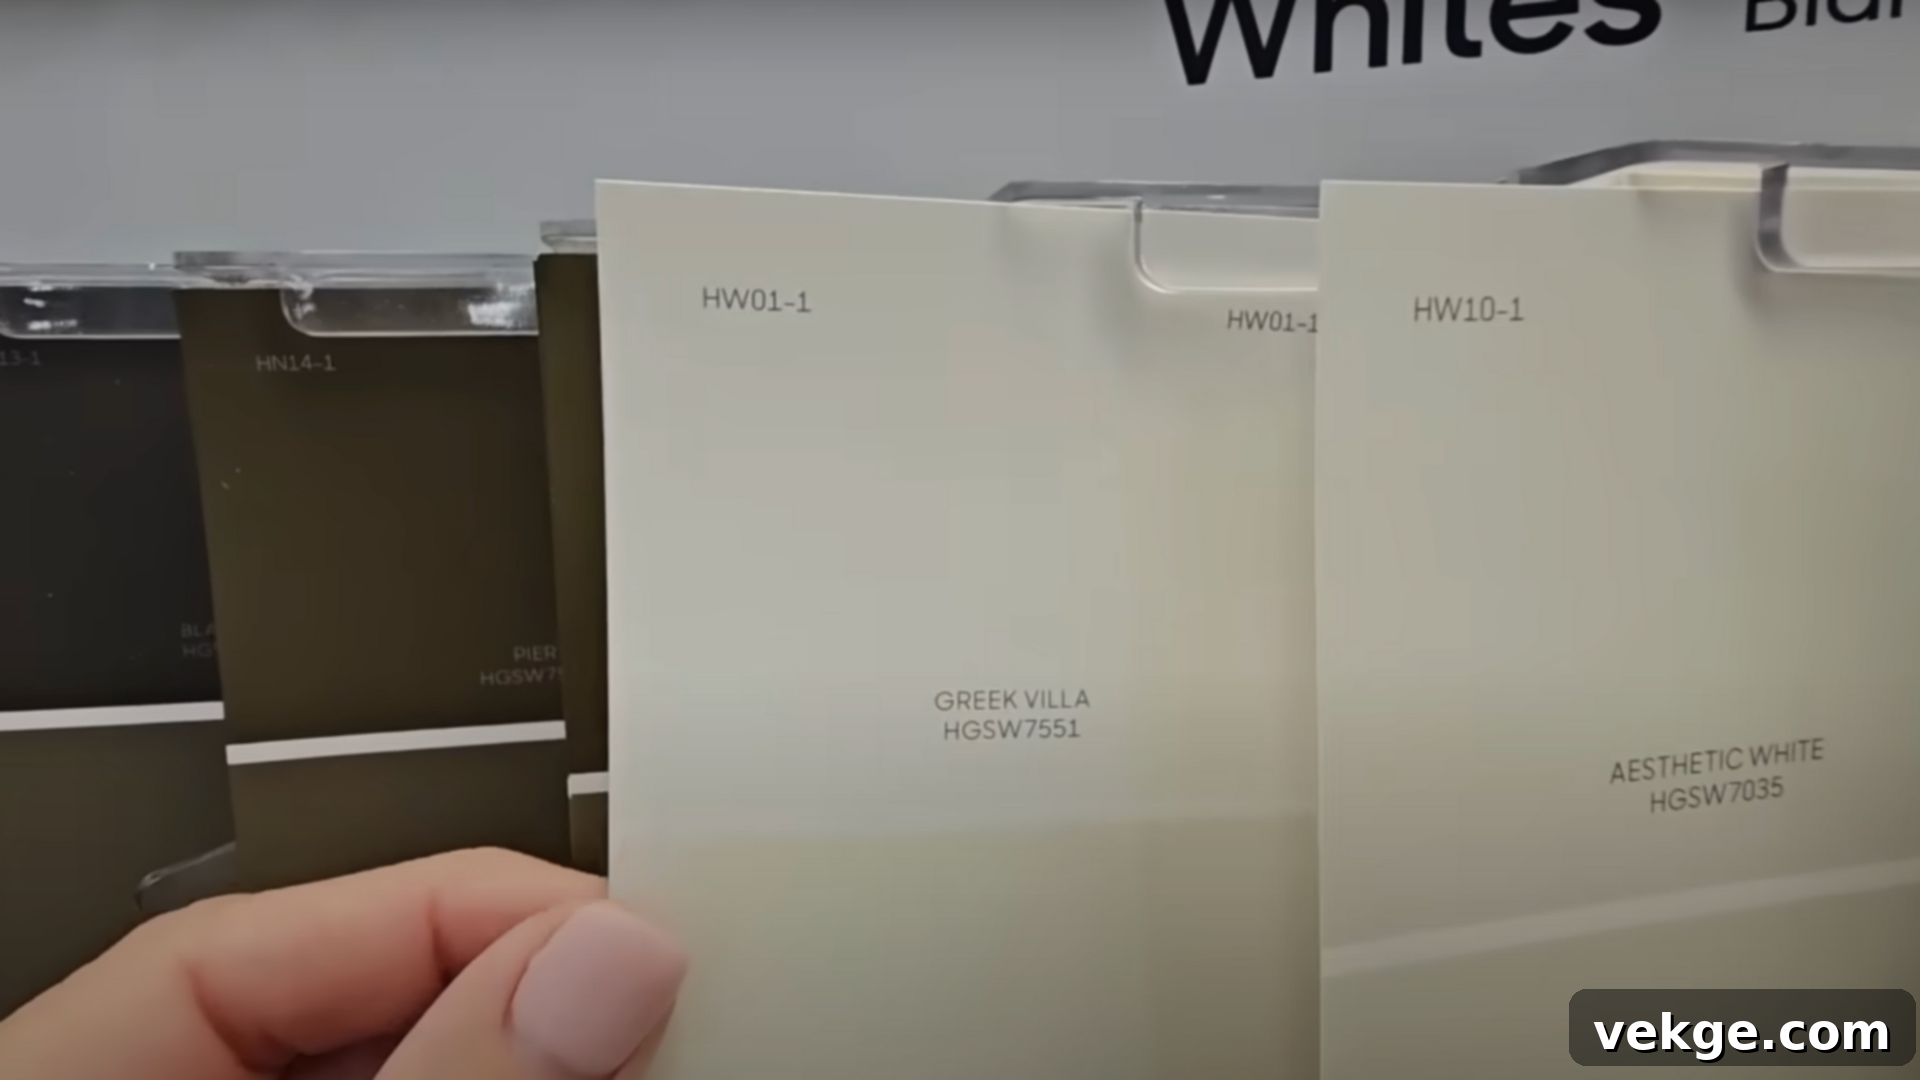
With a clear vision and plan in place for your budget-friendly master bathroom makeover, the next crucial step is to meticulously gather all the necessary materials and tools. Opt for soft, neutral paint shades that will instantly brighten the space, and ensure you have a collection of basic, reliable tools. To significantly save money and achieve a truly customized look, consider making your own shiplap paneling from readily available wooden underlayment sheets. This DIY approach not only keeps costs down but also adds a unique, handcrafted charm to your bathroom.
Having a well-organized supply list will make the entire project run much smoother. Here’s a comprehensive sample supply list to help you get started on your master bathroom transformation:
- Paints: Choose high-quality, durable interior paints like Sherwin-Williams White Duck for a warm white base and Greek Villa for complementary trim or accents.
- Shiplap boards: Economical 5mm underlayment sheets, ideal for cutting into custom planks.
- Cutting tools: A precise table saw for straight cuts, supplemented by a utility knife for intricate trimming.
- Prep tools: Various grits of sandpaper or versatile sanding blocks to smooth edges and surfaces.
- Sealers: High-quality caulk and a reliable caulking gun for sealing gaps and creating a polished finish.
- Cleaning: Keep a pack of baby wipes handy for quick and easy caulk smoothing and cleanup.
- Painting: A selection of paintbrushes for detailed work and painter’s tape for crisp lines.
- Mounting: Reliable wall anchors and screws to securely fasten items to the walls.
- Measuring: A spirit level for perfectly straight lines and a tape measure for accurate dimensions.
- Safety gear: Essential gloves and safety glasses to protect yourself during the renovation process.
By keeping your material choices and tools simple and focused, you ensure that each subsequent step of your master bathroom DIY project becomes more manageable and less overwhelming, contributing to a smoother overall experience.
Step 3: Construct and Install Your Custom Shiplap Paneling
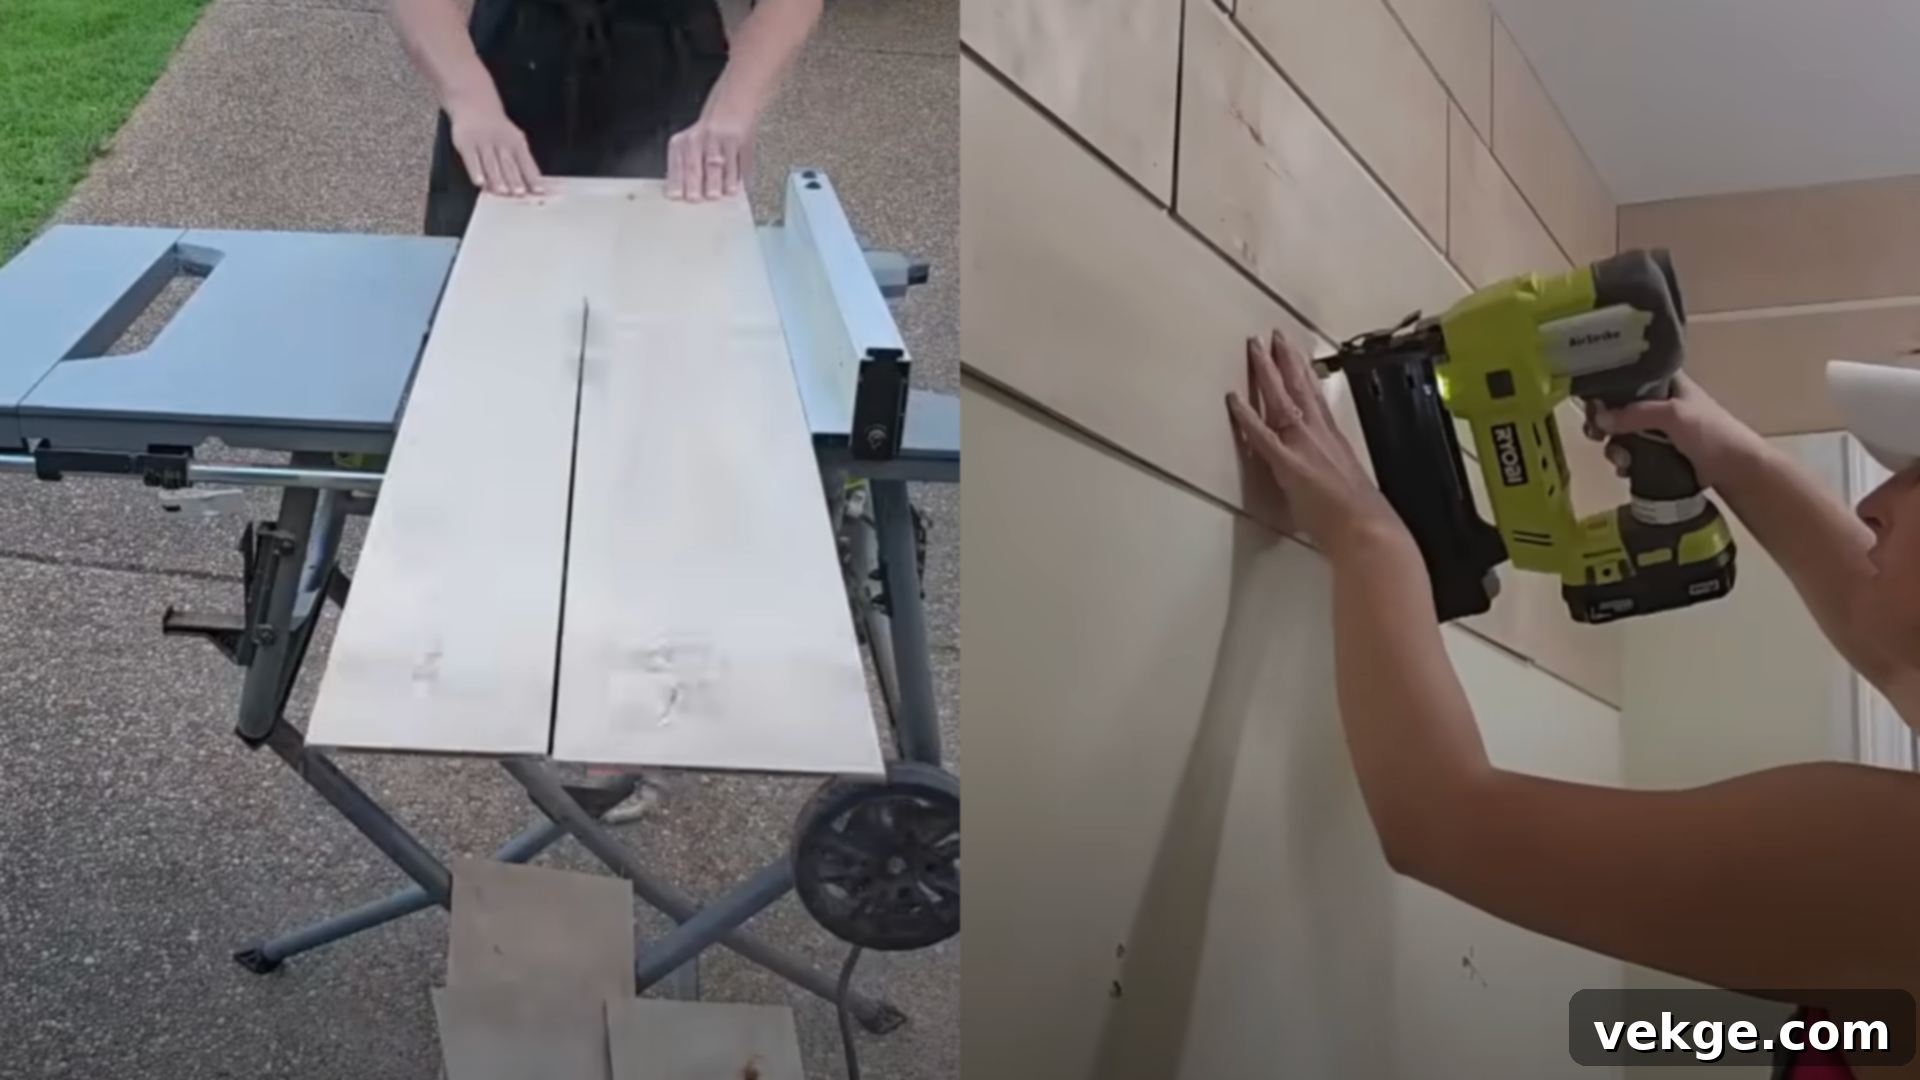
This step truly elevates your master bathroom’s aesthetic. Begin by carefully cutting your underlayment sheets into uniform 8-inch-wide planks. This custom sizing not only gives you complete creative control over the final look but also represents a significant cost saving compared to pre-made shiplap. Once cut, take the time to thoroughly sand all the edges of each plank. This crucial step ensures they are smooth to the touch, easy to handle, and will create a professional, splinter-free finish.
Before installation, meticulously mark your wall to guide your shiplap placement. Utilize a level diligently to ensure that each row of planks remains perfectly straight and consistent, which is key to a polished appearance. Securely nail each plank directly into wall studs wherever possible for maximum stability, or use appropriate wall anchors in areas without studs. For maintaining consistent, visually appealing gaps between planks, use small spacers such as coins or specialized shiplap spacers. Exercise precision when cutting planks to fit around electrical outlets, light switches, and corners to achieve a seamless, integrated look.
Step 4: Expertly Seal and Prep the Walls for Painting
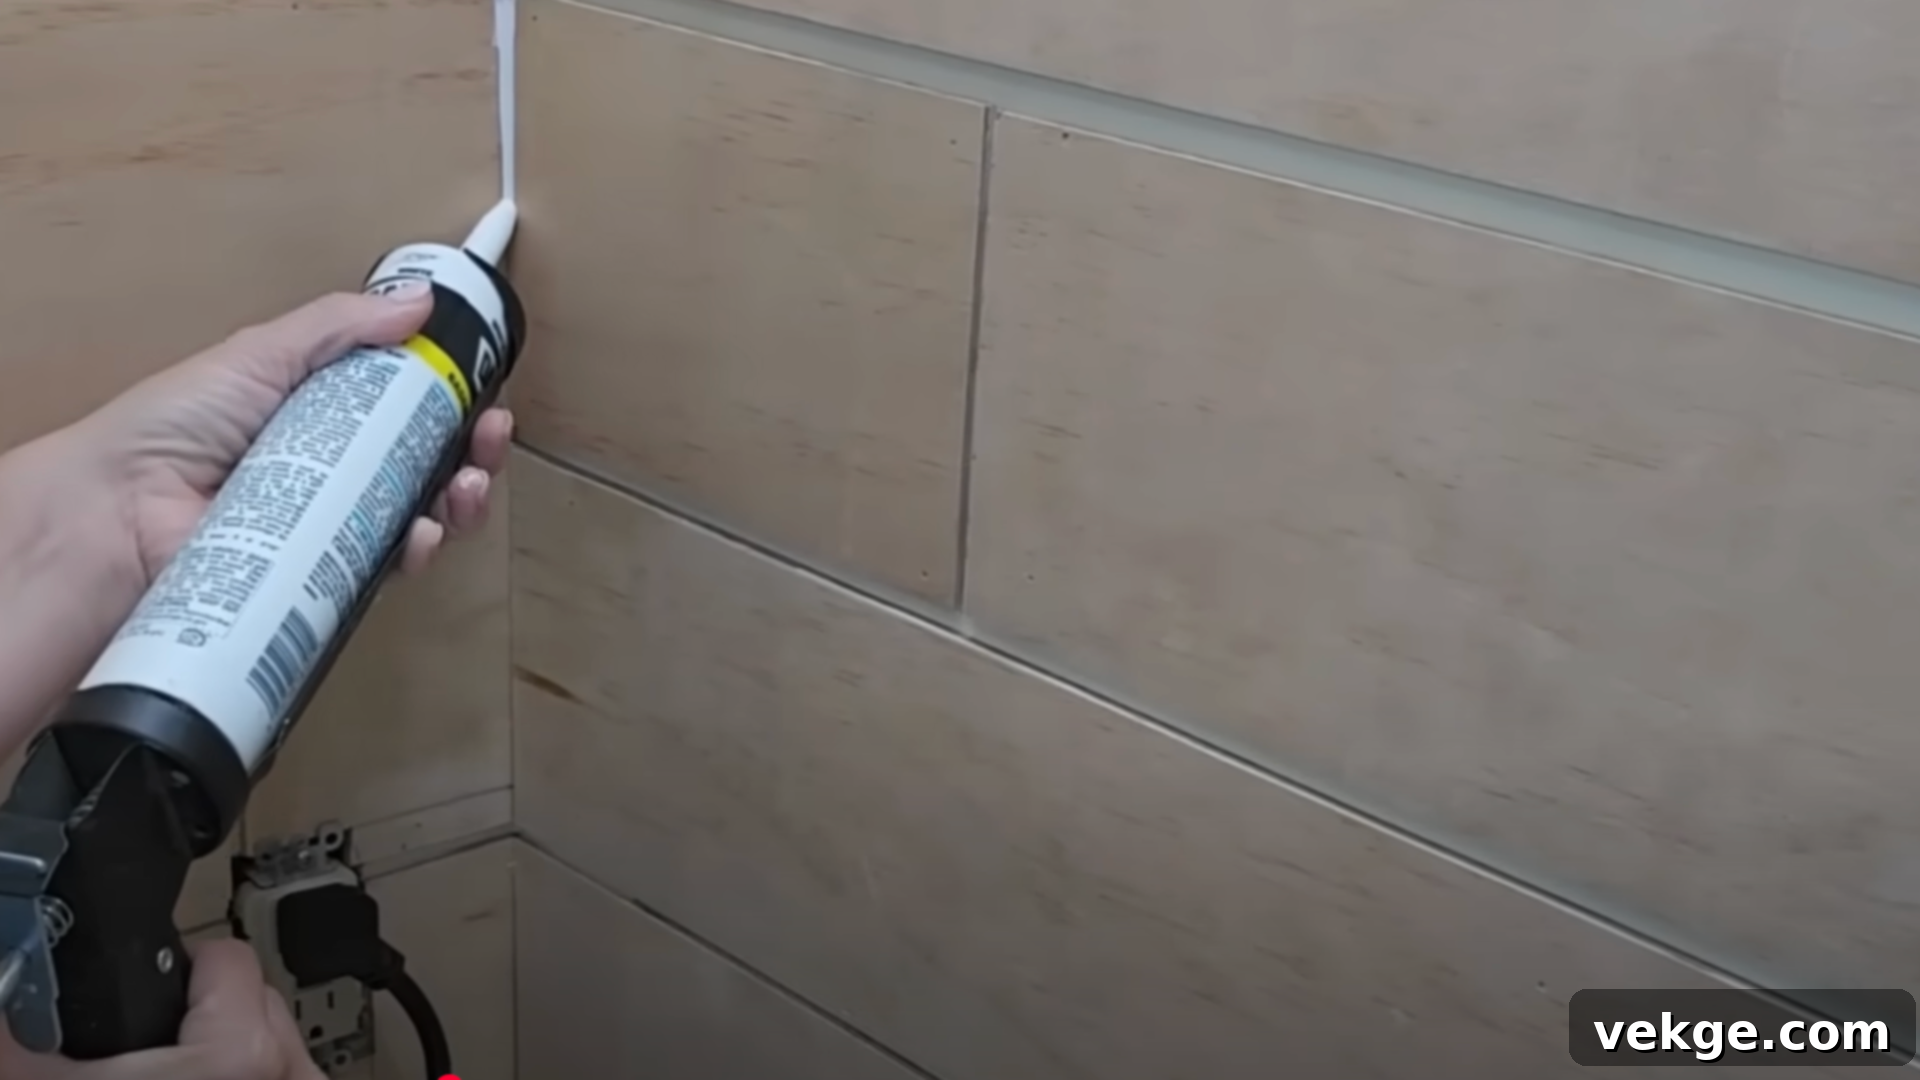
Once all your custom shiplap panels are securely installed, the next vital step is to meticulously seal all the gaps and seams with high-quality caulk. This process is crucial for achieving a smooth, professional, and durable finish. Use baby wipes or a putty knife to carefully smooth out the caulk, ensuring a clean line and an even application. This attention to detail will give your freshly installed shiplap wall a truly polished and seamless appearance.
Allow the caulk to dry completely according to the manufacturer’s instructions. Once dry, your beautifully textured shiplap wall will be perfectly prepped and ready for the next exciting stage: painting. This sealing step not only enhances aesthetics but also protects the wood and helps prevent moisture intrusion, crucial for a bathroom environment.
Step 5: Masterfully Paint Your Renovated Master Bathroom
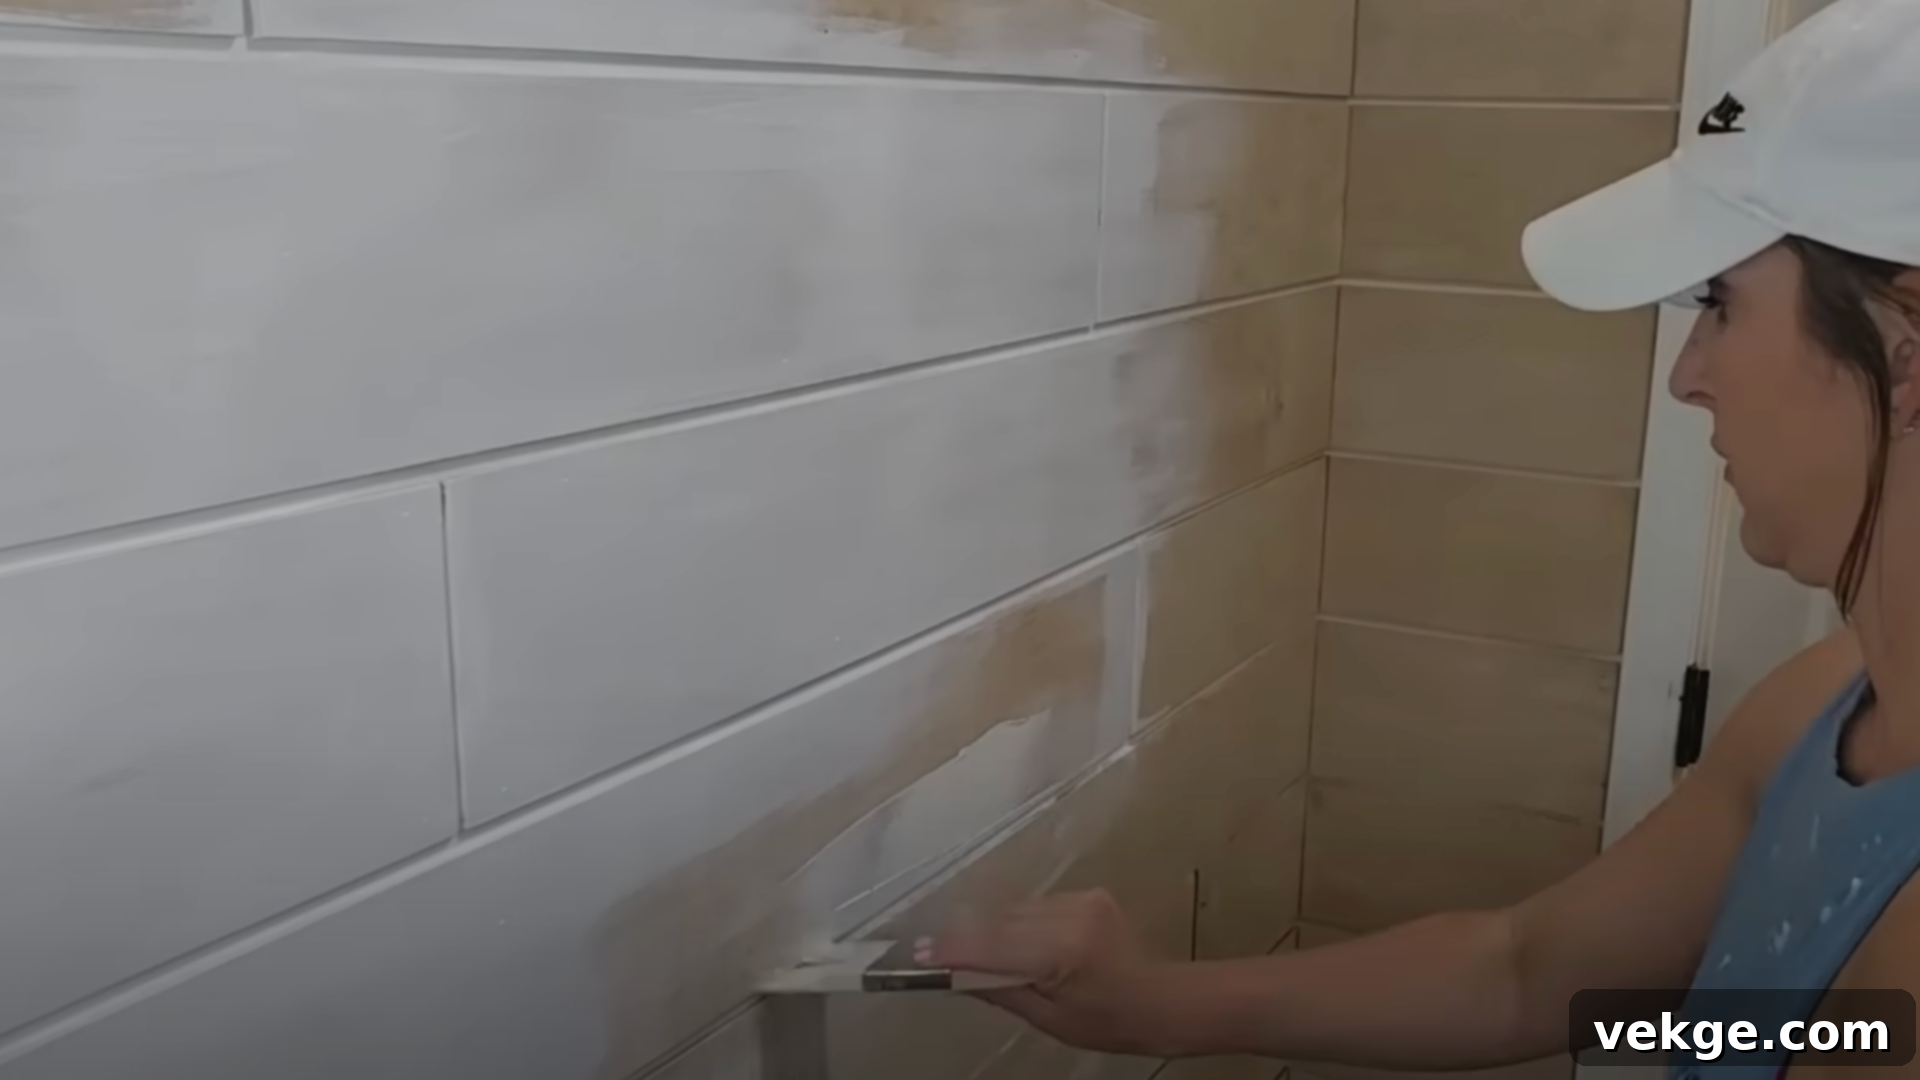
Now it’s time to infuse your master bathroom with fresh color. For the walls, including the new shiplap, opt for a satin finish in a color like White Duck. Satin paint offers a soft, elegant sheen that is also remarkably easy to clean and maintain, perfect for a bathroom environment. For trim and baseboards, choose a semi-gloss finish in the same White Duck shade; this provides a subtle contrast in texture and adds a slight, durable shine that stands up well to moisture and wear.
When painting the shiplap, start by carefully painting the grooves first to ensure thorough coverage. Then, use long, smooth strokes to evenly coat the flat surfaces of the boards, avoiding drips and streaks. Extend this fresh look by also painting your existing vanity cabinet and adding shiplap to any damaged cabinet sides. This strategic painting ensures everything visually blends together seamlessly, creating a cohesive and beautifully updated master bathroom aesthetic that feels both spacious and meticulously finished.
Step 6: Elevate Your Lighting and Mirror Fixtures
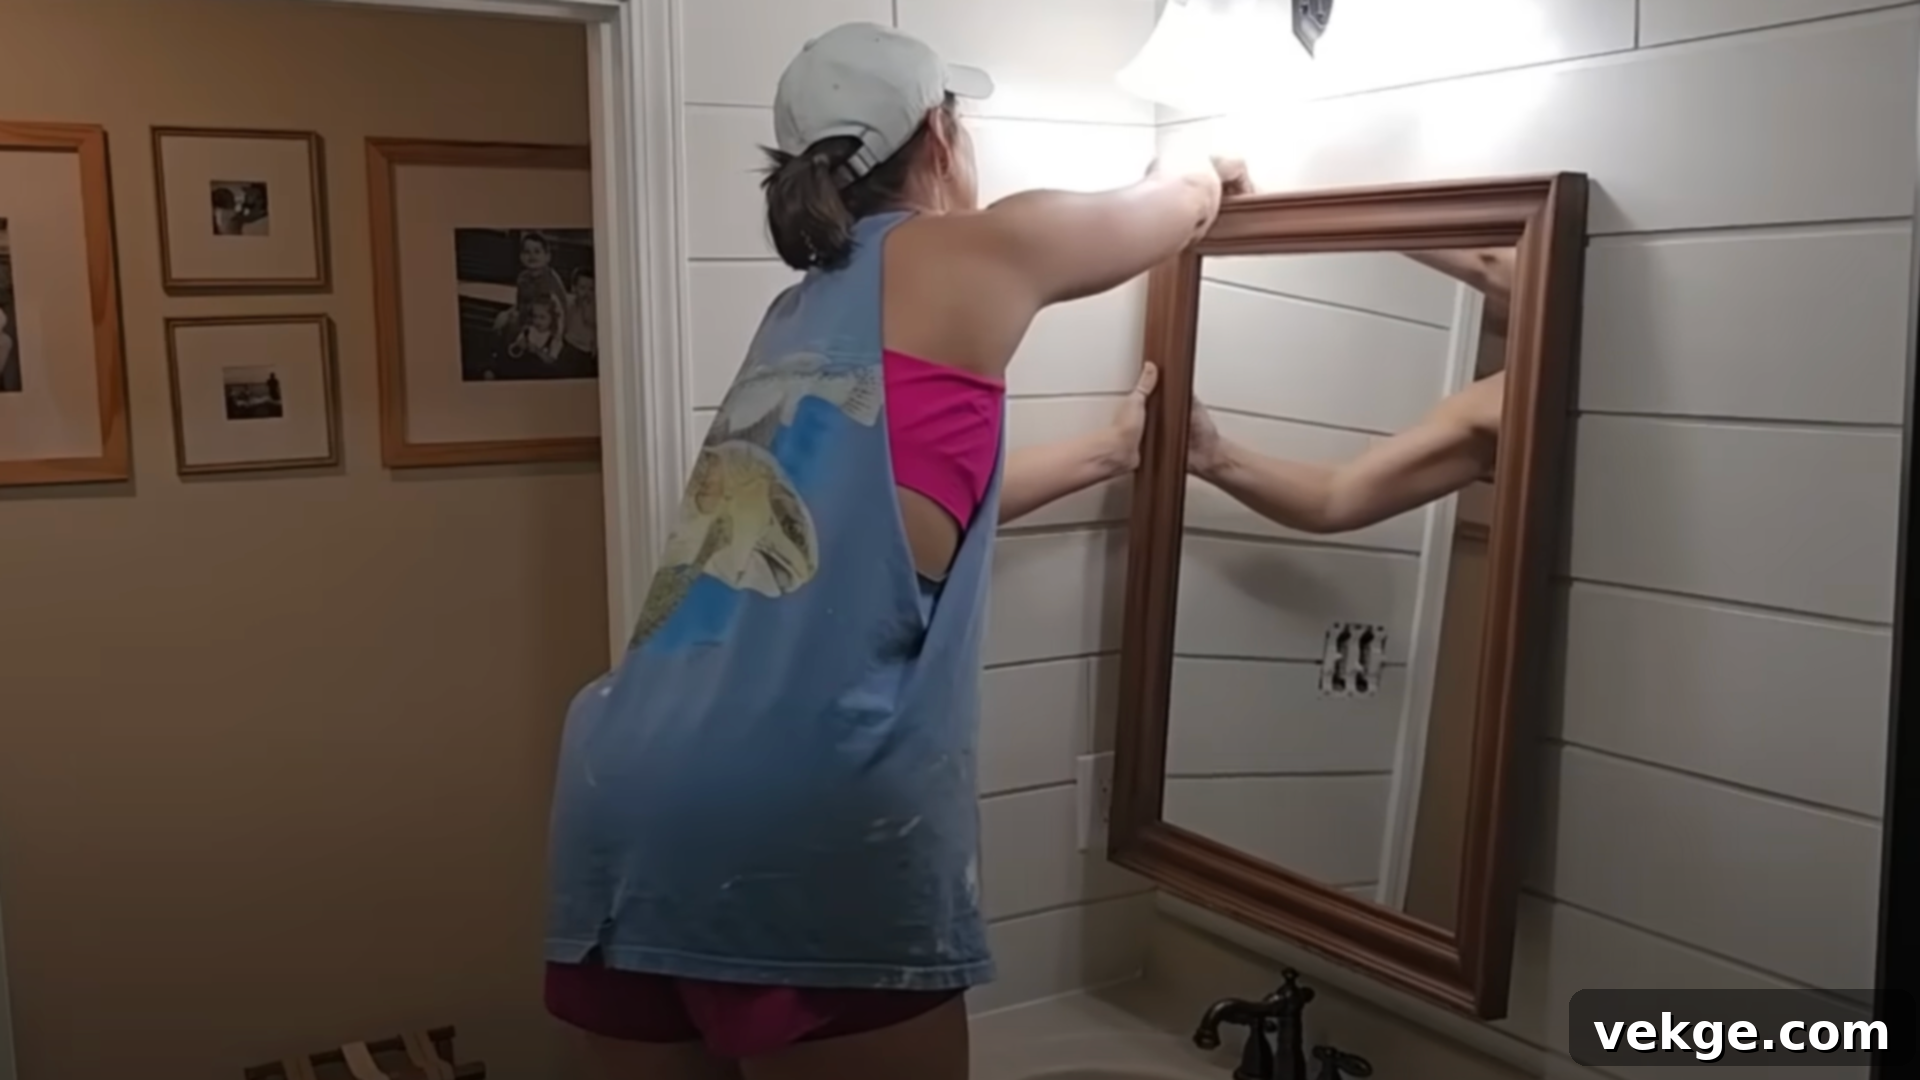
Upgrading your lighting and mirror can dramatically alter the feel of your master bathroom. To accommodate a larger, more impactful mirror, you might need to carefully move your existing light fixture up by a few inches. Always, and without exception, turn off the main power to the bathroom circuit before commencing any electrical work for safety. Instead of using traditional drywall patching methods, patch the old fixture hole using a small piece of leftover shiplap. This clever trick ensures the patched area blends seamlessly with your new wall treatment, maintaining a cohesive look.
A thoughtfully chosen mirror, perhaps a thrifted gem with a charming wood frame, can introduce much-needed warmth and character into the space. This wood accent helps to break up a potentially stark white palette, adding a natural, inviting touch. Consider the size and shape of your mirror to maximize light reflection and create an illusion of greater space, making your master bathroom feel more expansive and brighter.
Step 7: Optimize Storage Solutions and Thoughtful Extras
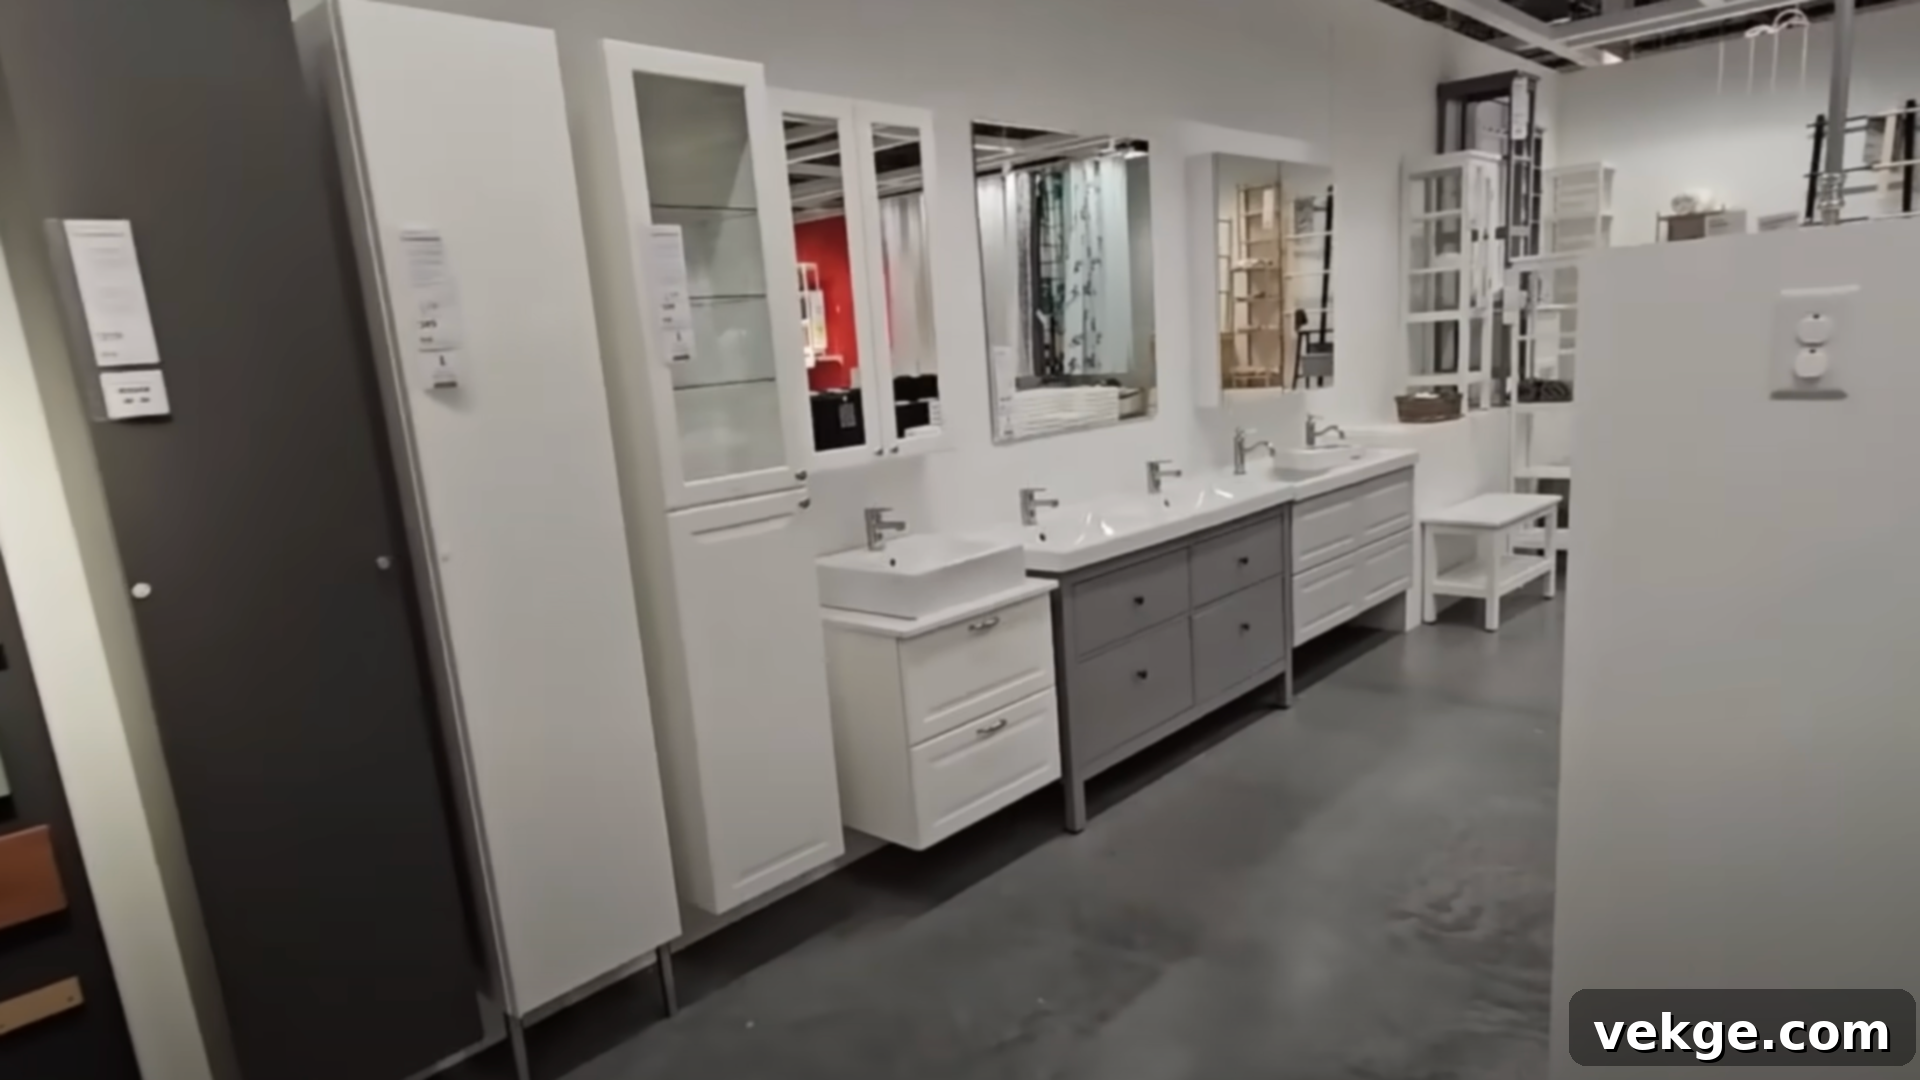
Efficient storage is paramount in any functional master bathroom. Consider implementing practical and personalized solutions such as color-coded towel hooks or individual bins, ensuring each family member has their own designated space. This simple organization method helps to keep clutter at bay and promotes a tidy environment. To further maximize vertical storage, install stylish wall shelves, easily sourced from craft stores like Hobby Lobby, which are perfect for holding decorative baskets, rolled towels, or personal care items.
For additional hanging capacity, incorporate sturdy cast iron hooks, ideal for robes or frequently used items. To enhance organization and add a touch of charming detail, label everything clearly using apothecary-style tags or elegant custom labels. This thoughtful labeling system not only makes it effortless for everyone to know exactly where things belong but also contributes to the overall neatness and aesthetic appeal of your master bathroom, making it a joy to use.
Step 8: Introduce Softness and Thoughtfully Cover the Floor
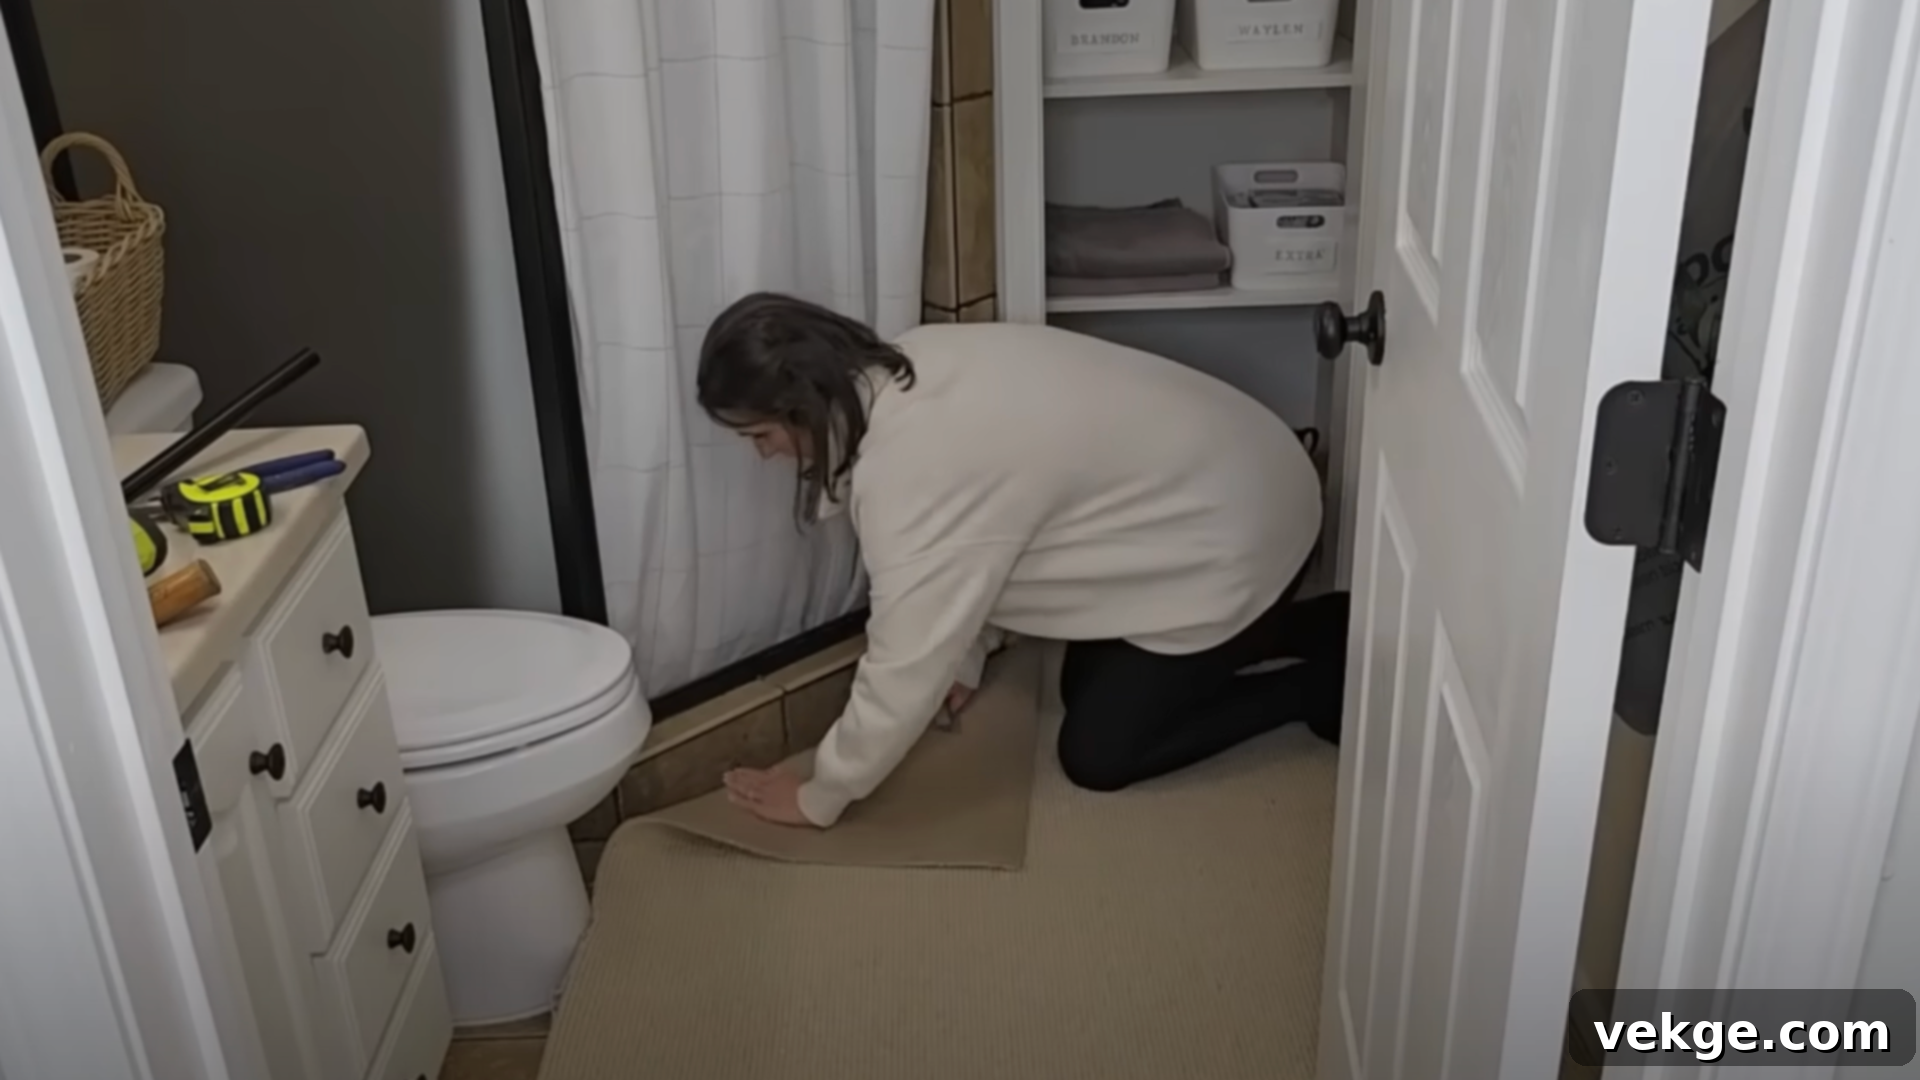
To enhance both comfort and privacy in your master bathroom, apply a high-quality privacy film to the window. This allows ample natural light to flood the space, creating a bright and airy atmosphere, while simultaneously ensuring your personal privacy. If your bathroom features challenging or awkward ceiling angles, consider building and installing a custom ceiling-mounted curtain rod. This clever solution ensures your shower curtain hangs perfectly straight and neatly, significantly improving the overall tidiness and visual appeal of the shower area, making it look much more custom and intentional.
Complete the comfort aspect of your master bathroom by adding a custom-cut carpet remnant. Placing this soft, inviting layer underfoot provides warmth and a luxurious feel, instantly transforming the cold, hard surface into a cozy and welcoming zone. Choose a remnant with a subtle texture or pattern to complement your new color scheme, tying the entire look together with both comfort and style.
Step 9: Conclude with Thoughtful and Simple Finishing Touches
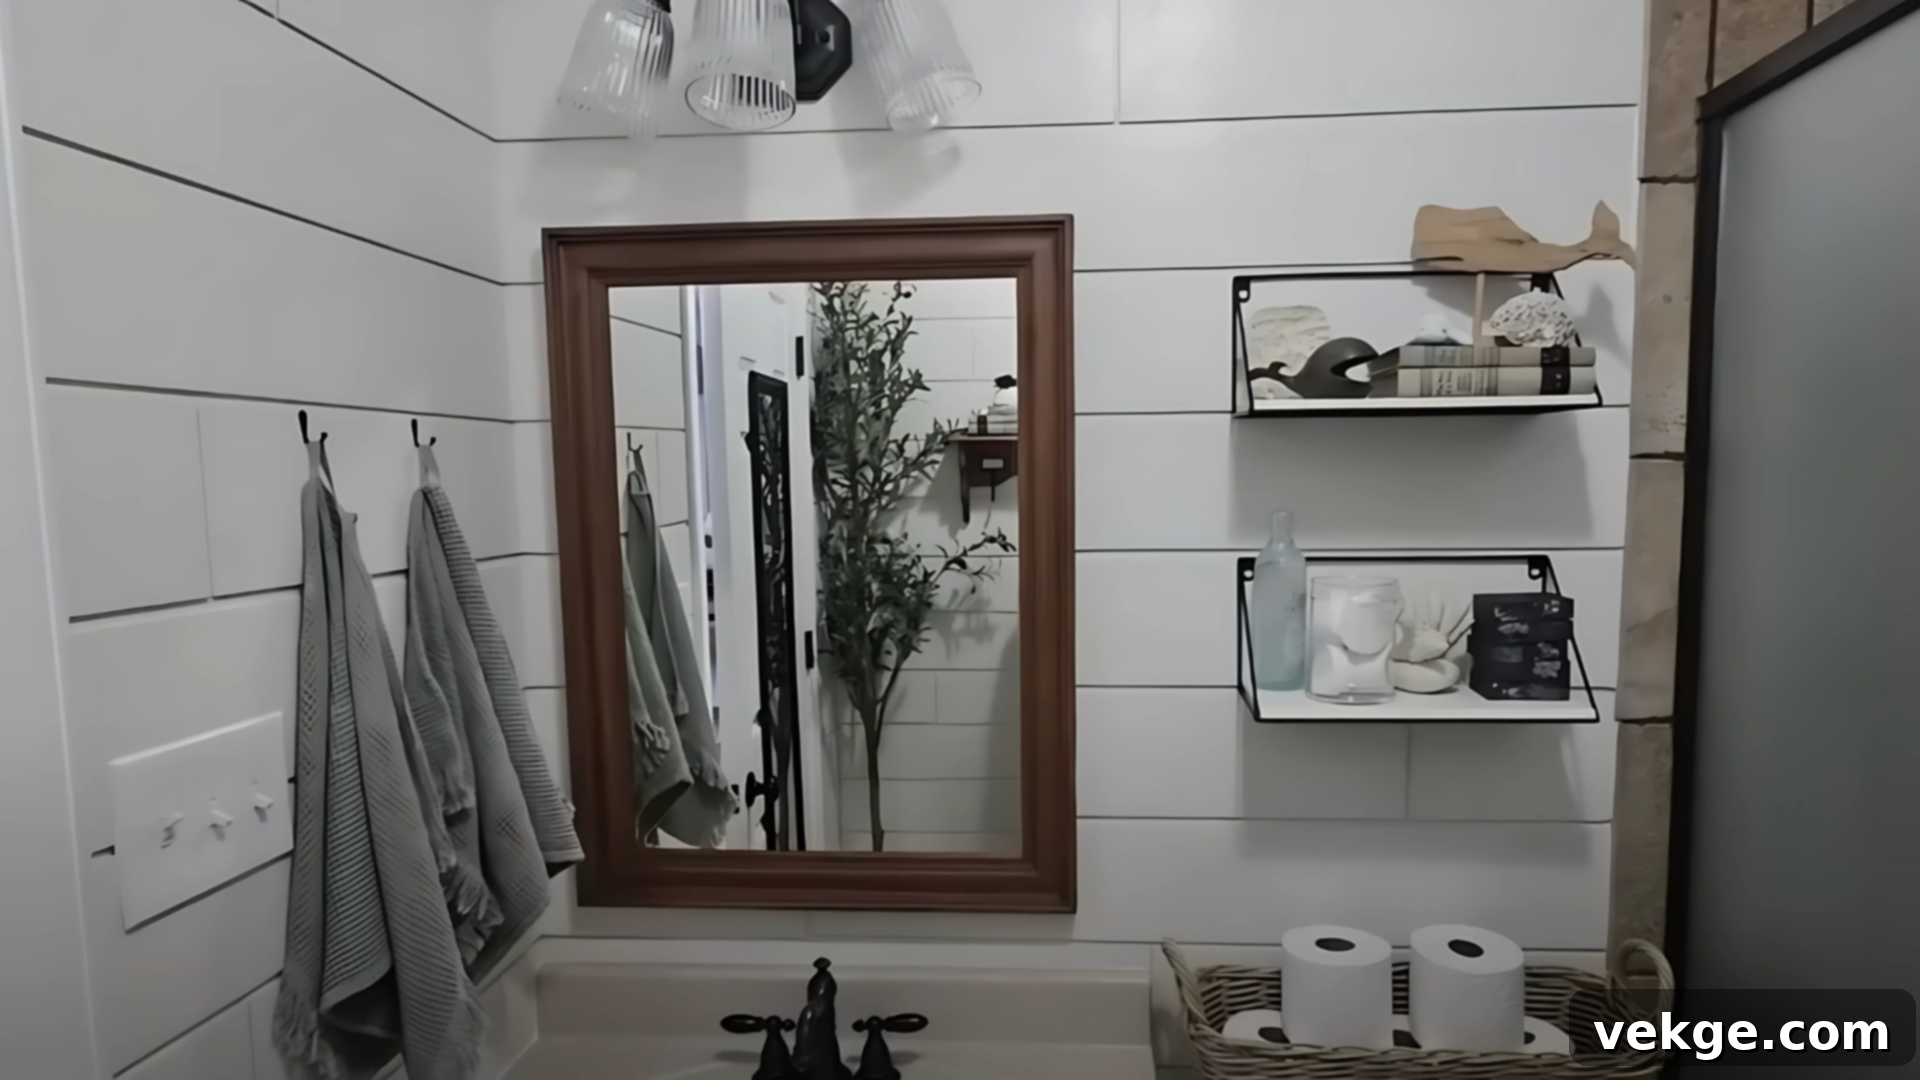
To truly finalize your master bathroom makeover, bring in elements that add a touch of life and personality. Consider a small faux olive tree or another low-maintenance plant, easily found at stores like Walmart. Greenery instantly introduces organic texture and a calming natural element into the space, enhancing its serene atmosphere without requiring constant upkeep.
Thoughtfully select a few well-chosen decorative items that are both aesthetically pleasing and genuinely practical. These could include a stylish soap dispenser, an elegant tissue box cover, or curated artwork that reflects your personal taste. Don’t forget the satisfying step of taking comprehensive before-and-after photos to fully capture and appreciate the incredible transformation you’ve achieved. This final step not only celebrates your hard work but also provides a visual testament to the power of a well-planned DIY renovation.
The Complete Master Bathroom Transformation
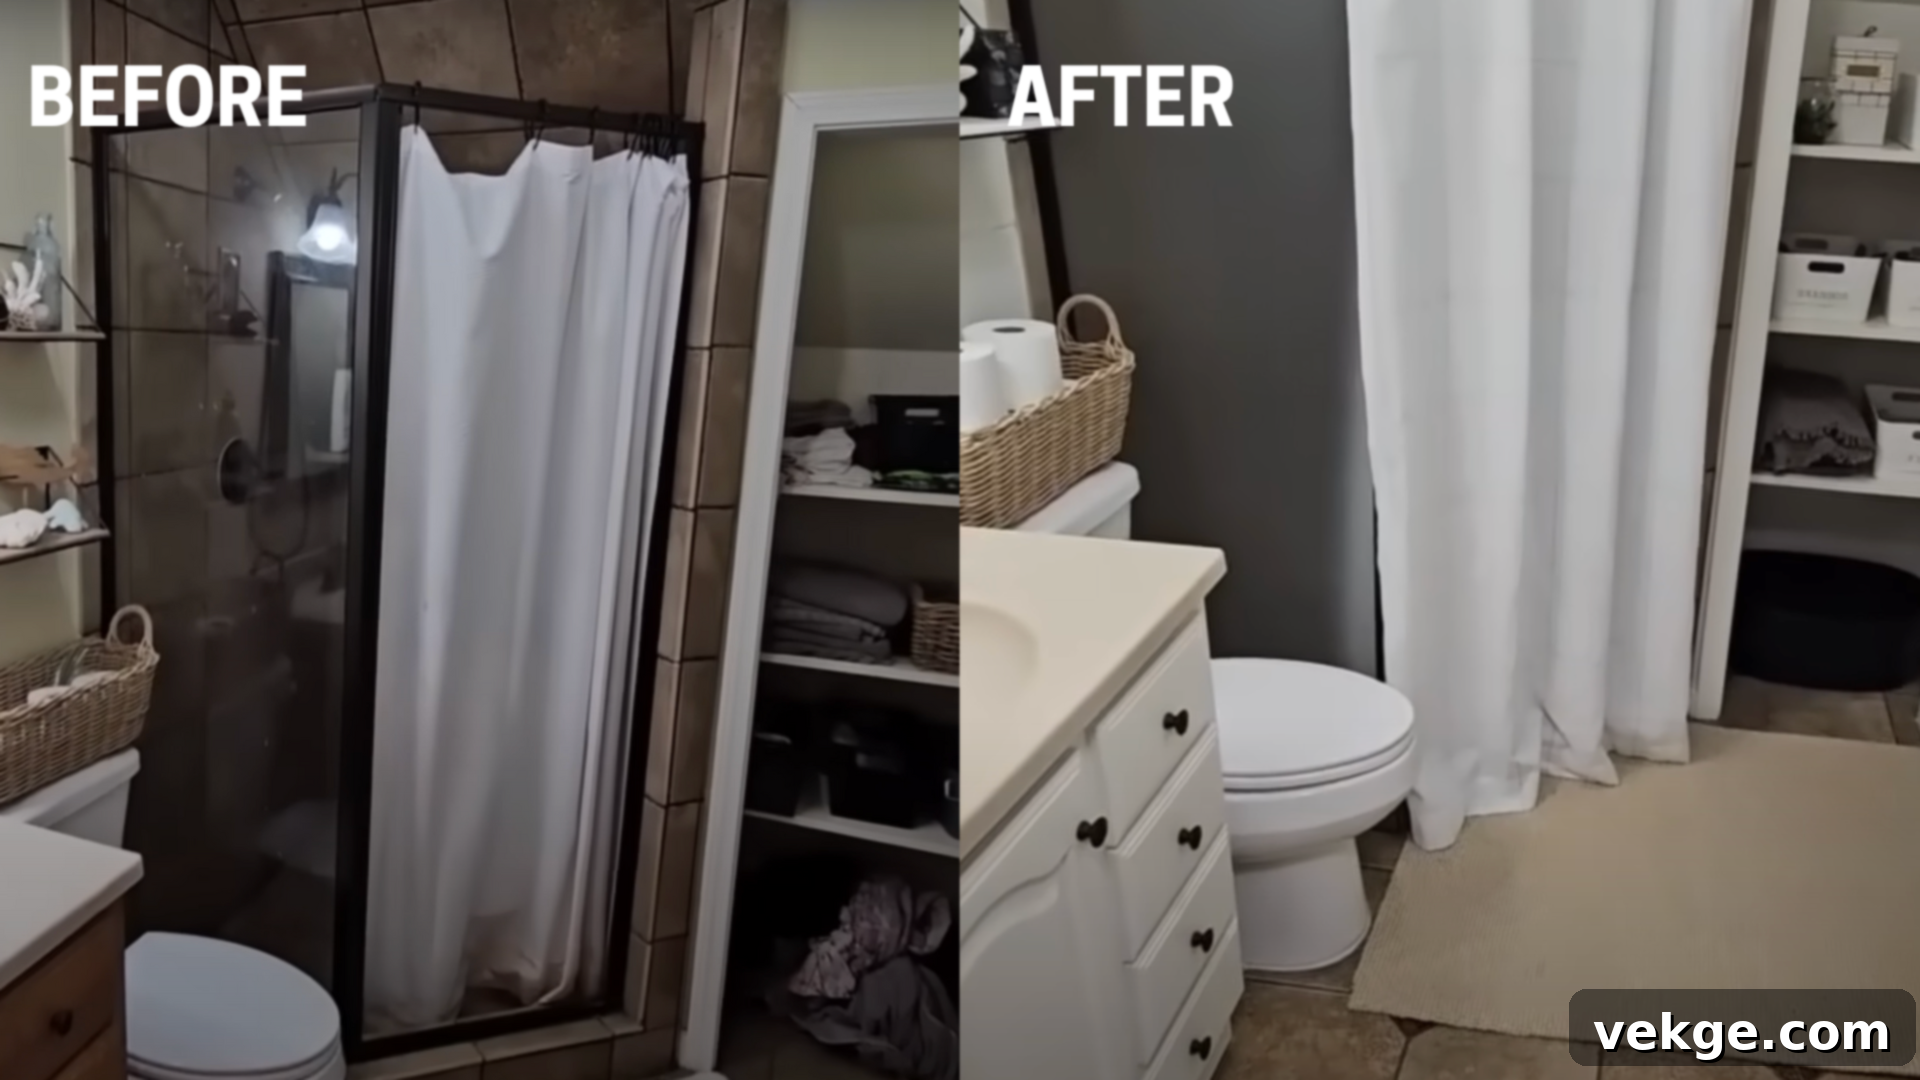
Once all the planned updates are meticulously completed, step back and admire your handiwork: your master bathroom will genuinely feel brand new, radiating a fresh energy. You’ll immediately notice the dramatic improvement in brightness and cleanliness, a stark contrast to its previous state. The comparison is unequivocal—this isn’t merely a superficial quick fix, but a profound and lasting transformation that breathes new life into the entire space.
The oppressive dark tones and distracting clutter of yesteryear have given way to soft, inviting walls, clean, crisp lines, and effortlessly functional storage solutions. The custom shiplap adds a captivating layer of texture and visual interest without ever making the room feel crowded or overwhelmed. A freshly painted vanity and a carefully chosen, cozy rug work in harmony to pull all these elements together, creating a cohesive and beautifully inviting environment.
Through a clever mix of resourceful reuse and strategic, simple updates, you have successfully crafted a master bathroom that finally feels like an organic extension of the rest of your home. It’s a space that not only meets your practical needs but also delights your senses, offering a serene retreat for daily rituals and moments of quiet relaxation.
Valuable Lessons Learned During the Makeover
Undertaking a renovation project, especially a DIY master bathroom makeover, teaches you to approach every single step with meticulous thought and planning. You quickly learn that in a smaller space, every single inch truly matters, requiring careful consideration of placement and functionality. It also becomes apparent that even tasks that appear straightforward can often demand more time, effort, and patience than initially anticipated, reinforcing the importance of a flexible timeline.
For instance, installing shiplap on walls that are less than perfectly even can present unexpected challenges, testing your precision and problem-solving skills. However, the satisfaction of seeing it perfectly installed, truly tying the room together with its clean lines and texture, makes the effort incredibly worthwhile. Sometimes, the wisest decision is to strategically skip certain updates—like retaining an original closet door or existing fixtures—to keep the project firmly on track and within your budget. This flexibility prevents scope creep and ensures the overall success of the renovation.
The most crucial takeaway from any DIY project, especially a master bathroom remodel, is the necessity of adaptability. Projects rarely unfold exactly as planned, and encountering unforeseen hurdles is a normal part of the process. What ultimately matters most is your ability to adjust, find creative solutions, and persist in your goal of creating a beautifully functional space that genuinely works for your daily life and brings you joy.
Simple Decorating Tips That Truly Work
After the major updates of your master bathroom makeover are complete, a few thoughtful and strategic decorating choices can significantly help the room feel truly finished and thoughtfully curated. These simple yet effective ideas are easy to implement and will instantly make the space more comfortable, inviting, and impeccably neat, reinforcing the overall calm and clean aesthetic you’ve worked hard to achieve.
| Tip | Why It Works |
|---|---|
| Utilize neutral tones with strategic color pops | This approach maintains a serene and calm foundation, while carefully chosen color accents add visual interest and personality without overwhelming the tranquil atmosphere of the room. |
| Thoughtfully incorporate natural wood accents | Introducing elements of real wood, like a mirror frame or a small stool, instantly brings in warmth and organic texture, expertly breaking up an otherwise predominantly white or neutral palette. |
| Maintain consistency with one metal type | By sticking to a single metallic finish for all fixtures and hardware (e.g., brushed nickel, matte black), the space achieves a more polished, cohesive, and less visually chaotic appearance. |
| Introduce diverse textures for depth | Adding various textures, such as woven baskets, plush soft towels, or a subtly patterned rug, provides visual variety and balance, making the room feel richer and more inviting without adding clutter. |
| Layer your lighting sources effectively | Optimizing mood and practical function is achieved by combining different light sources—like bright overhead lighting with softer, smaller vanity or accent fixtures—to create a versatile and welcoming ambiance. |
Maintenance Tips to Keep Your Master Bathroom Looking Pristine
Once your master bathroom is beautifully redone, you’ll naturally want to preserve its fresh, new look for as long as possible. Implementing a few simple, consistent habits can make a significant difference in maintaining its pristine condition and ensuring its longevity.
- Wipe surfaces weekly: Make it a habit to use gentle, appropriate cleaners to regularly wipe down your shiplap, mirror, vanity, and fixtures. This prevents grime buildup and keeps surfaces sparkling.
- Keep touch-up paint on hand: Store a small, labeled container of your wall and trim paints. This makes it incredibly easy to quickly address any minor scuffs, chips, or marks that may appear over time, keeping your paint job looking flawless.
- Clear out clutter often: Dedicate a short time each month to go through your storage bins, baskets, and drawers. Remove any unnecessary extras or expired products to maintain an organized and visually clear space.
- Regularly check caulk lines: Over time, constant exposure to moisture can cause caulk to degrade or separate. Periodically inspect all caulk lines around sinks, tubs, and showers, and reapply where needed to prevent water damage and maintain a neat seal.
- Utilize a bathroom fan or open a window: Always remember to turn on your bathroom fan during and after showers, or crack open a window. This crucial step helps to rapidly reduce moisture buildup, preventing mold, mildew, and potential damage to surfaces and paintwork.
Remember, you don’t need to tackle all these tasks at once. Just by staying consistent with these few simple maintenance habits, you will effortlessly keep your newly renovated master bathroom looking fresh, clean, and inviting for many years to come.
Common Mistakes to Avoid During Your Master Bathroom Makeover
Even a seemingly simple master bathroom makeover can encounter unexpected hurdles if you don’t meticulously plan ahead. Being aware of common slip-ups is the first step to avoiding them, ensuring your project progresses smoothly and yields the beautiful results you envision:
- Skipping surface preparation: This is a critical step often overlooked. Proper sanding, thorough cleaning, and priming of surfaces make all the difference in how well paint adheres and how durable your finishes will be. Neglecting this leads to peeling paint and an unprofessional look.
- Overloading with too many design ideas: It’s easy to get excited by countless inspirations, but trying to incorporate too many styles or color palettes into one small space can result in a chaotic and unharmonious look. Stick to a clear, cohesive style and a limited color palette for a sophisticated finish.
- Buying everything upfront without testing: Resist the urge to purchase all your materials immediately. Always test a few choices—like paint samples on your wall or a lighting fixture in person—before committing to large purchases. Colors can look different in your specific lighting, and materials might not feel as expected.
- Ignoring proper lighting and ventilation: Poor airflow or dim, inadequate lighting can severely undermine all your beautiful upgrades. Ensure you have effective exhaust ventilation to prevent moisture problems and install layered lighting to create both functional brightness and inviting ambiance.
- Forgetting the importance of function: A master bathroom that looks stunning but doesn’t genuinely work for your daily routine won’t stay tidy or enjoyable for long. Prioritize practical storage, easy-to-clean surfaces, and a comfortable layout that supports your everyday needs.
By focusing just as much on the practical purpose and inherent functionality of your master bathroom as you do on its aesthetic appearance, the results of your makeover will not only be beautiful but also remarkably enduring and truly enhance your quality of life.
Conclusion
You now possess the knowledge and confidence to completely transform your master bathroom by focusing on what truly matters: functionality, light, and personalized style. From the initial fresh coat of paint to the clever and functional storage solutions, every single step you undertake contributes significantly to making your room feel more usable, more inviting, and undeniably more reflective of your personal taste.
Remember, achieving a remarkable master bathroom makeover doesn’t demand expensive tools or an exorbitant budget. Instead, it requires a commitment of your time, dedicated effort, and, most importantly, a solid, realistic plan. When approached with this methodical mindset, the entire renovation process remains manageable and realistic, and the stunning results will feel profoundly and uniquely yours.
Are you now feeling inspired and ready to tackle your own master bathroom space? Use this comprehensive guide as your essential benchmark and confidently begin your transformation journey today! The serene, functional, and beautiful master bathroom you’ve always dreamed of is within your reach.
Check out more insightful guides on our site for detailed, step-by-step makeovers, simple yet impactful home upgrades, and stress-free ways to continuously improve and love your living space.
