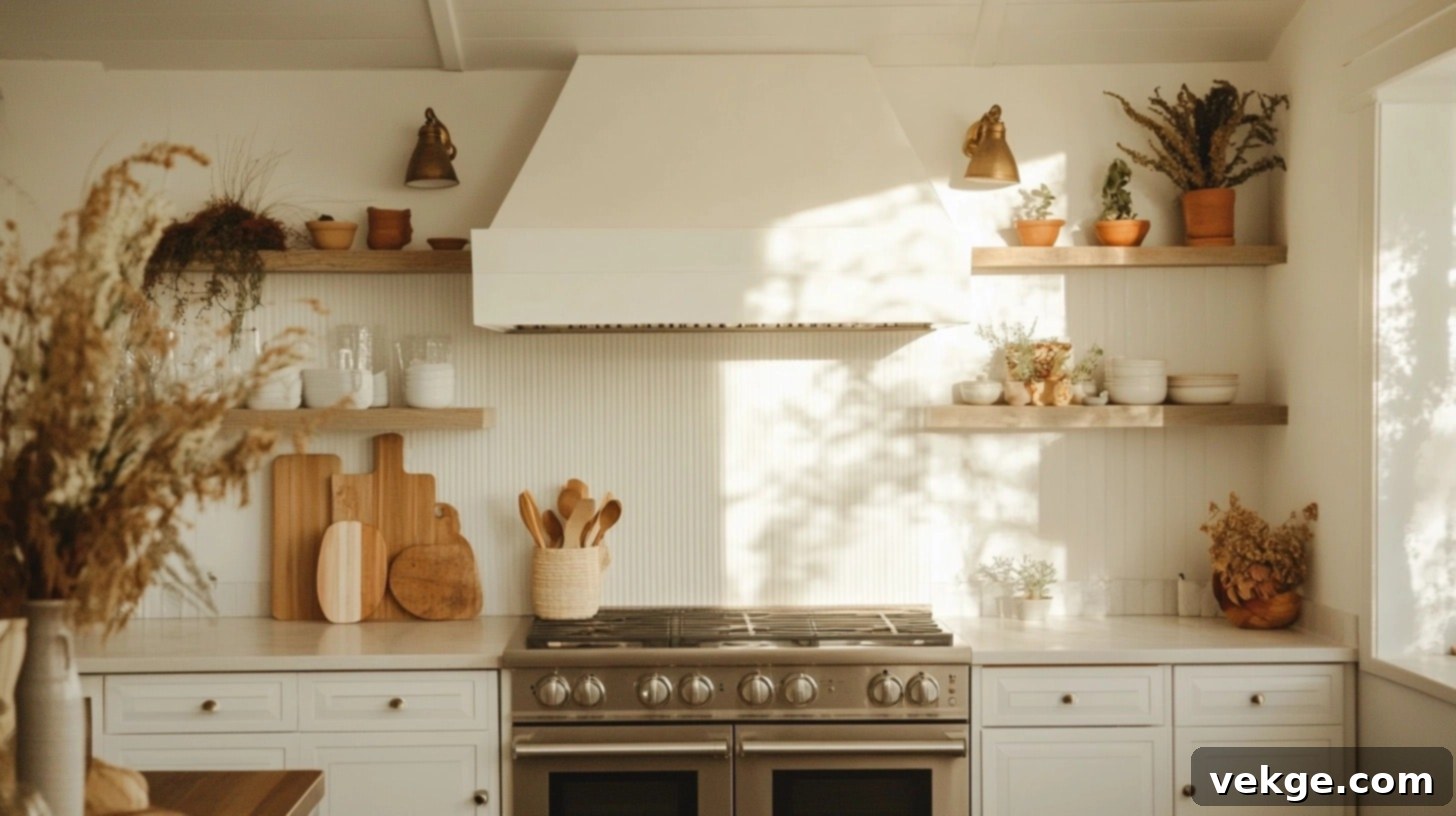
The Ultimate DIY Guide to Building a Stunning Plaster Range Hood
Welcome to the ultimate guide on creating a breathtaking plaster range hood that will instantly become the focal point of your kitchen! If you’ve been dreaming of a custom, high-end look without the hefty price tag, you’re in the right place. I’ve dedicated years to mastering the art of plastering and custom kitchen features, and today, I’m thrilled to share my refined techniques and invaluable insights with you.
A beautifully crafted plaster range hood transcends its primary function of ventilation. It infuses your kitchen with unparalleled character, warmth, and style, elevating an ordinary cooking space into a truly extraordinary culinary haven. This comprehensive guide will meticulously walk you through every stage of developing your own plaster range hood, from the initial conceptual design and material selection to the intricate plaster application and final decorative touches. By the end of this journey, you’ll possess the confidence and expertise to tackle this rewarding DIY project yourself, achieving professional-grade results. Let’s embark on this creative endeavor and build something truly spectacular together.
What is a Plaster Range Hood? Enhancing Kitchen Aesthetics and Functionality
A plaster range hood is a sophisticated kitchen appliance that seamlessly marries aesthetic appeal with essential functionality. At its core, it consists of a standard vent system, typically an insert, encased within a robust wooden or metal frame. This frame is then meticulously covered with drywall and subsequently coated with a durable layer of plaster, creating a smooth, elegant, or richly textured surface that can be customized to complement any kitchen décor.
Imagine it as the elegant attire for your kitchen’s workhorse – the ventilation system. While the internal components efficiently capture and remove cooking smoke, grease, and odors, the external plaster shell provides a striking architectural element. The typical construction involves a metal vent insert, responsible for effective airflow, securely mounted within a custom-built wooden or steel frame. This frame is then often wrapped with materials like wire mesh or drywall to provide a solid base for the plaster. The final plaster application transforms this functional structure into a decorative masterpiece.
Homeowners frequently opt for plaster range hoods due to their exceptional versatility and timeless charm. They are remarkably adaptable, fitting effortlessly into a wide spectrum of kitchen styles, from rustic farmhouse and classic traditional to sleek modern and industrial minimalist. Beyond their aesthetic flexibility, plaster hoods are also celebrated for their ease of maintenance, enduring strength, and impressive longevity. Unlike pre-fabricated alternatives, a plaster hood offers the unique advantage of being painted or refinished at any point, allowing for complete design refreshes without extensive renovations. Furthermore, when compared to many custom metal or wood hood options, a DIY plaster range hood can often be a more cost-effective solution, offering significant savings without compromising on bespoke style.
Step-by-Step Guide: Your DIY Plastered Range Hood Project
Embarking on a DIY plaster range hood project can be incredibly rewarding, transforming your kitchen with a personalized touch. This detailed guide breaks down the process into manageable steps, ensuring a smooth and successful build. For a visual walkthrough, you can watch the embedded video tutorial below:
Essential Tools and Materials for Your Plaster Range Hood
Before diving into the construction, gathering all necessary tools and materials is crucial. This table provides a comprehensive list, along with estimated costs, to help you budget and prepare effectively. Remember that costs can vary based on location, brand, and supplier.
| Tools | Estimated Cost | Materials | Estimated Cost |
|---|---|---|---|
| Tape measure | $10-$20 | Frame kit (e.g., Archways and Ceilings) | $500-$1,200 |
| Chalk reel | $5-$10 | Venetian plaster (e.g., Thermalux or similar) | $50-$150 per gallon |
| Cordless drill/driver | $80-$200 | Joint compound (all-purpose) | $10-$30 per bucket |
| Screwdriver set | $15-$30 | Drywall sheets (1/2″ or 5/8″) | $15-$35 per sheet |
| Utility knife / X-Acto knife | $10-$20 | Drywall tape (paper or mesh) | $5-$15 per roll |
| Miter saw / Chop saw | $150-$400 | Rounded corner beads (metal or vinyl) | $10-$30 per pack |
| Safety glasses | $5-$15 | Reclaimed barn wood (optional for accents) | Varies ($50-$300+) |
| Work gloves | $5-$15 | Wood screws (various sizes) | $5-$20 per box |
| Ladder (step or extension) | $50-$150 | Electrical vent hood insert | $200-$800+ |
| Plastering trowel(s) | $15-$40 each | Spray adhesive (for corner beads) | $10-$15 |
| Sanding block & sandpaper (220 grit) | $5-$15 | Drywall primer (high-quality) | $15-$30 per gallon |
| Stapler (manual or electric, for corner beads) | $10-$30 | Paint (for cabinet or plaster finish, e.g., Benjamin Moore Revere Pewter) | $30-$70 per gallon |
| Dust mask / Respirator | $5-$15 | Paint for Venetian plaster tinting (e.g., Greek Villa) | $30-$70 per gallon |
| Mixing paddle for drill | $10-$20 | Buckets for mixing | $5-$10 each |
Step 1: Precise Measurement, Area Preparation, and Frame Assembly
The foundation of a successful plaster range hood lies in meticulous planning and construction of the support frame. Begin by accurately measuring the designated area above your cooktop. Use your tape measure and chalk reel to precisely mark the center point of the hood and the stud locations on your wall and ceiling. This ensures your frame will be anchored securely to structural elements. If you’re using a pre-fabricated frame kit, such as those from Archways and Ceilings, carefully follow the manufacturer’s instructions for assembly. These kits often come with pre-cut pieces that slot together. Use your cordless drill and appropriate wood screws to firmly attach the frame components, ensuring all connections are tight and square. Double-check that the entire structure is plumb and level. During this stage, it’s also critical to drill any necessary holes for your electrical wiring and ductwork, ensuring they are positioned correctly to accommodate your vent hood insert and connect to your home’s existing ventilation system.
Step 2: Vent Hood Installation and Drywall Application
With the frame securely in place, the next step involves integrating the functional components and beginning to enclose the structure. Carefully insert your chosen electrical vent hood into the framed opening. Connect it to the main ductwork, ensuring a tight seal for optimal air extraction, and securely wire it to the electrical supply according to local building codes and the manufacturer’s guidelines. Once the vent hood is installed, it’s time to attach the drywall. For curved or arched hood designs, you may need to score the back of the drywall with an X-Acto knife (scoring about halfway through the thickness) to make it flexible enough to bend without breaking. Carefully attach the drywall panels to the wooden frame using drywall screws, ensuring they conform smoothly to the hood’s contours. Drive screws flush with the surface but avoid breaking the paper. For flat sections, standard drywall installation techniques apply. Proper drywall application creates the smooth, solid substrate necessary for the plaster finish.
Step 3: Preparing the Surface for Plastering
Achieving a flawless plaster finish depends heavily on proper surface preparation. Begin by applying a generous coat of all-purpose joint compound to all seams where drywall panels meet, filling any screw holes, and smoothing out the edges of the drywall. Allow this first coat to dry completely, then lightly sand any rough spots. Next, carefully apply rounded corner beads to all exterior corners of your hood. These beads are crucial for creating crisp, durable, and aesthetically pleasing edges, especially for a classic plaster look. You can secure them with spray adhesive initially for positioning, then embed them firmly with additional layers of joint compound. Feather the joint compound out from the beads onto the drywall surface, creating a seamless transition. This step requires patience and attention to detail to ensure perfectly smooth, consistent curves and lines. Allow each layer of joint compound to dry thoroughly, sanding lightly between coats to achieve a perfectly smooth, uniform surface ready for plaster.
Step 4: Expert Venetian Plaster Application
Now comes the artistic part: applying the Venetian plaster. First, prime the entire drywall surface with a high-quality drywall primer. This ensures proper adhesion of the plaster and prevents the drywall from absorbing too much moisture too quickly. Once the primer is dry, prepare your Venetian plaster according to the manufacturer’s instructions, tinting it with your chosen paint color (e.g., Greek Villa) if desired. Using a plastering trowel, apply the first thin, even coat of Venetian plaster. Work in small sections, using varied, overlapping strokes to create depth and avoid repetitive patterns. Aim for a relatively thin, uniform layer. Allow this initial coat to dry completely, which typically takes several hours. For the second coat, use a “skipping” or “dragging” technique, applying small amounts of plaster and gently spreading it, allowing some of the first coat to show through. This creates the characteristic textured, multi-dimensional look of Venetian plaster. Continue this process, building up layers until you achieve your desired texture and depth. Allow the final coat to cure and dry overnight, or longer if specified by the plaster manufacturer.
Step 5: Buffing, Finishing, and Styling Touches
The final step brings your plaster range hood to life, refining its texture and integrating it into your kitchen’s overall design. Once the plaster has completely dried and cured, use fine-grit (220-grit) sandpaper or a specialized buffing tool to gently buff the entire surface. This process smooths out any minor imperfections, enhances the plaster’s natural sheen, and brings out the subtle nuances of its texture without removing the character you’ve meticulously built. Work in circular motions, being careful not to over-sand in any one area. After buffing, gently wipe down the surface to remove any plaster dust. If applicable to your kitchen renovation, this is also an ideal time to paint your kitchen cabinets to match or complement your new hood. To further enhance a European farmhouse, rustic, or transitional style, consider adding decorative elements like a piece of reclaimed barn wood as a mantel or trim detail. Secure it firmly to the hood structure. This adds a warm, authentic touch that beautifully contrasts with the plaster, completing your custom range hood project.
How to Choose the Right Plaster Hood Style for Your Kitchen
Selecting the perfect plaster range hood involves more than just aesthetics; it’s about creating harmony within your kitchen’s design and ensuring optimal functionality. Here are key considerations to guide your choice:
- Consider Your Kitchen’s Overall Theme: The plaster hood should act as a cohesive element, complementing your existing or planned kitchen style. A smooth, unadorned finish is ideal for contemporary or minimalist spaces, while a heavily textured, distressed, or rustic look dramatically enhances farmhouse, Tuscan, or European-inspired kitchens. Think about the era and mood you want to evoke.
- Hood Shape and Size: Proportionality is key. Your hood’s dimensions must be appropriate for both the size of your kitchen and the cooktop it serves. Large, open-concept kitchens can comfortably accommodate grander, more ornate designs, making a bold statement. Conversely, smaller kitchens or those with lower ceilings will benefit from simpler, clean-lined hoods that don’t overwhelm the space, ensuring a feeling of spaciousness rather than clutter.
- Custom vs. Pre-fabricated Options: Custom plaster hoods offer unparalleled personalization, allowing for unique designs, specific dimensions, and intricate detailing tailored precisely to your vision. This bespoke approach comes at a higher cost and requires more time and skilled craftsmanship. Pre-fabricated frame options (like the Archways and Ceilings kit mentioned) offer a more affordable and quicker installation process, providing excellent customization potential without the need for full custom framing, though they might have limitations on complex shapes.
- Texture Selection: The texture of your plaster finish profoundly influences the hood’s character. Choose a smooth, polished finish for a sleek, modern, or sophisticated look. Opt for a more textured, trowel-marked finish to achieve a rustic, old-world, or organic feel, which can add depth and visual interest.
- Color and Tinting Choices: Neutral tones such as warm whites, soft grays, or subtle beiges offer versatility and blend effortlessly with most kitchen palettes, creating a calm and inviting atmosphere. For those seeking a bolder statement, incorporating a striking color or a deep, earthy tone can create a dramatic focal point and reflect a more adventurous design sensibility.
- Integration with Other Design Elements: For a truly cohesive kitchen design, your plaster hood should harmonize with other key elements. Consider how its style, color, and texture will interact with your cabinets, countertops, backsplash, and even metal accents like hardware or light fixtures. The goal is to tie the entire kitchen design together seamlessly, making the hood feel like an integral part of the space.
- Functional Compatibility: Beyond aesthetics, ensure the chosen hood design is compatible with your kitchen’s ventilation system. Verify that the internal vent insert can effectively handle the volume of air required for your cooktop and that the hood’s structure allows for proper airflow and efficient smoke and odor removal. Consult local building codes for ventilation requirements.
- Budget Considerations: Naturally, your budget will play a significant role. Fully custom designs involving extensive architectural work and specialized plastering techniques are typically more expensive. Pre-fabricated frame kits combined with DIY plastering offer a more budget-friendly alternative, allowing you to achieve a high-end look without compromising excessively on style or quality.
Exploring Different Styles and Popular Designs of Plaster Range Hoods
Plaster range hoods are incredibly versatile, capable of adapting to almost any interior design style. Here are some popular designs, each bringing a unique ambiance to the kitchen:
1. Modern Minimalist Plaster Range Hood
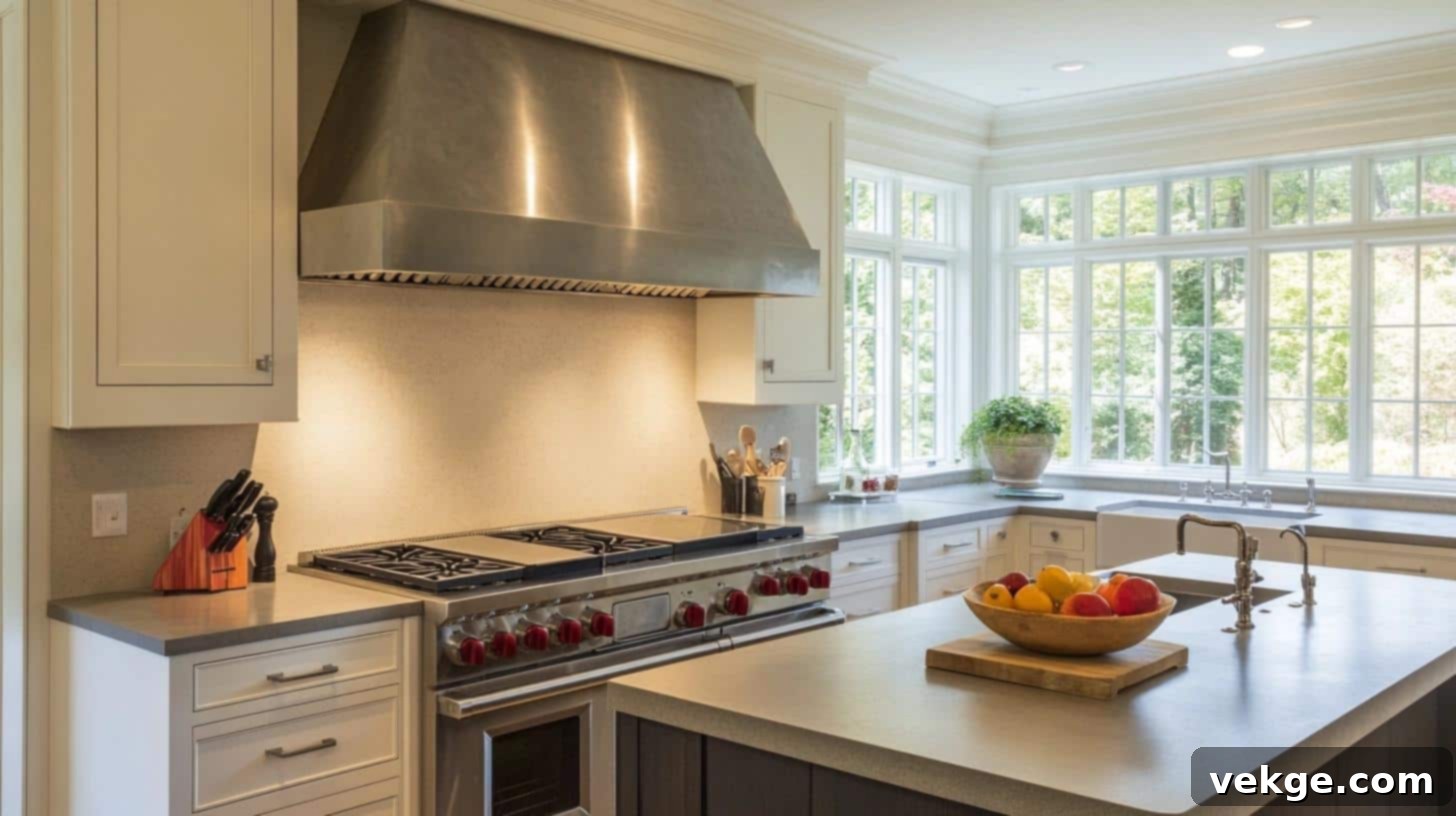
The modern minimalist plaster range hood makes a powerful statement through its understated elegance, emphasizing basic geometric shapes and exceptionally clean lines. Its structure typically features seamless, uninterrupted flows, with surfaces kept flat, smooth, and devoid of embellishment. The beauty lies in its simplicity and sleek, architectural presence.
- Works Best With: Flat-panel or slab-style cabinetry, stainless steel or integrated appliances, monochromatic or single-color backsplashes, and plain natural stone or concrete countertops.
2. Traditional Style Plaster Range Hood
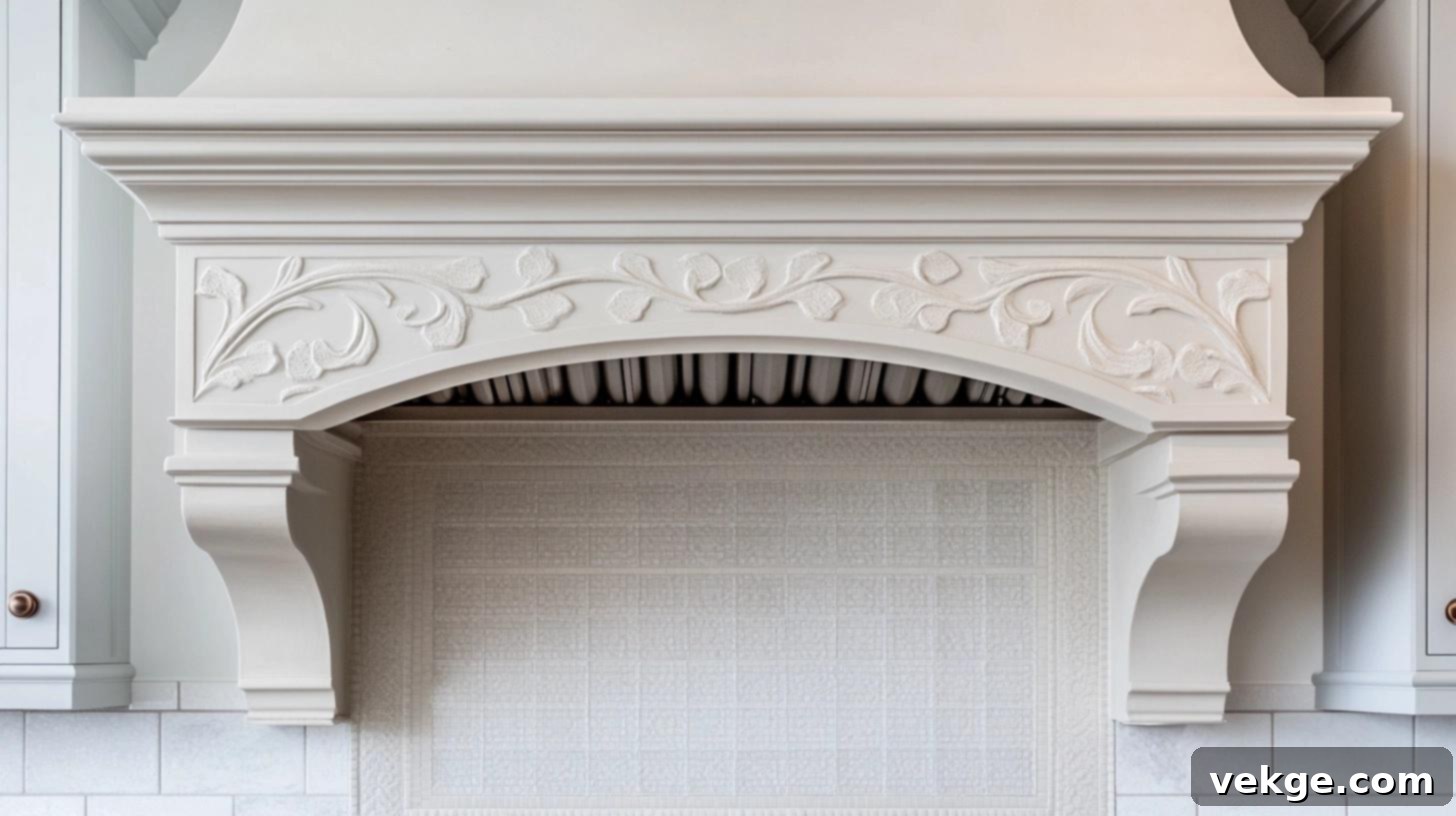
A traditional plaster range hood brings skilled craftsmanship and enduring elegance to your kitchen. Characterized by graceful curves, each element connects smoothly, often framed by decorative crown molding at both the top and bottom. Subtle details such as pressed patterns or delicate cornices add charm, defining this classic and timeless look.
- Works Best With: Raised-panel or shaker-style cabinets, natural stone surfaces like granite or marble, patterned tiles for backsplashes, and classic hardware in finishes like copper, bronze, or polished brass.
3. Rustic Plaster Range Hood
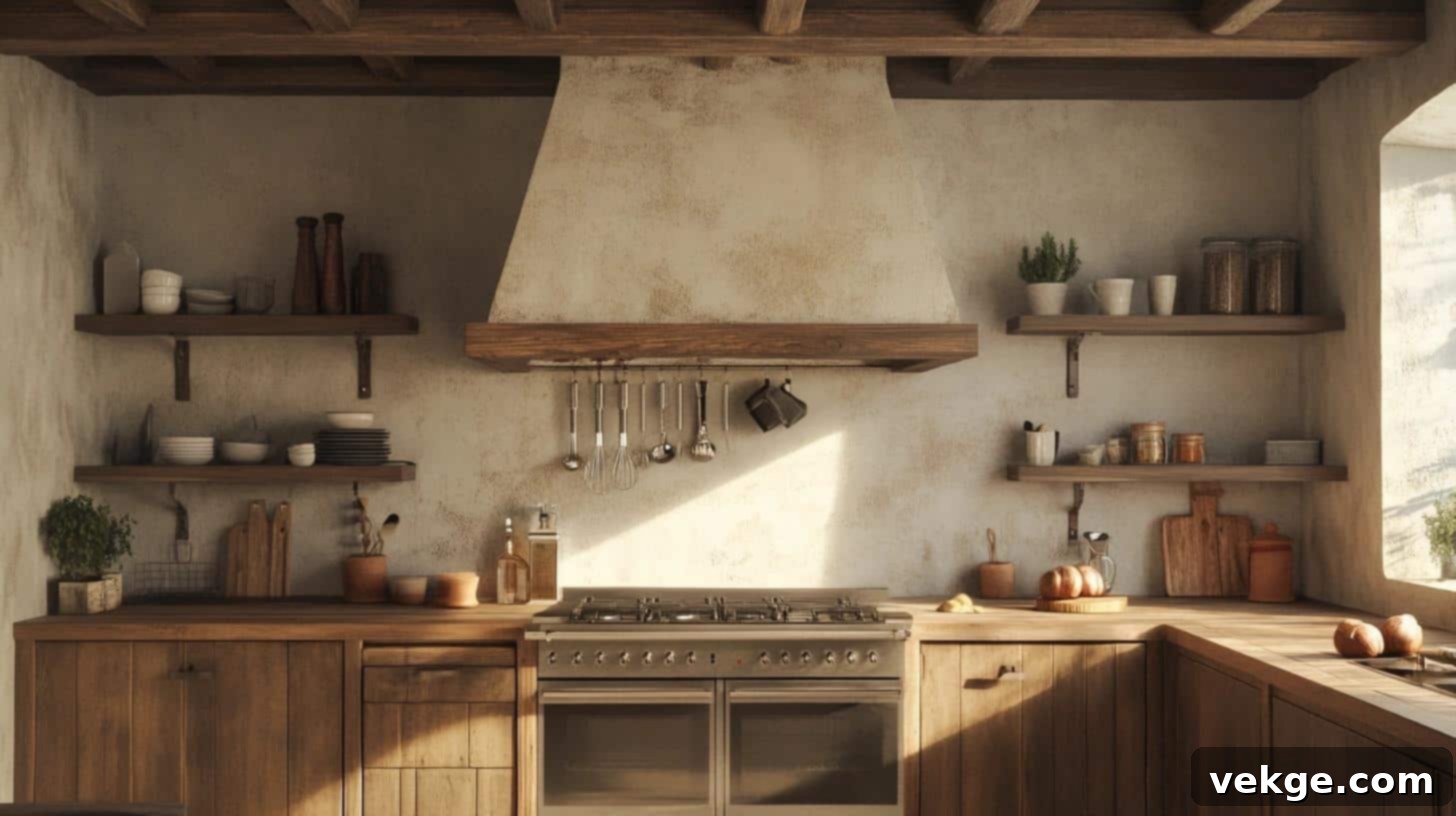
This rustic plaster range hood celebrates an organic, earthy aesthetic, featuring a distinctively textured finish with intentional natural marks and subtle grooves. The raw, unrefined surface, often in warm, earthy tints, creates a casual, inviting, and homey feel, making it perfect for country-style, cabin, or bohemian-inspired spaces.
- Works Best With: Exposed wooden beams, reclaimed wood accents, stone slab surfaces, open shelving, and simple, forged iron or distressed metal hardware.
4. Tuscan Plaster Range Hood
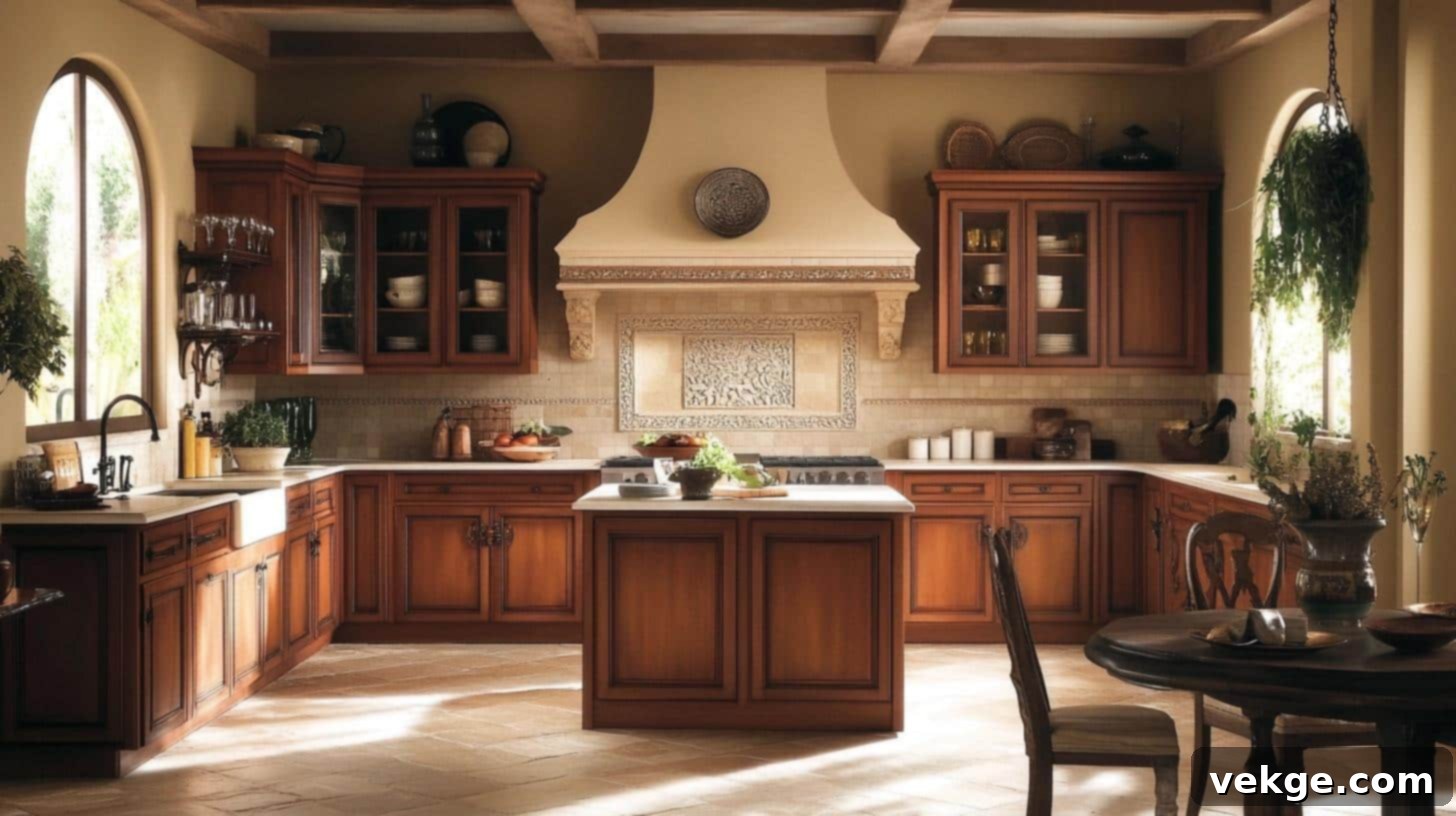
Inspired by the sun-drenched homes of the Italian countryside, the Tuscan style plaster hood introduces old-world charm and beauty. Its design frequently incorporates carefully placed decorative trim, graceful arches, and flowing curves. The finish often showcases subtle color variations, evoking the warmth and aged patina of ancient European walls.
- Works Best With: Terra cotta tiles, intricately carved wood details, natural stone floors, and wrought iron accents such as lighting fixtures or pot racks.
5. Industrial Plaster Range Hood
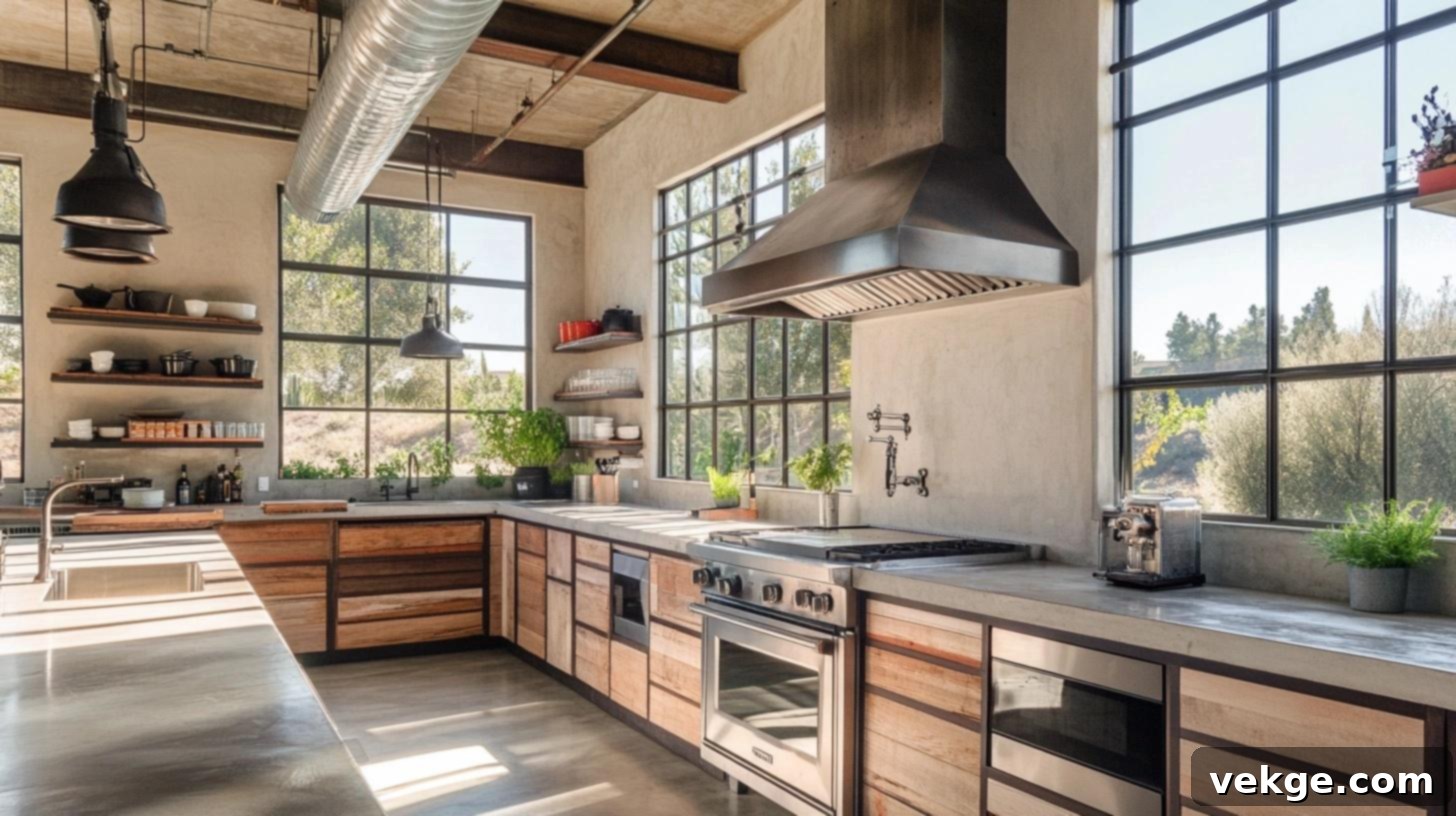
The industrial style plaster range hood boldly mixes raw plaster with exposed metal elements, creating a workshop-inspired, utilitarian aesthetic. Simple, unadorned finishes with visible joints or structural lines contribute to a rugged, functional feel, while contrasting metal elements like steel bands or rivets add an authentic, edgy touch.
- Works Best With: Exposed brick walls, metal fixtures, concrete countertops, stainless steel appliances, and visible piping or ductwork.
6. Arched Design Plaster Range Hood
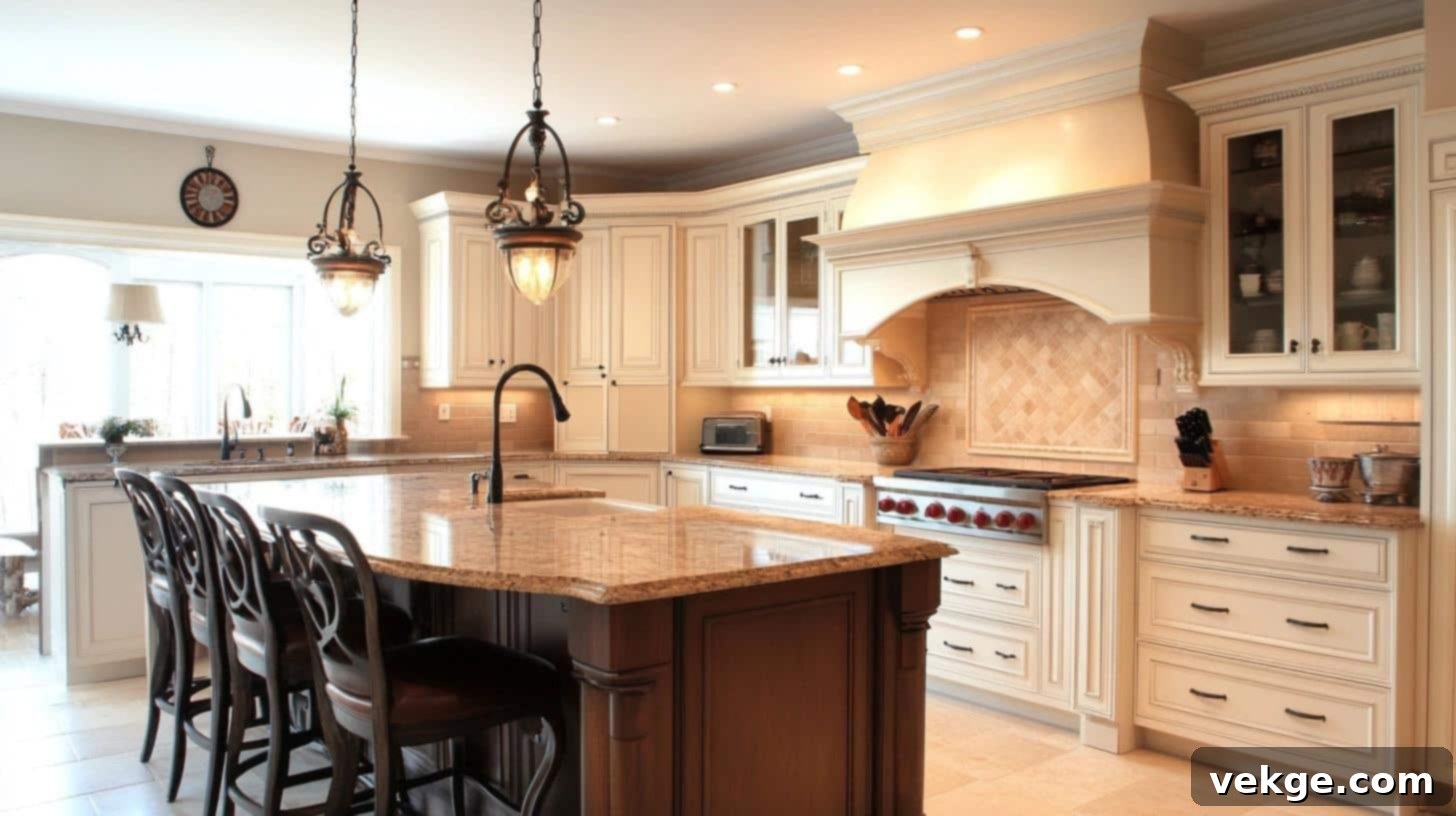
Characterized by a gentle, graceful curve at its base or overall form, the arched design creates a soft yet impactful statement piece. This versatile style elegantly bridges traditional and contemporary aesthetics by maintaining simple lines while incorporating enough curvature to softly capture the eye and add architectural interest.
- Works Best With: Mixed material countertops, classic subway or zellige tiles, simple shaker-style or flat-panel cabinets, and statement lighting that complements the curve.
7. French Country Plaster Range Hood
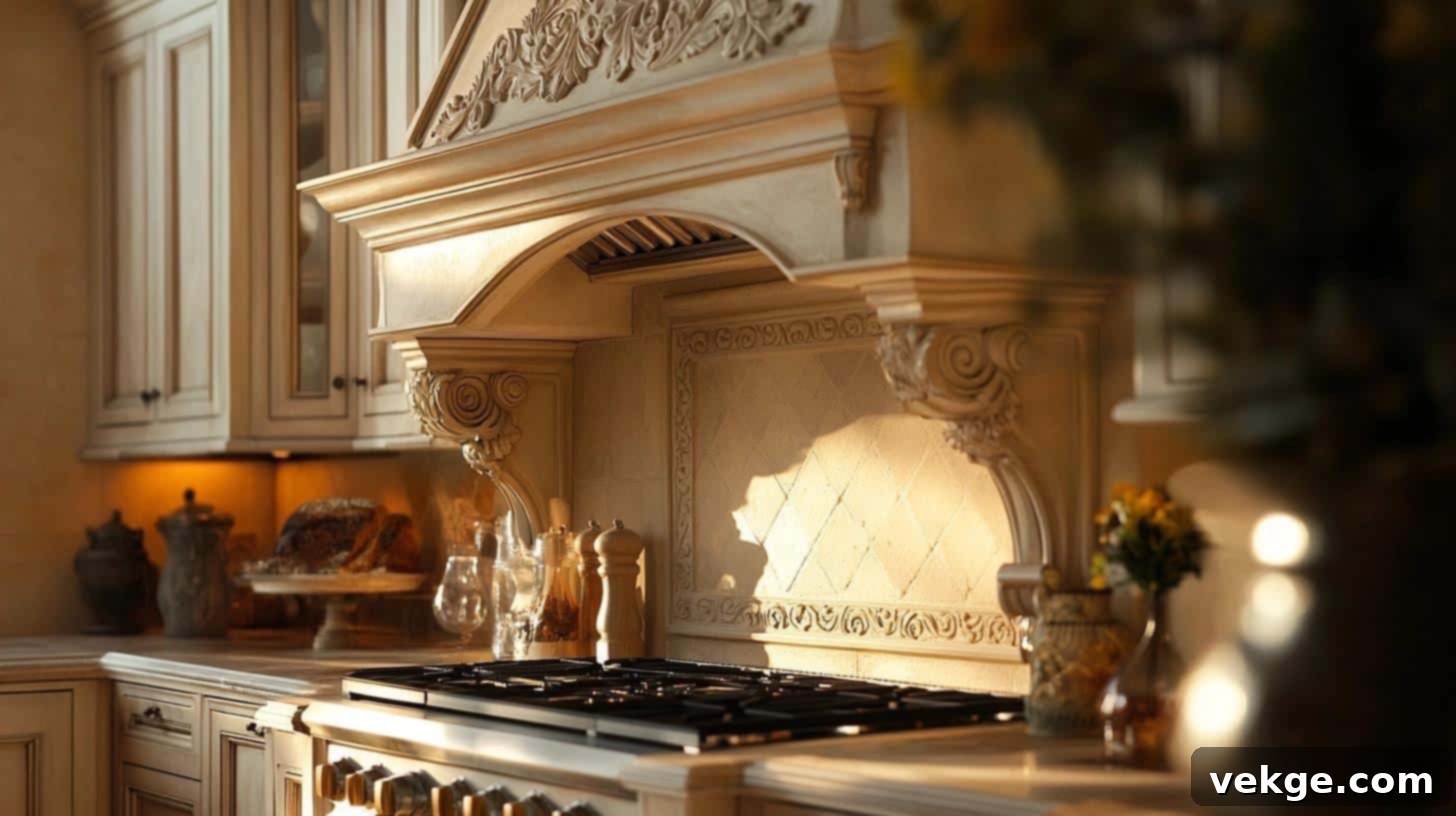
The French Country plaster range hood is distinguished by its small, carefully crafted details and an air of rustic sophistication. Hand-finished touches, often subtly distressed plasterwork, and delicate carved patterns evoke a cozy yet refined farmhouse feel. The hood frequently features elegant fluted columns on the sides and structured trim work, hinting at skilled artisanship and classic elegance.
- Works Best With: Painted cabinets (especially in muted tones), stone or butcher block counters, antique-style hardware, and light fixtures with soft, ornate shapes.
Essential Maintenance Tips for Your Plaster Range Hood
To ensure your beautiful plaster range hood retains its charm and functionality for years to come, regular and mindful maintenance is essential. Here are key tips to keep it looking pristine:
- Regular Gentle Cleaning: Make it a habit to wipe down the surface of your plaster hood weekly with a soft cloth dampened with warm water and a small amount of mild dish soap. This quick cleaning routine is crucial for preventing the buildup of grease and food splatters, which can become stubborn if left to set. Always use soft, non-abrasive cloths to avoid scratching or dulling the plaster finish.
- Handle With Care to Prevent Damage: Plaster, while durable, can be susceptible to impact. Be mindful when handling pots, pans, and other kitchen utensils around the range hood. Accidental bumps or sharp impacts can lead to unsightly chips or hairline cracks. Maintain a safe distance between cooking tools and the hood’s surface to protect its integrity.
- Proactive Moisture Control: The kitchen environment is inherently humid. Regularly inspect your hood for any signs of water spots, steam condensation, or moisture discoloration. Ensure your hood is installed at the appropriate height above your stove, as specified by the manufacturer. Crucially, always activate your range hood’s fan while cooking, especially when boiling or steaming, to effectively draw moisture and steam away from the plaster surface and out of the kitchen.
- Promptly Address Small Imperfections: Don’t let minor issues escalate. Attend to any tiny cracks, chips, or surface blemishes as soon as you notice them. Small cracks can typically be filled with a plaster patching compound designed for interior use. After the patch dries, lightly sand the area with fine-grit sandpaper and touch up with matching paint or plaster finish if necessary. Addressing these issues promptly prevents them from becoming larger, more complex repairs later on.
- Conduct a Yearly Comprehensive Check-Up: Once a year, perform a thorough inspection of your entire range hood system. Test the fan to ensure it’s operating efficiently, check all seals around the hood and ductwork for any gaps, and look for any signs of wear and tear on the plaster surface. Completely clean the vent filters according to the manufacturer’s instructions to maintain optimal airflow. If your plaster finish has a sealant, consider applying a fresh coat annually to provide renewed protection against moisture and stains, especially if the surface appears dull or less resistant.
- Prioritize Safety and Proper Ventilation: Always adhere to normal cooking temperatures; extreme, prolonged heat can potentially affect plaster over time. Ensure your ventilation fan is consistently working effectively, as its primary role is to keep the kitchen air clean and prevent grease buildup. Make it a point to clean your grease filters monthly or as recommended, not only for performance but also to mitigate potential fire risks associated with accumulated grease.
Conclusion: Your Journey to a Custom Kitchen Centerpiece
I genuinely hope this comprehensive guide has demystified the process of creating a plaster range hood, showing you that this ambitious project is far more achievable than it might initially appear. With the right selection of tools, quality materials, and a commitment to patience and precision, you truly can construct a unique and stunning feature for your kitchen that reflects your personal style and craftsmanship.
Remember, the journey of DIY is often about learning and refining. Your first attempt doesn’t need to be flawlessly perfect. The primary focus should always be on getting the fundamental elements right: ensuring proper and effective ventilation, building a solid and secure structural frame, and achieving good sealing for durability. The inherent beauty and forgiving nature of plaster lie in its ability to be refined; you can always smooth out minor rough spots, apply additional coats, or make adjustments until you are completely satisfied with the aesthetic and finish. This project is a testament to what you can achieve with your own hands, adding significant value and character to your home.
I’m incredibly excited to witness your creative endeavors! Please feel free to share photos of your magnificent finished range hood in the comments section below. Should you encounter any questions or require assistance at any stage of your project, do not hesitate to reach out. Together, let’s continue to make beautiful, functional additions to our homes.
Frequently Asked Questions About Plaster Range Hoods
Can I Apply Plaster Over an Existing Range Hood?
Yes, in many cases, you can successfully cover an existing range hood with plaster, provided its structure is sound and adequately secured. First, thoroughly clean and degrease the existing surface. For optimal plaster adhesion, it’s often recommended to add a metal lath or wire mesh over the old hood, securing it firmly. This provides a crucial mechanical bond for the plaster layers. Subsequently, you can apply your base coats and plaster layers as described in the DIY guide. Always ensure the existing hood is sturdy enough to support the added weight of the new plaster finish.
How Do I Seal a Plaster Hood to Prevent Stains?
To effectively protect your plaster hood from kitchen stains and moisture, it is essential to apply a high-quality sealant. We recommend applying two to three thin, even coats of a clear, water-based, non-yellowing sealant specifically formulated for kitchen use or high-moisture areas. Ensure each coat dries completely according to the manufacturer’s instructions before applying the next. For the best and most enduring protection, consider reapplying the sealant annually, especially in high-traffic cooking zones, to maintain its stain-resistant properties and keep your hood looking fresh.
What Type of Vent Insert Should I Use for Optimal Performance?
Choosing the right vent insert is critical for effective ventilation. Select a vent insert whose CFM (Cubic Feet per Minute) rating matches the size of your cooktop and your typical cooking habits. For standard residential stoves and moderate cooking, an insert with 600-900 CFM typically provides excellent performance. For professional-grade ranges or frequent high-heat cooking, you might consider higher CFM options. Always measure the dimensions of your opening carefully and ensure the insert is compatible with your ductwork. Additionally, it is crucial to check local building codes and regulations regarding ventilation requirements in your area before making a purchase.
Is Plaster Durable Enough for Kitchen Environments?
Absolutely, when properly applied and adequately sealed, plaster is remarkably durable and well-suited for the demanding environment of a kitchen. It is naturally resistant to the typical heat and moisture fluctuations found in culinary spaces. With regular cleaning, appropriate sealing, and mindful handling (avoiding direct, hard impacts), a plaster range hood will resist cracking, chipping, and general wear and tear, maintaining its beauty and structural integrity for many years.
Can I Customize the Color and Texture of The Plaster?
Yes, the customizable nature of plaster is one of its most significant advantages! You have several options for achieving your desired look. You can mix liquid or powdered pigments directly into your plaster mixture before application to create a consistent, integrated color. Alternatively, once the plaster has fully cured, you can paint it with any interior paint to match or complement your kitchen’s palette. For texture, you can create various finishes—from ultra-smooth and polished to richly textured, rustic, or even highly artistic, multi-layered effects—by using different trowel techniques, sponges, or other tools during the application process. Experiment on a scrap piece first to perfect your technique!
