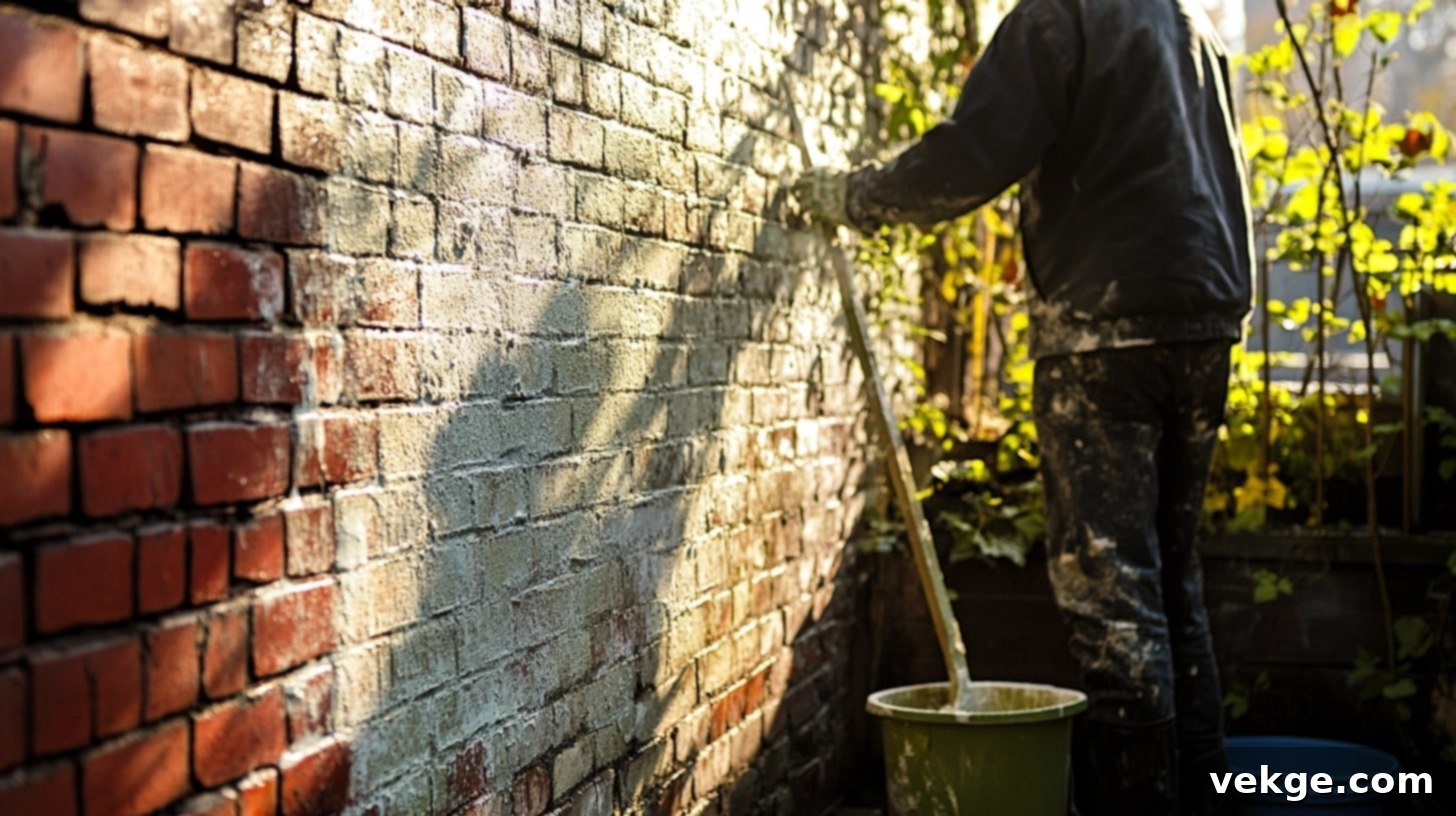
How to Limewash Brick: A Comprehensive Guide for a Beautiful, Breathable Exterior
Transforming your home’s exterior can feel like a daunting task, especially when dealing with brick surfaces. Many homeowners grapple with the decision of how to update their brick, often fearing that traditional paint might trap moisture, leading to long-term damage and costly repairs. I understand this concern deeply; I’ve navigated those very waters myself, seeking a solution that offers both aesthetic appeal and lasting protection.
The good news is that a superior alternative exists: limewashing. This centuries-old method is experiencing a resurgence for good reason. It’s a natural, breathable finish that not only protects your bricks but also imbues them with a unique, aged character that evolves beautifully over time. Unlike conventional paints that merely sit on the surface, limewash deeply penetrates and bonds with the brick, allowing it to breathe naturally.
In this comprehensive guide, I will walk you through the exact steps to successfully limewash your brick exterior. You’ll learn everything from meticulously preparing your surface and mixing the perfect consistency to expertly applying the coating for results that are not just beautiful but also durable. I’ll also share invaluable tips and common pitfalls to help you avoid mistakes, ensuring your project is a resounding success. Get ready to revitalize your home’s facade with a finish that truly stands the test of time and weather.
Let’s embark on this journey right away and uncover the secrets to a stunning limewashed brick exterior!
What Exactly Is Limewash? Unveiling its Composition and Benefits
At its core, limewash is a remarkably simple yet powerful mixture consisting primarily of slaked lime (calcium hydroxide) and water. When applied to brick surfaces, it creates a distinctive matte, chalky finish that appears incredibly natural and grows more beautiful as it ages. What sets limewash apart from conventional paints is its unique interaction with the brick: instead of forming an impermeable layer on top, limewash is absorbed into the pores of the brick, becoming an integral part of its surface.
This deep penetration is key to its functionality and aesthetic. As the limewash dries, the calcium hydroxide reacts with carbon dioxide in the air through a process called carbonation, reverting back to calcium carbonate (limestone). This chemical bond strengthens the brick and creates a highly durable, permeable finish that won’t peel or chip.
Composition and Key Properties:
- The primary ingredient is high-quality lime putty, traditionally derived from crushed and burnt limestone. This natural mineral foundation is what gives limewash its unique characteristics.
- When mixed with water, it transforms into a thin, milky liquid. The consistency can be adjusted to achieve various levels of opacity and coverage.
- Limewash is celebrated for being completely natural, free from harsh chemicals, volatile organic compounds (VOCs), and synthetic polymers often found in modern paints. This makes it an environmentally friendly choice for your home.
- Its porous finish allows bricks to “breathe” freely, facilitating the escape of trapped moisture. This breathability is crucial for maintaining the long-term health and integrity of your brickwork, preventing issues like spalling and efflorescence.
- Thanks to its naturally high pH level, limewash inherently resists the growth of mold, mildew, and even insects, contributing to a healthier living environment and reducing maintenance needs.
- Each meticulously applied coat chemically bonds with the brick, creating a finish that becomes increasingly durable and resistant to fading and weathering over the years.
Understanding these fundamental properties reveals why limewash isn’t just a decorative coating but a protective, enhancing treatment for your brick exterior, offering benefits far beyond what traditional paints can provide.
Limewash vs. Whitewash vs. Paint vs. German Smear: Which Brick Finish is Right for You?
When considering an exterior update for your brick home, you’ll encounter several popular finishing techniques, each offering distinct aesthetics and functional properties. While they might seem similar at first glance, understanding their differences is crucial for making the right choice for your home’s specific needs and desired look. Let’s break down limewash, whitewash, traditional paint, and German smear.
| Method | Materials Used | Outcome | Pros | Cons |
|---|---|---|---|---|
| Limewash | Hydrated lime, water (optional mineral pigments) | Natural, chalky, matte finish; gradually fades for a truly authentic aged look. Highly permeable. | – Eco-friendly, VOC-free, and allows brick to breathe, preventing moisture issues. – Bonds chemically with brick, preventing peeling or chipping. – Naturally mold and mildew resistant due to high pH. – Develops a beautiful, soft patina over time. – Very affordable if mixed yourself; long-lasting (5-7+ years). |
– Fades subtly over time, which may require reapplication for consistent intensity. – Limited color options (earthy, muted tones) unless custom-pigmented. – Requires specific surface preparation and application techniques. – Initial color appears darker when wet, takes time to fully cure and lighten. |
| Whitewash | Traditional latex or acrylic paint diluted significantly with water (often 1:1 or 1:2 paint to water) | Light, semi-transparent coverage; allows original brick color and texture to subtly show through for a rustic, vintage look. | – Affordable and DIY-friendly using readily available materials. – Easily adjustable opacity by varying dilution ratios. – Provides a quick way to lighten brick without fully obscuring it. – Dries quickly and is less sensitive to application conditions than limewash. |
– May peel, chip, or flake over time as it sits on the surface of the brick. – Does not offer the same breathability or moisture protection as limewash. – Less durable and may require more frequent touch-ups or reapplication. – Can trap moisture behind the paint film, potentially damaging brick. |
| Paint | Exterior-grade latex or acrylic masonry paint (100% acrylic is often recommended) | Solid, opaque, and uniform coverage; completely hides the brick, offering a vast array of color choices and a modern, often smoother finish. | – Wide range of colors available, offering maximum color control and customization. – Long-lasting and provides a uniform, low-maintenance finish. – Excellent at concealing brick imperfections and previous stains. – Offers a complete aesthetic overhaul, transforming the entire look of the home. |
– Can trap moisture within the brick, leading to spalling, efflorescence, and mold growth. – Requires thorough preparation (cleaning, priming) to ensure adhesion. – Regular upkeep needed to prevent peeling, chipping, and fading over time. – Often irreversible without damaging the brick; difficult to remove once applied. – Higher initial material cost compared to limewash or whitewash. |
| German Smear | Mortar (often white or light-colored, sometimes mixed with sand or limestone), applied thickly and then smeared or scraped back. | Rough, heavily textured, old-world look with partial brick coverage. Mimics the appearance of historic European masonry. | – Adds significant texture and character, creating a distinctive, aged aesthetic. – Extremely durable and long-lasting once applied and cured. – Allows for custom coverage, revealing more or less of the original brick. – Provides excellent protection against weather and wear. |
– Permanent once applied; extremely difficult, if not impossible, to remove without damaging the brick. – Can be challenging and labor-intensive to apply evenly, requiring skill and practice. – Results are highly dependent on applicator’s technique, leading to potential inconsistencies. – Requires specialized materials and tools, potentially increasing cost and complexity. |
Choosing between these methods hinges on your desired aesthetic, budget, climate, and the long-term health of your brickwork. While paint offers bold color, it sacrifices breathability. Whitewash is a quick fix, but lacks durability. German Smear creates intense texture but is permanent. Limewash stands out as the ideal choice for those seeking a natural, breathable, and beautifully aged finish that respects and protects the inherent qualities of brick.
Why Limewash Your Brick? Unlocking the Myriad Benefits
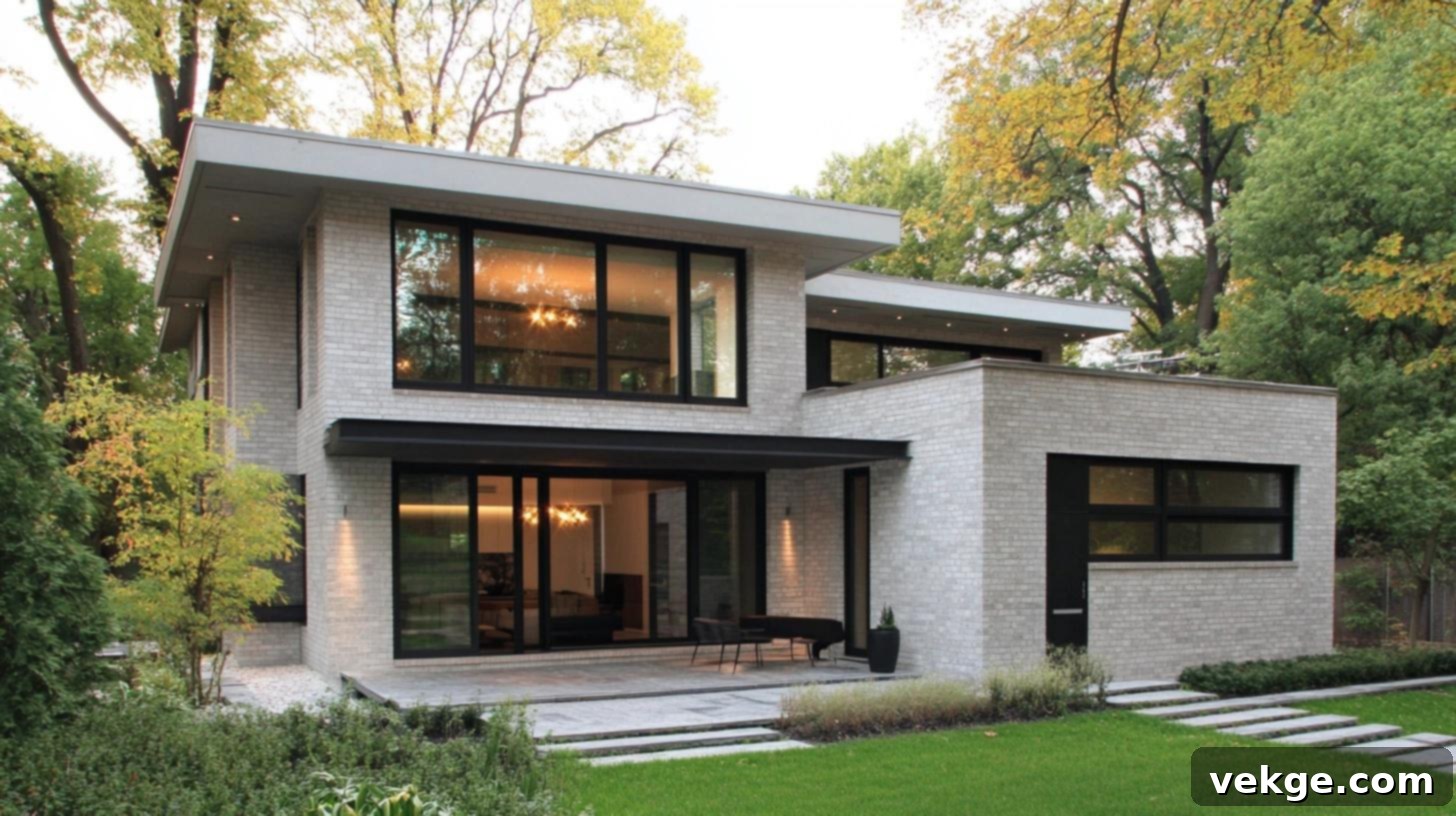
Choosing to limewash your brick exterior is more than just a renovation—it’s an investment in your home’s character, health, and longevity. The benefits extend far beyond a simple coat of paint, offering a unique blend of aesthetic enhancement, structural protection, and environmental responsibility. Here’s a deeper look into why limewashing stands out.
1. Aesthetic Transformations: Embracing Timeless Beauty and Unique Character
Limewash imparts a soft, velvety texture and a distinctive matte finish that interacts dynamically with natural light. The finish begins with a more pronounced color and subtly mellows over time, developing a rich, lived-in patina that traditional paints simply cannot replicate. What I particularly admire is how each individual brick absorbs the limewash differently, creating a one-of-a-kind pattern that highlights the natural variations and history of your masonry. This isn’t about uniform coverage; it’s about enhancing the inherent beauty of brick, providing a look that is both timeless and deeply personal to your home. The gentle fading effect contributes to an authentic, aged aesthetic that adds immense curb appeal and a sense of established elegance.
2. Breathability and Health of Brick: Protecting Your Home from Within
Perhaps the most critical advantage of limewash is its unparalleled breathability. The porous nature of this finish allows moisture to move freely through your bricks, both entering and, more importantly, escaping. This natural vapor permeability is vital for preventing water from becoming trapped within the masonry, a common problem with non-breathable paints. Trapped moisture can lead to a host of detrimental issues, including efflorescence (white, powdery salt deposits), spalling (flaking or peeling of the brick surface), and structural damage. I’ve personally witnessed how this natural coating helps even very old and fragile bricks maintain their strength and integrity for many years, significantly extending the lifespan of your brickwork and preventing costly repairs down the line.
3. Eco-Friendly Aspects: A Sustainable Choice for Your Home and the Planet
In an era where environmental consciousness is paramount, limewash shines as an exceptionally eco-friendly option. Composed almost entirely of natural limestone and water, it is 100% natural and sustainable. It contains no harsh chemicals, synthetic resins, or volatile organic compounds (VOCs), which are commonly found in acrylic paints and can contribute to air pollution and indoor health issues. As someone deeply committed to environmental stewardship, I genuinely appreciate how limewash breaks down safely over time without harming soil or water, making it a responsible choice for both your family’s health and the planet. Its minimal environmental footprint from production to decomposition makes it a truly green building material.
4. Cost-Effectiveness: Smart Investment for Long-Term Value
While the initial cost of materials might seem comparable to high-quality exterior paints, limewash often proves to be more cost-effective in the long run. A single bag of lime putty, when properly mixed, can cover a significantly larger area than an equivalent volume of traditional paint. From my experience, a well-applied limewash finish on exterior walls can last a remarkable 5-7 years, often even longer, before needing a refresh. Its inherent resistance to peeling, chipping, and mold reduces the frequency and cost of maintenance. The simple ingredients and exceptional longevity, combined with its protective qualities, make limewash a truly smart and value-driven investment for any homeowner.
But Is Limewashing Right for You? Key Considerations Before You Begin
Before you commit to limewashing your brick exterior, it’s essential to perform a thorough assessment. While limewash offers numerous benefits, it’s not a universal solution for every brick surface or every homeowner’s aesthetic preference. Taking these factors into account will help ensure the success and satisfaction of your project.
Assessing Your Brick Surface: The Foundation of Success
Begin by meticulously examining your brick walls. Are they currently painted? If so, any existing paint, especially non-breathable types, must be completely removed first, as limewash requires a porous surface to bond properly. I strongly recommend checking for any loose, broken, crumbling bricks, or deteriorating mortar. Your brick surface needs to be in good, stable condition for limewash to adhere effectively and last. Limewash will not solve underlying structural issues; it will highlight them if not addressed.
Crucially, ensure your bricks are clay-based. Cement bricks, often found in newer constructions or as veneers, have different absorption properties and won’t take limewash properly. If you’re unsure of your brick type, consulting a masonry expert or conducting a small absorption test (as described in the preparation section) can provide clarity.
Considering Your Climate and Environment: Weathering the Elements
Your local weather conditions play a significant role in the successful application and curing of limewash. If you reside in a region prone to frequent rain, plan to apply limewash during extended dry spells. The coating typically requires a minimum of 24 hours of dry weather to bond properly and ideally several days to fully cure without interruption. High humidity can prolong drying times, while extreme heat can cause it to dry too quickly, leading to an uneven finish.
Furthermore, consider your home’s immediate environment. Heavy tree coverage near walls can lead to increased moisture retention and potential for mold growth, which might necessitate more frequent cleaning. I always suggest thoroughly checking your area’s typical weather patterns and forecasts for at least a week out before you even consider opening a bucket of limewash. Ideal conditions are typically mild temperatures (50-85°F) with moderate humidity and overcast skies to prevent too-rapid drying.
Desired Aesthetic Outcomes: Managing Expectations for a Natural Look
Finally, pause to truly envision your desired aesthetic. Limewash creates a soft, matte, and often subtly variegated finish that naturally fades and changes over time. It is not designed to produce a glossy, perfectly uniform, or opaque color that completely hides the brick’s texture. If your goal is a flawlessly smooth, intensely vibrant, or entirely consistent color across your entire facade, then traditional paint might be a more suitable choice.
However, if you are drawn to an aged, organic, and naturally evolving look – one that celebrates the imperfections and character of your brick – then limewash is undoubtedly for you. The beauty of limewash lies in its living finish, which will be unique to your home, reflecting its history and adapting to its environment. Embrace the idea that the finish will not be perfectly uniform; its charm comes from its natural variation.
Essential Tools and Materials Needed to Limewash Brick
Embarking on a limewashing project requires the right set of tools and high-quality materials to ensure a smooth application and a lasting, beautiful finish. Gather everything beforehand to prevent interruptions and ensure efficiency.
| Item | Purpose |
|---|---|
| Tools | |
| Large masonry brush (e.g., Block Brush or Lime Brush) | Absolutely essential for applying limewash evenly and working it into the porous surface of the brick. Look for natural bristle brushes, as they hold more material and apply it effectively. |
| Paint sprayer (optional, but recommended for large areas) | Can significantly speed up application, especially for extensive surfaces or multi-story homes. Ensure it’s designed for thicker, sometimes abrasive liquids and has appropriate nozzle sizes. |
| Heavy-duty drill with mixing attachment (paddle mixer) | Crucial for thoroughly mixing the lime and water to achieve a consistent, lump-free mixture. This ensures even coverage and color. |
| Large buckets (5-gallon capacity or more) | Needed for mixing large batches of limewash, holding water for misting, and cleaning tools. |
| Garden hose with spray nozzle or dedicated spray bottle | Used to pre-dampen the brick surface before application and for light misting during the curing process to prevent rapid drying. |
| Gloves, safety glasses, and dust mask/respirator | Essential personal protective equipment (PPE). Limewash is alkaline and can irritate skin and eyes. A dust mask is important when mixing dry lime. |
| Drop cloths, painter’s tape, plastic sheeting | For protecting surrounding surfaces (windows, doors, landscaping, foundation) from drips and splatters. |
| Stiff bristle brush (non-metallic) and/or power washer (low setting) | For cleaning the brick surface thoroughly before application. Avoid metal brushes on delicate brick. |
| Ladders or scaffolding | For safely reaching higher sections of your exterior. Ensure they are stable and rated for your weight. |
| Materials | |
| High-quality hydrated lime (Type S or Type CL90) or lime putty | The key ingredient. Ensure it’s specifically for limewash or masonry applications. Avoid agricultural lime. |
| Clean water (potable) | Used to mix with hydrated lime to create the limewash. Water quality can affect the final finish. |
| Mineral pigments (optional) | If a tinted finish is desired beyond natural white, use lime-compatible, alkali-resistant mineral pigments. Test colors extensively. |
| Masonry cleaner (optional, for stubborn stains) | For heavy efflorescence, mold, or persistent dirt. Always test in an inconspicuous area first. |
| Masonry caulk or mortar repair kit (if needed) | For filling small cracks and repairing minor mortar damage before limewashing. |
Having all these items ready before you start will make the limewashing process much smoother and more enjoyable. Don’t cut corners on safety equipment; your well-being is paramount.
Preparing Your Brick Surface: The Foundation for a Flawless Finish
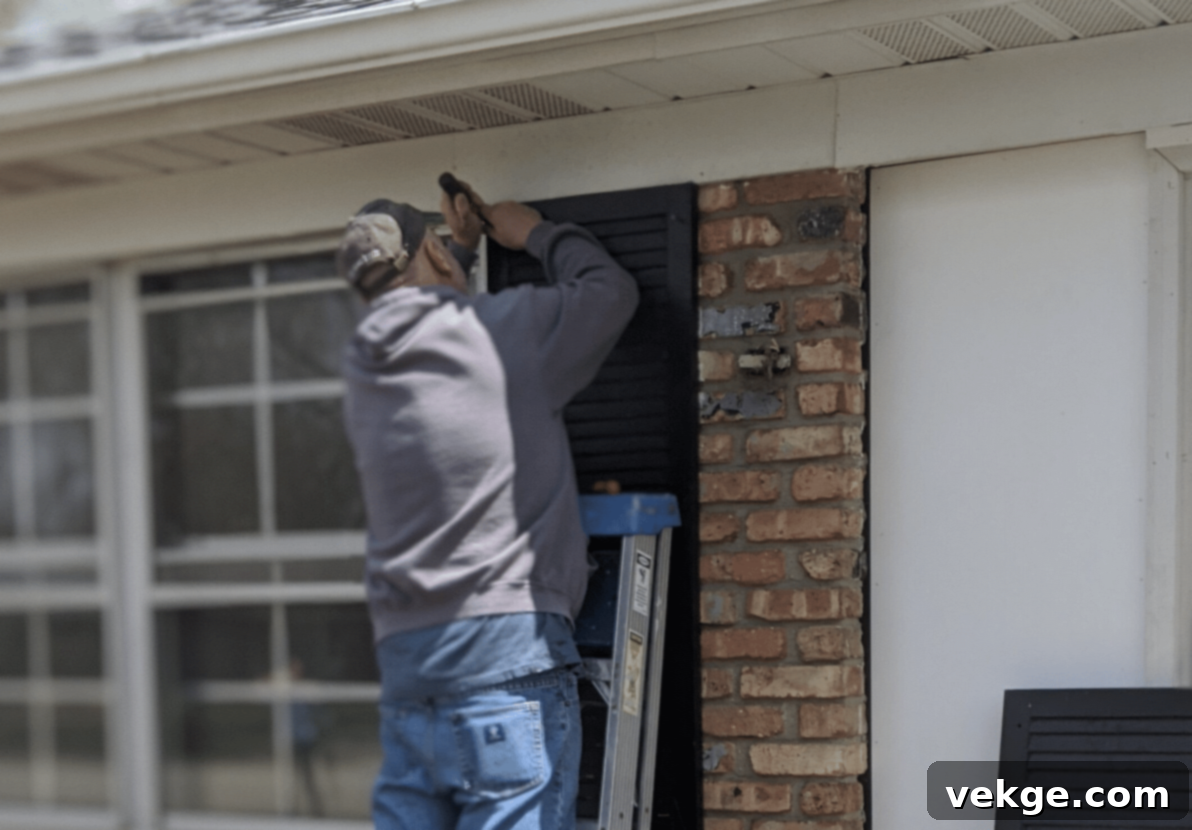
The success of your limewashing project hinges significantly on thorough surface preparation. Limewash needs to penetrate the brick, so any dirt, grime, or previous coatings will hinder adhesion and breathability. Skimping on this step will lead to disappointing and short-lived results.
1. Thorough Cleaning of the Brick
Start with a meticulously clean surface. I typically begin by using a garden hose with a moderate spray to wet the bricks thoroughly. Then, I scrub the entire surface with a stiff, non-metallic brush (like a nylon or tampico fiber brush) to remove loose dirt, cobwebs, and light mildew. Avoid wire brushes on bricks, as they can scratch the surface or leave metallic residues that can stain.
For tougher issues:
- Efflorescence (white powdery patches): These salt deposits require a more rigorous approach. After wetting, use a stiff brush and a dedicated efflorescence cleaner (following manufacturer instructions) or a diluted solution of white vinegar (1 part vinegar to 10 parts water). Rinse thoroughly.
- Mold and Mildew: For persistent green or black growth, use a solution of 1 part bleach to 3 parts water, applied carefully with a scrub brush. Allow it to sit for 15-20 minutes, then scrub and rinse extremely well.
- Stubborn Spots: For grease, oil, or embedded dirt, a specialized masonry cleaner might be necessary. Always test any cleaner on a small, inconspicuous spot first to check for adverse reactions or discoloration.
When cleaning, always work from the bottom up to prevent dirty water from streaking clean sections. Rinse from the top down. Never use high-pressure settings on a power washer directly on your bricks – it can cause chips, erode mortar, and damage the brick face. If using a power washer, keep the pressure low (under 1200 PSI) and the nozzle at a 45-degree angle, maintaining a safe distance.
After cleaning, allow the walls to dry completely, typically for at least 24-48 hours, depending on weather conditions. Any residual moisture can interfere with the limewash application.
2. Assessing Brick Absorption
Limewash relies on the brick’s porosity for proper adhesion. To test for good absorption, spray water in several different spots on your wall. Good, untreated clay bricks should absorb water within a minute or so, causing the surface to darken significantly. If the water beads up, runs off, or takes an extended time to soak in, your surface might have existing sealers, silicone treatments, or oils that will prevent limewash from bonding properly. In such cases, these coatings would need to be removed, which can be a complex and costly process, potentially requiring professional intervention.
I always recommend testing several areas – absorption can vary across your wall due to sun exposure, weathering, or past treatments. This test is critical and should not be skipped.
3. Repairing and Repointing
Before any limewash touches your walls, inspect each brick and mortar joint carefully. Limewash will not cover structural damage.
- Cracks: Fill small, hairline cracks in bricks or mortar with appropriate masonry caulk or a thin mortar patch.
- Broken Bricks: Replace any loose, crumbling, or severely broken bricks. This is essential for the long-term integrity of your facade.
- Deteriorating Mortar: If mortar crumbles easily when you touch it or if there are visible gaps, it needs repointing. Repointing involves removing deteriorated mortar and replacing it with fresh mortar.
Crucial Curing Time: If you perform any significant repairs (like repointing or replacing bricks), you must wait at least 28 days for the new mortar or caulk to fully cure before applying limewash. Applying limewash too soon can lead to inconsistent adhesion and color variations in those repaired areas.
This meticulous preparation lays the groundwork for a successful and long-lasting limewash finish, ensuring the beauty you achieve today will endure for years to come.
A Step-by-Step Guide to Limewashing Your Brick Exterior
Once your brick surface is clean, repaired, and ready, you can begin the exciting process of applying the limewash. Patience and careful execution are key to achieving that beautiful, natural finish.
Step 1: Mixing the Limewash to the Perfect Consistency
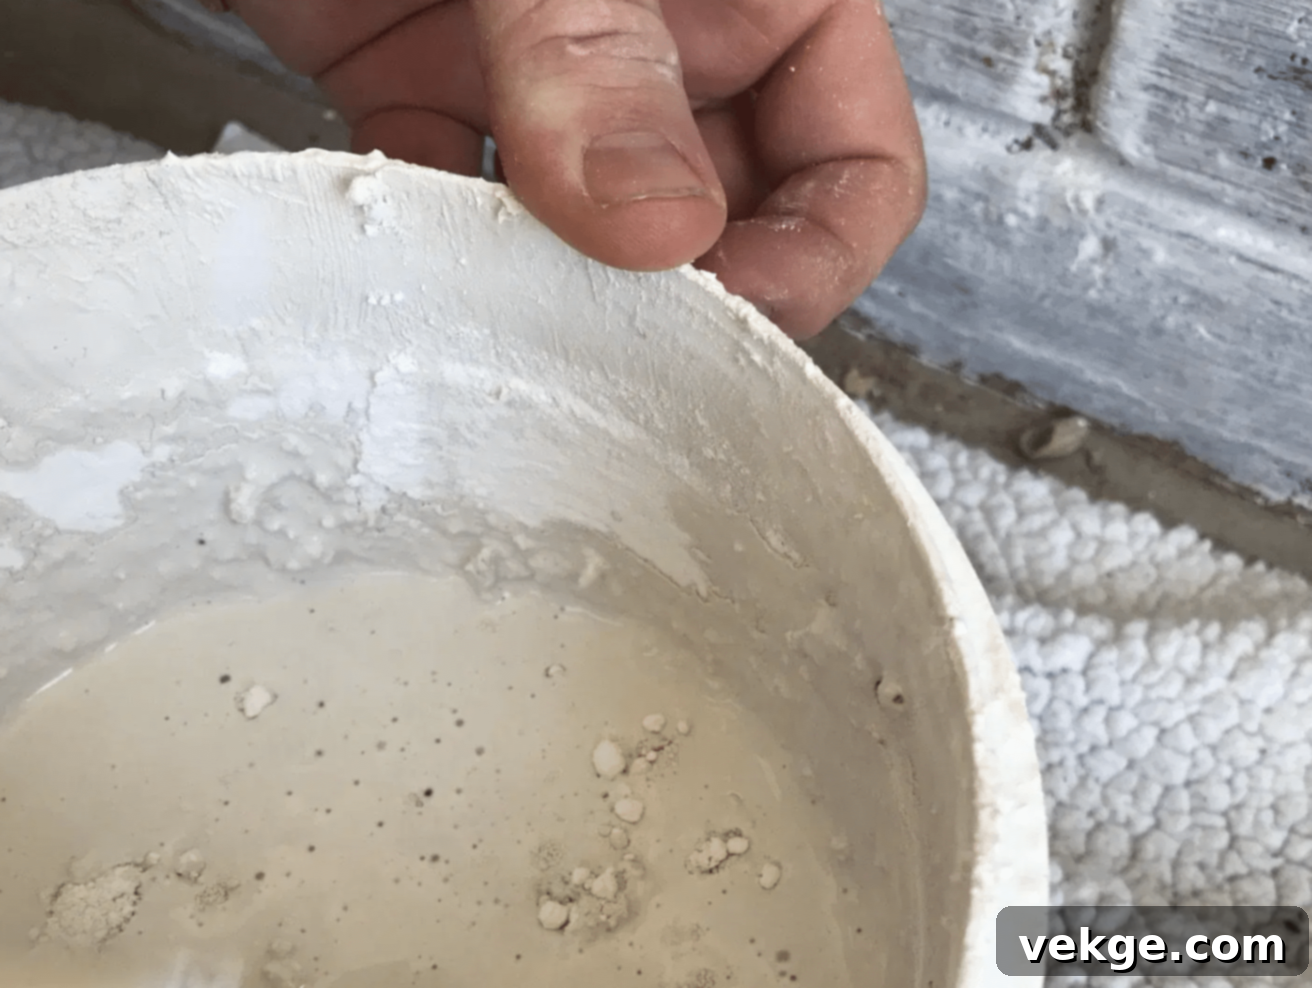
Achieving the right consistency is vital for both ease of application and the final look. Start with high-quality hydrated lime (Type S or CL90) in a large, clean bucket. While specific ratios can vary based on the lime product and desired opacity, a good starting point is a 1:3 ratio (one part lime to three parts clean water by volume).
- Initial Mix: Pour the water into the bucket first, then slowly add the lime while mixing constantly with a heavy-duty drill and paddle mixer. This helps prevent lumps.
- Consistency: Aim for a consistency similar to that of thin pancake batter or whole milk. It should be thin enough to easily spread but not so watery that it drips excessively or lacks body.
- Adjusting Opacity: For a thicker, more opaque, chalky appearance (less original brick showing through), you might try a 1:1 or 1:2 ratio. For a more translucent, washed-out look, increase the water ratio (e.g., 1:4 or 1:5).
- Adding Pigments (Optional): If you desire a tinted finish, thoroughly mix lime-compatible mineral pigments into the water before adding the lime, or add them gradually to the prepared limewash mixture, ensuring even dispersion. Always use pigments specifically formulated to be alkali-resistant.
- Allow to Slake: For best results, especially with lime putty, let the mixture sit for at least 30 minutes, or even overnight, allowing the lime to fully “slake” or hydrate. This improves workability and consistency. Remix thoroughly before use.
Remember, limewash looks darker and more transparent when wet and will lighten and become more opaque as it dries and cures. This is why testing is so important.
Step 2: Testing the Limewash on an Inconspicuous Area
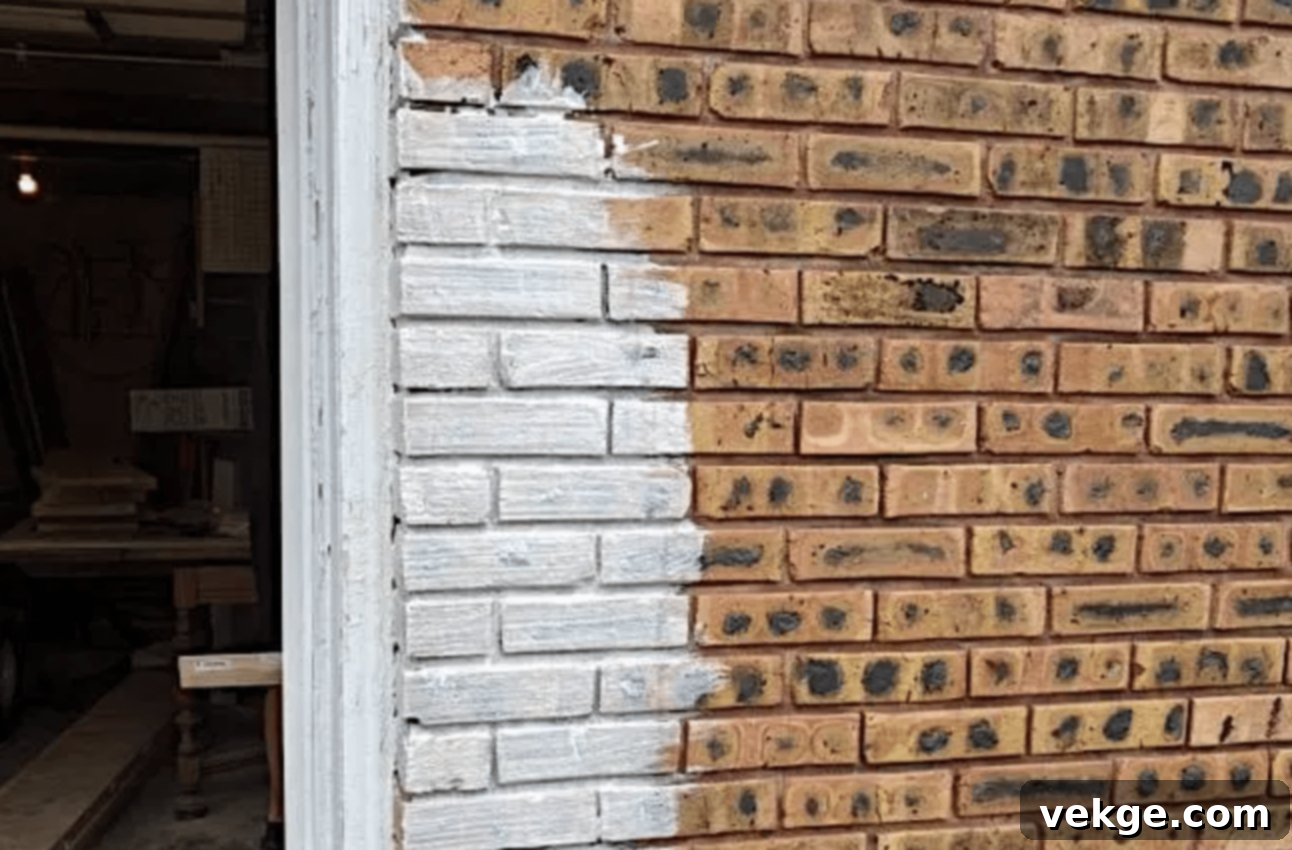
This step is non-negotiable. Before committing to the entire facade, choose a small, inconspicuous area (e.g., behind a bush, a low-visibility corner, or a spare brick) to test your limewash mixture and application technique. This test area will be your crucial reference point.
- Apply and Observe: Apply a small amount of limewash to your test area. Try different techniques, such as a single light wash for a transparent effect, a heavier coat for more coverage, or even a German smear technique if that’s an option you’re considering.
- Drying Time: Allow the test patch to dry completely and cure for at least 24-48 hours. This is critical because, as mentioned, limewash will dry significantly lighter and more opaque than it appears when wet. The true color and texture will only reveal themselves after full carbonation begins.
- Evaluate: Step back and assess the dried test patch in different lighting conditions (morning, midday, evening). Is the color what you envisioned? Is the opacity right? Does it complement your home’s existing features? Adjust your mix ratio or application technique based on your observations. Repeat testing if necessary.
Step 3: Applying the Limewash with Precision
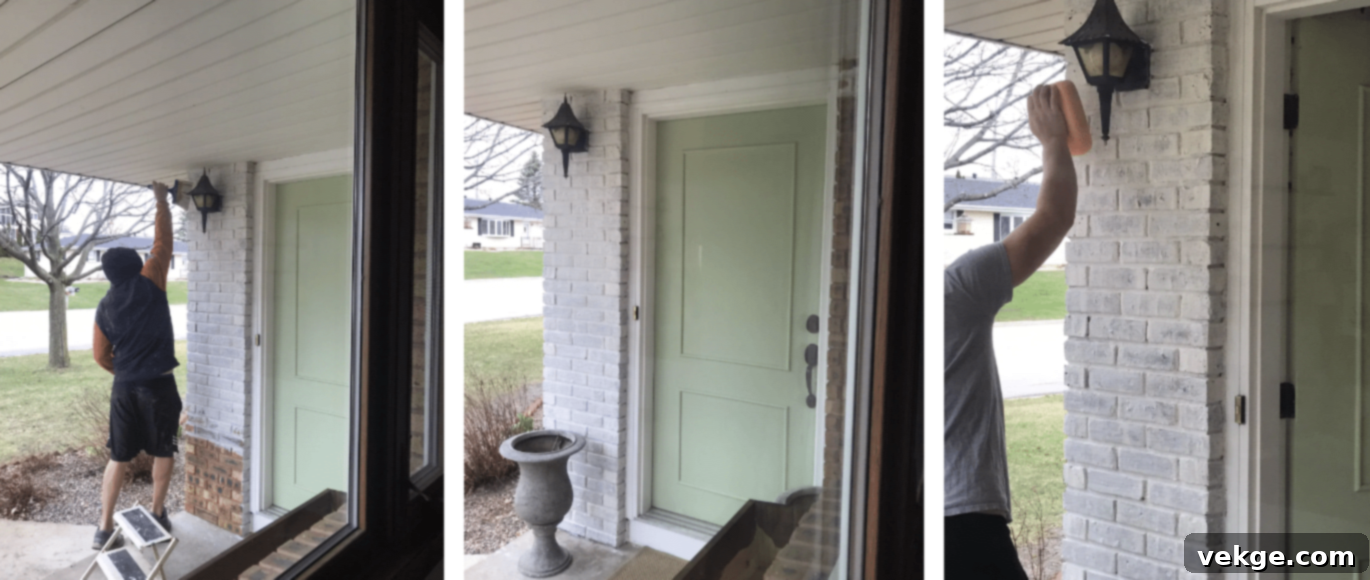
With your mixture perfected and your test approved, you’re ready for the main event. Always work in small, manageable sections to maintain a wet edge and ensure even coverage. The ideal application conditions are typically warm, cloudy days with moderate humidity – avoiding direct, harsh sunlight which can cause the limewash to dry too quickly.
- Dampen the Surface: Before applying limewash to any section, always mist the brick with water using your garden hose or spray bottle until it is damp but not dripping. This helps the limewash penetrate properly and prevents it from drying too quickly.
- Brush Application: Using your large masonry brush, apply the limewash in broad, overlapping strokes. Work it into the mortar joints and brick pores. Many professionals recommend a cross-hatch or circular motion to ensure full coverage and create a natural, textured look. Work from top to bottom, avoiding drips. If drips occur, brush them out quickly before they dry.
- Sprayer Application (if using): If using a paint sprayer, ensure it’s set to a wide, even fan pattern. Keep the sprayer moving consistently to avoid heavy build-up in one area. Sprayers are faster but may require more masking and can be prone to overspray. Always wear a respirator when spraying.
- Achieving Desired Opacity: For a lighter, more translucent effect, a single thin coat might suffice. For a thicker, more solid white or an opaque finish, allow the first coat to dry completely (usually 1-2 hours, depending on conditions) before adding additional coats. Most projects benefit from two to three thin coats rather than one thick one, allowing for better depth and durability.
- Work Systematically: Complete one section fully before moving to the next. This helps maintain consistency and prevents visible lines where you stopped and started.
Remember that limewash is a living finish; embrace its natural variations. The true beauty emerges as it dries and cures, revealing its unique character.
Drying and Curing Process: Nurturing Your Limewash Finish
Understanding the drying and curing process is just as critical as the application itself. Limewash doesn’t just “dry”; it undergoes a chemical transformation called carbonation, which binds it to the brick and gives it its unique properties and durability. This process takes time and requires specific conditions.
Initial Drying (24-48 hours)
The first drying phase typically takes about 24 hours. During this period, the water in the limewash evaporates, and the initial chemical reaction with carbon dioxide in the air begins. It’s during this crucial phase that I’ve learned the importance of gentle misting with water. Limewash needs a slow and steady drying process to cure properly. If it dries too quickly, it can become powdery, flake off, or not achieve its full strength. Keep checking the surface; if it feels powdery or appears to be drying too fast, give it a light spray with your garden hose or a misting bottle. This reintroduces moisture, allowing the carbonation process to continue optimally.
Protect the freshly applied limewash from heavy rain, strong winds, and direct, intense sunlight during these first 48 hours. I always check weather forecasts diligently before starting any limewash project, as unexpected rain can wash away or streak a fresh coat. If rain is unavoidable, consider covering the area with plastic sheeting, ensuring there’s still some airflow.
Full Curing (3-5 days or longer)
The full curing process, where the limewash fully converts back to solid calcium carbonate, takes approximately 3-5 days, though it can extend to several weeks depending on environmental conditions (temperature, humidity, airflow). During this extended period, it’s best to avoid touching the walls or placing anything against them. The color will continue to lighten and settle into its final shade as it fully cures. The true, luminous quality of the limewash often doesn’t fully reveal itself until after this period.
Factors Affecting Curing Time:
- Temperature: Ideal conditions are between 50-85°F (10-30°C). Colder temperatures slow down carbonation, while excessively hot temperatures can cause it to dry too fast.
- Humidity: Moderate moisture in the air is beneficial for curing. Very low humidity can accelerate drying, requiring more frequent misting.
- Airflow: Good air circulation promotes carbonation, but strong winds can cause rapid drying.
I often find that early morning applications, when temperatures are cooler and humidity is higher, work best. This allows the limewash to begin its drying process gently before the heat of the day. By understanding and respecting the drying and curing requirements, you ensure the longevity, durability, and exquisite finish of your limewashed brick.
Aftercare and Maintenance Tips for Lasting Limewash Beauty
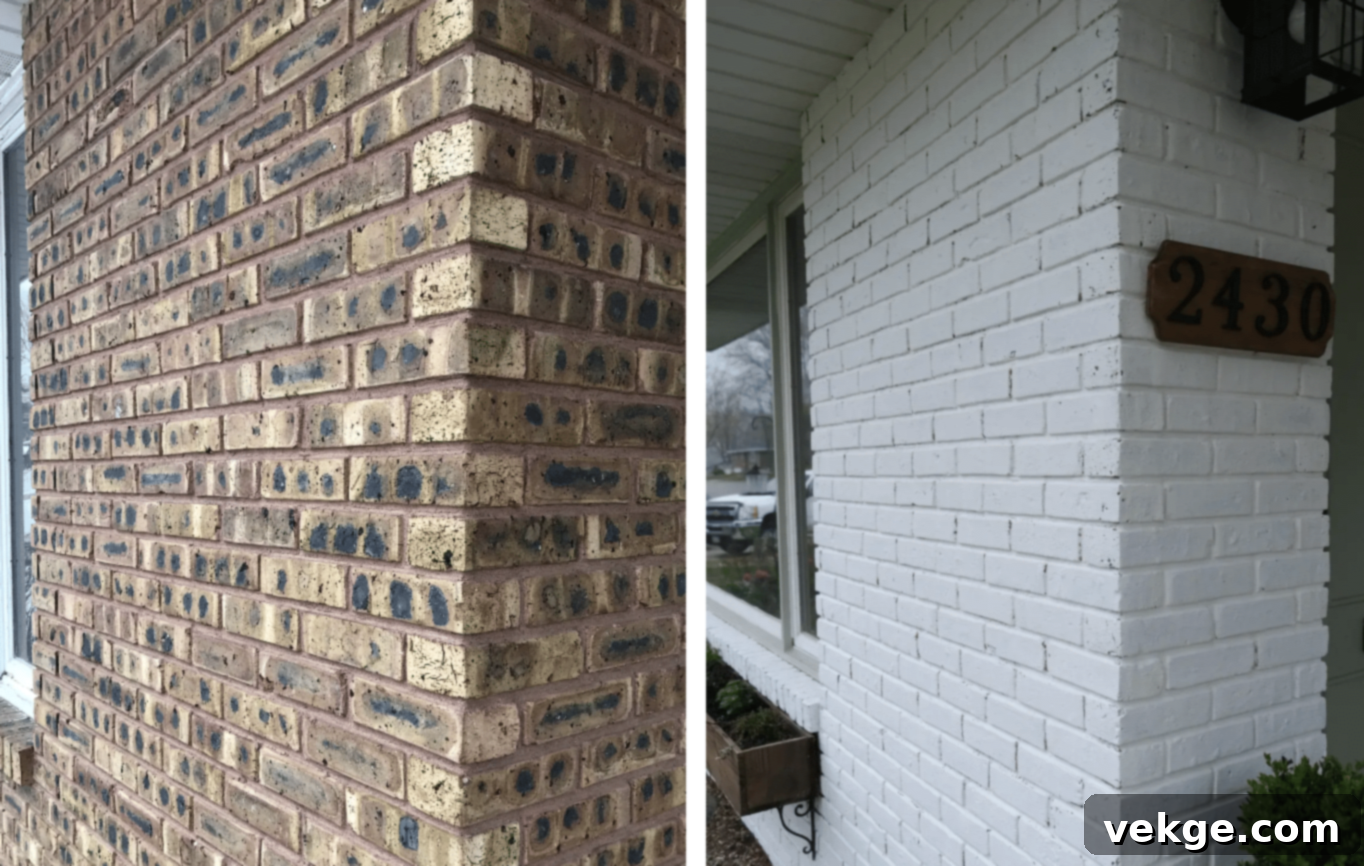
Once your limewashed brick has fully cured, caring for it is relatively simple, ensuring its beauty endures for many years. Unlike painted surfaces that can chip and peel, limewash ages gracefully, becoming more charming with time.
1. Longevity of Limewash: Embracing the Patina
With proper application and care, your limewash coating can last an impressive 5-7 years, and often much longer, before needing a refresh. The finish doesn’t degrade by peeling or chipping; instead, it slowly and naturally fades and weathers, developing a beautiful, unique character that enhances your home’s aesthetic over time. I’ve observed that north-facing walls, which receive less direct sunlight and weathering, often retain their finish longer, while south-facing walls might experience more fading and potentially need more frequent touch-ups due to increased sun exposure.
2. Cleaning Limewashed Surfaces: Gentle Care is Key
Limewashed surfaces are naturally resistant to mold and mildew, but like any exterior, they will accumulate dirt and environmental grime over time. I recommend cleaning your walls once a year with plain water and a soft-bristle brush or sponge.
- Method: Use a garden hose to gently wet the surface, then lightly scrub with a soft brush using gentle, circular motions. Work from bottom to top to avoid streaks, and then rinse thoroughly from top to bottom.
- Avoid Harsh Cleaners: Absolutely avoid harsh chemical cleaners, abrasive brushes, or high-pressure washing, as these can damage the delicate limewash finish. Limewash is alkaline, so using acidic cleaners can also cause adverse reactions.
- Allow to Dry: Always let the walls dry completely after cleaning.
3. Touch-up Techniques: Seamless Repairs
Over the years, minor scuffs or areas of wear might appear. For seamless touch-ups, it’s invaluable to keep a small amount of your original limewash mix recipe (or a pre-mixed product) on hand.
- Prepare the Area: Start with a clean, dry surface.
- Application: I gently dab the fresh limewash mixture onto the affected area with a small brush, feathering the edges carefully to blend it with the existing finish.
- Color Match: Remember that new limewash will always appear brighter and more opaque at first. It will take time (days to weeks) for the fresh touch-up to fully cure and blend in with the surrounding aged finish, matching the patina of the older limewash. Patience is key here.
4. Reapplying Limewash in the Future: Renewing the Beauty
When it’s time for a full refresh or a new coat after several years, the process is straightforward.
- Preparation: Clean the surface thoroughly, just as you did for the initial application. The old limewash does not need to be removed; in fact, it provides an excellent, porous base for new coats to bond to.
- Application: Apply thin coats of fresh limewash, following the same steps as the first time (dampening the surface, applying in sections, allowing for drying between coats).
- Benefits of Reapplication: Each new layer not only revitalizes the color but also strengthens and deepens the overall finish, contributing to the brick’s long-term protection and aesthetic appeal.
By following these simple aftercare and maintenance tips, your limewashed brick exterior will remain a stunning and healthy feature of your home for decades.
When to Hire a Professional for Your Limewash Project?
While limewashing is a rewarding DIY project, there are specific scenarios where calling in a professional is not just advisable but often essential. Recognizing these situations can save you time, money, and potential headaches, ensuring the job is done safely and correctly.
Consider hiring a professional if:
- Height and Access: Your home is taller than one story, or you have particularly tricky, high-up spots to reach. Working at heights requires specialized equipment (scaffolding, tall ladders) and a strong understanding of safety protocols, which professionals are equipped to handle.
- Major Brick Repairs: If your bricks need extensive repairs, such as widespread repointing, numerous brick replacements, or significant structural remediation, I strongly recommend expert help. These foundational repairs are critical for the long-term success of the limewash and should not be overlooked or improperly executed.
- Time Constraints and Physical Limitations: Limewashing a large exterior is a significant, labor-intensive undertaking. If you have limited time, physical restrictions, or simply don’t have the proper tools, a professional can complete the project efficiently and effectively.
- Unusual Brick Conditions: If your brick has previous non-breathable sealers, paint, or unusual stains that are difficult to remove, a professional will have the expertise and specialized products to prepare the surface properly.
- Desired Precision: While limewash embraces natural variation, if you have very specific aesthetic demands or a highly intricate architectural facade, a professional can ensure a more consistent and refined application.
A skilled and experienced contractor brings invaluable expertise to your limewash project, offering:
- Proper Surface Testing: They can accurately assess brick porosity, identify potential issues like efflorescence, and recommend the best prep methods.
- Material Mixing Ratios: Professionals have experience achieving the perfect limewash consistency for different brick types and desired finishes.
- Safe Ladder and Scaffolding Work: They possess the training and equipment for working safely at any height.
- Even and Consistent Application: Their experience ensures uniform coverage and a professional finish, minimizing streaks or uneven patches.
- Weather Timing Expertise: They know how to schedule the project around optimal weather conditions for the best curing and longevity.
- Insurance and Warranty: Professional services typically come with insurance and a warranty, providing peace of mind.
Ultimately, investing in a professional ensures that your home receives the best possible care, resulting in a beautiful, durable limewashed exterior that you can enjoy for years without the stress of DIY challenges.
Wrapping It Up: Embrace the Timeless Beauty of Limewashed Brick
Giving your brick home a limewash finish is so much more than a simple exterior update – it’s a journey into enhancing its inherent character while providing superior, breathable protection for your walls. Throughout this comprehensive guide, I’ve shared the essential steps and insights, from meticulous preparation to expert application and long-term maintenance, all designed to help you achieve that coveted, perfectly aged look that only improves with time.
Remember, the true success of your limewashing project lies in two key pillars: proper preparation and abundant patience. Take the time to thoroughly test your surface for absorption, gather all the right tools and materials, and crucially, wait for the ideal weather conditions. These initial efforts are not mere formalities; they are the foundation upon which your lasting, beautiful finish will stand.
Your dedication and effort will undoubtedly pay off, rewarding you with a stunning, long-lasting finish that not only elevates your home’s curb appeal but also ensures the continued health and integrity of your brickwork. The unique patina and natural texture that limewash imparts will make your home truly stand out, radiating a timeless elegance.
Ready to transform your exterior? Begin today by selecting a small, inconspicuous test area. Observe closely how the limewash behaves on your specific bricks – this invaluable insight will guide the rest of your project. If, at any point, you feel unsure about any step or the scale of the task seems too daunting, do not hesitate to call a seasoned professional. Their expertise can be the difference between a good result and a truly exceptional one.
Your home is a significant investment and deserves the best care possible. Embrace the natural beauty and protective power of limewash, and watch your brick exterior come alive with a fresh, enduring charm.
