Mastering the Art of Drying Hydrangeas: A Comprehensive Guide to Preserving Your Beautiful Blooms
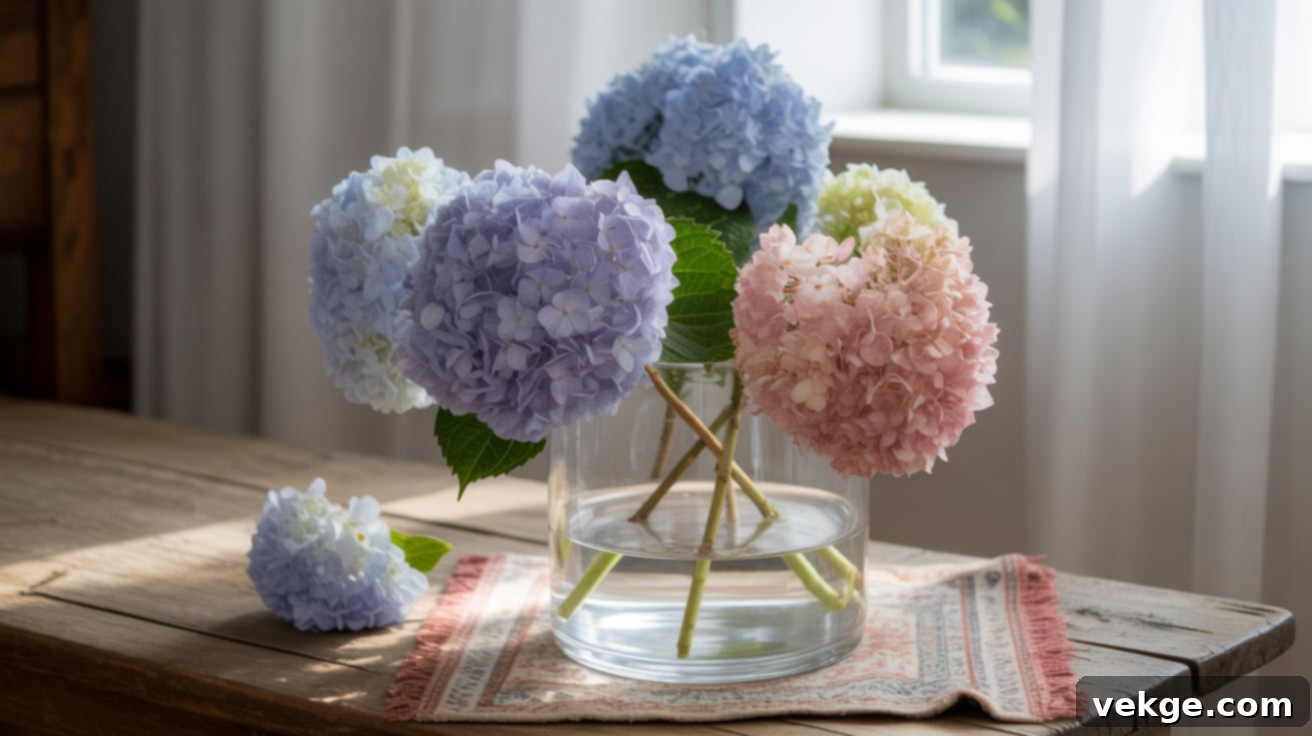
Hydrangeas, with their magnificent, cloud-like blooms and spectrum of gentle to vibrant colors, are truly a spectacle in any garden. It’s almost impossible to walk past them without being captivated by their charm. If you’ve ever brought a fresh bouquet indoors, you’ve likely wished that their fleeting beauty could last beyond a few days. The good news is, it can! Preserving hydrangeas is not only possible but also surprisingly simple, allowing you to enjoy their timeless elegance long after their season has ended.
This detailed guide will walk you through everything you need to know about successfully drying hydrangeas. Forget about needing expensive tools or extensive experience; with a little care and some straightforward techniques, you can transform your fresh blooms into stunning, long-lasting decor. We’ll cover the essential steps, from selecting the perfect flowers to employing various preservation methods, and even offer creative ideas for showcasing your preserved treasures in your home.
Inside this comprehensive guide, you will learn:
- The Optimal Time to Harvest: Discover precisely when to cut your hydrangeas for the best drying results, ensuring maximum beauty and longevity.
- Diverse Drying Techniques: Explore five effective and easy methods, including the popular vase drying, efficient air drying, color-preserving silica gel, quick microwave drying, and delicate pressing.
- Color Retention Secrets: Practical tips and tricks to help maintain the beautiful hues and structural integrity of your dried blooms.
- Creative Styling Ideas: Smart and inspiring ways to incorporate dried hydrangeas into your home decor, adding a touch of natural elegance to any space.
- Troubleshooting Common Issues: Solutions to ensure your drying process is a success and your preserved hydrangeas look their best.
Drying hydrangeas is an immensely rewarding project that extends the life of your garden’s beauty and brings a piece of nature indoors all year long. Let’s embark on this journey and start preserving your favorite hydrangea blooms today!
Essential Steps and Proven Methods for Drying Hydrangeas
When to Harvest Hydrangeas for Optimal Drying Results
Timing is absolutely crucial when it comes to successfully drying hydrangeas. Cutting your flowers at the right stage ensures they retain their structure and color, making the preservation process much more effective and yielding the most beautiful results. The best window for harvesting hydrangeas specifically for drying is typically late summer through early fall. This period allows the blooms to mature fully on the plant, developing the ideal texture and composition for long-term preservation.
How do you know if a hydrangea bloom is truly ready for drying? Look for these key indicators: the petals should feel distinctly papery or somewhat stiff and leathery to the touch, rather than soft, spongy, or watery like a freshly opened flower. You might also notice that the vibrant original color of the bloom has begun to subtly mute, deepen, or develop a slight antique hue while still on the plant. This change indicates that the flower is naturally starting its drying process and has lost much of its internal moisture. If you cut hydrangeas too early, when they are still full of water and very soft, they are far more likely to wilt, shrivel, turn brown, or even fall apart during drying, leading to disappointing outcomes.
Always aim to cut your hydrangeas in the morning, after any dew has evaporated but before the intense heat of midday. This is when the stems are most hydrated, which helps them transition into the drying process more smoothly. Use clean, sharp bypass pruners or scissors to make a clean cut at an angle. This prevents crushing the stems, which can impede initial water absorption (even for drying methods that use water) and ensures the flower’s structural integrity, allowing it to hold its shape better during preservation.
1. The Effortless Vase Drying Method
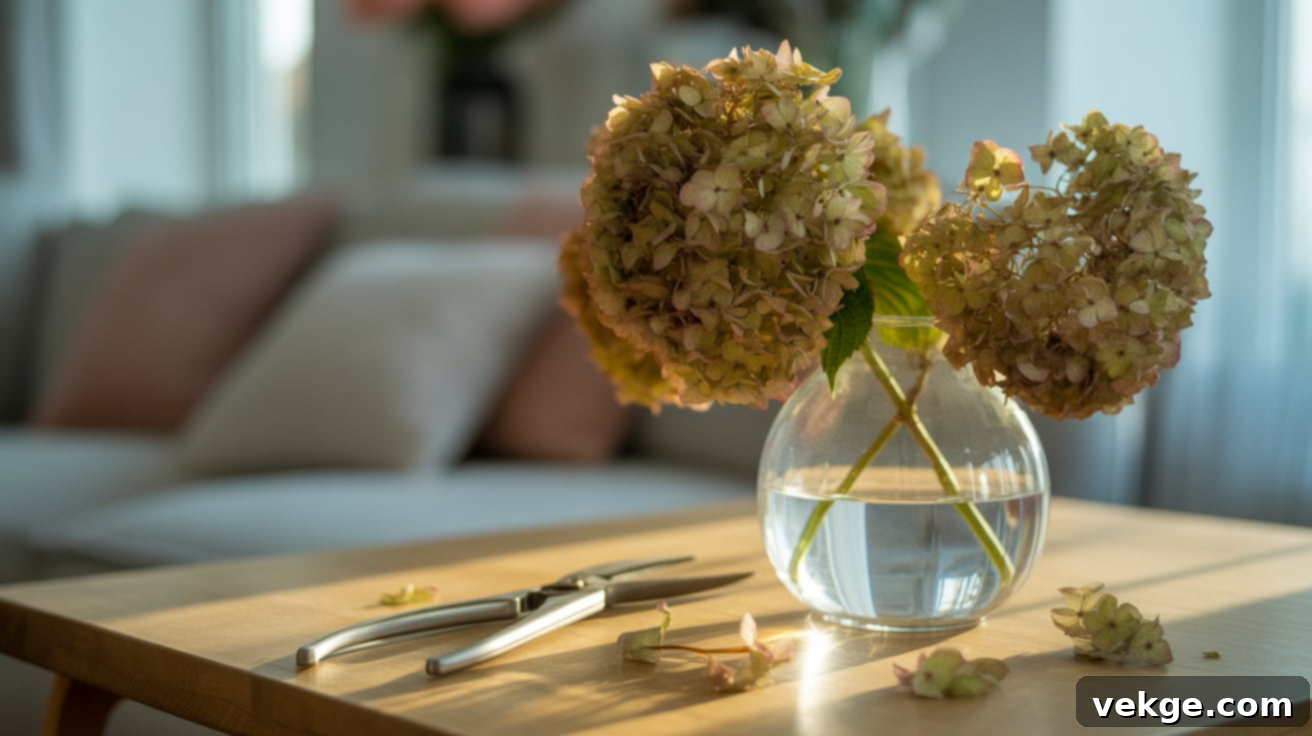
The vase drying method is perhaps the easiest and most hands-off way to preserve your hydrangeas. It allows the flowers to dry naturally and slowly, resulting in beautifully muted, vintage-style blooms that retain much of their original shape. This method is perfect for those who appreciate a gentle, natural fade and a somewhat rustic or classic aesthetic in their dried floral arrangements.
What You’ll Need:
- Clean, sharp scissors or pruners for precise cuts.
- A sturdy vase or jar, ideally with a wide mouth to prevent overcrowding.
- A small amount of fresh water, typically just a few inches.
Step-by-Step Guide:
- Harvest Your Blooms: Cut fresh, mature hydrangea blooms early in the day, ensuring they meet the papery-feel criteria mentioned above for optimal drying.
- Prepare the Stems: Immediately after cutting, trim the stems at a sharp angle (about 45 degrees) to maximize the surface area for water absorption. Carefully remove all leaves from the stems, especially any that would fall below the waterline in the vase. Removing leaves helps reduce moisture loss from the petals and prevents bacterial growth in the water, which could lead to decay.
- Fill the Vase: Pour just a few inches of fresh water into your chosen vase. The goal here is not to fully hydrate the flowers, but to provide just enough moisture for a slow, gradual drying process rather than rapid dehydration.
- Arrange Loosely: Place the prepared hydrangea stems into the vase. It’s crucial to arrange them loosely so that air can circulate freely around each bloom. Overcrowding can trap moisture, which might lead to mold or uneven drying, compromising the final look.
- Choose the Right Location: Position the vase in a cool, dark, and shaded spot indoors. Avoid direct sunlight at all costs, as it can bleach the colors of your hydrangeas and cause them to dry too quickly, making them brittle and fragile. A room with good airflow is also beneficial for even drying.
- Allow Natural Evaporation: Let the water in the vase evaporate naturally over the course of 1 to 2 weeks. As the water slowly disappears, the blooms will gradually dry out, transitioning from their fresh state to soft, muted tones and a wonderfully preserved texture.
Once the blooms feel completely crisp and dry to the touch, they are fully preserved and ready for display. You can then continue to showcase them in the same vase, or transfer them to another dry container for long-term enjoyment. This method consistently results in a charming, slightly faded appearance, perfect for a natural, understated decor style that adds a touch of rustic elegance to any room.
2. Silica Gel Drying for Vibrant, Lasting Color
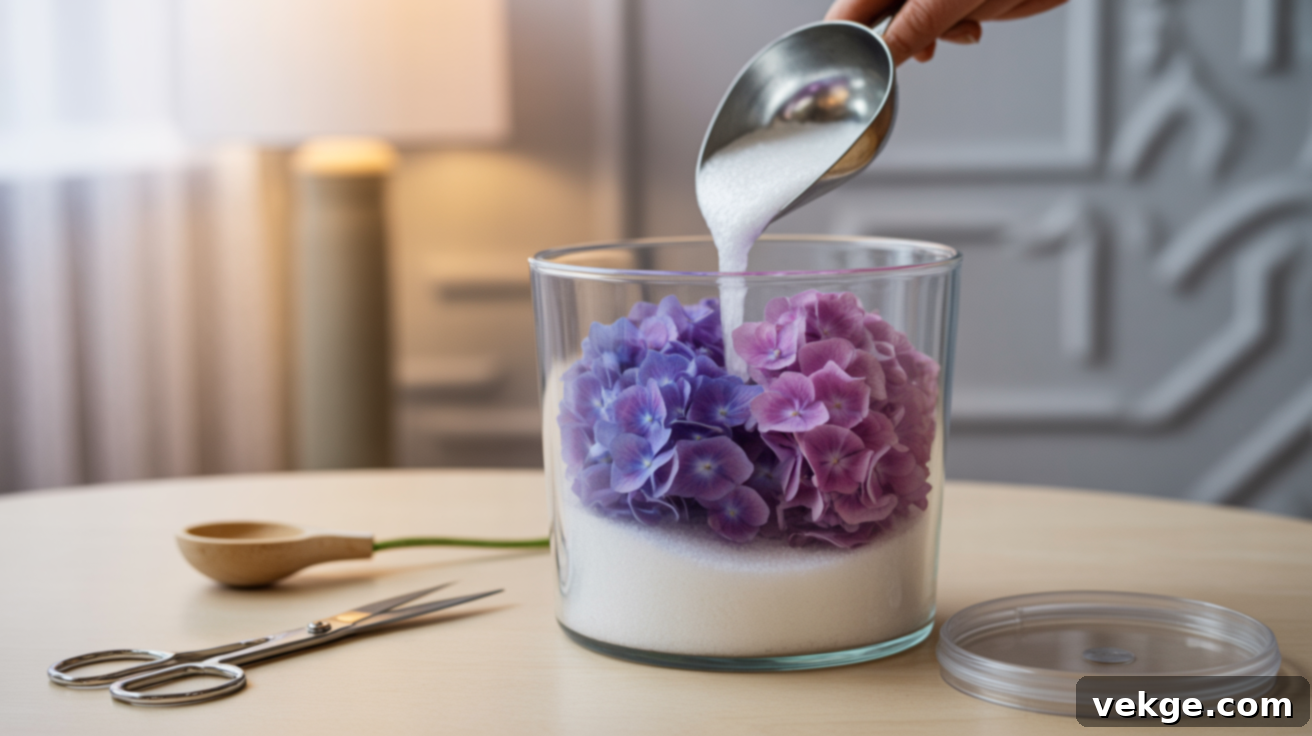
If your primary goal is to preserve the vibrant, original color and intricate, lifelike shape of your hydrangeas with remarkable accuracy, silica gel drying is the superior method. While it requires a bit more active participation and specific materials than vase or air drying, the results are truly stunning, yielding beautifully detailed and almost lifelike preserved flowers. Silica gel is a powerful desiccant, meaning it rapidly absorbs moisture, making it highly effective for quickly drawing water out of delicate petals and preserving their structure and hue.
What You’ll Need:
- A large, airtight container with a tight-fitting lid (plastic storage bins or even large Tupperware containers work exceptionally well).
- Silica gel crystals (readily available at most craft stores, floral supply shops, or online retailers; look for the fine granular type).
- Clean, sharp scissors or pruners for preparing your blooms.
- A small, soft paintbrush (optional, but very useful for gently removing residual gel).
Step-by-Step Guide:
- Prepare the Blooms: Select fresh hydrangea blooms that are at their peak and show no signs of wilting or damage. Trim the stems short, leaving about 1 to 2 inches, and meticulously remove all leaves. Shorter stems make it easier to submerge the entire bloom in the gel.
- Lay the Base Layer: Pour a layer of silica gel, approximately 1 to 2 inches deep, into the bottom of your airtight container. Ensure this layer is even and covers the entire base.
- Position the Flowers: Carefully place your prepared hydrangea blooms upright on the bed of silica gel. Depending on the size of your container and blooms, you can also lay them gently on their side if that better suits their shape or allows for more flowers. Ensure there is adequate space between each bloom, as they should not touch each other during the drying process.
- Gently Cover with Gel: Slowly and meticulously pour more silica gel over and around each bloom. The key is to ensure that every petal, crevice, and part of the flower is completely covered by the gel. You can gently tap or jiggle the container or use a small spoon to help the crystals settle around the petals without crushing them. The blooms should be entirely submerged.
- Seal and Store: Once the flowers are completely encased in silica gel, seal the container tightly with its lid. Store the sealed container in a cool, dry place away from direct sunlight for approximately 5 to 7 days. Larger or denser hydrangea blooms might require a few extra days to dry completely.
- Reveal and Clean: After the drying period, carefully open the container. Gently pour out the silica gel, or use a small spoon to carefully excavate the dried flowers. Handle the blooms with extreme care, as they will be very delicate at this stage. Use a soft brush (like a makeup brush) or gently shake to remove any remaining silica gel crystals.
These silica gel-dried hydrangeas will retain much of their original, vivid color and intricate shape, offering a remarkably preserved, almost fresh appearance. To extend their lifespan and protect them from humidity, consider spraying them with a clear floral sealant or even an unscented hairspray. Always display them in a dry environment and keep them away from direct sunlight and high humidity to prevent fading or re-absorption of moisture, ensuring their beauty lasts for years.
3. The Traditional Air Drying Method for Rustic Charm
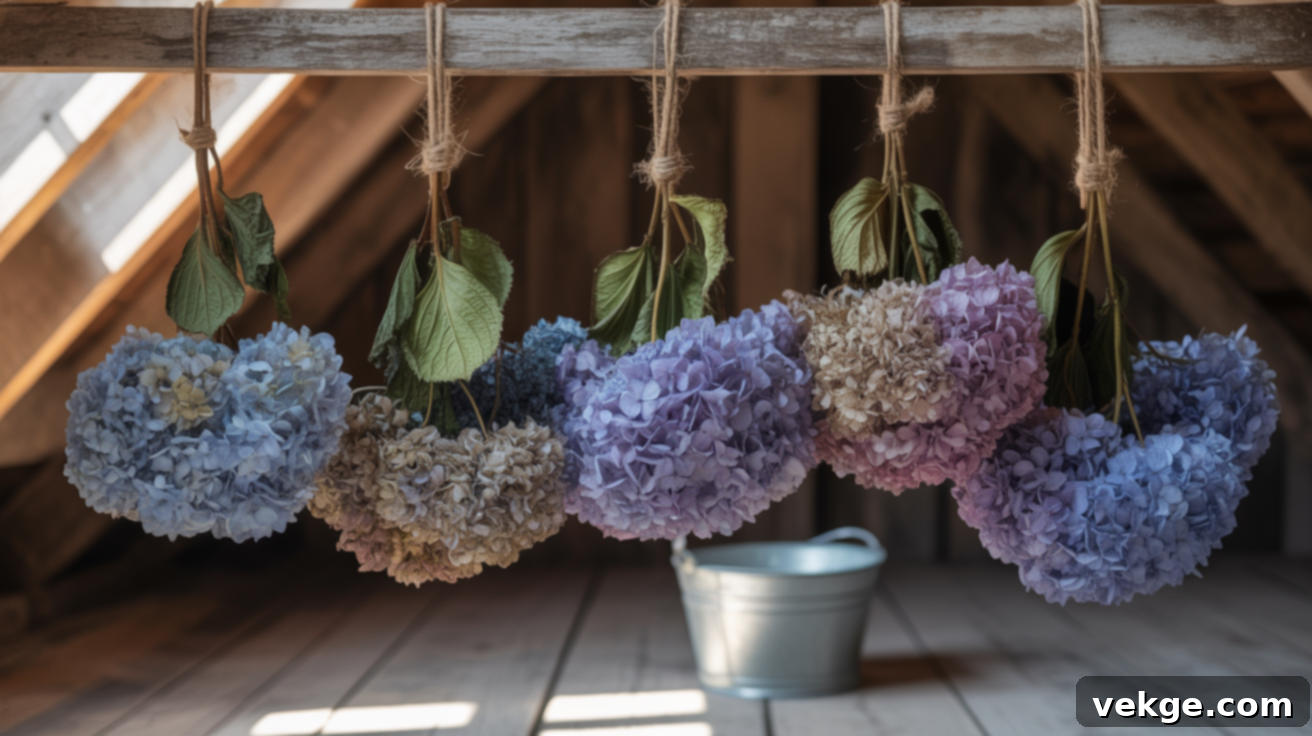
Air drying is one of the oldest and most traditional methods for preserving flowers, and it’s particularly well-suited for hydrangeas. This straightforward and eco-friendly technique yields blooms with a delightful, papery texture and a naturally faded, rustic appeal. It’s an excellent choice if you’re aiming for a classic, timeless, or farmhouse-inspired look in your decor, celebrating the natural aging process of the flowers.
What You’ll Need:
- Twine, natural string, or rubber bands for securing stems.
- Clean, sharp scissors or pruners for preparing your flowers.
- A dark, dry space with excellent airflow (e.g., an attic, a rarely-used closet, a well-ventilated pantry, or a garage with good circulation).
- Clothes hangers, a clothesline, or a dedicated drying rack for hanging (optional, but helpful).
Step-by-Step Guide:
- Prepare Your Blooms: Cut hydrangeas at their optimal drying stage, as described in the “When to Harvest” section. Immediately remove all leaves from the stems, as leaves tend to shrivel, curl, and detract from the neat, dried aesthetic. The focus should be solely on the beautiful bloom.
- Create Bunches: Gather 3 to 5 individual hydrangea stems into a small bunch. Tying them in smaller, manageable bundles ensures better air circulation around each bloom, which is absolutely crucial for even and thorough drying. Securely tie the stems together near their ends using twine, string, or a rubber band. Be careful not to tie them too tightly, as this can compress the stems and hinder the drying process, potentially trapping moisture.
- Hang Upside Down: Hang the hydrangea bunches upside down from a clothes hanger, a clothesline, or a drying rack. It’s imperative to ensure that there is ample space (several inches) between each bunch to allow for proper air circulation on all sides. This prevents moisture from being trapped between blooms and significantly reduces the risk of mold or mildew formation.
- Choose the Ideal Location: Place the hanging bunches in a dark, dry, and very well-ventilated area. Darkness helps significantly to preserve the natural color of the blooms, preventing them from bleaching, becoming excessively faded, or turning an undesirable brown. Good airflow is essential to wick away moisture from the flowers efficiently and uniformly.
- Allow to Dry: Let the hydrangeas air dry for approximately 2 to 3 weeks. The exact drying time will vary depending on the humidity of your specific environment, the size of the blooms, and the density of your bunches. You’ll know they’re fully dry when the petals feel completely crisp, papery, and brittle to the touch, and the stems are rigid.
Once fully dried, air-dried hydrangeas offer a beautiful, natural texture and a slightly muted, antique-like color palette. To help maintain their faded charm and prevent further discoloration, keep them out of direct sunlight. These timeless blooms can last for many months, even years, adding an elegant, understated, and rustic touch to any space when handled gently.
4. Microwave Drying for Speed and Convenience
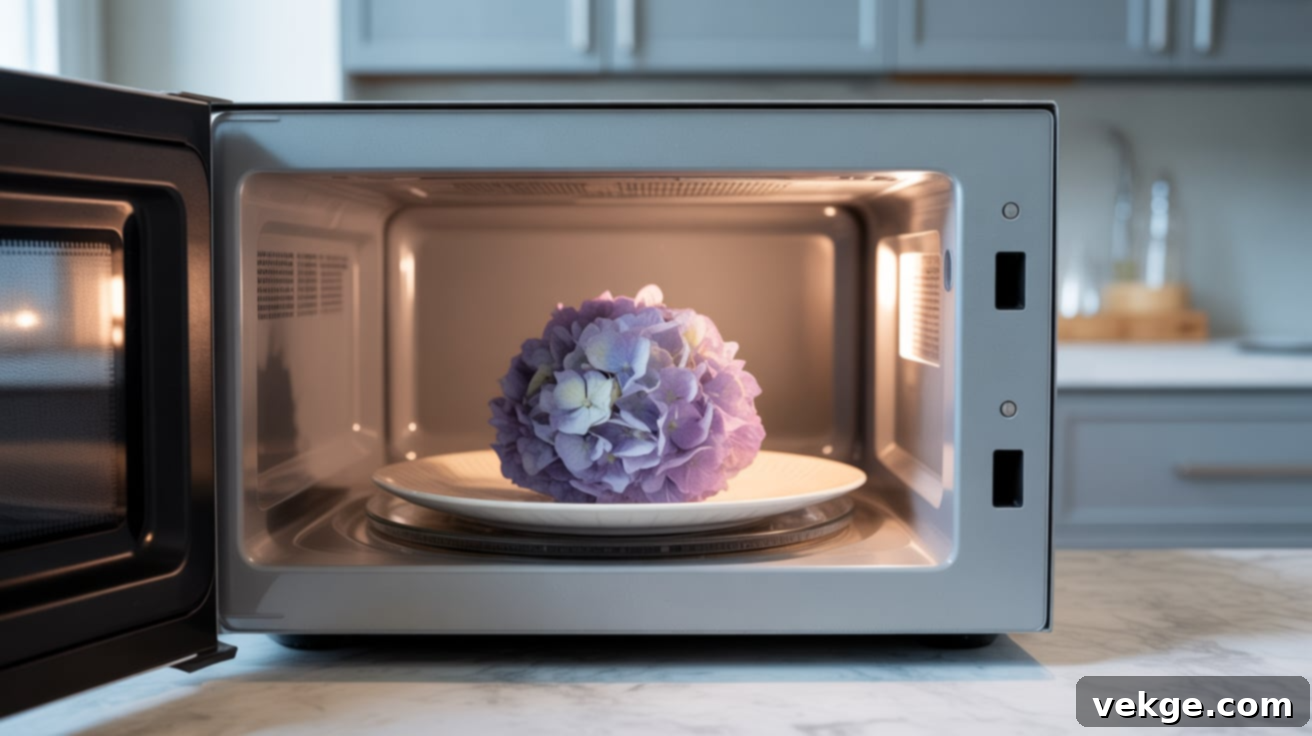
For those times when you need to preserve smaller hydrangea blooms quickly, the microwave drying method offers a rapid and efficient solution. This technique is particularly effective for retaining both color and shape, similar to silica gel drying, but in a fraction of the time. However, it does require close attention and careful monitoring to prevent overheating and damaging the delicate petals.
What You’ll Need:
- A microwave-safe container (e.g., a glass baking dish, ceramic bowl, or plastic container clearly labeled for microwave use).
- Silica gel crystals (the fine granular type is best for even coverage).
- A microwave oven.
- Clean, sharp scissors or pruners.
- A small, soft brush (optional, for cleaning gel).
Step-by-Step Guide:
- Prepare the Bloom: Select a small to medium-sized hydrangea bloom. This method works best with single, smaller blooms rather than large, dense clusters. Trim the stem very short, leaving just enough to handle (about 1 inch), and remove all leaves.
- Create a Silica Gel Bed: Add a layer of silica gel, approximately 1 inch deep, to the bottom of your microwave-safe container. Ensure it forms an even bed for the flower.
- Position and Cover: Carefully place your single hydrangea bloom on top of the silica gel bed, ensuring it sits upright or in the desired position. Gently and completely cover the entire bloom with more silica gel, making sure all petals are submerged and supported by the crystals.
- Microwave in Bursts: Place the uncovered container into the microwave. Heat on a low to medium power setting (e.g., 50% power or defrost setting is often recommended) for very short bursts, starting with 30 seconds to 1 minute.
- Check and Repeat: After each burst, carefully remove the container and let it cool for a minute or two. Gently check the bloom by slightly moving the gel. The bloom should start to feel dry and firm. If it’s still soft or moist, re-cover it with gel and repeat the microwave process for another short burst. Continue this process, being extremely cautious not to overheat, which can scorch, burn, or brown the delicate petals. The total microwave time can range from 1 to 5 minutes, depending on your microwave and the flower’s size.
- Cool and Clean: Once the bloom feels completely dry and firm to the touch, remove the container from the microwave. It’s crucial to allow the flower to cool completely within the silica gel for several hours, or even overnight, to fully set and prevent re-absorption of moisture. Then, carefully remove the flower and gently brush off any remaining silica gel with a soft brush.
This method is ideal when you’re short on time and want to preserve the vibrant color and shape of your hydrangeas quickly. Allow the bloom to rest for a few hours in open air after drying to ensure all moisture has dissipated before using or storing. For best longevity, store microwave-dried blooms in a cool, dry place, such as a sealed box or display cabinet away from direct sunlight and humidity, to keep them looking their absolute best for an extended period.
5. Pressing Hydrangeas for Delicate Flat Art
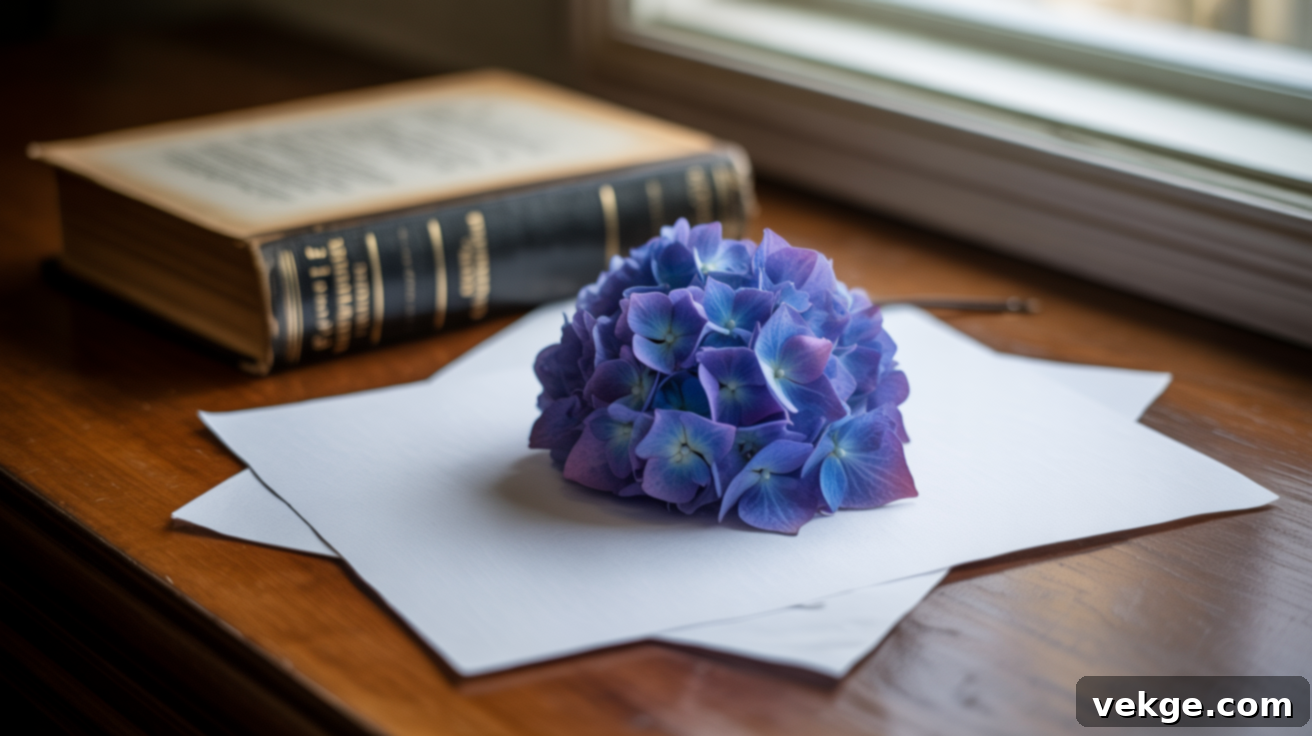
Pressing hydrangeas offers a unique and artistic way to preserve their beauty, transforming them into delicate, flat, paper-like elements perfect for various crafting and artistic projects. This method is simple, incredibly neat, and yields beautiful, intricate results for those who enjoy scrapbooking, card-making, journaling, or creating unique framed botanical art. It’s a wonderful way to capture the fine details of individual florets.
What You’ll Need:
- Fresh, individual hydrangea florets or very small, flat clusters (pressing full, thick blooms is generally difficult and not recommended).
- Sheets of absorbent plain paper (e.g., newspaper, blotting paper, coffee filters, or plain white printer paper – avoid glossy or heavily textured paper).
- A heavy book (like a dictionary or old textbook) or a dedicated flower press.
- Additional weight (more books, bricks, or a flat, heavy object) if using a book.
- Parchment paper or wax paper (optional, but highly recommended to prevent flowers from sticking to the absorbent paper).
Step-by-Step Guide:
- Prepare the Flowers: Select individual florets or very small, flat clusters from your hydrangea blooms that are relatively thin. Trim away any excess stem or thick, fleshy parts that would prevent them from lying flat. Gently flatten each floret or cluster as much as possible with your fingers without damaging the delicate petals.
- Arrange for Pressing: Lay a sheet of absorbent paper inside your heavy book or flower press. If desired, place a sheet of parchment paper or wax paper on top of the absorbent paper to create a barrier and prevent the flowers from sticking. Carefully arrange your prepared hydrangea florets on the paper, ensuring they do not overlap. Leave a little space between each one for optimal air circulation and even drying.
- Cover and Layer: Place another sheet of absorbent paper (and parchment paper, if used) directly over the hydrangeas. If you are pressing multiple layers of flowers, you can repeat this process, adding another section of the book or press, ensuring each layer is separated by absorbent paper.
- Apply Pressure: Carefully close the heavy book or tighten the screws firmly on your flower press. If using a book, place additional heavy objects (more books, bricks, or a stack of flat weights) on top to ensure consistent and firm pressure across the entire surface. This pressure helps to flatten the flowers and press out moisture.
- Wait Patiently: Leave the hydrangeas undisturbed for a period of 2 to 3 weeks. The exact time required will depend on the thickness of the florets, the humidity of your environment, and the amount of pressure applied. Resist the urge to check too often, especially in the first week, as opening the press can disrupt the drying process and introduce moisture. The flowers are fully pressed when they are completely dry, thin, and feel papery to the touch.
Once pressed, these beautiful, flattened hydrangea florets will be thin, dry, and surprisingly vibrant, retaining much of their original color and intricate detail. They are now ready to be used in a multitude of creative projects, such as decorating greeting cards, embellishing journal pages, creating unique framed botanical art, or enhancing scrapbooks. To ensure their longevity, store them carefully in an airtight container away from light and humidity until ready for use, as exposure can cause fading or damage.
Styling Ideas for Your Beautiful Dried Hydrangeas
Once your hydrangeas have been lovingly dried and preserved using one of the methods above, a whole new world of decorative possibilities opens up. Dried hydrangeas offer a timeless elegance and a touch of natural beauty that complements almost any interior style, from rustic farmhouse to modern minimalist. Their soft textures and muted tones (or vibrant hues, if using silica gel) make them incredibly versatile. Here are some inspiring ideas to showcase your preserved blooms around your home, adding warmth, character, and a touch of enduring nature to your living spaces:
- Elegant Table Displays: Arrange a cluster of dried hydrangea heads in a small ceramic bowl, a clear glass jar, a rustic wooden trough, or a wide-mouthed vase for a simple yet sophisticated centerpiece. This creates a soft, relaxed focal point on a dining table, coffee table, kitchen island, or side console. Mix different colors for added depth.
- Charming Wall Décor: Incorporate dried hydrangeas into various wall art projects. Tuck small blooms into hanging baskets, create framed botanical collages by mounting pressed or silica-dried florets, or attach them with hot glue to a reclaimed wood board for a natural, textural accent piece. They can also be a beautiful, organic addition to gallery walls, adding a three-dimensional element.
- Rustic Wreaths: Design stunning, custom wreaths by mixing dried hydrangea heads with other natural elements like eucalyptus branches, dried lavender, delicate twigs, pinecones, or preserved greenery. These handmade wreaths make a welcoming statement on your front door, above a mantelpiece, or in an entryway, celebrating seasonal beauty.
- Shelf and Bookshelf Fillers: Elevate your shelf styling by placing a few tall, dried hydrangea stems inside a narrow vase, an antique bottle, or a decorative pitcher. They add height, unique texture, and a touch of organic charm to otherwise empty shelf spaces, beautifully complementing books, picture frames, and other decorative items.
- Thoughtful Gifts and Gift Wraps: Add a personal and elegant touch to wrapped presents. Tie one or two small dried hydrangea blooms onto a gift box using natural twine, jute string, a delicate satin or silk ribbon, or raffia. This thoughtful, handcrafted embellishment makes any gift feel extra special and memorable.
- Seasonal Window Box Accents: Extend the life and beauty of your outdoor decor by tucking robust dried hydrangea stems among evergreens, pinecones, or other dried plants in your window boxes during the cooler months. They provide lovely shape, texture, and a hint of faded color, bringing winter interest and charm to your home’s exterior.
- Potpourri and Sachets: Gently break apart smaller dried florets and mix them with other fragrant dried botanicals (like rose petals, orange peel, cinnamon sticks) and a few drops of essential oils (e.g., lavender, rose, citrus) to create custom potpourri for decorative bowls or small sachets for drawers and closets.
- Candle Rings: Arrange small, sturdy dried hydrangea clusters around the base of pillar candles or in hurricane lamps for a beautiful, natural candle ring that adds a cozy and elegant ambiance to any setting.
- Table Runners & Garlands: For special occasions or everyday decor, lay a series of dried hydrangea heads (either individually or strung together lightly) along the center of a dining table as a unique, natural table runner or garland.
Troubleshooting Common Problems When Drying Hydrangeas
While drying hydrangeas is generally a straightforward and rewarding process, you might encounter a few common issues along the way. Understanding why these problems occur and, more importantly, how to prevent or remedy them, can significantly improve your success rate and the overall quality and longevity of your preserved blooms. Here’s a guide to common challenges and their solutions:
- Problem: Hydrangeas Turn Brown or Discolored
- Cause: This is one of the most common complaints and is often the result of cutting the hydrangeas too early, when they still contain too much moisture and haven’t fully matured or begun their natural drying process. Drying them in direct, strong sunlight can also bleach their color or cause them to brown prematurely, losing their desired hue.
- Solution: The key here is timing. Always wait until the blooms feel distinctly papery or leathery to the touch and their natural color has begun to subtly fade or deepen on the plant itself. This indicates they are physiologically ready for drying. For all drying methods, especially vase drying and air drying, ensure you place the hydrangeas in a cool, dark, and shaded area. Avoid direct sunlight at all costs to help maintain a soft, even, and attractive color.
- Problem: Drooping or Curled Petals
- Cause: Drooping or severely curled petals usually indicate insufficient structural support during the drying process or excessive moisture loss too quickly from certain parts of the flower. Overcrowding in a vase or during air drying can also lead to misshapen blooms, as petals don’t have enough space to hold their form.
- Solution: When vase drying, arrange stems loosely to allow air to circulate and for the blooms to support each other gently. For air drying, ensure each bunch is tied securely but not too tightly, and leave ample space between bunches when hanging. You can also gently reshape individual petals with your fingers during the early stages of drying if you notice them beginning to curl. For silica gel drying, ensure the gel fully supports and completely encases every petal, holding it in place as it dries.
- Problem: Petals Feel Excessively Brittle or Fall Apart Easily
- Cause: If your dried hydrangeas feel overly brittle and fragile, it usually means they dried too quickly or became excessively dehydrated, losing all flexibility. This can happen in very hot, arid environments or if exposed to excessive heat (as can sometimes occur with microwave drying if not monitored carefully).
- Solution: After drying, if the blooms are excessively brittle, you can try to reintroduce a tiny bit of moisture to make them more pliable for handling. Mist them very lightly and sparingly with water from a fine spray bottle, or place them in a humid bathroom for a short period (15-30 minutes, or during a shower) to allow them to absorb a minimal amount of atmospheric moisture. Be very careful not to make them too damp, as this can encourage mold. Store them in an area with stable, moderate humidity, and avoid very dry environments if possible.
- Problem: Mold or Mildew Appears on Blooms
- Cause: Mold or mildew is a clear and unfortunate sign that the flowers were dried in an environment that was too humid, lacked sufficient airflow, or were cut when they had too much internal moisture that couldn’t escape fast enough. Overcrowding is a major contributor to this problem, as it traps moisture.
- Solution: Prevention is absolutely key here. Always ensure your drying space is well-ventilated, cool, and dry. Separate individual blooms or bunches to allow maximum air circulation around each flower. If using vase drying, ensure there’s only a small, controlled amount of water. For air drying, a dark, dry attic, unused closet, or a room with a dehumidifier is much better than a damp basement. If mold appears on any blooms, it’s best to discard the affected flowers immediately to prevent the spores from spreading to other drying or dried blooms.
Conclusion: Embrace the Enduring Beauty of Dried Hydrangeas
Drying hydrangeas is more than just a craft; it’s a delightful way to extend the joy and exquisite beauty of your garden, allowing you to hold onto a piece of summer’s magic long after the fresh blooms have faded. By following the simple yet effective techniques outlined in this comprehensive guide, you can confidently transform ephemeral flowers into lasting works of art for your home, creating decorative elements that endure through seasons.
You now have a thorough understanding of when to harvest your hydrangeas at their prime, how to prepare each stem with care, and five distinct methods to preserve them—each offering a unique aesthetic outcome. Whether you prefer the natural fade and rustic charm of vase drying, the vibrant color retention of silica gel, the traditional appeal of air drying, the speed and convenience of microwave preservation, or the delicate artistry of pressing for flat botanical art, there’s a method perfectly suited for your needs, preferences, and desired final look.
Experimentation is truly part of the fun and learning process! Start with the method that appeals most to you, and don’t hesitate to try others. Each process offers a different sensory experience and yields a uniquely beautiful result, allowing you to discover your favorite technique. The act of preserving these magnificent flowers can be just as enjoyable and fulfilling as admiring the final, enduring display.
Embrace the enduring elegance of dried hydrangeas and infuse your living spaces with their timeless charm and natural beauty. These preserved blooms are not just decorations; they are memories and pieces of your garden, thoughtfully carried indoors. For more inspiring and simple ideas to bring nature into your home or enhance your home decor, we invite you to explore our other guides and articles. Discover endless possibilities to cultivate beauty and comfort in your surroundings!
