DIY Guide: How to Hang Your Coastal Chandelier Safely and Stylefully
Congratulations! You’ve finally brought home one of those exquisite coastal chandeliers you’ve always envisioned for your living space. This magnificent piece of art is more than just a light fixture; it’s a statement, a centerpiece that promises to infuse your home with serene, beach-inspired elegance. The excitement of transforming your space with this new acquisition must be palpable. But now comes the crucial question: how do you hang this beautiful luminary so it truly becomes the focal point it’s meant to be?
Whether you’re an enthusiastic DIYer eager to tackle this project yourself, or simply can’t wait for a professional to arrive, we’re here to guide you through every step of this rewarding journey. Installing a chandelier might seem daunting, but with the right knowledge and tools, it’s a perfectly achievable home improvement task. Let’s embark on this adventure together and illuminate your home with your stunning new coastal chandelier!
1. Choose the Perfect Location for Your Chandelier
The first and most critical step in chandelier installation is selecting its ideal location. This isn’t just about finding an empty spot; it’s about identifying where your chandelier will have the most impact, both functionally and aesthetically. Consider rooms like your living room, dining area, grand entryway, or even a spacious bedroom. These areas often benefit significantly from the dramatic flair and focused illumination a chandelier provides. Once you’ve settled on the room, pinpoint the exact spot. Typically, chandeliers are hung in the center of a room or directly above a key furniture piece like a dining table or coffee table to maximize their visual statement and provide balanced lighting.
When choosing, think about the room’s dimensions. For dining rooms, ensure the chandelier is centered over the table and hung high enough so it doesn’t obstruct views or head space, usually about 30-36 inches above the tabletop. In entryways or open spaces, consider ceiling height; a good rule of thumb is to allow at least 7 feet of clearance from the bottom of the chandelier to the floor, ensuring it’s out of the way of foot traffic. Mark the chosen location precisely with a pencil. If there isn’t an existing electrical junction box, you might need to consult an electrician to install one, as it’s crucial for securely supporting the chandelier’s weight.

2. Prioritize Safety: Turn Off the Power
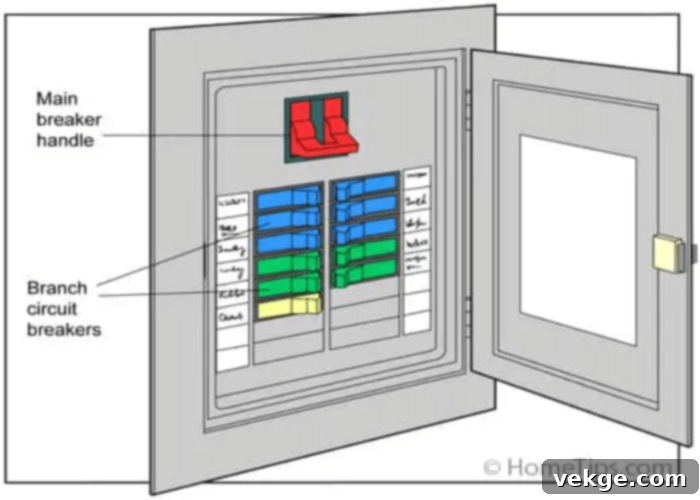
Before you even think about touching wires or tools, your safety is paramount. After meticulously choosing your chandelier’s spot, the very next and absolutely non-negotiable step is to turn off the power to that specific circuit or section of your home. Working with live electricity is extremely dangerous and can lead to severe injury or even fatality. Do not rely solely on a wall switch; always go to your home’s main electrical panel (breaker box).
Locate the circuit breaker that controls the lighting fixture where your chandelier will hang. If your breakers aren’t clearly labeled, you might need to flip them one by one until the existing light in that area goes out. Once you’ve identified and switched off the correct breaker, it’s wise to place a note on the panel indicating that work is in progress, preventing anyone from accidentally turning the power back on. For an extra layer of safety, use a non-contact voltage tester to confirm that the power is indeed off at the fixture’s wires before proceeding. This simple yet critical step ensures a safe working environment as you proceed with the installation.
3. Gather Your Essential Tools and Materials
A successful chandelier installation hinges on having the right tools and materials readily available. Before you begin, take a moment to collect everything you’ll need. This preparation not only streamlines the process but also ensures you can safely and effectively handle each step. Here’s a comprehensive list of items you’ll likely require:
- Sturdy Ladder: Crucial for reaching the ceiling safely. Ensure it’s stable and tall enough for you to work comfortably.
- Non-Contact Voltage Tester: Absolutely essential for verifying that the power is off before touching any wires.
- Wire Strippers: For cleanly removing insulation from electrical wires, ensuring solid connections.
- Wire Connectors (Wire Nuts): To securely join electrical wires together.
- Pliers: Useful for gripping, bending, or cutting wires. Needle-nose pliers can be particularly helpful for tight spaces.
- Screwdrivers (Phillips and Flathead): For removing existing fixtures and securing mounting brackets and canopy screws.
- Measuring Tape and Pencil: For accurate placement and marking.
- Safety Glasses: To protect your eyes from dust or debris.
- Work Gloves: For better grip and protection.
- Drill (optional, with appropriate bits): If you need to create pilot holes or reinforce the junction box.
- Stud Finder: If your junction box isn’t directly attached to a ceiling joist, a stud finder can help locate solid wood for additional support.
- Chandelier Manufacturer’s Instructions: Always refer to these, as specific wiring or mounting details can vary.
Having these essential items on hand will equip you perfectly, allowing you to navigate the intricacies of installation with confidence and ease. This thoughtful preparation is key to a seamless and successful project.

4. Prepare and Secure the Mounting Bracket
With power off and tools ready, your next step is to prepare the mounting bracket. This crucial component acts as the bridge between your ceiling’s electrical junction box and your new chandelier, providing the necessary support and stability. Start by carefully removing any existing light fixture. Once it’s down, you’ll expose the ceiling junction box. Inspect it to ensure it’s securely attached to a ceiling joist and rated to hold the weight of your new chandelier. Many older or plastic junction boxes might not be sufficient for heavier fixtures, potentially requiring an upgrade to a metal, fan-rated box.
Next, unpack your chandelier’s mounting hardware. It typically includes a circular or rectangular crossbar and a set of screws. Attach this crossbar securely to the ceiling junction box using the provided screws. Ensure it is level and firmly fastened. This step is foundational for a safe and visually appealing installation. Do not overtighten, but make sure there is absolutely no wobble. Double-check that all components are aligned according to the manufacturer’s instructions. This attention to detail now will prevent future issues and guarantee that your chandelier hangs perfectly balanced and secure for years to come.

5. Master the Electrical Connection: Connect Wiring
Connecting the electrical wires is arguably the most delicate and critical step of the installation process. Even though the power is off, handle all wires with care. Most standard household wiring consists of three primary wires: the black (or sometimes red) “hot” wire, the white “neutral” wire, and the bare copper (or green insulated) “ground” wire. Your chandelier will have corresponding wires. The general rule of thumb is to connect wires with matching colors: black to black, white to white, and ground to ground.
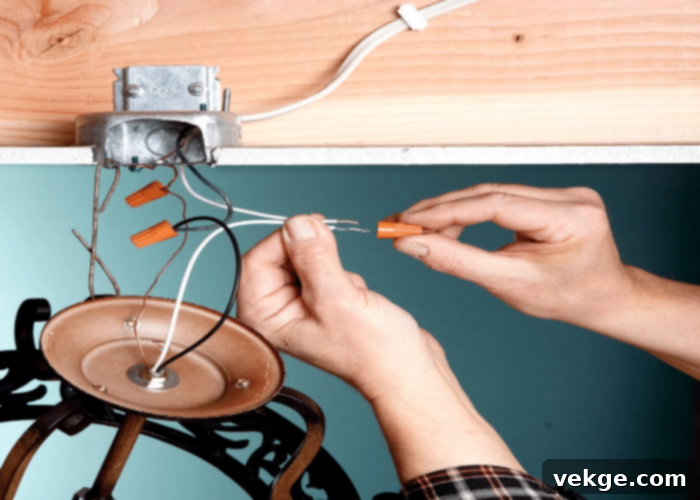
However, it is absolutely essential to refer to your chandelier’s manufacturer’s instructions, as there can be variations, especially with international products or specialized fixtures. Before connecting, use your wire strippers to expose about half an inch of bare copper wire on each lead if they aren’t already stripped. Twist the ends of corresponding wires together (e.g., house black with chandelier black) firmly using pliers, then cap them with wire connectors (wire nuts). Ensure the connections are tight by gently tugging on each wire. The ground wire from the chandelier should be connected to the ground wire from the house, and also typically secured to a green ground screw on the mounting bracket. This ensures proper grounding, a vital safety feature. A reliable electrical bond is key to your chandelier functioning correctly and safely.
6. Lift and Attach the Chandelier to the Mounting Bracket
With the electrical connections made, it’s time for the exciting part: physically attaching your beautiful chandelier. This step can be challenging, especially if your chandelier is large or heavy. Do not hesitate to ask for assistance from a friend or family member. Having an extra set of hands will make the lifting and securing process much safer and easier, preventing potential damage to the fixture or injury to yourself.
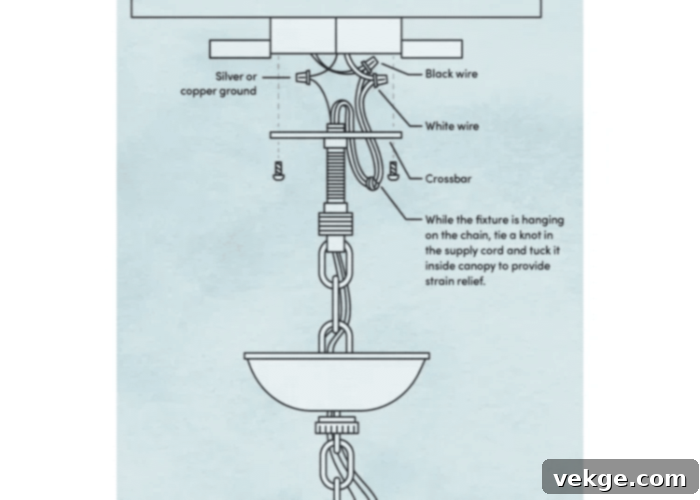
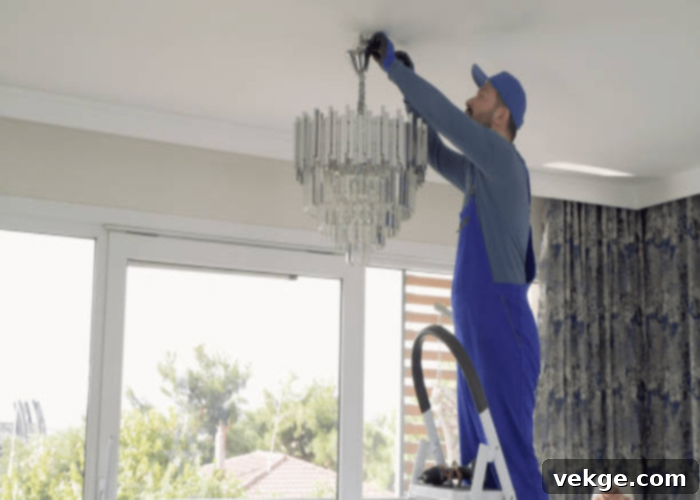
Carefully lift the chandelier towards the ceiling, aligning its canopy or main body with the mounting bracket you installed earlier. Depending on your chandelier’s design, it will either attach via a central threaded nipple, screws that go into the mounting strap, or a decorative chain hook. For chain-hung fixtures, adjust the chain length to achieve your desired hanging height before securing it. For downrod or flush-mount chandeliers, align the holes and secure them with the provided screws. Ensure all fastenings are snug but do not overtighten, as this could strip screws or damage the fixture. Once properly fastened, give the chandelier a gentle tug to confirm it is securely attached and stable. Seeing your vision begin to come to life at this stage is incredibly rewarding!
7. Neatly Secure Wires and Install the Canopy
Excellent work! Your chandelier is now securely hanging, but our task isn’t quite finished. The next step is to neatly tuck and secure the connected wires into the ceiling junction box. This is crucial for both safety and aesthetics. Gently push the wire-nutted connections and any excess wiring up into the junction box, ensuring that no bare copper is exposed outside of the wire connectors and that the wires are not pinched. The goal is a tidy arrangement that allows the canopy (the decorative cover that sits flush against the ceiling) to be installed without obstruction.
Once the wires are safely housed, align the chandelier’s canopy with the mounting bracket. Most canopies attach with decorative nuts or screws that thread onto the mounting posts or bracket. Carefully push the canopy flush against the ceiling, covering all the wiring and the junction box. Tighten the securing nuts or screws until the canopy is firmly in place, leaving no gaps. This not only conceals the electrical connections for a clean, finished look but also adds to the overall stability of the fixture. With each wire carefully secured and the canopy perfectly positioned, you’re one step closer to unveiling the full grandeur of your coastal chandelier.
8. Install the Bulbs and Decorative Elements
Now comes the moment to infuse your chandelier with its intended brilliance! It’s time to install the light bulbs and any remaining decorative elements, bringing your fixture to full life. Carefully screw in the recommended type and wattage of light bulbs into each socket. Refer to your chandelier’s manual for specific bulb requirements, as using incorrect wattage can pose a fire hazard or damage the fixture. Consider the desired ambiance: warm white bulbs (2700K-3000K) for a cozy glow or cooler white bulbs (3500K-5000K) for a brighter, more modern feel. Energy-efficient LED bulbs are often an excellent choice for longevity and reduced electricity consumption.
After the bulbs are in place, attach any final decorative components that came with your coastal chandelier. This might include crystals, glass shades, finials, or other embellishments that give the fixture its unique character. Handle these pieces with care, ensuring they are securely fastened according to the manufacturer’s instructions. As each bulb and decorative element finds its place, you’ll witness a dramatic transformation, preparing your chandelier for its grand debut and adding the perfect finishing touches to your space. Your room will soon be bathed in a warm, inviting glow.

9. Restore Power, Test, and Adjust as Needed
The moment of truth has arrived! With all components securely in place and bulbs installed, it’s time to restore power and admire your handiwork. Return to your electrical panel and carefully flip the circuit breaker back to the “on” position. Head back to the room and switch on the light. The immediate illumination of your new coastal chandelier will undoubtedly be a breathtaking sight, casting a radiant glow across your space. Prepare to fall in love with your home all over again!
Once the light is on, take a moment to assess everything. Does the chandelier hang perfectly level? Is the height ideal for the room and its function? Are all bulbs working? If you notice any issues – perhaps the light isn’t turning on (double-check bulb tightness and wire connections), or it’s slightly crooked – now is the time to make adjustments. If needed, turn the power off again before making any physical adjustments to the fixture or checking connections. You can gently adjust the chain length if it’s a hanging fixture, or slightly loosen and realign the canopy if it’s not perfectly flush. Ensuring everything is just right will guarantee both maximum aesthetic impact and flawless functionality.
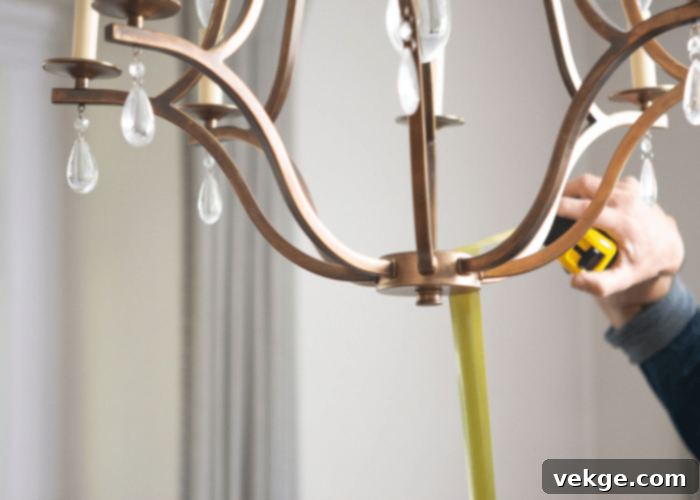
10. Finalize the Installation and Enjoy the View
Your chandelier is lit and looks spectacular, but a few final touches ensure its long-term elegance and functionality. Complete your installation by meticulously examining every component of the chandelier. Double-check that all decorative elements, such as crystals, shades, or unique coastal accents, are firmly attached and correctly positioned. Ensure any canopy screws or decorative caps are tightened down. Take a step back and view the chandelier from various angles in the room. Are there any loose wires peeking out? Is anything wobbling?
This final inspection ensures that every detail contributes to the chandelier’s overall beauty and structural integrity. By connecting each detail, you solidify the chandelier’s elegance and functionality. Once you are completely satisfied, your DIY installation is officially complete. You’ll find that this coastal-inspired centerpiece is even more captivating than you had imagined, transforming your space into a serene, inviting haven. It’s a testament to your hard work and attention to detail. Take a moment to truly appreciate the stunning new focal point you’ve brought to life.

11. Cleanup and Celebrate Your Achievement
With your magnificent coastal chandelier now dazzling in all its glory, the final step is a thorough cleanup. This not only restores order to your workspace but also allows you to truly relax and enjoy the fruits of your labor. Carefully gather all packaging materials, discarded wire clippings, and any other debris, disposing of them responsibly. Return your tools to their designated places, ensuring they are clean and ready for your next home improvement project. A tidy workspace is a sign of a job well done.
Reflect on what you’ve accomplished. With your determination, careful planning, and our detailed guide, you have successfully installed a complex lighting fixture all on your own. This is no small feat! Take a moment to pat yourself on the back and soak in the satisfaction of a DIY project expertly completed. Your new coastal chandelier isn’t just a source of light; it’s a symbol of your skill and dedication, transforming your home with a personal touch. Now, dim the lights, perhaps put on some relaxing music, and truly savor the beautiful ambiance you’ve created.

Final Thoughts on Your Chandelier Installation
In the vast world of interior design and home improvement, few projects offer the immediate and profound satisfaction that comes from successfully installing a beautiful lighting fixture like your new coastal chandelier. Embarking on this DIY journey, from the initial thought to the final flip of the switch, is an empowering and incredibly rewarding experience. It speaks volumes about your capability to tackle challenging tasks and transform your living space with your own hands.
From the careful selection of the perfect spot to the intricate connection of wires and finally witnessing its radiant beauty illuminating your home, this DIY installation is a perfect testament to the adage that hard work truly pays off. This chandelier isn’t just a light source; it’s a conversation starter, a focal point that tells a story of personal achievement. Every time guests admire your stunning coastal fixture, you’ll have a fantastic adventure to recount – a testament to your dedication and skill. As you revel in the newfound elegance and charm of your space, remember to also consider periodic maintenance, like gentle dusting and timely bulb replacement, to keep your chandelier shining brightly for years to come. For now, sit back, relax, and bask in the glow of your magnificent accomplishment.
