Transform Your Home: The Ultimate DIY Guide to Painting Interior Doors Black
Are you contemplating a dramatic yet simple refresh for your living space? Painting interior doors black is a surprisingly impactful upgrade that can instantly elevate the style and sophistication of any room. This bold color choice offers a high-end, finished look without the significant expense or disruption of a full-scale renovation.
If you’re wondering how to achieve this stunning transformation yourself, you’ve come to the right place. This comprehensive guide will walk you through every step of the process, from selecting the ideal paint and gathering the necessary tools to executing a flawless application and ensuring long-lasting beauty. By the end, you’ll possess all the knowledge and confidence required to paint your interior doors black like a seasoned professional. Say goodbye to dull, uninspired doors and hello to a chic, modern aesthetic. Let’s dive in!
Why Painting Your Interior Doors Black is a Smart Choice
Beyond just aesthetics, opting for black interior doors offers a multitude of practical and design advantages that make it a truly smart choice for any homeowner. This striking color isnates beautifully with a wide array of interior styles, making it incredibly versatile.
- Modern Minimalism: Black doors provide sharp, clean lines that perfectly complement the uncluttered, sleek look of modern minimalist homes.
- Cozy Farmhouse: In a farmhouse setting, black doors can add a sophisticated, grounding contrast to rustic wood and soft textures, enhancing the cozy charm.
- Sleek Industrial: For industrial spaces, black seamlessly integrates with exposed brick, metal, and concrete, reinforcing the raw, urban vibe.
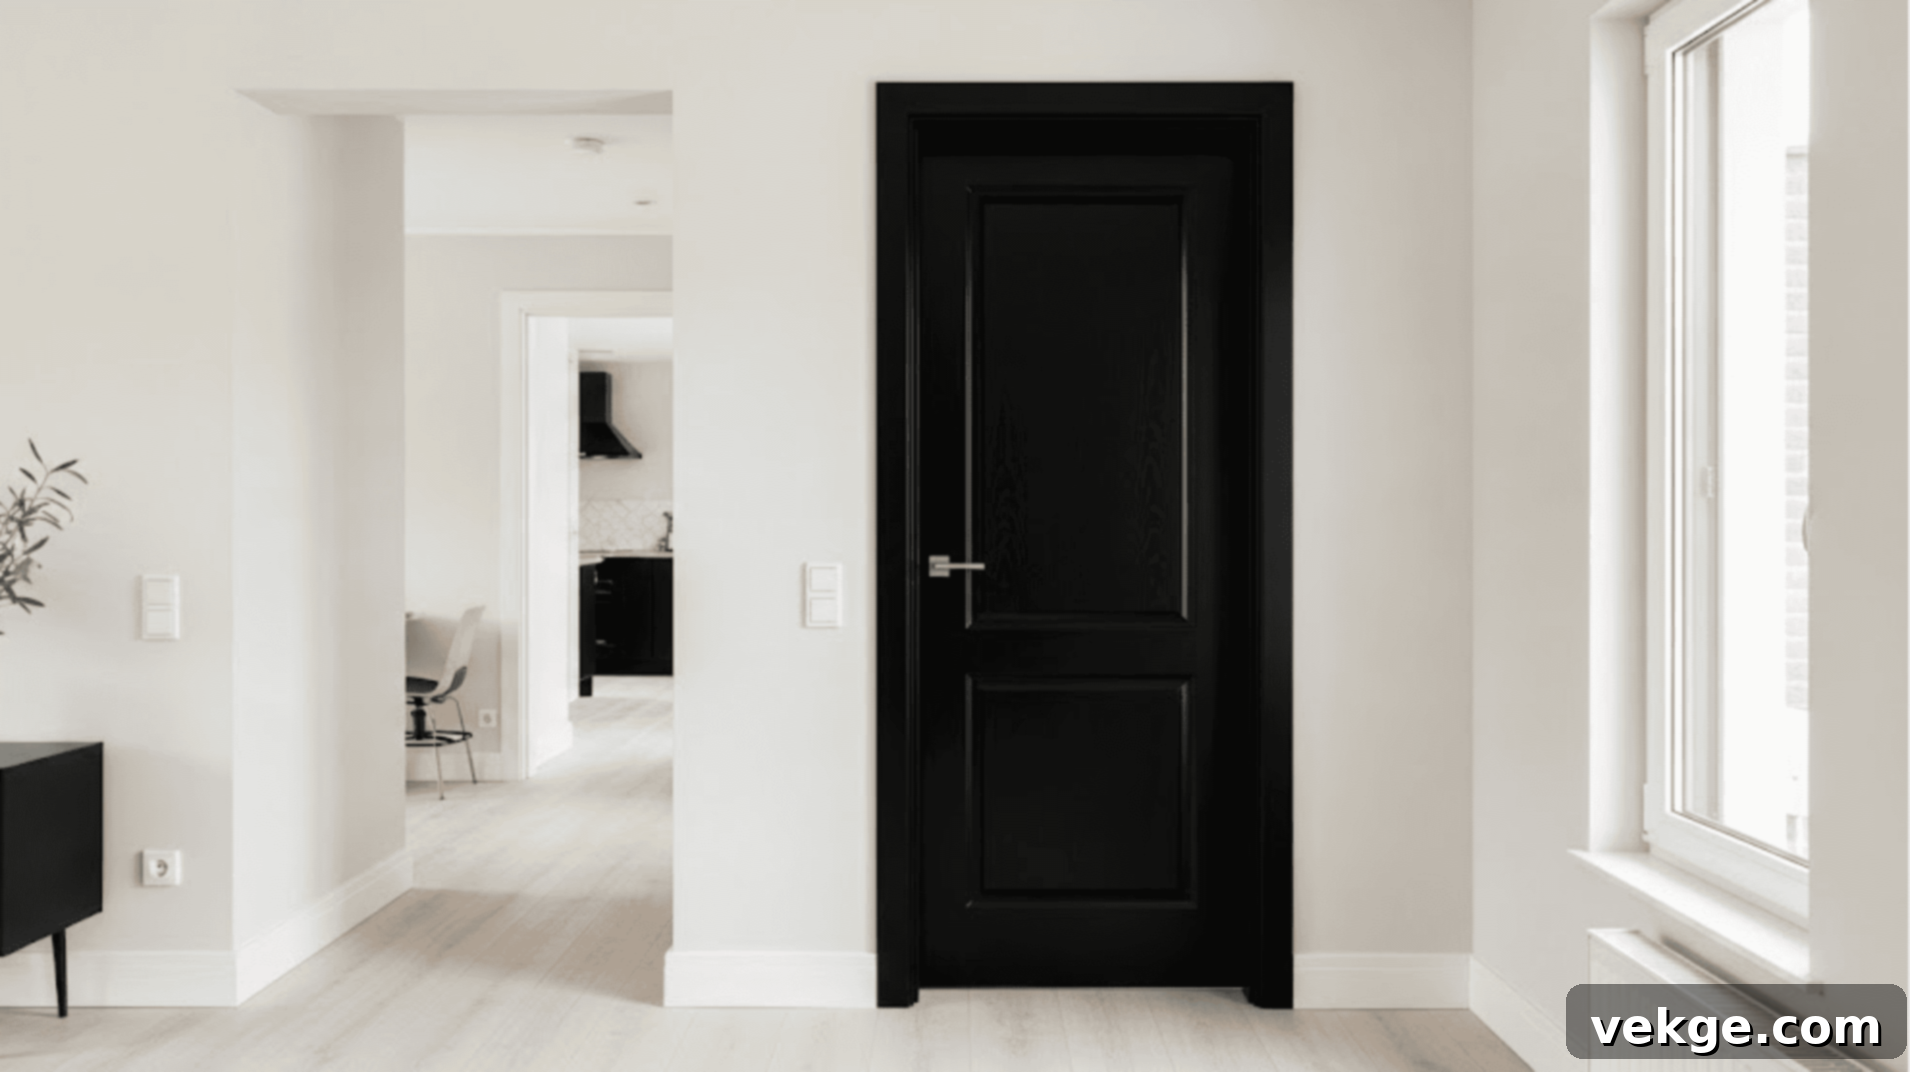
- Dramatic Contrast: Black creates a powerful visual contrast, making your door and trim work pop against lighter wall colors. This defines architectural elements and adds depth to your space, drawing the eye and making rooms feel more curated.
- Enhanced Durability and Cleanliness: One of the most significant practical benefits is black’s ability to conceal everyday wear and tear. Unlike lighter colors that quickly show fingerprints, scuff marks, and dirt, black doors maintain their fresh appearance for much longer, requiring less frequent cleaning and touch-ups. This makes them ideal for high-traffic areas.
- Increased Property Value and Appeal: Black doors photograph exceptionally well, contributing to a high-end, sophisticated look that can significantly boost your home’s appeal if you ever plan to sell. They create a memorable impression and signal a thoughtful, modern aesthetic to potential buyers.
Choosing the Right Paint for Your Interior Doors
The type of paint and finish you select is crucial for both the aesthetic appeal and the long-term durability of your black interior doors. A well-chosen paint will ensure your doors look fantastic and withstand the rigors of daily use.
Paint Types:
- Oil-Based Paints: Traditionally known for creating an exceptionally hard, durable finish that is highly resistant to scratches, chips, and dings. This makes them an excellent choice for doors, especially in busy households. However, they have a longer drying time, a stronger odor, and require mineral spirits for cleanup.
- Latex (Water-Based) Paints: These paints are popular for their faster drying times, low odor, and easy water cleanup. Modern latex paints, especially premium formulas, offer impressive durability. They are ideal for quick weekend projects and are generally more environmentally friendly.
- Alkyd Hybrid Paints: A fantastic compromise, these paints offer the easy cleanup and lower VOCs of latex paints with much of the hardness and durability of oil-based formulas. They tend to level out beautifully, minimizing brush strokes, and are often recommended by professionals for trim and doors. Products like Sherwin-Williams Urethane Trim Enamel (mentioned in our materials list) fall into this category.
Finishes:
The sheen of your paint significantly impacts how your doors look and perform. For interior doors, washability and durability are key considerations.
- Satin Finish: Offers a subtle, low-to-medium sheen. It’s very durable, easy to clean, and helps to hide minor surface imperfections without being too reflective. This is a popular and practical choice for doors.
- Semi-Gloss Finish: Provides a noticeable shine and is highly durable and very easy to wipe clean. It reflects more light than satin, giving a crisp, polished look. While it’s excellent for high-traffic areas, its reflectivity can highlight any surface imperfections if the door isn’t perfectly prepped.
- Glossy (High-Gloss) Finish: Delivers a mirror-like shine and maximum durability. It’s incredibly easy to clean but will reveal every single imperfection on the door’s surface. Reserved for a truly dramatic, high-impact look where perfect surface prep is guaranteed.
- Matte or Flat Finish: While offering a sophisticated, velvety appearance and excellent ability to hide flaws, matte finishes are generally not recommended for doors. They tend to absorb dirt and oils more easily and are less washable than higher sheens, making them prone to showing wear quickly in high-traffic areas.
For most interior doors, especially those painted black, a satin or semi-gloss finish strikes the perfect balance between elegance, durability, and ease of maintenance.
Essential Materials for Painting Interior Doors Black
To ensure a professional and lasting finish for your black interior doors, gathering the right tools and materials is paramount. Below is a comprehensive list of recommended items, along with estimated cost ranges, to help you prepare for your project. Investing in quality supplies will save you time and effort and yield superior results.
| Material | Estimated Cost Range | Purpose |
|---|---|---|
| Sherwin-Williams Urethane Trim Enamel (1 qt, enough for 1-2 doors) | $30 – $40 | Premium, durable paint known for excellent flow, leveling, and hard finish. An alkyd hybrid is ideal for doors. |
| High-Quality Painter’s Tape (e.g., Frog Tape or similar delicate surface tape) | $6 – $10 | Creates sharp, clean lines and prevents paint bleed onto walls or hinges. |
| High-Density Foam Roller (4-inch recommended) | $4 – $8 | Applies paint smoothly, minimizing texture and brush marks for a factory-like finish. |
| Angled Sash Brush (1.5-2 inches) | $5 – $15 | Essential for cutting in edges, painting detailed panels, and reaching tight spots. |
| Fine-Grit Sandpaper (P220 grit) and Sanding Sponge | $4 – $8 (pack) | Preps the surface for primer/paint adhesion and smooths between coats. |
| Liquid Deglosser/Sander (optional but recommended for previously painted doors) | $7 – $15 | Chemically de-glosses existing finishes, eliminating the need for extensive sanding. |
| High-Quality Primer (quart, compatible with chosen paint) | $10 – $20 | Ensures superior adhesion, blocks stains, and provides an even base for the black paint. |
| New Door Handles and Hardware (optional, but highly recommended for a fresh look) | $15 – $40 (per set) | Upgrades the door’s aesthetic and enhances the overall transformation. |
| Screwdriver (Phillips and Flathead) | $6 – $15 | For removing and reinstalling door hardware. |
| Drop Cloths or Old Sheets/Newspaper | $3 – $10 | Protects floors and surrounding areas from paint drips and spills. |
| Clean Rags and Bucket | (Already owned) | For cleaning, wiping, and general project use. |
| Painter’s 5-in-1 Tool | $5 – $10 | Useful for opening paint cans, cleaning rollers, scraping, and spreading. |
| Total Estimated Cost (Excluding new hardware) | $75 – $146 | |
| Total Estimated Cost (Including new hardware) | $90 – $186 |
NOTE: These costs are estimated and may vary based on your geographic location, current market prices, specific product brands chosen, and any sales or discounts available. It’s always a good idea to check local hardware stores or online retailers for the most accurate pricing.
How to Paint Interior Doors Black: A Step-By-Step Process
Achieving a professional-looking finish when painting interior doors black is entirely within your reach, even if you’re a DIY novice. This detailed, step-by-step guide will ensure you prepare, paint, and finish your doors correctly, resulting in a beautiful, durable transformation that will last for years.
Step 1: Meticulously Prepare Your Doors for Painting

Proper preparation is the cornerstone of any successful paint job. Do not rush this step, as it directly impacts the adhesion and longevity of your new black paint.
- Remove Hardware: Carefully unscrew and remove all door handles, latches, and hinges. Place these small parts in a labeled bag or container to avoid losing them. This allows for a clean, uninterrupted paint application across the entire door surface.
- Thorough Cleaning: Use a mild household cleaner (like TSP substitute or a degreaser) mixed with warm water to thoroughly clean both sides of the door. Pay close attention to areas around door handles, edges, and the bottom, which tend to accumulate more grime. Rinse with clean water and allow the door to dry completely. Any dust, grease, or dirt will prevent the paint from adhering properly.
- Sanding for Adhesion (If Applicable):
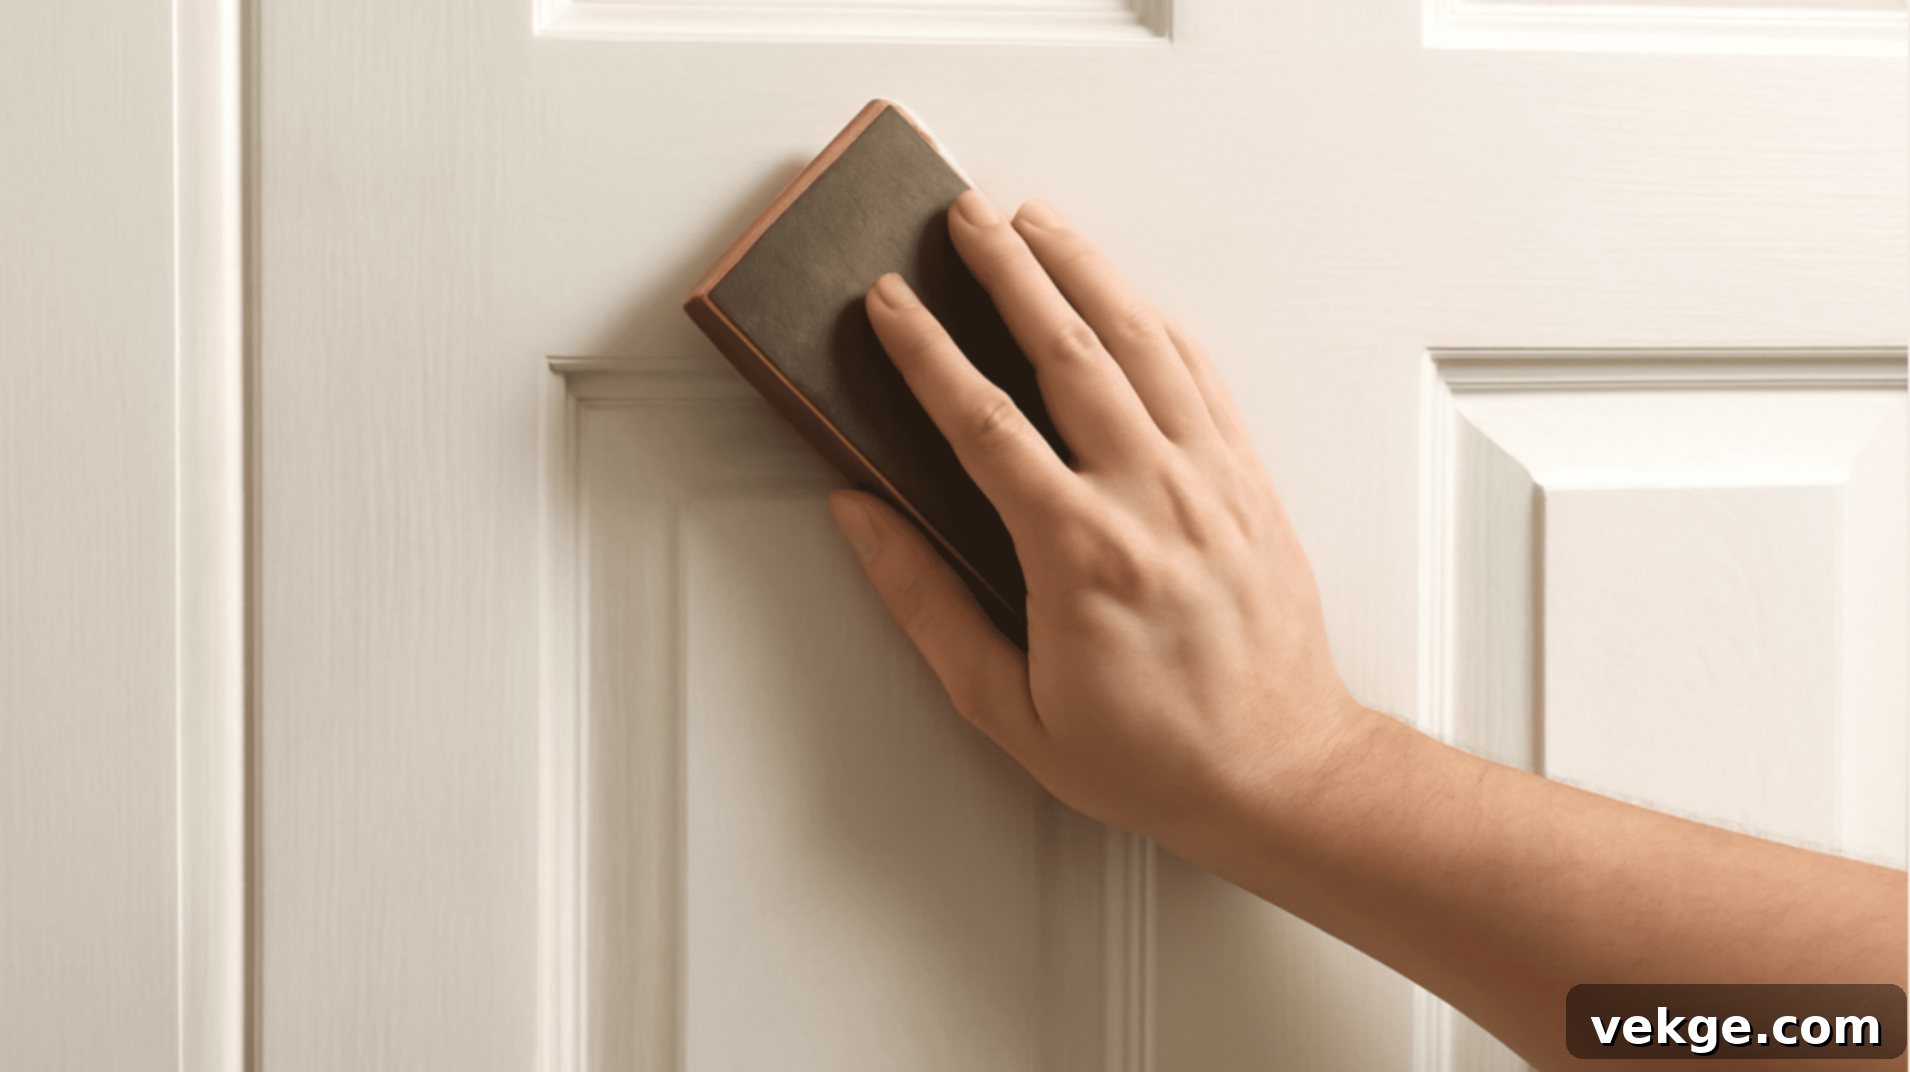
- If your doors are currently painted or have an old, glossy finish, light sanding with 220-grit sandpaper or a sanding sponge is essential. This creates a “tooth” for the new paint to grip onto, preventing peeling and ensuring a smooth finish. Sand in the direction of the wood grain.
- For bare wood doors, a light sanding will smooth the surface and help the primer adhere evenly.
- Using Deglosser (Alternative to Sanding): If you prefer to minimize sanding, a liquid deglosser can be a valuable alternative for previously painted or varnished doors. Apply it according to the manufacturer’s instructions to chemically dull the surface, improving paint adhesion. Always wear appropriate protection when using deglosser.
- Fill Imperfections: Use wood filler to patch any holes, cracks, or dings on the door’s surface. Once dry, sand the filled areas smooth with fine-grit sandpaper.
- Final Dusting: After sanding and filling, wipe down the entire door with a tack cloth or a damp microfiber cloth to remove all sanding dust. Ensure the surface is perfectly clean and dry before proceeding.
Pro Tips:
- Do not skip sanding or deglossing; it is critical for proper paint adhesion and a durable finish.
- Clean your door thoroughly after sanding to ensure no dust or dirt interferes with the paint.
- Consider taking the door off its hinges and laying it flat on sawhorses. This provides an ideal painting surface and minimizes drips.
Step 2: Carefully Tape Off the Door and Trim

Precise taping is crucial for achieving crisp, professional lines, especially when painting a bold color like black. This step prevents paint bleed and ensures your edges look sharp.
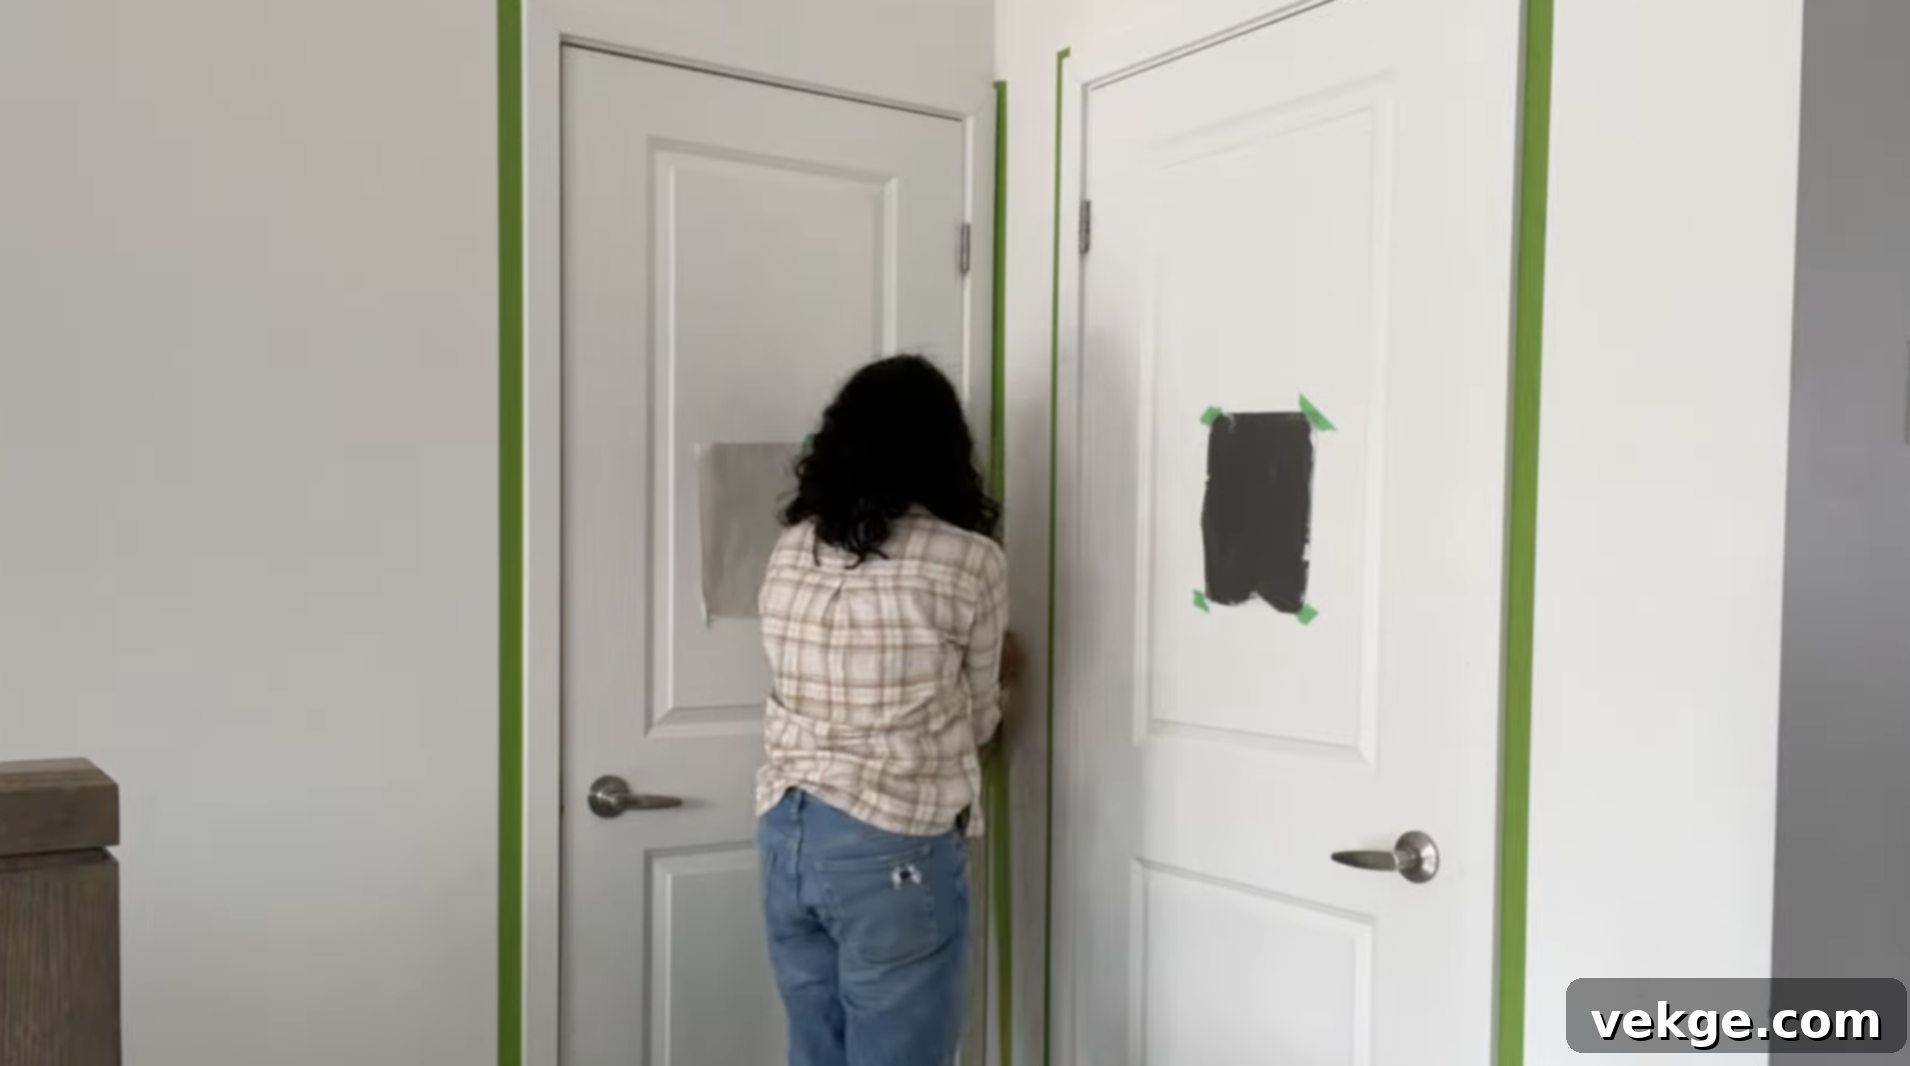
- Apply Painter’s Tape: Use a high-quality painter’s tape, such as Frog Tape or a similar delicate surface tape. Carefully apply it along the edges of the door where it meets the frame (if painting the door in place) or any areas you don’t want painted.
- Seal the Edges: Once the tape is in place, firmly press down along its entire length with a putty knife or your fingernail. This helps to create a tight seal, minimizing the chance of paint seeping underneath the tape.
- Protect the Floor: Lay down drop cloths or old newspaper on the floor directly beneath the door and extend them slightly beyond the working area to catch any accidental drips or splatters.
Pro Tips:
- Frog Tape is highly recommended for its PaintBlock® Technology, which prevents paint bleed.
- Take your time with taping; neat tape lines lead to neat paint lines.
- Consider taping off the entire door frame if you’re not planning to paint it, to ensure sharp contrast.
Step 3: Apply Primer and Multiple Coats of Black Paint

This is where the magic happens! Applying primer and paint correctly will determine the smoothness and richness of your black doors.
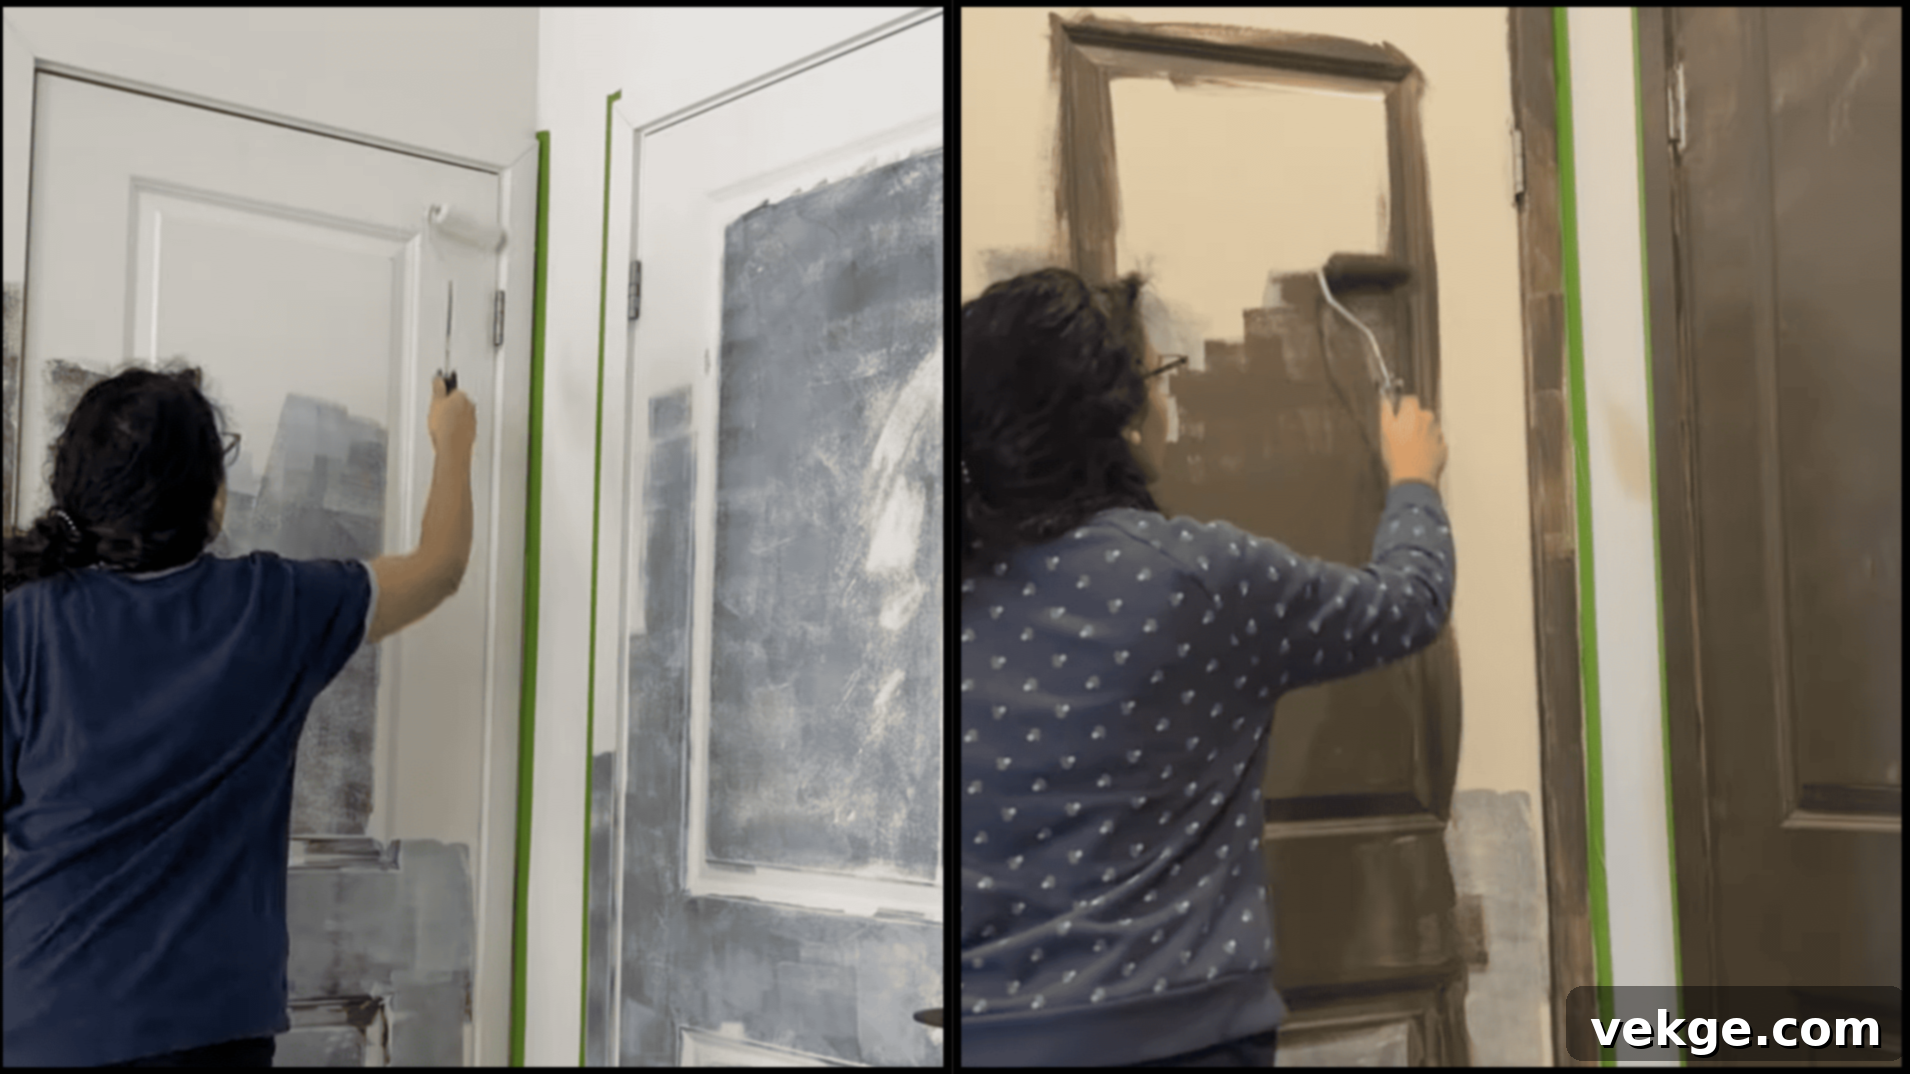
- Priming: Apply one thin, even coat of high-quality primer. If your door is currently a very light color or bare wood, a grey-tinted primer can help achieve better coverage with fewer coats of black paint. Use your angled brush for recessed panels and edges, then follow with your foam roller for flat surfaces. Allow the primer to dry completely according to the manufacturer’s instructions.
- Light Sanding After Primer (Optional but Recommended): Once the primer is dry, lightly sand the entire surface with a 220-grit sanding sponge. This removes any minor imperfections or raised grain, ensuring an ultra-smooth base for your paint. Wipe clean with a tack cloth.
- First Coat of Black Paint: Begin applying your chosen black paint. Work in sections, starting with any recessed panels or decorative moldings using your angled brush. Next, use the foam roller for the larger flat surfaces, applying even, thin coats. Roll in the direction of the wood grain (if applicable) and avoid pressing too hard, which can create roller marks. Ensure full coverage on the edges of the door.
- Subsequent Coats: Allow each coat of paint to dry completely before applying the next. Refer to your paint can for recommended recoat times (typically 2-4 hours for latex/hybrid paints). Applying multiple thin coats is far superior to one thick coat, as it reduces drips, brush marks, and provides a more durable, even finish. Lightly sand with a 220-grit sanding sponge between coats for an even smoother result, especially for a semi-gloss or high-gloss finish. Two to three coats are usually sufficient for a rich, opaque black.
Pro Tips:
- Never rush the drying process between coats. Patience here pays off immensely.
- Always apply multiple thin coats rather than one thick coat to prevent drips and ensure a smoother finish.
- A high-density foam roller is essential for minimizing texture and achieving a sleek, almost sprayed-on look.
- Maintain proper ventilation by opening windows or using fans, especially when using alkyd or oil-based paints.
Step 4: Install New Hardware and Finishing Touches

Once your final coat of paint is dry to the touch, it’s time to bring your door to life by reinstalling the hardware. This is the exciting moment when your vision truly comes together.
- Reinstall Hardware: Carefully reattach your existing or new door handles, latches, and hinges. Take your time to align everything properly to ensure smooth operation and a polished look. Use your screwdriver to secure all components firmly.
- Check Operation: Open and close the door a few times to ensure everything is functioning correctly. If needed, make minor adjustments to the hinges or strike plate for a perfect fit and smooth close.
- Remove Painter’s Tape: This step is critical for a clean edge. Gently and slowly peel off the painter’s tape while the paint is still slightly pliable, but not wet enough to smudge. If the paint is completely dry, there’s a higher risk of it cracking or peeling along with the tape. Pull the tape at a 45-degree angle away from the painted surface.
Pro Tips:
- Install hardware carefully; ensure proper alignment for a neat and functional finish. Use a level if needed for handles.
- Remove painter’s tape while the paint is still slightly tacky (but not wet) to prevent the paint from peeling off with the tape.
- If you notice any small paint bleeds under the tape, carefully touch them up with a small artist’s brush and your wall paint.
Step 5: Clean Up and Perform Any Necessary Touch-Ups

The final stage of your project involves cleaning up your workspace and applying any last-minute touch-ups to perfect your newly painted black doors.
- Immediate Spill Cleanup: Address any paint splatters or drips on floors, walls, or hardware immediately. For latex paint, warm water and soap will work. For oil-based or alkyd paints, you’ll need mineral spirits or a designated paint thinner.
- Tool Cleaning: Clean your brushes and rollers thoroughly. For water-based paints, rinse them under warm running water until the water runs clear. For oil-based paints, use mineral spirits. Proper cleaning ensures your tools are ready for future projects.
- Touch-Ups: Inspect your newly painted doors for any missed spots, minor smudges, or imperfections. Use a small artist’s brush or the angled brush with a minimal amount of paint to carefully touch up these areas. Blend gently to avoid creating noticeable patches.
- Full Curing Time: While the paint may be dry to the touch in a few hours, it takes several days, sometimes weeks, for paint to fully “cure” and reach its maximum hardness and durability. Be gentle with your doors during this period to prevent damage.
- Store Leftover Paint: Seal your leftover paint cans tightly and store them in a cool, dry place. This will be invaluable for future touch-ups.
Pro Tips:
- Clean up paint spills immediately to prevent stubborn stains.
- Use a small, fine-tipped brush for precise touch-ups, ensuring a seamless finish.
- Allow the paint to fully cure before subjecting the doors to heavy use to ensure maximum durability.
For a more detailed walkthrough of the process, check out the complete video tutorial below:
Dos and Don’ts When Painting Interior Doors Black
Following these crucial guidelines can make the difference between a stunning, long-lasting finish and a frustrating, imperfect result. Heed these simple rules to avoid common pitfalls in your door painting project.
| DOs | DON’Ts |
|---|---|
| Always apply a high-quality primer before painting, especially if changing a light door to black or painting bare wood. Primer ensures adhesion and color depth. | Don’t rush the drying process; allow each coat of primer and paint to fully dry according to manufacturer recommendations. Rushing leads to tackiness, uneven finishes, and peeling. |
| Use high-quality paint specifically designed for doors and trim for superior coverage, durability, and a smoother finish that withstands daily wear and tear. | Don’t paint over existing doors without proper prep work, including thorough cleaning, sanding (or deglossing), and filling imperfections. Skipping prep is the number one cause of poor results. |
| Sand lightly between coats (after the primer and between subsequent paint coats) with fine-grit sandpaper (220-grit). This creates an incredibly smooth, professional-looking surface. | Avoid using matte or flat finishes for high-traffic doors. These finishes are less durable, harder to clean, and will show scuffs and dirt much more quickly than satin or semi-gloss. |
| Ensure proper ventilation in your workspace by opening windows or using fans. This helps with drying, reduces fumes, and creates a safer painting environment. | Don’t skip the cleaning step before starting your paint job. Any dust, grease, or grime on the door will prevent the paint from adhering properly, leading to a bumpy or peeling finish. |
| Remove door hardware like handles, hinges, and plates. Painting around hardware is nearly impossible to do cleanly and professionally. | Don’t apply thick coats of paint. Always opt for two or three thin, even coats. Thick coats are prone to dripping, take longer to dry, and can create an uneven, unprofessional look. |
Keep these essential tips handy while you work to ensure your black doors turn out beautifully. Taking your time with each step, especially the preparation and drying times, will consistently give you results that look like a professional did the work, creating a stunning focal point in your home.
Maintaining Your Beautiful Black Interior Doors
Once you’ve put in the effort to paint your interior doors black, proper maintenance is crucial to preserve their sleek appearance and ensure their longevity. With just a few simple and consistent steps, you can keep your doors looking fresh, polished, and new for many years to come.
- Regular Dusting: Dust your black doors regularly (e.g., weekly or bi-weekly) with a soft, dry microfiber cloth or a feather duster. This prevents dust and cobwebs from accumulating, which can dull the finish and make the door appear less clean.
- Gentle Cleaning: For smudges, fingerprints, or light dirt, use a soft microfiber cloth dampened with a mild soap solution. Mix a few drops of dish soap with warm water. Gently wipe the surface of the door, then follow immediately with a clean, damp cloth to remove any soap residue. Finally, dry the door with a clean, dry cloth to prevent water spots and streaks, which are particularly visible on black surfaces.
- Avoid Harsh Chemicals: Steer clear of abrasive cleaners, harsh chemical sprays, or scrubbing pads. These can damage the paint finish, leading to dullness, streaks, or even chipping over time. Stick to mild soap and water.
- Prompt Touch-Ups for Chips and Scuffs: Despite their durability, minor chips or scuffs can happen. Keep a small amount of your original black paint on hand. For small imperfections, use a fine artist’s brush to carefully apply a tiny amount of touch-up paint, blending it seamlessly. Address these promptly to prevent them from becoming more noticeable or allowing moisture to penetrate.
- Protect Against Scratches: Consider adding felt pads to items that might frequently brush against the door, such as furniture or decorative pieces. Encourage careful handling, especially in high-traffic areas.
- Maintain Hardware: Periodically check and tighten any loose door handles or hinges. Keeping your hardware in good condition also contributes to the overall appearance and function of your doors.
By incorporating these simple maintenance practices into your routine, your black interior doors will continue to make a bold, elegant statement in your home, looking as good as the day you painted them.
Wrapping Up Your Black Door Transformation
Painting interior doors black is genuinely one of the most effective and accessible home improvement projects you can undertake to dramatically enhance your space. It’s a testament to how a simple, well-executed change can yield such a significant impact on your home’s aesthetic and feel.
Now equipped with this detailed guide, you have all the knowledge needed to confidently prep, paint, and finish your doors to achieve that coveted clean, modern, and polished look. Imagine the elegant contrast, the sophisticated depth, and the surprisingly easy maintenance that bold black doors will bring to your rooms.
Remember, success lies in the details: take your time during preparation, invest in quality tools and paint, apply thin, even coats, and allow ample drying time. I’ve witnessed firsthand how even a seemingly small update like this can completely redefine a living area, injecting it with character and contemporary flair.
Don’t hesitate to embark on this rewarding DIY journey. Your transformed interior doors will not only impress but also provide lasting satisfaction. For more inspiring home updates, clever paint ideas, and practical project guides, explore other insightful blogs and resources on our website to continue making your home look its absolute best!
