The Ultimate Guide to Cleaning and Maintaining Limewash Brick Exteriors for Lasting Beauty
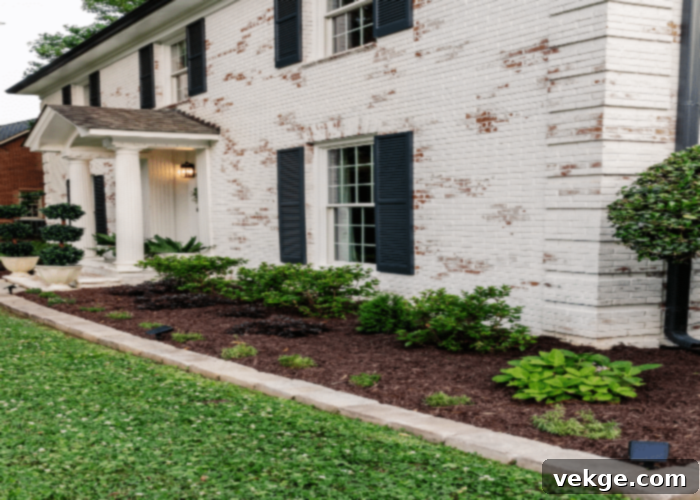
Limewash offers a distinctive, soft, and breathable finish that can transform any home, adding a timeless charm and sophisticated aesthetic. Particularly stunning on brick, stucco, and stone surfaces, freshly applied limewash imparts a classic, natural off-white shade that enhances curb appeal instantly. Beyond its visual appeal, limewash provides practical benefits, including a high pH level that naturally deters pests and inhibits the growth of mold and mildew, contributing to a healthier home environment.
Unlike traditional paints, limewash is deeply absorbed into the surface rather than merely sitting on top. This unique characteristic allows the masonry to breathe, preventing moisture entrapment and reducing issues like peeling and cracking often associated with less breathable coatings. This natural integration makes limewash brick remarkably easy to maintain, as it becomes one with the substrate.
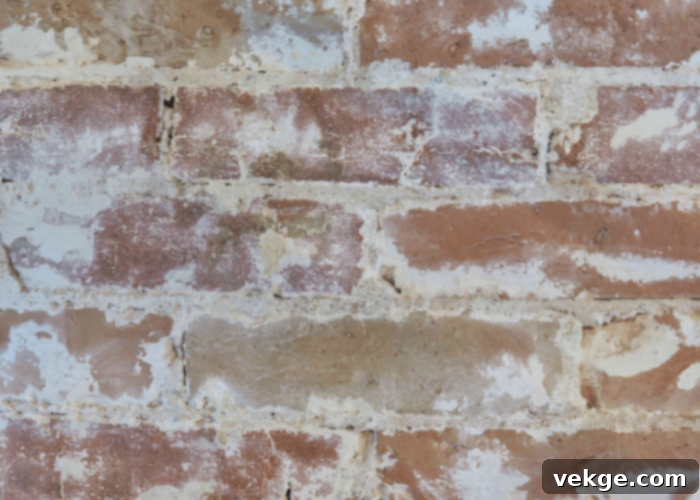
However, even with its inherent durability, a limewashed surface will naturally weather and evolve over time. While many appreciate the beautiful, aged patina that develops, achieving a perfectly consistent, opaque coverage will eventually require a refresh. Typically, a limewashed brick exterior will need a touch-up or a fresh reapplication every 5-7 years to restore its original vibrancy and full protective qualities. This gradual erosion is part of its charm, but for those who prefer a perpetually fresh and pristine look, regular maintenance and timely reapplication are key.
If you’re a devoted admirer of limewash and committed to preserving its unique beauty, understanding the best practices for cleaning and maintenance is crucial. This comprehensive guide will walk you through the essential steps and expert tips to ensure your limewash brick exteriors remain stunning and well-protected for many years to come.
Essential Supplies for Cleaning and Maintaining Limewash Brick
Before you begin the cleaning or maintenance process, it’s vital to gather the right tools and products. Using appropriate, high-quality supplies will not only make the job easier but also ensure the longevity and integrity of your limewash finish. Here’s what you’ll typically need:
- Algae and Moss Cleaner: Look for an eco-friendly, non-abrasive cleaner specifically designed for masonry surfaces to effectively tackle unsightly green growth without harming your limewash.
- Pump Sprayer: A garden pump sprayer is ideal for applying cleaners evenly and efficiently to large areas.
- Garden Hose: Essential for rinsing surfaces thoroughly after cleaning, ensuring no residue is left behind.
- Limewash: Keep some on hand for touch-ups and eventual reapplication. Ensure it’s the same type and color as your original application for seamless results.
- Stain Brush Applicator: A high-quality stain or masonry brush is crucial for applying limewash evenly, especially during touch-ups.
- Soft Bristle Brush or Sponge: For gentle scrubbing of stains or general cleaning with mild soap.
- Clean Rags or Microfiber Cloths: For wiping surfaces and applying cleaning solutions to smaller areas.
- Protective Gear: Gloves and eye protection are always recommended when working with cleaning agents.
Step-by-Step Guide: How to Clean Limewash Brick Effectively
Maintaining the pristine appearance of your limewash brick doesn’t have to be a daunting task. By following these steps, you can effectively clean your surfaces and extend the life of your beautiful finish. Remember, gentleness is key when working with limewash.

-
Address Algae, Moss, and Mildew Buildup
One of the most common issues on exterior surfaces is the unsightly growth of algae, moss, and mildew, especially in shaded areas or around eaves and chimneys where moisture tends to linger. To tackle this, apply a specialized algae and moss cleaner using your pump sprayer. Ensure the cleaner is safe for masonry and follows the manufacturer’s instructions for dilution and application. Spray generously on the affected areas, making sure to saturate the growth. Allow the cleaner to work its magic for the recommended duration, typically 24-48 hours. You’ll know it’s ready for removal when the moss or algae trunks turn a distinct bright red or brown, indicating they are dead. This preparation is crucial for a clean base.
-
Thorough Rinsing and Spot Touch-ups
After the cleaner has done its job, use a garden hose to thoroughly wash the entire limewashed surface. Begin rinsing from the top down to ensure all traces of the cleaner, dead moss, algae, and any accumulated dirt are flushed away. Focus on achieving a clean, residue-free surface. For any stubborn spots or hard-to-reach corners and crevices where you might notice slight fading or dislodged limewash, perform small touch-ups. Using a small masonry brush and a small amount of limewash, gently blend the new application into the existing finish. This helps maintain a consistent appearance and provides added protection.
-
Apply a Mineral Shield for Enhanced Protection
Once the surface is completely clean and dry – typically waiting a full week to ensure all moisture has evaporated – consider applying a fresh coat of a mineral shield. This invisible topcoat is designed to enhance the durability of your limewash. A quality mineral shield will significantly reduce the effects of weathering, repel water, and offer protection against common stains from grass, clay, and general dirt. By adding this protective layer, you can substantially elongate the life of your lime paint. Ensure you allow ample drying time for the mineral shield to cure properly, which is vital in preventing moisture-related issues down the line and ensuring maximum effectiveness.
-
Effective Stain Removal Techniques
Stain removal is paramount for maintaining the pristine look of limewash brick. For minor, fresh stains, a simple, quick fix can often suffice. Create a gentle paste by mixing baking soda with a small amount of water until it reaches a spreadable consistency. Apply this paste directly onto the stained area of the wall. Allow it to sit for a few minutes, giving the baking soda a chance to react gently with the limewash and lift the stain. Once the paste has dried, take a soft-bristle brush and gently scrub the paste off the wall. Finish by rinsing the treated space thoroughly with clean water to remove any residue. For more stubborn or embedded stains, consult specific limewash cleaning guidelines or consider professional help, always avoiding harsh chemicals.
-
Cleaning Small Limewash Surfaces (e.g., Fireplaces)
For smaller limewashed surfaces, such as interior fireplace surrounds or accent walls, the cleaning process can be more controlled and thorough, potentially leading to longer-lasting results. Begin by dusting the surface to remove any loose debris. Then, prepare a mild cleaning solution by mixing a small amount of pH-neutral soap with water. It’s crucial to select a soap that won’t strip or damage the delicate limewash finish. Before applying the mixture to the entire surface, always perform a small patch test in an inconspicuous area. This allows you to check for any adverse reactions or discoloration. Once confirmed safe, apply the solution with a soft sponge or cloth, gently wiping down the surface. Rinse with a clean, damp cloth to remove all soap residue, as leftover soap can attract new dirt over time.
Do’s and Don’ts to Maintain Limewash Bricks for Longevity
Proper maintenance is key to preserving the unique charm and protective qualities of your limewash brick. By adhering to these essential do’s and don’ts, you can ensure your limewash coating remains beautiful and functional for many years.

The Do’s of Limewash Maintenance:
- Gentle Stain Removal: For light surface stains on limewash bricks, gently rub them with a damp, clean rag. If a mild, pH-neutral soap is used for tougher spots, it is absolutely critical to rinse the surface thoroughly with clean water using a clean cloth or sponge to wipe away all soapy residue. Any leftover soap can attract dirt and lead to discoloration over time.
- Address Damage Promptly: To maintain the structural integrity and aesthetic of your limewash, take immediate action as soon as you spot any cracks, chips, or flakes. Small repairs can prevent larger issues and preserve the finish.
- Always Patch Test Sealants: Before applying any sealant to the entire limewashed wall, always test a sample in an inconspicuous area. Some sealants can react negatively with limewash, altering its appearance or breathability.
- Choose Breathable Sealants Wisely: If a sealant is absolutely necessary – for instance, in high-traffic areas or regions with extreme weather – select one that is specifically designed for historic masonry. It must be water-resistant yet breathable to allow the wall to transpire moisture naturally.
- Regular Reapplication: To maintain the original, fresh appearance and protective qualities of your limewash bricks, plan to reapply the limewash every 5-7 years, or as soon as you notice significant weathering or loss of opacity.
- Optimal Application Conditions: For maximum durability and proper curing, apply limewash on warm, sunny days when temperatures are between 50-80°F (10-27°C). This allows the limewash to dry gradually and evenly, promoting a stronger bond with the masonry. Avoid applying in direct, intense sunlight or on extremely hot surfaces, which can cause it to dry too quickly.
- Allow Sufficient Drying Time Between Coats: After applying a coat of limewash on bricks, wait for two to four days before applying the next coat. This crucial drying period allows the limewash to fully cure and develop its final color, which will become darker and more opaque as it dries.
-

Always Test the Color: Before committing to a large area, always test the limewash on a few inconspicuous bricks. This will give you an accurate idea of the final color and opacity once dry, as limewash can look different in the bucket than on the wall.
- Rinse Off Excess for an Antique Look: Once the final coat of limewash has been applied and has completely dried and cured (usually after a week or two), spray the wall gently with water using a garden sprayer. This helps to remove any loose, excess lime particles, leaving behind just enough limewash on the walls to give a beautiful, antique, and naturally weathered appearance without compromising the bond.
The Don’ts of Limewash Maintenance:
- Do Not Apply Thick Coats: Avoid applying limewash in thick, heavy coats. Thicker applications are more prone to cracking, crazing, and peeling faster, undermining the breathable nature of limewash. Aim for multiple thin, even coats for the best results and durability.
- Do Not Strip Existing Limewash: When reapplying limewash, there’s no need to remove the existing coat. Limewash is designed to build up over itself. Simply clean the surface thoroughly and apply a fresh, thin layer over the existing one. This adds to the depth and character of the finish.
- Do Not Use Abrasive Tools or Harsh Chemicals: Never use abrasive brushes, scouring pads, or strong chemical cleaning agents to get rid of a stain on limewash. These can easily damage or strip away the delicate limewash coat on the walls, leading to irreversible aesthetic and protective loss. Stick to soft brushes, sponges, and pH-neutral cleaners.
- Do Not Pressure Wash Aggressively: If your limewash brick surface doesn’t have a significant amount of dirt or grime, avoid pressure washing altogether. If you must use a pressure washer, use it with extreme caution. Spraying water on walls with high pressure can force water into the porous matter of the wall, harm the delicate surface, and even strip away the limewash coating. Always use the lowest possible pressure setting (under 500 PSI), a wide fan nozzle, and maintain a generous distance from the wall (at least 18-24 inches) to prevent damage.
Seasonal Care and Preventive Measures for Limewash Bricks
Beyond routine cleaning, incorporating seasonal care and preventive measures can significantly extend the life and beauty of your limewash brick. Proactive steps can minimize the need for extensive cleaning and repairs.
- Regular Inspections: Conduct seasonal inspections, especially after heavy rains or strong winds. Look for signs of moisture intrusion, new stains, or small chips and cracks. Early detection allows for minor repairs before they escalate.
- Manage Water Runoff: Ensure your gutters and downspouts are clean and functioning correctly, directing water away from your limewashed walls. Excessive water runoff can lead to concentrated areas of erosion or mineral staining. Consider installing splash blocks at downspout exits.
- Trim Vegetation: Keep trees, shrubs, and climbing vines trimmed back from your limewashed surfaces. Vegetation can trap moisture, promote algae and moss growth, and physically abrade the limewash finish, leading to wear and tear.
- Address Drainage Issues: Ensure proper ground drainage around your home’s foundation. Standing water or excessive moisture in the soil can wick up into the masonry, potentially affecting the limewash from below.
- Winter Protection (in cold climates): While limewash is breathable, extreme freeze-thaw cycles can be harsh. Ensure any minor cracks are repaired before winter to prevent water from freezing and expanding within the masonry, which could damage the limewash.
Common Limewash Issues and Simple Troubleshooting
Even with the best care, you might encounter some specific issues. Here’s a quick guide to troubleshooting common limewash problems:
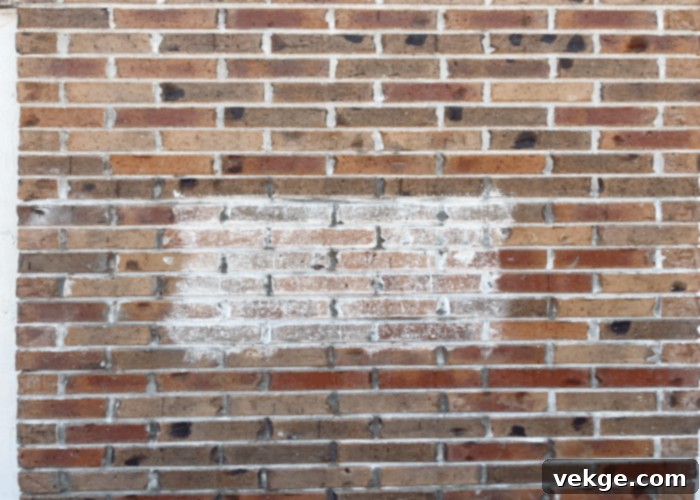
- Efflorescence: White, powdery deposits caused by soluble salts migrating from within the masonry to the surface. Gently brush off dry efflorescence with a soft brush. If severe or persistent, it indicates underlying moisture issues that need to be addressed at the source.
- Uneven Fading: Can occur due to inconsistent application, varying sun exposure, or localized moisture. For minor cases, a gentle rinse might even out the appearance. For more significant differences, a light touch-up coat of limewash on faded areas can restore uniformity.
- Mold/Mildew Recurrence: If mold or mildew reappears quickly after cleaning, it might indicate persistent moisture issues, inadequate ventilation, or an overly shaded area. Consider improving air circulation, trimming plants further back, or applying an appropriate, limewash-safe fungicidal wash (always test first).
Conclusion
Embracing the beauty of limewash brick is a choice that brings timeless elegance and a unique character to any home. By diligently adhering to these maintenance rules and following the detailed steps outlined above for regular care, you will undoubtedly be able to enjoy the enduring charm and protective benefits of your limewash surfaces for decades. These methods are not just about cleaning; they are about ensuring the longevity of the limewash on bricks and preserving its historical and aesthetic appeal.
It’s crucial to always bear in mind that limewash is a delicate and highly breathable coating, rich in natural minerals. Therefore, gentle care, consistent attention, and the use of appropriate cleaning techniques are absolutely essential for its continued vibrancy, structural integrity, and the very health of your masonry. Regular inspections, prompt action on minor issues, and thoughtful reapplication will keep your limewash looking magnificent.
If you’re considering revamping the limewash brick appearance of your house, or simply have questions about specific challenges you’re facing, please don’t hesitate. Leave your queries in the comments section below. We’re here to help you maintain the stunning allure of your limewash brick exteriors.
