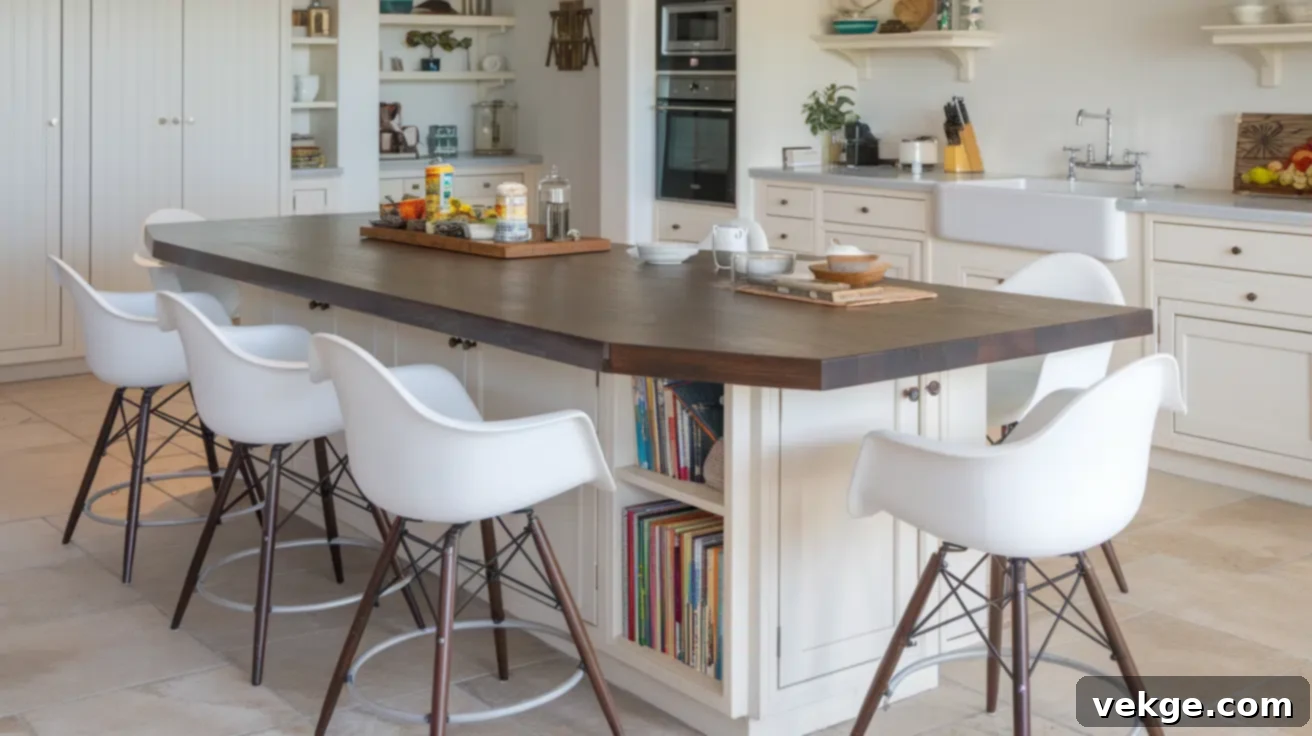
Unlock Your Kitchen’s Potential: The Comprehensive Guide to Custom Kitchen Island Designs
Your kitchen is undoubtedly the heart of your home, a vibrant hub where culinary creativity thrives, family memories are made, and daily life unfolds. If you’ve been contemplating an upgrade that profoundly enhances both the aesthetic appeal and practical functionality of your space, a custom kitchen island might be precisely what you need. Far more than just an extra counter, a well-designed island can revolutionize how you use and enjoy your kitchen.
Whether you’re working with a compact kitchen that demands clever space-saving solutions or a spacious one that yearns for a grand focal point, the right kitchen island design plans are key. They can effortlessly inject style, provide much-needed storage, and significantly boost your kitchen’s overall functionality, turning an ordinary room into an extraordinary culinary haven.
In this comprehensive guide, we’ll walk you through everything you need to know. You’ll learn how to select the perfect island for your unique space, explore smart layout ideas that maximize efficiency, and get step-by-step instructions to create a kitchen island that truly works for your lifestyle. From precise measuring and choosing the ideal materials to adding those crucial finishing touches, we’ve got every aspect of your island journey covered.
Are you eager to discover how to design an island that is not only incredibly useful but also a stunning centerpiece in your home? Let’s embark on this exciting journey to transform your kitchen into the functional and beautiful space you’ve always dreamed of.
Types of Kitchen Islands Tailored to Your Kitchen Size
Kitchen layouts are as diverse as the homes they inhabit, coming in an array of shapes and sizes. To truly optimize your cooking and gathering area, it’s absolutely essential to understand how to select and customize an island based on the specific dimensions and flow of your kitchen. The right island integrates seamlessly, enhancing both utility and visual harmony.
Small Kitchen Islands: Maximizing Compact Spaces
In kitchens where every square inch is precious, small kitchen islands offer ingenious, space-saving solutions. These clever designs are specifically engineered to maximize limited space without overwhelming the room, providing crucial additional workspace, prep areas, and often, much-needed storage. The goal is to create multifunctional surfaces that adapt to various needs.
Designers have developed a range of configurations that integrate seamlessly into tight areas. These can include narrow islands with slim profiles that allow for easy movement, rolling islands equipped with casters for ultimate flexibility, or peninsula-style extensions that create extra counter space by attaching to an existing wall or cabinet run. These versatile options serve as preparation zones, casual dining spots, and efficient storage centers, proving that even small kitchens can benefit from the power of an island.
Medium and Large Kitchen Islands: Unleashing Potential
Spacious kitchens present an exciting canvas, opening up a world of possibilities for islands that transcend basic functionality. In these environments, an island isn’t just an addition; it can become the magnificent centerpiece of your cooking and gathering space, capable of incorporating an impressive array of features that dramatically enhance both utility and style.
These larger islands can house built-in appliances such as cooktops, dishwashers, or wine refrigerators, offering expansive countertops for elaborate meal preparation or large-scale entertaining. Integrated seating transforms the island into a social hub, while multiple work zones allow several people to comfortably participate in kitchen activities simultaneously. Medium and large kitchen islands have the power to transform cooking spaces into comprehensive, high-performance culinary environments, blending gourmet functionality with luxurious comfort.
Popular Kitchen Island Design Plans
Kitchen islands have evolved from simple additions to central, indispensable components in modern kitchens. They provide invaluable extra workspace, enhance storage capabilities, and crucially, create a natural gathering spot for family and friends, making the kitchen truly the heart of the home. Here are some of the most popular and effective kitchen island design plans:
1. L-Shaped Islands: Dynamic & Expansive
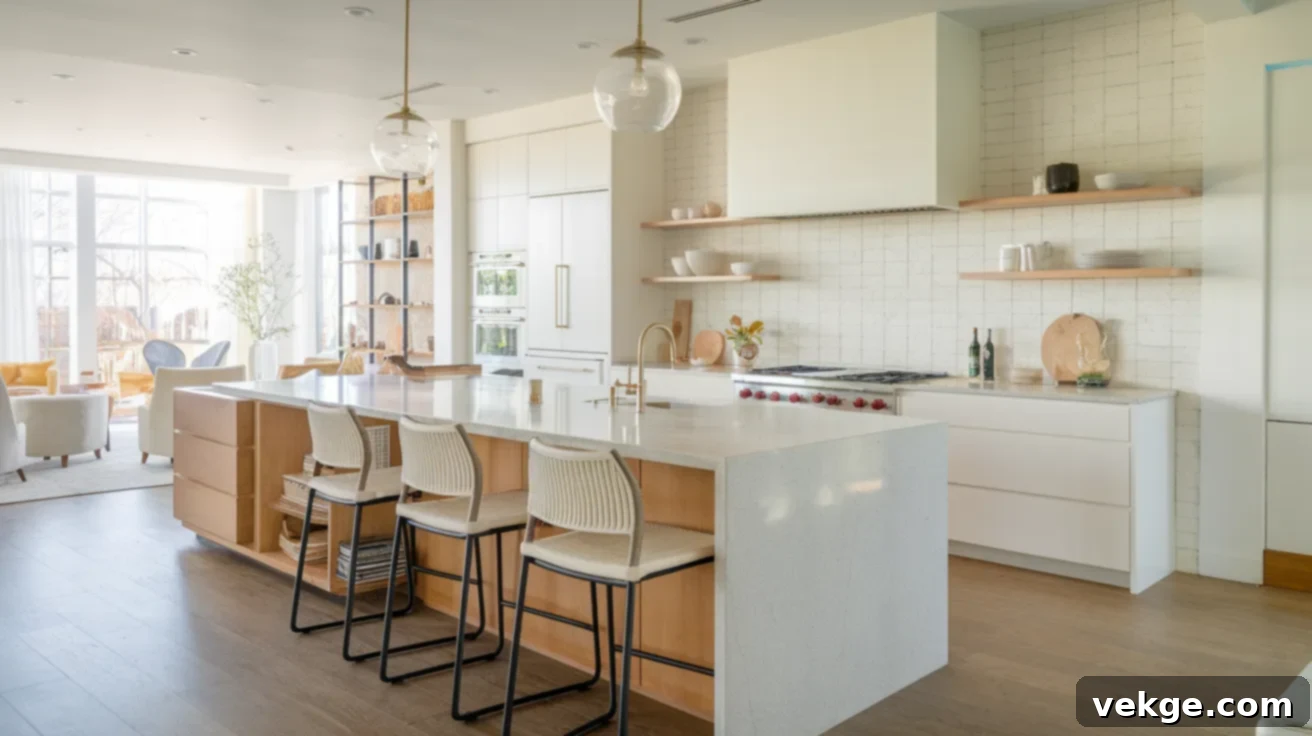
L-shaped islands are celebrated for their ability to create a natural and efficient flow in kitchens, particularly those with open floor plans. This configuration provides truly ample counter space, making it ideal for extensive food preparation, baking, or even multiple cooks working at once. One of their key advantages is the flexibility to incorporate generous seating on one or both sides, transforming part of the island into a comfortable dining or socializing area.
They excel at establishing a clear, yet fluid, division between the cooking zone and the social or dining areas, making them perfectly suited for medium to large kitchens. The unique corner section of an L-shaped island is often an underutilized opportunity that can ingeniously house a secondary sink or a dedicated cooktop, maximizing what might otherwise be “dead space” and enhancing the kitchen’s overall efficiency and versatility.
2. U-Shaped Islands: The Ultimate Workspace
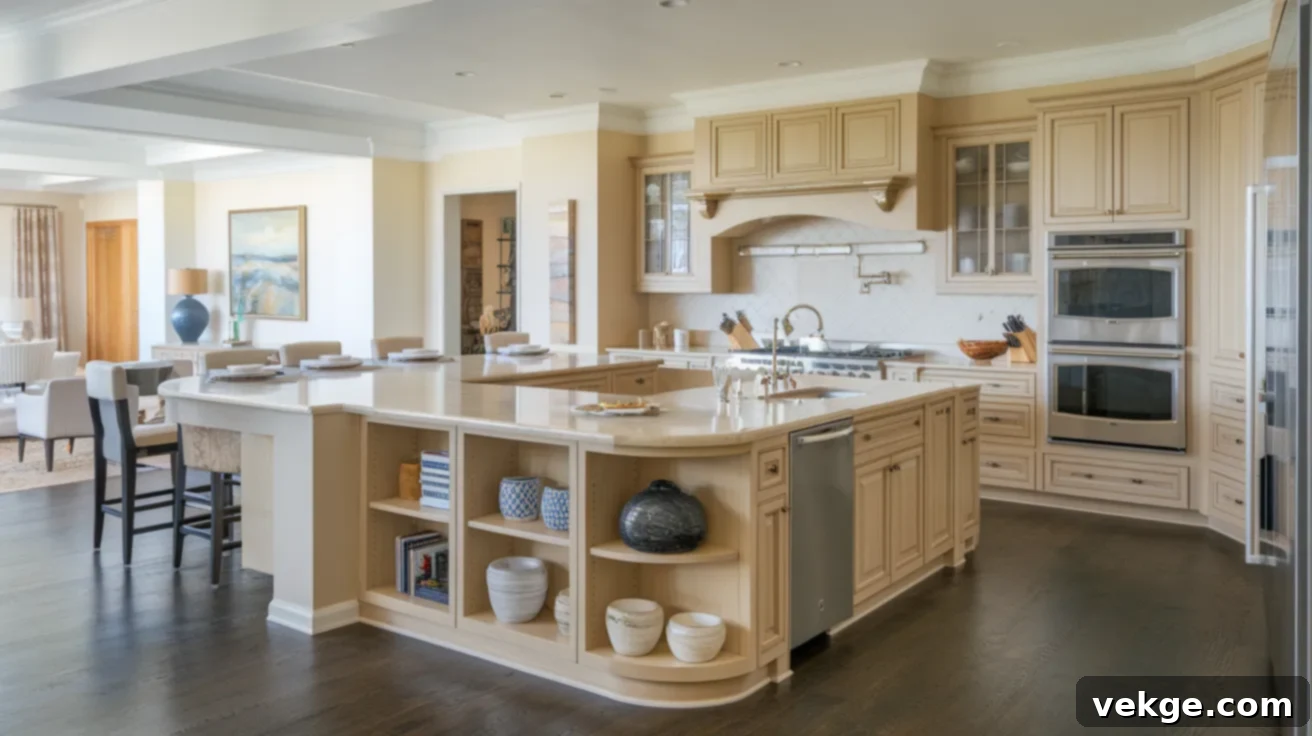
Designed for grander kitchens, U-shaped islands are the epitome of maximized workspace and extensive storage. This robust configuration creates a partial enclosure that places the cook at the very center of the action, providing unparalleled access to various stations. It naturally facilitates the creation of multiple work zones on a single island, perfect for large families or avid entertainers.
U-shaped designs offer extensive opportunities for integrated storage, from deep drawers for pots and pans to specialized cabinetry for small appliances, keeping everything organized and out of sight. They can comfortably accommodate several people working simultaneously, making collaborative cooking a joy. By strategically adding seating to one side of a U-shaped island, you create a natural and inviting gathering point for guests or family, all while maintaining an abundance of uninterrupted work surface.
3. Galley-Style Islands: Sleek & Streamlined Efficiency
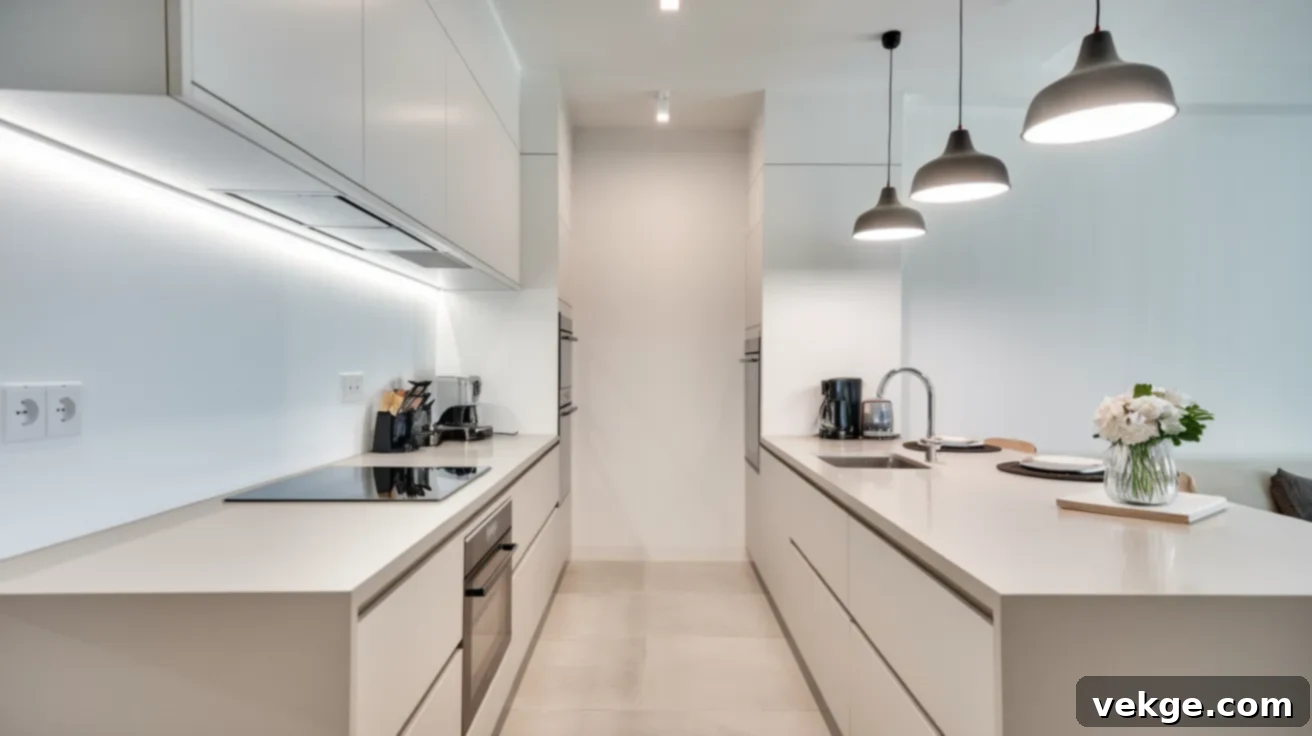
Galley-style islands are characterized by their long, straight, and often narrow design, making them an excellent choice for linear or more compact kitchens. These islands create a sleek, streamlined look that enhances the sense of space and offers generous, uninterrupted workspace along their entire length. They are particularly effective in maintaining an open feel while still providing significant utility.
Despite their often slender profile, galley islands can adeptly accommodate integrated appliances like under-counter refrigerators or microwave drawers, while still leaving ample prep space. It’s common for them to include seating along one side, transforming a portion of the island into a casual dining bar. This layout inherently promotes an efficient workflow, perfectly aligning with modern and contemporary kitchen designs that prioritize clean lines and practical elegance.
4. Circular and Oval Islands: Softening Edges with Style
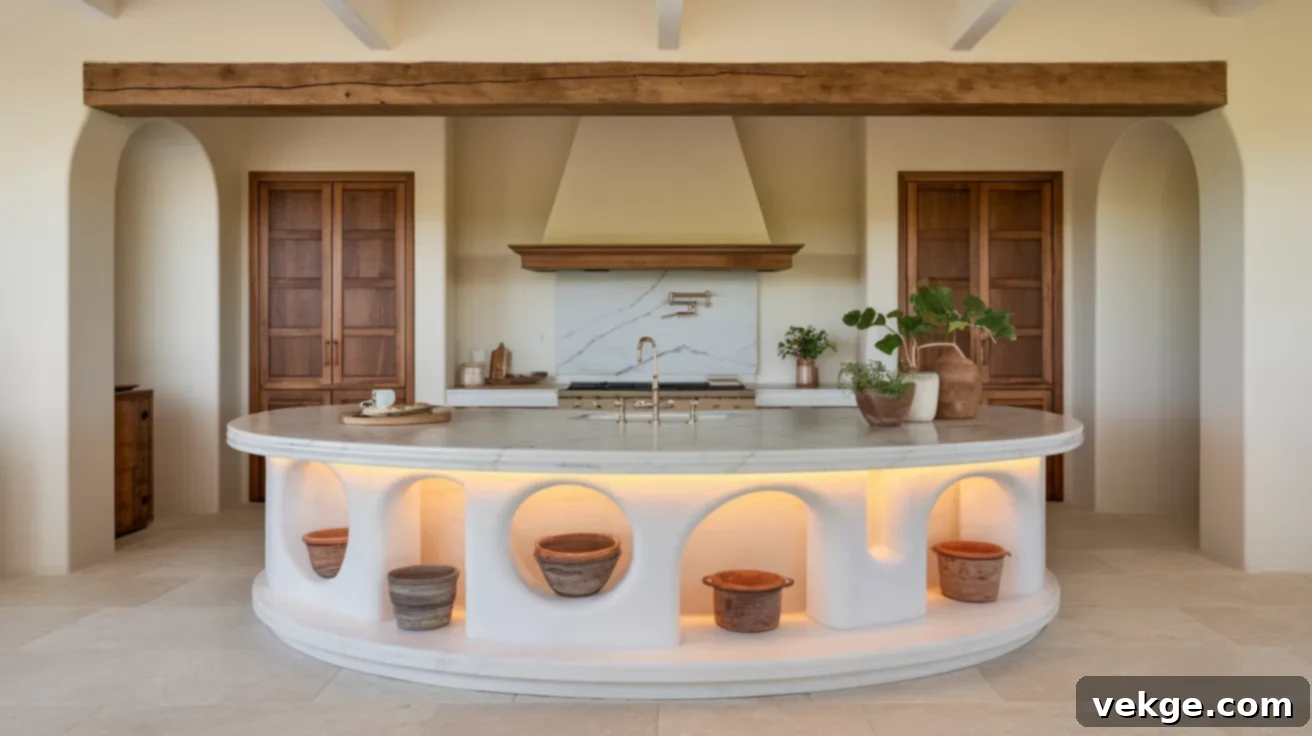
For those looking to break away from conventional rectangular shapes, circular and oval islands introduce a refreshing visual interest and a unique aesthetic to kitchens. These distinctive forms inherently soften the often-hard lines and angularity prevalent in many kitchen designs, creating a more organic and inviting atmosphere. A significant practical benefit is the elimination of sharp corners, which is particularly advantageous in high-traffic areas, improving safety and flow.
Beyond their safety features, these rounded islands naturally foster a more intimate gathering spot, encouraging conversation as everyone faces inward. They work exceptionally well in kitchens with unusual dimensions, angles, or those aiming for a custom, sculptural feel. While they might offer slightly less linear usable surface area compared to their rectangular counterparts, their distinctive appearance and the unique ambiance they create can make them an incredibly worthwhile consideration for homeowners seeking something truly different and visually striking.
5. Two-Tier Islands: Functional Separation & Entertaining Elegance
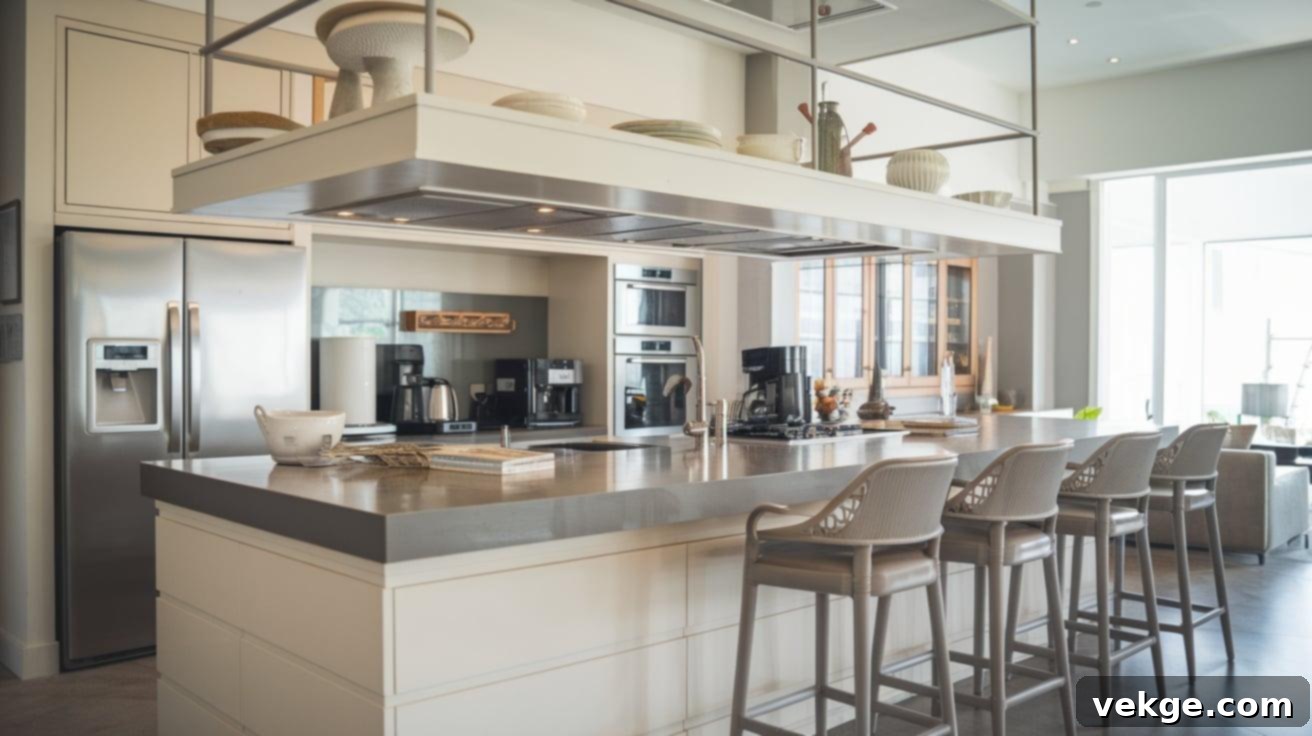
Two-tier islands are a highly functional design that incorporates different height surfaces, typically featuring a standard counter-height work surface alongside a higher, bar-height section. This intelligent arrangement serves several practical purposes: it distinctly separates the often-messy food preparation areas from cleaner dining or entertaining spaces, and cleverly hides kitchen clutter from view when guests are present.
The higher tier provides comfortable, bar-height seating, perfect for casual meals, quick breakfasts, or social interaction during cooking. This design also offers the opportunity to incorporate different materials for each level, adding visual texture and depth. This layout is particularly advantageous for open-concept homes, where the kitchen seamlessly flows into living or dining areas, maintaining an open feel while clearly defining functional zones and enhancing both privacy and presentation.
6. Rolling Islands: Versatility & Mobility
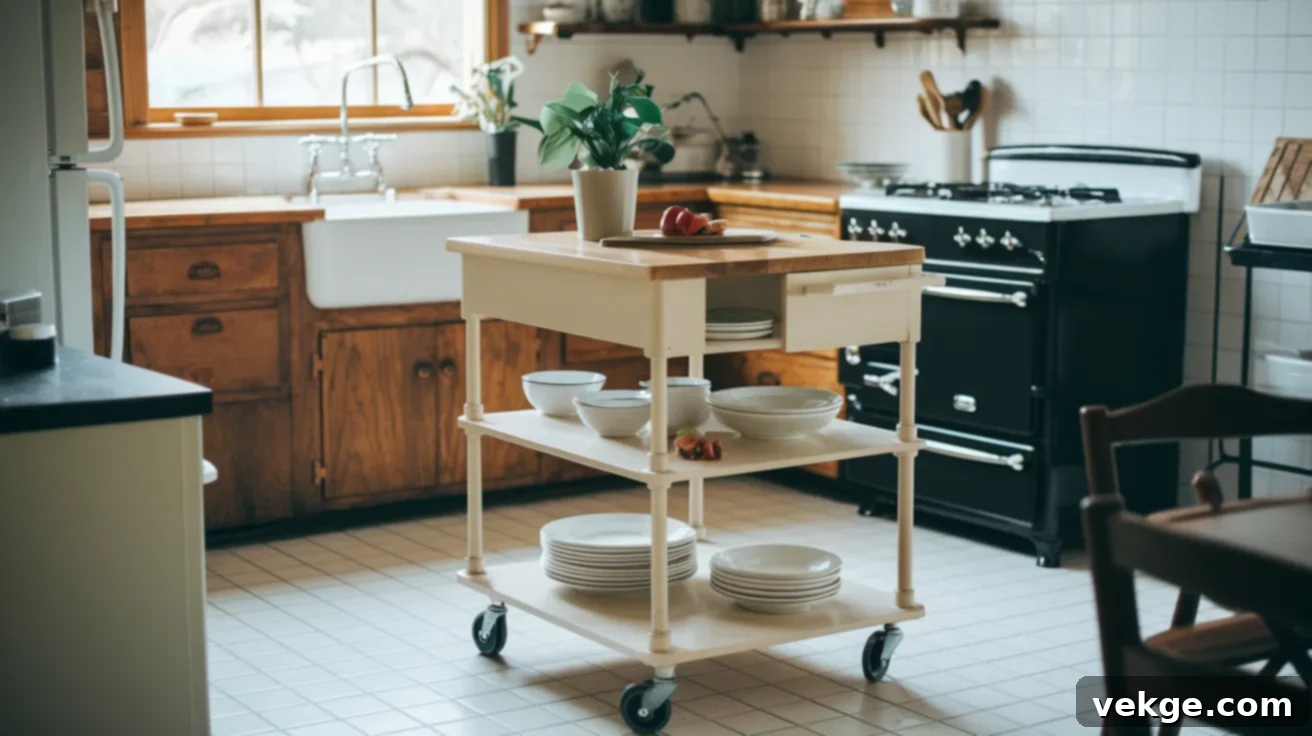
For kitchens that demand flexibility, especially smaller spaces or those with evolving needs, rolling islands offer unmatched mobility and adaptability. These portable options can be effortlessly moved as required for various activities—whether it’s creating extra prep space for a large meal, serving as a mobile bar during entertaining, or simply being tucked away when not in use to open up floor space. They are the ultimate solution for dynamic kitchen layouts.
Often equipped with locking wheels, they provide essential stability when stationary, ensuring safety during use. While generally smaller than permanent built-in islands, rolling versions deliver similar benefits in terms of additional counter space and storage, but with the invaluable added advantage of complete versatility. They are a practical and stylish choice for occasional entertaining or for maximizing the functionality of a compact kitchen.
7. Islands with Integrated Appliances: Smart & Streamlined Functionality
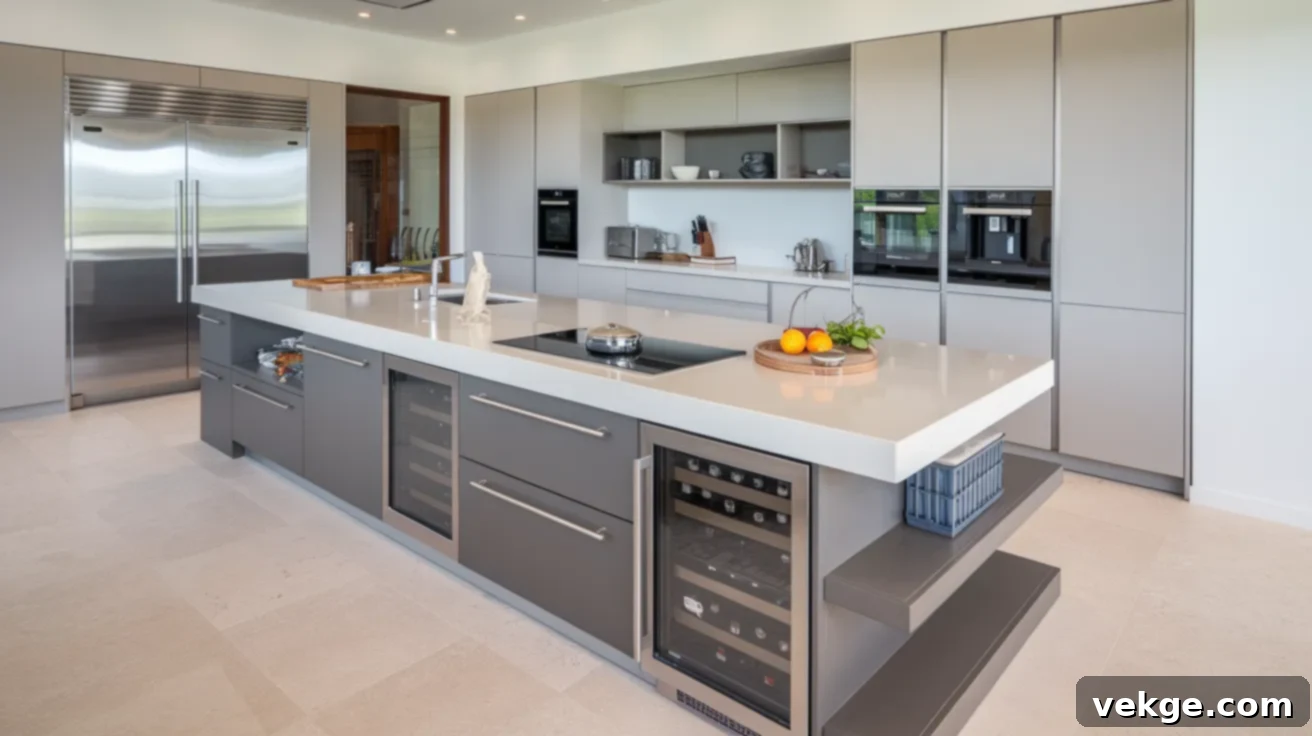
The incorporation of appliances directly into kitchen islands has become an increasingly popular and sophisticated trend, enhancing both convenience and workflow. Common options include sink-centered islands, which efficiently relocate dishwashing tasks away from perimeter walls, or cooking islands featuring integrated cooktops or ranges, transforming the island into the primary cooking station. Other popular additions include built-in refrigerator drawers, microwave ovens, or warming drawers, all seamlessly integrated for a clean look.
When planning an island with appliances, it is crucial to consider the necessary plumbing, ventilation, and electrical requirements very early in the design process. Proper planning ensures that these vital utilities are correctly installed and adequately supported, creating a highly functional and beautifully integrated appliance hub that significantly boosts your kitchen’s efficiency and user experience.
8. Waterfall Islands: Modern Elegance & Visual Impact
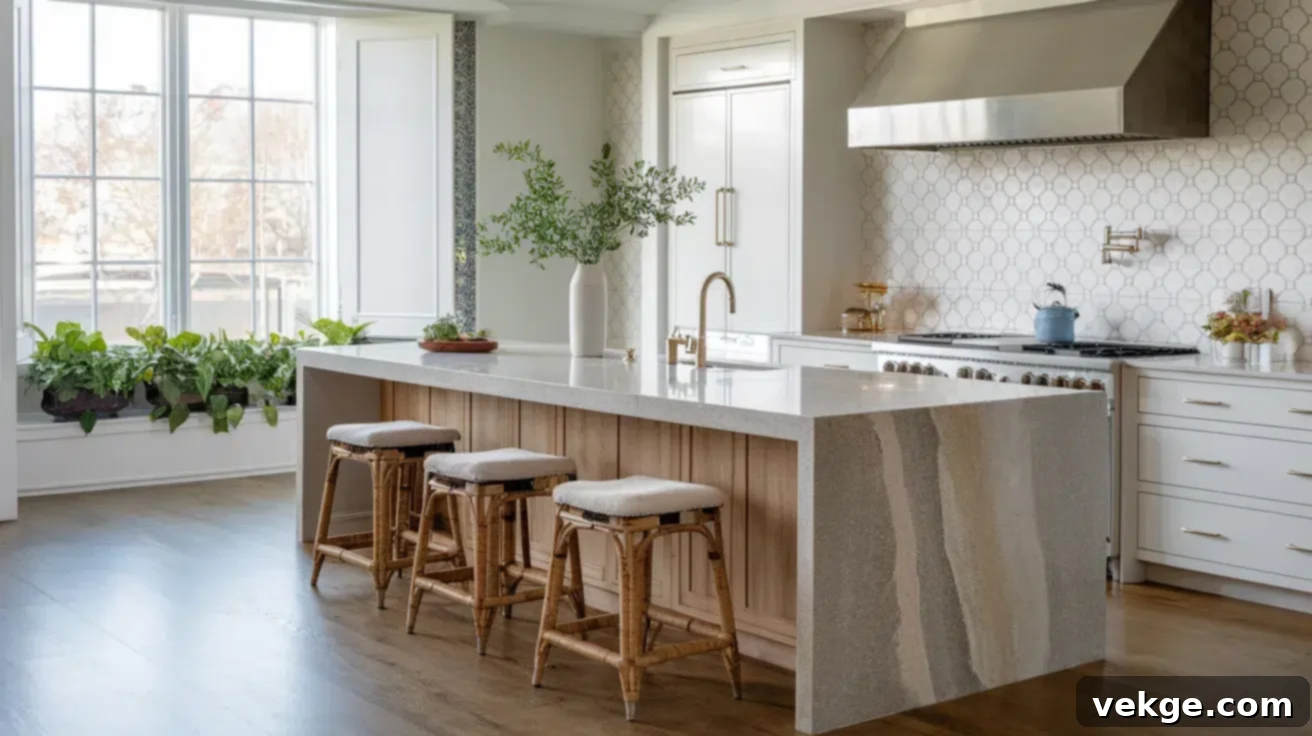
Waterfall islands are a hallmark of contemporary kitchen design, characterized by the striking visual effect created when the countertop material extends seamlessly down the sides to the floor. This design approach creates a continuous, unbroken visual flow that transforms the island into a truly sculptural and commanding focal point within the kitchen. It’s an ideal way to showcase the natural beauty and unique patterns of high-quality countertop materials.
Beyond their stunning aesthetic, waterfall edges offer practical benefits such as a clean, minimalist appearance and robust protection for the cabinet ends from everyday wear and tear. This style works exceptionally well with premium materials like natural stone (granite, marble), engineered quartz, or solid surface materials, where the material’s pattern or veining can create a dramatic, cohesive statement, elevating the entire kitchen’s design.
9. Multi-Level Islands: Ultimate Customization for Diverse Needs
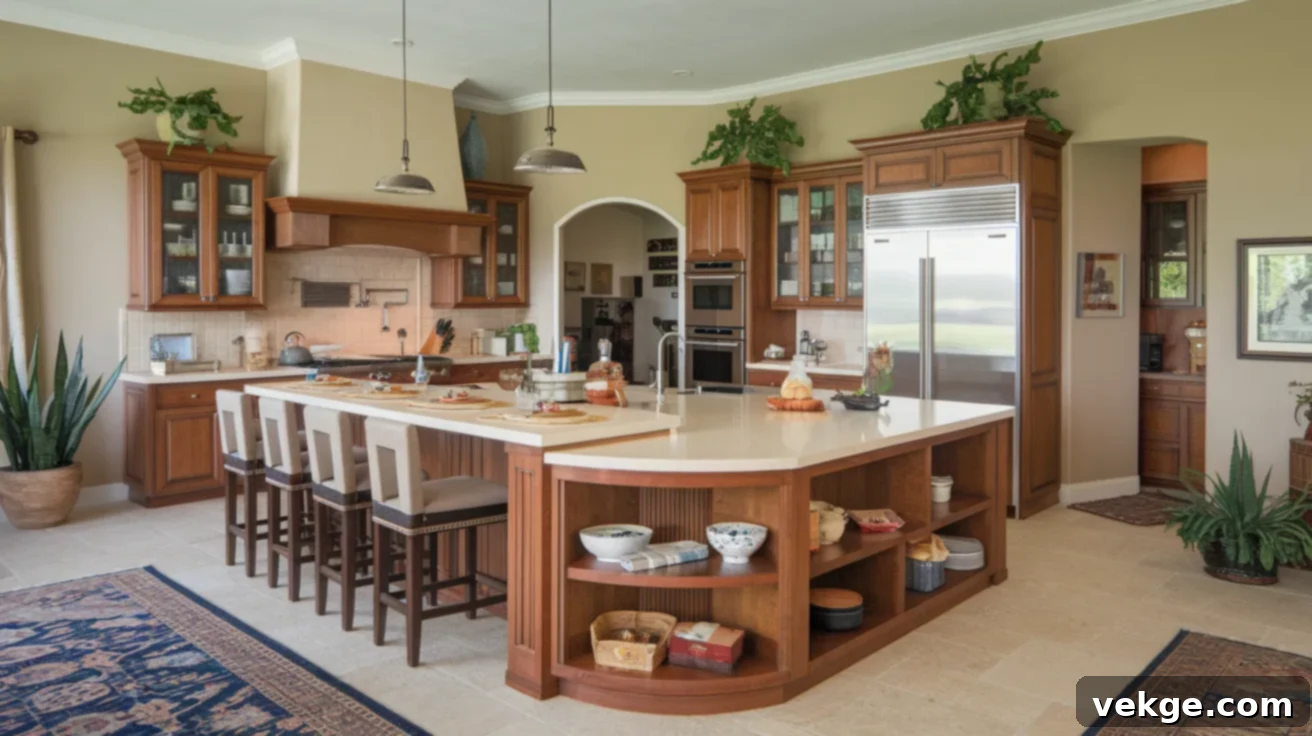
Multi-level islands represent the pinnacle of customization, moving beyond the traditional two-tier approach to incorporate various heights and depths, each optimized for different functions. These sophisticated islands can feature a standard counter height for general food preparation, lower sections ideal for baking, kneading dough, or making pasta (often at a comfortable seated height), and higher sections specifically designed for casual dining or a breakfast bar. Some designs even include cut-out sections to perfectly accommodate stools or wheelchairs.
This dynamic approach allows for a truly customized workspace that precisely meets specific cooking needs, ergonomic requirements, and entertaining styles. Multi-level islands are an excellent choice for serious home chefs or families with diverse needs, creating a highly personalized and exceptionally functional centerpiece that adapts to every activity within the kitchen.
10. Peninsula-Style Extensions: Smart Alternatives for Smaller Spaces
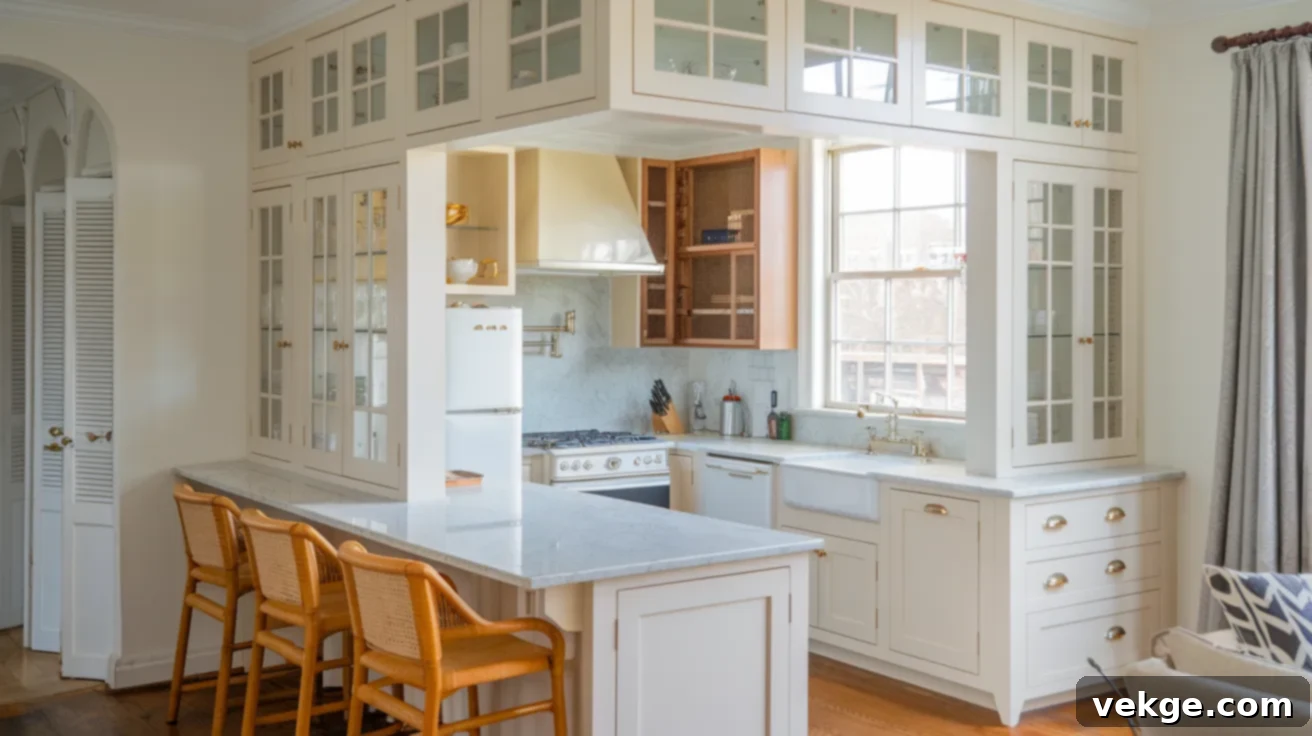
While not technically freestanding islands (as they connect to existing cabinetry or a wall on one end), peninsula layouts offer many of the same coveted benefits, making them an excellent alternative, especially in kitchens where a true island simply won’t fit. Peninsula configurations are incredibly effective in smaller or more compact kitchens, providing a generous extension of counter space and storage without demanding the open floor space a traditional island requires.
They cleverly create a partial room division without the need for solid walls, helping to define zones within an open-plan living area. Peninsulas offer valuable additional counter and storage space, and can very easily include seating on their open sides, transforming into a breakfast bar or a casual dining area. For kitchens where space is a premium, peninsulas provide an incredibly practical, stylish, and highly functional solution, delivering many of the advantages of an island without the spatial constraints.
Steps to Create Your Dream Custom Kitchen Island
Building a custom kitchen island is a rewarding project that allows you to infuse your kitchen with personalized style and enhanced functionality. This practical guide provides a clear, step-by-step path to crafting a practical, attractive, and perfectly tailored addition to your kitchen.
1. Measure Your Kitchen Space Precisely

Precise measurement forms the absolute core of any successful kitchen island project. Begin by carefully calculating the available floor area, paying meticulous attention to how people will move through the space around the island. A critical rule of thumb is to aim for a minimum of 36-48 inches (approximately 90-120 cm) of clearance around all sides of your island. This ensures smooth traffic flow, allows cabinet doors and appliance drawers to open fully, and prevents the kitchen from feeling cramped or difficult to navigate.
Beyond clearance, select island dimensions that work harmoniously with your kitchen’s overall layout and existing design. Consider the “working triangle” (sink, stove, refrigerator) and ensure your island enhances, rather than obstructs, this crucial efficiency pathway. Take multiple measurements and double-check them to avoid costly errors later in the building process.
2. Design Your Island: Function Meets Style
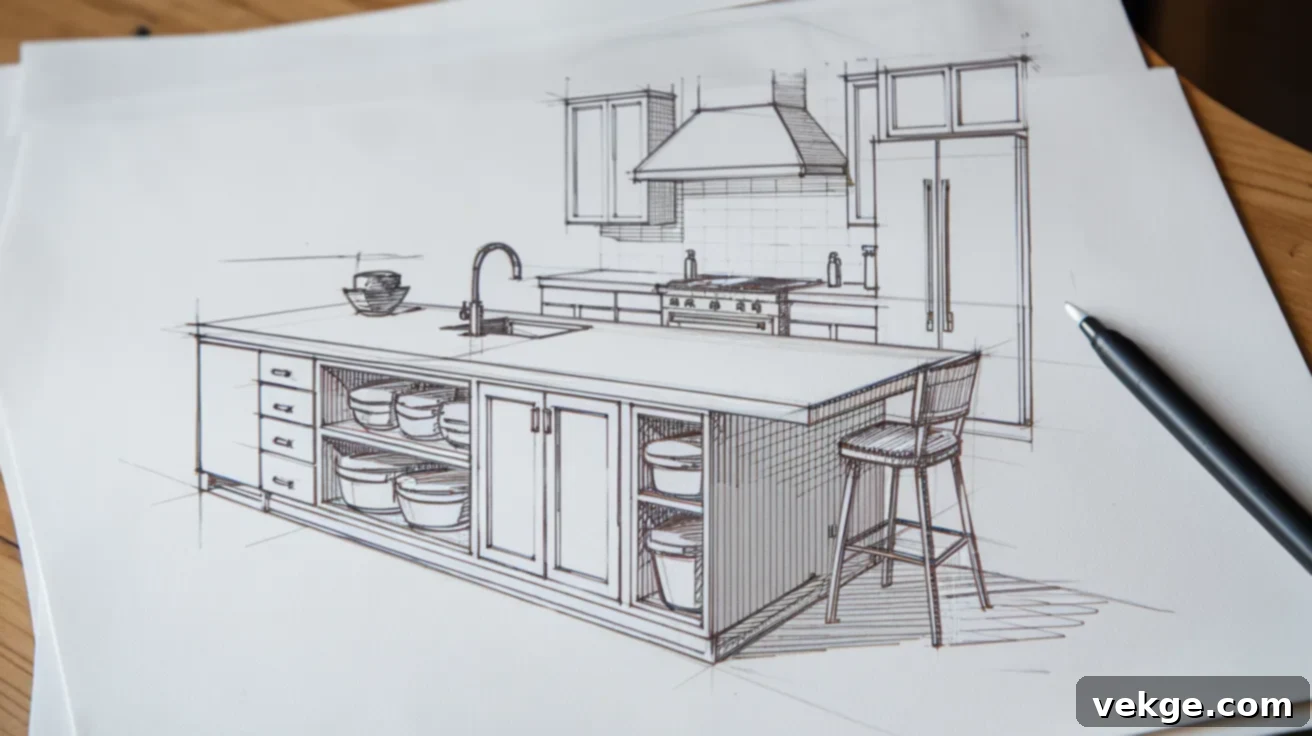
Once you have your measurements, it’s time for the creative part: designing. Create a detailed sketch or a digital rendering that meticulously captures your unique requirements and perfectly complements your kitchen’s existing style. Your first step is to determine the island’s primary purpose or, more likely, its combination of purposes. Will it primarily be for food preparation, a casual dining spot, extra storage, or perhaps a dedicated baking station?
Select design elements that seamlessly integrate with and enhance your existing kitchen decor, considering everything from cabinet styles and colors to countertop finishes. Critically, think about practical aspects like the types of storage options you need (drawers, open shelving, closed cabinets), and if applicable, the layout and height of potential seating areas. A well-designed island considers both its aesthetic contribution and its practical utility.
3. Gather Tools and Materials: Preparation is Key
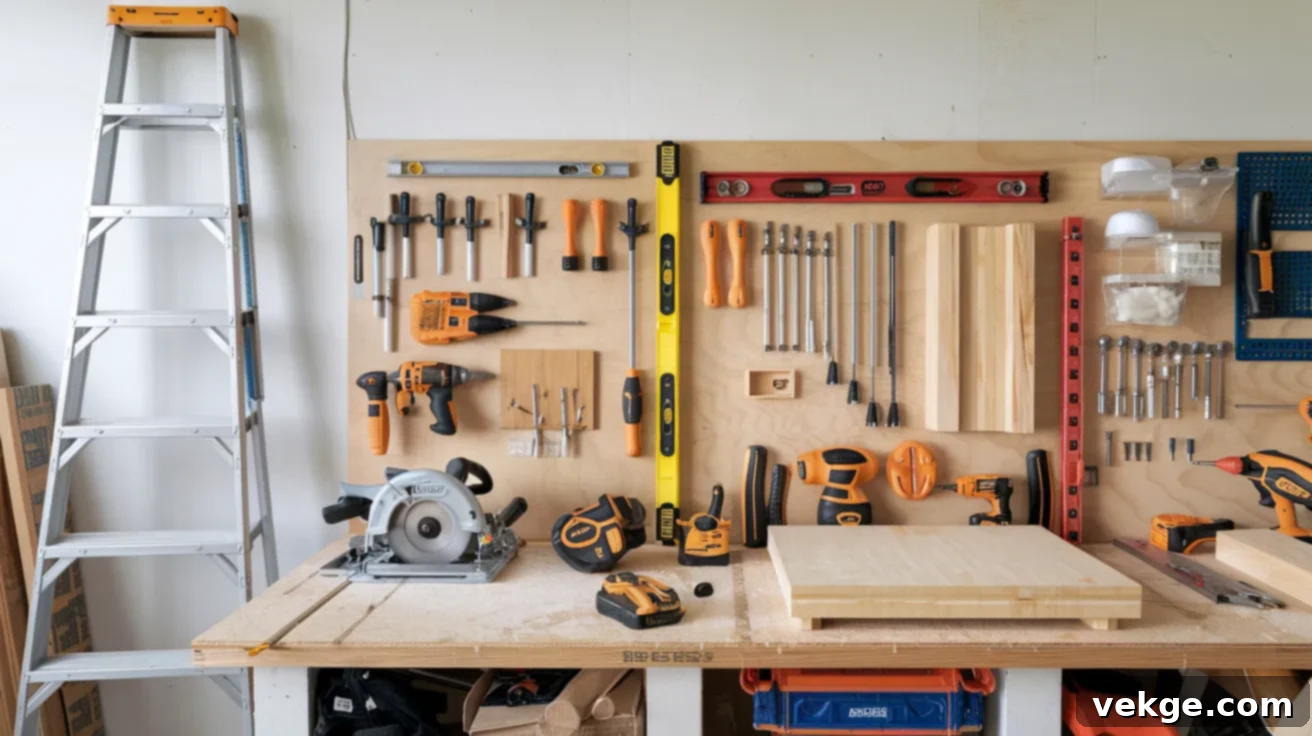
Thorough preparation sets the foundational stage for a successful and smooth project. Before you begin construction, meticulously collect all essential tools. This typically includes a reliable measuring tape, a circular saw (or miter saw for precision cuts), a power drill, a spirit level, screwdrivers, a sander, and appropriate safety gear (gloves, eye protection). Having everything at hand will save significant time and frustration.
Next, gather your materials. For the base, you’ll likely need high-quality plywood or sturdy lumber. For the countertop, consider options like durable butcher block, elegant granite, versatile quartz, or a solid surface material. Don’t forget consumables such as wood screws of various lengths, strong wood glue, paint or stain to match your desired finish, and hardware like cabinet handles, drawer pulls, and mounting brackets. Confirm all materials are suitable for kitchen use and meet local building codes.
4. Construct the Base: The Foundation of Stability
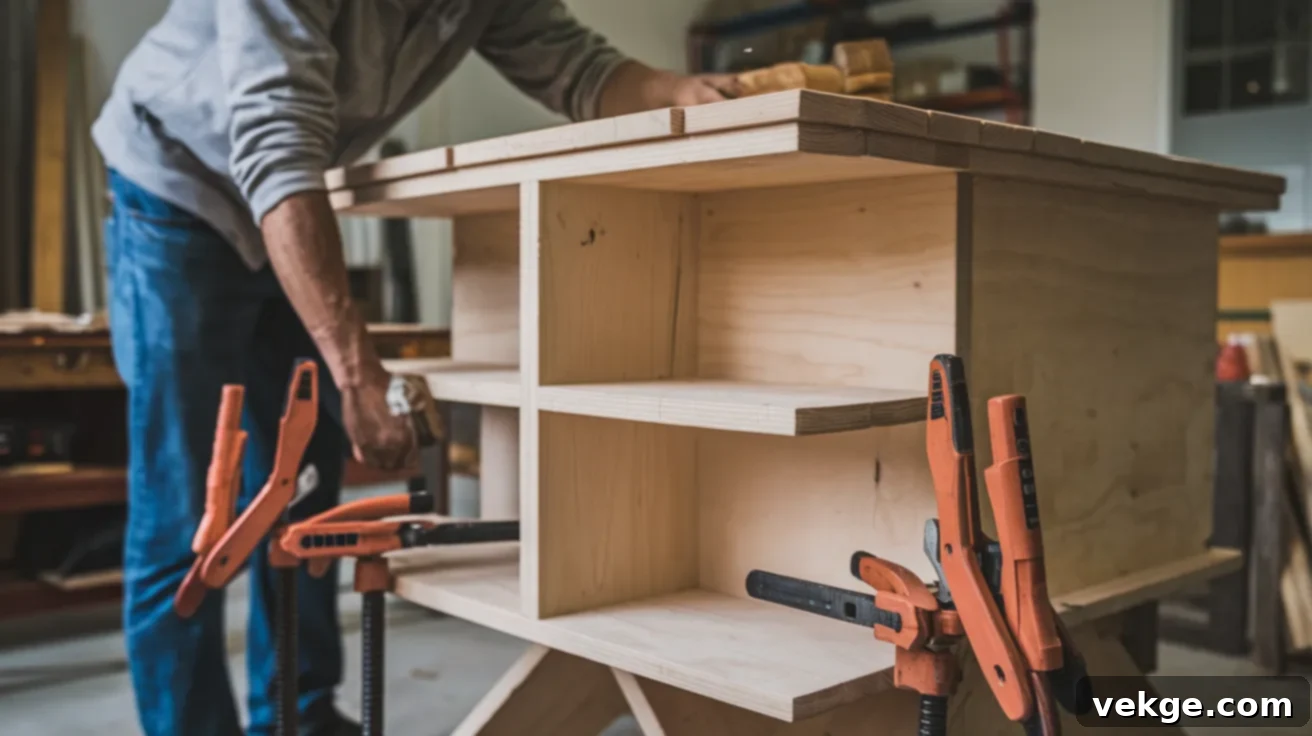
Building a robust and stable base is paramount, as it will support the entire weight of the countertop and withstand the rigors of daily use. Follow your detailed design plan to cut and assemble the framework. This is where you’ll create the internal storage compartments, whether they are simple shelves, sophisticated drawers, or versatile open spaces, all tailored to match your specific storage needs and kitchen items.
Throughout the construction, frequently use your spirit level to ensure that the frame is completely level and plumb at every stage. This step is critical; a perfectly level base prevents future stability issues, ensures even countertop installation, and provides a solid, long-lasting foundation for your custom kitchen island. Secure all joints with both screws and wood glue for maximum strength and durability.
5. Install the Countertop: The Island’s Crowning Glory
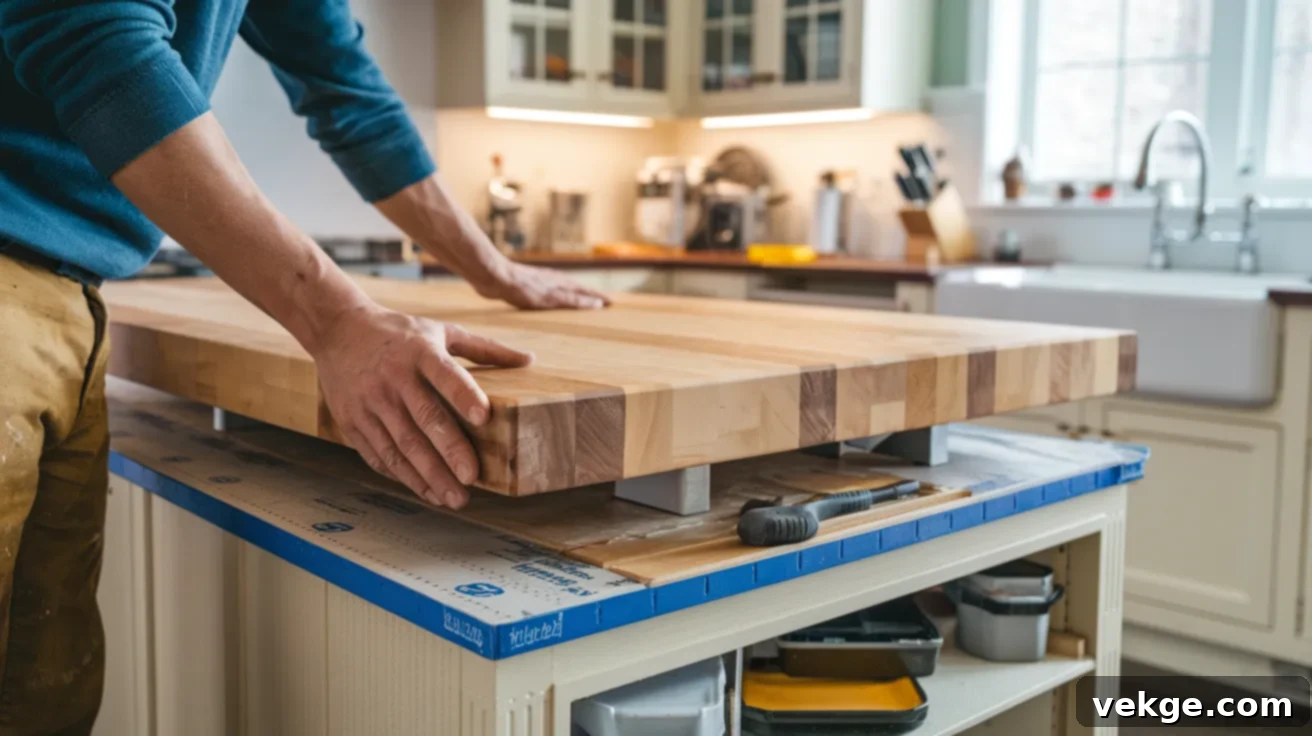
With the base securely in place, it’s time to install the countertop—the most visible and frequently used part of your island. Carefully cut your chosen countertop material to precise measurements, using appropriate tools for the material (e.g., a diamond blade for stone, a circular saw for wood). Precision here is key for a professional finish.
Securely mount the countertop to the base using the appropriate techniques and fasteners recommended for your specific material, ensuring it is perfectly level and firmly attached. For materials like wood, apply a high-quality protective finish or sealant. This not only enhances its aesthetic appeal but also significantly increases its durability and resistance to moisture, stains, and daily wear and tear, especially important in a busy kitchen environment.
6. Add Final Touches: Details that Define Perfection
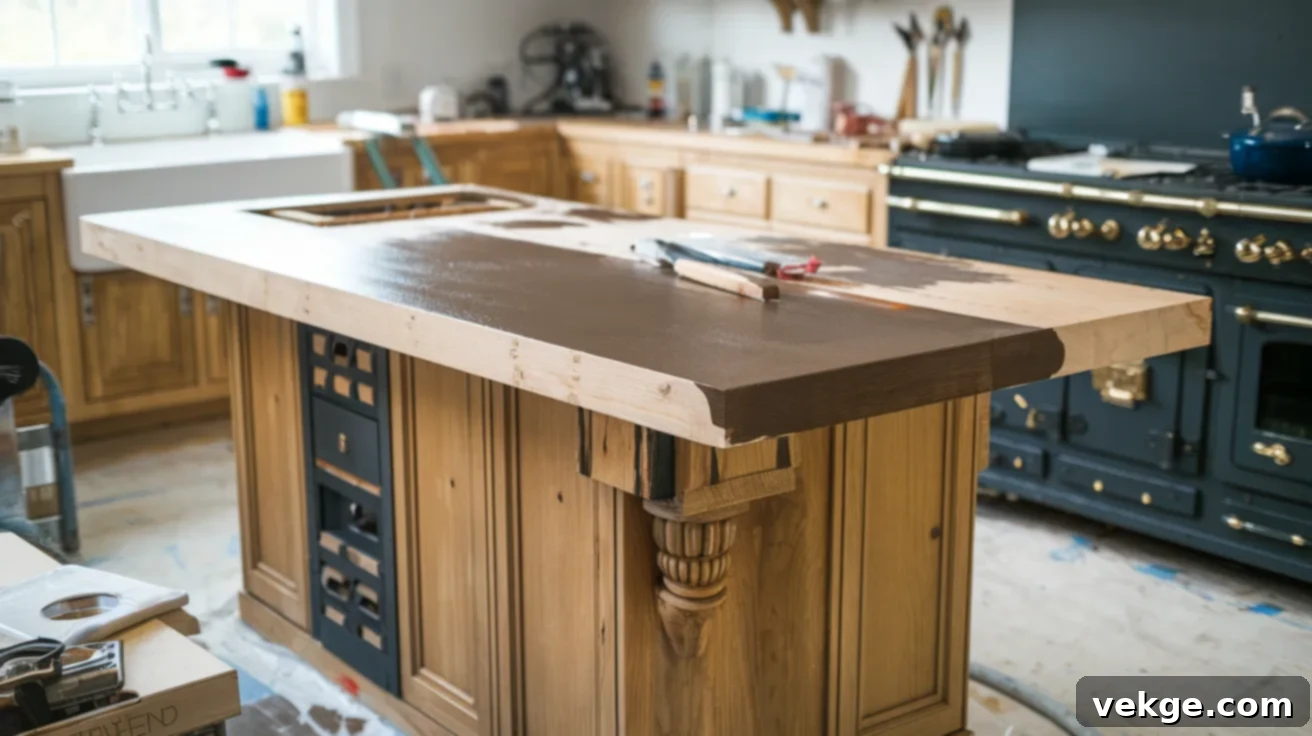
The final touches are where your island truly comes to life and reflects your personal style. Begin by installing all hardware, such as cabinet knobs, drawer pulls, and any decorative elements. Proceed with painting, staining, or applying a final protective coat to the base, ensuring it perfectly matches or beautifully complements your existing kitchen decor. Aim for a smooth, even finish that enhances the island’s overall appeal.
Consider adding practical features that significantly increase functionality. This might include integrating electrical outlets for small appliances or charging devices, installing discrete under-cabinet lighting, or even adding decorative trim. Paying meticulous attention to these final details creates a polished, professional-looking kitchen island that not only reflects your unique personal style but also perfectly meets and exceeds your specific cooking and entertaining needs for years to come.
Key Features to Consider For Your Kitchen Island
A kitchen island is much more than just an additional counter space; it’s a dynamic, multifunctional hub. Understanding the critical design elements that transform an ordinary island into a highly functional and attractive workspace is essential for maximizing its potential.
Storage Solutions: Cleverly Designed Organization
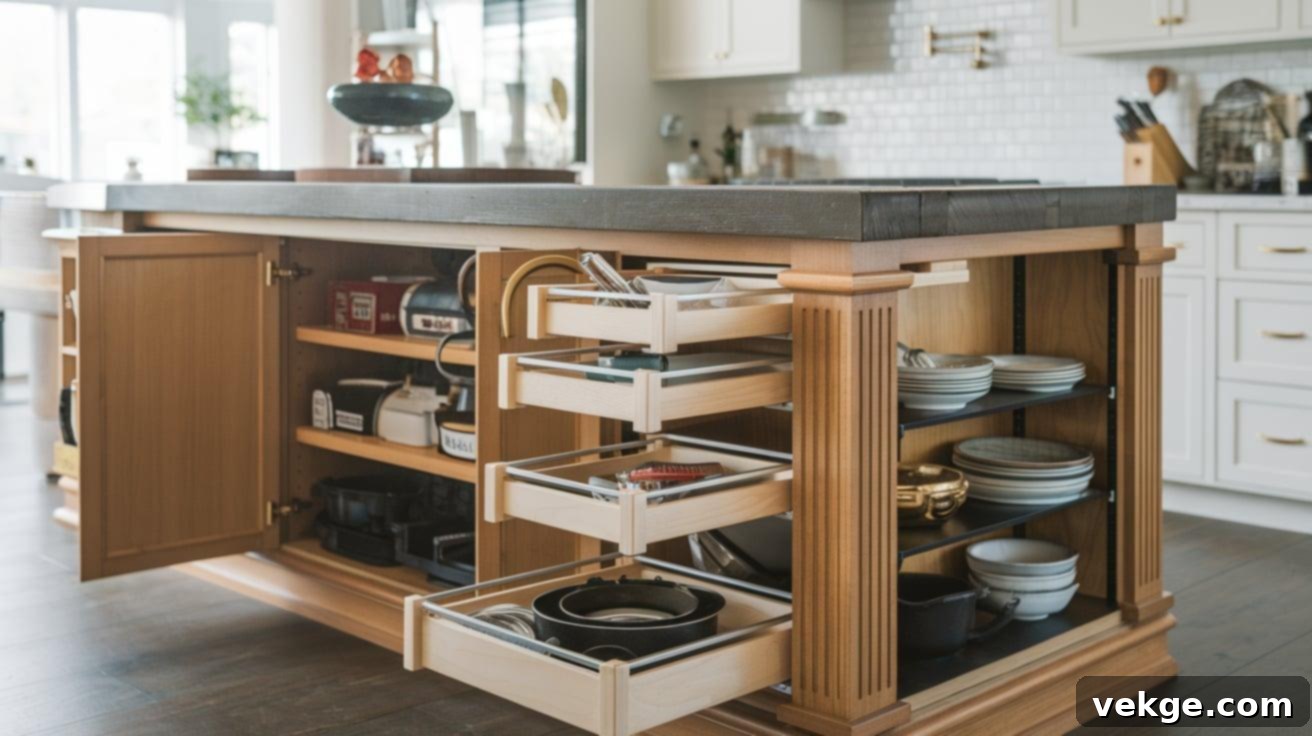
Smart storage is the undeniable backbone of an effective kitchen island design. Innovative solutions are crucial for maximizing every available inch of space, all while maintaining a clean, uncluttered, and highly organized appearance. Think beyond basic cabinets.
Pull-out cabinets and pantry drawers offer convenient, full-access retrieval for frequently used items, ensuring nothing gets lost in the back. Integrate specialized storage solutions such as narrow spice racks, dedicated knife blocks, vertical storage slots for cutting boards or baking sheets, and even small appliance garages that keep clutter off your counters. Thoughtful storage should accommodate your specific cooking style and keep essential tools within easy reach, significantly reducing visual clutter and dramatically improving overall kitchen efficiency and flow. Consider open shelving for displaying decorative items or cookbooks, or closed cabinetry for concealing less attractive necessities.
Work Surfaces and Countertops: The Balance of Beauty and Durability
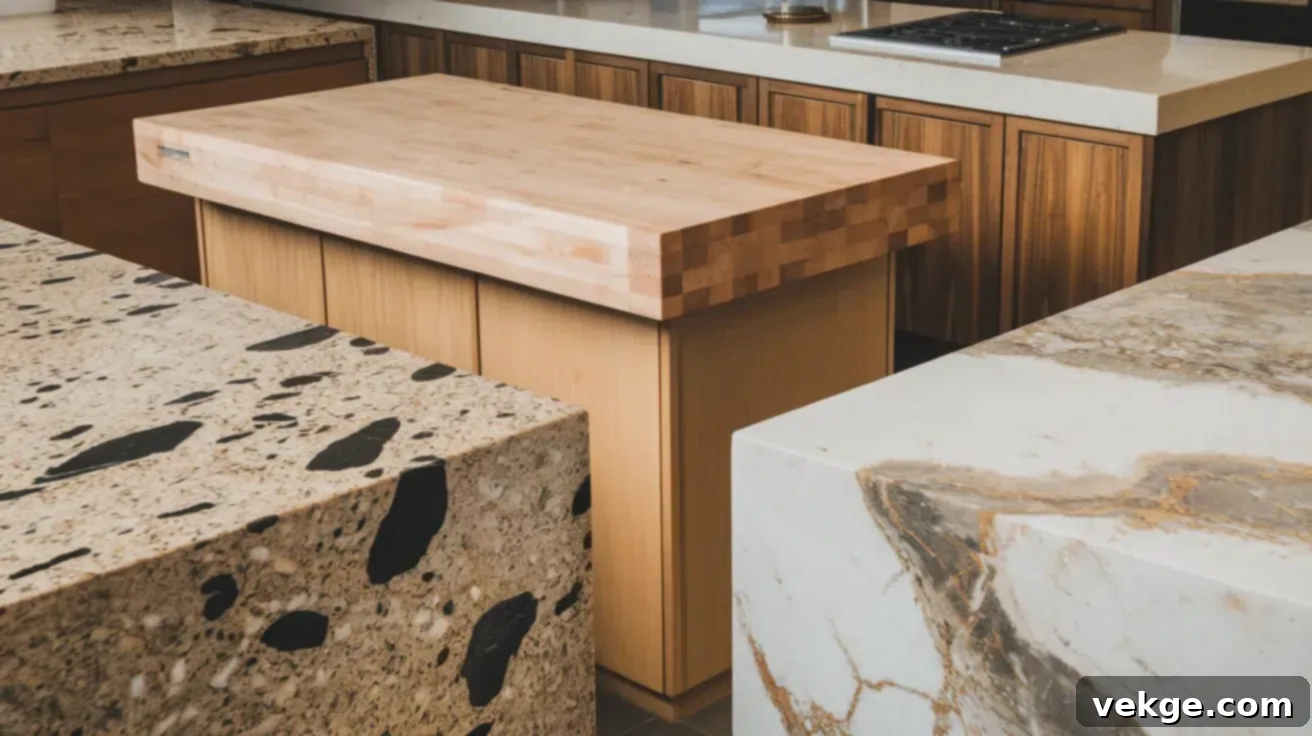
Selecting the right countertop material for your kitchen island is a pivotal decision that profoundly impacts both the island’s day-to-day functionality and its overall visual appeal. Each material offers a unique set of characteristics, catering to different priorities in a busy kitchen environment.
Granite remains an enduringly popular choice, revered for its exceptional durability, natural heat resistance, and timeless, classic style. Its unique patterns add character to any kitchen. Butcher block countertops, typically made from hardwoods like maple or walnut, provide a warm, inviting, and natural look, offering a resilient surface where direct food preparation (chopping, kneading) is possible with proper maintenance. Quartz, an engineered stone, offers a perfect balance of remarkable durability, impressive stain resistance, and incredibly low maintenance, along with a vast range of color and pattern options to suit any design aesthetic. Other options include marble for luxurious elegance (though it requires more care), stainless steel for an industrial look, or concrete for a modern, edgy feel. Consider the material’s porosity, heat resistance, scratch resistance, and required maintenance when making your choice.
Lighting and Power Sources: Enhancing Functionality and Ambiance
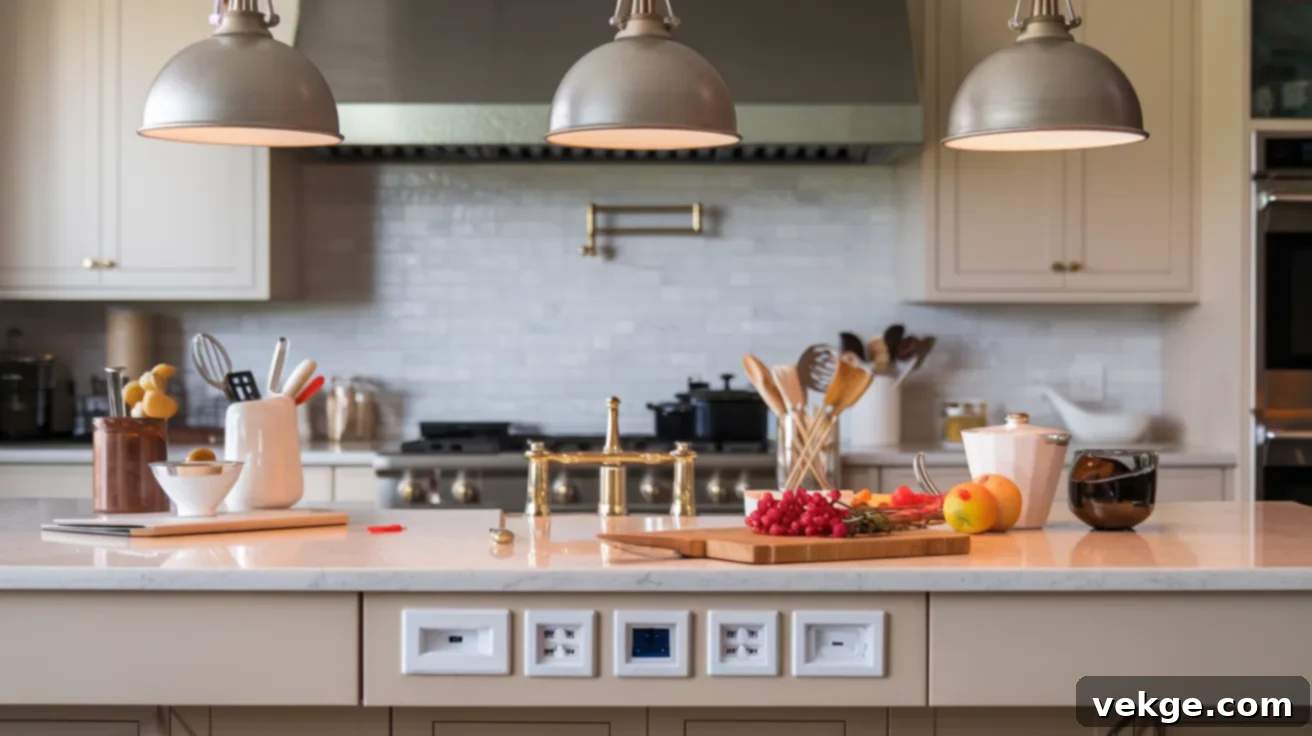
Effective lighting and strategic power integration are crucial for making your kitchen island a truly multifunctional and highly utilized centerpiece. Beyond general ambient lighting, your island requires targeted task lighting to ensure safe and efficient food preparation. Elegant pendant lights have become a ubiquitous design element, providing not only excellent task illumination directly over the work surface but also serving as a significant decorative focal point, adding style and character to the kitchen.
Consider adjustable lighting systems that can be dimmed to suit different times of day or various activities, transforming the island’s mood from bright workspace to intimate dining spot. Equally important is the integration of accessible power outlets. Incorporating USB charging ports and standard electrical outlets directly into the island ensures easy access for small appliances, laptops, or mobile devices. The ultimate goal is to make your island space not only functional and safe but also beautifully designed to significantly improve your overall kitchen experience and adaptability.
Maintenance Tips for Your Kitchen Island
A custom kitchen island isn’t just an investment in style and function; it’s a prominent centerpiece that requires consistent care to maintain its beauty and durability. Regular, proactive maintenance will keep your island looking fresh, vibrant, and performing at its best for many years to come, protecting your investment.
- Wipe surfaces daily: Use a soft, damp cloth and a mild dish soap solution to clean all surfaces. Avoid harsh chemicals, abrasive cleaners, or scouring pads, as these can easily damage stone, wood, or quartz finishes, dulling their shine or compromising their seal.
- Use cutting boards and trivets: Always place cutting boards beneath knives and sharp utensils to protect countertops from scratches and gouges. Similarly, use trivets or hot pads under hot pots, pans, and baking dishes to prevent heat damage, discoloration, or cracking, especially on sensitive materials.
- Seal stone surfaces regularly: For natural stone surfaces like granite or marble, re-seal them every 6–12 months (or as recommended by the manufacturer) with a penetrating sealer. This prevents staining from liquids and oils, and significantly reduces moisture absorption, prolonging the stone’s life and beauty.
- Oil butcher block countertops monthly: To maintain moisture resistance and prevent drying or cracking, regularly oil butcher block countertops monthly (or more frequently if used heavily) with food-safe mineral oil or a specialized butcher block conditioner. This also enhances their natural luster.
- Clean spills immediately: Act quickly to clean up any spills, especially those involving acidic liquids (like citrus juice, vinegar) or highly pigmented foods (like red wine, coffee, turmeric). Immediate cleaning is crucial to prevent permanent staining, particularly on porous materials like wood or unsealed stone.
- Tighten loose hardware: Periodically check and tighten any loose hardware, such as cabinet knobs, drawer handles, and screws within the island’s frame. This simple step helps keep your island sturdy, prevents wobbly components, and extends the lifespan of the cabinetry.
- Inspect electrical and plumbing fixtures regularly: If your island incorporates built-in sinks, cooktops, dishwashers, or electrical outlets, make it a habit to inspect these fixtures regularly. Catching small issues like leaky pipes, loose wiring, or malfunctioning outlets early can prevent larger, more costly repairs and ensures continued safe operation.
By diligently following these simple yet effective maintenance steps, your custom kitchen island will not only continue to look stunning but will also perform at its absolute best, serving as a cherished and functional hub in your home for many years to come.
Conclusion
Designing the right kitchen island is a transformative step that can dramatically enhance your space, making it more useful, stylish, and an absolute joy to be in. It’s an investment in the heart of your home, promising increased functionality and elevated aesthetics.
Now that you’re equipped with a comprehensive understanding of the various kitchen island design plans, practical insights into how to build one, and essential tips on how to keep it looking pristine, you’re perfectly ready to take the next exciting step in your kitchen renovation journey.
Take the time to thoughtfully consider your unique kitchen needs, your personal style, and your daily routines. With this knowledge, you can confidently begin planning the custom island that not only fits your home best but also beautifully reflects your lifestyle. Remember, even seemingly small choices, such as selecting the most appropriate layout or choosing the right materials, can collectively make a monumental difference in the overall look and feel of your kitchen.
Above all, prioritize good maintenance. A little consistent care will ensure your magnificent kitchen island remains a beautiful, functional, and admired centerpiece for countless years, enduring through all the cooking, gathering, and memory-making it facilitates. Embrace the journey of creating your ideal kitchen island!
If you found this detailed guide helpful and inspiring, we encourage you to explore our other blogs for even more smart kitchen ideas, expert design tips, and practical home improvement advice.
Frequently Asked Questions About Kitchen Islands
What is the ideal size for a kitchen island?
The ideal size for a kitchen island typically ranges from 2-4 feet wide and 4-6 feet long. This allows for comfortable movement around the island (maintaining at least 36-48 inches of clearance on all sides) while providing ample workspace and often space for seating. However, the true ideal size depends heavily on your kitchen’s overall dimensions and the specific functions you intend for the island.
How long does it take to build a custom kitchen island?
Building a custom kitchen island from scratch typically takes 1-3 weekends for a DIY enthusiast, depending on the complexity of the design, your skill level, and whether you’re integrating appliances. Professional installation can be much quicker, often completed within a few days once materials are prepared.
Can a kitchen island be added to a small kitchen?
Absolutely! Even small kitchens can benefit from an island. Options like narrow islands, rolling islands (on casters), or peninsula-style extensions are designed to maximize limited space without obstructing traffic flow. The key is to choose a design that fits the scale of your kitchen and offers essential functionality without overwhelming the room.
What materials are best for kitchen island countertops?
Popular and durable options include granite (for durability and natural beauty), quartz (for low maintenance and wide color choices), and butcher block (for a warm, natural look and direct food prep). Other choices like marble, concrete, or stainless steel also offer unique aesthetics and benefits, but may require specific maintenance considerations.
How much clearance is needed around a kitchen island?
A minimum of 36 inches (90 cm) of clear space is recommended around all working sides of a kitchen island to allow for comfortable movement, opening cabinet doors, and using appliances. For higher traffic areas or if multiple cooks are often in the kitchen, 42-48 inches (105-120 cm) is preferred.
