DIY Garage Door Insulation: Comprehensive Guide to Boost Energy Efficiency, Comfort & Home Value
Insulating your garage door is much more than just a weekend DIY project; it’s a smart strategic upgrade that can dramatically transform your garage. Imagine your garage evolving from a simple storage area or car park into a versatile, energy-efficient extension of your home. Whether you envision your garage as a bustling workshop, a dedicated fitness room, or a serene retreat, proper insulation significantly enhances comfort by stabilizing interior temperatures, dramatically reducing outdoor noise, and cutting down on your home’s overall energy costs.
This comprehensive guide will walk you through every critical step of insulating your garage door, providing detailed instructions and invaluable expert tips to ensure you achieve the best possible results. From understanding the core benefits and selecting the ideal insulation material to the final touches that guarantee long-term durability and efficiency, we’ve got you covered. Let’s embark on this transformative journey together, making your garage not just another part of your house, but a cozy, functional, and energy-smart living space.
In the ongoing quest for a more energy-efficient and comfortable home, many homeowners often overlook the garage door as a significant player in energy loss and thermal inefficiency. Yet, this large, often uninsulated or poorly insulated surface acts as a major gateway for energy leakage. This constant thermal exchange impacts not only the internal temperature of the garage itself but also heavily influences the overall climate control and energy consumption within your adjacent living spaces, particularly if your garage shares walls with your home.
Investing in garage door insulation offers a myriad of compelling benefits that extend far beyond simple energy savings. It fundamentally transforms your garage into a more livable and usable space, effectively minimizes external noise pollution, and can even substantially increase the resale value of your property. With the right tools, appropriate materials, and a bit of patience, insulating your garage door can be an incredibly rewarding DIY project that pays significant dividends in enhanced comfort, reduced utility bills, and long-term home value.
This detailed, step-by-step guide is designed to equip you with all the essential knowledge and practical techniques required to effectively insulate your garage door. By following these instructions, you will turn it into a robust barrier against the elements and a crucial gateway to improved home energy efficiency and comfort.
Understanding the Importance of Insulating Your Garage Door

Insulating your garage door offers a multitude of compelling benefits that extend beyond simple comfort. It transforms your garage into a more integral, functional part of your home. Here’s a deeper look into the significant advantages:
- Enhanced Energy Efficiency: The primary benefit of insulating your garage door is its remarkable impact on energy consumption. A well-insulated door creates a thermal barrier, preventing heat transfer between your garage and the outdoors. In colder months, it keeps warm air inside, reducing the workload on your heating system. During summer, it blocks scorching heat from entering, thereby lightening the load on your air conditioning. This consistent temperature regulation translates directly into lower heating and cooling costs, leading to substantial savings on your utility bills year-round.
- Improved Comfort and Versatility: An uninsulated garage can be an uncomfortable place, frigid in winter and stifling in summer. Insulation changes this dramatically, creating a more stable and comfortable environment. This added comfort makes your garage a far more versatile space, ideal for a wide range of activities. Whether you use it as a home gym, a dedicated workshop, a children’s play area, or even an overflow pantry, insulation makes these activities enjoyable and practical regardless of the season.
- Significant Noise Reduction: Beyond thermal benefits, garage door insulation acts as an effective sound dampener. The materials absorb and block sound waves, significantly reducing external noises like traffic, neighborhood activities, or adverse weather conditions from entering your garage and, consequently, your home. Conversely, it also helps contain noise from activities within the garage, such as woodworking or loud music, providing a quieter environment for your household and neighbors.
- Increased Property Value and Curb Appeal: Energy-efficient home improvements are highly attractive to potential buyers. A well-insulated garage door signals a thoughtful, well-maintained home, contributing positively to its overall value and curb appeal. It demonstrates a commitment to comfort and efficiency, making your home stand out in the real estate market.
- Protection for Stored Items: Fluctuating temperatures and humidity levels in an uninsulated garage can be detrimental to stored items. From paints and chemicals that can freeze or spoil, to electronics, seasonal decorations, and even food items, insulation protects your belongings from extreme conditions, preserving their quality and extending their lifespan.
Choosing the Right Insulation Material for Your Garage Door
Selecting the appropriate insulation material is crucial for the success and effectiveness of your garage door insulation project. Each type offers distinct advantages in terms of thermal performance (measured by R-value), ease of installation, and cost. Understanding these differences will help you make the best choice for your specific needs and climate:
- Fiberglass Batts:
- Description: Made from fine glass fibers, fiberglass batts are a common and affordable insulation choice. They come in pre-cut panels or rolls, often with a paper or foil facing that acts as a vapor barrier.
- Pros: Easy to cut and install, readily available, cost-effective, and provide good thermal resistance for their thickness. The flexibility of batts allows them to conform well to irregularities.
- Cons: Can be irritating to the skin, eyes, and lungs during installation (requiring protective gear). If they get wet, their insulating properties are severely compromised, and they can sag. Lower R-value per inch compared to foam boards.
- Best For: DIY enthusiasts looking for a budget-friendly option in moderately humid climates, especially for garage doors with internal frames to hold the batts in place.
- Foam Board (Polystyrene or Polyurethane):
- Description: Rigid panels made from expanded polystyrene (EPS), extruded polystyrene (XPS), or polyisocyanurate (polyiso). They offer higher R-values per inch than fiberglass.
- Pros: Excellent thermal resistance and R-values, resistant to moisture (especially XPS), lightweight, durable, and relatively easy to cut and install with adhesive. They provide structural rigidity to the door panels.
- Cons: Can be more expensive than fiberglass. Requires precise cutting for a snug fit. May require an additional vapor barrier depending on the product and climate.
- Best For: Homeowners seeking superior thermal performance and moisture resistance. Ideal for all climates, particularly where high R-value is critical.
- Reflective Insulation:
- Description: Typically consists of one or two layers of polyethylene bubbles sandwiched between highly reflective aluminum foil. It works by reflecting radiant heat.
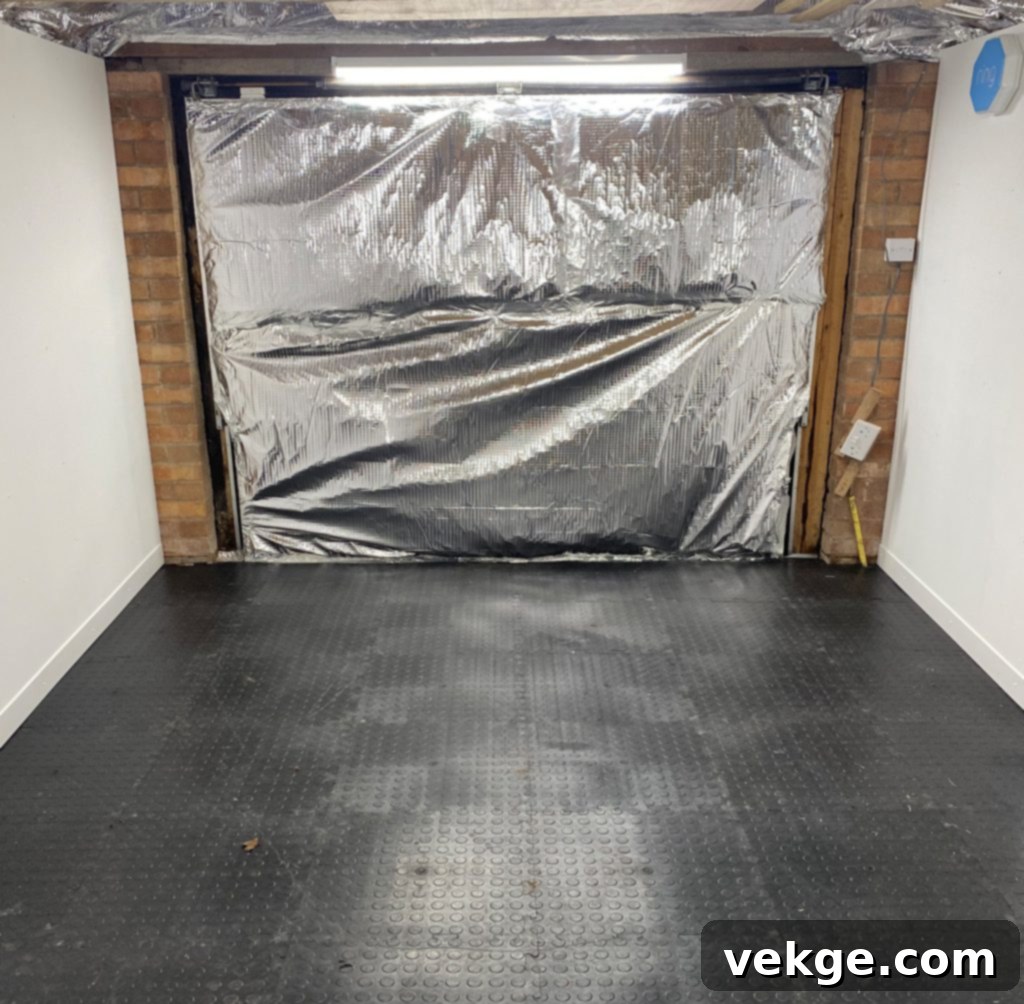
- Pros: Very effective in hot climates by reflecting heat away from the garage. Lightweight, thin, and easy to cut and install with tape or adhesive. Can also act as a vapor barrier.
- Cons: Less effective at blocking conductive or convective heat transfer compared to bulk insulation like foam or fiberglass. Its R-value is often lower and primarily effective against radiant heat.
- Best For: Garages in hot, sunny climates where radiant heat gain is the primary concern. Can also be used in conjunction with other insulation types for a comprehensive solution.
- Spray Foam Insulation:
- Description: A liquid foam applied directly to the garage door panels that expands and hardens, creating an airtight seal and insulation layer. Available in open-cell and closed-cell varieties.
- Pros: Provides exceptional R-value and an unparalleled airtight seal, effectively eliminating drafts and moisture infiltration. It conforms to any shape, making it ideal for irregularly shaped panels. Adds structural rigidity.
- Cons: Typically requires professional installation due to specialized equipment and safety precautions. It is the most expensive option. DIY kits are available but can be challenging to apply evenly.
- Best For: Homeowners prioritizing the highest level of thermal performance and air sealing, willing to invest in professional installation for optimal results. Suitable for all climates.
Essential Tools and Materials
Before you begin your insulation project, gathering all the necessary tools and materials will ensure a smooth and efficient process. Here’s what you’ll typically need:
- Insulation Material: Your chosen type (fiberglass batts, foam board, reflective insulation, or a pre-packaged garage door insulation kit).
- Tape Measure: For precise measurements of your garage door panels. Accuracy is key for a snug fit.
- Utility Knife or Heavy-Duty Scissors: Essential for cutting insulation materials to size. A sharp blade ensures clean cuts.
- Straightedge or Ruler: To guide your utility knife for perfectly straight cuts on foam boards or reflective insulation.
- Appropriate Adhesive or Fasteners:
- For foam boards: A strong, all-purpose construction adhesive suitable for adhering insulation to metal or wood, ensuring it holds securely.
- For fiberglass batts: A stapler and staples (if your door has a frame to staple to) or retaining pins/clips designed for garage door insulation.
- For reflective insulation: Heavy-duty aluminum foil tape or spray adhesive.
- Safety Gear:
- Gloves: Essential, especially when handling fiberglass, to protect your hands from irritation.
- Safety Goggles: To protect your eyes from dust and fibers during cutting and installation.
- Dust Mask/Respirator: Recommended for fiberglass and when creating dust from cutting, to protect your respiratory system.
- Cleaning Supplies: Rags, mild detergent, and water to clean door panels before installation.
- Optional: Weatherstripping or Foam Tape: To seal gaps around the insulation for maximum energy efficiency.
Step-by-Step Guide to Insulating Your Garage Door
Follow these detailed steps carefully to achieve a professional and effective garage door insulation installation:

Step 1: Prepare and Clean Your Garage Door Panels
Before applying any insulation, ensure your garage door panels are clean, dry, and free from any grease, dust, or debris. Use a mild detergent and water to clean the surfaces thoroughly, then let them dry completely. This ensures proper adhesion for glues or tapes. Also, inspect your garage door’s overall condition; address any needed garage door repairs, such as loose hinges or rollers, before proceeding.
Step 2: Measure Each Garage Door Panel Accurately
Using your tape measure, carefully determine the exact dimensions (width and height) of each individual recessed panel on your garage door. Most sectional roll-up garage doors consist of several distinct panels. Measure each one separately, as there can sometimes be slight variations. Note down these measurements precisely. The accuracy of this step is paramount for a snug and effective insulation fit.
Step 3: Cut the Insulation Material to Size
Transfer your panel measurements to your chosen insulation material. Using a utility knife (for foam boards and reflective insulation) or heavy-duty scissors (for fiberglass batts), carefully cut each piece of insulation. For foam boards, use a straightedge to ensure clean, straight lines. Aim for a fit that is just slightly snug (an eighth of an inch smaller than the panel opening for foam boards, or precisely the size for batts) to ensure a tight seal without buckling. Always wear your safety gloves, goggles, and a dust mask when cutting, especially with fiberglass.
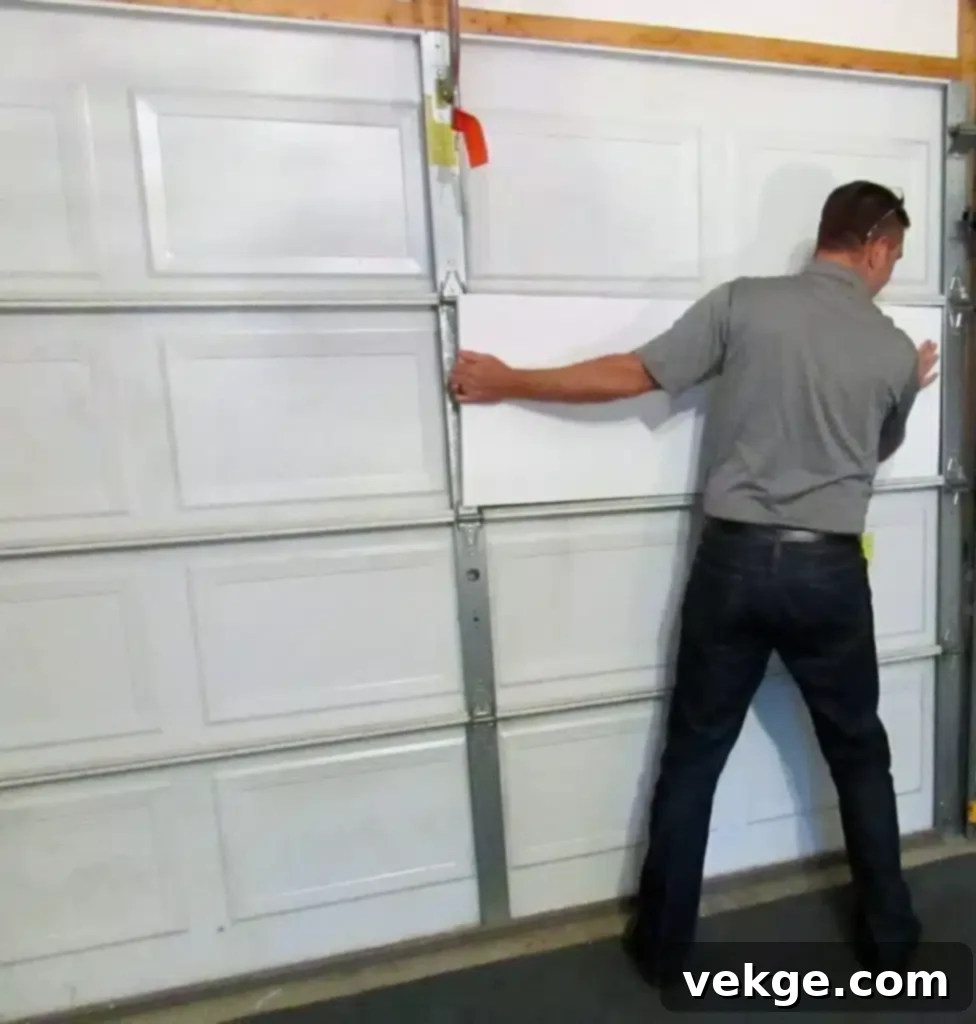
Step 4: Attach the Insulation to the Panels
This step varies depending on your chosen material:
- For Fiberglass Batts: Gently push the fiberglass batt into the recess of each panel. Ensure it fits snugly without compressing too much, as over-compression reduces its R-value. If your door has an internal frame, you can staple the facing of the batt to the frame. Many fiberglass insulation kits come with retaining clips or pins that you stick to the door, allowing you to secure the batt in place. If your batts have a vapor barrier (a shiny paper or foil side), this should typically face the inside of the garage (the warmer side).
- For Foam Boards: Apply a continuous bead of strong construction adhesive to the back edges of each cut foam board piece. You might also add a few dots in the center for extra hold. Carefully position the foam board into the panel recess and press firmly for at least 30 seconds to ensure good adhesion. Ensure there are no significant gaps around the edges.
- For Reflective Insulation: Cut the reflective insulation to size, usually slightly larger than the panel so it can be taped down securely. Apply spray adhesive to the back of the reflective material or directly to the garage door panel, then press the insulation firmly into place. Alternatively, you can use strong aluminum foil tape to secure the edges of the reflective insulation directly to the garage door panels, creating a complete reflective surface.
Step 5: Seal Any Gaps and Edges
While a snug fit is essential, small gaps can still allow air leakage, compromising your insulation’s effectiveness. To maximize energy efficiency:
- For foam board installations, use weatherstripping or foam tape to seal any remaining gaps between the insulation and the garage door frame.
- For reflective insulation, ensure all edges are securely taped down with aluminum foil tape to prevent heat from escaping or entering.
- Consider adding new weatherstripping along the bottom, sides, and top of your entire garage door opening to prevent drafts from around the door itself. This is often just as important as insulating the panels.
Step 6: Test the Garage Door and Adjust Balance
Once all insulation is securely installed, slowly and carefully test your garage door. Open and close it manually a few times to ensure it operates smoothly without any sticking or rubbing. Adding insulation adds weight to the door, which can affect its balance. If the door feels significantly heavier or doesn’t stay open at mid-height, the springs may need adjustment. This is often a task best left to a professional garage door technician to avoid injury. Improperly balanced doors can overwork your garage door opener and shorten its lifespan.
Additional Tips for Optimal Garage Door Insulation
To further enhance the performance and longevity of your insulated garage door, consider these valuable tips:
- Consider a Pre-Packaged Garage Door Insulation Kit: For beginners or those seeking maximum convenience, an all-in-one garage door insulation kit can be an excellent choice. These kits typically include pre-cut panels of foam board or reflective insulation, along with the necessary adhesive or fasteners and clear instructions, simplifying the DIY process significantly.
- Don’t Forget Weatherstripping and Thresholds: Insulating the door panels is only part of the solution. Ensure your garage door has robust weatherstripping around the perimeter (top, sides, and bottom) and a proper garage door threshold seal on the floor. These components are vital for preventing air drafts, moisture, and pests from entering your garage, complementing the panel insulation.
- Inspect and Maintain Regularly: Periodically check your insulation for any signs of damage, wear, or detachment. Re-secure any loose pieces or repair damaged sections promptly to maintain optimal thermal performance. Also, regularly inspect your garage door’s moving parts, lubricating hinges and rollers to ensure smooth operation, especially after adding weight with insulation.
- Address Other Garage Air Leaks: For maximum energy efficiency, consider the entire garage envelope. Seal any cracks or gaps in the garage walls, ceiling, and around windows or utility penetrations. Insulating the garage walls and ceiling, if not already done, will create a truly temperature-controlled space.
- Ensure Adequate Ventilation if Needed: If your garage doubles as a workshop where you use paints, chemicals, or generate significant dust, ensure you have proper ventilation. While insulation keeps conditioned air in, it also traps fumes. A good exhaust fan or proper cross-ventilation will be essential for health and safety.
- When to Call a Professional: If your garage door is old, damaged, or significantly out of balance, or if you’re uncomfortable making spring adjustments, it’s always best to consult a professional garage door repair service. They can ensure your door is safe and functioning correctly before and after insulation.
Conclusion: A Warmer, Quieter, and More Efficient Garage Awaits
Embarking on the project of insulating your garage door is a meaningful investment in your home’s future, offering a perfect blend of immediate satisfaction and substantial long-term benefits. By diligently following the detailed steps and expert advice provided in this comprehensive guide, you have not only taken a significant stride towards enhancing your garage’s energy efficiency but also towards creating a more comfortable, versatile, and quiet space that truly complements your home.
Insulation is far more than just a barrier against heat or cold; it represents a fundamental transformation that elevates your garage to an entirely new level of functionality and comfort. As we conclude this thorough journey, remember that the enduring success of your project hinges on careful planning, precise execution, and a keen eye for every detail. With your garage door now expertly insulated, you can confidently look forward to a space that is more than just an ancillary part of your home—it’s a year-round, energy-efficient, and fully integrated extension of your living environment.
Congratulations on successfully completing this rewarding home improvement project. Your newly insulated garage will offer a multitude of benefits, from lower energy bills and increased comfort to enhanced property value. Your garage, and indeed your entire home, will undoubtedly thank you for years to come for this thoughtful and impactful upgrade.
