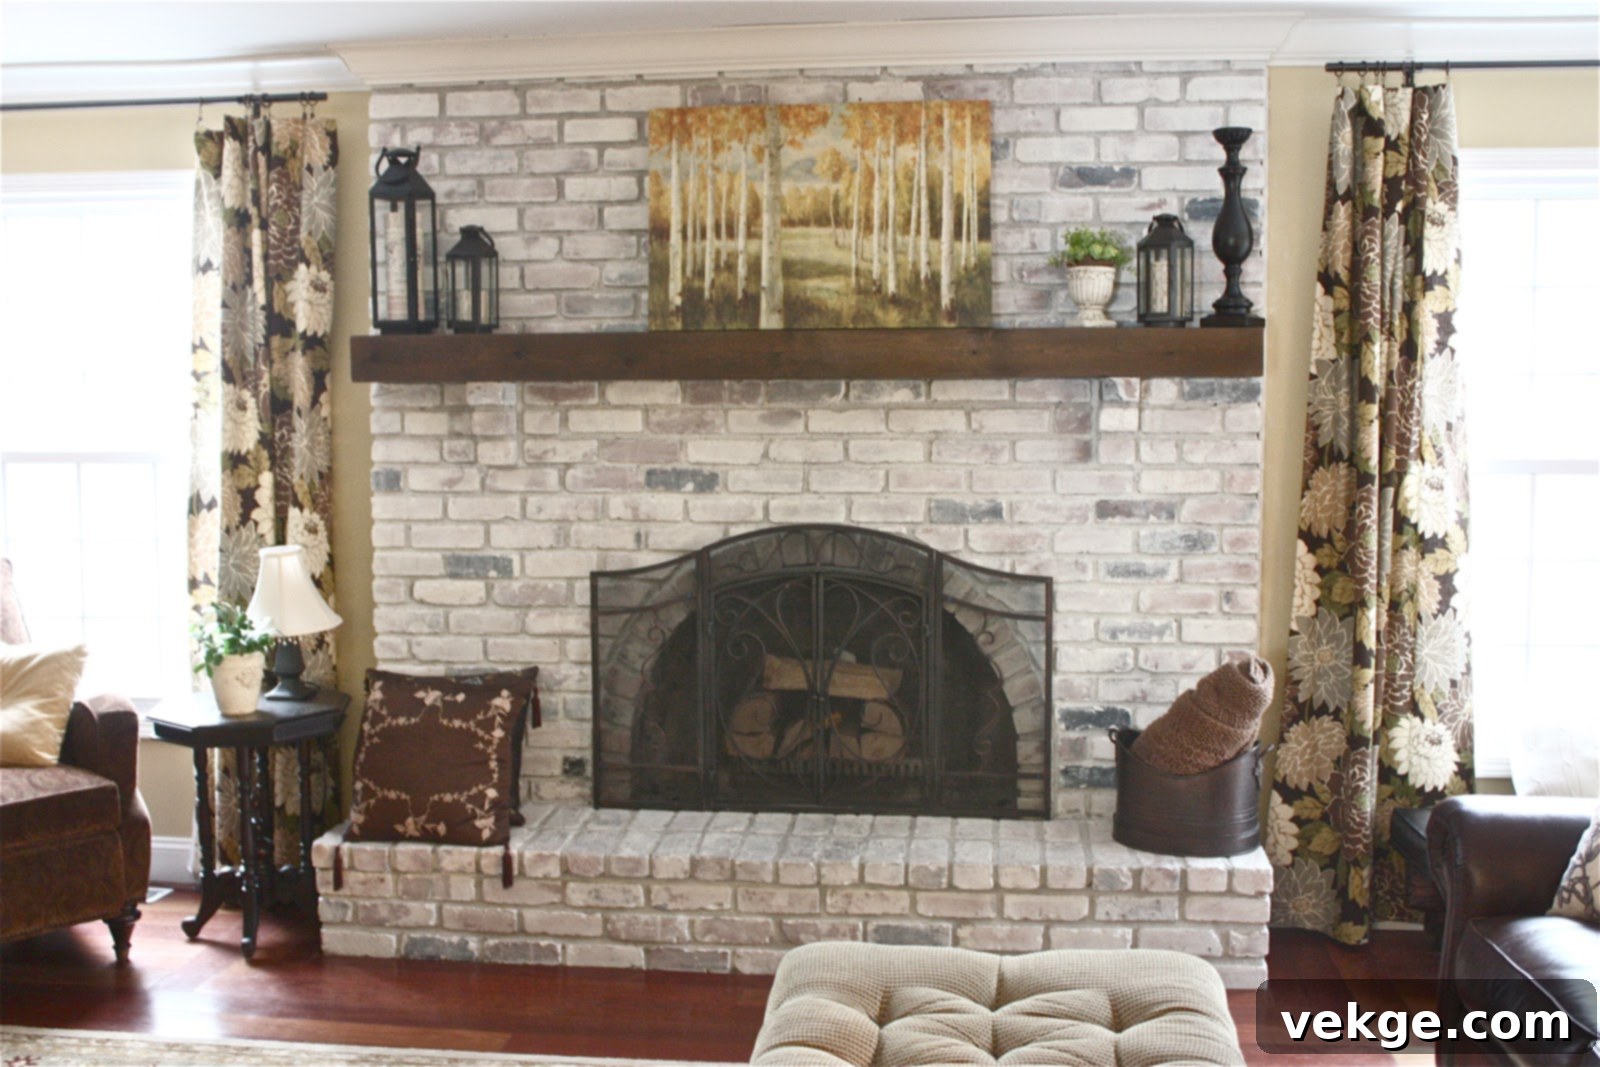
The Ultimate Guide to Whitewashing Your Brick Fireplace: Modernize Your Home with Ease
Fireplaces serve as more than just a source of warmth; they are often the architectural and emotional focal point of a living space. A well-maintained and stylish fireplace can dramatically enhance the ambiance and visual appeal of any home, transforming an ordinary room into a cozy, inviting sanctuary. While many homeowners appreciate the classic, rustic charm of a natural brick fireplace, others might find its strong red tones or aged appearance out of sync with their desired interior aesthetic. Fortunately, revitalizing a brick fireplace doesn’t always require an expensive overhaul. Simple, effective techniques like painting, limewashing, or whitewashing can breathe new life into an outdated hearth.
Among these renovation options, whitewashing stands out as a particularly popular and accessible method for those seeking a refreshed look without completely obscuring the brick’s inherent character. This technique offers a beautiful balance, softening the brick’s intensity while allowing its natural texture and subtle color variations to subtly shine through. Whether your home features traditional masonry or a modern prefabricated unit, a whitewash finish can create a bright, airy, and contemporary feel, making your fireplace a true centerpiece that complements a variety of design styles, from farmhouse chic to coastal modern.
What is Whitewash? Understanding This Popular Brick Finish
Whitewash is a decorative finish that involves applying a diluted, translucent coat of white paint to brick surfaces. Unlike traditional opaque paint, whitewash is specifically formulated to allow the underlying brick texture and a hint of its original color to remain visible. This creates a softer, more subtle effect, often described as a ‘weathered’ or ‘distressed’ look, which is highly sought after for its ability to brighten a room while retaining the rustic charm of brickwork.
The core of a whitewash mixture typically consists of water, latex paint, and sometimes a small amount of salt, which historically served as a binding agent and preservative. The exact ratio of water to paint is crucial and directly influences the final appearance. A higher water content results in a more translucent, ‘washy’ effect, revealing more of the brick’s original hue. Conversely, less water yields a more opaque, yet still not fully concealing, finish. This versatility allows homeowners to customize the look, ranging from a subtle haze to a more pronounced, yet still natural-looking, white layer.
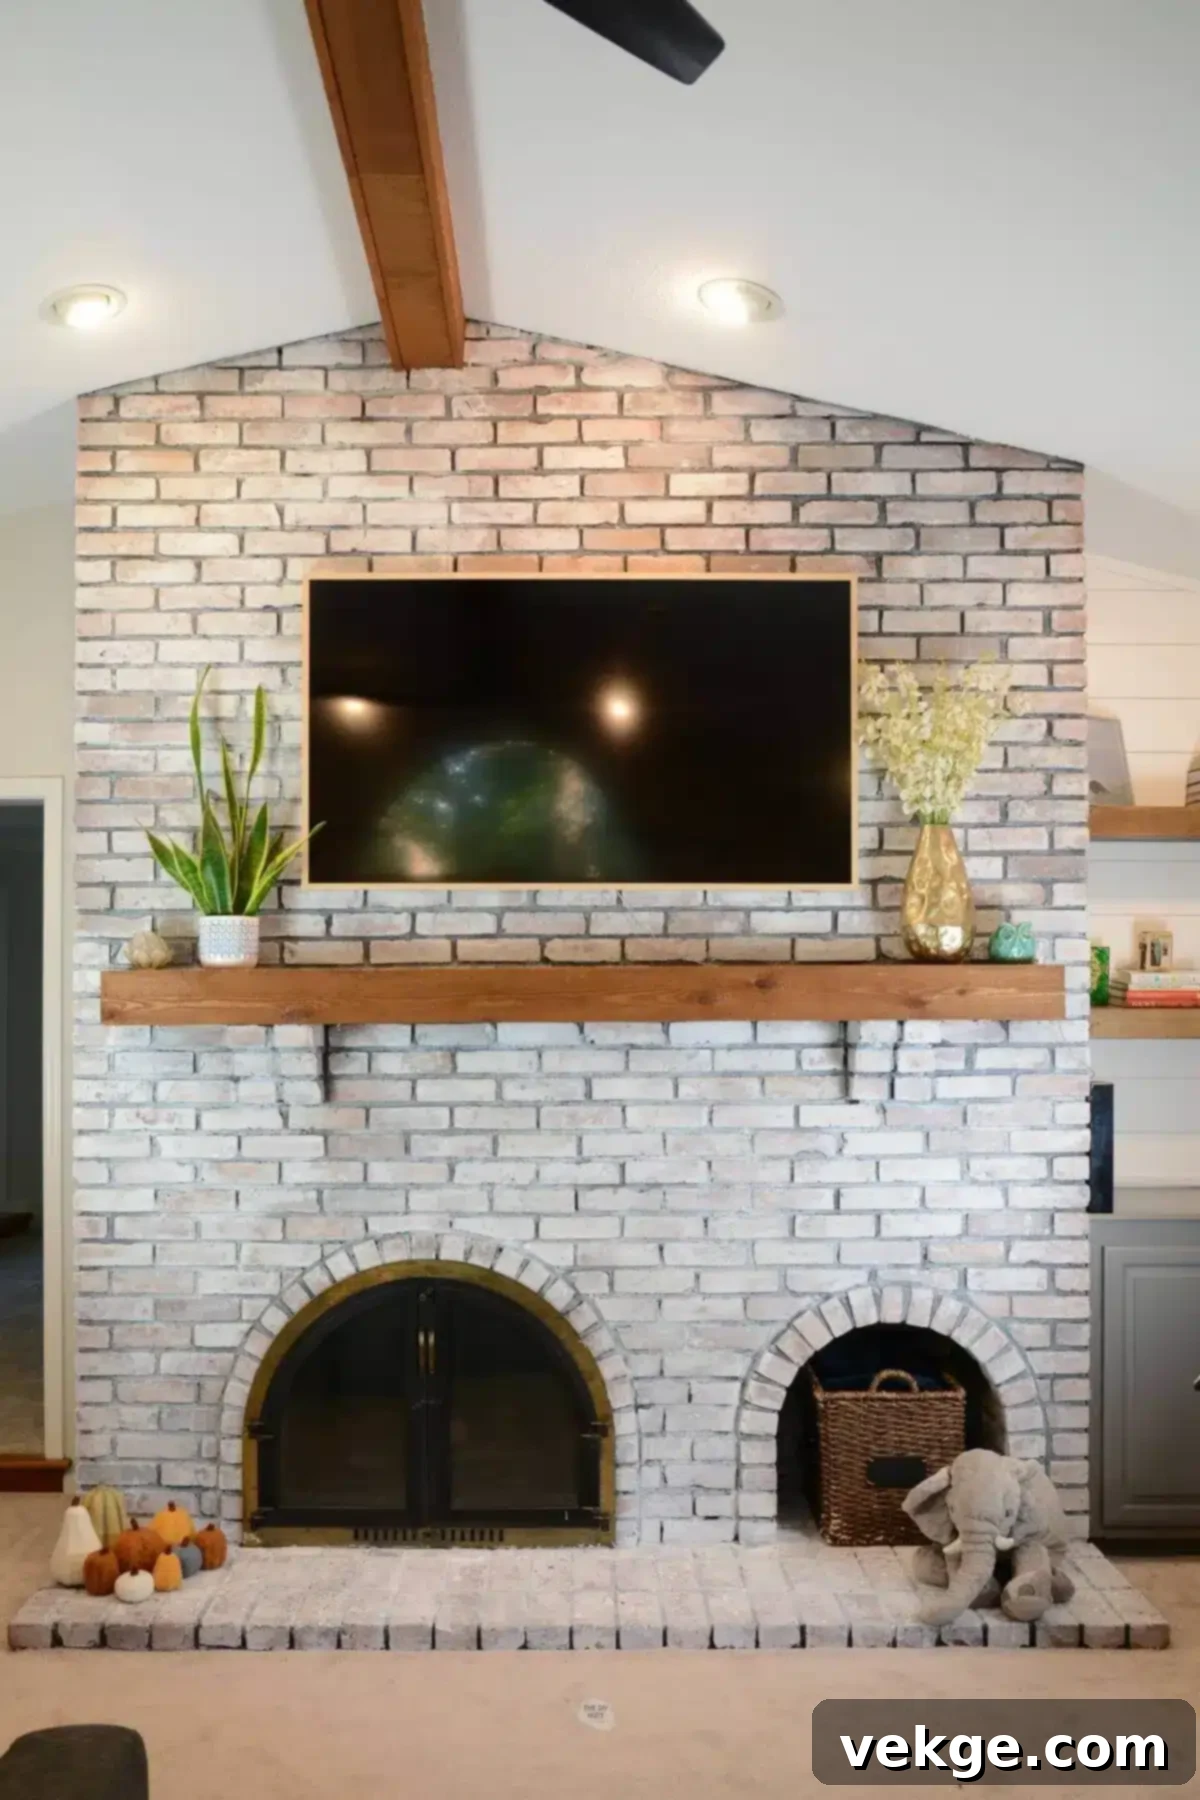
Historically, whitewash has been used for centuries, not only as an economical alternative to more expensive paints but also for its ability to protect surfaces and allow them to breathe. In modern applications, its appeal lies primarily in its aesthetic qualities. It effortlessly transforms dark, heavy brickwork into a bright, contemporary feature without sacrificing its architectural integrity. The enduring popularity of whitewash stems from its ability to create an aged, yet fresh, look that complements both traditional and modern decor, providing a timeless elegance that can last for many years with proper application.
Whitewashing vs. Painting a Fireplace: Choosing the Right Finish
While both whitewashing and painting are popular methods for updating a brick fireplace, they yield distinctly different results and have varying implications for longevity and maintenance. Understanding these differences is key to making an informed decision that aligns with your aesthetic goals and practical considerations.
Whitewashing involves applying a diluted paint mixture, resulting in a translucent finish. This means that the natural variations, textures, and even a hint of the original red tones of the brick remain visible beneath the white layer. The effect is often described as softer, more organic, and weathered, contributing to a popular ‘farmhouse,’ ‘shabby chic,’ or ‘coastal’ aesthetic. This technique is designed to soften the brick’s appearance, brighten the room, and provide a sense of age and character without completely covering the material. A properly applied whitewash can be remarkably durable, often lasting 30 to 40 years before needing a refresh, as it integrates well with the porous nature of brick.
In contrast, painting a brick fireplace typically involves applying an opaque, undiluted coat of paint. This method completely covers the brick’s original color and texture, resulting in a solid, uniform finish. If your goal is to achieve a crisp, clean, and completely modernized look that totally hides the brick, then painting might be the preferred choice. While painting offers a vast array of color options and a more dramatic transformation, it often requires more frequent maintenance. Paint can chip, peel, or show dirt more readily, necessitating touch-ups or complete repainting every few years to maintain a pristine appearance. Furthermore, painting can sometimes feel less “natural” than whitewashing, as it removes the visual depth and character inherent in exposed brick.
Ultimately, the choice between whitewashing and painting depends on your desired outcome. If you appreciate the texture and a subtle hint of brick beneath a soft, bright finish and prefer a low-maintenance, long-lasting solution, whitewashing is an excellent option. If you seek a complete color change, a uniform appearance, and don’t mind potentially more frequent maintenance, then painting offers full coverage and color versatility.
Essential Materials for Whitewashing Your Brick Fireplace
Before embarking on your whitewashing project, gathering all the necessary materials in advance will ensure a smooth and efficient process. Having everything at hand will prevent interruptions and allow you to maintain your momentum. Here’s a detailed list of what you’ll need:
- Latex Paint (Water-Based): This is the cornerstone of your whitewash mixture. Opt for a high-quality latex paint in white or a desired off-white shade. It’s crucial that it’s water-based, as oil-based paints will not mix properly with water to create the translucent effect. Matte or eggshell finishes are often preferred for their ability to blend seamlessly with the brick’s natural texture.
- Water: Essential for diluting the paint to achieve the desired translucent consistency. Tap water is usually sufficient.
- Pigments (Optional): If you wish to introduce a subtle color tint to your whitewash beyond pure white, you can add small amounts of universal liquid pigments. Experiment with caution to avoid overpowering the translucent effect.
- Large Mixing Bucket: A sturdy bucket is needed to prepare your whitewash mixture. Ensure it’s clean and large enough to hold your paint and water comfortably.
- Stirring Stick or Drill Mixer: For thoroughly combining the paint and water to achieve a consistent, lump-free mixture.
- Drop Cloths or Plastic Sheeting: Absolutely vital for protecting your floors, furniture, and surrounding areas from paint drips and splatters. Heavy-duty plastic sheeting or canvas drop cloths are recommended.
- Painter’s Tape: To tape off walls, mantels, and other areas adjacent to the fireplace that you don’t want to get paint on.
- Wire Brush or Stiff Bristle Brush: For cleaning the brick surface and removing any loose debris, soot, or old mortar.
- Sponge or Cleaning Cloths: For washing the bricks with a suitable cleaner.
- Bucket for Cleaning Solution: To mix your brick cleaner.
- Protective Gear:
- Gloves: To protect your hands from paint and cleaning solutions.
- Safety Goggles: Essential for protecting your eyes from splashes and dust, especially during the cleaning phase.
- Mask: If cleaning old, dusty brick or using strong cleaners, a mask can protect against inhaling particles or fumes.
- Paint Brushes:
- Large Masonry Brush: Ideal for applying whitewash over broad brick surfaces efficiently.
- Smaller Detail Brush: Useful for getting into grout lines, corners, and intricate areas around the firebox.
- Spray Bottle (Optional): Some prefer to lightly mist the bricks with water before applying whitewash to help the mixture spread more evenly and prevent rapid absorption.
- Clean Rags or Sponges: For wiping away excess whitewash or dabbing areas to achieve a desired distressed look.
Assembling these items before you begin will streamline your project, allowing you to focus on the application and enjoy the transformation of your brick fireplace.
How to Whitewash a Brick Fireplace: A Step-by-Step Guide
Transforming your brick fireplace with a whitewash finish is a rewarding DIY project that can be completed in a day or two. Follow these detailed steps to achieve a beautiful and lasting result:
1. Thoroughly Cleaning the Bricks
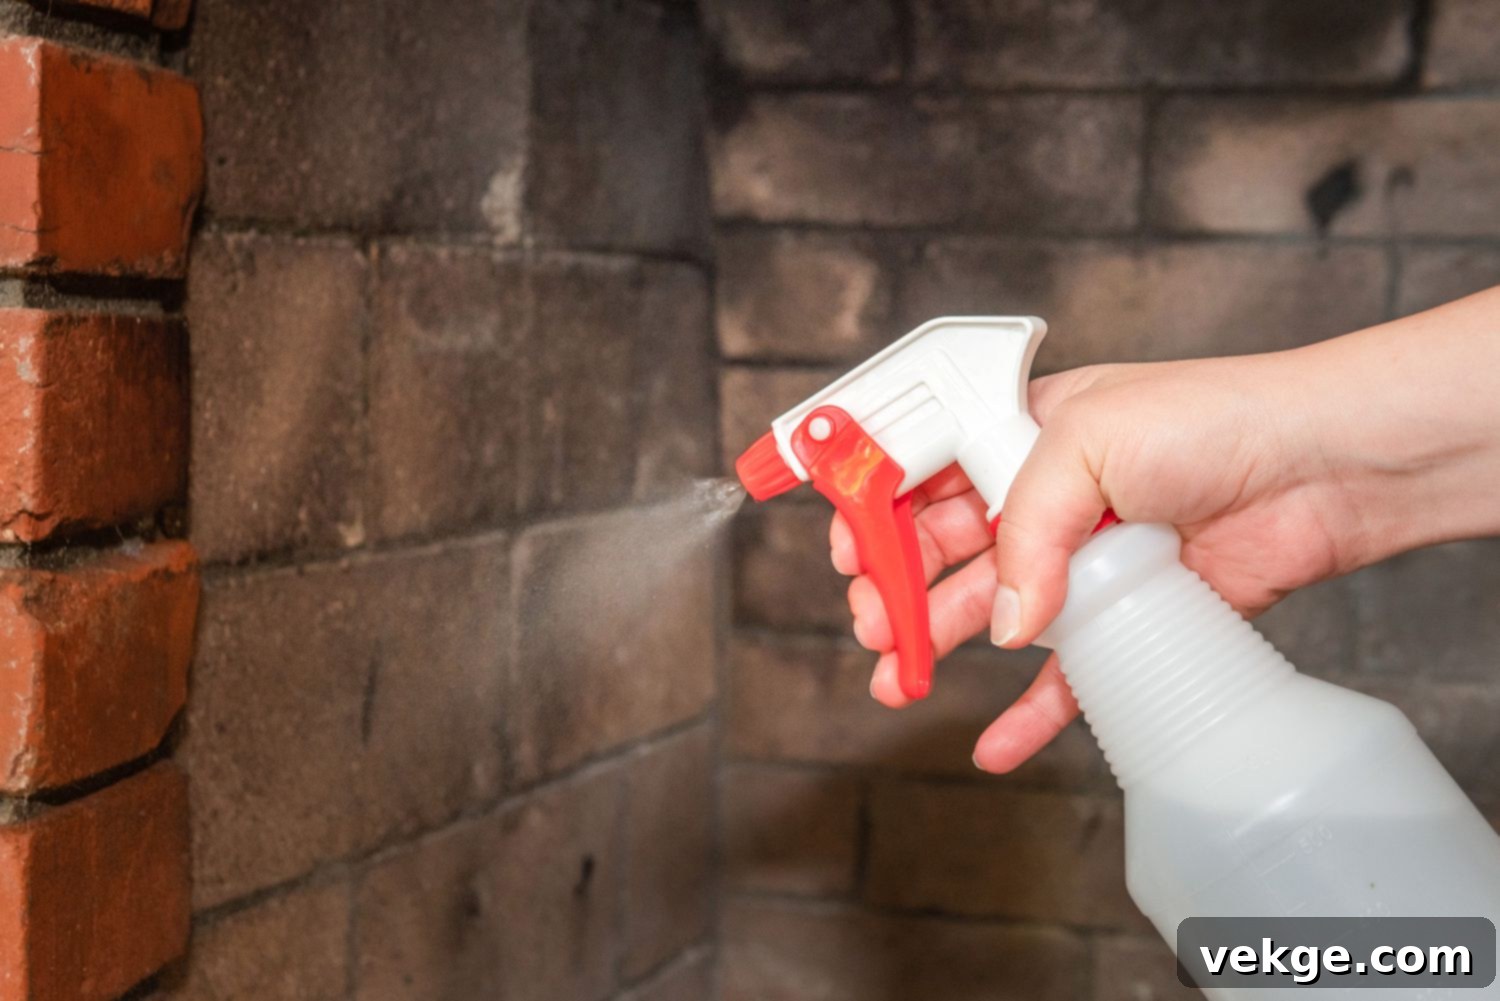
The success and longevity of your whitewash depend heavily on the cleanliness of the brick surface. Any dirt, grease, soot, cobwebs, or loose debris will prevent the whitewash from adhering properly, leading to an uneven finish or premature peeling. Begin by thoroughly brushing the brick with a stiff wire brush to remove any loose mortar or particles. For tougher grime and soot, use a dedicated brick cleaner or a solution of trisodium phosphate (TSP) mixed with water. Apply the cleaner with a sponge or brush, allowing it to penetrate for a few minutes before scrubbing vigorously. Rinse the bricks thoroughly with clean water to remove all cleaning solution residue. Ensure the fireplace is completely dry before proceeding; this can take 24-48 hours, depending on humidity.
2. Removing Any Old Paint (If Applicable)
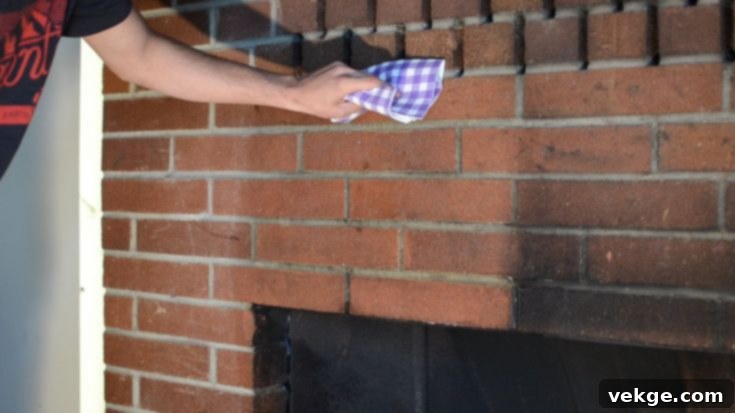
This step is crucial if your brick fireplace has been previously painted with an opaque, non-breathable coating. Whitewash is designed to penetrate and slightly absorb into the porous surface of the brick. If there’s an existing layer of paint, especially an oil-based one, the whitewash won’t be able to achieve its characteristic translucent effect or adhere correctly, potentially leading to flaking. To remove old paint, you might need a chemical paint stripper or a heat gun with a scraper. Always follow manufacturer instructions carefully, ensuring adequate ventilation and wearing appropriate personal protective equipment (gloves, goggles, respirator). If this is the first time your fireplace is being treated, or if it has only been whitewashed before, you can skip this labor-intensive step.
3. Mixing the Ingredients to the Perfect Proportion
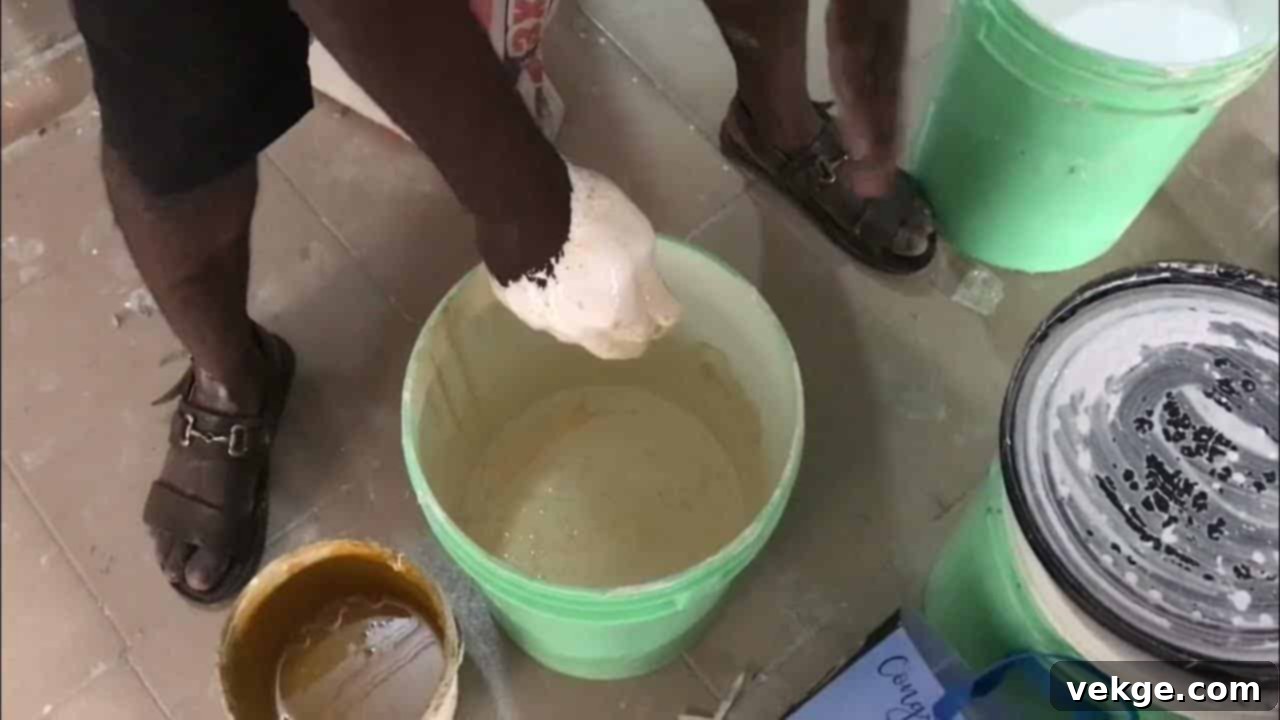
Achieving the right consistency for your whitewash mixture is vital for the desired outcome. A common starting ratio is 1:1, meaning one part latex paint to one part water. However, this is merely a starting point. Bricks are highly porous and tend to absorb water quickly, so you may need to adjust this ratio. For a more transparent, ‘washy’ look, add more water (e.g., 1 part paint to 2 parts water). For a more opaque finish, use less water (e.g., 2 parts paint to 1 part water). Mix thoroughly in your bucket until the mixture is completely smooth and free of lumps. If you’re adding pigments for a colored whitewash, incorporate them gradually and mix well. Always aim for a consistency that allows for easy application but doesn’t drip excessively. A patch test (see next step) is essential here.
4. Take the Brushes and Get Started! Application Techniques
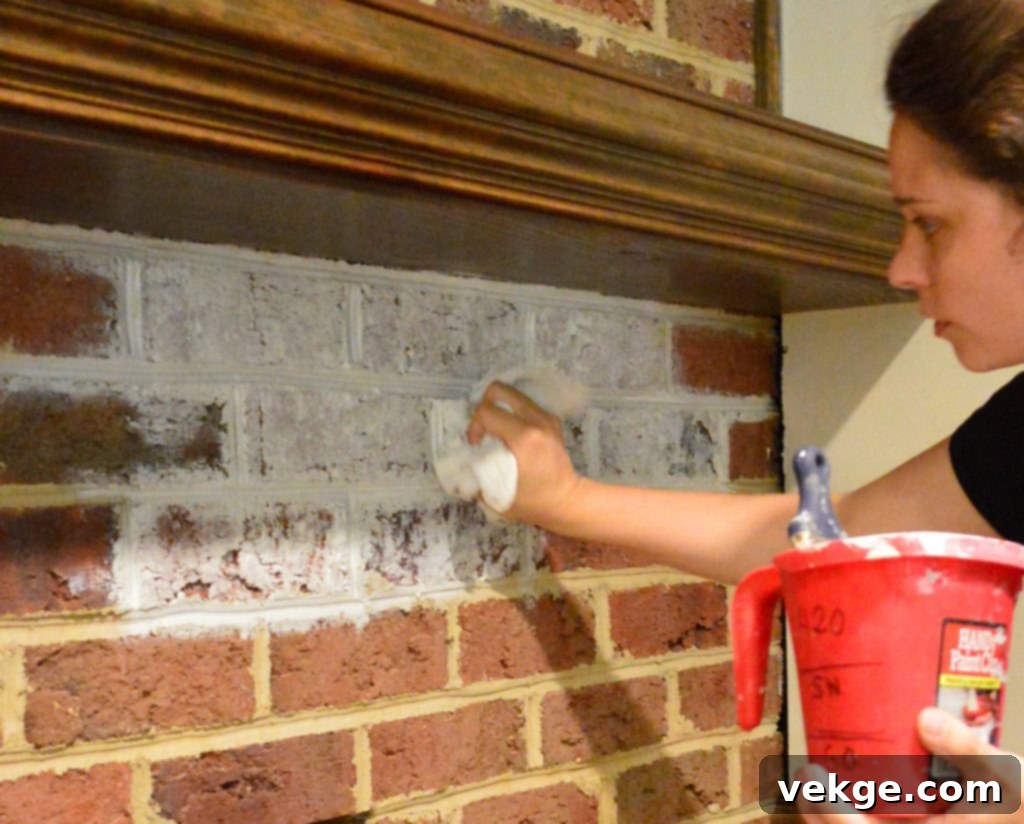
Before committing to the entire fireplace, perform a patch test on an inconspicuous area, such as a side brick or a small section of the firebox opening. Apply a thin coat and let it dry completely. This allows you to assess the color, translucency, and overall effect, and adjust your mixture if needed. Once satisfied, prepare your work area by laying down drop cloths and taping off adjacent surfaces. Begin applying the whitewash from top to bottom using a large masonry brush. Work in small sections, brushing with the grain of the brick and ensuring even coverage. You can apply one or multiple coats, allowing each coat to dry completely before adding the next, to build up the desired level of opacity. For a more distressed look, you can gently wipe away some of the wet whitewash with a damp cloth or sponge immediately after application, exposing more of the brick underneath. Experiment with your technique to achieve your unique vision.
Important Precautions for a Safe and Successful Whitewashing Project
While whitewashing a brick fireplace is a relatively straightforward DIY task, taking necessary precautions is essential to ensure both your safety and the success of the project. Adhering to these guidelines will help prevent mishaps and achieve professional-looking results.
- Work Top-to-Bottom: Always begin applying whitewash from the top sections of your fireplace and work your way downwards. This prevents drips and splatters from falling onto freshly whitewashed areas below, saving you from extra cleanup and potential reapplication. Gravity is not your friend when painting upwards!
- Protect Your Surroundings: Lay down heavy-duty drop cloths or old newspapers generously over your flooring and any nearby furniture. Painter’s tape should be meticulously applied to protect mantelpieces, adjacent walls, and any other surfaces you do not wish to be whitewashed. This small effort saves significant time and frustration during cleanup.
- Mind the Water-to-Paint Ratio: The consistency of your whitewash mixture is paramount. Too much water will result in a weak, overly translucent coat that may not adhere well and will require many applications to show any effect. Conversely, too little water will make the mixture too thick, resembling regular paint and losing the characteristic translucent look of whitewash. Always start with a recommended ratio (like 1:1) and adjust incrementally, performing patch tests until you achieve the desired consistency and opacity.
- Allow Proper Drying Time Between Coats: If your project requires more than one coat to achieve the desired look, it is absolutely crucial to allow each preceding coat to dry completely before applying the next. Rushing this step can lead to a patchy, uneven finish, and may cause the whitewash to peel or crack later. Refer to your paint manufacturer’s guidelines for specific drying times, typically a few hours.
- Wear Personal Protective Equipment (PPE): Safety should always be a priority. Wear protective gloves to prevent skin irritation from paint and cleaning solutions. Safety goggles are essential to shield your eyes from splashes, especially when working overhead. If you’re using strong cleaners or working in a poorly ventilated area, consider wearing a respirator mask to avoid inhaling fumes or dust particles. In case of accidental contact with paint or cleaner, immediately wash the affected area with plenty of cool water.
- Be Gentle During Cleaning: When preparing the bricks, start with the mildest cleaning solution and scrubbing technique possible. Aggressive scrubbing or harsh chemicals can damage the brick surface or mortar, especially with older fireplaces. If the initial mild approach doesn’t yield satisfactory results, gradually increase the strength of your cleaner or the intensity of your scrubbing. Inspect the bricks carefully for any signs of damage during cleaning.
- Confirm Paint Type: Ensure that you are using a water-based paint, specifically latex paint, for your whitewash mixture. Oil-based paints are incompatible with water and will not mix properly, leading to separation and an unusable mixture. Double-check the paint label before purchase to confirm it is suitable for this application.
By diligently following these precautions, you’ll not only safeguard yourself but also guarantee a beautiful, long-lasting whitewashed finish for your brick fireplace.
Advantages of Whitewashing Your Brick Fireplace
Opting to whitewash your brick fireplace comes with a host of benefits that make it a highly attractive option for homeowners seeking an aesthetic upgrade. From enhancing visual appeal to offering practical advantages, here are the key reasons why whitewashing might be the perfect choice for your home:
1. Smoother, Brighter Appearance
One of the most immediate and noticeable benefits of whitewashing is the transformation it brings to the brick’s aesthetic. The translucent white coating softens the harsh, often dominant red or brown tones of natural brick, resulting in a significantly brighter and more visually cohesive appearance. This ‘smoother’ look contributes to an overall sense of calm and modernity, instantly refreshing the fireplace and making it feel less heavy or dated. It also helps integrate the fireplace more seamlessly into a room’s decor, rather than letting it stand out as an independent, sometimes overwhelming, feature.
2. Low Maintenance and Long-Lasting
Compared to other brick treatments, particularly opaque painting, whitewashing boasts remarkably low maintenance requirements. Because the finish is absorbed into the porous brick rather than sitting on top, it is less prone to chipping, peeling, or flaking. This inherent durability means a properly applied whitewash can maintain its beautiful look for many years—often 30 to 40 years—without significant upkeep. The aged, distressed look it provides also means that minor wear and tear or slight discoloration over time can actually enhance its character, rather than detract from it.
3. An Accessible and Easy DIY Process
Whitewashing is widely considered an ideal DIY project, even for those with limited home improvement experience. The process does not require specialized tools or the intricate techniques associated with more complex renovations like limewashing, which can be more temperamental. With basic painting supplies, a bucket, and a little patience, homeowners can achieve impressive results within a few hours or a weekend. This accessibility makes it a budget-friendly way to significantly impact your home’s interior design without the added cost of professional labor.
4. Availability of Subtle Color Options
While the term “whitewash” inherently suggests white, the process allows for surprising versatility in color. Since it involves diluting latex paint, you’re not strictly limited to pure white. You can subtly tint your whitewash mixture by adding small amounts of universal liquid pigments to the paint-and-water solution. This allows you to achieve various off-white, cream, or even very light grey tones, enabling you to perfectly match the whitewash to your existing decor and color palette while still maintaining the desired translucent effect.
5. Compatible with Previously Painted Bricks
Unlike some other brick treatments, whitewashing offers the flexibility of being applied over certain types of existing painted bricks. While it’s always ideal to apply whitewash to raw brick for optimal absorption and adhesion, if your fireplace has been previously painted with a water-based latex paint, whitewashing can still be a viable option after proper cleaning and preparation. This provides a solution for those who are tired of a solid painted brick look and wish to introduce more texture and character without the arduous task of complete paint stripping.
6. Inexpensive Home Upgrade
For homeowners looking to achieve a high-impact aesthetic change on a limited budget, whitewashing is an exceptionally cost-effective solution. The primary materials – latex paint and water – are relatively inexpensive. Compared to purchasing new materials for a complete fireplace refacing, hiring professional painters, or undertaking more extensive remodeling, whitewashing offers a dramatic transformation at a fraction of the cost. This makes it an attractive option for budget-conscious renovators.
7. Enhances Brick Longevity and Safety
Beyond its aesthetic appeal, whitewashing also offers protective benefits for your brick fireplace. The diluted paint mixture, once absorbed and dried, creates a breathable layer that can help protect the brick from minor moisture penetration and resist the accumulation of dirt and some types of pests. This protective barrier can extend the lifespan of your brickwork by mitigating some environmental stresses, thus contributing to the long-term safety and structural integrity of your fireplace. It’s an enhancement that beautifies and fortifies simultaneously.
Disadvantages of Whitewashing Brick Fireplaces: What to Consider
While whitewashing offers many appealing benefits, it’s equally important to be aware of its potential drawbacks before committing to this home improvement project. Understanding these considerations will help you make a well-informed decision that aligns with your long-term vision for your home’s aesthetic.
1. Whitewashing is Permanent (Relatively)
For many, the long-lasting nature of whitewash is a significant advantage. However, for individuals who enjoy frequently updating their home’s look or experimenting with diverse design trends, the permanence of whitewashing can be a disadvantage. Once applied, going back to the original, natural brick appearance is extremely difficult, if not impossible, without a complete re-facing or aggressive chemical stripping. Your options for change will primarily be to re-whitewash with a different tint or apply a solid coat of paint over the whitewash. This makes it a decision that requires careful consideration of your future design preferences.
2. It Won’t Deliver a Fully Bright, Opaque Look
If your goal is to achieve an intensely bright, uniform, and completely opaque white finish that completely masks the brick’s original color and texture, whitewashing is not the appropriate solution. By its very nature, whitewashing provides a translucent, softened effect. It allows elements of the underlying brick to show through, creating a muted, weathered appearance rather than a crisp, solid white. For a truly bright and fully covered look, traditional opaque painting with multiple coats of solid white paint would be a more suitable choice. Manage your expectations regarding the level of brightness and coverage.
3. The Application Process Can Be Messy
Due to the diluted, water-based nature of the whitewash mixture, the application process can be considerably messier than working with thicker, undiluted paints. The thinner consistency means drips and splatters are more common, and the mixture can be prone to running if too much is applied at once. This necessitates meticulous preparation, including extensive use of drop cloths and painter’s tape to protect floors, furniture, and surrounding walls. The cleanup can be more involved, and the process can feel more strenuous if you have a large fireplace or are working in a space where preventing stains is critical.
4. Moisture Management is Crucial for Brick Health
While whitewash is generally breathable, improper application or pre-existing moisture issues can still pose problems. Brick is a porous material that needs to breathe and release absorbed moisture. If the whitewash creates an overly thick or non-breathable layer, or if there’s an underlying issue with moisture penetration into the brick, it could trap moisture. This trapped moisture can lead to dampness, efflorescence (white salt deposits), or even structural damage to the bricks and mortar over time. It’s vital to ensure your fireplace is completely dry before application and to address any existing moisture problems before beginning the whitewashing process to maintain the long-term health of your brickwork.
Conclusion: A Fresh Chapter for Your Brick Fireplace
Brick fireplaces, with their inherent vintage appeal and ability to evoke a sense of coziness, are undeniably charming architectural features. However, simply having a fireplace isn’t the end of its journey; it often requires thoughtful treatment and aesthetic considerations to truly complement your home’s evolving style. Whether you choose to cherish the raw, unpainted brick, or opt for transformative methods like limewashing, painting, or whitewashing, the goal is always to enhance its presence and integrate it harmoniously into your living space.
Whitewashing emerges as a superb option for those desiring a significant refresh without sacrificing the authentic texture and character of their brickwork. It’s a method that beautifully brightens a space, offering a soft, translucent finish that modernizes the fireplace while celebrating its rustic roots. With its numerous advantages, including a smoother aesthetic, low maintenance, ease of application, and cost-effectiveness, whitewashing empowers homeowners to undertake a high-impact DIY project with confidence.
The final look of a well-executed whitewashed brick fireplace is often breathtaking, transforming a potentially heavy, dark feature into a luminous focal point that exudes contemporary charm and warmth. However, as with any home improvement endeavor, safety and meticulous preparation are paramount. By diligently following the necessary precautions – wearing protective gear, preparing your workspace, and understanding the nuances of the application process – you ensure a successful outcome and protect yourself from potential mishaps.
Embark on this rewarding journey of whitewashing your brick fireplace. With careful planning and execution, you’ll not only give a striking new outlook to your home but also create a captivating centerpiece that will be admired for years to come. Your transformed fireplace awaits, ready to radiate both warmth and style.
