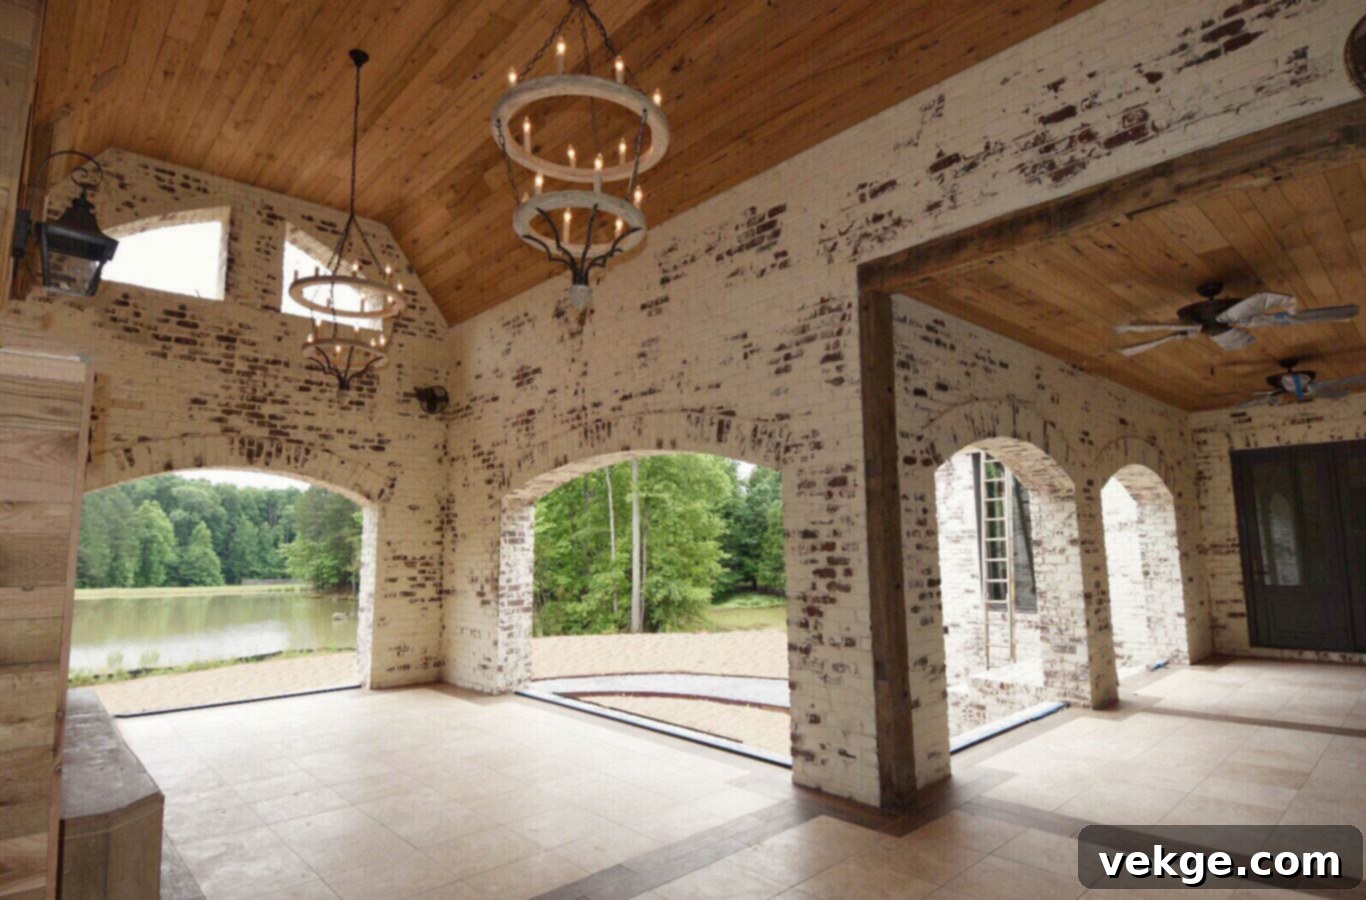
Transform Your Home: The Ultimate DIY Guide to Limewashing Brick Walls for Lasting Beauty and Protection
Brick homes possess a timeless appeal, renowned for their inherent strength, classic aesthetic, and a sense of enduring quality. They contribute significantly to a property’s character, making a house feel well-designed and established. It’s no wonder that brick remains one of the most popular choices for exterior finishes.
However, even the most robust brick exteriors are susceptible to the passage of time. Exposure to harsh weather, pollution, and general wear can lead to staining, fading, or a weathered look that diminishes their original charm. When your brick walls start to appear tired or dated, it’s natural to seek a renovation solution that rejuvenates their appearance while preserving their structural integrity.
Enter limewash: an ancient, breathable finish that offers a remarkable transformation for brick. Limewashing your brick walls is a highly effective way to infuse them with new life, creating a soft, Old-World aesthetic that is both sophisticated and inviting. Beyond its visual appeal, limewash provides a durable, protective layer against environmental elements, ensuring your rejuvenated bricks remain beautiful for years to come. Unlike modern paints, limewash integrates with the brick, allowing it to breathe and offering superior longevity.
Considering the myriad benefits – from its unique chalky finish to its robust protection and eco-friendly properties – if you’re ready to give your brick walls a stunning makeover, this comprehensive guide is for you. Here, we’ll walk you through every step of how to apply limewash to a brick wall, empowering you to achieve professional-looking results with confidence.
How to Limewash Your Brick Wall?
Limewashing your brick walls can be a rewarding and enjoyable DIY project, requiring just a few key materials and a methodical approach. With limewash putty or powder, a bucket, and appropriate brushes, you’re well on your way to a beautifully transformed exterior. Follow these detailed instructions to successfully limewash your bricks:
1. Prepare the Bricks and Surface Thoroughly
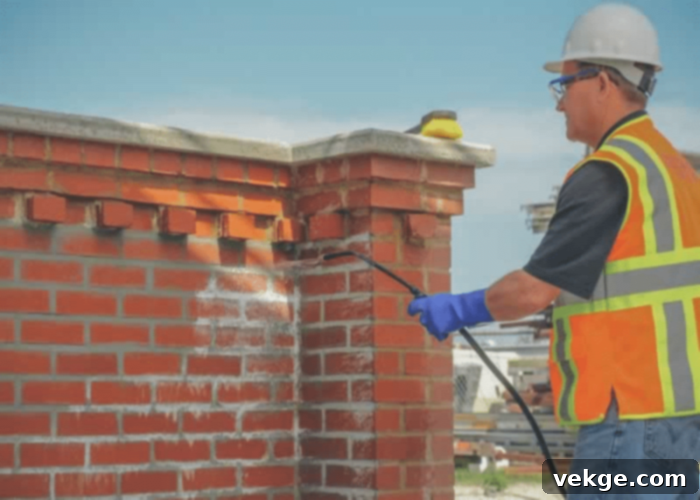
The foundation of a successful limewash application lies in meticulous surface preparation. Begin by thoroughly cleaning the brick surface to remove all loose dirt, dust, grime, efflorescence, mold, mildew, or any other rough particles. This step is crucial for ensuring proper adhesion of the limewash. For light dirt, a stiff-bristle brush and water can suffice. For more stubborn stains, consider using a mild detergent, or a diluted bleach solution for mildew, followed by a thorough rinse. A garden hose or a spray bottle can be effective tools for dampening and rinsing the surface. If using a pressure washer, exercise caution and use a low-pressure setting to avoid damaging the mortar joints or the brick itself. After cleaning, allow the bricks to dry completely before the next step. Just before limewashing, the bricks should be lightly dampened, as this helps the limewash penetrate and adhere better, preventing it from drying too quickly on the surface.
2. Prioritize Safety: Gear Up for the Project
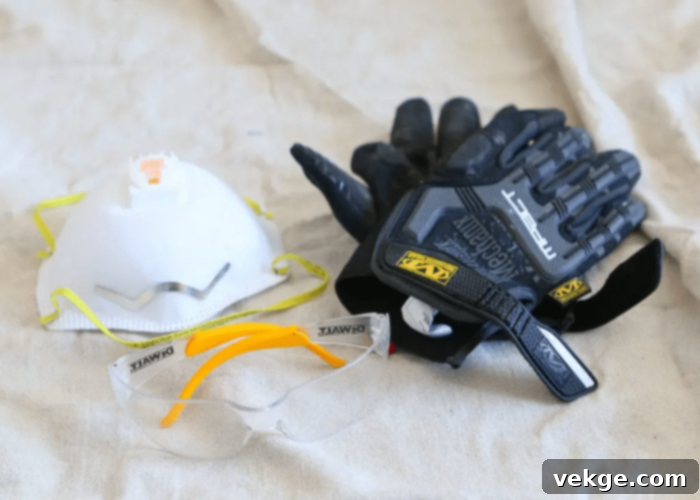
Before embarking on any DIY home improvement project, especially one involving chemicals, safety should be your top priority. Limewash, being an alkaline substance, can be corrosive and cause skin or eye irritation. Therefore, it’s essential to protect yourself adequately. Ensure your skin is fully covered by wearing long sleeves and pants. Crucial safety essentials include durable hand gloves to protect your hands, protective eyeglasses or goggles to shield your eyes from splashes, and a respiratory mask, especially when working with lime powder or in areas with limited ventilation. Always work in a well-ventilated area and keep a bucket of clean water nearby to immediately rinse off any accidental splashes on skin or eyes. Taking these precautions will ensure a safe and successful limewashing experience.
3. Prepare Your Limewash Mixture with Precision
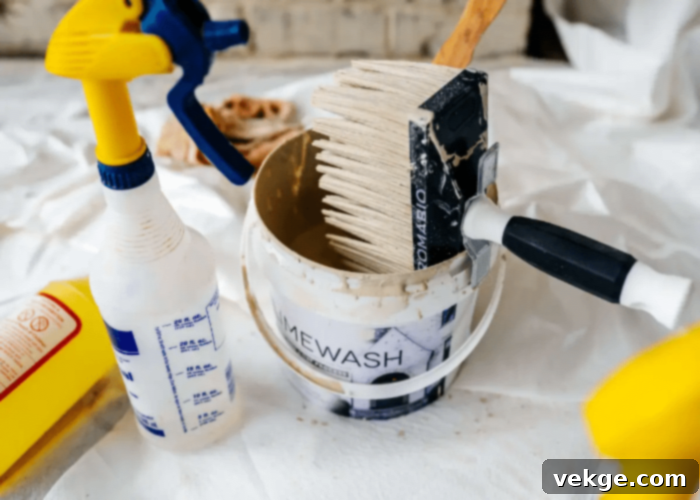
With your surface prepped and safety gear on, it’s time to prepare your limewash. You can purchase ready-mixed limewash putty or powder from specialty paint or hardware stores. If using limewash powder, it typically needs to be mixed with water. While some ready-to-use products may suggest slight dilution for specific effects, the general rule for mixing lime powder is to achieve a balanced, consistent ratio. A common starting point is around 20-25% lime powder to 75-80% water. However, always refer to the manufacturer’s specific instructions, as ratios can vary by brand and desired opacity. It’s crucial to mix the ingredients thoroughly, ideally using a drill mixer with a paddle attachment, to eliminate lumps and ensure a smooth, paint-like consistency. The mixture should be well-incorporated, with no dry powder settling at the bottom or water remaining on top. Stir the limewash frequently during application to maintain its consistency, as the lime particles tend to settle.
4. Apply Limewash Evenly to the Bricks
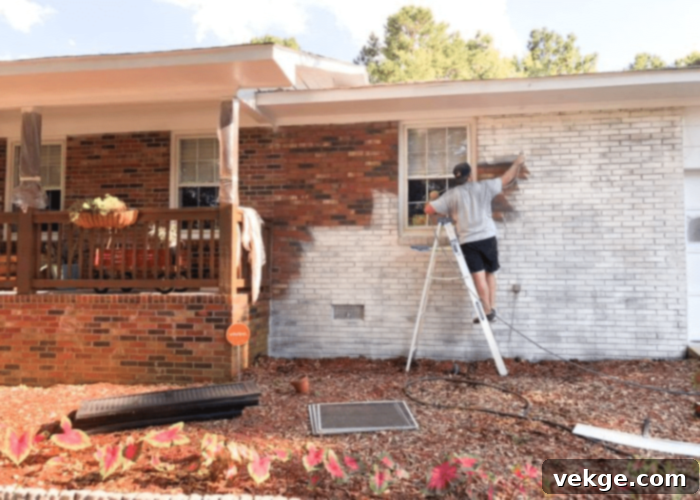
Once your limewash is perfectly mixed, it’s time for application. For best results, use suitable tools like high-quality, long-bristle masonry brushes specifically designed for limewash or masonry work. While rollers can be used for larger, flatter areas, brushes offer better control for textured brick and mortar joints. Begin by applying a thin, even coat. Work in small sections, applying the limewash in a cross-hatch pattern or with sweeping, vertical strokes from top to bottom. The goal is to avoid harsh lines and achieve a natural, slightly irregular finish that allows some of the brick’s original character to show through, creating that desirable classic, distressed look. Remember to keep the surface slightly damp as you work, misting it with water if it dries too quickly, especially in warmer conditions. This aids in the limewash’s absorption and proper curing process.
5. Allow Proper Drying Period Before Second Coating
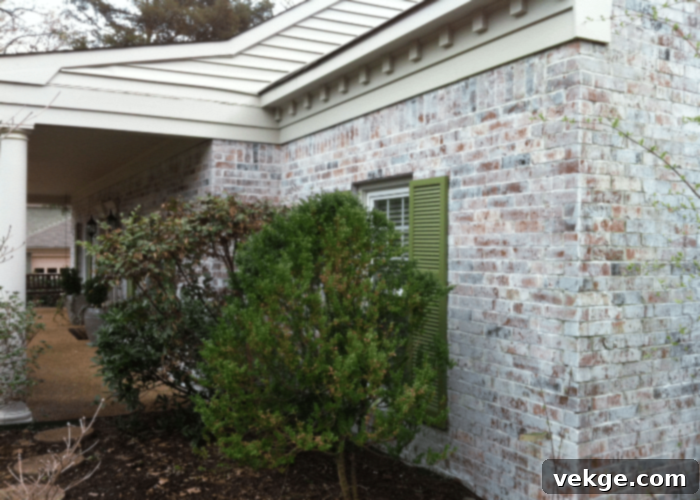
Patience is key after applying the first coat of limewash. The drying period is crucial for the limewash to properly cure and bond with the brick surface. The exact drying time can vary significantly based on several environmental factors, including humidity levels, ambient temperature, and the porosity of your brick. In general, it’s recommended to wait a minimum of 24 to 72 hours before considering a second coat. During this initial drying phase, the limewash may appear somewhat translucent or uneven, which is completely normal. As it dries and begins the carbonation process (reacting with CO2 in the air), it will gradually become more opaque and uniform. Before applying the next layer, carefully inspect the first coat to ensure it is thoroughly dry and has achieved an even distribution. Applying a second coat too soon can compromise adhesion and the final finish.
6. Apply Multiple Coats for the Finest Look and Desired Opacity
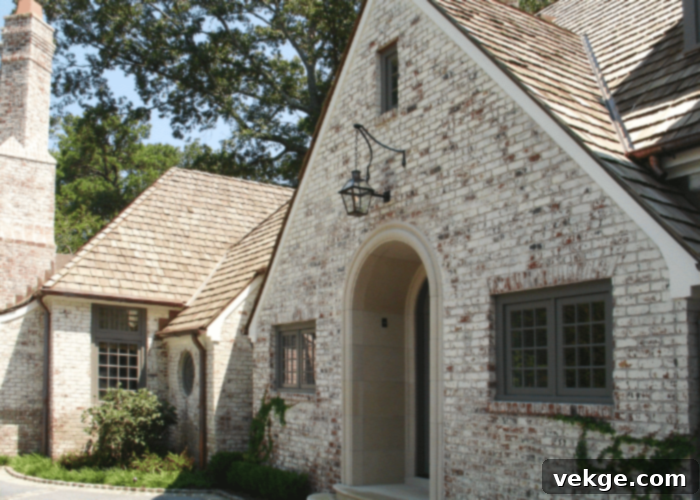
One of the most fascinating aspects of limewashing is how the color and opacity develop with each successive coat. Initially, the limewash may appear translucent and almost watery during its drying stage. However, with every additional application, the walls will gradually achieve a more opaque, finished, and robust look. Most limewash projects benefit from at least two, and often three or more, coats to achieve the desired depth and color saturation. Each coat builds upon the last, contributing to the rich, chalky texture that is characteristic of limewash. It is generally suggested to maintain a waiting period of at least 24 hours between each coat to allow for proper drying and carbonation. This ensures that the limewash fully bonds and cures, creating a durable and beautifully layered finish that reveals subtle nuances with every pass. Experiment with the number of coats on a test patch to determine the perfect level of opacity for your home.
Why Limewash Your Bricks? Explore the Enduring Benefits
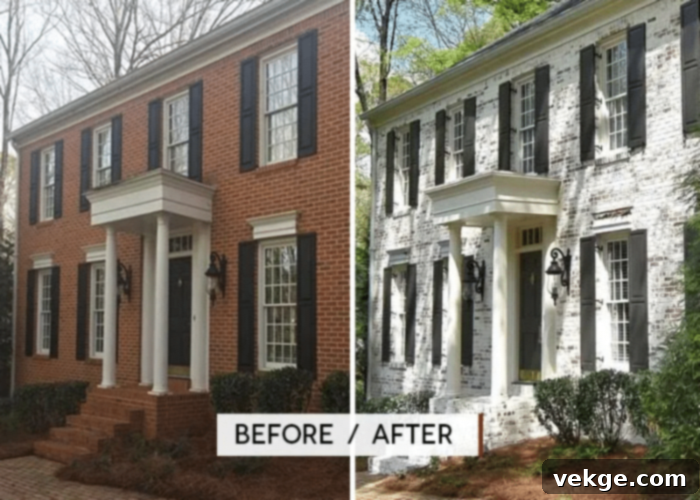
While the process of limewashing is straightforward, you might still wonder about its popularity and why it’s such a preferred choice for homeowners. The advantages of limewash bricks extend far beyond their aesthetic appeal, offering practical and environmental benefits that make them a superior option for exterior renovation. Here are some compelling reasons to choose limewash for your home:
Classic and Stylish Aesthetic That Boosts Curb Appeal
The foremost advantage of limewash bricks is their unparalleled aesthetic quality. They impart a supremely classy, elegant, and timeless look that instantly elevates both interiors and exteriors. Limewash creates a soft, matte finish with subtle variations that reveal the brick’s texture underneath, unlike opaque paints that completely hide it. This unique finish is incredibly versatile, complementing a wide array of architectural styles, from European farmhouses and modern industrial designs to traditional and contemporary homes. It can instantly enhance your home’s curb appeal, making it stand out with a sophisticated, Old-World charm that can even increase property value. The breathable, lived-in feel of limewash offers a distinct character that many find more appealing and authentic than a painted brick surface.
Pocket-Friendly and Easily Accessible Solution
Another significant benefit contributing to the high preference for limewash bricks is its affordability. Limewashing your old brick walls allows for a complete renovation without placing a harsh burden on your budget. Compared to expensive alternatives like repointing or entirely replacing brick, limewash offers a cost-effective way to achieve a dramatic transformation. Furthermore, the essential ingredients required to prepare the limewash coat are typically easy to source from most hardware stores or specialized suppliers, making them widely accessible to almost everyone. This DIY potential, combined with the long-term durability that reduces the frequency of future maintenance, makes limewash an exceptionally economical choice for home improvement.
Superior Weather Protection and Minimal Maintenance
Your home’s exterior walls are constantly exposed to challenging weather conditions, from torrential rain and harsh sunlight to freezing temperatures. These environmental adversaries can take a severe toll on the wall’s appearance and structural integrity over time. Limewash bricks offer an ideal solution by providing robust, long-lasting protection against such elements. Unlike conventional paints, limewash is highly breathable, meaning it allows moisture trapped within the brick to evaporate. This prevents issues like peeling, blistering, and efflorescence, which are common problems with non-breathable coatings. Limewash also boasts natural anti-fungal and anti-bacterial properties, deterring mold and mildew growth. It doesn’t crack or chip easily and its mineral-based composition makes it highly resistant to UV fading. Consequently, limewash bricks require significantly less maintenance over their lifespan. After proper application, homeowners can enjoy the beautiful, protected look of their house for many years without constant worries about upkeep.
Eco-Friendly and Sustainable Choice for Your Home
In today’s environmentally conscious world, the sustainability of building materials is increasingly important. Limewash stands out as an exceptionally eco-friendly option. It is a natural, mineral-based product composed primarily of aged lime and water, making it non-toxic and free from harmful volatile organic compounds (VOCs). This contributes to better indoor air quality if used internally and a healthier outdoor environment. As limewash cures, it undergoes a process called carbonation, absorbing carbon dioxide from the atmosphere, making it a carbon-neutral to carbon-negative material over its lifetime. Its breathability also contributes to a healthier building envelope by managing moisture naturally. Opting for limewash means choosing a traditional, sustainable material that minimizes environmental impact while enhancing your home’s aesthetic and durability.
Conclusion
Cracked, chipped, or stained brick walls can significantly detract from your home’s overall appeal, creating an unwelcoming impression. Limewashing your brick walls presents an elegant, durable, and relatively easy alternative to revitalize and protect your property.
Limewash bricks are celebrated for their enduring beauty, classic elegance, and robust characteristics, consistently ranking as a top choice among home decor enthusiasts and renovators. And for good reason – limewash offers a comprehensive package of benefits. From its unique, soft aesthetic and straightforward application process to its numerous advantages including cost-effectiveness, accessibility of materials, exceptional durability, and minimal maintenance requirements, it truly has it all. The transformation it brings is not just superficial; it’s a deep, lasting enhancement.
What’s more, limewash offers a degree of reversibility. Should your design preferences evolve in the future, the limewash finish can be altered or potentially removed using appropriate tools and techniques, offering flexibility that many other exterior finishes lack.
So, why wait? Embrace the opportunity to renovate your old brick walls and bestow upon them an amazing new look and enhanced protection with the timeless charm of limewash. Gather your materials, follow this guide, and prepare to be delighted by the stunning results.
Happy renovating!
