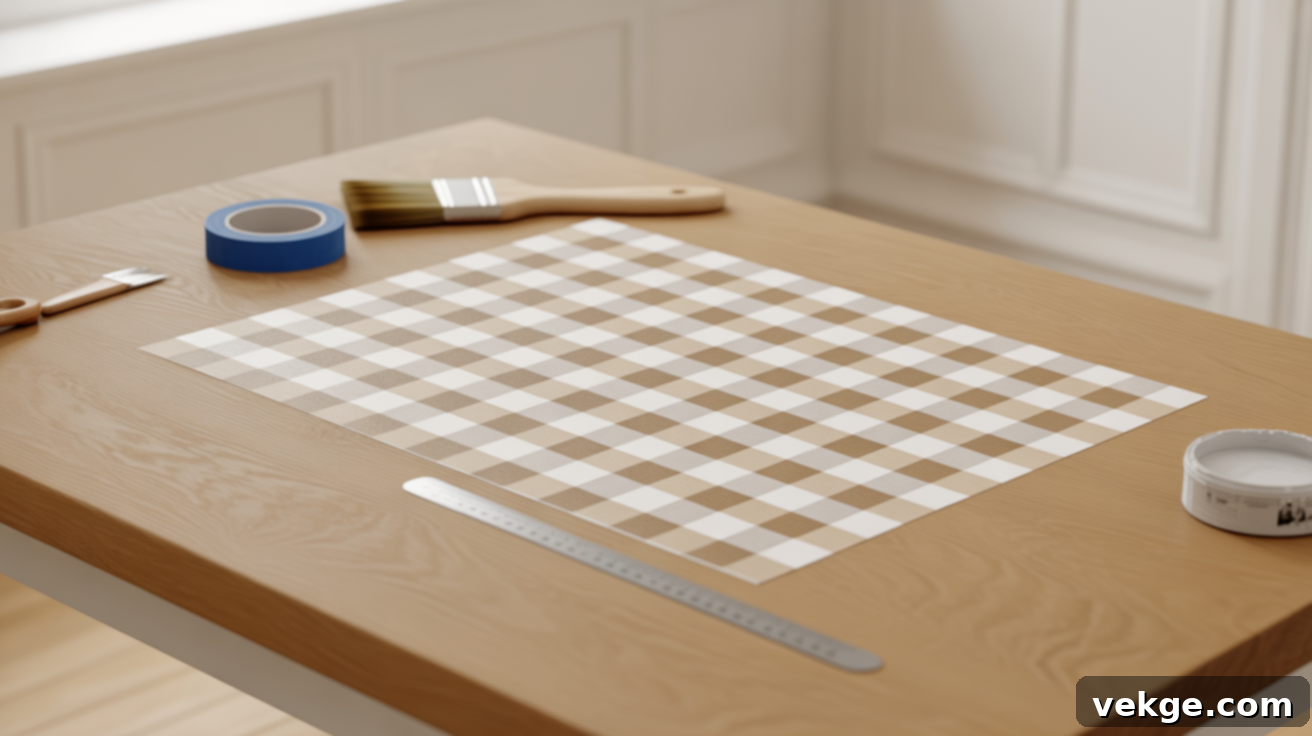
Master the Art of Painting Gingham: Your Comprehensive Step-by-Step Guide
There’s an undeniable charm and satisfaction in the crisp, clean lines and perfectly balanced squares of a gingham pattern. This timeless design effortlessly blends a sense of neatness with a cozy, handmade aesthetic, making it a beloved choice for countless DIY and decorating projects. From rustic farmhouse chic to modern minimalist, gingham adapts beautifully to almost any style and setting.
Its versatility knows no bounds; you can find gingham adorning everything from soft fabrics and durable canvases to sturdy wood furniture and even entire walls. Throughout my own creative journey, I’ve incorporated painted gingham into a wide array of projects, from thoughtful handmade gifts to significant home makeovers, and it consistently remains a personal favorite.
Over the years, through trial and error, I’ve uncovered a collection of invaluable tips and subtle tricks that transform the process of painting gingham. These insights make the experience not only simpler and more precise but also significantly more enjoyable and rewarding. Forget the intimidation; mastering this classic pattern is well within your reach.
In this comprehensive guide, I will share everything I’ve learned, taking you through each step of how to paint gingham. You’ll learn to achieve consistently beautiful results using simple, accessible tools and a calm, methodical approach that works reliably every single time. Get ready to add this versatile and charming pattern to your DIY toolkit!
What Is Gingham? Unpacking This Classic Pattern
Gingham is a distinctive fabric pattern characterized by its simple, repeating check design, typically created using just two colors. One of these colors is almost always white, which provides a crisp contrast to the accent hue. The pattern is formed by evenly spaced vertical and horizontal stripes that intersect to create a grid of squares. These squares feature three distinct shades: the primary color, white, and a third, darker shade where the primary color stripes overlap.
What sets gingham apart from other checked patterns is its inherent uniformity and simplicity. Unlike plaid, which frequently incorporates multiple colors, varying line widths, and complex patterns, gingham adheres to a fundamental two-color structure with consistent, uniform spacing between its lines. This creates a clean, uncluttered visual appeal that is both refreshing and classic.
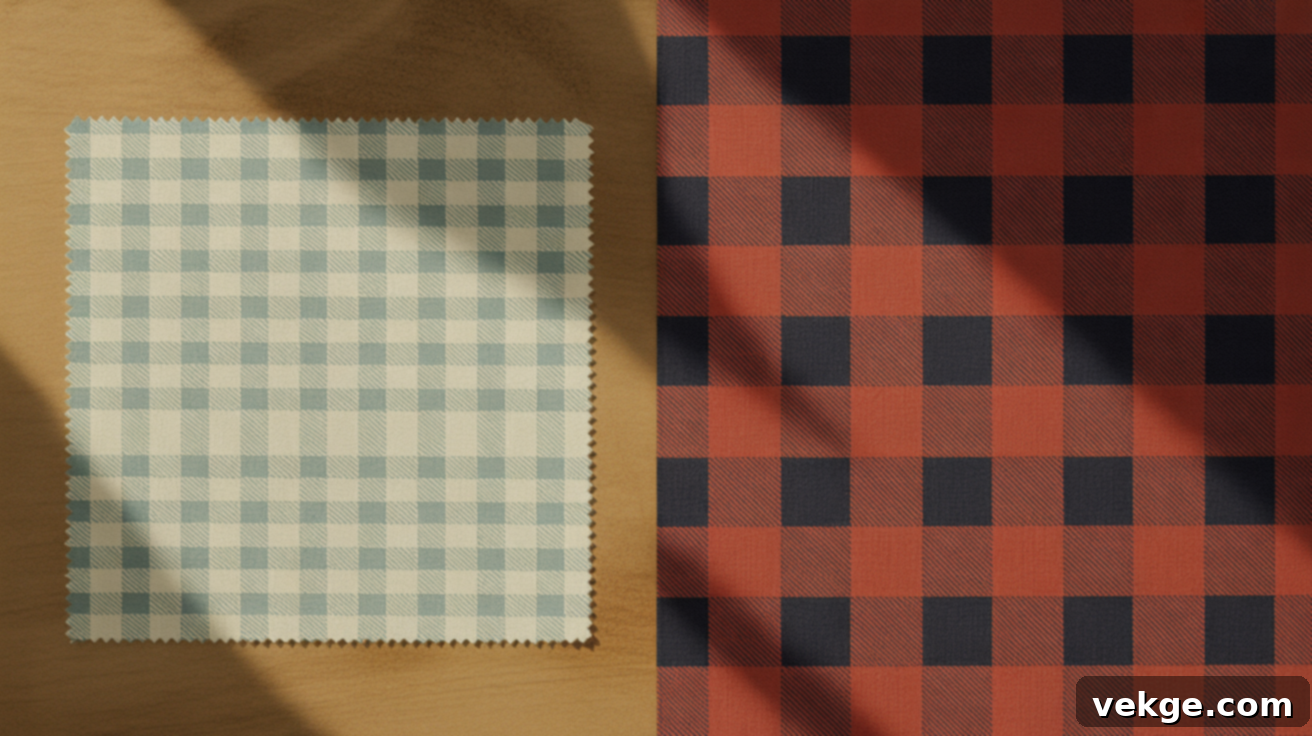
It also differs significantly from buffalo check, another popular pattern often confused with gingham. Buffalo check is known for its bolder lines and much larger squares, typically featuring high-contrast colors like black and red. Gingham, in contrast, tends to be finer, more delicate, and often utilizes softer, more subtle color combinations, making it adaptable to a broader range of styles and projects.
Gingham’s adaptability makes it a fantastic choice for a diverse array of surfaces and applications. You can find it on traditional tablecloths, fashion garments, and interior fabrics, as well as beautifully painted walls, charming craft projects, and upcycled furniture. Its inherent customizability allows you to easily adjust square size and color palettes to fit any aesthetic, resulting in a crisp, organized, and effortlessly stylish appearance when painted with care.
Gingham vs. Buffalo Check: A Side-by-Side Look
While both gingham and buffalo check patterns utilize intersecting stripes to create a checked appearance, they are fundamentally distinct in their scale, color intensity, and overall style. Understanding these differences is crucial for choosing the right pattern for your specific project. Here’s a quick side-by-side comparison to highlight their key characteristics:
| Feature | Gingham | Buffalo Check |
|---|---|---|
| Square Size | Typically small to medium and evenly spaced, creating a delicate grid. | Significantly larger and bolder squares, designed for a more pronounced statement. |
| Color Style | Often uses lighter, softer shades or classic primary colors paired with white for a traditional look. | Characterized by high contrast, frequently using strong, saturated colors like red, black, and white. |
| Stripe Width | Features thin, uniform lines that create a subtle and intricate pattern. | Composed of thick, bold lines that contribute to its distinctive, impactful appearance. |
| Overall Look | Offers a neat, airy, and often vintage or country-chic aesthetic. | Projects a strong, rustic, and eye-catching vibe, perfect for making a statement. |
| Common Uses | Ideal for crafts, apparel fabric, delicate home accents, and subtle wall art. | Popular for rugs, blankets, accent walls, and cabin-style decor where a bold presence is desired. |
Choosing between gingham and buffalo check largely depends on the desired impact and aesthetic of your project. Gingham offers a refined, understated elegance, while buffalo check provides a robust, visually striking presence.
Tools and Materials You’ll Need for Painting Gingham
Before you embark on the satisfying journey of painting a gingham pattern, taking a moment to gather all your necessary supplies is paramount. Having everything neatly organized and within reach will ensure a smooth, uninterrupted creative process, allowing you to focus on precision and enjoyment. Here’s a comprehensive list of what you’ll typically need for most surfaces, along with a brief explanation of why each item is important:
- Painter’s Tape: This is arguably the most critical tool for achieving crisp, clean lines. Invest in high-quality tape like FrogTape, which is designed with PaintBlock technology to prevent paint bleed, ensuring perfectly defined edges. Cheaper tapes can lead to frustrating touch-ups.
- Acrylic or Latex Paint: Select two complementary shades that will layer well, plus a foundational white or light base color. Acrylic paints are versatile for crafts and canvas, while latex paints are ideal for larger surfaces like walls or furniture. Consider the sheen you desire (matte, satin, semi-gloss).
- Measuring Tools: A reliable ruler, tape measure, or even a T-square is indispensable for accurately spacing your lines. Precision in this step lays the foundation for a perfectly balanced gingham pattern.
- Pencil or Chalk: Use a light pencil or tailor’s chalk to lightly mark your grid. This allows for precise guidance without the risk of staining or leaving permanent marks on your prepared surface. Disappearing ink pens are also excellent for fabric.
- Brushes or Rollers: The choice depends on the size and texture of your surface. Smaller detail brushes are perfect for canvas or intricate areas, while foam rollers or larger flat brushes are more efficient for furniture and walls, providing an even coat.
- Optional but Recommended:
- Stencil: While not strictly necessary, a pre-made gingham stencil can offer extra guidance, especially for beginners or for ensuring perfect uniformity on smaller projects.
- Fabric Medium: If you plan to paint on cloth, mixing acrylic paint with a fabric medium is essential. This additive makes the paint flexible and washable, preventing it from cracking or feeling stiff once dry.
- Primer: For porous surfaces like raw wood or slick surfaces like laminate, a primer will ensure better paint adhesion and a more durable finish.
- Sealer/Topcoat: For furniture or high-traffic items, a clear topcoat (like polycrylic or varnish) will protect your beautiful gingham design from wear, scratches, and spills.
- Drop Cloths and Wet Rags: Always have these on hand to protect your workspace and quickly clean up any accidental drips or spills.
How to Paint Gingham: A Step-by-Step Guide for Perfect Patterns
Painting a crisp, beautiful gingham pattern is far simpler than it appears, especially when you follow each stage with precision and patience. This method breaks down the process into five clear, manageable steps, designed to help you achieve clean, even, and professional-looking results every single time. Let’s transform your surface into a charming gingham masterpiece!
Step 1: Mark the Grid on Your Surface
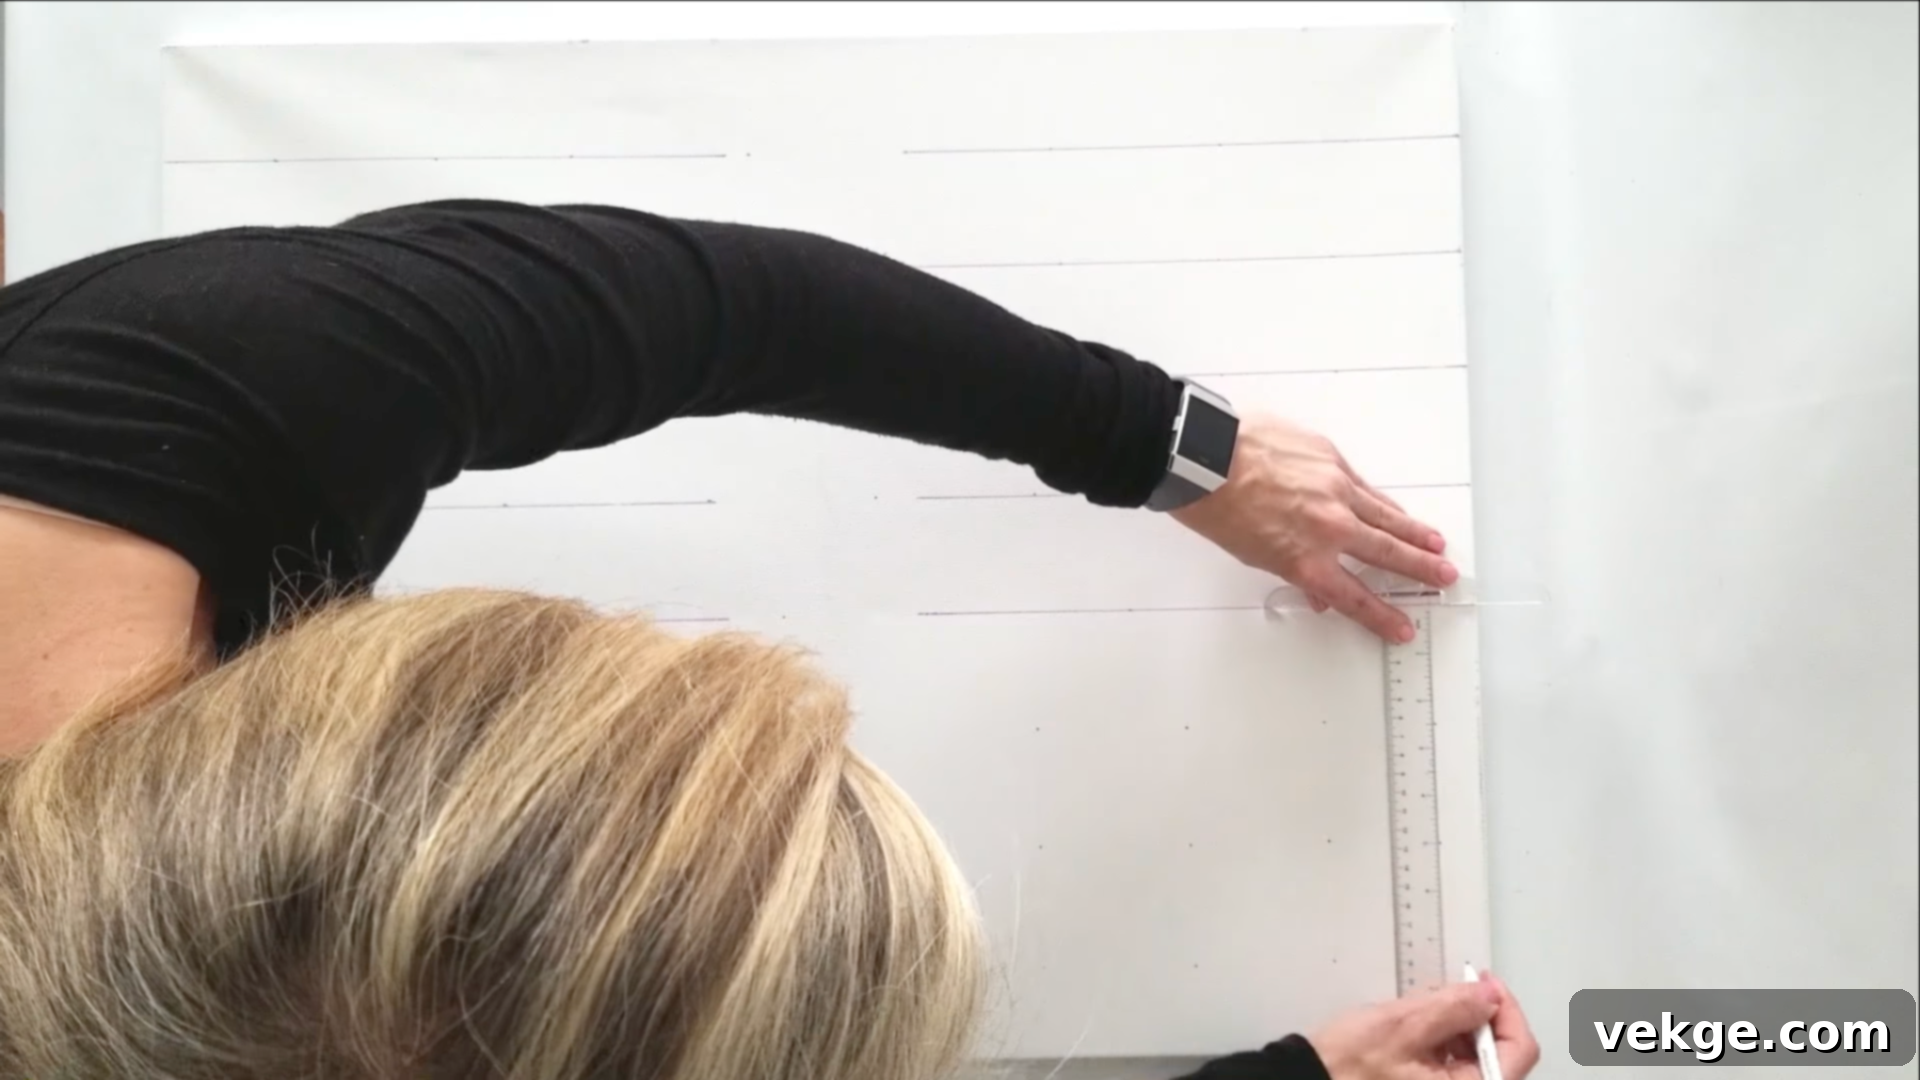
The foundation of any perfect gingham pattern is an accurately marked grid. Begin by using a T-square or a long ruler and a pencil (or a disappearing ink pen for fabric) to mark your canvas, wall, or furniture surface with evenly spaced lines. For instance, KC in the example used 2.5-inch spacing, which creates a noticeable yet refined pattern. It’s crucial to mark both vertical and horizontal lines across the entire surface. These light, temporary lines will serve as your essential guide for precise tape placement in the subsequent steps, ensuring all your squares are uniform and balanced.
Step 2: Tape and Paint the First Set of Stripes
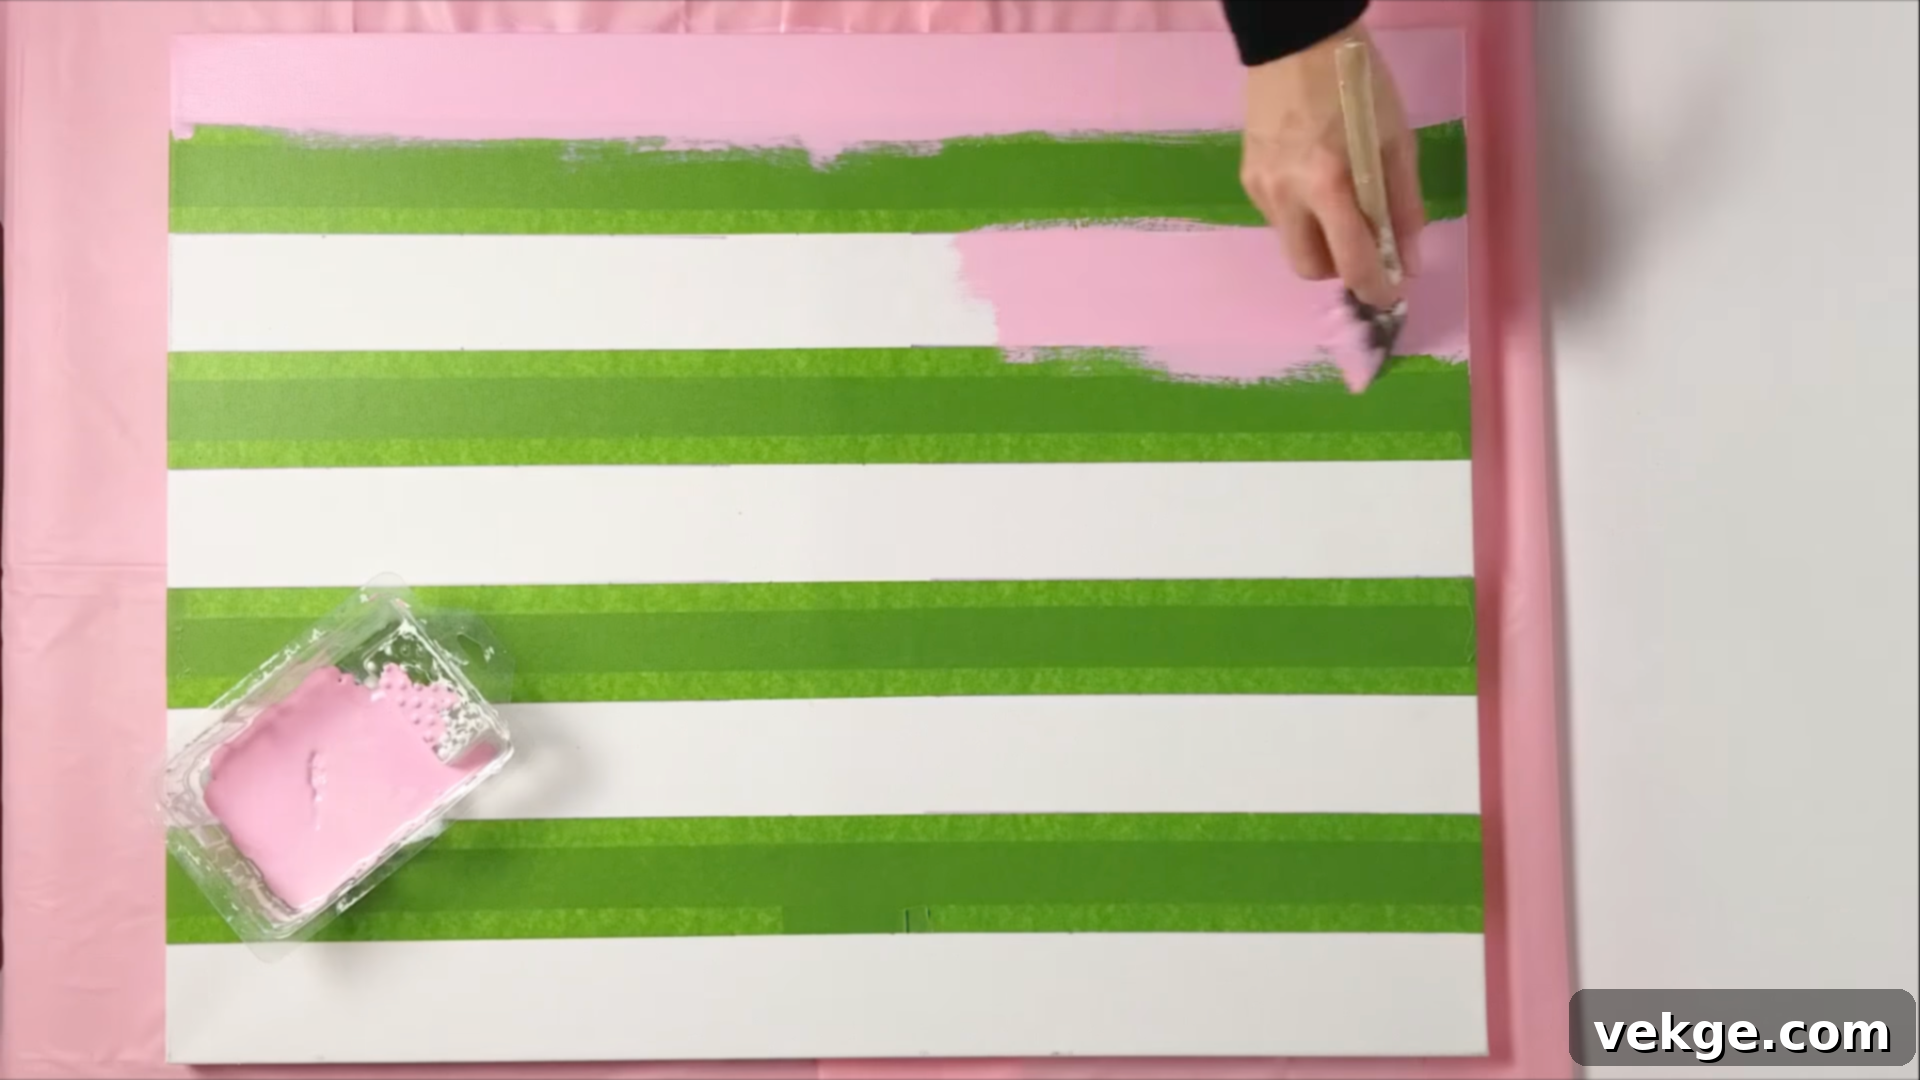
Once your grid is marked, carefully apply painter’s tape (like FrogTape) along every other vertical section of your surface. Press the tape down firmly to seal the edges and prevent paint bleed. With your first set of sections taped off, paint the exposed areas using your chosen mid-tone color. For example, if you’re aiming for a pink gingham, this would be your light pink shade. If you’re painting a canvas or item with visible sides, remember to paint those edges now for a finished look. Apply thin, even coats to avoid drips and ensure quick drying. Allow the paint to dry completely according to the manufacturer’s instructions before gently removing the tape. Patience here is key for crisp lines.
Step 3: Tape and Paint the Second Set of Stripes
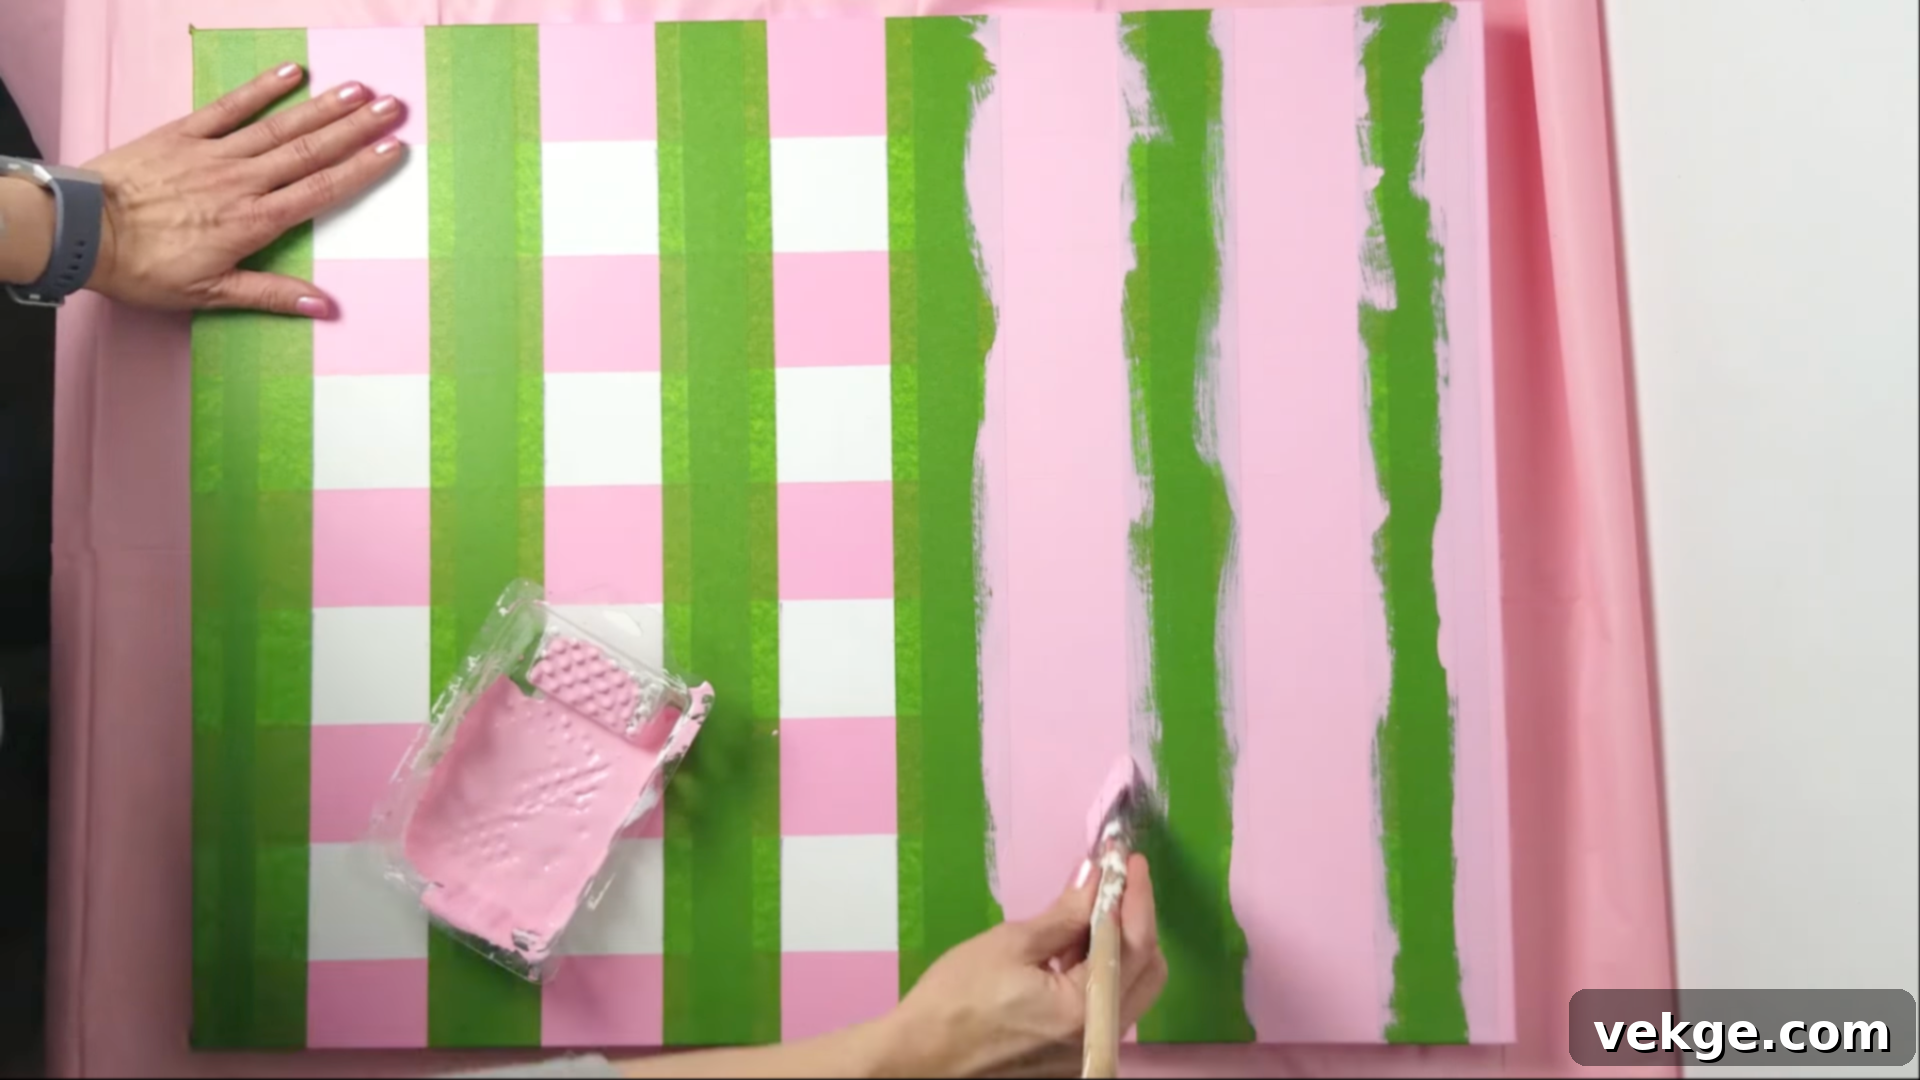
Now, rotate your canvas or orient yourself to address the horizontal lines. Using the original grid marks in the white (unpainted) areas as your guide, mark new horizontal lines. Similar to Step 2, carefully tape off every other horizontal stripe. Ensure the tape aligns perfectly with your existing grid. Once taped, paint these exposed horizontal sections with the exact same mid-tone color you used for the vertical stripes. Again, apply thin coats and allow the paint to dry fully. Once dry, carefully peel off the tape. At this stage, you should see a classic checkerboard pattern emerge, with squares of your mid-tone color alternating with the base white.
Step 4: Mark and Tape the Overlap Areas
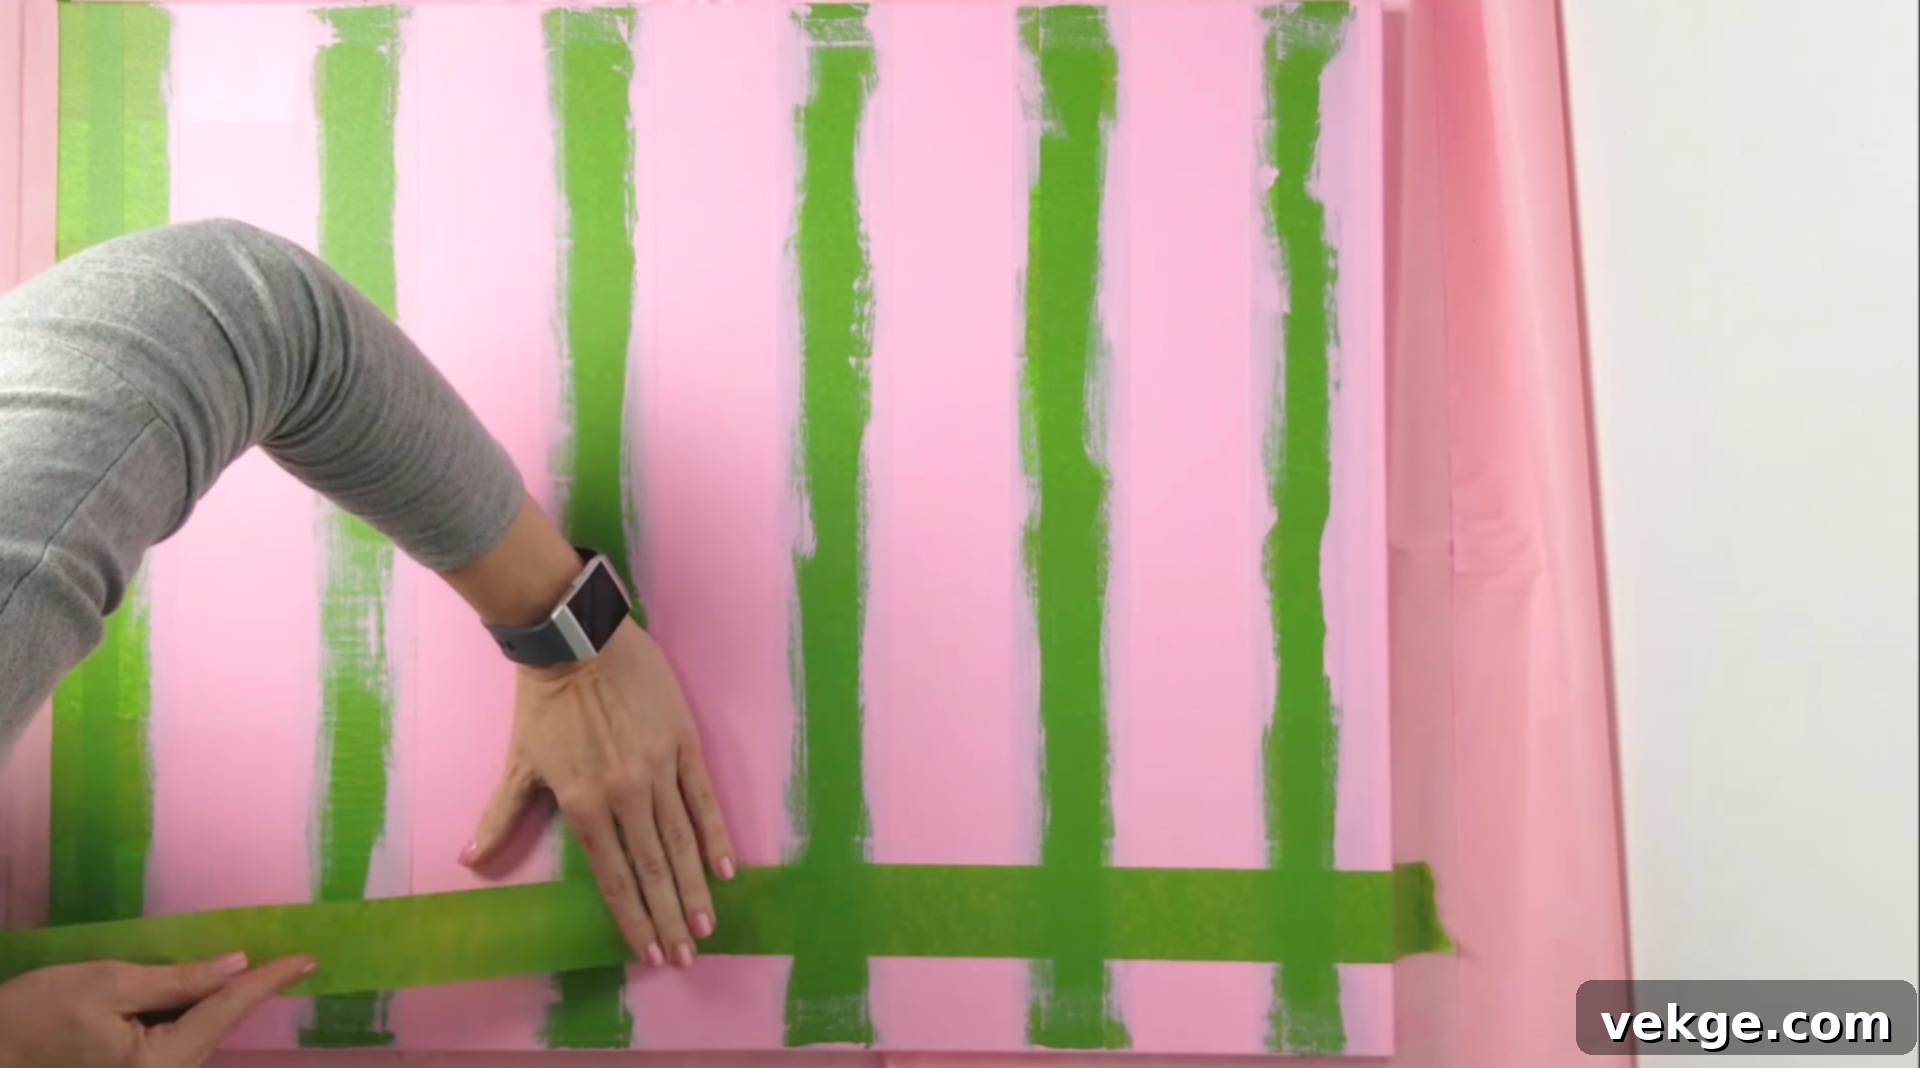
This is the crucial step that transforms a simple checkerboard into a true gingham pattern, creating the characteristic darker squares. Using your existing painted lines as a guide, carefully apply painter’s tape around the squares where the vertical and horizontal mid-tone stripes intersect. These are the areas that will receive your darkest color, completing the traditional gingham look. Take your time with this step, ensuring that the tape is precisely placed to define only these overlap squares. Double-check your placement before proceeding to avoid any mismatched or uneven squares, as accuracy here is paramount for the final effect.
Step 5: Paint the Overlap Squares and Reveal Your Gingham
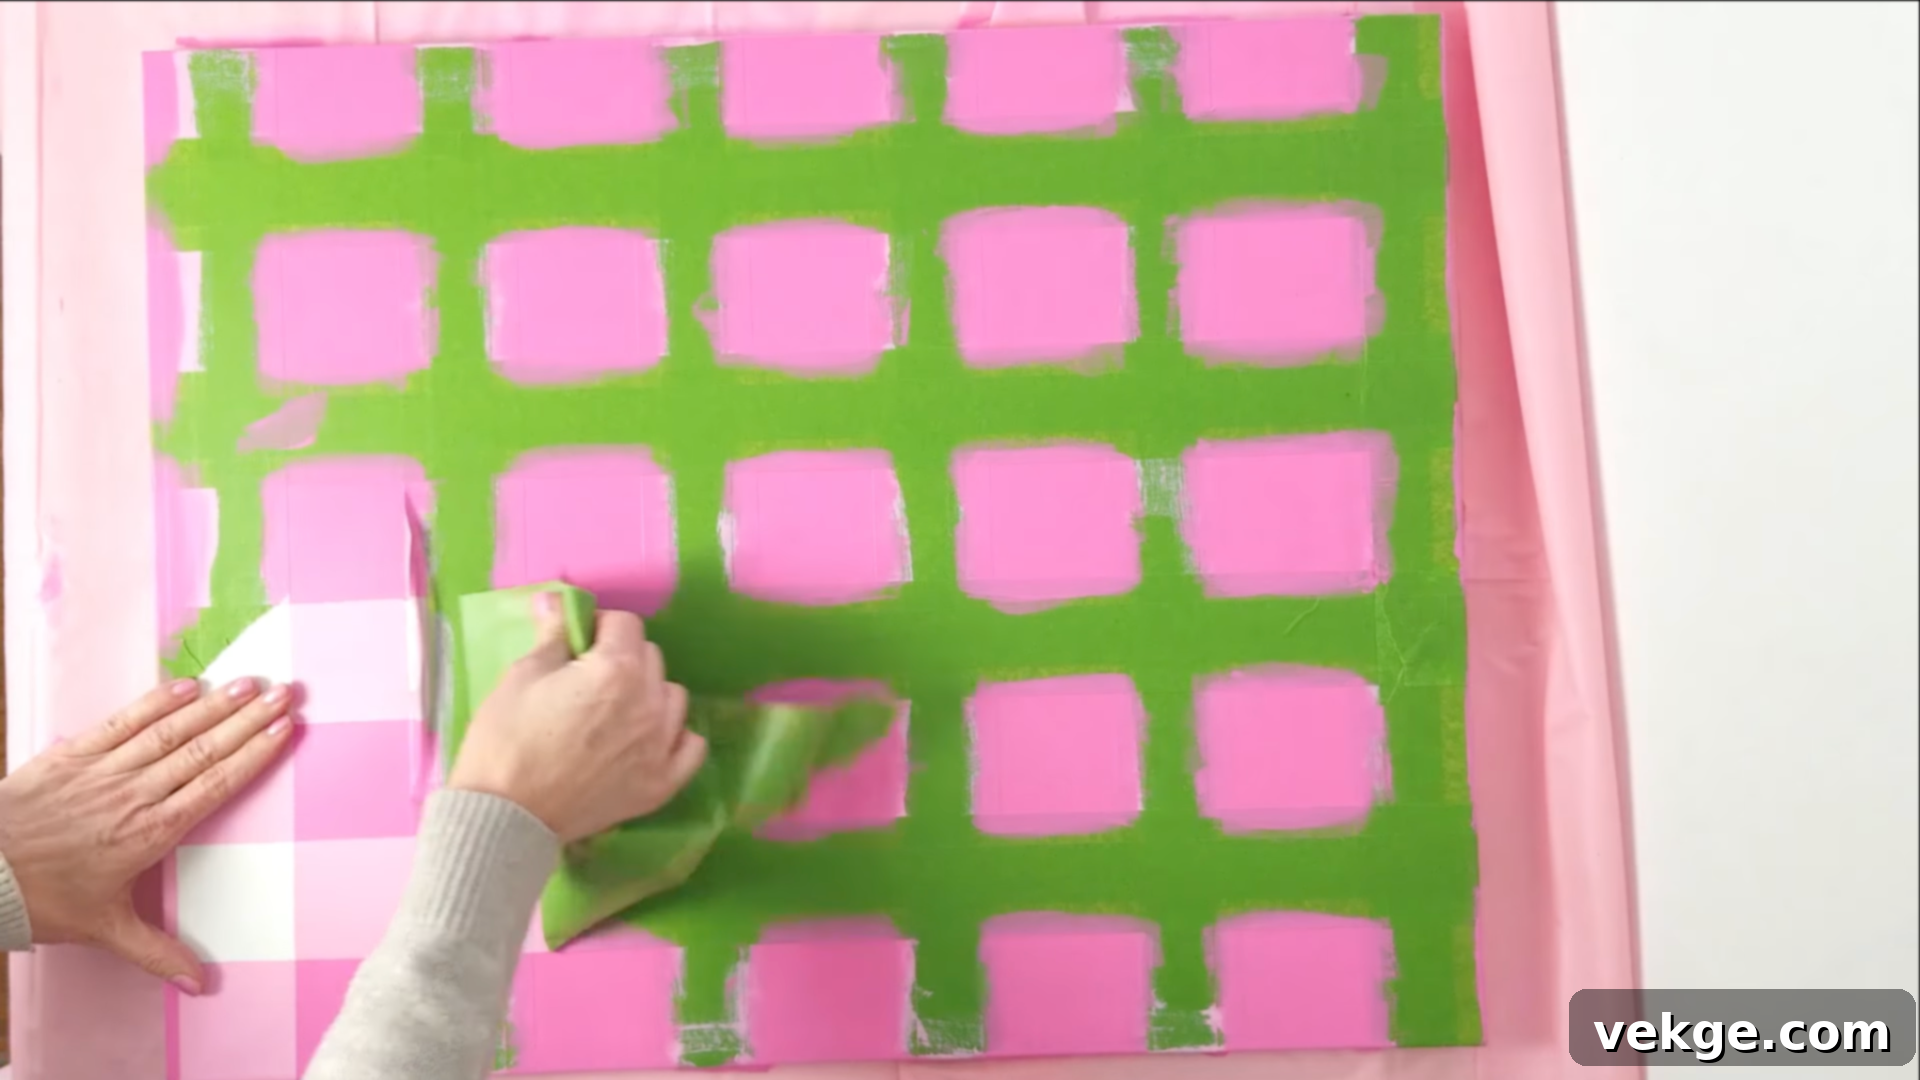
With the overlap squares precisely taped off, it’s time to apply your darkest color. For our pink gingham example, this would be the “flamingo pink” or a similar deeper shade. Carefully paint within the taped areas, applying thin, even coats. Depending on your paint and desired opacity, you may need to apply two coats to achieve a rich, consistent color. Allow each coat to dry thoroughly between applications. Once the final coat is completely dry (this is critical to prevent smudging or lifting paint), carefully and slowly remove all the painter’s tape. Step back and admire your beautifully completed, authentic gingham pattern!
For a more detailed walkthrough and visual demonstration of the entire painting process, be sure to check out the helpful YouTube video below:
Gingham Variations and Styling Ideas to Spark Your Creativity
Gingham is much more than just the classic white and single-color patterns. Its inherent simplicity makes it incredibly adaptable, allowing you to tailor it to perfectly suit different seasons, align with specific color palettes, or integrate seamlessly into various DIY ideas around your home. Here’s how you can personalize and make this timeless pattern truly your own, expanding its creative potential:
Seasonal Themes with Gingham
- Christmas Charm: Embrace the festive spirit by opting for traditional red and white gingham. This combination is perfect for hand-painted ornaments, rustic wooden signs to adorn your mantel, festive table runners, or even charming gift tags.
- Fresh Spring Vibes: Usher in the vibrancy of spring with a pastel gingham palette. Think soft mint green, delicate lilac, or serene baby blue paired with white. These light, airy shades are ideal for crafting decorative accents, refreshing throw pillow covers, or creating cheerful nursery decor.
- Cozy Fall Aesthetics: As the leaves change, so can your gingham. Warm oranges, rich rust tones, deep maroons, or even earthy browns and creams work beautifully. Apply these colors to wooden autumn signs, fabric pumpkins, or cozy placemats to capture the essence of the season.
Captivating Color Combinations to Try
- Navy and White: This classic combination exudes a sophisticated, clean, and subtly nautical vibe. It’s perfect for coastal-themed decor, preppy accents, or creating a crisp, timeless look in any room.
- Sage and Ivory: For a more understated and earthy aesthetic, sage green paired with ivory or a soft off-white is an excellent choice. This duo creates a subtle, serene atmosphere, ideal for neutral decor schemes, bohemian styles, or peaceful bedrooms.
- Blush and Pink: If you’re aiming for a soft, romantic, or wonderfully cozy feel, a blush pink combined with a deeper rose or fuchsia creates a charming gingham pattern. This is particularly lovely for nurseries, children’s rooms, or adding a gentle touch of warmth to a bedroom.
- Black and White: For a bold, graphic, and modern statement, black and white gingham is a versatile choice that never goes out of style. It can be edgy, sophisticated, or simply classic, depending on the scale and context.
Gingham Painting Tips Tailored for Every Surface
Gingham is a wonderfully adaptable pattern that can be painted on an impressive variety of surfaces. However, each material presents its own unique challenges and requires a slightly different approach to achieve the best results. Selecting your desired surface and following the appropriate preparation and application steps below will significantly enhance the durability and appearance of your painted gingham design.
Canvas or Art Board
Canvas or a rigid art board serves as an excellent starting point for painting gingham, especially if you are new to the pattern. These surfaces are typically flat, lightweight, and easy to handle, frame, or display.
- Preparation: If using a stretched canvas, ensure it’s taut. For both canvas and art board, a coat of gesso or white primer creates a smooth, uniform base that allows colors to pop.
- Marking: Lightly sketch your grid with a pencil or disappearing ink pen. Since these surfaces are less porous than wood, marks are easier to erase if needed.
- Taping & Painting: Apply painter’s tape meticulously. For canvases, remember to paint the sides of the canvas as you go to create a finished look. Apply thin, even coats of paint, allowing each layer to dry completely before applying the next or removing tape. This prevents paint from pulling up or mixing colors.
- Finishing: Once dry, a clear matte or satin varnish can protect your artwork from dust and UV damage, especially if it will be displayed in direct sunlight.
Furniture or Wood Surfaces
Transforming wood furniture with a gingham pattern can give an old piece new life. Proper surface preparation is absolutely critical for a lasting and beautiful finish.
- Preparation: Begin by thoroughly sanding the surface to ensure it’s smooth and free of any rough spots or glossy finishes. A smooth surface ensures better paint adhesion and cleaner lines. Wipe away all sanding dust. Apply a high-quality wood primer, which helps the paint stick evenly and provides a uniform base color, crucial for true color representation.
- Marking: Use a ruler and a light pencil to mark your grid. Ensure your lines are straight and consistent across the entire piece.
- Taping & Painting: Tape off the lines with extra care, pressing down firmly to prevent any paint bleeding into the wood grain. Apply paint in thin coats to minimize drips and allow for complete drying between layers.
- Finishing: After the entire design is complete and fully cured (which can take longer on wood), apply several coats of a clear, durable sealer like polycrylic or polyurethane. This will protect your painted gingham pattern from scratches, spills, and daily wear, making it suitable for tabletops, drawers, decorative trays, or stools.
Wall or Accent Space
Painting a gingham pattern on a wall adds an incredibly charming and personalized touch to a room, perfect for a nursery, kitchen, entryway, or a cozy reading nook.
- Preparation: Ensure your wall is clean, dry, and free of dust. Fill any holes and smooth out imperfections. A base coat of white or your lightest chosen color is essential for a uniform background.
- Planning & Measuring: Measure the wall carefully. The size of your gingham squares will significantly impact the room’s feel—larger squares create a bolder, more modern impact, while smaller ones offer a subtle, traditional texture. Use a long level and a pencil to meticulously mark out a full grid across the entire accent wall. For large walls, consider using a laser level for maximum accuracy.
- Taping & Painting: This step requires patience. Tape off every other line, paint, and let dry completely. Then, tape off the perpendicular lines, paint, and let dry. Finally, tape off the overlap squares and paint them with the darkest color. Using light colors will create a soft, airy effect, while bold shades will produce a striking contrast. Always ensure that each layer of paint dries completely to maintain crisp, sharp lines and prevent tape from lifting wet paint.
- Finishing: No special finish is needed for walls unless it’s a high-traffic area, in which case a washable paint will suffice.
Fabric or Textile Projects
Gingham works beautifully on fabric, but achieving a soft, flexible, and washable design requires specific materials and techniques.
- Preparation: Always prewash and dry your fabric to remove any sizing or finishes that could prevent paint adhesion. Iron the fabric flat to ensure a smooth, wrinkle-free surface for painting. Place a piece of cardboard or plastic underneath the fabric to prevent paint from bleeding through to the other side.
- Materials: Use dedicated fabric paint, or mix acrylic paint with a fabric medium (typically a 1:1 ratio, but check product instructions). This ensures the design remains flexible, soft, and won’t crack after washing.
- Marking: Mark your grid using tailor’s chalk or a disappearing fabric pen. These marks will vanish, leaving only your painted design.
- Application: Apply paint in light, thin coats to avoid saturating the fabric, which can make it stiff. Use a steady hand and good brush control. Allow each layer to dry completely before proceeding to the next.
- Finishing: Many fabric paints or fabric medium mixes require heat setting once completely dry to become permanent and washable. Follow the product instructions for ironing or machine drying to properly set the paint. This technique is ideal for pillow covers, tote bags, table runners, or even subtle accents on clothing.
Gingham Care: 7 Tips to Keep Your Painted Patterns Pristine
Once you’ve invested time and effort into painting a beautiful gingham pattern, you’ll want to ensure it stays clean, crisp, and long-lasting. These seven essential tips cover both ongoing maintenance and common pitfalls to avoid, helping you preserve the beauty of your hand-painted creations:
- Seal and Protect High-Use Areas: For any painted gingham on furniture, decorative trays, or even floors, applying a clear protective topcoat is non-negotiable. Products like polycrylic or varnish will guard against scratches, spills, and the daily wear and tear that can quickly degrade your design. Apply multiple thin coats for maximum durability.
- Use Light Cleaners and Soft Cloths: When it comes to cleaning your painted surfaces, always stick to mild soap and water. Harsh chemical cleaners, abrasive sponges, or rough scrubbers can easily dull the paint finish, cause discoloration, or even physically damage the painted pattern. Gently wipe with a soft, damp cloth.
- Measure and Level Your Grid Accurately: Many instances of uneven lines or tilted patterns stem from rushed marking or skipping the use of a level during the initial grid creation. Precision in Step 1 is paramount. Take your time, double-check your measurements, and use a level to ensure all lines are perfectly straight.
- Apply Thin Coats and Allow Them to Dry Fully: Resist the temptation to apply thick layers of paint in an effort to speed up the process. Thick paint is prone to streaking, uneven coverage, and significantly extends drying times. Always apply thin, even coats and allow each layer to dry completely (often for several hours or as per paint instructions) before applying the next or repositioning tape. This prevents sticky residue and paint lifting.
- Test Your Color Combination First: The way colors appear can subtly shift based on lighting conditions, the underlying material, and how they interact when layered. Before committing to your full pattern, always try a small swatch of your chosen colors on a scrap piece of your surface or an inconspicuous area. This allows you to confirm the desired outcome.
- Keep Fabric Projects Dry or Spot Clean Gently: For gingham painted on textiles (like throw pillows or tote bags), avoid machine washing unless explicitly stated by the paint or fabric medium manufacturer and after heat-setting. Machine washing can cause the paint to crack, peel, or fade. Instead, spot clean gently with a damp cloth and mild soap to preserve the design’s integrity and flexibility.
- Watch for Fading and Chips, and Touch Up Promptly: To maintain a fresh and tidy appearance, limit direct, prolonged sun exposure, which can cause colors to fade over time. Dust painted surfaces regularly. If you notice any small nicks, chips, or scratches, address them quickly with a matching paint pen or a small brush to prevent further damage or wear.
Conclusion: Embrace the Joy of Painting Gingham
Painting a gingham pattern is truly one of those projects that often feels far more complicated and intimidating than it actually is. Once you break it down into manageable, step-by-step actions, as we’ve done in this guide, it transforms into a wonderfully fun, low-stress, and deeply satisfying way to add a touch of classic charm to just about anything.
I’ve personally applied this versatile method to a diverse range of items—from rustic wooden signs and delicate fabric pieces to even a functional cabinet door in my home—and the results consistently hold up beautifully, enduring daily use while maintaining their crisp appeal. My hope is that this comprehensive guide has equipped you with all the essential information, practical tips, and confidence you need to roll up your sleeves and give it a try yourself. Imagine the possibilities!
If you’re now feeling inspired and ready to explore more simple, hands-on projects like this one, I encourage you to delve deeper. There’s a wealth of creative ideas and practical tutorials waiting for you. Take a moment to look around the website and discover what else might ignite your passion for your next delightful paint day or DIY adventure.
And if you do decide to embark on this gingham painting journey, please don’t hesitate to share your experience! Let me know in the comments how your project turned out. Nothing beats the joy of seeing these creative ideas come to life and flourish in someone else’s hands and home.
