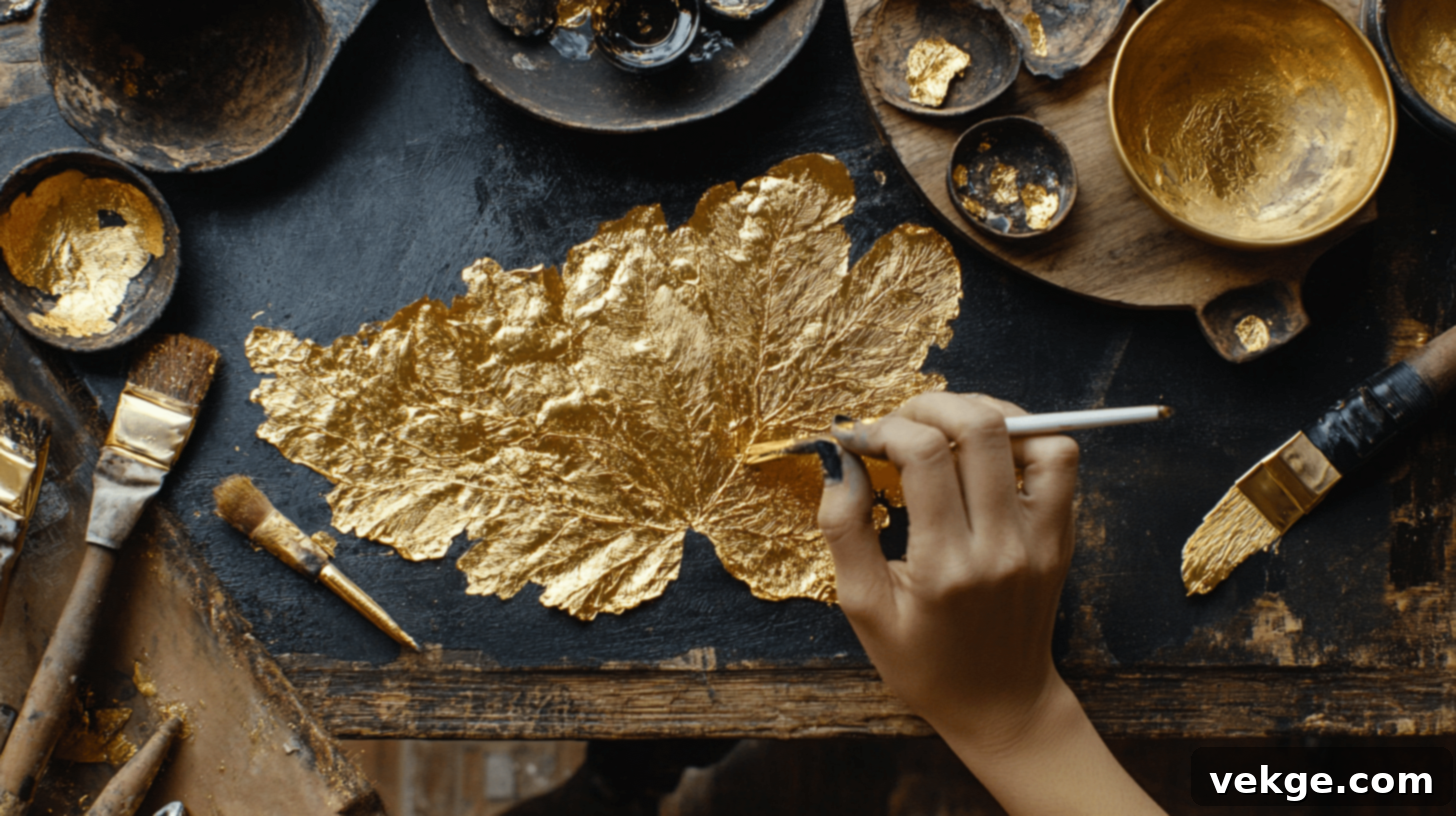
Mastering Gold Leaf: A Comprehensive Guide to Applying Gold Leaf on Any Surface
Transforming ordinary items into extraordinary pieces with the radiant gleam of gold leaf can be incredibly rewarding. For years, I’ve refined my skills, moving past initial trial-and-error to discover the precise methods for applying gold leaf on various materials. My journey began with its share of frustrating moments and wasted materials, but each challenge taught me invaluable lessons about achieving flawless, enduring finishes.
Are you hesitating to embark on your first gold leaf project, perhaps concerned about ruining expensive materials or seeing your hard work peel away? That initial apprehension is entirely normal. Everyone wants their gilded creations to last and look professional, not uneven or flaking. This guide is designed to alleviate those fears and empower you with the knowledge I’ve accumulated.
I’m here to walk you through the exact, step-by-step process for successfully applying gold leaf across a diverse range of surfaces, including wood, metal, glass, canvas, and more. From selecting the right type of gold leaf to mastering the finishing touches, you’ll gain the confidence to tackle any project.
By following these detailed instructions and expert tips, you will learn to create stunning, luminous items that captivate with a rich, warm glow, elevating your crafts and decor to a truly luxurious level.
What Exactly is Gold Leaf? A Deep Dive into Gilded Materials
At its core, gold leaf is an incredibly thin sheet of metal, often pure gold, hammered into a film far finer than a human hair. In my experience, handling genuine gold leaf is a unique sensation; it feels almost weightless, fragile yet capable of imparting immense luxury. Historically, skilled artisans painstakingly hand-hammered gold into these delicate sheets. Today, while traditional methods still exist, modern machinery ensures greater consistency and efficiency in production.
It’s truly remarkable to consider that a mere ounce of gold can produce approximately 100 sheets of gold leaf, highlighting its incredible malleability. Gold leaf comes in various grades, typically distinguished by their karat purity. The most common varieties I frequently use and recommend for projects are 22-karat and 23-karat gold. These offer a beautiful, rich gold color with excellent durability. While pure 24-karat gold leaf is available, it is considerably more expensive and often reserved for highly specialized or ceremonial applications due to its slightly softer nature.
Understanding the different types of gold leaf is crucial for choosing the right material for your project:
1. Genuine Gold Leaf: The Enduring Standard
- Composition: Made from pure gold (22k-24k) or high-karat gold alloys.
- Longevity & Shine: Offers an unparalleled, long-lasting brilliance and will not tarnish or oxidize over time. Its inherent resistance to environmental factors means its luster remains undiminished for centuries.
- Color Stability: Guaranteed to maintain its original, radiant gold color without any risk of discoloration.
- Ideal Applications: Perfect for outdoor projects, architectural gilding, historical restorations, or any item where permanence and premium quality are paramount.
- Cost: Significantly more expensive than other options, reflecting its purity and durability.
2. Composition Leaf (Imitation Gold Leaf): A Versatile Alternative
- Composition: Also known as Dutch metal, this leaf is primarily made from brass (an alloy of copper and zinc) and contains no real gold.
- Cost-Effectiveness: A much more affordable alternative to genuine gold, making it ideal for beginners, large-scale projects, or items that don’t require the extreme longevity of pure gold.
- Ideal Applications: Works exceptionally well for indoor decorative items, craft projects, furniture, and pieces that will be protected from direct elements.
- Potential for Tarnish: Because it’s not real gold, composition leaf is susceptible to tarnishing and oxidation over time, especially if exposed to humidity or acidic environments. A high-quality sealer is essential for preserving its shine.
Over the years, I’ve successfully applied gold leaf to an incredibly diverse array of materials, demonstrating its versatility:
- Wood: Furniture, picture frames, decorative boxes, and intricate carvings. It adheres beautifully to sanded and primed wood surfaces, enhancing their natural texture or providing a smooth, opulent finish.
- Glass: Mirrors, vases, decorative panels, and glassware. Glass offers a unique reflective quality that amplifies the gold’s brilliance, creating stunning effects.
- Ceramic: Pots, plates, tiles, and sculptures. Gold leaf can transform everyday ceramic items into luxurious accent pieces.
- Metal: Light fixtures, jewelry, decorative hardware, and artistic metalwork. It adds a sophisticated gleam to a variety of metallic bases.
- Walls & Ceilings: Architectural details, cornices, ceiling medallions, and accent walls, bringing an element of grandeur to interior spaces.
- Paper & Canvas: Art projects, invitations, bookbinding, and mixed-media paintings, adding a metallic highlight to artistic creations.
- Stone: Sculptures, fireplace surrounds, and decorative elements, introducing an unexpected touch of elegance to rugged surfaces.
The truly amazing aspect of gold leaf, in my experience, is its adherence to almost any clean, smooth surface. I’ve even seen it used by culinary artists to add a touch of extravagance to food and drinks for high-end events – though I always advise leaving such specialized applications to professional food decorators!
One crucial piece of advice I always offer beginners: start your gold leafing journey with simple, flat surfaces. My very first attempt was on a complex, curved vase, which turned into a rather frustrating learning experience! Flat picture frames, small wooden boxes, or even simple panels make excellent practice pieces. They allow you to get a feel for the material and technique without the added challenge of intricate shapes, building your confidence for more ambitious projects.
Step-by-Step Guide: How to Apply Gold Leaf Flawlessly
Ready to bring that radiant gleam to your chosen item? This detailed, step-by-step guide will walk you through the entire process, ensuring a smooth and successful gold leaf application. Mastering each stage is key to a professional-looking finish.
Tools & Materials Required for Gilding Success
Before you begin, gather all your supplies. Having everything at hand will make the process much smoother and more enjoyable.
- Gold Leaf Sheets: Genuine or imitation, depending on your project and budget.
- Small Scissors: Precision scissors are best for clean, accurate cuts of the delicate leaf.
- Beauty Blender or Makeup Sponge: Ideal for gently pressing and burnishing the leaf, ensuring full adhesion without tearing.
- Mini Heat Gun (or Craft Heat Tool): Helps to speed up the drying time of the adhesive, especially useful in humid environments.
- Gold Leaf Adhesive (Size): A specialized glue that remains tacky after drying, providing the perfect surface for the leaf to adhere to. Water-based and oil-based options are available, with different drying times.
- Clean Working Surface: A dust-free, well-lit area is crucial to prevent imperfections.
- The Item You Want to Gild: Your prepped surface is ready for its golden transformation!
- Soft Brush: For applying adhesive and dusting off excess leaf.
- Sealer: A clear, protective topcoat to protect the gold leaf from tarnish and damage, especially important for imitation leaf.
Step-by-Step Process for Applications: From Prep to Perfection
- Prepare Your Surface: The Foundation of Flawless Gilding
- Clean Thoroughly: Begin by meticulously cleaning your item. Any dust, grease, or dirt will prevent the gold leaf from adhering properly and will show through the thin leaf.
- Ensure Purity: Use a mild detergent and water, or a specialized cleaner appropriate for your material. For wood, sand smooth and wipe with a tack cloth. For glass, rubbing alcohol is excellent for removing oils and fingerprints.
- Prime if Necessary: For porous surfaces like wood, or highly absorbent materials, applying a primer first will create a smoother, more consistent base for your adhesive and prevent it from soaking in too quickly. Ensure the primer is completely dry before moving on.
- Apply Adhesive (Size): The Sticky Secret
- Even Coverage is Key: Using your finger (if applying to small, intricate areas) or a soft brush, apply a thin, even layer of gold leaf adhesive (also known as “size”) to the exact area you intend to gild. Avoid over-applying, as thick layers can lead to an uneven finish or longer drying times.
- Work in Sections: If your project is large, apply adhesive to smaller, manageable sections at a time. This prevents the adhesive from drying too much before you can apply the leaf.
- Be Precise: The adhesive defines where the gold leaf will stick, so apply it carefully, following your design lines or the edges of your item.
- Dry the Adhesive Until Tacky: The “Open Time”
- Patience is a Virtue: Allow the adhesive to dry until it reaches a “tacky” stage. This means it should feel sticky to the touch, but no longer wet or transferable to your finger. The drying time varies greatly depending on the type of adhesive (water-based generally dries faster than oil-based) and environmental conditions. Always check the manufacturer’s instructions.
- Speed Up Drying (Carefully): You can use a mini heat gun or craft heat tool to accelerate the drying process. Hold the heat gun several inches away from the surface and move it continuously to ensure even drying and prevent overheating or bubbling of the adhesive.
- Avoid Over-Drying: If the adhesive dries completely, the gold leaf will not stick. If this happens, you’ll need to reapply the adhesive.
- Prepare Gold Leaf: Precision Cutting
- Handle with Care: Gold leaf is extremely delicate. Avoid breathing directly on it or touching it excessively with your fingers, as oils can affect adhesion.
- Cut to Size: Using sharp, precision scissors, carefully cut the gold leaf sheets into smaller, manageable pieces. It’s often easier to work with smaller sections than a whole sheet, especially for beginners or curved surfaces.
- Slightly Larger: Cut pieces that are slightly larger than the area you intend to cover. This provides a small overlap for easier handling and ensures full coverage, with excess easily removable later.
- Apply Gold Leaf: The Moment of Truth
- Gentle Placement: Carefully pick up a cut piece of gold leaf (using tweezers or a gilder’s tip brush can help) and gently lay it onto the tacky surface. Don’t worry if it isn’t perfectly aligned initially.
- Allow to Settle: Let the gold leaf settle naturally onto the adhesive. It will begin to cling immediately.
- Overlap Slightly: When applying adjacent pieces, slightly overlap them to ensure complete coverage and prevent gaps.
- Press and Seal: The Bonding Process
- Gentle Pressure: Once the gold leaf is in place, use a clean beauty blender or makeup sponge to gently press it down. Use light, dabbing motions, working from the center of the leaf outwards towards the edges.
- Smooth Adhesion: This gentle pressure helps the gold leaf fully bond to the adhesive and conform to the contours of your item, creating clean, crisp edges and a smooth finish. Continue dabbing until the entire applied area feels securely adhered.
- Remove Air Bubbles: The dabbing motion also helps to release any trapped air bubbles beneath the leaf.
- Remove Excess: Revealing the Masterpiece
- Delicate Removal: After the gold leaf is firmly pressed, gently brush away any loose, excess pieces using a very soft, dry brush (like a squirrel hair brush or a dedicated gilding brush) or lightly pat with your beauty blender.
- Collect Scraps: Don’t discard the excess! These small flakes can be saved in a container and used for future smaller projects or for creating distressed gold leaf effects.
- Final Pat: Give the newly gilded area a final, gentle pat with your beauty blender to ensure any remaining loose edges are smoothed down. Your surface should now be shimmering with gold!
Overall Cost Analysis for Applying Gold Leaf to Any Material
Understanding the potential costs involved in gold leaf projects can help you budget effectively and choose the right materials. While genuine gold leaf is an investment, imitation leaf offers an affordable entry point into the world of gilding.
| Item | Cost Range (USD) |
|---|---|
| Basic Starter Kit | |
| Adhesive (Size) (2 oz) | $10 – $15 |
| Sealer (per bottle) | $8 – $12 |
| Gold Leaf Sheets (25 sheets) | |
| Imitation Leaf (25 sheets) | $8 – $12 |
| Genuine Gold Leaf (25 sheets, e.g., 23k) | $30 – $45 |
| Beauty Blender / Makeup Sponge | $5 – $8 |
| Small Precision Scissors | $8 – $12 |
| Mini Heat Gun / Craft Heat Tool | $15 – $25 |
| Estimated Cost Per Project Type (Excluding Basic Kit Tools) | |
| Small Items (e.g., 4×4 inch coaster, small frame) | |
| Imitation Leaf Total (1-2 sheets) | $3 – $5 |
| Real Gold Leaf Total (1-2 sheets) | $8 – $12 |
| Medium Items (e.g., 12×12 inch tray, medium mirror frame) | |
| Imitation Leaf Total (4-6 sheets) | $10 – $15 |
| Real Gold Leaf Total (4-6 sheets) | $25 – $35 |
| Large Items (e.g., 24×24 inch furniture panel, large wall art) | |
| Imitation Leaf Total (10-15 sheets) | $20 – $30 |
| Real Gold Leaf Total (10-15 sheets) | $60 – $90 |
Money-Saving Tips I’ve Learned Through Experience
Gilding doesn’t have to break the bank. Here are some smart ways to save money without compromising on quality:
- Save Leftover Pieces: Never throw away small scraps of gold leaf. Store them in a sealed container; they are perfect for patching tiny gaps, adding subtle accents, or tackling very small projects later on.
- Use Imitation Leaf for Practice: Especially when you’re starting out or trying a new technique, opt for imitation gold leaf. It’s much cheaper, allowing you to perfect your skills without the pressure of wasting expensive genuine gold.
- Buy Tools in Sets When Possible: Many craft stores and online retailers offer starter kits that bundle essential tools like brushes, adhesives, and a small quantity of leaf. These often provide better value than purchasing each item individually.
- Start with Small Projects First: Not only is this great for building confidence, but smaller projects also require fewer materials, keeping your initial investment low.
- Store Materials Properly to Avoid Waste: Gold leaf and adhesive can be sensitive to air and humidity. Keep leaf sheets flat and covered, and ensure adhesive bottles are tightly sealed to prevent premature drying or degradation.
- DIY Surface Prep: Instead of buying specialized primers for every surface, research cost-effective alternatives like gesso for canvas or diluted PVA glue for certain wood types.
Hidden Costs to Consider for a Truly Finished Project
While the initial material costs are straightforward, always factor in these less obvious expenses:
- Extra Sealer for Outdoor Items: Outdoor projects demand robust, UV-resistant sealers that typically cost more but are essential for longevity.
- Replacement Beauty Blenders/Brushes: These tools wear out or get gummed up over time, especially brushes used for adhesive, so having replacements on hand is wise.
- Surface Prep Materials: Sandpaper (various grits), wood filler, specialized cleaners, or primers can add up, but they are critical for a smooth base.
- Touch-Up Supplies: Small amounts of extra leaf or adhesive for unexpected repairs are often needed to perfect a piece.
- Protective Gloves: Essential for keeping fingerprints off delicate leaf and protecting your hands from adhesive.
- Clean-Up Materials: Solvents for brushes (if using oil-based adhesive), rags, and general cleaning supplies are necessary post-project.
- Practice Materials: The cost of materials used for practice pieces should be factored in, as this is part of the learning curve.
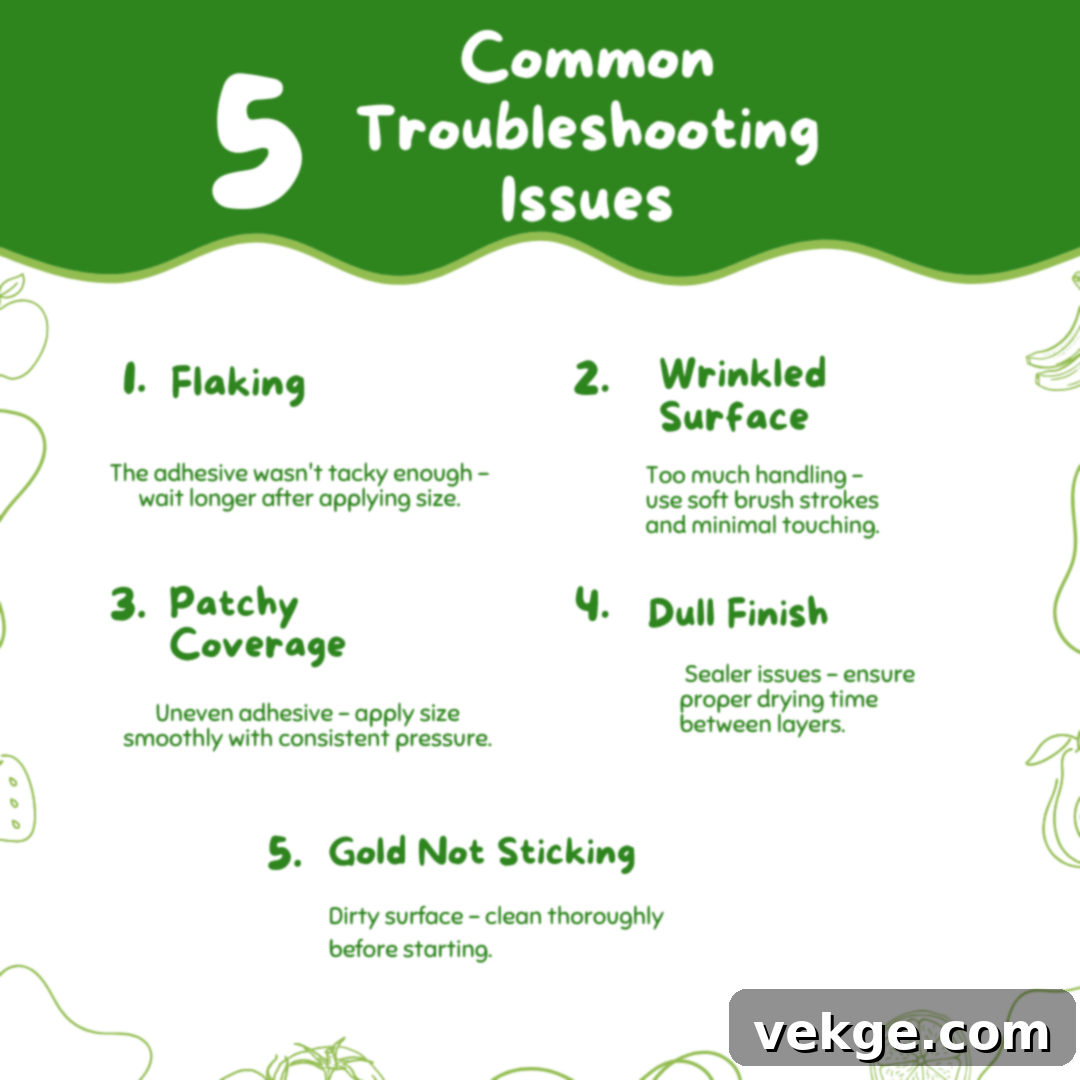
How to Give a Finishing Look: Sealing and Protecting Your Gilding
Applying gold leaf is just the first step; proper finishing is crucial for protecting your artwork and ensuring its longevity, especially for imitation gold leaf which is prone to tarnishing. These steps will seal in the beauty and add a professional sheen.
Surface Smoothing: Refining the Gilded Surface
- Wait for Full Cure: Allow the gold leaf and adhesive to fully cure for at least 24 hours before any smoothing. This ensures the leaf is completely bonded and minimizes the risk of damage.
- Gentle Buffing: Using a very soft, lint-free cloth (such as a microfiber cloth or cotton ball), gently buff the gilded surface. Work in small, circular motions, applying minimal pressure.
- Inspect Carefully: Check your work under good lighting to identify any remaining loose flakes, rough edges, or tiny imperfections.
- Address Imperfections: Use the corner of your soft cloth or a very soft, dry brush to carefully remove any stubborn dust particles or gently press down any slightly lifted edges. This step is about refining, not aggressively rubbing.
Sealing Steps: The Protective Shield
Sealing is non-negotiable, particularly for imitation gold leaf. A good sealer protects against scratches, moisture, and tarnishing.
- First Thin Coat:
- Choose the Right Sealer: Select a clear, non-yellowing sealer appropriate for your project and the type of leaf. Acrylic-based sealers are common and user-friendly.
- Apply Evenly: Using a soft, clean brush (a foam brush can also work well), apply the first thin coat of sealer. Use long, even strokes, avoiding pooling or thick patches.
- Full Dry Time: Allow this coat to dry fully, which typically takes 4-6 hours, or as per manufacturer’s instructions. Ensure the room is dust-free during drying.
- Check for Coverage: After drying, inspect for any missed spots or areas where the sealer might have absorbed unevenly.
- Second Protective Coat:
- Enhance Protection: Apply a second thin coat of sealer. This layer provides added durability and a more uniform finish.
- Consistent Direction: Brush in one consistent direction to minimize brush strokes and achieve a smooth appearance.
- Watch for Bubbles: Be vigilant for air bubbles forming during application; gently brush them out immediately.
- Fix Streaks Promptly: If streaks appear, blend them quickly before the sealer begins to set.
- Overnight Cure: Allow the second coat to dry completely, ideally overnight, or for the maximum time recommended by the product.
Final Touches: Polishing Your Masterpiece
- Edge Inspection: Scrutinize all edges and corners for any areas that might have lifted or missed sealing.
- Fill Tiny Gaps: If you find any minute gaps, use a tiny amount of adhesive and a small scrap of leaf to carefully fill them, then seal again.
- Gentle Buff: Once the sealer is fully cured, a final gentle buff with a very clean, soft cloth can enhance the shine.
- Test Sealer Strength: Lightly press a fingernail into an inconspicuous area (if possible) to ensure the sealer is hard and protective.
- Clean Any Marks: Carefully wipe away any smudges or fingerprints with a clean, dry cloth.
- Add Final Shine: For extra gloss, some artisans apply a layer of clear wax over the sealed gold leaf, buffing it to a high shine.
Protection Tips: Maintaining Your Gilded Items
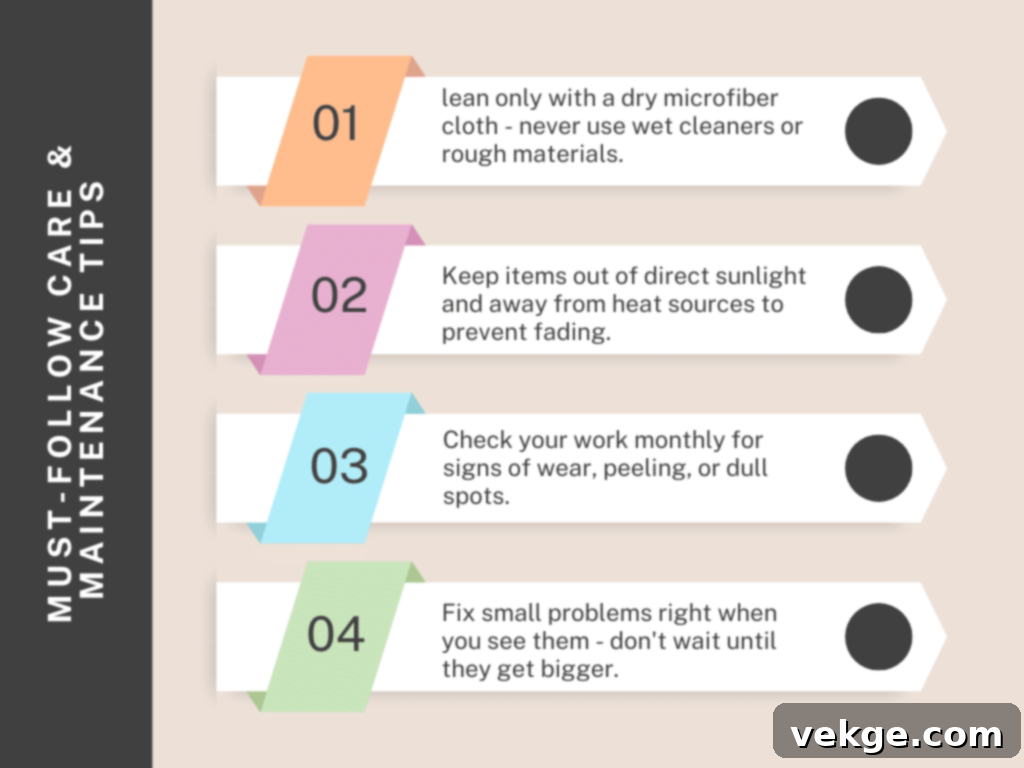
- Keep Away from Water: Gold leaf, especially with a sealer, is generally resistant to light moisture, but prolonged exposure to water can compromise the adhesive or sealer.
- Avoid Direct Sunlight: While genuine gold leaf is UV stable, strong direct sunlight can degrade sealers over time, potentially leading to yellowing or cracking. Imitation leaf can also tarnish faster under intense light.
- Use Gentle Cleaners: For cleaning, use a soft, dry cloth. If absolutely necessary, a barely damp cloth with plain water can be used, but avoid harsh chemical cleaners.
- Don’t Scratch the Surface: Gold leaf is thin and can be easily scratched. Avoid abrasive materials or sharp objects coming into contact with it.
- Handle with Care: When moving or storing gilded items, handle them gently, preferably by non-gilded areas.
- Check Sealer Annually: For items that see a lot of use or are exposed to elements, consider checking the integrity of the sealer yearly and reapplying if signs of wear appear.
Application of Gold Leaf to Various Materials: Specialized Techniques
While the core steps of gold leaf application remain consistent, each material presents unique considerations and best practices for optimal adhesion and finish. Here’s how to tailor your approach for different surfaces:
1. Applying Gold Leaf to Wood: Achieving Classic Elegance
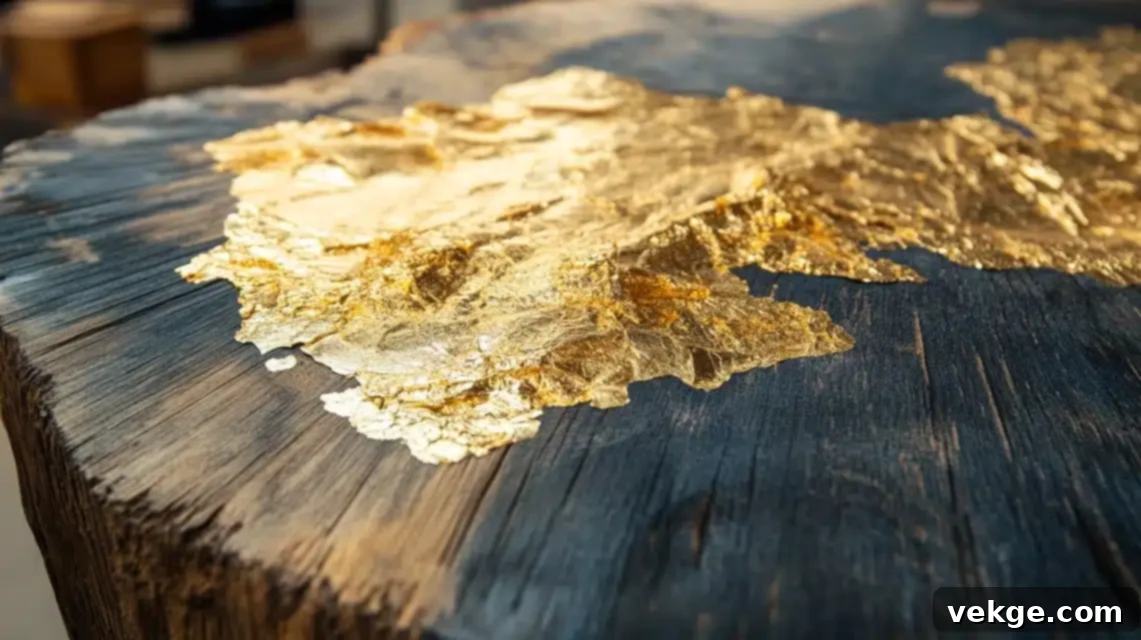
Wood is a popular surface for gilding, offering a warm base for the gold. Proper preparation is essential to prevent the wood from absorbing the adhesive unevenly.
- Grain Matters Greatly: For a smooth finish, I typically sand wood surfaces first with 220-grit sandpaper to remove rough spots, followed by 400-grit for a silky smooth feel. This ensures the gold leaf lays perfectly flat.
- Fill Open Grain Woods: Woods with prominent open grains (like oak or ash) should be treated with wood filler or grain filler to create a uniform surface. Allow it to dry thoroughly and sand smooth.
- Sand Between Primer Coats: After applying a wood primer (often gesso or a wood sealer), lightly sand with fine-grit sandpaper (e.g., 600-grit) between coats. This creates an ideal, non-porous base for the adhesive.
- Thin Primer Coats for Texture: If you desire to keep some of the wood’s natural texture visible, use very thin coats of primer or even skip it if the wood is already smooth and non-porous.
- For Rustic Looks, Skip Heavy Sanding: For a deliberately distressed or rustic look, you can skip extensive sanding and priming, allowing the wood’s imperfections to show through the leaf, but still ensure it’s clean.
- Seal Knots Before Starting: Wood knots can release sap that can stain or interfere with adhesion. Apply a shellac-based sealer over knots to prevent this.
- Watch for Sap Bleeding Through: Even after sealing, occasionally sap can bleed through. Address this by re-sealing the specific spot and allowing ample drying time before continuing.
2. Canvas and Paintings: Adding a Luminous Dimension
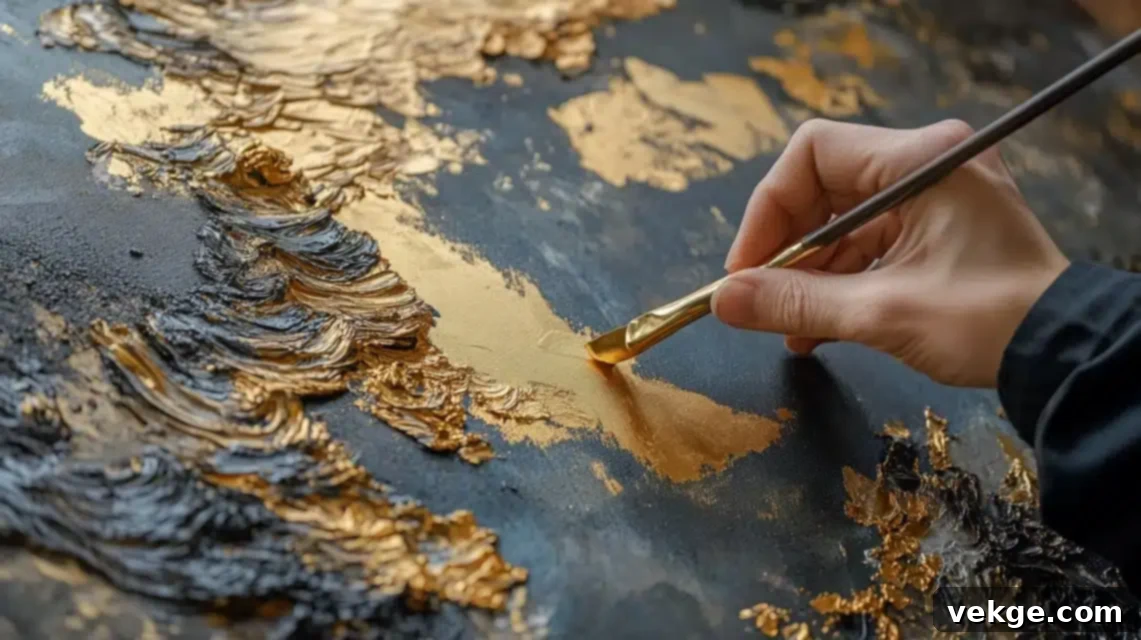
Integrating gold leaf into art on canvas or other painted surfaces can add exquisite highlights and focal points. The key is working with the delicate nature of both materials.
- Timing is Flexible: You can apply gold leaf either before or after the paint. Applying it before offers a clean base, while applying it after allows for precise layering over cured paint.
- Use Flexible Adhesive for Canvas: Choose an adhesive that remains slightly flexible after drying. This accommodates the natural movement of canvas without cracking the gold leaf.
- Press Very Gently to Avoid Tears: Canvas texture can make the leaf more prone to tearing. Use extremely light pressure with your beauty blender or a very soft brush.
- Work in Small Sections: Due to the texture and potential for flexibility, apply adhesive and leaf in smaller, more manageable sections to maintain control.
- Let Paint Dry Fully First: If applying over paint, ensure the paint is completely dry and cured to avoid smudging or chemical reactions with the adhesive.
- Keep Leaf Away from Wet Paint: Accidental contact with wet paint can dissolve or discolor the gold leaf. Maintain a clear working boundary.
- Use Soft Brushes Only: When dusting off excess leaf, use the softest brushes possible to avoid scratching or damaging the underlying paint or canvas.
- Seal Carefully: Choose a sealer compatible with both your gold leaf and the paint medium, especially if the paint is oil-based.
3. Metal Surfaces: A Luminous Overlay
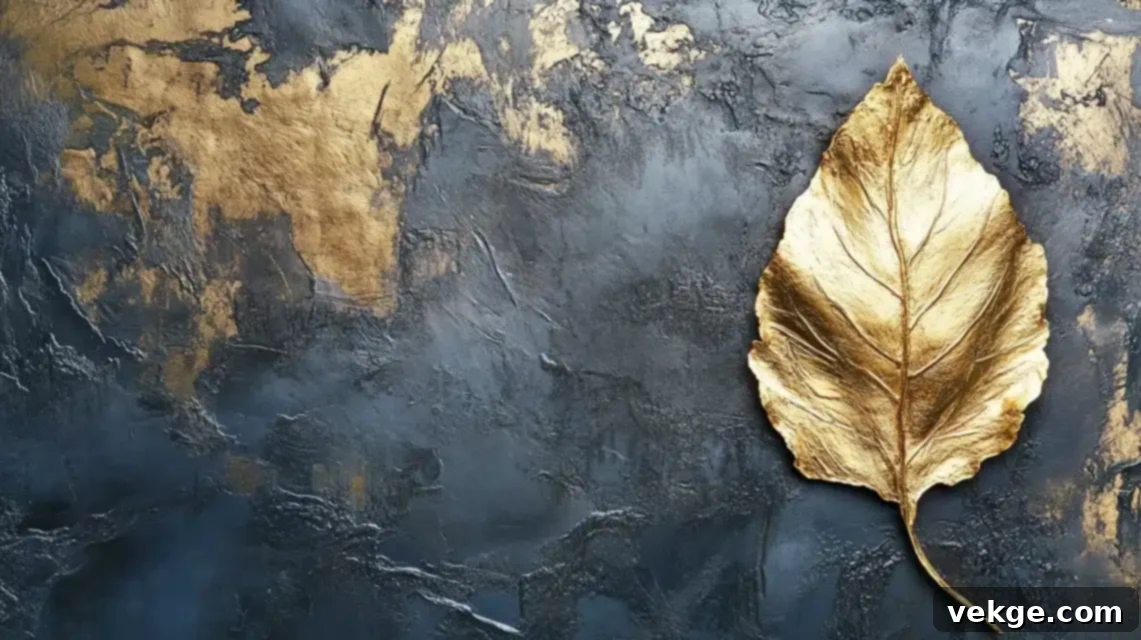
Gilding metal surfaces can transform industrial items into elegant decor. The key challenges are ensuring perfect adhesion and preventing rust or corrosion from compromising the finish.
- Remove All Rust Spots: Rust is an absolute no-go. Use a wire brush, sandpaper, or rust remover to meticulously eliminate any signs of rust.
- Sand Until Smooth: For optimal adhesion, sand the metal surface until it is perfectly smooth. This can involve several grits of sandpaper, progressing from coarse to fine.
- Wipe with Metal Cleaner/Degreaser: After sanding, thoroughly clean the metal with a specialized metal cleaner or degreaser to remove any sanding dust, oils, or residues that could impede adhesion.
- Use Metal-Specific Primer: For many metals, a dedicated metal primer (such as an etching primer) is essential. It provides a bonding layer that helps the adhesive stick better and can offer rust protection.
- Check for Oil Residue: Even after cleaning, some metals can retain oily residues. A final wipe with rubbing alcohol or acetone can ensure a pristine surface.
- Test Adhesion in a Small Spot: If possible, perform a small test application in an inconspicuous area to ensure your primer and adhesive are compatible with the specific metal.
- Let Each Layer Dry Fully: Each layer – cleaner, primer, and adhesive – must be completely dry before proceeding to the next step to prevent issues.
4. Glass and Mirrors: Reflective Brilliance
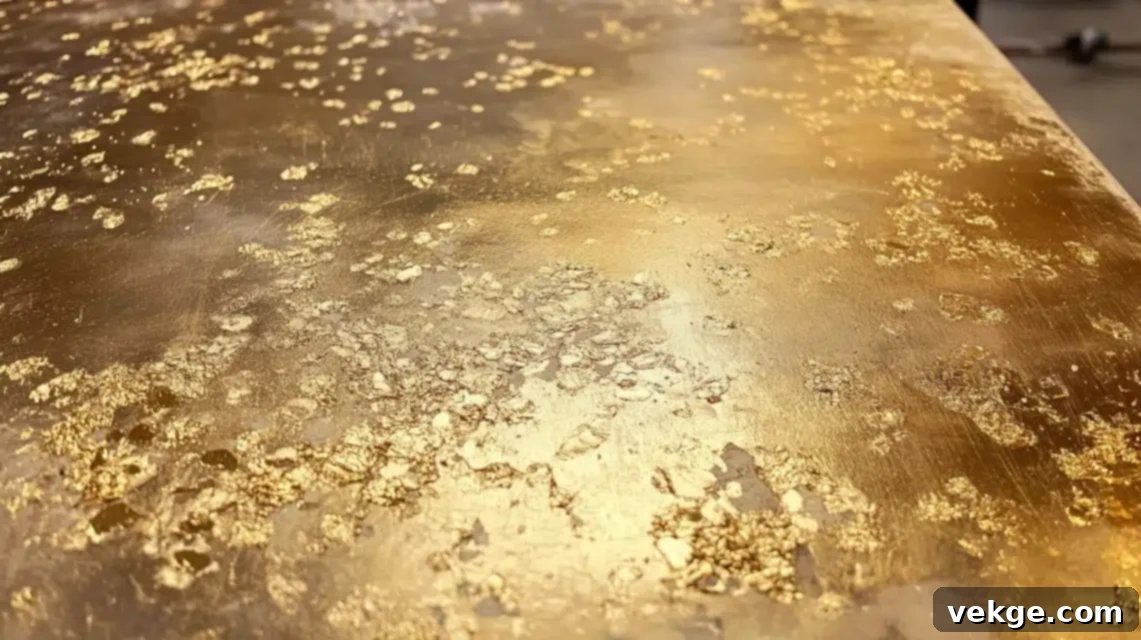
Gilding glass offers a stunning, often translucent, effect. The challenge lies in achieving a streak-free application on a perfectly smooth, non-porous surface.
- Clean with Rubbing Alcohol: Glass must be impeccably clean. Use rubbing alcohol (isopropyl alcohol) or a dedicated glass cleaner to remove all dirt, grease, and streaks.
- Remove All Finger Marks: Even the slightest fingerprint can show through the delicate gold leaf. Wear cotton gloves if necessary during preparation and application.
- Work from Top to Bottom: When applying adhesive to a vertical glass surface, work from the top down to prevent drips and maintain an even layer.
- Use Glass-Specific Size: Opt for an adhesive formulated for glass or non-porous surfaces. These often have a slower drying time, allowing for more precise placement of the leaf.
- Check That Edges Are Sealed: Pay extra attention to the edges of your gold leaf on glass, as these are common areas for lifting. Ensure they are firmly pressed and sealed.
- Avoid Water Spots: Any water residue on the glass will leave a mark that will be visible under the gold leaf. Ensure the surface is completely dry before applying adhesive.
- Let Dry Between Coats: If applying multiple layers (e.g., for a reverse gilding effect), ensure each layer of adhesive or sealer is fully dry before applying the next.
- Reverse Gilding: For a protected finish, especially on mirrors, consider reverse gilding where the leaf is applied to the back of the glass, viewed from the front.
5. Furniture and Large Pieces: Grand Scale Gilding
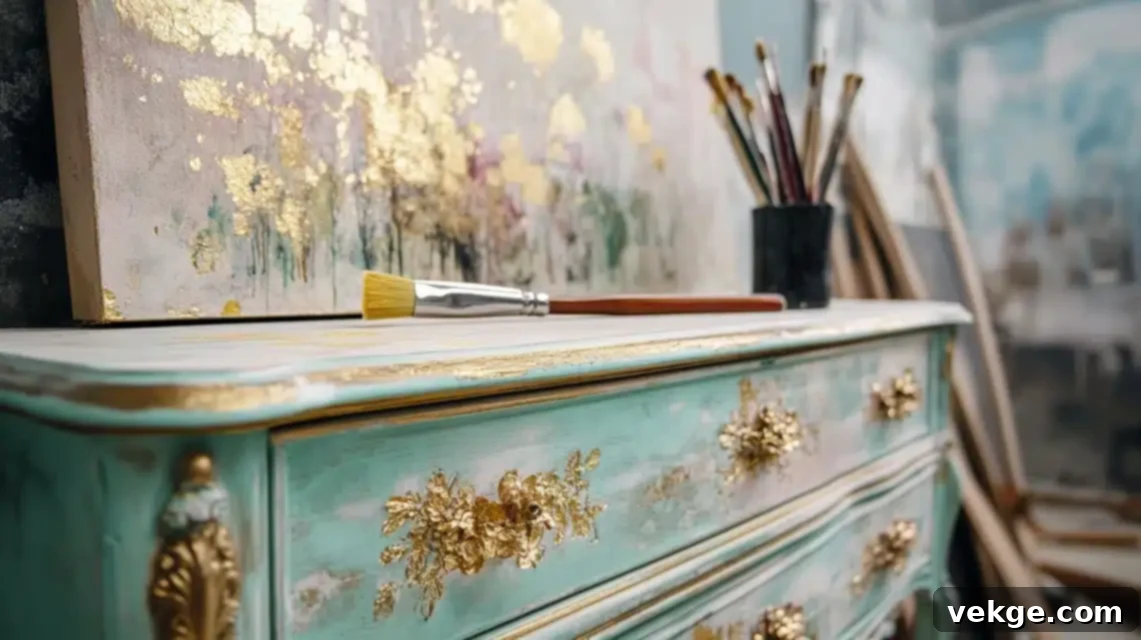
Gilding furniture or other large items requires meticulous planning and a systematic approach to ensure a consistent, seamless finish across expansive areas.
- Plan Your Sections First: Before applying any adhesive, visually divide your large piece into manageable sections. This helps ensure your adhesive remains tacky for the area you’re working on.
- Mark Off Workable Areas: Use painter’s tape or a light pencil mark to define each section you plan to gild at one time. This prevents accidental application of adhesive to areas you’re not ready for.
- Keep Consistent Pressure: When pressing down the gold leaf with your beauty blender, maintain consistent pressure across the entire surface to avoid uneven adhesion or blotchy areas.
- Watch for Drips: When applying adhesive, particularly to vertical surfaces of furniture, be vigilant for drips. Smooth them out immediately before they dry.
- Check Lighting As You Work: Periodically step back and examine your work under different lighting conditions. This helps spot imperfections like missed spots or unevenness early on.
- Use Larger Leaf Sheets: For expansive, flat surfaces, consider using larger sheets of gold leaf to cover more area quickly and reduce the number of overlaps.
- Take Breaks Between Sections: Gilding large pieces can be tiring. Take short breaks between finishing sections to maintain focus and prevent rushing your work.
- Overlap Strategically: When joining sections, overlap the gold leaf slightly and then use a soft brush or cotton swab to gently buff away the seam for a less noticeable transition.
Some Advanced Techniques You Can Try for a Smooth Look and Unique Effects
Once you’ve mastered the basics, the world of gold leaf opens up to more intricate and creative possibilities. Let me share some advanced methods I’ve refined over the years for creating truly smooth, eye-catching, and unique gold leaf finishes that go beyond simple application.
Pattern Making Techniques: Precision and Design
Creating patterns with gold leaf requires precision and patience, but the results can be stunningly intricate.
- Basic Line Work with Tape:
- Use Thin Tape for Guides: For crisp, straight lines or geometric patterns, apply thin painter’s tape or fine-line masking tape to outline your design.
- Ensure Tape is Tight: Press the tape down firmly along its edges to prevent the adhesive from bleeding underneath.
- Apply Leaf & Peel When Wet (or Tacky): Apply adhesive within your taped-off area, let it become tacky, then apply the gold leaf. The trick is to carefully peel off the tape while the adhesive is still slightly wet/tacky (but not fully set) for the cleanest lines.
- Clean Lines with a Brush: After removing the tape, use a fine, stiff brush (like an artist’s brush) to gently clean up any fuzzy edges.
- Double Layer Method for Rich Depth:
- Apply First Layer Fully: Complete the first layer of gold leaf application, ensuring full coverage and removal of excess.
- Let Dry for 24 Hours: Allow this first layer to fully set and cure for at least 24 hours.
- Add Second Layer Over First: Apply a second thin layer of adhesive directly over the first gilded surface, let it come to tack, then apply another layer of gold leaf.
- Creates Rich Depth: This technique adds incredible visual depth and opacity to the gold, making it appear exceptionally rich and substantial.
- Fills Tiny Gaps: It’s also excellent for filling any microscopic pinholes or tiny imperfections from the first layer.
- Color Variations: Mixing Metals for Unique Hues:
- Mix Metal Leaf Types: Experiment by layering different types of metal leaf, such as genuine gold with silver leaf, copper leaf, or even variegated leaf.
- Layer Different Shades: For example, apply a darker karat gold (like 18k) over a lighter one (23k) to create subtle tonal shifts, or use composition leaf in different shades of gold, silver, or copper.
- Ensure Compatibility: Make sure the adhesives and sealers you use are compatible with all the different metal leaf types.
- Test Combinations First: Always do a small test swatch to see how the colors interact and cure before committing to your main project.
- Keep Patterns Simple: When introducing multiple colors or types, keep your patterns relatively simple to avoid a cluttered look.
Texture Effects: Adding Dimension and Character
Beyond smooth applications, gold leaf can be manipulated to create fascinating tactile and visual textures.
- Crackle Look: Aged Elegance:
- Apply Size Unevenly: For a crackled effect, apply your adhesive with deliberate unevenness, varying the thickness in certain areas.
- Let Dry Longer (Slightly Over-Tacky): Allow the adhesive to dry slightly longer than usual, pushing it towards being “too dry” but still tacky.
- Press Leaf Gently: When applying the leaf, press it very gently, almost allowing it to fall into place. The uneven adhesive and slightly over-dried tack will naturally create tiny cracks and fissures in the leaf.
- Seal Carefully: Seal the crackled surface thoroughly to protect these delicate cracks.
- Distressed Effect: Vintage Appeal:
- Use Steel Wool Lightly: After the gold leaf has fully dried (and ideally after a light initial sealer coat), use very fine steel wool (0000 grade) or a gentle abrasive pad.
- Rub Selected Areas: Lightly rub specific areas where natural wear would occur (e.g., edges, raised details) to intentionally remove small bits of leaf, revealing the base layer beneath.
- Create Worn Spots: This technique creates an authentic, time-worn appearance.
- Work in Patterns: Consider the natural wear patterns of the item to make the distressing look more realistic.
- Seal Right After: Re-seal the item immediately after distressing to protect the remaining gold leaf and the newly exposed base.
- Burnishing Methods: High Shine and Durability:
- Use an Agate Stone Burnisher: For a truly lustrous, mirror-like finish (especially with genuine gold leaf), use an agate stone burnisher.
- Press in Circles: After the leaf is applied and excess is removed, gently rub the agate stone over the gold leaf in small, overlapping circular motions.
- Work Small Areas: Focus on small sections at a time, applying consistent, gentle pressure.
- Creates High Shine: This compresses the gold leaf, making it incredibly smooth and enhancing its natural reflectivity.
- Takes Practice: Burnishing is an advanced technique that requires practice to avoid tearing the delicate leaf. It’s typically done on a gesso base prepared for water gilding, but can also be adapted for oil gilding with caution.
Special Effects: Adding Unique Visual Impact
These techniques allow for more artistic and dimensional uses of gold leaf.
- Raised Design: Textured Gold Accents:
- Build Up the Base Layer: Before applying gold leaf, create a raised design using a thick medium like gesso, modeling paste, or even wood filler. Build it up in layers, allowing each to dry.
- Sand Edges Smooth: Once the raised design is fully dry, sand its edges smooth for a refined look.
- Apply Leaf On Top: Apply adhesive and gold leaf directly over the raised areas following the standard steps.
- Seal Well: Ensure the entire piece, especially the edges of the raised design, is thoroughly sealed.
- Shadow Effect: Adding Depth and Contrast:
- Paint Dark Base: Before gilding, paint your surface with a dark base color (e.g., black, deep brown, or a rich jewel tone).
- Leave Some Showing: When applying gold leaf, intentionally leave small, subtle areas of the dark base coat exposed, especially along edges or in recessed areas.
- Creates Depth Look: The dark background peering through creates a striking contrast and an illusion of greater depth, making the gold appear even more vibrant.
- Works on Flat Items: This effect is particularly effective on flat or slightly textured items where the contrast can be fully appreciated.
- Use Thin Gold Leaf: A thinner gold leaf or imitation leaf often works best for this, allowing the underlying color to subtly influence the overall tone.
Conclusion: Embrace the Art of Gilding
Embarking on a gold leaf project might seem daunting at first, but as I’ve shown, it’s an art form that is far more accessible than you might imagine. With the right tools, a clear understanding of the process, and a dash of patience, you now possess the knowledge to create truly beautiful items that will capture attention and radiate with timeless elegance.
To recap, always remember my three foundational tips for gold leaf success: meticulously prepare your surface, apply your adhesive with careful precision and allow it to reach the perfect tack, and always, always seal your finished work properly. These three critical steps are the pillars that support the difference between a good gold leaf application and an truly exceptional one.
Don’t let perfection be the enemy of good. Why not start with something small and manageable, like a decorative picture frame, a simple wooden box, or a ceramic coaster? This is precisely how I began my own gilding journey, and those early, smaller projects were instrumental in building my confidence and honing my skills for larger, more ambitious creations. Each successful project will fuel your desire to explore even more intricate designs and challenging surfaces.
I am genuinely excited to hear about your gold leafing adventures! Please feel free to share your experiences, triumphs, and even your learning moments in the comments section below. Or, if you’re looking for more inspiration, be sure to explore my other craft guides for a wealth of creative ideas and detailed tutorials.
Frequently Asked Questions About Gold Leaf Application
What is the Best Way to Apply Gold Leaf for Beginners?
For beginners, the best way to apply gold leaf involves starting with a clean, smooth, and flat surface. Carefully apply a thin, even layer of gold leaf adhesive (size), ensuring it dries to a tacky, but not wet, consistency. Then, gently place cut pieces of gold leaf onto the tacky surface, pressing them down with a soft beauty blender or cotton swab. Finish by softly brushing away excess leaf and applying a protective sealer. Working in small sections and having all your tools ready beforehand will significantly ease the process.
How Long Do You Leave the Gold Leaf on Before Brushing Off the Excess?
After applying the gold leaf onto the tacky adhesive, it’s generally best to let it sit and bond for about 15-30 minutes. This allows the leaf to fully adhere to the size. You can gently test the edge of the leaf with your knuckle; it should feel firmly attached and no longer easily movable. If you try to brush too soon, the leaf might tear or lift from the surface. However, avoid waiting too long, as the adhesive might cure completely, making it harder to remove the excess cleanly. The exact time can vary depending on the adhesive type and ambient humidity.
Is Real Gold Leaf Better than Imitation Gold Leaf?
Yes, for longevity and prestige, genuine gold leaf (22-24 karats) is inherently superior to imitation gold leaf (composition leaf). Real gold leaf will not tarnish, oxidize, or change color over time, maintaining its brilliant shine for centuries, and is ideal for outdoor use or historical preservation. Imitation gold leaf, being an alloy of copper and zinc, is prone to tarnishing and dulling, especially if exposed to moisture or air, and thus always requires a protective sealer. However, imitation leaf is significantly more affordable, making it an excellent choice for indoor decorative projects, craft items, and for beginners to practice their techniques without a high material cost. The “better” choice ultimately depends on your project’s specific needs, budget, and desired lifespan of the finish.
Can I Apply Gold Leaf to Uneven or Textured Surfaces?
Yes, gold leaf can be applied to uneven or textured surfaces, but it requires more careful technique. For slightly textured surfaces, apply the adhesive thoroughly into the crevices and use a very soft brush or your fingertip to gently press the leaf into the contours. For highly uneven surfaces or those with deep textures, you might opt for a “distressed” look where the gold leaf partially adheres to the raised areas, letting the underlying texture show through. Alternatively, a thicker primer or gesso can be applied and sanded to create a smoother, more uniform base before gilding.
What Kind of Adhesive (Size) Should I Use?
There are generally two main types of gold leaf adhesive: water-based size and oil-based size. Water-based size dries quicker (usually within 15-60 minutes to tack) and is easier to clean up with water, making it popular for crafters and beginners. It’s suitable for most indoor projects. Oil-based size has a longer “open time” (can remain tacky for several hours or even days), which is beneficial for large projects or intricate designs, giving you more time to work. It offers a more traditional and durable bond, especially for outdoor use, but requires mineral spirits for cleanup. Always choose an adhesive that matches your project’s requirements and your experience level.
