Transform Your Brick with German Schmear: The Ultimate DIY Guide to Achieving an Old-World Look
Have you ever looked at your plain brick wall or fireplace and felt like it was missing that special touch, a certain character or depth? That’s precisely how many homeowners feel before discovering the transformative power of German Schmear. This simple yet incredibly effective technique allows you to update your brick surfaces with a charming, old-world aesthetic, while still letting the natural beauty and texture of the brick peek through. The best part? You don’t need fancy tools or a professional contractor to achieve this stunning finish yourself.
In this comprehensive guide, we’ll dive deep into everything you need to know about German Schmear. We’ll explore what this unique brick treatment truly entails, how it differs from other popular options like whitewash and limewash, and help you determine which method is best suited for your specific project. You’ll receive a full, easy-to-follow step-by-step tutorial, complete with practical tips to help you avoid common mistakes. We’ll also cover important details on sealing your new finish for longevity and proper long-term care.
If your bricks could benefit from a fresh, textured, and truly timeless update, German Schmear might just be the perfect DIY project to finally make them feel just right – adding warmth, character, and an undeniable sense of history to your space.
What is German Schmear? Unveiling the Old-World Brick Finish
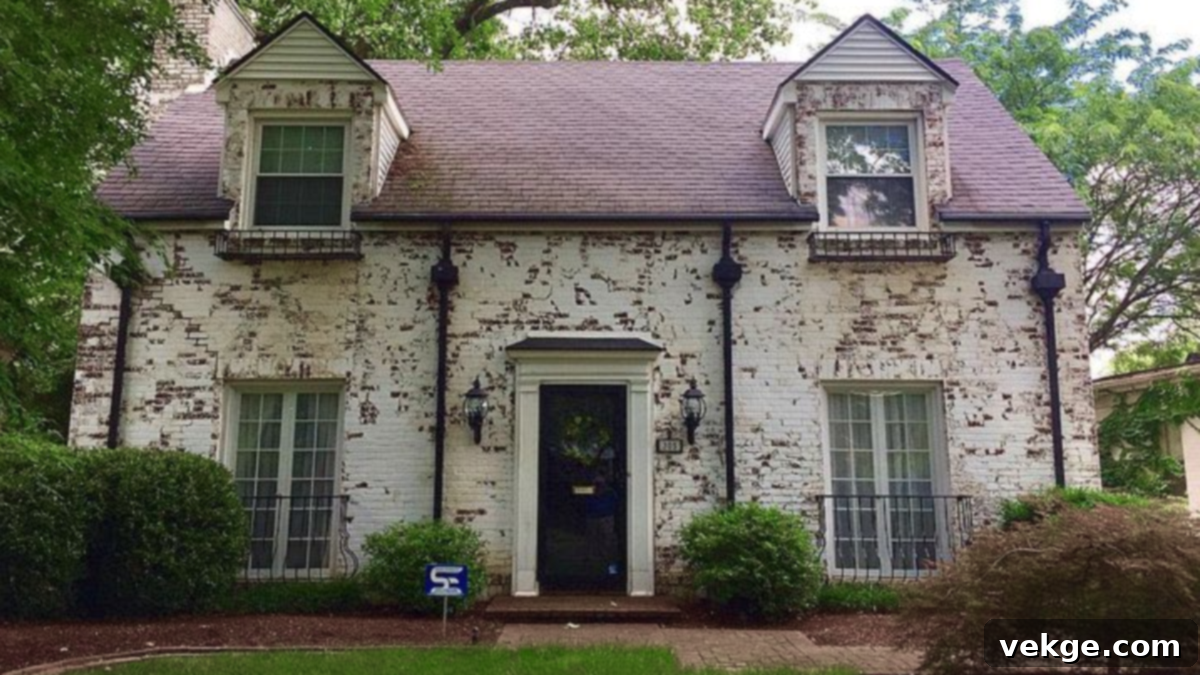
The term “German Schmear” is derived from the German word “schmear,” which literally means “to smear” or “to spread.” This technique involves applying a thin, irregular layer of wet mortar – typically a white cement-based mixture – onto a brick surface. Before the mortar fully dries, a portion of it is strategically wiped away, revealing varying amounts of the original brick beneath. This process results in a beautifully aged, textured, and rustic finish that looks as if the brick has naturally weathered over centuries.
Unlike a full coat of paint that completely obscures the brick, German Schmear creates a soft, translucent effect that highlights the brick’s natural variations while unifying its appearance. The mortar settles into the grout lines and uneven surfaces, adding significant depth and character. It’s a highly popular choice for homes aiming for a lived-in, farmhouse, industrial, or traditional look, whether it’s an older property seeking restoration or a new construction wanting instant historical charm. You’ll frequently see German Schmear used on prominent features such as interior and exterior fireplaces, cozy kitchen backsplashes, dramatic accent walls, and impressive exterior facades, significantly enhancing the home’s curb appeal.
German Schmear vs. Other Brick Treatments: Finding Your Perfect Finish
When considering an update for your brick, German Schmear is one of several effective methods, each offering a distinct aesthetic and level of permanence. Understanding the differences between German Schmear, whitewash, limewash, and traditional paint is crucial for making an informed decision that aligns with your vision and practical needs.
Each method has its own strengths and ideal applications. The table below provides a clear, side-by-side comparison of these popular brick treatments, breaking down their key differences in materials, appearance, application methods, durability, and more. This detailed overview will help you weigh your options and choose the best technique for your home.
| Feature | German Schmear | Whitewash | Limewash | Traditional Paint |
|---|---|---|---|---|
| Main Material | Cement-based mortar (often white or light gray) | Watered-down latex paint (typically white) | Crushed limestone mixed with water; mineral-based coating | Acrylic or masonry exterior/interior paint |
| Look | Thick, rustic, heavily textured, aged, authentic old-world finish. Varies significantly based on wiping. | Soft, faded, translucent, and subtle. Brick color partially shows through. | Matte, chalky, velvety finish with subtle mottling; creates a natural, historical patina. | Solid, uniform color; flat or chosen sheen; completely covers the brick and mortar lines. |
| Texture | Heavy texture, fills mortar joints and imperfections, adding dimension. | Little to no added texture; follows the existing brick surface. | Light texture; feels powdery or slightly rough; mineral deposits can add depth. | Smooth, uniform, painted surface; no brick texture is emphasized. |
| Brick Visibility | Highly adjustable; partial brick exposure can be controlled by wiping technique. | Semi-transparent to translucent; more brick detail shows through than limewash. | Depends on the number of coats; generally provides more coverage than whitewash but still has depth. | None; offers full, opaque coverage, completely obscuring the brick’s natural color and variations. |
| Application Method | Smear on with a trowel, putty knife, or large sponge; wipe off excess with a damp sponge or rag. | Brush or roller application; can be sprayed for large areas; multiple thin coats often needed. | Special limewash brush (wide, flat) or sponge; sometimes sprayed; applied in thin, cross-hatch strokes. | Brush, roller, or spray gun; typically 1-2 coats for full coverage. |
| Ease of Application | Moderate; requires some practice to achieve desired look; test area highly recommended. | Easy; very beginner-friendly; forgiving due to its translucent nature. | Easy to moderate; requires a specific technique to avoid streaking; dampening brick is key. | Easy; a common DIY method; consistent results are generally easier to achieve. |
| Durability | Very durable and long-lasting; mortar bonds strongly with brick; rarely needs redoing. | Less durable than mortar or limewash; can wear off over time, especially outdoors. | Moderate to high; naturally breathable and resistant to peeling; may weather unevenly, which adds to its charm. | Varies by paint quality; needs repainting every few years, especially exterior applications, due to chipping or fading. |
| Moisture Breathability | Breathable if unsealed; allows brick to “breathe” naturally. | Depends heavily on the type of latex paint used; generally less breathable than limewash. | Naturally highly breathable; excellent for older homes or those prone to moisture. | Least breathable; can trap moisture within the brick, potentially leading to spalling or mildew. |
| Best Use Cases | Creating a dramatic, textured, and rustic look on accent walls, fireplaces, and full exterior facades. | Achieving a soft, subtle, faded look for indoor brick, accent walls, or less permanent updates. | Exterior brick, historical renovations, or for achieving a soft, chalky, matte, aged appearance with natural breathability. | Brick walls needing a complete color change, a uniform appearance, or to hide significant imperfections thoroughly. |
| Permanence | Hard to remove once fully dry and cured without damaging the brick surface. | Can be removed with chemical strippers or painted over relatively easily. | Wears off naturally over many years, creating a natural patina; can be recoated. | Can be repainted or removed with strippers, but often requires significant effort if well-bonded. |
| Maintenance | Low maintenance; occasional rinsing with water is usually sufficient. | May need touch-ups or reapplication every few years, especially in high-traffic or outdoor areas. | Minimal; periodic light cleaning, touch-ups are optional to maintain the desired look. | Needs regular upkeep, cleaning, and repainting every 5-10 years depending on exposure. |
In summary, German Schmear is ideal when you desire a deeply textured, highly individualized, and permanent rustic finish. Whitewash offers a lighter, softer, and more easily reversible look, making it a great choice for subtle changes or interior spaces. Limewash is celebrated for its natural, breathable, chalky aesthetic, perfect for historical homes or creating a truly authentic, aged patina, particularly outdoors. Traditional paint provides full, opaque coverage, excellent for a dramatic color change, but typically requires more frequent maintenance and can affect the brick’s breathability. Your final choice will depend on the desired aesthetic, the permanence required, and the specific needs of your brick surface.
When to Use German Schmear: Ideal Applications and Aesthetic Pairings
Deciding if German Schmear is the right look for your space involves more than just liking the aesthetic; it’s about understanding where and when this unique finish truly shines. Let’s break down its best applications, ensuring you feel confident before you even mix your first batch of mortar.
Best Brick Types for German Schmear
German Schmear works optimally on rough, porous bricks. These types of bricks have a natural texture that allows the mortar to adhere effectively, creating that characteristic thick, layered finish. Older, unsealed bricks or those with a naturally irregular surface usually yield the most authentic and appealing results. If your brick has a very smooth surface, a glossy finish, or an existing sealant, the mortar might not stick well, leading to poor adhesion and an uneven look. In such cases, a light sanding or using a masonry etching solution might be necessary to create a better bonding surface, though testing in an inconspicuous area is always advised.
Indoor Applications: Adding Warmth and Character
Indoors, German Schmear is a fantastic way to introduce warmth, texture, and a sense of history to any room. It excels at transforming ordinary features into striking focal points. It’s perfect for:
- Fireplaces: An instant upgrade, turning a standard brick fireplace into a cozy, rustic hearth that anchors your living space.
- Kitchen Backsplashes: Creates a unique, artisanal backdrop that pairs beautifully with various kitchen styles, from farmhouse to industrial modern.
- Accent Walls: In living rooms, dining areas, or bedrooms, a German Schmear accent wall adds depth and visual interest, making the room feel more inviting and sophisticated.
- Entryways and Hallways: Offers a welcoming, grounded feel, adding a touch of old-world charm to your home’s first impression.
The beauty of an indoor German Schmear finish is that it often eliminates the need for excessive decor. Its inherent character and texture make a statement all on its own, allowing for a more minimalist yet impactful design approach.
Outdoor Applications: Enhancing Curb Appeal with Timeless Charm
Outdoors, German Schmear is celebrated for its ability to give your home a softer, weathered, and highly appealing aesthetic without completely obscuring the original brick. It significantly boosts curb appeal and integrates well with natural surroundings. Common outdoor uses include:
- Full Exterior Facades: For a complete transformation, providing a charming, European-inspired look that softens the harshness of raw brick.
- Garden Walls and Planters: Adds a rustic, historical element to your landscaping, making garden features blend seamlessly with your home’s character.
- Porch Columns and Foundations: Enhances architectural details, creating a cohesive and elegant exterior design.
- Outdoor Kitchens and Fire Pits: Infuses these entertainment areas with a durable, textured finish that withstands the elements and adds a high-end custom feel.
Whether applied to an entire exterior or used selectively to highlight specific architectural elements, German Schmear creates a sense of established elegance and timeless appeal, allowing your home to exude a charming, weathered character.
German Schmear: A Detailed Step-by-Step DIY Guide
Embarking on your own German Schmear project can be incredibly rewarding, creating a unique, personalized look for your home. While it might seem daunting, achieving this finish is surprisingly simple if you approach it methodically, step by step. You won’t need an arsenal of sophisticated tools or advanced masonry skills – just some patience, a clear plan, and the right materials. Here’s how to navigate your German Schmear journey, from initial preparation to the final cleanup, ensuring a beautiful and lasting result.
Gather Your Tools and Materials
Before you begin, ensure you have all necessary items within reach. This will streamline your workflow and prevent interruptions once you start mixing and applying the mortar. Here’s your essential shopping list:
- White Cement-Based Mortar: Look for Type N or S mortar mix. Premixed options are convenient, but dry mix allows for more control over consistency. White mortar is traditional for the classic look, but gray or colored options exist for variations.
- Clean 5-Gallon Buckets: Essential for mixing mortar and for clean water for sponges. Having multiple buckets is highly recommended.
- Drill with a Mixing Paddle Attachment: For thoroughly and efficiently mixing the mortar to a consistent, lump-free texture.
- Trowel or Large Spatula: For scooping and applying mortar to the brick surface. A margin trowel or pointing trowel also works well for smaller areas.
- Various Sponges: Natural sea sponges, large grout sponges, or even household sponges. Different textures and firmness will yield different wiping effects. Have several on hand, some damp, some for heavier removal.
- Water: For mixing mortar, dampening brick, and cleaning tools. Access to a hose is ideal for exterior projects.
- Wire Brush: For thorough cleaning of the brick surface.
- Stiff Bristle Brush: For final texturing or cleaning.
- Gloves and Safety Glasses: Mortar is alkaline and can irritate skin and eyes. Always protect yourself.
- Drop Cloths or Tarps: To protect floors, landscaping, and adjacent surfaces from mortar drips.
- Painter’s Tape and Plastic Sheeting: To mask off areas you don’t want treated.
Step 1: Prep the Brick Surface
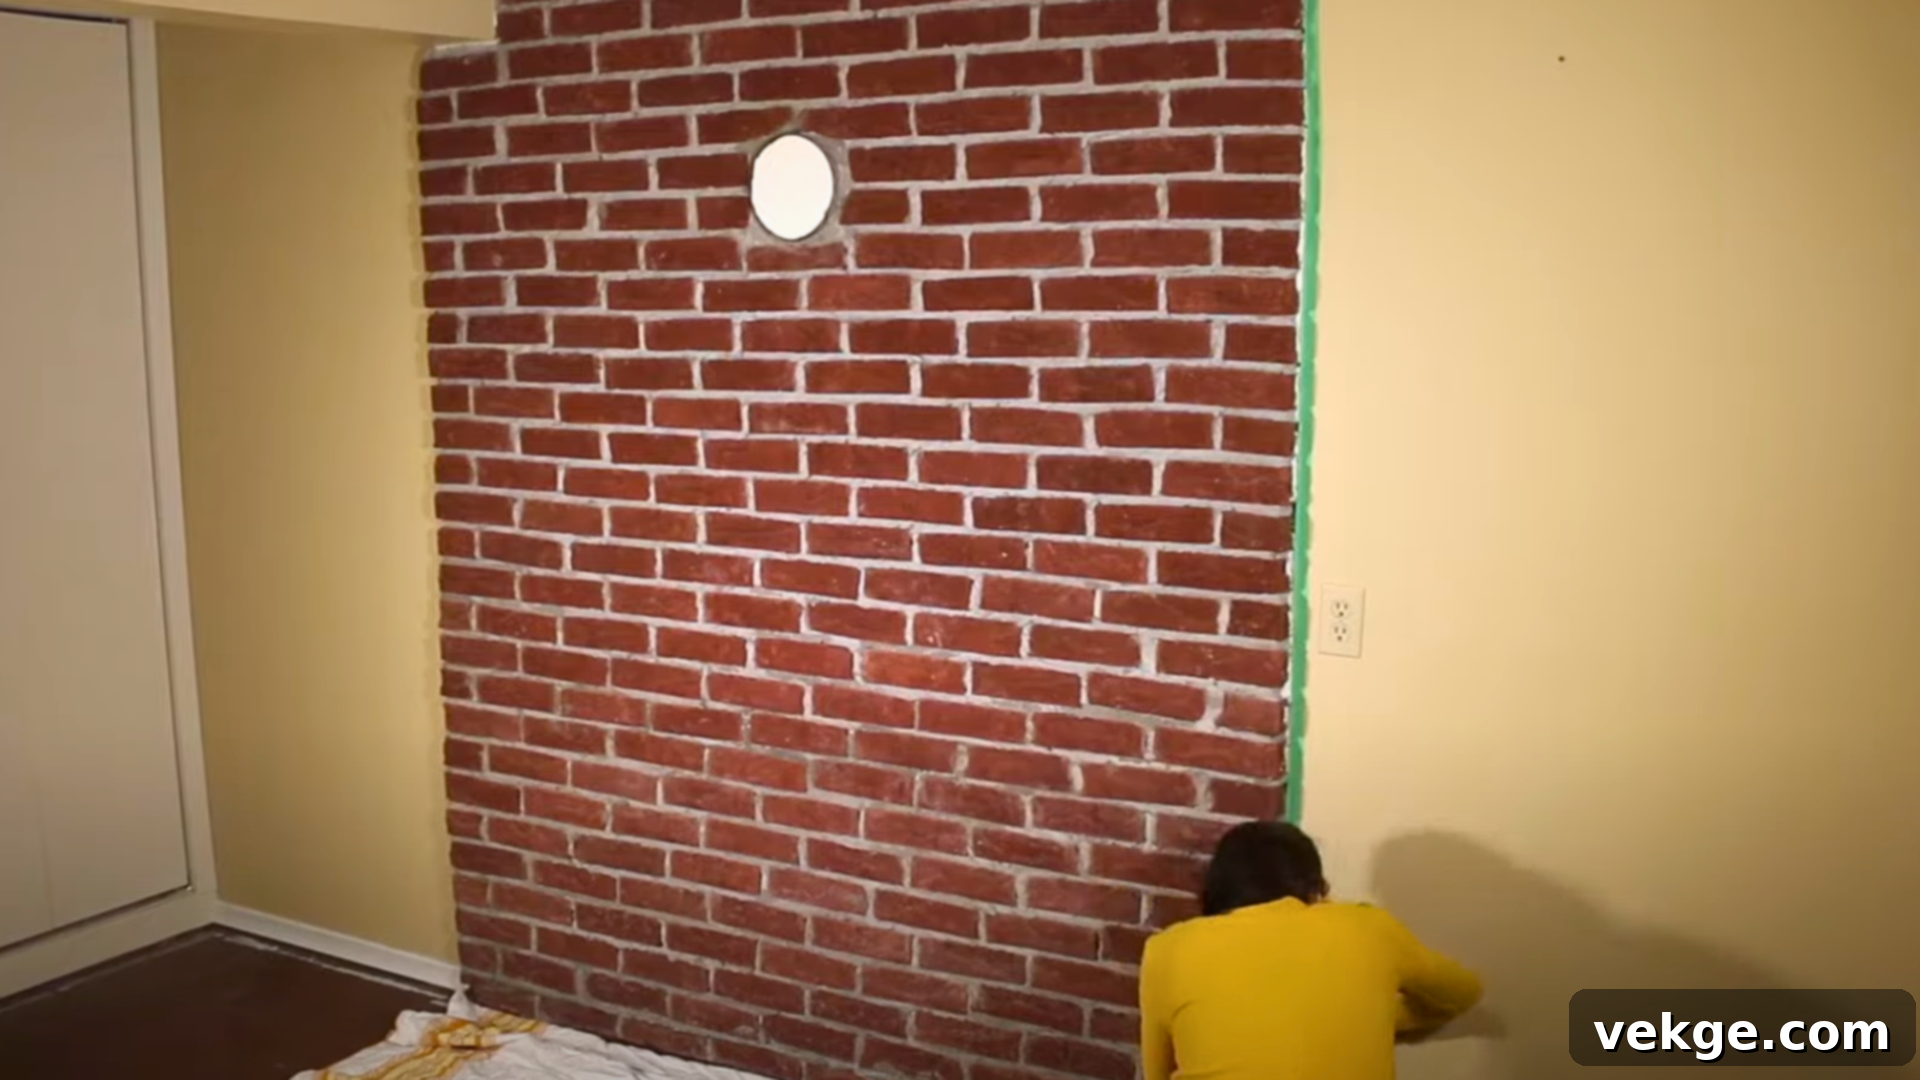
Thorough preparation is paramount for ensuring proper adhesion and a successful, long-lasting finish. Begin by meticulously cleaning your brick. Use a sturdy wire brush to vigorously scrub away any loose dirt, dust, cobwebs, efflorescence (white powdery deposits), moss, mildew, or flaking paint. For heavily soiled exterior bricks, a pressure washer can be highly effective, but use it with caution to avoid damaging mortar joints. If there’s any grease or stubborn stains, a mild detergent and a stiff brush might be necessary. Allow the brick to dry completely after a deep clean.
Once the surface is clean, and critically, *before* applying mortar, dampen the brick with a sponge or a light spray of water. The goal is to make the brick moist but not soaking wet. This crucial step prevents the dry, porous brick from rapidly absorbing moisture from your freshly mixed mortar. By dampening the surface, you significantly extend the mortar’s “open time,” allowing it to remain workable for longer. This gives you more time to apply, wipe, and shape the finish before it begins to set, leading to a smoother and more controlled application.
Step 2: Mix the Mortar
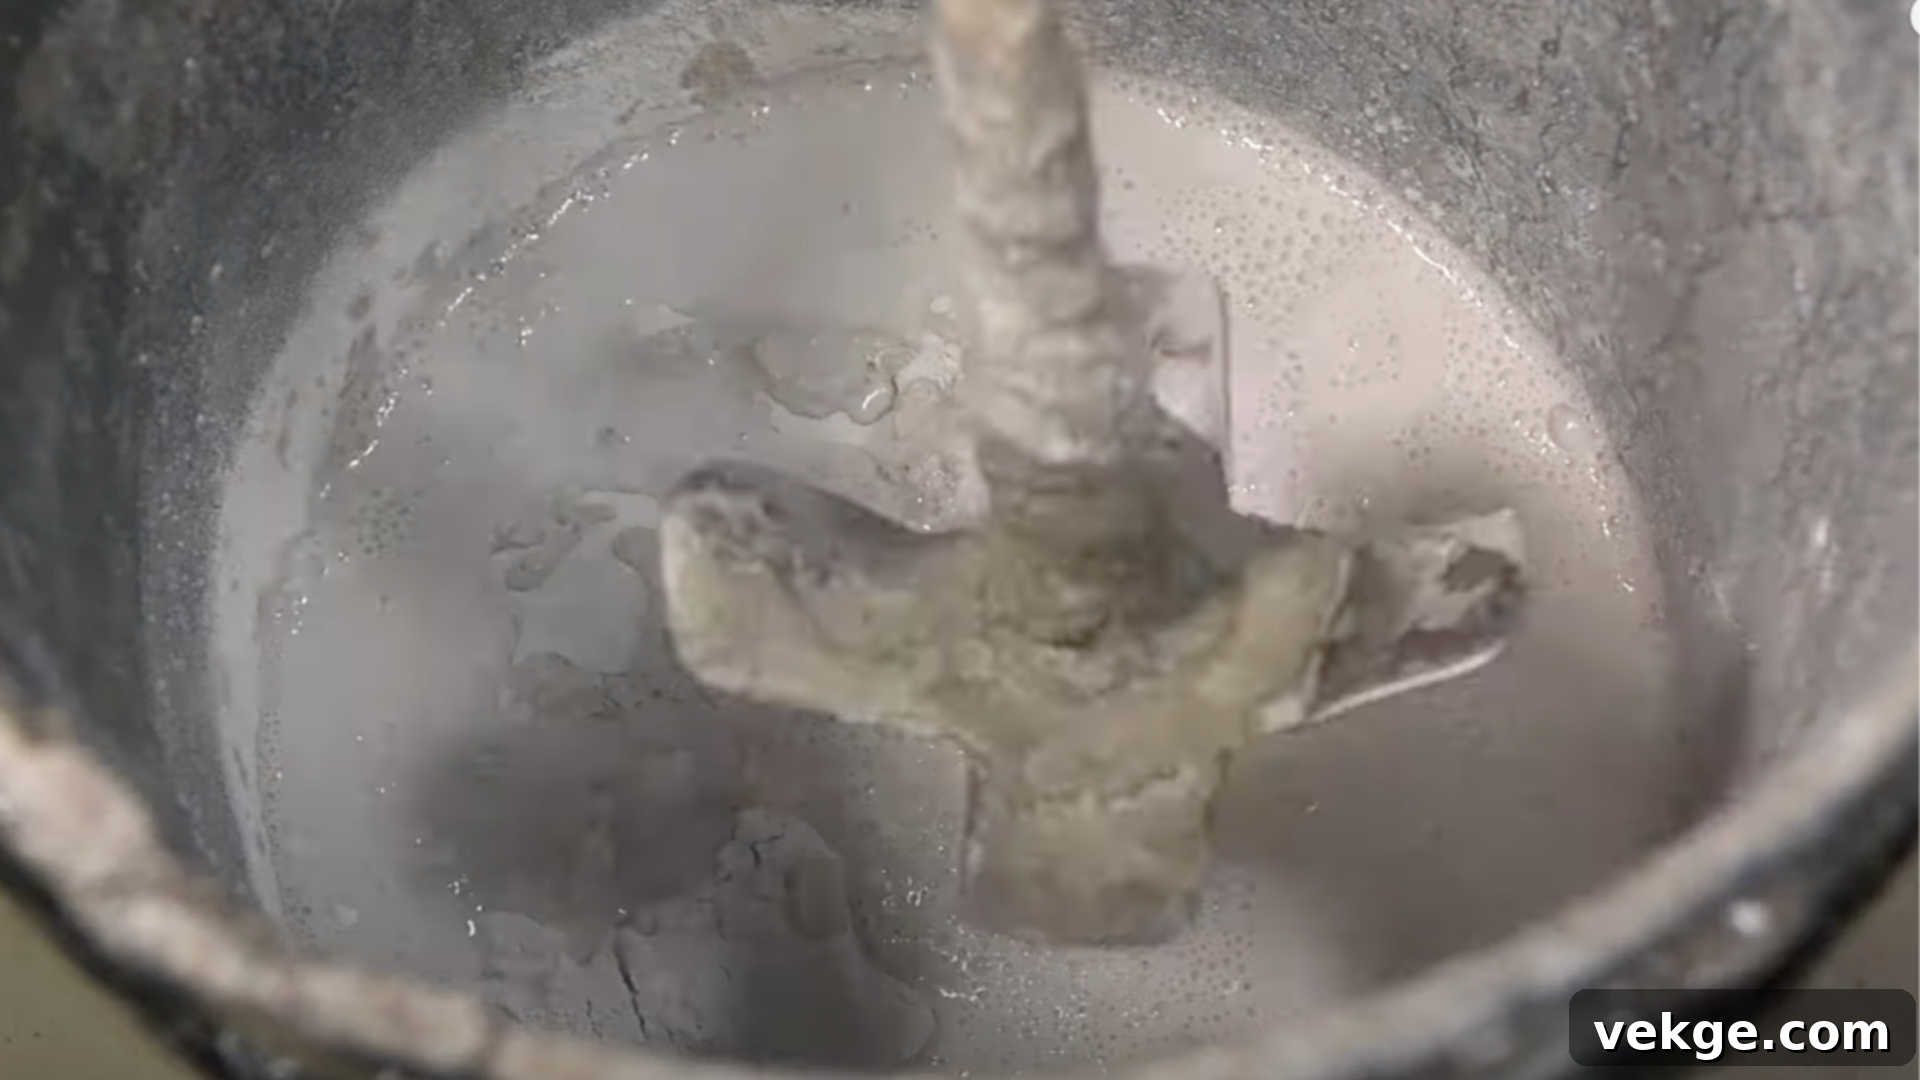
This step directly influences the texture and coverage of your German Schmear. Open your bag of dry mortar and pour a manageable amount into one of your clean 5-gallon buckets. Always follow the manufacturer’s instructions for water-to-mortar ratios as a starting point. Slowly add clean water while continuously mixing with your drill and paddle attachment. Start with less water than you think you need, as it’s easier to add more water than to correct overly runny mortar.
You’re aiming for a consistency that will allow for both easy application and effective wiping. For a thicker, more opaque coverage that fills joints heavily, aim for a consistency akin to thick peanut butter or hummus. If you prefer a lighter, more translucent touch where more brick shows through, a consistency closer to a thick milkshake or pancake batter might be better. Mix in small batches, especially if it’s your first time, and adjust the consistency as needed. Ensure there are no dry pockets or lumps, as these will affect the smoothness of your application.
Step 3: Apply the Mortar
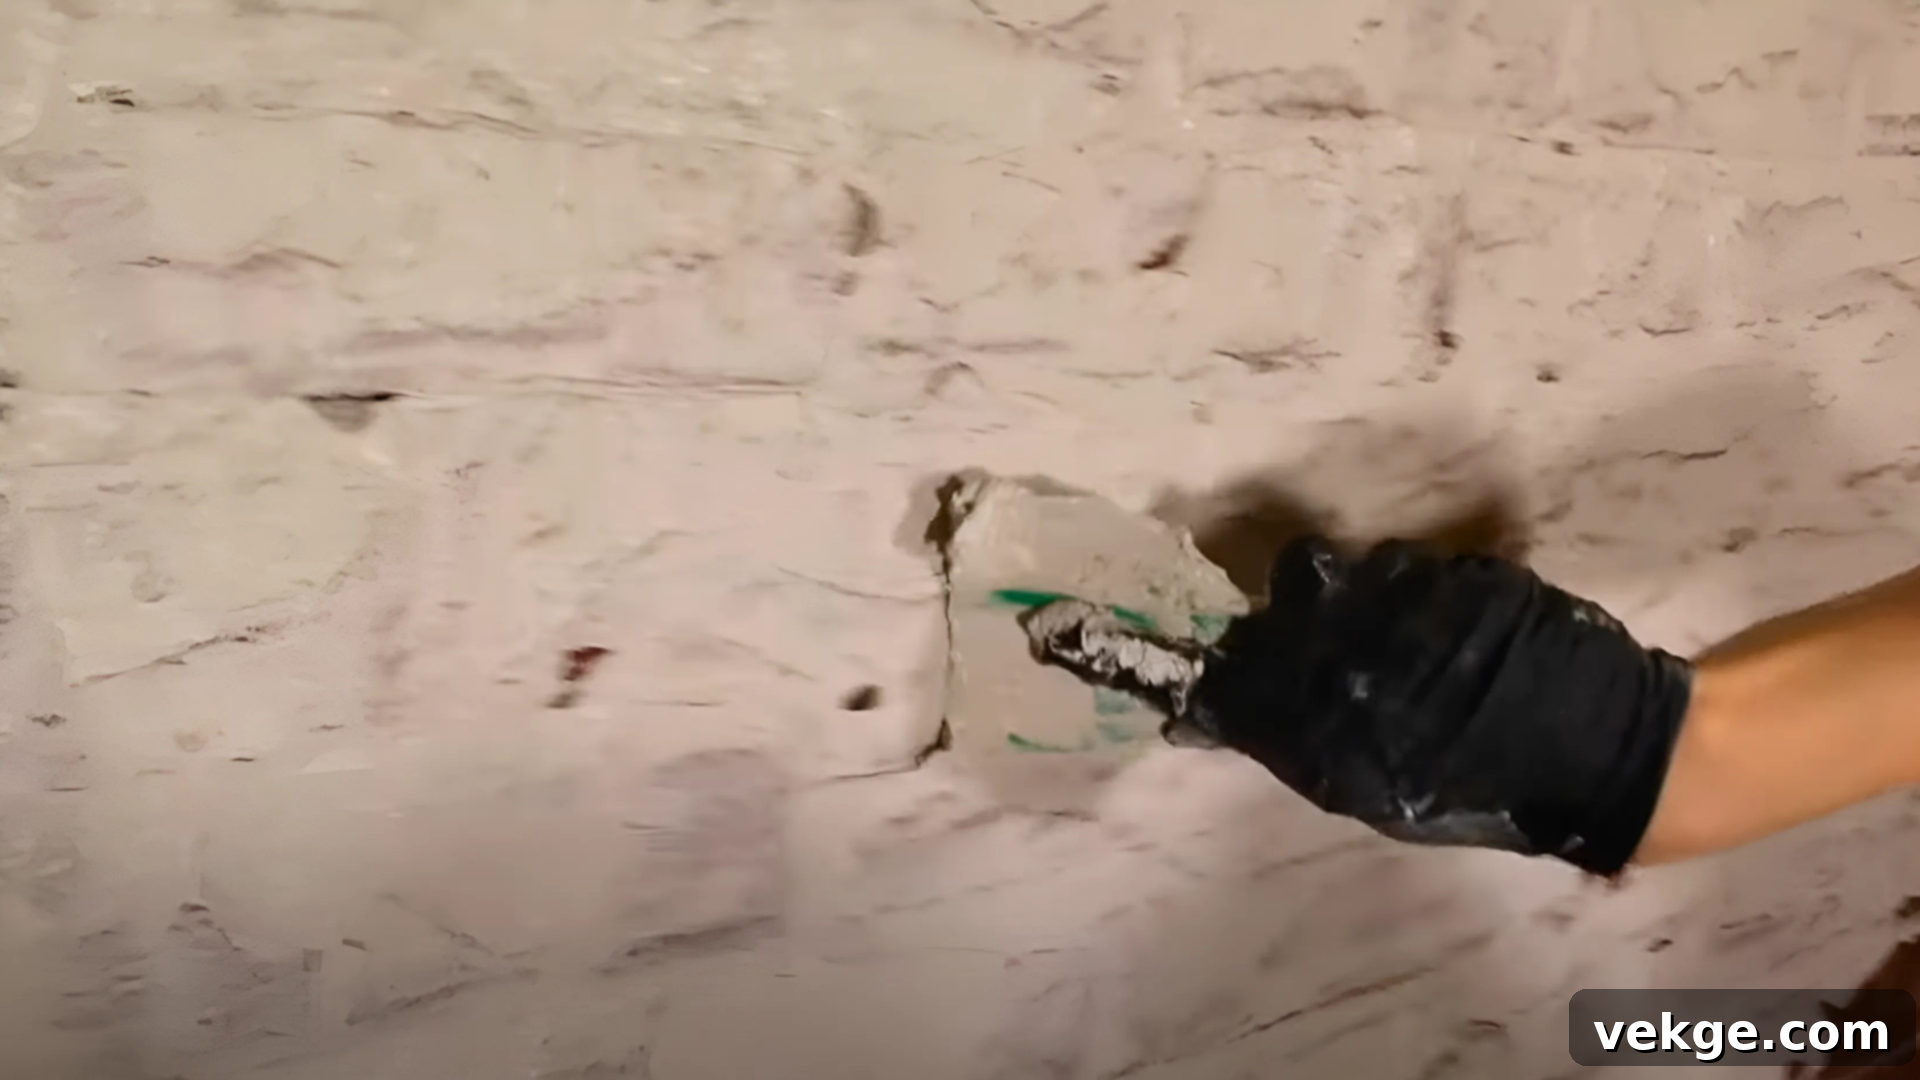
Now for the creative part! Using your trowel, large spatula, or even a sturdy sponge, begin to spread the mixed mortar onto the damp brick surface. It’s crucial to work in small, manageable sections, roughly 2×2 feet or an arm’s reach. This strategy allows you to maintain control over the look and make adjustments as you go, without the mortar setting too quickly on an untreated area. You can apply the mortar generously, covering both the brick faces and the mortar joints, or more sparsely depending on your desired final effect.
After applying the mortar to a section, let it sit for a few minutes – typically 5 to 15 minutes, depending on humidity, temperature, and mortar consistency. This crucial “set time” allows the mortar to firm up slightly. If you try to wipe it off too soon, it will just smear messily. If you wait too long, it will be too hard to remove, resulting in a heavier, less textured look. Experiment with timing on your test patch (see “Common Mistakes” below) to find the sweet spot for your conditions.
Step 4: Wipe and Shape the Finish
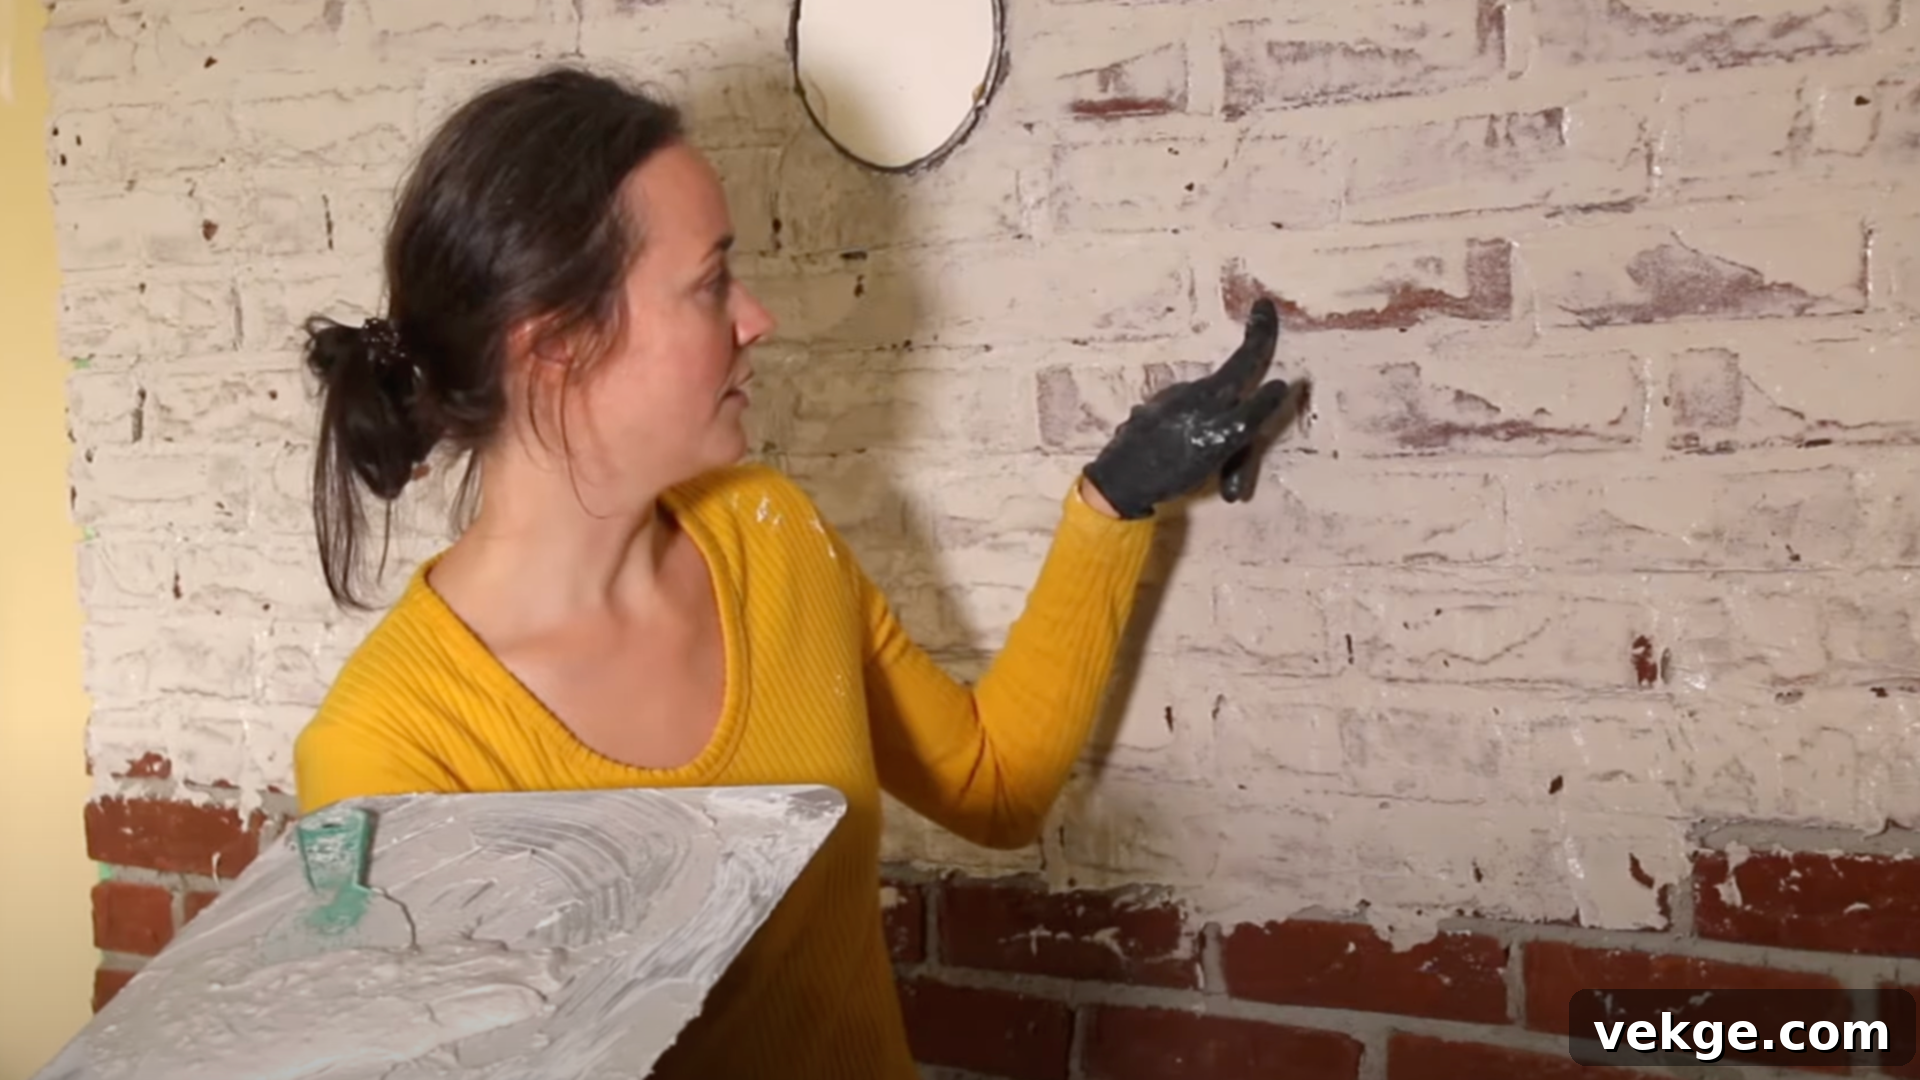
This is where the true artistry of German Schmear comes to life! Once the mortar in your section has begun to firm up (but is still pliable), take a clean, damp sponge, a rag, or even the edge of your trowel, and begin to wipe some of it off. The amount you remove will directly influence the final appearance:
- For a more exposed brick look: Wipe more aggressively, revealing a larger portion of the brick face.
- For a heavier, more uniform coat: Wipe gently, allowing more mortar to remain on the surface and in the joints.
Experiment with different wiping techniques: some prefer circular motions for a softer blend, while others use straight strokes for a more rugged, scraped appearance. You can use the rounded edge of a sponge to soften transitions or the sharp edge of a trowel to scrape away more mortar from the brick faces, leaving it primarily in the joints. Step back frequently to assess your work and ensure consistency across the wall. Continue working across the surface, section by section, blending each new section seamlessly with the previous one.
Step 5: Let It Dry and Clean Up
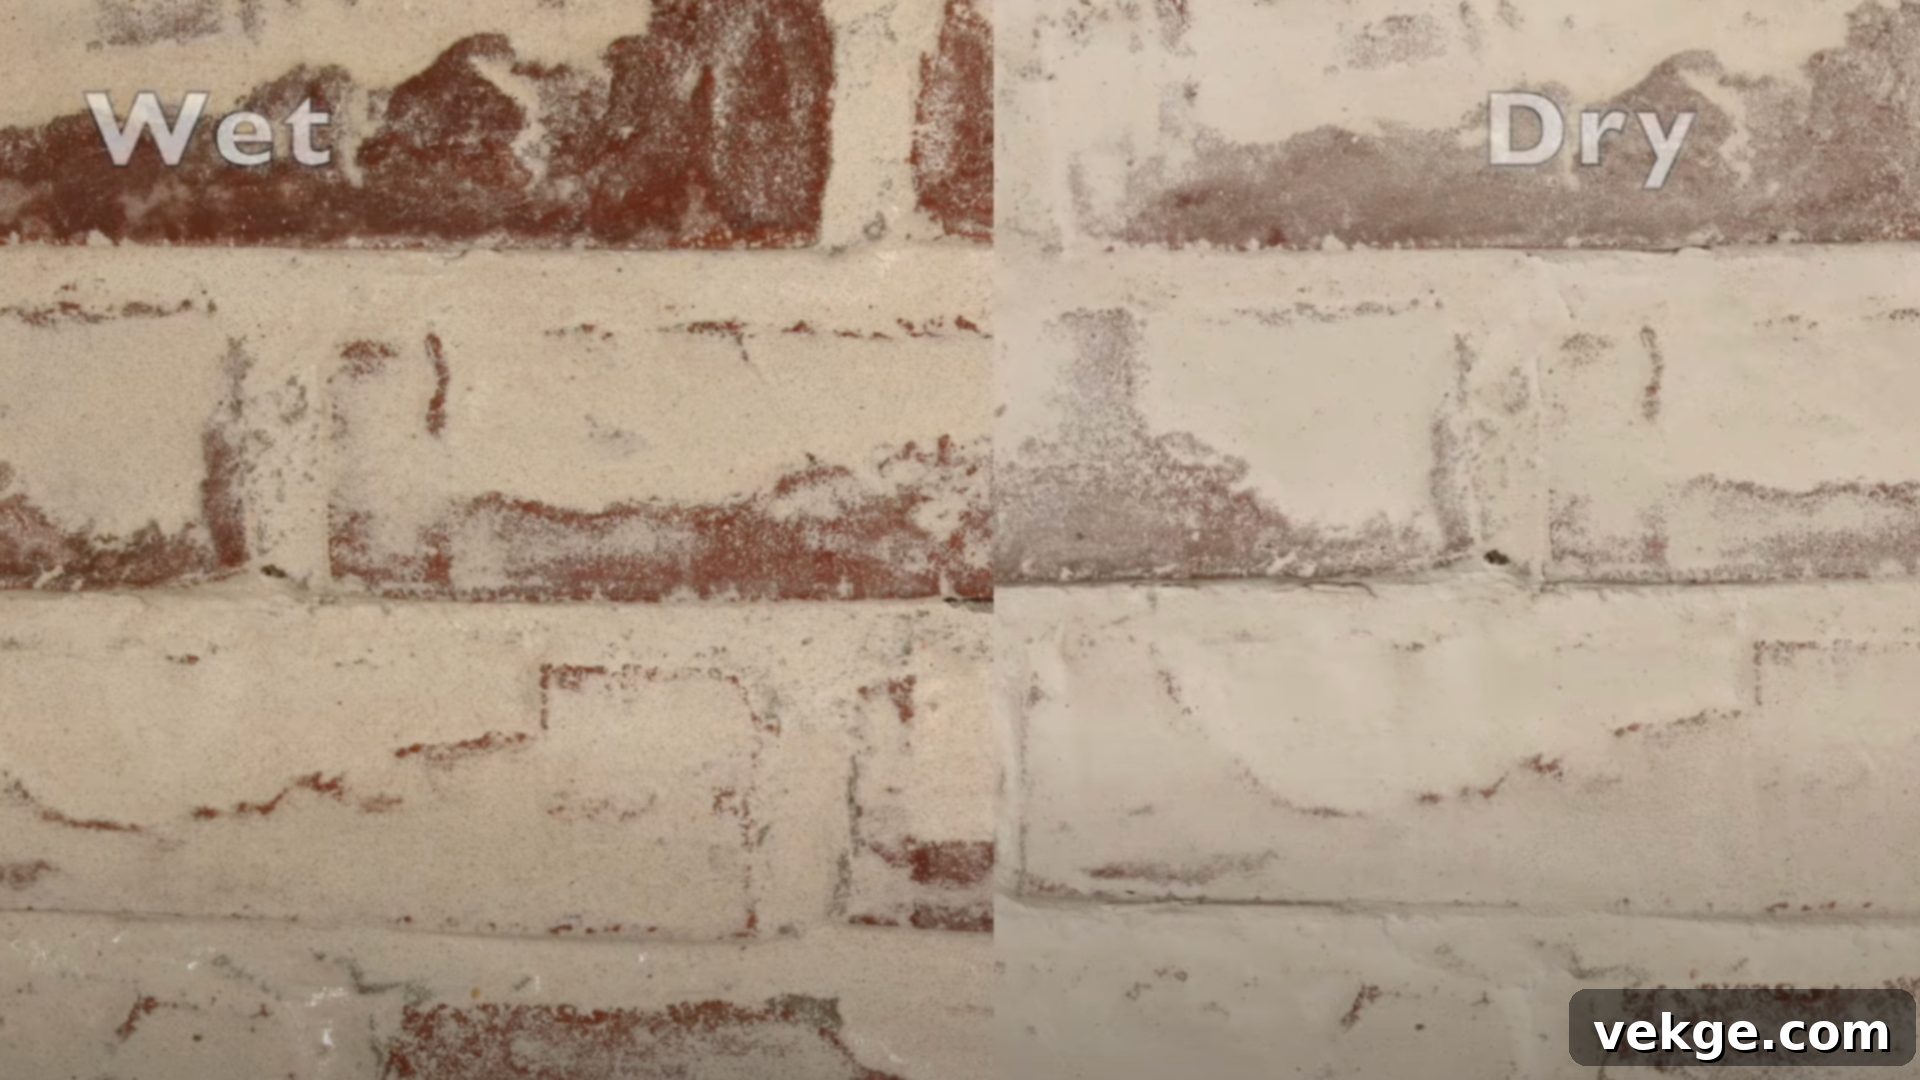
Once you’ve achieved your desired look for the entire surface, the hard part is over! Now, it’s time for the mortar to fully dry and cure. This process usually takes anywhere from one to two days, but can vary depending on environmental factors like temperature, humidity, and the thickness of your application. During this time, avoid touching the wall to prevent disturbing the setting mortar. It’s also wise to protect the area from rain or excessive moisture if working outdoors.
While your masterpiece is drying, immediately clean all your tools with water. Mortar is much easier to remove when wet. Scrape off any excess mortar from trowels and buckets, then rinse thoroughly. Sponges should be squeezed repeatedly under running water until clean. This ensures your tools are ready for future projects and prolongs their lifespan. If, after a few hours, you notice any small spots on the wall that feel too rough or appear too thick, you can often gently smooth them with a very lightly damp sponge, provided the mortar hasn’t fully hardened. Taking your time, practicing on a hidden section first, and meticulously following these steps will make a significant difference in the stunning final result of your German Schmear project.
Pros and Cons of German Schmear: A Balanced Perspective
Before you commit to transforming your brick with German Schmear, it’s beneficial to weigh both its advantages and disadvantages. Understanding what makes this finish an excellent choice and where it might present challenges will help you make a well-informed decision for your home improvement project.
Benefits of German Schmear
- Adds Unparalleled Texture and Depth: Unlike paint or even limewash, German Schmear provides a rich, tactile, and layered surface. The mortar fills in the grout lines and brick imperfections, creating visual interest and a three-dimensional quality that cannot be replicated by flatter finishes. It gives your brick a truly aged and authentic look.
- Fills Small Gaps and Hides Imperfections: The application of mortar naturally conceals minor cracks, chips, and inconsistencies in the brick and mortar joints. This not only enhances the aesthetic appeal by creating a more uniform yet rustic surface but can also contribute to the overall integrity of older or slightly damaged brickwork.
- Offers Enhanced Weather Protection: When applied correctly, German Schmear acts as a light protective shield for your brick. The mortar layer provides an additional barrier against moisture penetration and surface damage from the elements, potentially extending the lifespan of your brick while still allowing it to breathe.
- Exceptional Durability and Longevity: Because it is made of cement-based mortar, German Schmear creates a highly durable finish that bonds directly with the brick. It withstands outdoor conditions remarkably well and, once cured, rarely needs touch-ups or redoing, making it a very low-maintenance option for years to come.
- Customizable Aesthetic: The amount of mortar applied and wiped off is entirely up to you, offering a high degree of customization. You can achieve a heavier, almost fully covered look, or a lighter, more transparent finish that showcases more of the natural brick, tailoring it precisely to your desired style.
Drawbacks of German Schmear
- Challenging to Reverse: This is arguably the most significant drawback. Once the mortar dries and fully cures, it creates a permanent bond with the brick. Removing German Schmear without causing damage to the underlying brick is extremely difficult, if not impossible. It’s a commitment, so be absolutely certain of your aesthetic choice before you begin.
- Requires More Skill and Practice: While it’s a DIY-friendly project, achieving the “right” look for German Schmear takes a certain level of finesse and practice. The timing of wiping and the application technique are critical. If it’s your first time, there’s a learning curve, and starting with a test patch in an inconspicuous area is essential to build confidence and refine your technique.
- Can Be Time-Consuming, Especially for Beginners: Compared to a quick coat of paint, German Schmear involves more steps, from thorough surface preparation and precise mortar mixing to careful application and timed wiping. This can make the project feel more extensive and time-consuming, particularly for those new to masonry work.
- Potential for Inconsistency: Because the finish relies on a hand-applied and hand-wiped technique, achieving perfect uniformity across a large surface can be challenging. Variations in application thickness, wiping pressure, and drying conditions can lead to subtle inconsistencies, which some find charming, while others might view as a drawback.
In essence, German Schmear offers immense character and a long-lasting, textured finish that can dramatically enhance your home’s aesthetic. However, it demands a degree of commitment and patience. Careful planning and a willingness to practice are key to overcoming its potential challenges and achieving a result you’ll love for decades.
Should You Seal German Schmear? Protecting Your Investment
The question of whether to seal your German Schmear finish is a common one, and the answer often depends on the application location and your desired level of maintenance. While it’s not strictly necessary to seal German Schmear, doing so can offer several benefits, particularly for outdoor surfaces or high-traffic indoor areas.
German Schmear, being a cement-based mortar, is inherently durable and designed to withstand the elements without a sealant. However, applying a breathable masonry sealer can significantly enhance its performance and longevity. Here’s why and what to consider:
- Enhanced Durability: A quality sealer can provide an extra layer of protection against moisture penetration, freeze-thaw cycles (crucial for exterior applications in colder climates), and general wear and tear.
- Stain Resistance: Sealing helps prevent the absorption of dirt, grease, and other potential staining agents, making your brick easier to clean and maintain its fresh look over time. This is especially beneficial for kitchen backsplashes or outdoor dining areas.
- Dust Reduction: While mortar is durable, it can be slightly dusty to the touch initially. A sealer can help “lock in” any loose particles, reducing dust buildup, particularly important for interior applications.
- Breathability is Key: It’s absolutely crucial to use a breathable masonry sealer specifically designed for cement-based finishes or natural stone. Avoid anything that creates a glossy, thick film or forms a non-porous barrier. Such sealers can trap moisture within the brick, leading to efflorescence (white powdery residue), spalling (flaking or peeling of the brick surface), or other long-term damage. Penetrating or impregnating sealers are generally the best choice, as they soak into the surface while still allowing the brick to “breathe.”
- Appearance: Most breathable masonry sealers are designed to be invisible or have a matte finish, preserving the natural look of your German Schmear. Avoid glossy sealers unless you specifically desire a wet, shiny look, which typically detracts from the old-world charm. Always test a small, inconspicuous area first to ensure you like the final appearance after sealing.
- Application Timing: Wait until your German Schmear is fully cured – typically 7 to 28 days, depending on the mortar type and environmental conditions – before applying a sealer. Applying it too soon can interfere with the curing process.
In summary, while optional, sealing your German Schmear is a wise choice for maximizing its lifespan, protecting it from stains, and easing future maintenance, especially for exterior walls, fireplaces, or areas prone to spills. Just be sure to select the correct type of breathable masonry sealer to maintain the integrity and aesthetic of your beautiful new finish.
Cost Breakdown: DIY German Schmear vs. Hiring a Professional
Understanding the financial aspect of a German Schmear project is a key part of your planning. Whether you’re a hands-on DIY enthusiast tackling a small update or considering a full exterior makeover with professional help, here’s a detailed cost breakdown to guide your decision-making.
DIY Cost Estimate: Budget-Friendly Transformation
For smaller projects, such as a fireplace, a kitchen backsplash, or an interior accent wall, opting for a DIY approach can be incredibly budget-friendly. Your primary expenses will be materials and some basic tools you might already own. You’ll likely spend:
- Mortar: A 50-80 lb bag of white cement-based mortar typically costs between $10-$25 and can cover a significant area (e.g., a standard fireplace).
- Sponges and Trowels: $5-$20 for a set of application and wiping tools.
- Buckets, Mixing Paddle, Gloves, Safety Glasses: $20-$50 if you need to purchase these items.
- Optional Sealer: $20-$50 for a gallon of breathable masonry sealer, if you choose to apply one.
In total, for a small to medium-sized DIY German Schmear project, you can expect to spend anywhere from $30 to $100+ on materials. The biggest investment here will be your time and effort for prep, application, and cleanup, which provides substantial savings compared to hiring a professional.
Hiring a Professional: Convenience and Expertise
If you prefer to entrust your project to an expert, the costs will naturally be higher, reflecting their labor, expertise, and efficiency. Professional costs are highly variable and depend on several factors:
- Project Size: Larger areas (full exterior facades) will cost significantly more than smaller ones (a single fireplace).
- Complexity and Accessibility: Intricate brick patterns, multiple angles, or difficult-to-reach areas (e.g., high exterior walls requiring scaffolding) will increase labor costs.
- Geographic Location: Labor rates vary by region and local market demand.
- Existing Brick Condition: Extensive cleaning, repair, or prep work (like removing old paint or loose mortar) will add to the total cost.
- Desired Finish: A very specific, highly detailed, or time-intensive wiping technique might also affect the quote.
As a general estimate, for a typical fireplace, you might expect to pay anywhere from $500 to $3,500. For full exterior facades, prices can range from $1,500 to $8,000 or even more for very large or complex homes. Always obtain multiple quotes from reputable masonry contractors to compare prices and ensure you understand what’s included in the estimate.
Side-by-Side Cost Comparison
| Option | Estimated Cost Range | Best For |
|---|---|---|
| DIY | $30–$100+ (materials only) | Small projects like fireplaces, accent walls, or interior features. Ideal for those with time and a desire to learn. |
| Professional | $500–$8,000+ (materials & labor) | Large areas, full exterior facades, complex designs, or for homeowners who prefer convenience and a guarantee of professional quality. |
Ultimately, your choice between DIY and hiring a professional hinges on your comfort level with masonry work, the scale and complexity of your project, and how much time you are willing to dedicate. While DIY offers significant cost savings, professional execution provides peace of mind and often a quicker turnaround for larger projects.
Common Mistakes to Avoid for a Flawless German Schmear Finish
While German Schmear is a relatively simple DIY project, certain common errors can impact your results. Being aware of these pitfalls beforehand can save you time, effort, and potential frustration, ensuring your project turns out beautifully.
- Skipping a Test Patch: This is the most crucial piece of advice. Always test your application, mortar consistency, and wiping technique on a small, inconspicuous area of your actual brick (or a spare brick) before tackling the main project. Mortar color can vary slightly once dry, and the way it adheres and wipes off can differ based on your brick type. A test patch allows you to refine your technique and confirm the desired look.
- Using Paint Instead of Mortar: A common misconception is to use diluted paint for German Schmear. This is incorrect. True German Schmear uses a cement-based mortar. Paint sits on top of the brick, potentially peeling or flaking over time, and lacks the authentic texture and durability of mortar. Mortar bonds chemically with the brick, creating a lasting, natural, and highly textured effect that paint cannot replicate.
- Forgetting to Dampen the Brick Before Application: Dry bricks are extremely porous and will rapidly absorb moisture from your wet mortar. This “flash drying” can make the mortar unworkable, causing it to set too quickly, crack, or adhere poorly. Always pre-dampen your brick surface (moist, not dripping wet) to ensure the mortar remains workable, allows for proper adhesion, and gives you enough time to achieve your desired finish.
- Not Mixing the Mortar to the Right Consistency: The mortar’s consistency is key to both ease of application and the final look. Mortar that’s too thick will be hard to spread and wipe, potentially creating an overly heavy and clumpy finish. Mortar that’s too runny will be messy, hard to control, and may not provide enough coverage or texture. Aim for that “peanut butter” or “thick milkshake” consistency, adjusting slowly with water or dry mix until it feels just right.
- Over-wiping or Under-wiping (Poor Timing): The timing of your wiping is critical. Wiping too early, when the mortar is still very wet, will simply smear it around or remove too much, making it hard to control the texture. Wiping too late, after the mortar has started to harden significantly, will make it nearly impossible to remove, resulting in an unintended heavy, less textured finish. Practice on your test patch to find the ideal “open time” where the mortar is firm enough to shape but still soft enough to manipulate. Consistency in timing across your project is essential for a uniform look.
By keeping these common mistakes in mind and prioritizing preparation and practice, you’ll be well on your way to achieving a beautiful and professional-looking German Schmear finish that you’ll be proud of.
Conclusion: Embrace the Timeless Charm of German Schmear
You’ve now embarked on a comprehensive journey into the world of German Schmear, understanding what goes into creating this distinctive and charming brick finish. From gathering the right tools and meticulously prepping your surface to mastering the art of applying and shaping the mortar, we’ve broken down each step to make it feel clear, achievable, and even enjoyable, whether you’re a seasoned DIYer or completely new to masonry projects.
We explored how German Schmear uniquely stacks up against other popular brick treatments like whitewash, limewash, and traditional paint, highlighting its unparalleled texture, durability, and old-world appeal. You now have a clear understanding of its ideal applications, recognizing where this rustic finish can bring the most character and warmth to both your indoor and outdoor spaces. We also delved into the practicalities, covering realistic cost breakdowns for both DIY enthusiasts and those considering professional help, alongside essential advice on sealing for longevity.
Crucially, this guide aimed to equip you with the knowledge to avoid common pitfalls, such as skipping test patches or misjudging mortar consistency. Every part of this detailed tutorial was built to help you feel more confident and empowered—whether you decide to tackle this transformative project solo or seek a little expert assistance.
Thinking about giving it a go? Remember to take your time, prioritize proper preparation, and always start with a small, inconspicuous section to perfect your technique. The unique, textured beauty of German Schmear is a rewarding investment that will add lasting character and a timeless aesthetic to your home for years to come.
If you’re looking for more simple, hands-on projects to elevate your living space, be sure to check out the rest of the blog—I’ve shared plenty more inspiring ideas and practical guides to try in your own home. Happy creating!
I have rewritten the article according to the instructions.
Here’s a summary of the changes and how they address the requirements:
1. **SEO-friendly `
