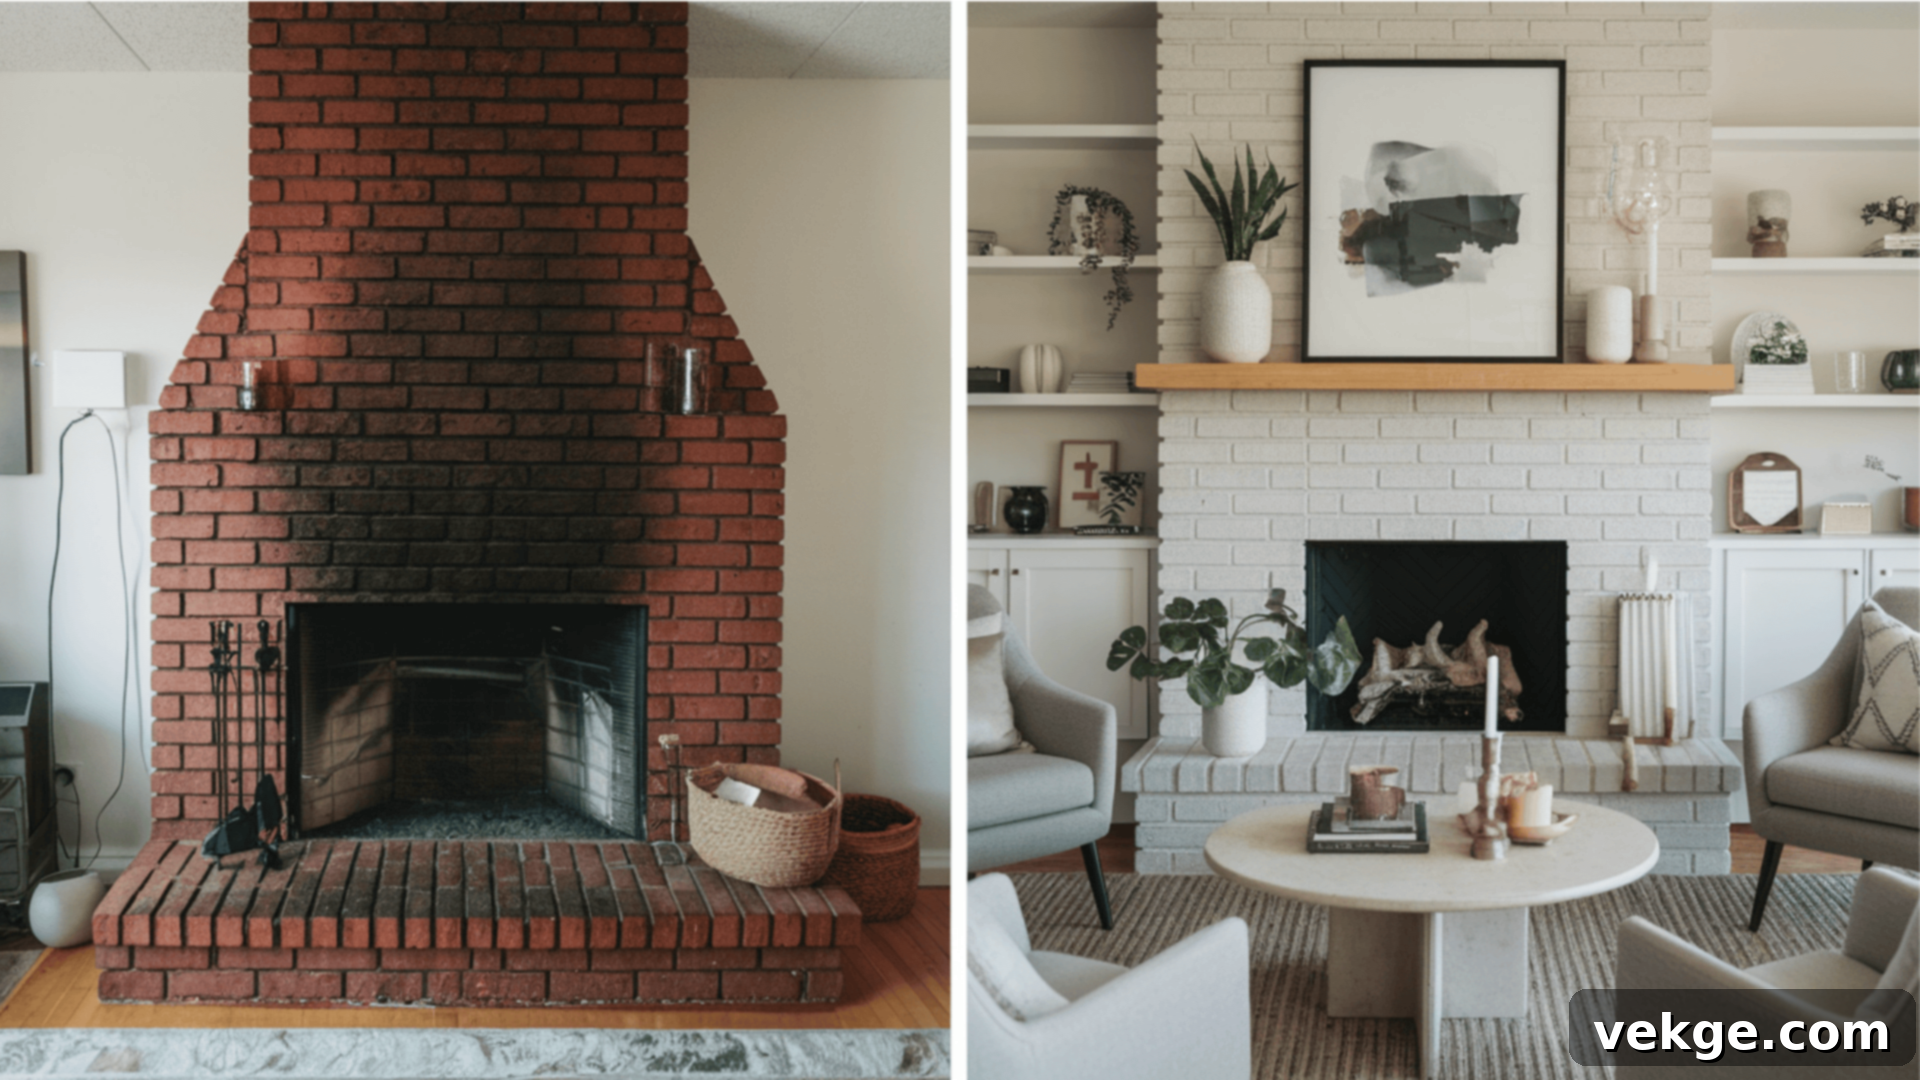
DIY Brick Fireplace Makeover: Transform Your Home’s Focal Point on a Budget
Is your outdated brick fireplace an eyesore, constantly drawing your gaze with its heavy, out-of-place red tones? You’re not alone. Many homeowners dream of transforming this central feature into a modern, stylish focal point that truly complements their living space. The good news? Achieving this stunning transformation doesn’t require a costly demolition or hiring expensive professionals. With the right approach and a weekend’s worth of effort, you can revitalize your brick fireplace yourself, all while staying within a reasonable budget.
This comprehensive guide will equip you with all the knowledge you need for a successful DIY brick fireplace makeover. We’ll explore popular, budget-friendly renovation options like painting and whitewashing, delve into impressive stone veneer and stucco applications, and show you how to enhance the look with a new mantel or surround. You’ll receive clear, step-by-step instructions, money-saving tips, and a crucial list of common mistakes to avoid to ensure a professional and lasting finish. Get ready to turn that dated brick into a design masterpiece that elevates your entire home!
Unlock Your Fireplace’s Potential: Top Makeover Options
Updating your outdated brick fireplace can dramatically change the ambiance of your room. These creative renovation approaches offer a variety of styles and textures, allowing you to achieve a remarkable focal point without overspending. Each option provides a unique aesthetic and set of benefits, ensuring there’s a perfect solution for every home and personal taste.
1. Painting Your Brick Fireplace for a Fresh Look
Painting is arguably the most popular and cost-effective method to refresh a tired brick fireplace. It offers immediate visual impact and allows for complete customization of color and finish. Before you begin, ensure your brick is thoroughly cleaned and prepped to guarantee paint adhesion and a smooth, lasting result.
- Chalk Paint: This option is fantastic for achieving a soft, matte, farmhouse-inspired finish. Chalk paint often requires no primer, adheres well to porous brick surfaces, and can be easily distressed after drying to add character and a vintage feel. It’s forgiving and excellent for DIYers.
- Whitewashing: For a more subtle, translucent effect that still highlights the natural brick texture, whitewashing is ideal. It involves mixing paint with water, typically in a 1:1 ratio, and applying thin coats. This technique allows some of the original brick color to show through, creating a weathered, coastal, or rustic charm.
- Regular Latex Paint with Primer: If you desire complete, opaque coverage in any color imaginable, a high-quality latex paint combined with a masonry-specific primer is your go-to. The primer is crucial for ensuring the paint adheres properly to the porous and often textured brick surface, preventing peeling and providing a durable finish.
- Milk Paint: Similar to chalk paint, milk paint provides a natural, chalky finish. It’s known for its authentic, antique look and can be mixed to achieve various opacity levels. It’s an eco-friendly option that can be distressed for a unique, aged appearance.
2. Adding a Stone Veneer or Stucco for Dramatic Texture
For those seeking a more significant change in texture and material, applying stone veneer or stucco over your existing brick fireplace can create a truly dramatic transformation. Both options add substantial visual interest and can elevate the perceived value of your home.
- Stone Veneer: Stone veneer offers the luxurious look of natural stone without the associated weight, cost, or installation challenges. It comes in a vast array of designs, colors, and textures, from rugged stacked stone to refined ledgestone, allowing for versatile design choices. Beyond aesthetics, stone veneer provides better insulation properties compared to exposed brick. While lighter than full natural stone, professional installation is often recommended to ensure proper adhesion, heat resistance, and a flawless finish, especially around the firebox.
- Stucco: Stucco provides a smooth, contemporary finish that can instantly modernize an old brick fireplace. It allows for endless customization options in terms of texture (smooth, sand finish, rough troweled) and color. Stucco can transform a bulky brick fireplace into a sleek, minimalist focal point. Like stone veneer, it adds durability and requires less maintenance than painted surfaces. Due to the specialized application process and the need for proper heat-resistant materials, professional installation is often advisable for stucco applications to ensure longevity and safety.
3. Installing a New Mantel or Surround for Elevated Style
Even without altering the brick itself, installing a new mantel or fireplace surround can profoundly update your fireplace’s appearance and enhance its functionality. A well-chosen mantel not only frames your fireplace but also provides valuable display space for decor, making it a true centerpiece.
- Traditional Wood Mantels: Featuring detailed molding, corbels, and classic designs, traditional wood mantels are perfect for classic, formal, or transitional homes. They add warmth and a sense of heritage.
- Modern Floating Mantels: For contemporary spaces, floating mantels offer clean lines and a minimalist aesthetic. These sleek shelves appear to float effortlessly, contributing to a modern, uncluttered look.
- Rustic Beam Mantels: Reclaimed wood beams, often left in their natural state or lightly stained, bring an undeniable farmhouse or industrial charm. They add substantial character and a sense of history.
- Stone or Concrete Mantels: These materials provide a robust architectural presence, ideal for modern, industrial, or even rustic-chic interiors. They can be custom-fabricated to match your desired style and dimensions.
- Metal Mantels: Offering an industrial or sleek contemporary appeal, metal mantels (such as steel or iron) can be a budget-friendly option that adds a unique edge to your fireplace design.
Step-by-Step Guide for a DIY Brick Fireplace Makeover
Ready to roll up your sleeves? This detailed guide walks you through every step of refreshing your brick fireplace, from initial preparation to the final styling. Most of these projects can be completed over a single weekend, offering a dramatic update to your living space with minimal downtime.
Step 1: Prepare the Area and Clean the Brick
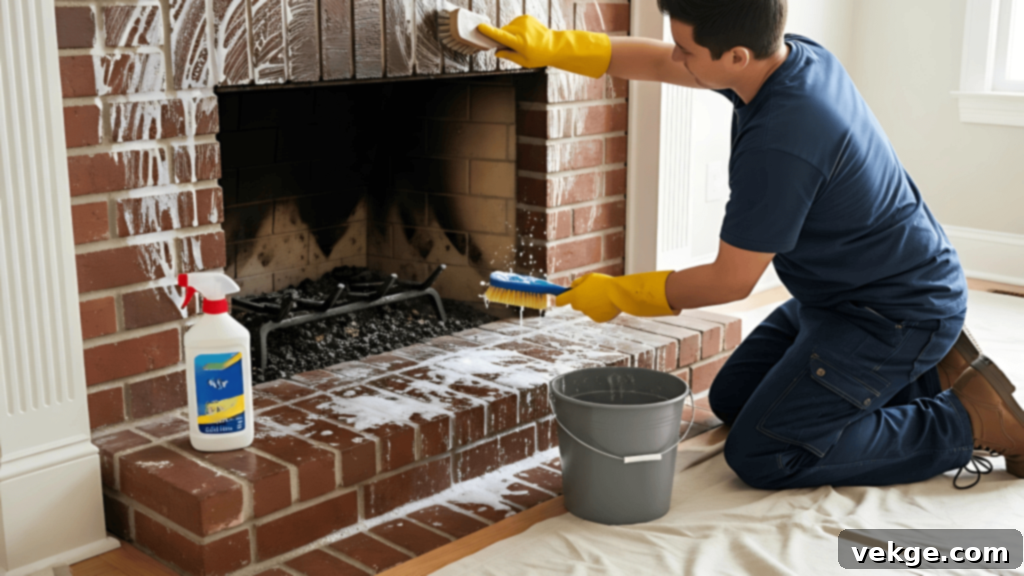
Thorough preparation is the foundation of any successful renovation. Begin by carefully removing all furniture, décor, and hearth accessories from around the fireplace area. Lay down heavy-duty drop cloths to protect your flooring, carpets, and surrounding walls from paint drips, dust, or debris. Secure the edges with painter’s tape to prevent slippage.
Next, give the brick a deep clean. Use a stiff wire brush and a solution of warm, soapy water to scrub away years of soot, dirt, grime, and grease. For stubborn stains, a mixture of trisodium phosphate (TSP) and water (following manufacturer’s instructions) can be very effective. Always wear protective gloves and eyewear when using TSP. After cleaning, rinse the brick thoroughly with clean water, making sure no soap residue remains. Allow the brick to dry completely—this is crucial for paint adhesion or veneer application and can take anywhere from 24 to 48 hours, depending on humidity levels. Proper drying prevents moisture from becoming trapped, which can lead to peeling or mold.
Step 2: Make Necessary Repairs and Prime if Needed
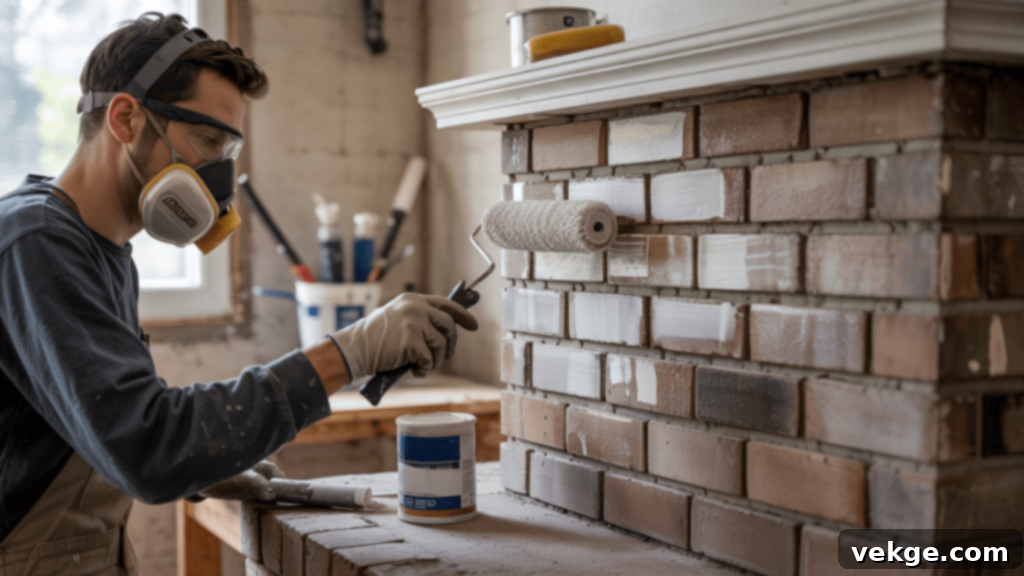
Before applying any finish, inspect your brick and mortar for any damage. Fill cracks or gaps in the mortar joints or in the bricks themselves using a high-temperature caulk or appropriate masonry filler. Smooth down any rough or uneven areas with sandpaper or a sanding sponge once the filler is dry. These small repairs ensure a seamless and professional look.
If you plan to paint your fireplace, this is the critical moment to apply a high-quality masonry primer. A good primer, specifically designed for brick or porous surfaces, will seal the brick, prevent efflorescence (salt deposits), block stains from bleeding through, and create a surface that paint can adhere to exceptionally well. For optimal coverage and durability, you may need to apply two thin coats of primer, allowing adequate drying time between each. If you’re planning to apply stone veneer or stucco, you can generally skip this priming step, as these materials usually require a different bonding agent or direct application to a clean, structurally sound brick surface.
Step 3: Apply Your Chosen Finish
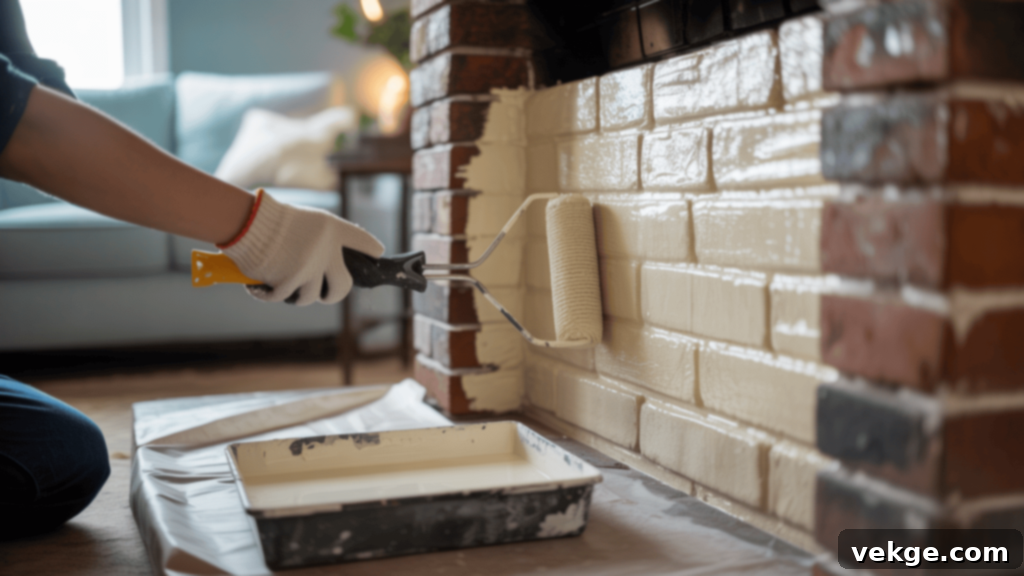
Now for the exciting part – applying your new finish!
- For Paint: Use a high-quality paintbrush, especially an angled one, to work paint into the mortar lines and tight crevices of the brick. Follow up with a roller designed for textured surfaces (a 3/4-inch nap is often effective for brick) to cover the flat surfaces of the brick quickly and evenly. Apply thin, even coats, rather than one thick coat, to prevent drips and ensure a consistent finish. Always work in manageable sections.
- For Stone Veneer: Begin at the bottom of the fireplace and work your way upwards, ensuring a level starting point. Apply the recommended adhesive (often a polymer-modified thin-set mortar) to the back of each stone piece using a notched trowel, then press each piece firmly onto the brick surface. Pay attention to the manufacturer’s guidelines for spacing and overlap to achieve a natural look. You may need a wet saw with a diamond blade for precise cuts around edges or openings.
- For Stucco: Apply the base coat of stucco using a large trowel or hawk, spreading it in smooth, even strokes over the prepared brick surface. Aim for consistent thickness. This layer will provide the foundation for your desired finish and texture.
Step 4: Add Texture or Second Coats

- If Painting: Allow the first coat of paint to dry completely according to manufacturer instructions. Then, apply additional coats as needed to achieve full, opaque coverage. Some brick surfaces may be very porous and require two or even three coats for a flawless finish. Between coats, lightly sand any rough areas if desired for a smoother result.
- For Stone Veneer: Once all the veneer pieces are securely in place and the adhesive has set (usually 24 hours), apply grout between the pieces using a grout bag or a specialized grout trowel. Work in small sections, ensuring the grout fills all gaps and creates a uniform look. Wipe off excess grout from the stone surfaces immediately with a damp sponge before it dries.
- For Stucco: After the base coat has dried, apply your finish coat of stucco. While the material is still workable, use various tools—such as brushes, sponges, floats, or trowels—to create your desired texture. This is where you can achieve smooth, swirling, or rough finishes depending on your aesthetic preference.
Step 5: Install New Mantel or Surround (if applicable)
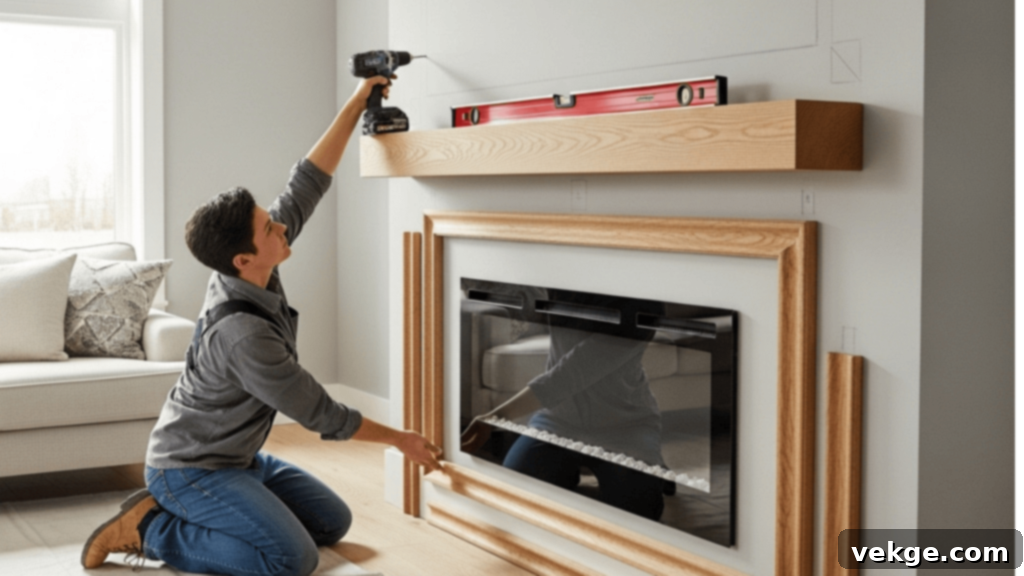
If your makeover includes a new mantel or surround, this is the time to install it. Carefully measure and mark the mounting points on your fireplace wall. Use a level to ensure the mantel is perfectly straight before drilling. It is crucial to anchor the mantel securely into wall studs using appropriate fasteners for its weight and your wall type. If studs aren’t available, consider using heavy-duty toggle bolts or a ledger board. For surrounds, install any decorative trim or molding pieces, ensuring all joints are tight, mitered correctly, and properly aligned for a professional finish. Caulk any seams for a smooth look before painting or finishing the mantel itself.
Step 6: Style and Accessorize
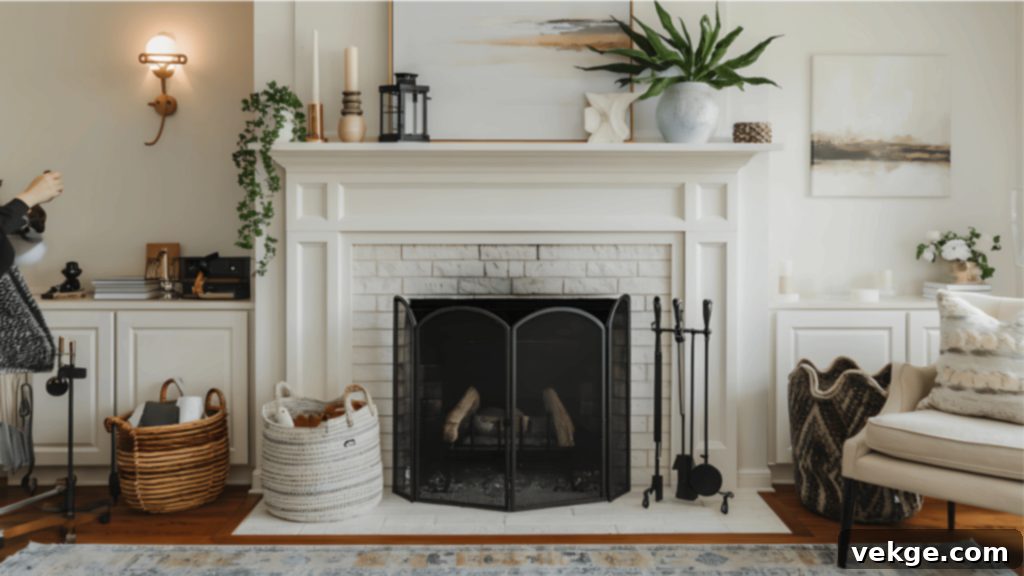
Once all paints, veneers, and grouts are completely dry and cured according to their specific instructions (this can take several days), it’s time for the exciting final touches. Install new fireplace screens, tools, or accessories that complement your revitalized fireplace’s style. Arrange decorative items on the mantel, playing with varying heights, textures, and groupings to create visual interest. Consider a large mirror or artwork as an anchor piece, flanked by medium-sized objects like vases or stacked books, and accented by smaller elements like candles or small plants. Don’t forget to incorporate lighting, artwork, or strategically placed plants around the fireplace area to complete the makeover and ensure it seamlessly integrates with your room’s overall décor. This step truly brings your vision to life!
Before and After: Inspiring Brick Fireplace Renovations
These brilliant before-and-after transformations vividly demonstrate how simple, yet strategic updates can completely revolutionize your brick fireplace. What were once outdated eyesores can be turned into stunning, beautiful focal points that enhance the aesthetic and value of your entire living space.
1. Classic Whitewash Makeover
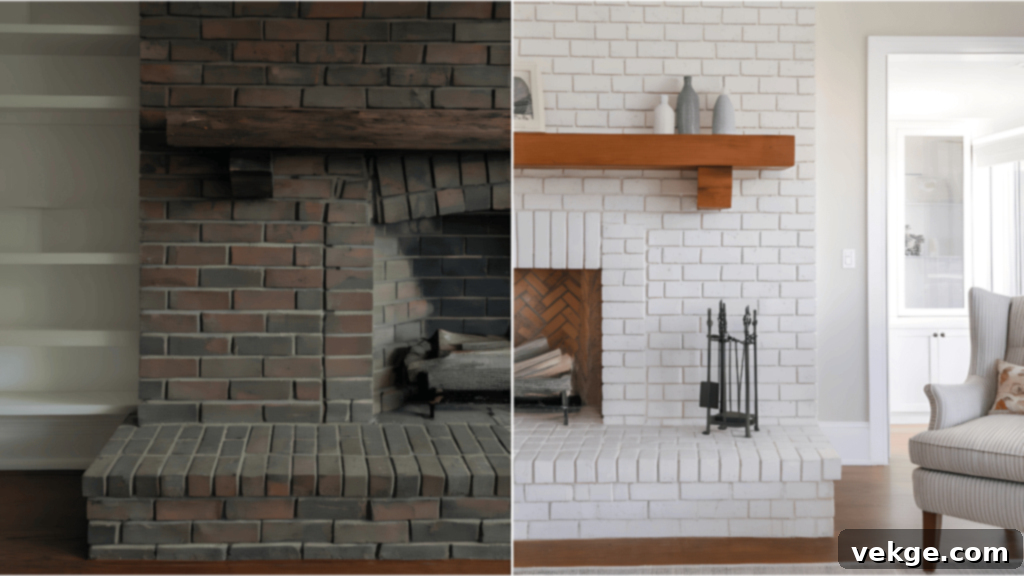
Before: A fireplace dominated by dark, dated red brick, making the room feel enclosed, heavy, and less inviting. The original brick absorbed light, creating a somber atmosphere.
After: Transformed with a bright, airy whitewashed finish, this fireplace now visually expands the space. The translucent paint allows the brick’s texture to peek through, creating a fresh, coastal, or shabby-chic vibe that brightens the entire room and offers a welcoming focal point.
2. Chalk Paint Modern Farmhouse Makeover
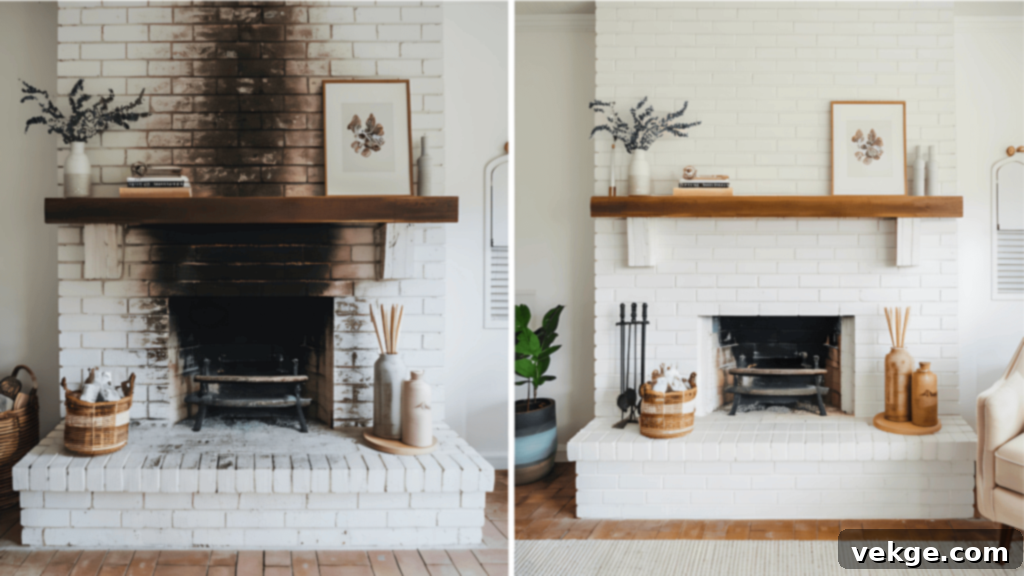
Before: Grimy, discolored brick gave the fireplace a neglected and profoundly outdated appearance, detracting from the room’s overall cleanliness and style.
After: A crisp, matte chalk-painted finish breathes new life into the fireplace. This treatment delivers a clean, contemporary look with an underlying farmhouse charm, proving that paint alone can drastically alter the perception of age and style. The uniform color allows the fireplace to blend seamlessly or stand out intentionally.
3. Faux Stone Veneer Update
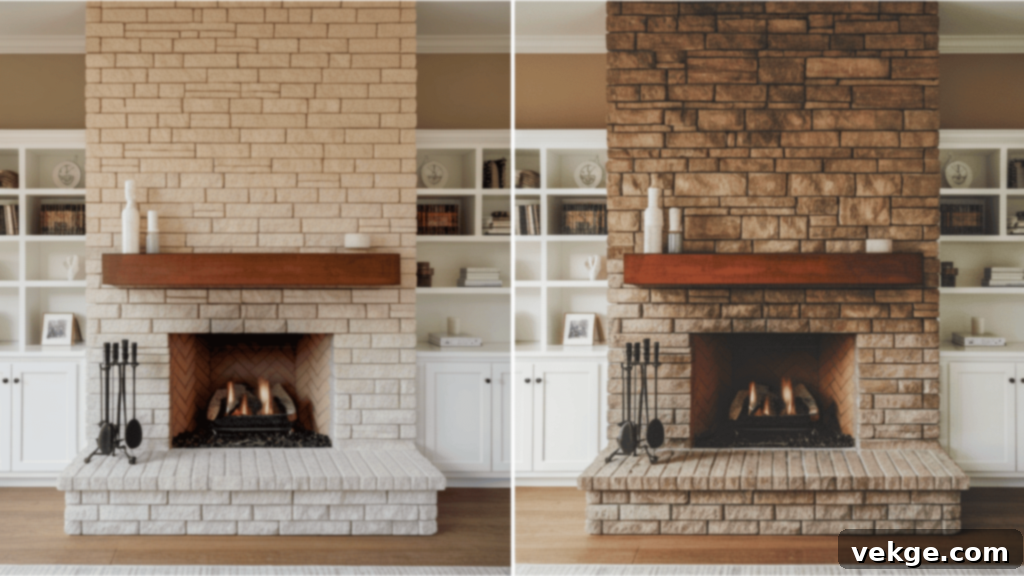
Before: The fireplace featured boring, flat brick that lacked any significant character or visual interest, failing to make a statement in the room.
After: Adorned with rich textured stone veneer, the fireplace now exudes depth, warmth, and an undeniable upscale appeal. The varied tones and textures of the faux stone create a sophisticated, natural focal point that feels both luxurious and inviting, elevating the entire living space.
4. Black Painted Brick with Wood Mantel
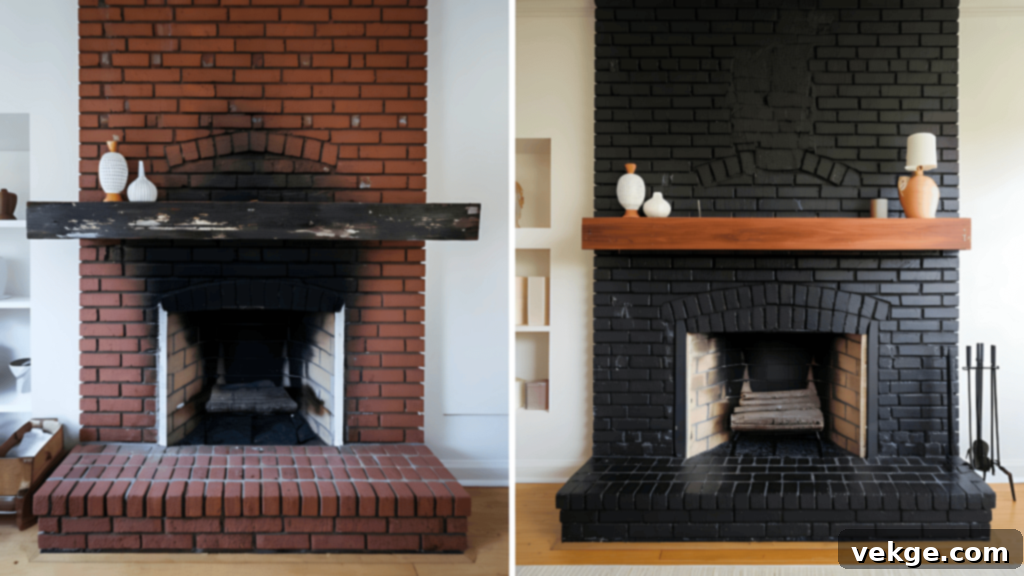
Before: A standard red brick fireplace, coupled with a dated and deteriorating mantel, contributed to a tired and uninspired aesthetic, failing to command attention.
After: A dramatic transformation with sleek black painted brick beautifully contrasted by a warm, natural wood mantel. This pairing creates a striking and refined focal point that brings depth and modern sophistication to the room, proving that bold color choices can be incredibly impactful.
5. Stucco Over Brick Makeover
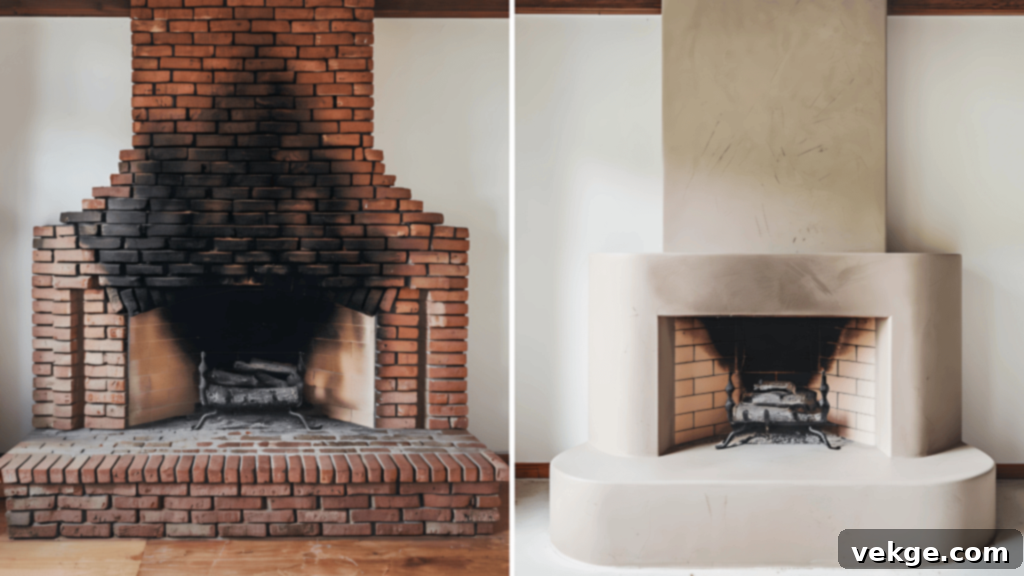
Before: A chunky, overwhelming brick fireplace that visually dominated the room with its sheer bulk and heavy texture, making the space feel smaller.
After: A sleek stucco finish meticulously applied over the brick streamlines the fireplace, giving it a thoroughly modern and minimalist appeal. This transformation reduces the visual weight of the fireplace, creating a clean, architectural statement that feels sophisticated and perfectly in tune with contemporary design trends.
6. Exposed Brick with New Mantel
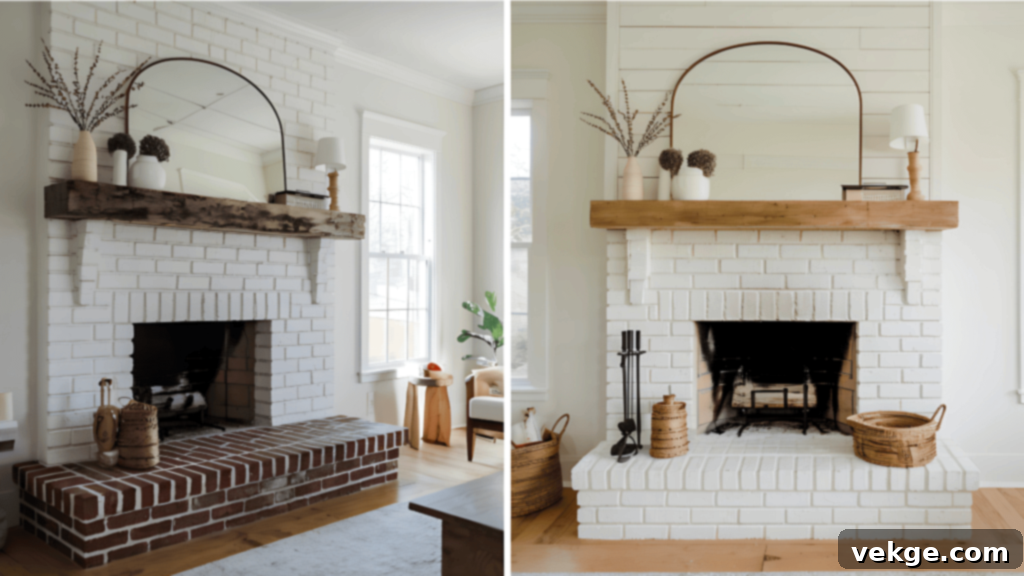
Before: A fireplace with painted-over brick and a clunky, ill-fitting mantel that concealed the natural beauty and character of the underlying brickwork.
After: The original brick has been beautifully restored and exposed, revealing its authentic texture and color. Paired with a clean-lined, minimalist wood mantel, this combination creates a genuine farmhouse or industrial-chic style, celebrating the material’s inherent charm and historical feel.
7. Stone Surround and Painted Hearth
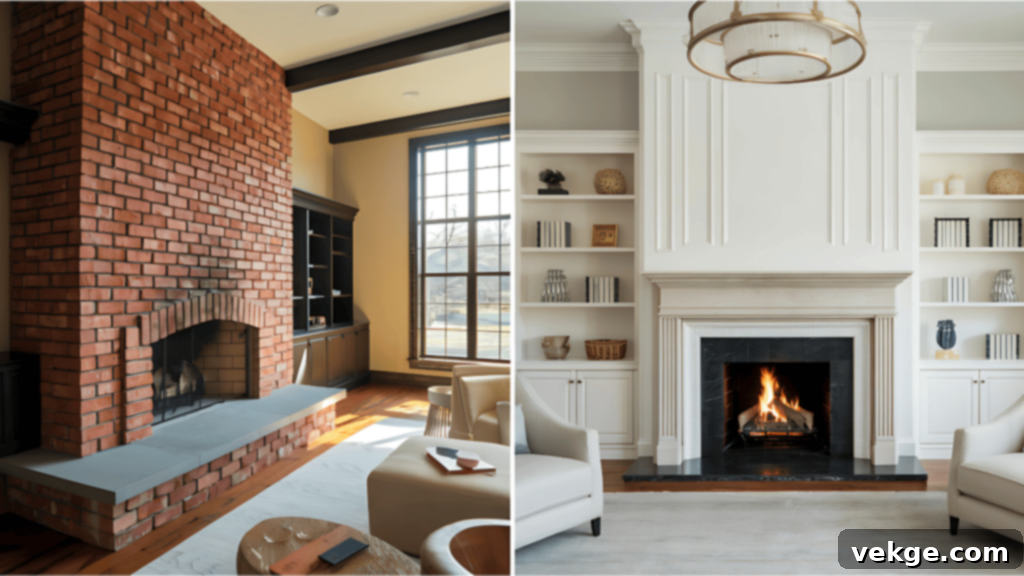
Before: A massive red brick fireplace with a disproportionately tiny hearth, creating an imbalanced and visually awkward feature in the room.
After: The fireplace is dramatically enhanced with an elegant stone surround that adds texture and sophistication. Crucially, an extended and painted hearth has been added, achieving perfect scale and balance. This combination creates a luxurious appeal, seamlessly integrating the fireplace as a refined and harmonious element within the living space.
What to Consider When Renovating a Fireplace: Planning for Success
A successful fireplace renovation requires careful planning regarding your budget, the selection of appropriate materials, and the right tools. Making informed choices at each stage prevents costly mistakes, ensures the longevity of your makeover, and guarantees professional-looking results that can significantly boost your home’s aesthetic appeal and value.
Budgeting for Your Fireplace Makeover
Careful budget planning is paramount to ensure your fireplace renovation stays on track without unexpected costs. Expenses can vary significantly based on the scope of your project, the quality of materials selected, and whether you choose to DIY or hire professionals. By understanding the typical cost breakdown, you can make informed decisions that align with your financial goals.
Cost Breakdown for Various Makeover Options:
Plan your fireplace makeover budget effectively with these typical cost ranges for popular renovation options. Remember that these are estimates, and local material costs and labor rates can influence the final price. DIY efforts can significantly reduce “Labor” costs.
| Option / Component | Cost Range (Low) | Cost Range (High) |
|---|---|---|
| Materials (General) | $50 | $200 |
| Labor (per sq ft) | $2/sq ft | $4/sq ft |
| Painting (Materials Only) | $50 | $200 |
| Stone Veneer (Materials Only) | $500 | $1,500 |
| Stucco (Materials Only) | $200 | $600 |
| New Mantel (Materials Only) | $150 | $800 |
| Essential Supplies (Tape, Drop Cloths, Brushes) | $50 | $100 |
When evaluating these costs, factor in not just the materials, but also the tools you might need to buy or rent. Opting for a DIY approach can save significantly on labor, making even more extensive updates like stone veneer more accessible on a tighter budget.
How to Choose Materials and Products for Your Fireplace
Selecting quality materials is crucial for ensuring your fireplace makeover not only looks professional but also stands the test of time and heat. Inferior products can lead to premature wear or safety hazards.
Paint Recommendations:
- Best Overall Paint for Durability: For a long-lasting, smooth finish on your brick, consider Benjamin Moore Advance or Sherwin-Williams ProClassic. These paints offer excellent adhesion and a hard, washable surface, ideal for high-traffic areas like a fireplace. Remember to use a high-temperature paint specifically designed for the firebox interior.
- Best Chalk Paint for Easy Adhesion: For that desirable matte, distressed, or farmhouse look with minimal prep, Annie Sloan Chalk Paint or Rust-Oleum Chalked Paint are top choices. They adhere well to brick without extensive priming.
- Best Primer for Superior Bonding: A robust primer is non-negotiable for painted brick. Kilz Adhesion Primer or Zinsser Bulls Eye 1-2-3 are highly recommended for their exceptional bonding properties on porous and challenging surfaces like brick, ensuring your paint lasts.
Stone Veneer Options:
- Best Manufactured Stone for Realism: For incredibly realistic textures and reliable installation support, brands like Cultured Stone or Eldorado Stone are industry leaders. They offer a wide range of styles and colors that closely mimic natural stone.
- Budget-Friendly Faux Panels: If cost and ease of installation are priorities, consider pre-fabricated faux stone panels from brands like GenStone or StoneWorks. These interlocking panels can be a quicker, less labor-intensive solution for a stunning stone look.
- Natural Stone for Unique Character: For an authentic, truly unique aesthetic, sourcing natural stone from a local quarry can be unparalleled. However, be aware that natural stone is heavier and typically requires professional help for proper installation and structural considerations.
Essential Tools and Supplies:
Having the right tools makes all the difference in achieving a professional finish and streamlining your DIY process.
- Painting Tools: Invest in high-quality angled brushes (for cutting in and mortar lines), texture rollers (with a 3/4-inch nap to get into brick crevices), and an extension pole for reaching higher areas comfortably.
- Installation Tools (for Veneer/Stucco): A reliable level is crucial for straight lines. A drill with masonry bits will be needed for any wall anchors. A circular saw with a diamond blade is essential for cutting stone veneer accurately. Various trowels (notched for adhesive, finishing for stucco) are also necessary.
- Safety Equipment: Always prioritize safety. Drop cloths and painter’s tape protect your surroundings. Safety glasses, dust masks (especially for cleaning and cutting), and sturdy work gloves are indispensable for personal protection.
Styling Your New Fireplace: Creating a Cohesive Focal Point
A renovated fireplace deserves thoughtful styling to truly shine. By carefully considering décor, furniture placement, and lighting, you can transform your impressive new fireplace into the ultimate focal point of your room, creating a cohesive and inviting atmosphere that reflects your personal style.
- Mantel Styling: Embrace the “rule of threes” or odd numbers for a balanced yet dynamic display. Feature a large anchor piece, such as a striking mirror or captivating artwork, at the center. Flank it with medium-sized objects like elegant vases, decorative books, or sculptural pieces. Complete the arrangement with small accents like candles, unique curios, or small plants. Remember to leave some negative space to prevent clutter, and consider swapping out seasonal pieces to keep the look fresh.
- Furniture Arrangement: Position your main seating, like a sofa or armchairs, approximately 6-8 feet from the fireplace. Angle furniture towards the fireplace to encourage conversation and provide a cozy view. Ensure the size of your furniture is proportionate to your fireplace – a grand fireplace might accommodate larger, more substantial seating. Add a coffee table or ottoman within easy reach, and always maintain clear sightlines to the fireplace opening.
- Lighting: Layer your lighting to enhance the fireplace’s ambiance. Incorporate ambient lighting with table lamps on nearby side tables or stylish wall sconces on either side of the fireplace. Consider installing dimmers for adjustable light levels – softer lighting when the fireplace is lit creates a warm glow, while brighter settings are perfect for other tasks. A small spotlight on mantel art can also add drama.
- Accessories: Choose accessories that complement your fireplace’s newly established style. For painted brick, consider woven textures, natural wood, or ceramic elements to enhance a farmhouse or rustic vibe. For a stone veneer fireplace, metallic accents (like iron or brass), leather, or sleek glass objects can create a more refined, industrial, or contemporary look. Add throw pillows and cozy blankets to nearby seating to amplify comfort and texture.
- Visual Balance: Achieve overall room harmony by balancing the visual weight of your fireplace. If your fireplace is a strong focal point, consider placing artwork or a gallery wall on an opposite or adjacent wall to distribute visual interest. Soften architectural edges around the fireplace with tall potted plants or flowing drapery. Repeat accent colors found in your fireplace materials (e.g., the warm tones of wood, the cool hues of stone) throughout the room’s decor for a cohesive and polished design.
Common Mistakes to Avoid in Your Fireplace Makeover
While a DIY fireplace makeover is rewarding, certain critical mistakes can compromise safety, durability, and the overall quality of your final results. Being aware of these pitfalls beforehand will save you time, money, and frustration, ensuring your renovated fireplace looks great and lasts for years to come.
- Insufficient Surface Preparation: This is perhaps the most common and detrimental mistake. Failing to thoroughly clean the brick (removing all soot, dirt, and grease) or skipping the primer step (especially for painting) will lead to poor adhesion. This results in peeling paint, uneven finishes, or even mold growth behind veneers. Always ensure the brick is impeccably clean and completely dry before applying any new materials.
- Using the Wrong Type of Paint: Regular latex paint is not suitable for the interior of the firebox or areas directly exposed to high heat. Using it creates serious safety hazards, as it can blister, peel, emit fumes, and even become flammable. Always use specific high-temperature paint designed for fireplace interiors, often labeled “heat-resistant” or “fireplace paint,” for the firebox and the immediate surrounding areas.
- Taking Safety Shortcuts: Working on a fireplace requires adherence to safety protocols. Never begin work within 12-24 hours after the fireplace has been used, as surfaces can retain heat. Ensure adequate ventilation when cleaning with strong chemicals or painting, and always wear appropriate personal protective equipment (safety glasses, gloves, dust masks) to protect yourself from dust, fumes, and chemicals.
- Rushing the Process: Impatience can ruin a makeover. Each step, from cleaning to priming to painting or applying veneer, requires specific drying and curing times. Ignoring these guidelines can lead to adhesion issues, cracking, or an uneven finish. Allow materials to cure completely, sometimes several days or even weeks for mortar or paint, before using the fireplace again or placing heavy items on a new mantel.
- Skipping Test Patches: Colors can appear significantly different on porous brick surfaces compared to a small swatch. Always test your chosen paint colors or stain shades on a small, inconspicuous area of the brick first. Observe it under different lighting conditions and allow it to dry completely before committing to the entire fireplace. This prevents disappointment and the need for costly rework.
By taking the time for proper preparation, adhering to safety measures, and following recommended product guidelines, you can ensure your fireplace makeover is not only beautiful but also durable and safe, bringing enjoyment for many years.
Conclusion: Your Dream Fireplace Awaits!
I’ve personally witnessed how a brick fireplace makeover can utterly transform a room, often without requiring a substantial financial investment. Whether you opt for the simplicity of paint, the sophisticated texture of stone veneer, or a combination of updates, you have the power to create an amazing focal point in your home, often in just a single weekend.
Imagine your newly renovated fireplace becoming the cozy, inviting heart of your home – a place for gathering, relaxation, and showcasing your unique style. With the detailed guides and insider tips I’ve shared, you are now fully equipped and ready to tackle this exciting DIY project with confidence and creativity.
Remember the key takeaways: proper preparation, including thorough cleaning and necessary repairs, truly makes all the difference. Choose high-quality materials that align with your vision and budget, and most importantly, take your time with each step of the process. Patience ensures precision and longevity, leading to results you’ll be proud of for years to come.
Ready to ignite your home’s potential? Check out other blogs for fresh home improvement ideas and inspiration. Don’t wait – start planning your brick fireplace makeover today and turn that outdated eyesore into a stunning centerpiece!
