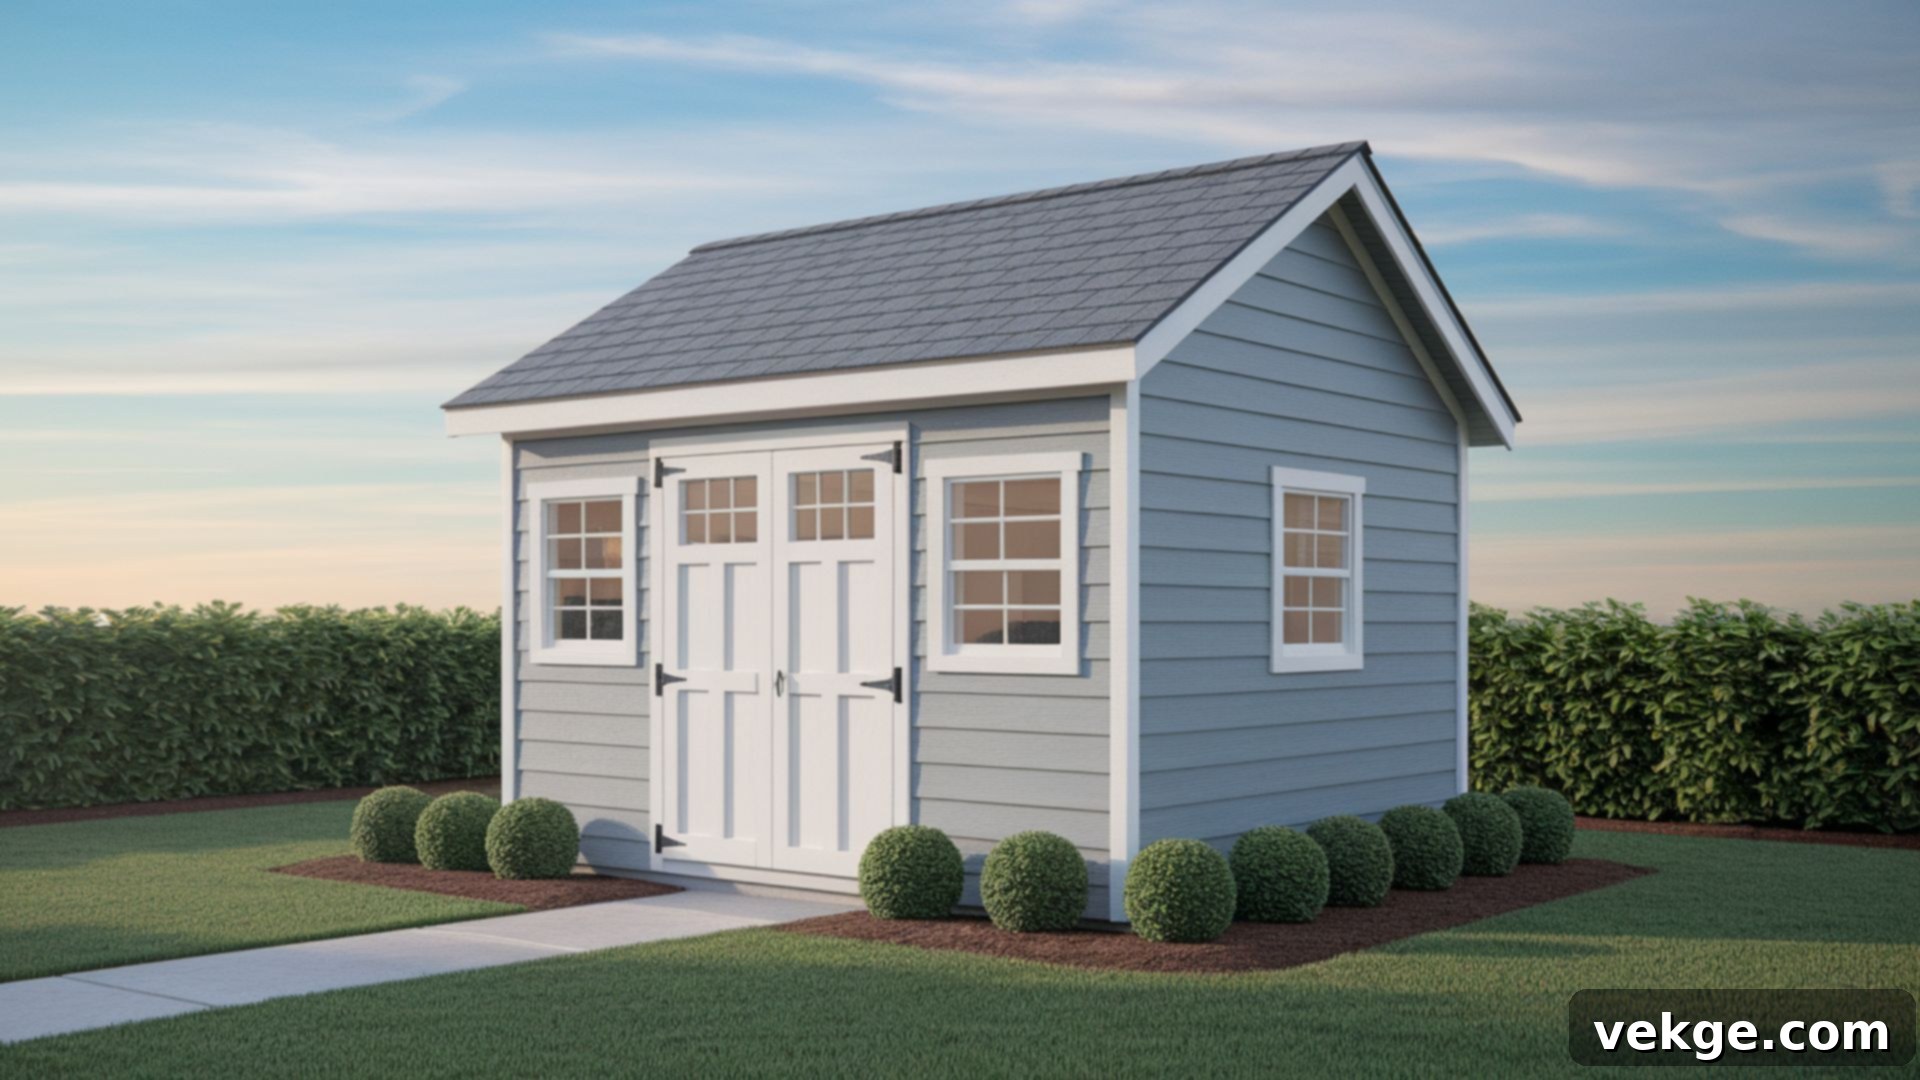
Build Your Dream 10×12 Shed: The Ultimate DIY Guide & Plans for Perfect Outdoor Storage
Are you tired of cluttered garages, overflowing basements, or constantly searching for your garden tools and seasonal decorations? It’s time to reclaim your space and transform your backyard with a functional and attractive storage solution. This comprehensive guide provides everything you need to build the perfect 10×12 shed, offering a compact yet remarkably roomy space that will solve your storage woes for good.
Whether you’re a first-time DIY enthusiast looking for a rewarding project or an experienced builder seeking an efficient solution for extra storage, we’ve got you covered. Our detailed plans are designed to guide you every step of the way, ensuring a smooth and successful build without unnecessary headaches. You don’t need to be a master carpenter to tackle this project; with basic tools and our clear, easy-to-follow instructions, you’ll construct a sturdy, great-looking shed that will not only impress your neighbors but also provide invaluable utility for years to come.
This guide includes meticulously crafted blueprints, complete materials lists, detailed step-by-step building instructions, and realistic cost breakdowns. We’ve compiled all the essential information to help you plan, build, and customize your ideal 10×12 shed, making efficient outdoor storage an achievable reality.
Why a 10×12 Shed is the Perfect Size for Your Needs
Choosing the right size for your outdoor shed is crucial, and a 10×12 footprint often hits the sweet spot for many homeowners. Offering a generous 120 square feet of interior space, a 10×12 shed is incredibly versatile, accommodating a wide range of storage and workspace needs without overwhelming your yard.
This ideal size provides ample room to store essential items like lawnmowers, garden tractors, wheelbarrows, gardening tools, and even bulkier holiday decorations. You’ll find enough space to maneuver comfortably inside, making it easy to access your belongings without feeling cramped. Beyond mere storage, a 10×12 shed excels as a dedicated:
- Workshop: Perfect for woodworking, crafts, or various DIY projects, offering enough space for a workbench, power tools, and material storage.
- Home Gym: Accommodate basic exercise equipment such as a treadmill, stationary bike, or weight bench, creating a private workout area.
- Hobby Space: Design a quiet retreat for painting, model building, pottery, or any passion that requires its own dedicated zone.
- Garden Hub: Organize all your planting supplies, potting benches, and seasonal equipment, keeping them protected and ready for use.
Furthermore, the 10×12 dimension is typically well-suited for most residential lots, appearing proportionate and integrated into the landscape rather than an imposing structure. In many areas, structures under 120 square feet may also fall below the threshold requiring a building permit, potentially simplifying your project. However, it is always crucial to verify specific building codes and permit requirements with your local municipality before starting any construction.
Exploring 10×12 Shed Plans: Gable, Lean-To, and Barn Styles
To cater to different aesthetic preferences, yard configurations, and building skill levels, 10×12 sheds come in various designs. Each plan is meticulously crafted with complete materials lists, detailed drawings, and step-by-step instructions to ensure your building project is a resounding success. Let’s explore three popular 10×12 shed designs:
Gable Roof Shed Plan (with Comprehensive Materials List)
The gable roof shed is a timeless classic, recognized by its characteristic pitched roof that slopes downwards from a central ridge. This design offers more vertical space inside, which is ideal for overhead storage solutions or enhancing airflow and ventilation.
- Key Features: Features a traditional, appealing look that blends seamlessly with most home architectures. The pitched roof design ensures excellent water runoff, protecting your shed from rain and snow accumulation. The increased vertical space makes it perfect for installing loft storage, adding overhead shelves, or incorporating effective ventilation systems.
- Detailed Schematics: Our plans include comprehensive front, side, and top views, complete with clearly labeled framing elements and precise dimensions. This ensures accuracy and ease during construction.
- Cost Estimate: Building a gable roof shed typically ranges from $2,000 to $3,000 USD. This estimate can vary based on your local material prices, specific finishes, and whether you opt for budget-friendly or premium components.
Lean-To Shed Plan
Designed for efficiency and integration, the lean-to shed is characterized by a single-sloping roof that typically “leans” against an existing structure, such as a house wall or a sturdy fence. This space-saving design is an excellent choice for narrow yards or locations with limited clearance.
- Best For: Ideal for side yards, tight spots, or when you wish to integrate the shed inconspicuously with another building. Its compact footprint makes it a smart choice where traditional freestanding sheds might be too bulky.
- Beginner-Friendly: With its simpler angles and more straightforward layout, the lean-to shed is often considered the most accessible option for first-time builders. Fewer complex cuts and structural components make the construction process less daunting.
- Space Saver: This design is perfect when you need effective storage without significantly encroaching on your yard space or obstructing views. It provides maximum utility with minimal visual impact.
Barn-Style Shed Plan (with Excellent Loft Potential)
For those seeking both charm and significant storage capacity, the barn-style shed, featuring a distinctive gambrel roof, is an outstanding choice. This iconic design instantly adds a touch of rustic appeal to your property while providing invaluable extra space.
- Best For: The unique dual-slope roof design inherently provides significantly more headroom and outstanding potential for an optional loft area. This makes it ideal for storing tall items, ladders, long garden tools, or creating an expansive upper-level storage solution.
- Design Perks: The gambrel roof achieves impressive interior height without requiring a larger foundation footprint, maximizing usable space within the existing 10×12 dimensions. Its classic aesthetic is also a major draw for many homeowners.
- Materials Included: Our plans for the barn-style shed typically include detailed specifications for robust framing, precisely cut roof trusses, durable SmartFloor decking, and various vertical or horizontal siding options to customize its exterior appearance.
Comprehensive Material List for Your 10×12 Shed Build
Having all your materials organized and ready before you break ground is key to a smooth and efficient building process. This comprehensive material list covers everything required to construct a sturdy and resilient 10×12 shed, from its foundational elements to its final touches. Remember to cross-reference quantities with your chosen plan and local building codes, as regional requirements (like higher snow loads or wind resistance) may necessitate specific material grades or additional hardware.
| Category | Materials Needed |
|---|---|
| Lumber & Framing | Pressure-treated 2×6 or 2×8 lumber for floor joists (essential for moisture resistance), 2×4 or 2×6 lumber for wall studs, 2×8 roof joists (typically spaced 16″ on center), sturdy rim joists and support beams, and header boards for window and door openings. |
| Flooring | Durable SmartFloor decking panels (OSB or composite options are common) engineered for exterior use, offering superior moisture resistance and rigidity compared to standard plywood. |
| Walls & Siding | OSB (Oriented Strand Board) wall sheathing for structural integrity and a solid base, complemented by your choice of exterior siding panels (e.g., horizontal lap siding, vertical panels, or custom-matched options to your home). |
| Roofing | Roof felt paper (underlayment) for moisture barrier, roofing nails, your preferred roofing material (asphalt shingles or metal roofing panels), and fascia and soffit trim boards for a finished, weather-protected edge. |
| Doors & Windows | Function-specific doors, such as a set of double garden-style doors for wide access, and a black-frame window to introduce natural light and enhance aesthetics. |
| Fasteners & Hardware | Assorted wood screws (deck screws for outdoor applications), galvanized nails (to prevent rust), robust metal brackets and hurricane ties (if local codes or high winds require them), and durable door hinges and latches for security and functionality. |
| Essential Tools Needed | Circular saw, miter saw (for precise cuts), nail gun or a sturdy hammer, a reliable level and tape measure, power drill with various bits, and a safe, stable ladder. |
Always double-check material quantities against your specific shed design and local building regulations. Certain structural reinforcements, like metal hurricane ties, might be mandatory depending on your area’s wind and snow load requirements. Planning ahead ensures you have everything on hand, minimizing interruptions during your build.
Step-By-Step Guide: Building Your 10×12 Shed from Foundation to Finish
Building a 10×12 shed is a rewarding project that can be broken down into five manageable phases. Each step is critical and builds upon the previous one, meaning careful execution in earlier stages will significantly simplify subsequent steps and ensure a professional-quality finish.
Step 1: Prepare the Foundation and Level the Floor Base
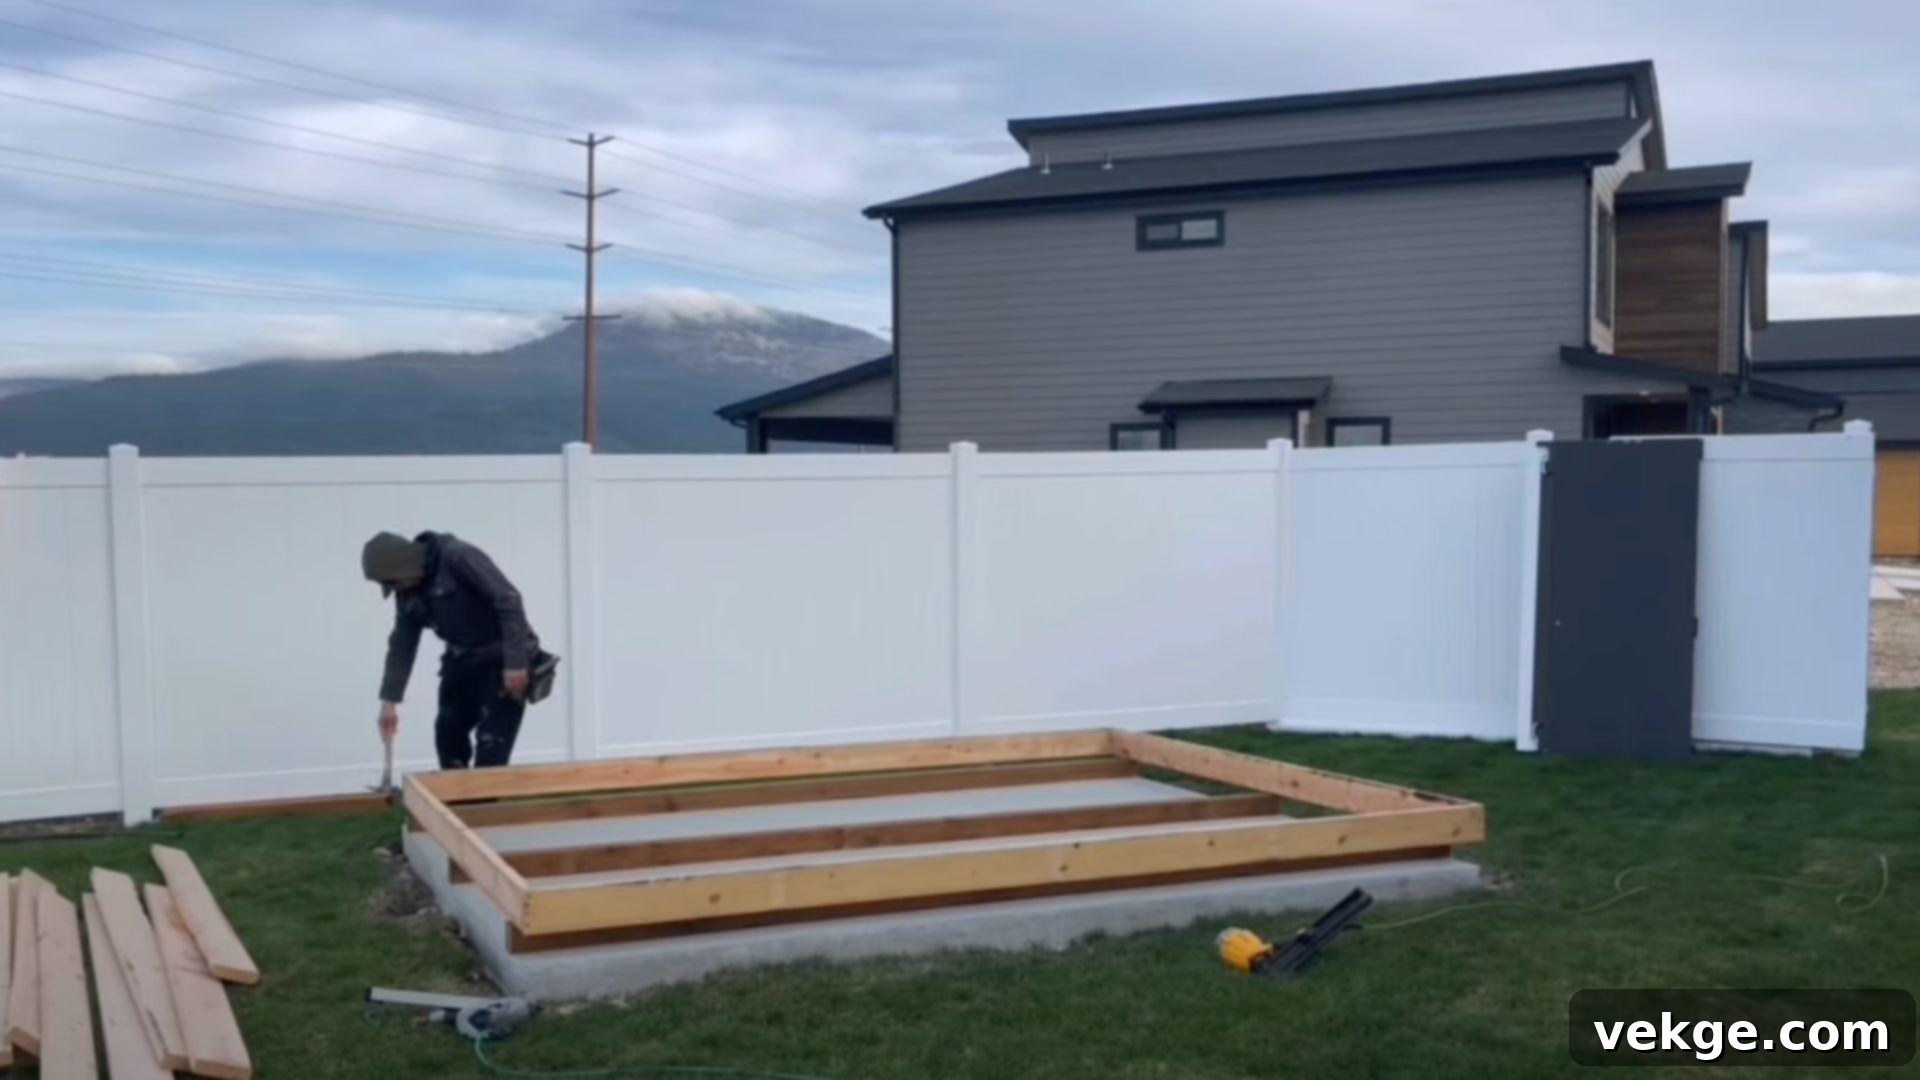
The success of your shed hinges on a flat and sturdy base. In many cases, a concrete slab provides an excellent, durable foundation. If your chosen slab has an uneven surface or a slight slope (as seen in some examples, like a 1.5-inch slope), it’s crucial to use shims or a self-leveling compound to create a perfectly level plane before you begin framing the floor.
Alternatively, a gravel pad foundation with pressure-treated skids can also serve as a cost-effective and robust base, especially if you’re on a tighter budget. Regardless of the foundation type, absolute levelness is non-negotiable for structural integrity and ease of building. Ensure proper drainage around your foundation to prevent water accumulation.
Bonus Tips for Foundation Prep:
- Verify Levelness: Always use a long spirit level or a laser level to meticulously check for any slopes or uneven spots across your entire foundation area.
- Shim Low Spots: Precisely shim any low areas under your floor joists to achieve perfect levelness. Using composite or pressure-treated shims will prevent rot and settlement.
- Anchor for Stability: If your area experiences strong winds, consider anchoring the corners of your foundation to the ground using ground anchors or concrete fasteners for added stability.
- Drainage Matters: Ensure the ground around your shed foundation slopes away from the structure to prevent water pooling, which can lead to moisture damage over time.
Step 2: Frame and Construct the Shed Floor
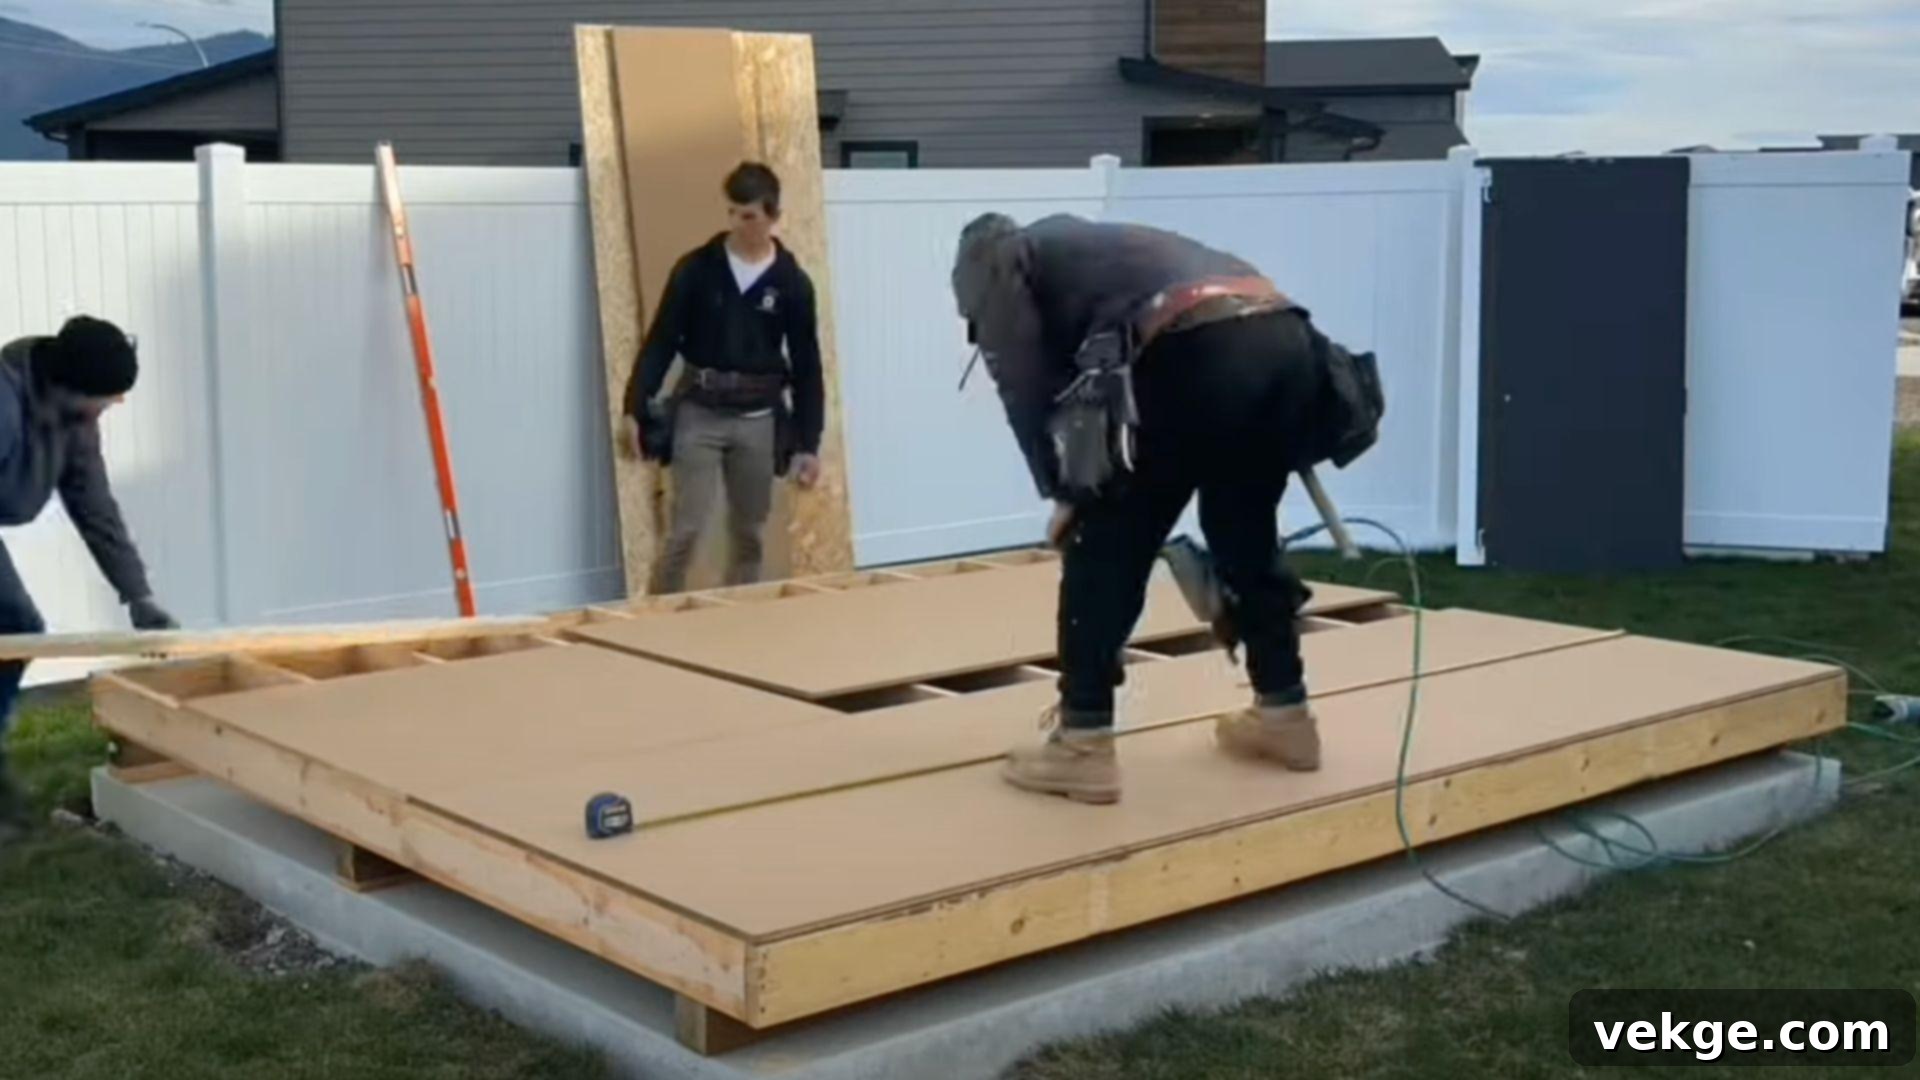
Once your foundation is perfectly level, the next critical step is to construct the floor frame and add the decking. Begin by assembling the perimeter of your floor frame using pressure-treated lumber, then install the interior floor joists. These joists provide the primary support for your shed’s floor and must be evenly spaced (typically 16 inches on center) to prevent sagging and ensure a strong, stable surface.
After the joists are securely in place, fasten the SmartFloor decking panels. SmartFloor products are an excellent choice as they are specifically engineered to be water-resistant and perform significantly better than basic plywood, offering enhanced durability against the elements. This completed floor becomes the solid base for all subsequent construction.
Bonus Tips for Floor Framing:
- Mark Joist Spacing: Before placing joists, clearly mark their spacing lines on the rim joists to ensure accurate and consistent installation.
- Choose Moisture-Resistant Decking: If you reside in a particularly wet or humid climate, always opt for highly moisture-resistant decking materials to prevent rot and extend your shed’s lifespan.
- Secure Decking Tightly: Use appropriate fasteners (screws or ring-shank nails) and ensure they are driven in tightly and evenly across the decking panels for a solid, squeak-free floor.
- Check for Square: Periodically check the squareness of your floor frame using the diagonal measurement method (diagonals should be equal) before fastening the decking.
Step 3: Frame and Erect the Walls
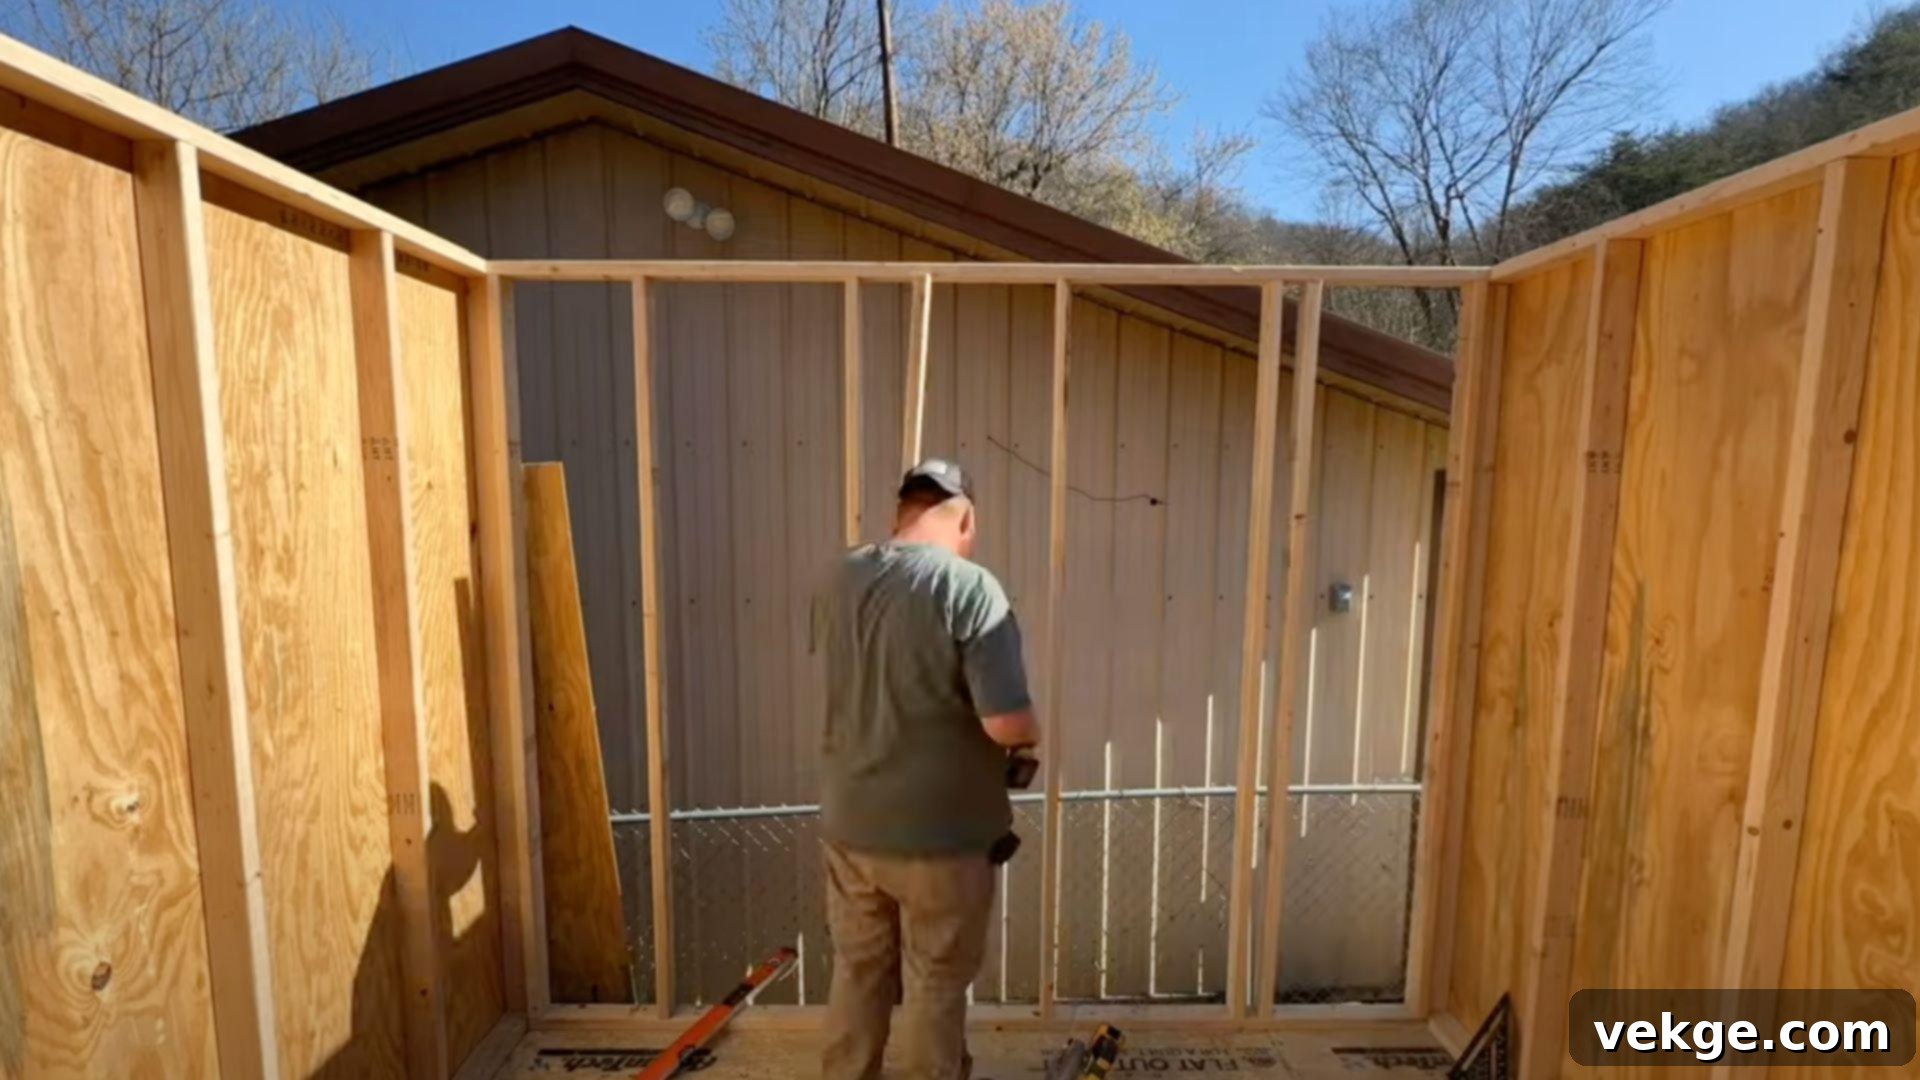
Pre-fabricating your shed walls on the ground is generally the safest and most efficient method. Lay out your bottom and top plates, then install the wall studs, ensuring they are correctly spaced (usually 16 or 24 inches on center) and plumb. During this framing process, carefully account for all window and door openings, installing headers and trimmers according to your plans.
Once each wall section is framed, gather sufficient help to safely lift them into an upright position on the completed floor. Securely fasten the bottom plates to the floor frame. After standing, the crew should immediately brace the walls temporarily to ensure they remain perfectly plumb and square until the roof structure is in place, preventing any shifting or bowing.
Bonus Tips for Wall Framing:
- Label Wall Sections: Before standing them, label each wall section (e.g., “Front,” “Back,” “Left,” “Right”) to avoid confusion during erection.
- Extra Hands are Essential: Raising wall sections, especially 10-foot long ones, is a multi-person job. Never attempt to lift heavy walls alone to prevent injury or damage.
- Temporary Bracing: Use diagonal braces from the top of the wall to the floor or stakes in the ground to keep walls stable and perfectly vertical until the roof framing provides permanent stability.
- Double-Check Openings: Confirm all door and window opening measurements before cutting headers and sills to ensure your chosen units will fit perfectly.
Step 4: Build the Roof Structure and Add Sheathing
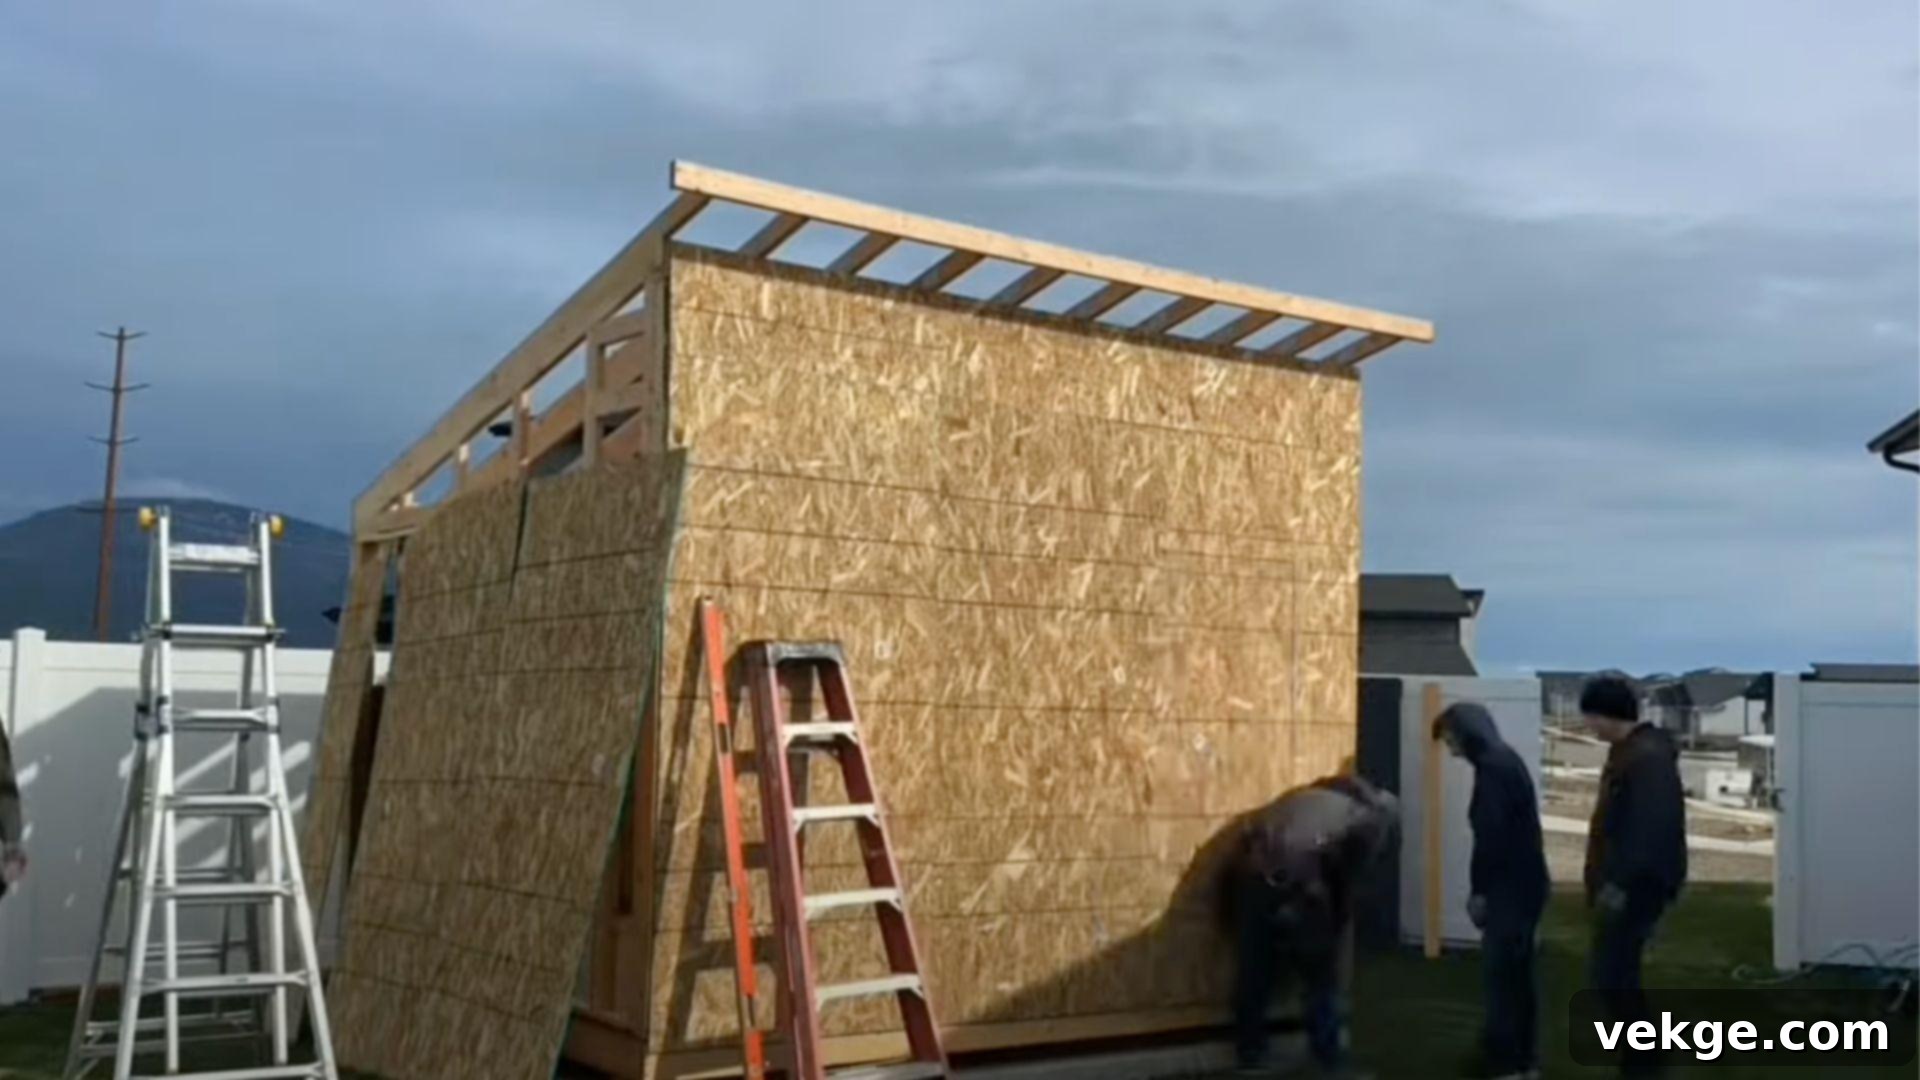
The roof provides vital protection for your shed and significantly contributes to its overall aesthetic. Depending on your chosen shed style (gable, lean-to, or barn-style), you will construct either rafters or trusses. In areas prone to heavy snow loads or strong winds, using thicker lumber like 2×8 rafters (spaced 16 inches apart) is recommended for enhanced structural integrity.
After the roof frame is securely built and attached to the wall plates, proceed with adding the OSB roof sheathing. Ensure a consistent overhang on all sides; this protects the walls from rain runoff and gives your shed a polished, finished look. Finally, cover the OSB with a layer of felt paper (roofing underlayment) to create a crucial moisture barrier before installing your final roofing material (shingles or metal panels).
Bonus Tips for Roof Construction:
- Tailor to Climate: Always use thicker joists or closer spacing in regions with significant snow accumulation or high wind zones to meet structural requirements.
- Pre-Plan Cuts: Precisely plan and mark all roof angles and cuts for rafters or trusses before making any cuts to ensure a perfect fit and minimize material waste.
- Moisture Protection: Promptly cover the OSB sheathing with felt paper or another suitable underlayment to protect it from moisture exposure during construction and before the final roofing is installed.
- Safety First: When working on the roof, always use appropriate safety gear, including a safety harness if working at significant heights, and ensure your ladder is stable.
Step 5: Finish With Doors, Siding, and Trim
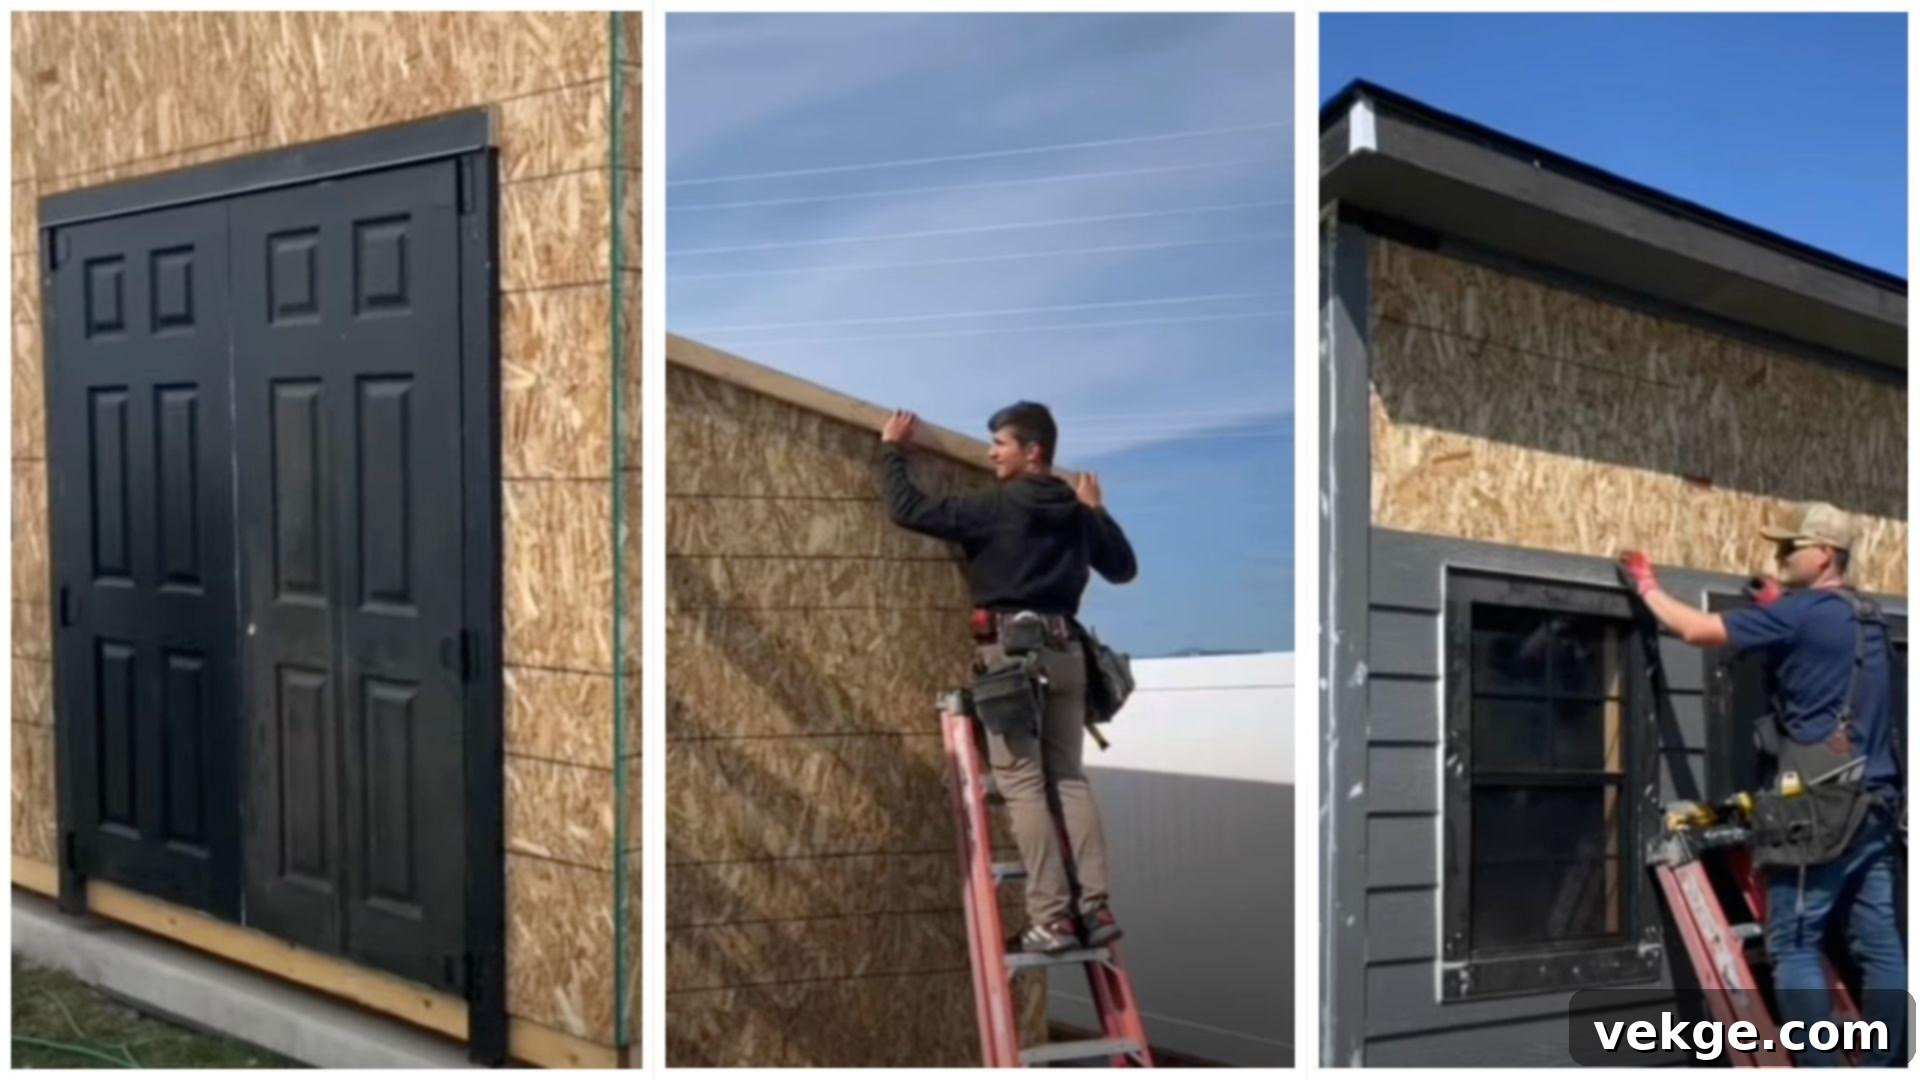
The final phase brings your shed to life with doors, exterior siding, and decorative trim. Install your chosen doors, such as practical double garden-style doors, ensuring they swing freely and latch securely. Next, apply your siding of choice – horizontal siding, vertical panels, or even custom options to match your home – starting from the bottom and working your way up.
Install windows (a black-framed window adds a modern touch and natural light), and then add corner trim, fascia boards, and soffit trim for a neat, weather-tight finish. Inside, if your walls are tall (up to 9 feet high in some designs), you’ll appreciate the ample vertical space for storage or shelving. Once completed, your shed will not only look fantastic but also serve as a highly functional space for gear storage, a workshop, or any other purpose you envision.
Bonus Tips for Finishing Touches:
- Siding Match: Consider matching the siding style and color to your existing house for a cohesive and aesthetically pleasing look.
- Corner Trim: Install corner trim boards to hide exposed cut edges of siding, provide a clean finish, and enhance weather protection.
- Paint or Seal: Always paint or apply a protective sealant to your siding, trim, and doors as soon as possible after installation to guard against weather damage, UV rays, and moisture.
- Weather Stripping: Don’t forget to install weather stripping around doors and windows to prevent drafts and moisture intrusion.
Watch How To Do It: 10×12 Shed Plans Video Tutorial
Sometimes, seeing is believing! To complement these detailed written instructions, we’ve included a video tutorial that visually walks you through key stages of building a 10×12 shed. This visual guide can clarify complex steps, demonstrate proper techniques, and provide invaluable insights that make your build even easier. Watch seasoned builders in action and gain confidence for your own project!
Watching the process unfold can reveal nuances and practical tips that greatly assist in your DIY journey. Make sure to pause, rewind, and re-watch sections as needed to fully grasp each step before proceeding.
Cost and Build Time Estimate for Your 10×12 Shed
Understanding the potential costs and time commitment is crucial for planning your 10×12 shed project effectively. The estimates below provide a general range, but remember that actual figures can fluctuate based on numerous factors, including your location, chosen materials, and personal building pace. This table helps you budget and allocate the necessary resources.
| Cost Level | Estimated Cost Range (USD) | Time Needed (DIY Builders) |
|---|---|---|
| Budget (DIY) | $2,000–$3,000 | 1 Weekend to 1 Week (highly dependent on experience and help) |
| Mid-Range (DIY with Premium Finishes / Some Professional Help) | $4,500–$5,000 | 1 Weekend to 1 Week (potentially faster with pre-fab elements) |
| Premium (Professionally Installed / High-End Materials) | $5,000–$7,800+ | Typically Installed by Professionals (times vary by contractor) |
When budgeting, consider not just the raw materials but also potential costs for foundation preparation (e.g., concrete delivery), tool rentals (if you don’t own everything), and any aesthetic upgrades like enhanced lighting or custom shelving. Choosing the option that aligns with your skills, schedule, and financial plan is key to a stress-free build.
NOTE: The costs and build times listed here are merely estimates. They are subject to significant variation based on local market prices for materials and labor, prevailing weather conditions during construction, and your individual skill level and efficiency as a builder. Always get local quotes for materials and verify specific labor costs if hiring professionals.
10×12 Shed Interior Layout Ideas: Maximize Your Space
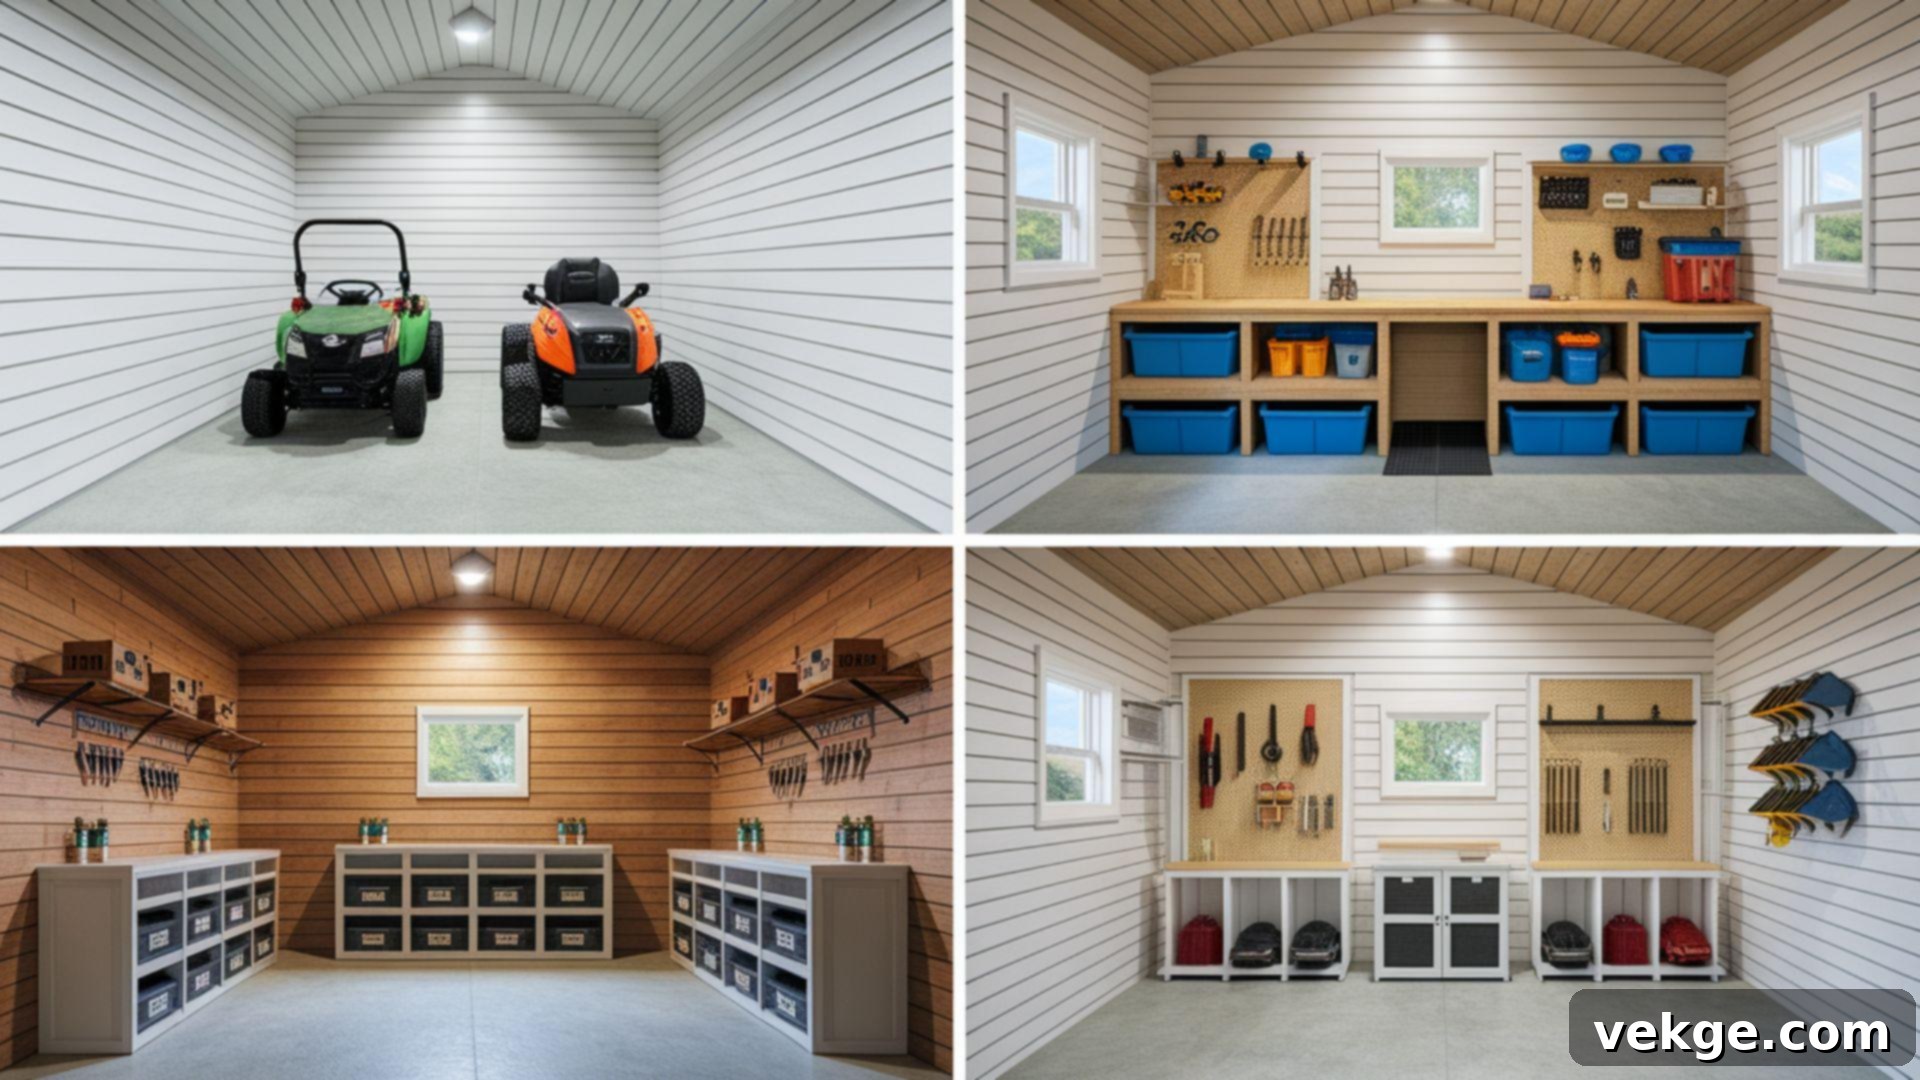
The true utility of your 10×12 shed comes from an intelligently designed interior layout. How you arrange the inside should be a direct reflection of its primary purpose. Smart planning will help you make the absolute most of your 120 square feet, transforming it into a highly efficient space.
- Open Storage Layout: This minimalist approach keeps the entire floor clear, making it perfect for storing large equipment such as riding lawnmowers, ATVs, snowblowers, or oversized seasonal items like patio furniture. Consider installing high shelves around the perimeter for smaller items while keeping the central floor space open.
- Dedicated Workshop Setup: Designate one entire wall for a sturdy workbench, complete with a durable countertop. Above the workbench, install shelves, pegboards, or slatwall systems for easy access to hand tools, power tools, and project supplies. This layout provides a focused area for repairs, crafts, or any hands-on project.
- Split-Use Design for Versatility: For maximum flexibility, divide the shed space into two distinct zones. One half can be dedicated to general storage with shelving and cabinets, while the other half serves as a functional workspace. A movable workbench can further enhance this versatility, allowing you to reconfigure the space as needed.
- Vertical Storage System Optimization: Regardless of your primary layout, integrating vertical storage is crucial. Utilize wall-mounted shelving units, heavy-duty pegboards, overhead racks, and ceiling-hung bike hooks to store smaller items, garden tools, and sporting equipment. This strategy frees up precious floor space, making your shed feel larger and more organized.
Consider your primary activities and future needs before construction begins, as this allows you to plan for optimal placement of electrical outlets, task lighting, and any plumbing requirements. While layouts can always be modified later, addressing these structural elements upfront is much easier and more cost-effective than retrofitting them.
Essential Tips for a Successful 10×12 Shed Build
Embarking on a shed construction project, even with detailed plans, can present challenges. By following these simple yet crucial tips, you can save significant time, prevent costly mistakes, and ensure your 10×12 shed build is a smooth and rewarding experience. These fundamental practices differentiate successful DIY builders from those who encounter frustration and potential setbacks.
- Constant Verification with Tools: Always use a reliable framing square and a long spirit level. Check for squareness and plumb constantly throughout every stage of construction, from the foundation to the roof. A small error early on can compound into major problems later.
- Label All Lumber: Before making cuts, label each piece of lumber with pencil marks indicating its purpose (e.g., “Front Wall Stud,” “Door Header,” “Roof Rafter”). This simple habit prevents confusion, especially when dealing with similar-sized boards or when resuming work after a break.
- Double-Check Openings: Before making any cuts for window and door openings, meticulously double-check your measurements against the actual dimensions of your purchased windows and doors. Wasting expensive lumber due to a miscalculation can be easily avoided with this careful step.
- Document Your Progress: Take clear photographs of your progress at each significant step of the build. These visual records can be invaluable later if you need to recall how certain components fit together, troubleshoot an issue, or even for insurance purposes.
- Read Plans Thoroughly: Before starting any step, take the time to read the entire section of the plans for that step. Understanding the full sequence of actions will help you anticipate challenges and prepare accordingly.
- Safety First: Always wear appropriate personal protective equipment (PPE), including safety glasses, work gloves, hearing protection, and sturdy footwear. Be mindful of power tool safety and ensure a clear, safe workspace.
- Don’t Rush: Resist the urge to rush. Taking your time, working methodically, and confirming each step before moving to the next will result in a higher quality, more durable shed.
- Seek Help When Needed: Some tasks, like raising walls or installing heavy roof components, are best done with an extra set of hands. Don’t hesitate to ask a friend or family member for assistance when safety or efficiency calls for it.
These habits might seem like extra work initially, but they are proven techniques used by professional builders to accelerate the construction process in the long run by preventing errors. Investing time in prevention is always more efficient than fixing mistakes after the fact.
Wrapping It Up: Your Journey to a Perfect 10×12 Shed
Congratulations! With these comprehensive 10×12 shed plans, we’ve walked you through every essential aspect of building your very own outdoor storage solution. From selecting the ideal size and understanding various design options to preparing your foundation, framing the structure, and adding the finishing touches, you now possess a wealth of knowledge.
You have access to detailed blueprints, a complete materials list, a clear step-by-step building guide, versatile design options, and valuable money-saving tips to ensure this project is a resounding success. Don’t let the scope of building a shed intimidate you; it is an entirely achievable endeavor with basic tools, a bit of dedication, and your free time. Countless DIYers have successfully constructed amazing, durable sheds using these very same techniques, transforming their backyards and simplifying their lives.
Your days of disorganized tools and overflowing storage are about to become ancient history. More importantly, you’ll gain the immense satisfaction and pride of building something incredible and highly functional with your own hands. So, grab those plans, gather your materials, and start building your dream 10×12 shed this weekend! Your perfectly organized outdoor space awaits.
