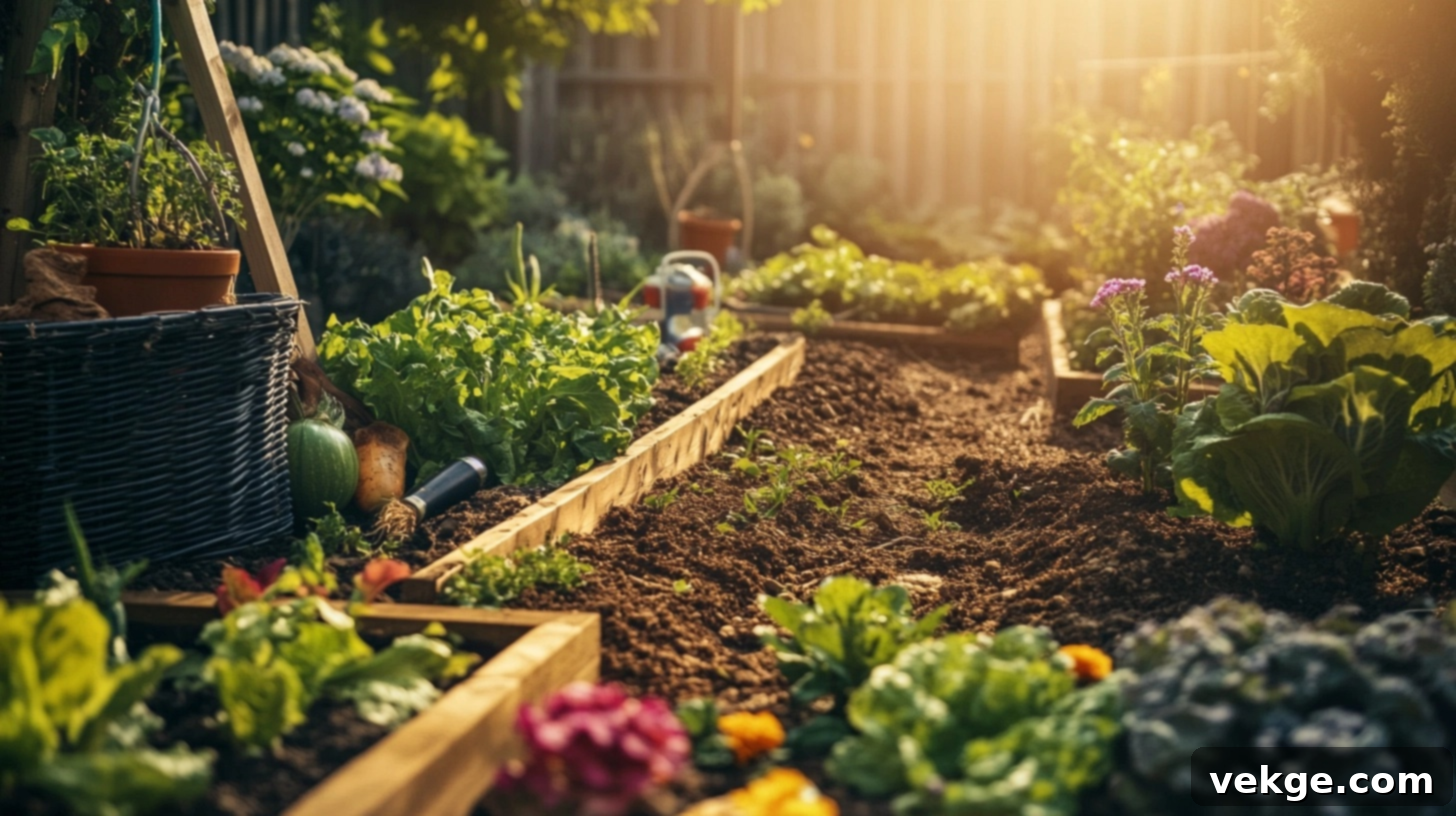
Mastering Your DIY Vegetable Garden: A Complete Guide to Growing Food at Home
Embarking on the journey of growing your own food at home fundamentally transforms your relationship with what lands on your plate. Every single bite becomes a direct connection to the effort of your own hands, fostering a profound sense of accomplishment and genuine joy from eating vegetables you’ve nurtured yourself. Beyond the sheer satisfaction, establishing a home vegetable garden offers a myriad of practical benefits, from significant savings on grocery bills to ensuring the freshest, most nutrient-rich food for your family.
Beyond the table, engaging with your garden provides invaluable benefits for both your physical and mental well-being. It serves as a vital escape from the digital world, offering a tangible opportunity to reconnect with nature, engage in moderate physical activity, and find peace amidst growing greenery. Whether you possess a sprawling backyard ripe for extensive cultivation or just a small patio suitable for a few strategically placed pots, the dream of growing your own food is well within reach.
This comprehensive guide is meticulously designed to walk you through every essential step, from the initial planning and construction of your garden space to selecting the most suitable plants for your environment, and ultimately, mastering the art of keeping them healthy and productive. Are you ready to roll up your sleeves and get your hands delightfully dirty? Let’s cultivate something incredible together!
Why Cultivate a DIY Vegetable Garden? Unveiling the Benefits
The decision to grow your own vegetables at home is an investment that yields substantial returns, making every bit of effort incredibly worthwhile. The advantages extend far beyond just having fresh produce, impacting your finances, health, and overall lifestyle.
- Significant Cost Savings: One of the most compelling reasons to start a home garden is the potential to dramatically reduce your grocery expenses. This is particularly true during peak seasons when market prices for fresh produce can soar. With a modest initial outlay for seeds and basic supplies, you can produce an abundant harvest from even a small area, often yielding much more than you could purchase for the same cost at a store.
- Unmatched Freshness and Flavor: There’s simply no comparison between the vibrant taste of a vegetable picked at its peak ripeness from your own garden and store-bought alternatives. Homegrown produce retains its natural sugars and complex flavors, offering a culinary experience that is truly superior. Imagine tomatoes bursting with juicy sweetness or herbs intensely aromatic – a world away from items that have traveled thousands of miles.
- Superior Nutritional Value: Homegrown foods are generally more nutritious. When you harvest vegetables from your garden, you can consume them almost immediately, ensuring their vitamin and mineral content is at its absolute highest. Store-bought produce, conversely, loses a significant portion of its nutritional value the longer it sits in transit or on shelves. You also have full control over what goes into your soil, meaning no questionable pesticides or chemicals if you choose organic methods.
- Mental Well-being and Stress Relief: Many individuals discover that the act of gardening is profoundly calming and immensely satisfying. The simple, rhythmic tasks involved in tending to plants – from sowing seeds to watering and harvesting – provide a meditative escape. Witnessing the miraculous transformation of tiny seeds into nourishing food instills a deep sense of accomplishment, connection to nature, and profound joy. It’s a powerful antidote to modern-day stress.
- Physical Activity and Connection to Nature: Gardening offers a fantastic way to incorporate moderate physical activity into your routine. Digging, planting, weeding, and watering all contribute to a healthy, active lifestyle. Moreover, it encourages you to spend more quality time outdoors, basking in natural light and fresh air, which is crucial for overall health and mood regulation.
- An Engaging Family Project: For families, a home garden presents a wonderful, educational, and collaborative project. Children can learn about where food comes from, the life cycle of plants, and the responsibility of nurturing living things. It’s an excellent opportunity to teach patience, teamwork, and the rewards of hard work, creating lasting memories together.
Your Guide to a DIY Vegetable Garden: Step-by-Step Construction
Creating your own vegetable garden at home is a deeply rewarding endeavor that not only provides you with an abundant supply of fresh produce but also enhances your outdoor living space. Drawing inspiration from practical, hands-on approaches, this guide will walk you through building a sturdy and beautiful raised garden bed system, complete with a functional central area. By carefully following these detailed steps, you’ll establish a garden that is not only highly productive but also a serene and inviting haven where you’ll love to spend time.
Essential Materials and Tools Needed:
- Road Base: For creating a level, stable foundation and ensuring proper drainage.
- Weed Mat/Landscape Fabric: To effectively suppress weed growth within your garden space.
- Pavers: For constructing a clean, stable, and aesthetically pleasing central pathway or seating area.
- River Rocks: To create attractive borders, aid in drainage, and add a decorative touch.
- IBC Tanks (Food-Grade): Ideal for crafting deep, robust raised planting beds (ensure they are thoroughly cleaned and certified food-grade for safety). Alternatively, lumber like cedar or treated pine can be used for raised beds.
- Hardwood Fence Palings/Decking Boards: For cladding the exterior of your raised beds, enhancing their appearance and adding durability.
- Screws and Drill: Essential for assembling the cladding and any other structural components.
- Quality Garden Soil: A rich, well-draining mix specifically formulated for vegetable gardens.
- String Line and Level: For accurate measurement, leveling, and establishing proper slopes.
- Shovel, Rake, Wheelbarrow: For digging, spreading, and transporting materials.
- Compactor (Manual or Powered): For firmly packing down the road base.
- Safety Gear: Gloves, safety glasses, and sturdy footwear.
- Optional: Outdoor lighting for evening use, drip irrigation system for efficient watering.
Step 1: Meticulous Ground Preparation
Begin by carefully clearing the chosen area for your vegetable garden. Select a site that receives ample direct sunlight for at least 6-8 hours daily, ideally with some protection from strong winds or harsh elements. Thoroughly remove all existing debris, rocks, stubborn weeds, and any remaining vegetation. This initial clearing is crucial for a clean start. If your ground is uneven, utilize a string line and a level to accurately visualize and establish the slight slope you’ll need to maintain across the entire area, ensuring effective water runoff and preventing pooling around your garden beds.
Step 2: Laying the Solid Base Layer
Once cleared, uniformly spread the road base across the entire prepared area. This foundational layer is critical for leveling the ground while meticulously maintaining the slight slope established in Step 1 for optimal water drainage. Use your string line and level as precise guides to ensure the correct drainage angle is achieved consistently. The road base creates a robust, stable foundation that will prevent your pavers and garden beds from shifting or settling over time. After spreading, use a compactor – either a manual hand tamper or a powered plate compactor for larger areas – to firmly and evenly pack down the road base, creating a dense, unyielding surface.
Step 3: Installing an Effective Weed Barrier
Roll out a high-quality weed mat or landscape fabric across the entire compacted road base. This barrier is indispensable for preventing stubborn weeds from sprouting up through your garden space, significantly reducing future maintenance. Ensure you overlap the edges of the mat by at least 6-12 inches to guarantee complete coverage and eliminate gaps where weeds could emerge. The weed mat allows essential water to drain through to the subsoil while keeping the garden bed area weed-free and tidy. Secure the mat in place with landscape staples or by placing your pavers directly on top.
Step 4: Precision Paver Installation
Carefully place your chosen pavers on top of the laid weed mat. This step creates a clean, durable, and stable surface that will serve as your central pathway or relaxation area within the garden. Arrange the pavers in your desired pattern, paying close attention to leaving precisely measured spaces for the eventual placement of your planting beds. Take ample time during this stage to perfect the layout, as this paved area forms the aesthetic and functional cornerstone of your garden’s design and usability. Ensure the pavers are level and firmly set.
Step 5: Preparing Your Planting Containers/Beds
If you opt for IBC tanks, as often seen in DIY projects, it is absolutely crucial to clean them thoroughly. If they previously held anything other than water, ensure they are certified food-grade and scrupulously cleaned to remove any residues that could be harmful to your plants or to consumption. Carefully cut the tops off the tanks to create deep, spacious planting beds. These large containers offer excellent depth for robust root growth and provide the added advantage of being semi-portable, should you ever need to reconfigure your garden layout. Alternatively, construct raised beds from timber, ensuring adequate drainage holes are drilled in the base if using solid bottoms.
Step 6: Adding Decorative and Functional Cladding
Attach hardwood fence palings or decking boards to the exterior of your planting containers or raised beds. This cladding serves a dual purpose: it dramatically improves the aesthetic appeal of your beds, transforming utilitarian containers into attractive garden features, and it allows you to create a practical, picture frame-style top edge. This flat surface provides a convenient place to lean comfortably when tending to your plants, set down tools, or rest small pots while working, greatly enhancing the ergonomics and usability of your garden space. Ensure all screws used are exterior-grade and rust-resistant.
Step 7: Strategic Positioning of the Beds
Thoughtfully arrange your newly clad planting beds around the paved central area. Aim for a balanced and harmonious layout that not only looks appealing but also provides easy, unobstructed access to all sides of each bed for planting, weeding, and harvesting. Consider the height of your beds – taller beds significantly reduce the need for bending and kneeling, making gardening more comfortable and accessible for individuals of all ages and physical abilities. Ensure there’s ample space between beds to move around freely with tools and a wheelbarrow.
Step 8: Incorporating Thoughtful Finishing Touches
Place river rocks meticulously around the edges of your paved area. This creates a clean, natural border, defines the space, and further assists with drainage by preventing soil erosion onto the pavers. Consider integrating discreet outdoor lighting for enchanting evening access to your garden, extending its usability and aesthetic appeal. If there’s a nearby fence or wall, plan to utilize it as a sturdy trellis system for climbing plants like tomatoes, cucumbers, or beans, maximizing vertical growing space and adding visual interest. These finishing details elevate the garden from purely functional to a truly inviting and beautiful outdoor sanctuary.
Step 9: Filling Beds with Premium Soil
Once your beds are in place, fill them with a high-quality soil mix specifically formulated for vegetable gardens. Investing in good soil is paramount as it directly impacts the health and productivity of your plants. Research the specific needs of the vegetables you plan to grow and consider amending your soil with compost or other organic matter to boost fertility and drainage. In areas prone to drought or with high rainfall, you might want to explore the benefits of wicking beds (self-watering systems) which can dramatically improve water efficiency and plant health. The right soil mix provides your vegetables with the absolute best possible start.
Step 10: Cultivating a Relaxation Oasis
To truly complete your garden transformation, add a comfortable table and chairs to your central paved area. This simple addition elevates your vegetable garden from merely a productive space to a true outdoor living room – a serene place where you can relax, observe the growth, and savor being intimately surrounded by your burgeoning food supply. Having a dedicated seating area nearby significantly increases the likelihood of spending more time in your garden, making it much easier to notice when plants require attention, whether it’s watering, pruning, or harvesting. It transforms gardening into a lifestyle rather than just a chore.
Essential Maintenance Tips and Troubleshooting Common Garden Issues
Sustaining a healthy and productive vegetable garden requires consistent, thoughtful care. Implementing a regular maintenance routine is key to preventing problems and ensuring a bountiful harvest. Here are some simple yet effective maintenance tips, along with natural and gentle approaches to addressing common garden challenges without resorting to harsh chemicals.
Proactive Maintenance Strategies:
- Natural Pest Sprays: Employ homemade, natural deterrents for pests. Effective mixtures often include garlic, hot pepper, or neem oil diluted with water and a small amount of dish soap (as an emulsifier). Apply these sprays thoroughly to your plants every few days, especially to the undersides of leaves, to naturally deter a wide range of common garden pests without harming beneficial insects or the environment.
- Attracting Beneficial Predators: Encourage nature’s own pest control by creating an inviting habitat for helpful insects. Plant companion flowers and herbs like marigolds (which deter nematodes), dill, cilantro, and sunflowers. These plants attract natural predators such as ladybugs, lacewings, and praying mantises, all of which are voracious eaters of aphids, mites, and other destructive pests.
- Consistent Weeding Regimen: Regular weeding is crucial. Pull weeds by hand frequently, ideally when they are small and before they have a chance to set seed. This task is often easiest and most effective immediately after rain, when the soil is soft and pliable, allowing weed roots to be extracted with minimal effort. Consistent weeding prevents competition for nutrients and water, allowing your vegetables to thrive.
- Strategic Mulching: Apply a 2-3 inch layer of organic mulch (such as straw, wood chips, or shredded leaves) around the base of your plants. Mulch is a powerhouse for garden health: it significantly suppresses weed growth by blocking sunlight, helps the soil retain vital moisture, moderates soil temperature, and slowly decomposes, adding valuable organic matter to the soil over time.
- Proper Watering: Water deeply and consistently, especially during dry spells. Aim to water at the base of the plant to prevent fungal diseases on leaves. Drip irrigation or soaker hoses are excellent for efficient water delivery, minimizing waste and ensuring the roots receive adequate moisture.
- Crop Rotation: Rotate your crops annually if possible. This helps prevent the build-up of specific soil-borne diseases and pests, and it ensures different nutrient demands are placed on the soil each season, maintaining overall soil health.
Troubleshooting Common Garden Issues (Natural Solutions):
Even with diligent care, occasional problems can arise. Here’s how to diagnose and address a few common garden issues using eco-friendly methods:
- Yellow Leaves: Often indicate nutrient deficiencies (e.g., lack of nitrogen, iron) or improper watering practices (both underwatering and overwatering). First, check soil moisture. If dry, water deeply. If soggy, allow to dry out more between waterings. Consider a balanced organic fertilizer or a compost tea application for nutrient boost.
- Wilting Plants: Primarily caused by underwatering, overwatering, or root disease. Feel the soil moisture level. If dry, water immediately and thoroughly. If the soil is waterlogged, improve drainage. If neither, carefully inspect for signs of root rot or stem damage near the soil line.
- Holes in Leaves: Typically signals insect damage, most commonly from caterpillars, slugs, snails, or beetles. Inspect plants thoroughly, especially the undersides of leaves, in the early morning or evening. Handpick larger pests, use row covers for prevention, or apply natural insecticidal soaps or neem oil for persistent issues.
- Stunted Growth: Occurs when the soil lacks essential nutrients, pH is off, or plants are overcrowded. Conduct a soil test to determine nutrient levels and pH. Amend soil with organic compost, well-rotted manure, or a balanced organic fertilizer. Ensure proper spacing between plants to reduce competition.
- Cracked Fruits: (e.g., tomatoes, melons) Usually develops from inconsistent watering patterns, especially fluctuating between very dry and very wet periods during fruit development. Maintain a consistent watering schedule, providing deep and regular moisture, particularly as fruits mature. Mulching helps regulate soil moisture, reducing cracking.
Creative DIY Vegetable Garden Ideas: Upcycling for Success
Transforming everyday items and recycled materials into clever garden accessories and solutions is an excellent way to save money, minimize waste, and infuse your garden space with unique character and charm. These simple, budget-friendly projects often require minimal tools and expertise, making them accessible for any home gardener.
1. Innovative DIY Raised Beds from Recycled Materials
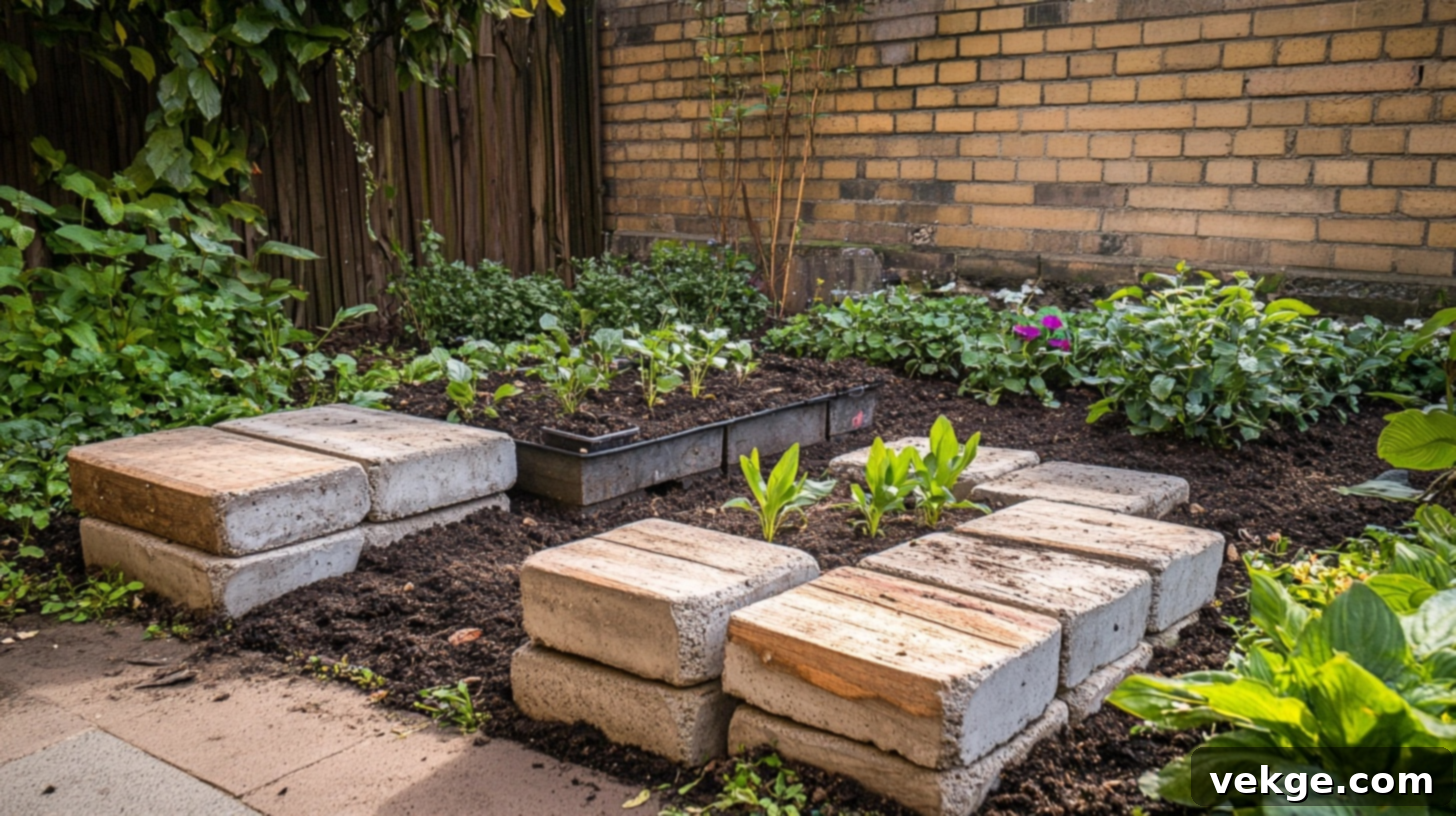
Embrace sustainability by constructing sturdy raised beds from discarded wooden pallets. Carefully disassemble the pallets, then reassemble the clean, untreated wood into rectangular or square box structures. Line the inside of these wooden beds with durable landscape fabric to prevent direct soil contact with any potentially treated wood and to enhance soil retention. For unique, eye-catching planters, drill ample drainage holes into old bathtubs, sinks, or large metal containers, transforming them into quirky and functional planting vessels. Concrete blocks, stacked creatively in a rectangular configuration, instantly create robust raised beds, offering bonus planting pockets within the block holes themselves. For a truly no-cost, rustic option, gather fallen logs or branches, arrange them in a rectangular or circular shape, and fill the natural enclosure with quality soil.
2. Smart Container Gardening Hacks for Every Space
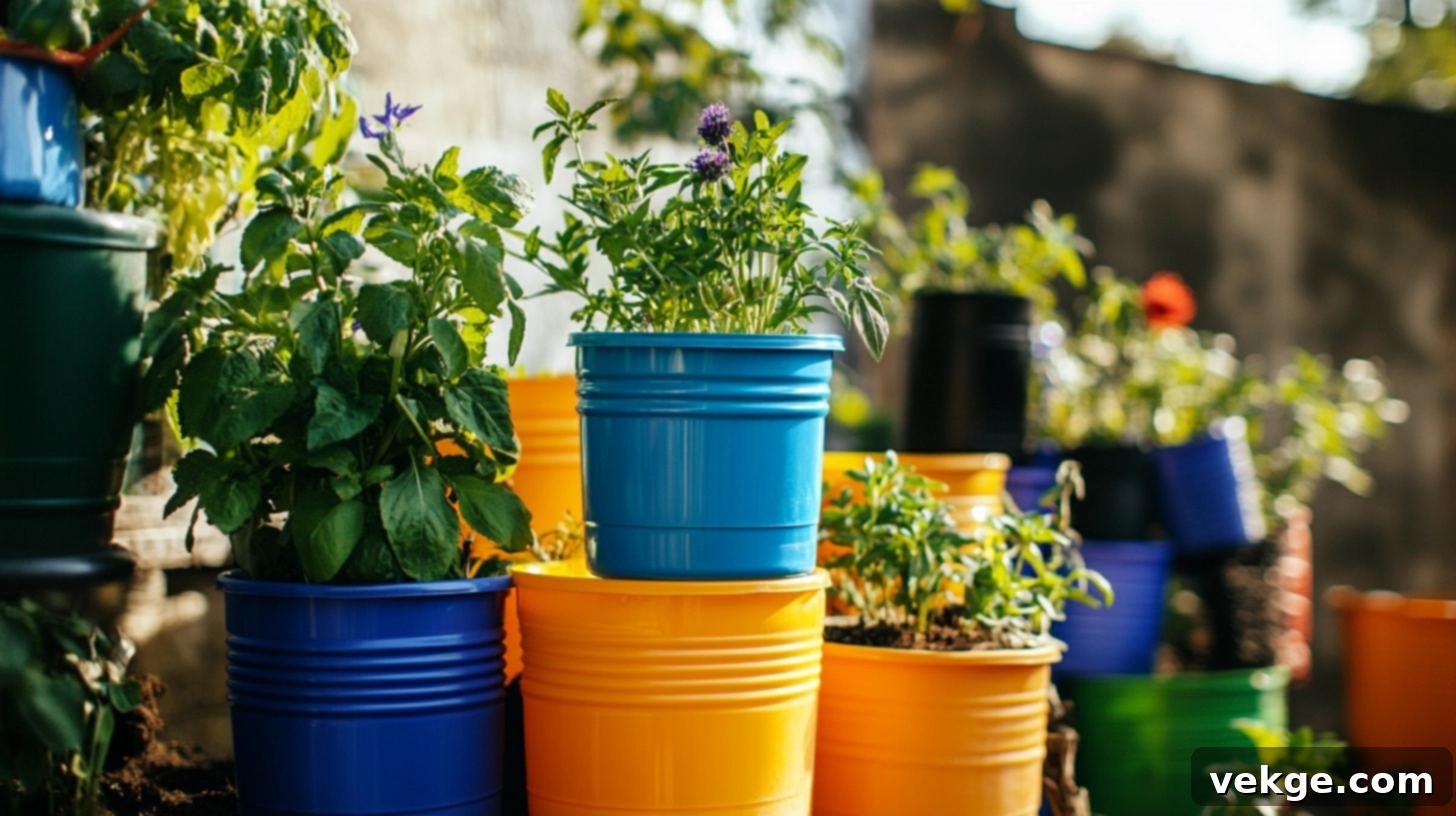
Unlock the potential of plastic milk jugs by converting them into ingenious self-watering planters. Simply cut off the top, poke several holes in the cap, invert it, and place it back inside the bottom half, which you’ll fill with water. This creates a wicking system for consistent moisture. Grow bountiful potato crops in old tires; as the potato plants grow taller, simply stack more tires on top and fill with soil, encouraging greater tuber development. Repurpose various plastic food containers, such as yogurt tubs or berry clam shells, into ideal seed-starting trays – just remember to add drainage holes. Coffee cans are perfect for cultivating small herb gardens on windowsills, adding fresh flavor to your kitchen. For an attractive and virtually free container garden, paint plastic buckets in vibrant colors to create a cohesive and cheerful display.
3. Composting: Your Source for Free, Rich Fertilizer
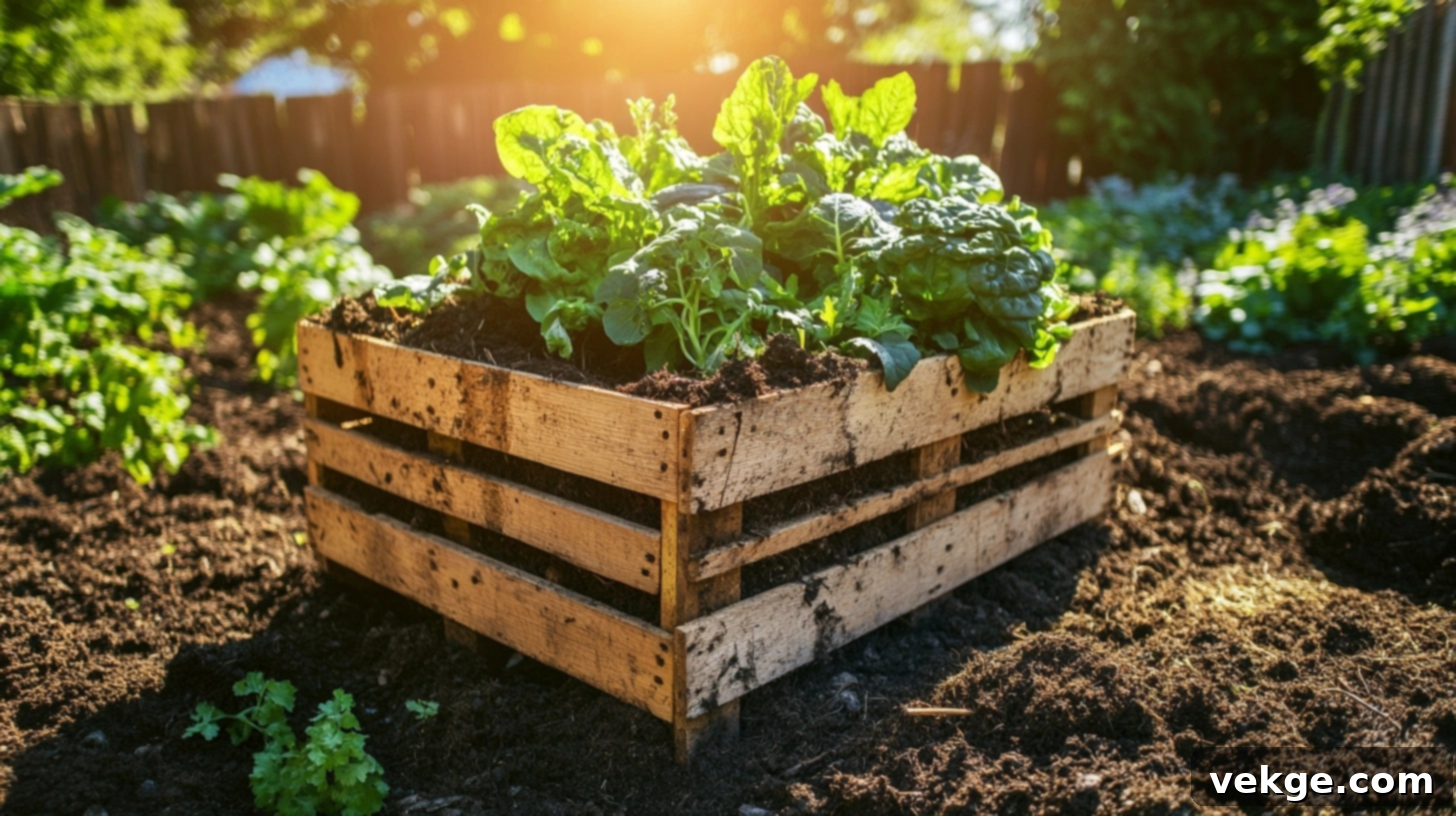
Harness the power of decomposition to create your own nutrient-rich soil amendments. Construct a straightforward compost bin by wiring together four wooden pallets at the corners – this design allows for easy assembly, access, and disassembly. For those desiring a more active approach, create a tumbling composter from an old plastic barrel securely mounted on a frame that permits easy rotation, speeding up the composting process. Apartment dwellers or those with limited space can opt for a worm bin (vermicomposting), easily made from stacked plastic containers with aeration holes and moist bedding material. Always save your kitchen scraps (fruit and vegetable peels, coffee grounds, eggshells) in a convenient countertop container before transferring them to your main compost pile. Accelerate decomposition by shredding larger materials and maintaining a balanced ratio of “greens” (nitrogen-rich like food scraps) and “browns” (carbon-rich like dried leaves, cardboard).
4. Maximizing Space with Vertical Gardening Solutions
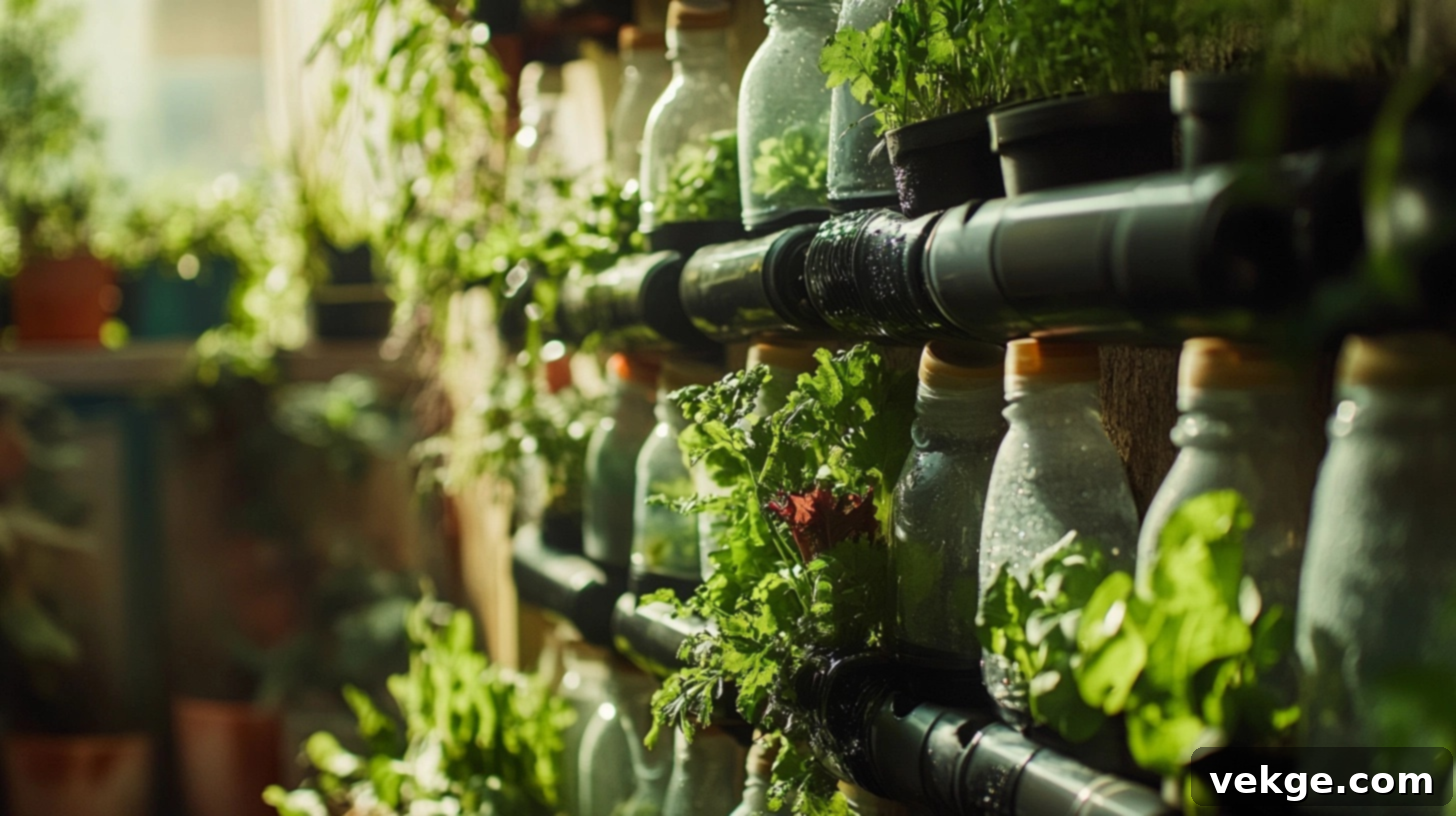
When horizontal space is limited, go vertical! Attach old rain gutters to fences or sunny walls at varying heights to engineer a tiered planting system, ideal for shallow-rooted crops such as lettuce, spinach, and various herbs. Repurpose fabric shoe organizers by hanging them on a sunny wall; fill each pocket with soil and small, compact plants. Create an impressive bottle tower garden by cutting strategic openings in large plastic bottles, stacking them, and running a central watering tube through the middle for efficient irrigation. Construct a rustic yet effective trellis from bamboo poles, fallen branches, or even old bed frames, tying them together with garden twine to support climbing vegetables like beans, peas, and mini pumpkins. Additionally, transform old wooden ladders into charming and functional plant stands, with each step providing a platform for different pots or planters.
5. Smart Garden Tool Organization and Storage
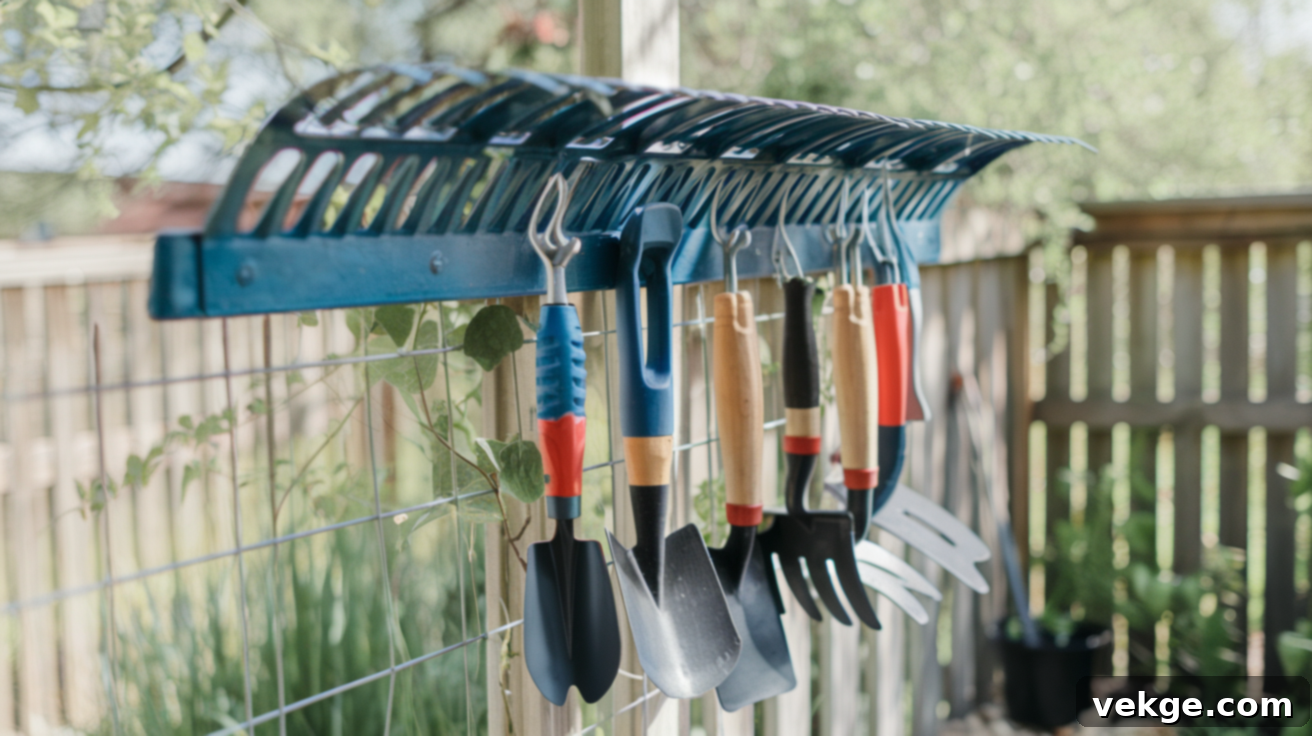
Keep your garden tools tidy, accessible, and protected with these innovative organization hacks. Convert an old mailbox into a weather-resistant garden tool station, mounting it conveniently near your garden for quick and easy access to hand tools like trowels, pruners, and gloves. Paint an old rake head in a bright color and mount it horizontally on a fence or shed wall; its tines are perfect for hanging small garden tools. For storing long-handled tools such as shovels, rakes, and hoes, cut PVC pipes into short sections and mount them horizontally on a wall, creating individual holders. On your potting bench or shed wall, repurpose kitchen utensil holders or old spice racks to neatly organize smaller garden essentials. As a practical and fun touch, paint the handles of your tools brightly to create custom, easy-to-spot handles, preventing loss and making them stand out amidst dense garden growth.
Conclusion: Embrace the Journey of Growing Your Own
Embarking on the adventure of starting your own vegetable garden doesn’t have to be an intimidating or overwhelmingly complex endeavor. The beauty of gardening lies in its simplicity and adaptability. You certainly don’t need to aspire to a grand-scale operation right from the outset – even a handful of thoughtfully placed pots on a sunny patio or balcony can provide you with a continuous supply of fresh, homegrown tomatoes, vibrant herbs, or crisp salad greens. The most pivotal step is simply to begin, to plant that first seed, and to embrace the continuous learning process that unfolds with each growing season.
Gardens possess a remarkable quality: they genuinely improve with each passing season. As you gain experience, you’ll intuitively discover what thrives best in your unique microclimate, understand your soil’s temperament, and refine your watering and feeding routines. Don’t be deterred by the inevitable challenges or small setbacks – making mistakes is an inherent and invaluable part of the gardening journey. Every unexpected outcome, every less-than-perfect harvest, serves as a powerful lesson, guiding you towards greater success and more bountiful yields in the future.
We are genuinely thrilled to witness the fruits of your labor and the beauty you cultivate! We encourage you to capture a moment of your thriving garden – whether it’s a flourishing raised bed, a creative container display, or your first ripe tomato – and share it with our community. Please take a photo of your garden and post it in the comments section below. Let us know what wonderful vegetables, fruits, or herbs you’re cultivating, and don’t hesitate to share any invaluable tips, ingenious hacks, or hard-won wisdom you’ve gathered along your green-thumbed journey. Happy gardening!
