Transform Your Walls: The Ultimate DIY Guide to Picture Frame Molding
Are your walls feeling a little… bland? I know the feeling. Not long ago, I looked at my plain, uninspired walls and longed for something more – a touch of elegance, a hint of bespoke design, but without the hefty price tag of a full renovation. That’s when I discovered the magic of picture frame molding, and let me tell you, it completely transformed my home. What started as a simple desire for change turned into an empowering DIY project that added character, depth, and a luxurious feel to every room I touched.
Picture frame molding isn’t a new trend; it’s a timeless design technique that’s experiencing a well-deserved resurgence. And for good reason! It’s an incredibly versatile and affordable way to elevate any space. The best part? You absolutely can do it yourself. My rooms went from forgettable to fabulous, and now, every time I walk in, I feel like I’m in a custom-designed home. The pride of knowing I achieved this transformation with my own hands is truly unmatched.
In this comprehensive guide, I’m going to share everything I learned on my journey, from the initial spark of inspiration to the satisfying final brushstroke. We’ll cover how to plan your design, choose the right materials, master the installation, and even explore creative ways to integrate picture frame molding into various interior styles. Ready to ditch the dull and embrace dynamic walls? Let’s embark on your picture frame molding expedition!
What is Picture Frame Molding and Why It’s a Game-Changer?
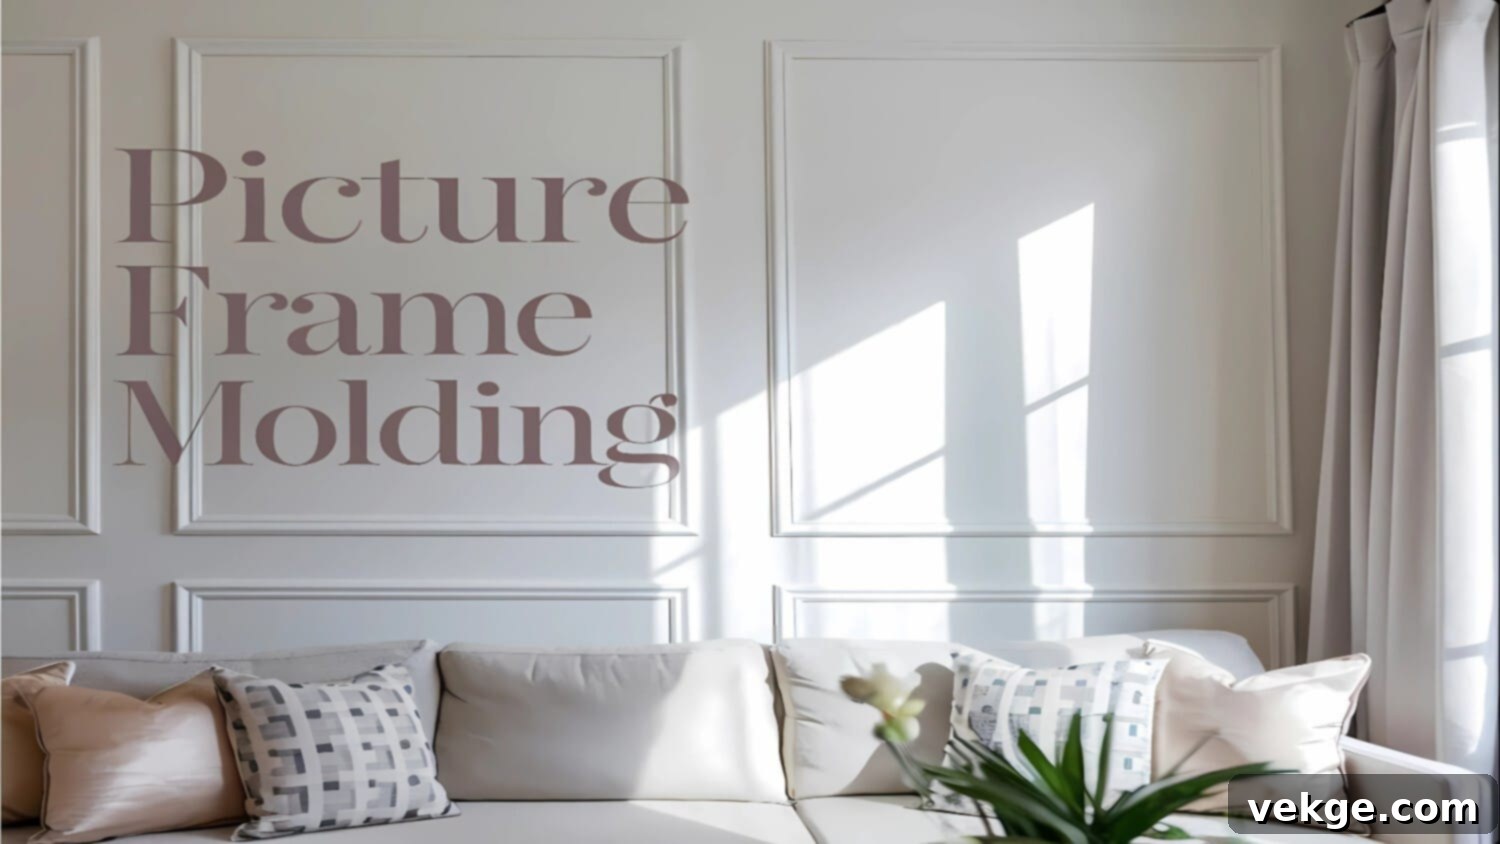
Picture frame molding, often referred to as panel molding, box paneling, or even a form of wainscoting, is a decorative trim that creates elegant, framed sections on your walls. Imagine taking the concept of a classic picture frame and applying it directly to your wall, often in a series of rectangles or squares. That’s precisely what picture frame molding achieves, adding a sophisticated architectural detail that instantly elevates a room’s aesthetic.
When I first learned about it, I was astonished by its simplicity and profound impact. It’s more than just trim; it’s an artful way to introduce texture, depth, and visual interest to otherwise flat surfaces. This subtle addition creates shadows and highlights, making your walls come alive and feel more substantial. It tricks the eye, making a room feel more expansive, formal, or cozy, depending on the style and placement you choose.
The beauty of picture frame molding lies in its incredible versatility. You can use it to cover entire rooms, creating a cohesive, custom-paneled look that evokes classic European interiors. Alternatively, you can opt for a more subtle approach, like I did, by adding it to a single accent wall to create a striking focal point. In my living room, the wall behind my couch now commands attention, turning a previously overlooked space into a captivating design element.
Beyond its aesthetic appeal, picture frame molding offers practical benefits too. It can protect walls from scuffs and scrapes, especially in high-traffic areas. More importantly, it’s a budget-friendly way to achieve a high-end look without the expense of bespoke cabinetry or complex wall treatments. This timeless design element works seamlessly with various decor styles, from traditional and transitional to modern minimalist, making it a truly adaptable choice for any homeowner looking to upgrade their space.
Exploring Different Types of Molding for Your Project
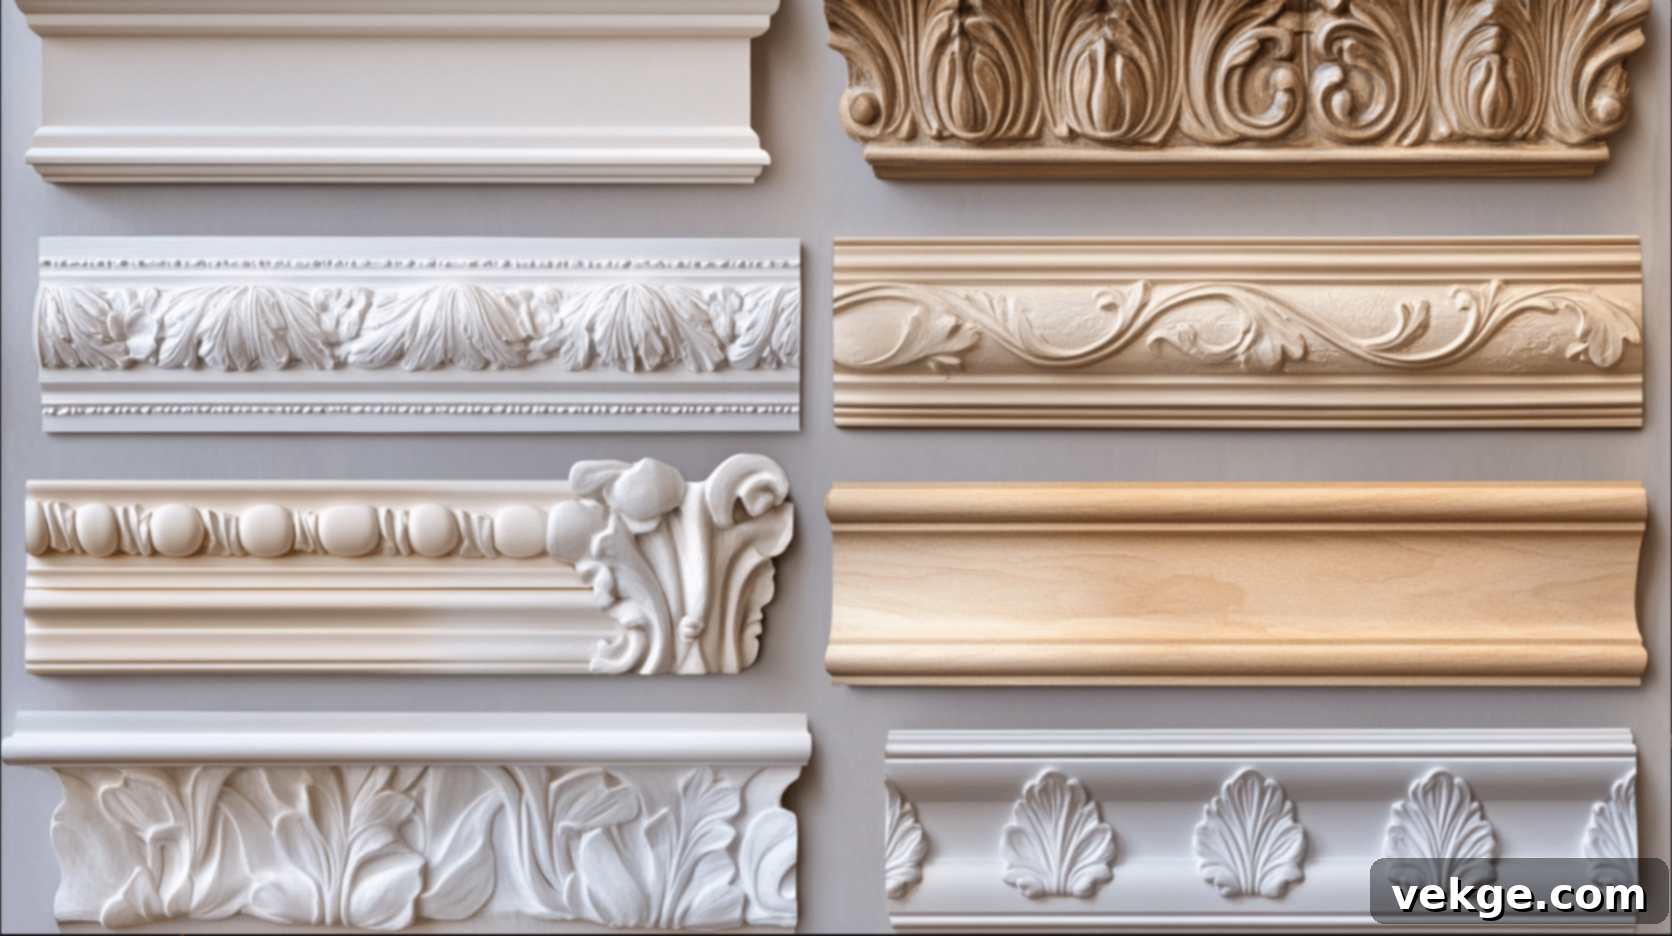
When I embarked on my picture frame molding adventure, I quickly realized that “molding” isn’t a one-size-fits-all term. There’s a whole world of decorative trims out there, each serving a unique purpose and contributing to a distinct aesthetic. Understanding these different types is crucial for planning your design and achieving the look you envision. Let me share what I discovered:
- Baseboards: These are the essential trims that run along the bottom of your walls, where the wall meets the floor. They protect the wall from bumps and scuffs and create a finished transition. While I already had baseboards in my home, adding picture frame molding above them dramatically enhanced their presence and made the entire wall feel more intentional and grand.
- Crown Molding: Often considered the “jewelry” of a room, crown molding is installed where your walls meet the ceiling. It draws the eye upward, making ceilings appear taller and rooms feel more expansive and luxurious. It’s like adding a sophisticated hat to your room, instantly elevating its formality and character.
- Chair Rail: This horizontal trim runs around the perimeter of a room, typically about one-third of the way up the wall from the floor. Historically, it protected walls from the backs of chairs. In modern design, it serves as a decorative divider, allowing for two-tone paint schemes or, as I used it, as the perfect top border for my picture frame molding. It creates a visual break and helps define the framed panels below.
- Panel Molding: This is the star of our show! Panel molding is typically thinner and less elaborate than baseboards or crown molding, specifically designed to create the “frames” or boxes on your wall. It comes in various profiles, from simple and clean-lined to more ornate, making it incredibly versatile for different styles. I chose a basic, easy-to-work-with style for my project, which was perfect for a DIY beginner.
- Cove Molding: Characterized by its concave profile, cove molding offers a soft, rounded transition. It can be used subtly within picture frames for a gentler edge or where walls meet ceilings or floors for a less angular look than traditional base or crown molding.
- Egg and Dart Molding: This is a classic, highly decorative trim featuring an alternating pattern of egg shapes and dart-like elements. It’s a more formal and intricate option, ideal for traditional or historical interiors where a touch of classical elegance is desired. It certainly wasn’t what I needed for my contemporary space, but it’s stunning in the right setting.
- Dentil Molding: Resembling a row of small, regularly spaced blocks or “teeth,” dentil molding is another traditional favorite. It’s often used as an accent beneath crown molding or along mantels, adding a distinguished and architectural touch.
- Bead Molding: Featuring a series of small, continuous rounded shapes or “beads,” bead molding can add a delicate, playful, or even rustic touch. It’s a great option for subtle detailing within smaller frames or to add a unique texture.
For my initial project, I kept it simple, focusing on panel molding for the frames and a chair rail to define the upper edge. However, understanding the breadth of options available empowered me to plan future projects and truly grasp how each molding type contributes to a room’s overall character. Remember, you’re the designer – feel free to mix and match profiles to craft a look that is uniquely yours!
Setting the Stage for Your Picture Frame Molding Transformation
Deciding to tackle picture frame molding filled me with a mix of excitement and a tiny bit of apprehension. But let me assure you, with proper planning, it’s an incredibly rewarding and entirely achievable DIY project! Here’s how I meticulously set the stage for my wall transformation:
1. Vision and Design Planning
This is where the magic begins. I spent considerable time examining my room, specifically the living room wall behind my couch, envisioning how the molding would enhance the space. I considered:
- Placement: Will it be a full-wall treatment, a single accent wall, or specific panels below a chair rail?
- Number and Size of Frames: I sketched various layouts on paper, playing with the number of panels, their height, and width. I found it helpful to use painter’s tape on the wall to visualize the scale and spacing before committing.
- Symmetry and Spacing: Aim for consistent spacing between frames and from the corners of the wall and existing trim (like baseboards and chair rails). This creates a balanced, professional look. A good rule of thumb is to maintain equal margins around each frame.
- Style: Do you want traditional ornate frames or a cleaner, modern aesthetic? My goal was a simple, elegant look that complemented my existing decor, which also happened to be easier for a beginner.
Once I had a clear vision, I took precise measurements of the wall to finalize my design plan and calculate material needs.
2. Material Selection and Shopping
With my design in hand, it was time for the fun part: shopping! I made sure to list every item I needed to avoid frustrating mid-project store runs. Consider the type of molding (MDF is often budget-friendly and easy to paint, while solid wood offers more durability and a premium feel), the paint, wood filler, caulk, and any specific tools I might need to rent or purchase. Don’t forget to account for a little extra molding (10-15%) for miscuts or errors – it’s always better to have too much than too little.
3. Workspace Preparation
A well-prepared workspace is key to a smooth project. I moved all furniture away from the wall I was working on and laid down drop cloths to protect the floor from dust, paint, and caulk. Ensuring good ventilation is also important, especially when cutting wood or painting.
4. Tool and Material Organization
Finally, I gathered all my tools and materials in one accessible spot. This included my miter saw, nail gun, level, measuring tape, caulk gun, sandpaper, and all the chosen moldings and finishing supplies. Having everything organized and within reach saved valuable time and kept frustration at bay throughout the installation process.
Taking the time for thorough preparation makes the actual installation much more enjoyable and less daunting. Trust me, the initial planning stage is just as important as the nailing and painting. If I, a DIY enthusiast, can plan and execute this, so can you! Next, we’ll dive into the specific materials and tools that will be your best friends on this exciting journey.
Essential Materials and Tools for Your Picture Frame Molding Project
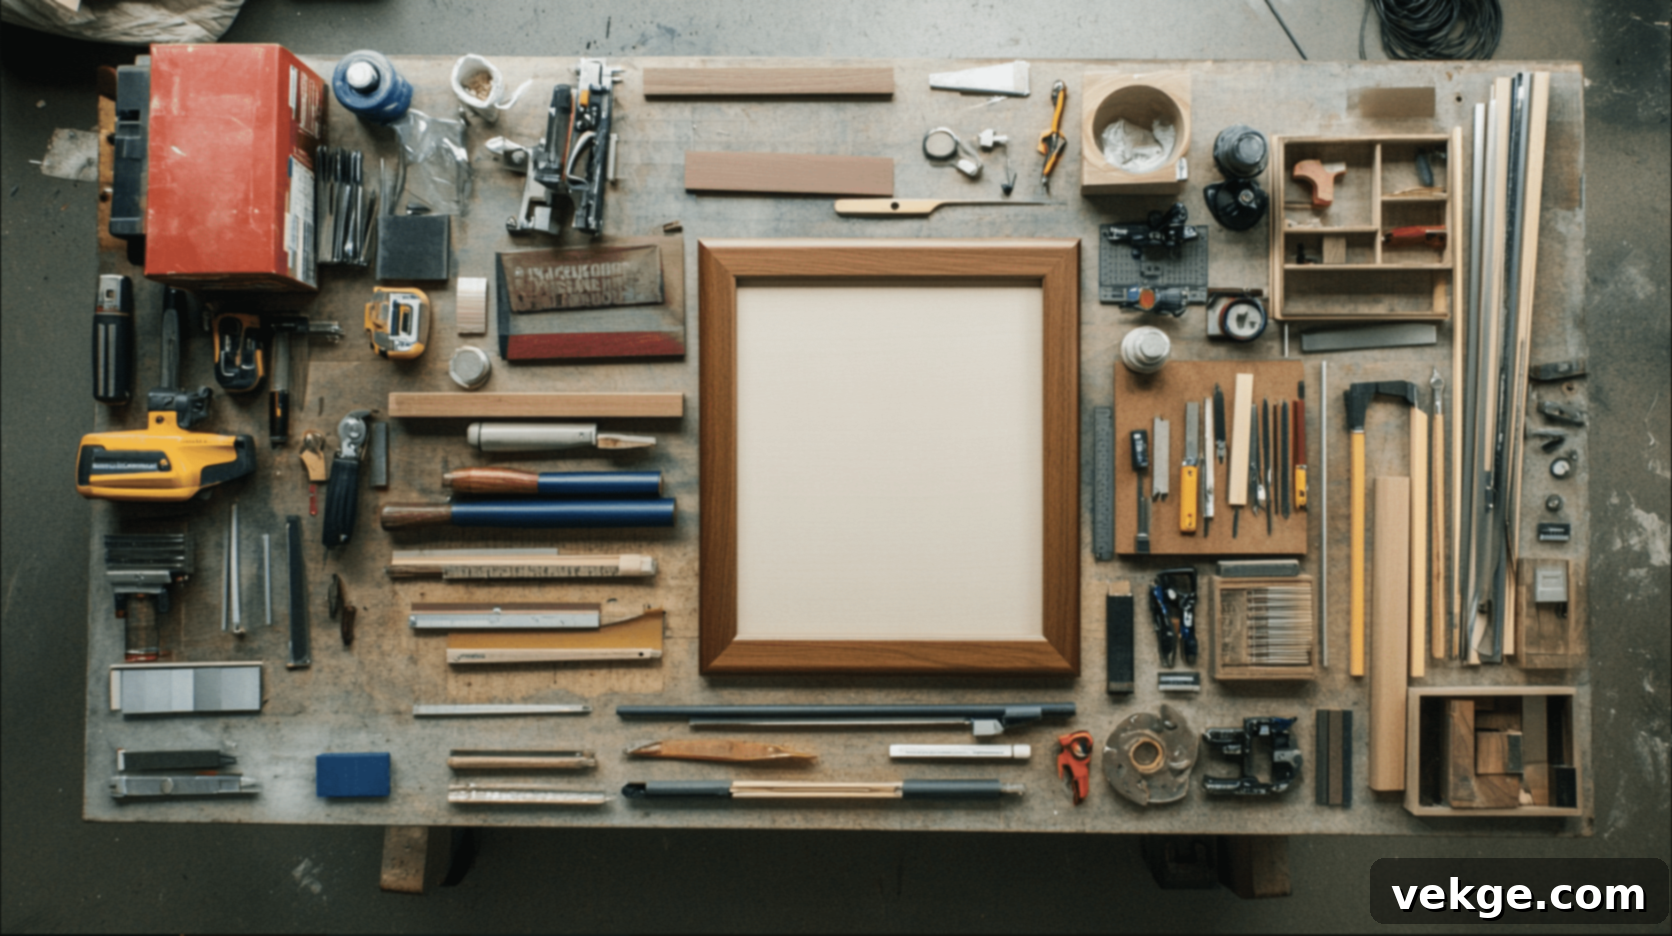
One of the keys to a successful DIY project, especially one that involves precision like picture frame molding, is having all your materials and tools ready before you start. I learned this firsthand, and it made the entire process so much smoother. Here’s a comprehensive list of what I gathered, along with some tips for selection:
Essential Materials:
- Molding: This is your main event. As I mentioned, I chose a simple panel molding for the frames themselves and a complementary chair rail for the top boundary. Consider materials like:
- MDF (Medium-Density Fiberboard): Affordable, smooth, and easy to cut and paint. Great for a paint-grade finish.
- Finger-Jointed Pine: A good balance of affordability and real wood feel. It’s primed and ready for paint.
- Poplar or Oak: More expensive, but offers a natural wood grain if you plan to stain or want a higher-end finish.
Always buy 10-15% more than your calculated needs to account for mistakes or damaged pieces.
- Paint: To seamlessly blend your molding with your walls or create a striking contrast. I matched my wall color for a unified, sophisticated look. Consider the finish – semi-gloss or satin is durable and easy to clean, often preferred for trim.
- Wood Filler: Essential for covering nail holes and any minor imperfections or gaps at joints. Look for one that dries hard and can be sanded smooth and painted.
- Caulk: A decorator’s secret weapon! Use paintable acrylic latex caulk to seal any tiny gaps between the molding and the wall, creating a flawless, professional finish.
- Sandpaper: Various grits (e.g., 120-grit for initial smoothing, 220-grit for fine finishing) are needed to smooth filler and molding edges before painting.
- Primer: Especially crucial if you’re using unprimed molding or going from a dark to a light paint color. Primer ensures better paint adhesion and a more consistent, durable finish.
- Construction Adhesive (Optional but Recommended): A thin bead on the back of the molding pieces before nailing adds extra security and prevents future shifting or separation, especially for larger pieces.
Indispensable Tools:
- Measuring Tape: Absolutely critical for precise measurements. “Measure twice, cut once” is the golden rule here.
- Pencil: For marking cutting lines on molding and light placement lines on the wall.
- Miter Saw: This is arguably the most important tool for clean, accurate angle cuts (especially 45-degree cuts for corners). If you don’t own one, consider renting or borrowing. A miter box and hand saw can work for smaller projects but require more effort.
- Nail Gun (Brad Nailer): A game-changer for speed and efficiency. It makes attaching the molding so much easier and leaves smaller holes than traditional hammer and nails. Ensure you have the correct length brad nails (typically 1.5 to 2 inches) for your molding thickness.
- Level: Non-negotiable for ensuring your frames are perfectly straight and plumb. A 4-foot level is ideal, but a smaller one can work for individual frame pieces.
- Caulk Gun: For applying caulk neatly and evenly. Practice on a scrap piece first to get a consistent bead.
- Paintbrushes and Rollers: High-quality brushes (angled for cutting in) for detailed work and perhaps a small roller for larger flat areas of molding (like a chair rail).
- Safety Gear: Don’t skip this!
- Safety Goggles: Essential when using power tools to protect your eyes from sawdust and debris.
- Dust Mask: Protects your lungs from fine wood dust, especially when cutting MDF.
- Ear Protection: Recommended when operating noisy power tools like a miter saw.
- Utility Knife: Useful for scoring caulk, cleaning up adhesive, or opening packages.
- Putty Knife: For applying wood filler smoothly.
I also found a calculator incredibly helpful for double-checking my measurements and spacing calculations. And, of course, wear old clothes – this project can get delightfully messy! Having all these items at your fingertips transforms potential hurdles into manageable steps, allowing you to focus on the craftsmanship of your beautiful new walls.
Step-By-Step Picture Frame Molding Installation Guide: From Vision to Reality
This is where your vision truly comes to life! Installing picture frame molding might seem intimidating at first, but by breaking it down into manageable steps, you’ll find it incredibly satisfying. Here’s the detailed process I followed to achieve my stunning wall transformation:
STEP 1: Measure and Plan Your Design Precisely
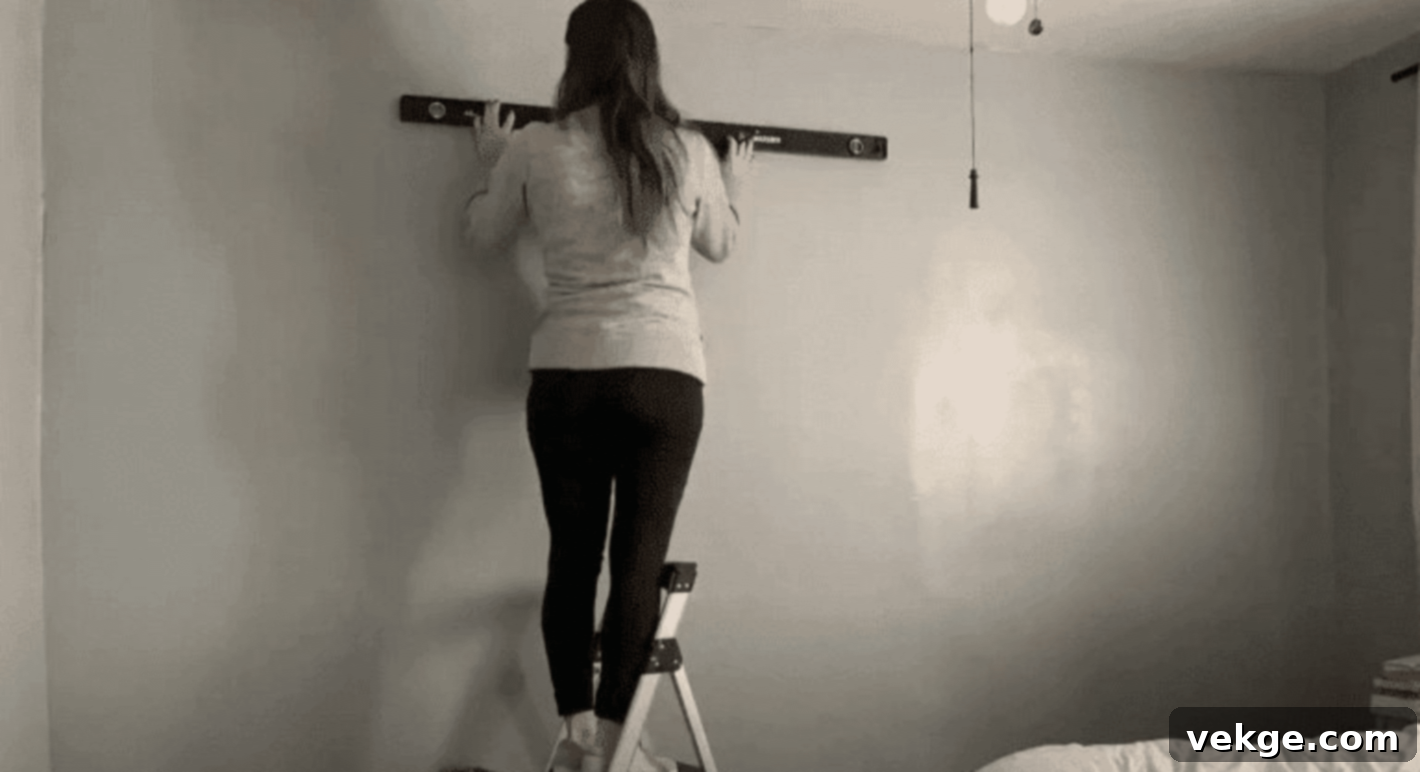
Begin by measuring the total width and height of your wall. Based on your initial design sketch, determine the desired dimensions of each picture frame, as well as the spacing between them and from the existing wall edges, baseboards, or chair rails. For a balanced look, aim for equal spacing around and between your frames. For instance, you might decide on 6-inch margins from the wall corners and 4-inch gaps between each frame. Carefully sketch your final design on paper with exact measurements. This blueprint is crucial for accurate cuts and placement.
STEP 2: Mark the Wall with Precision
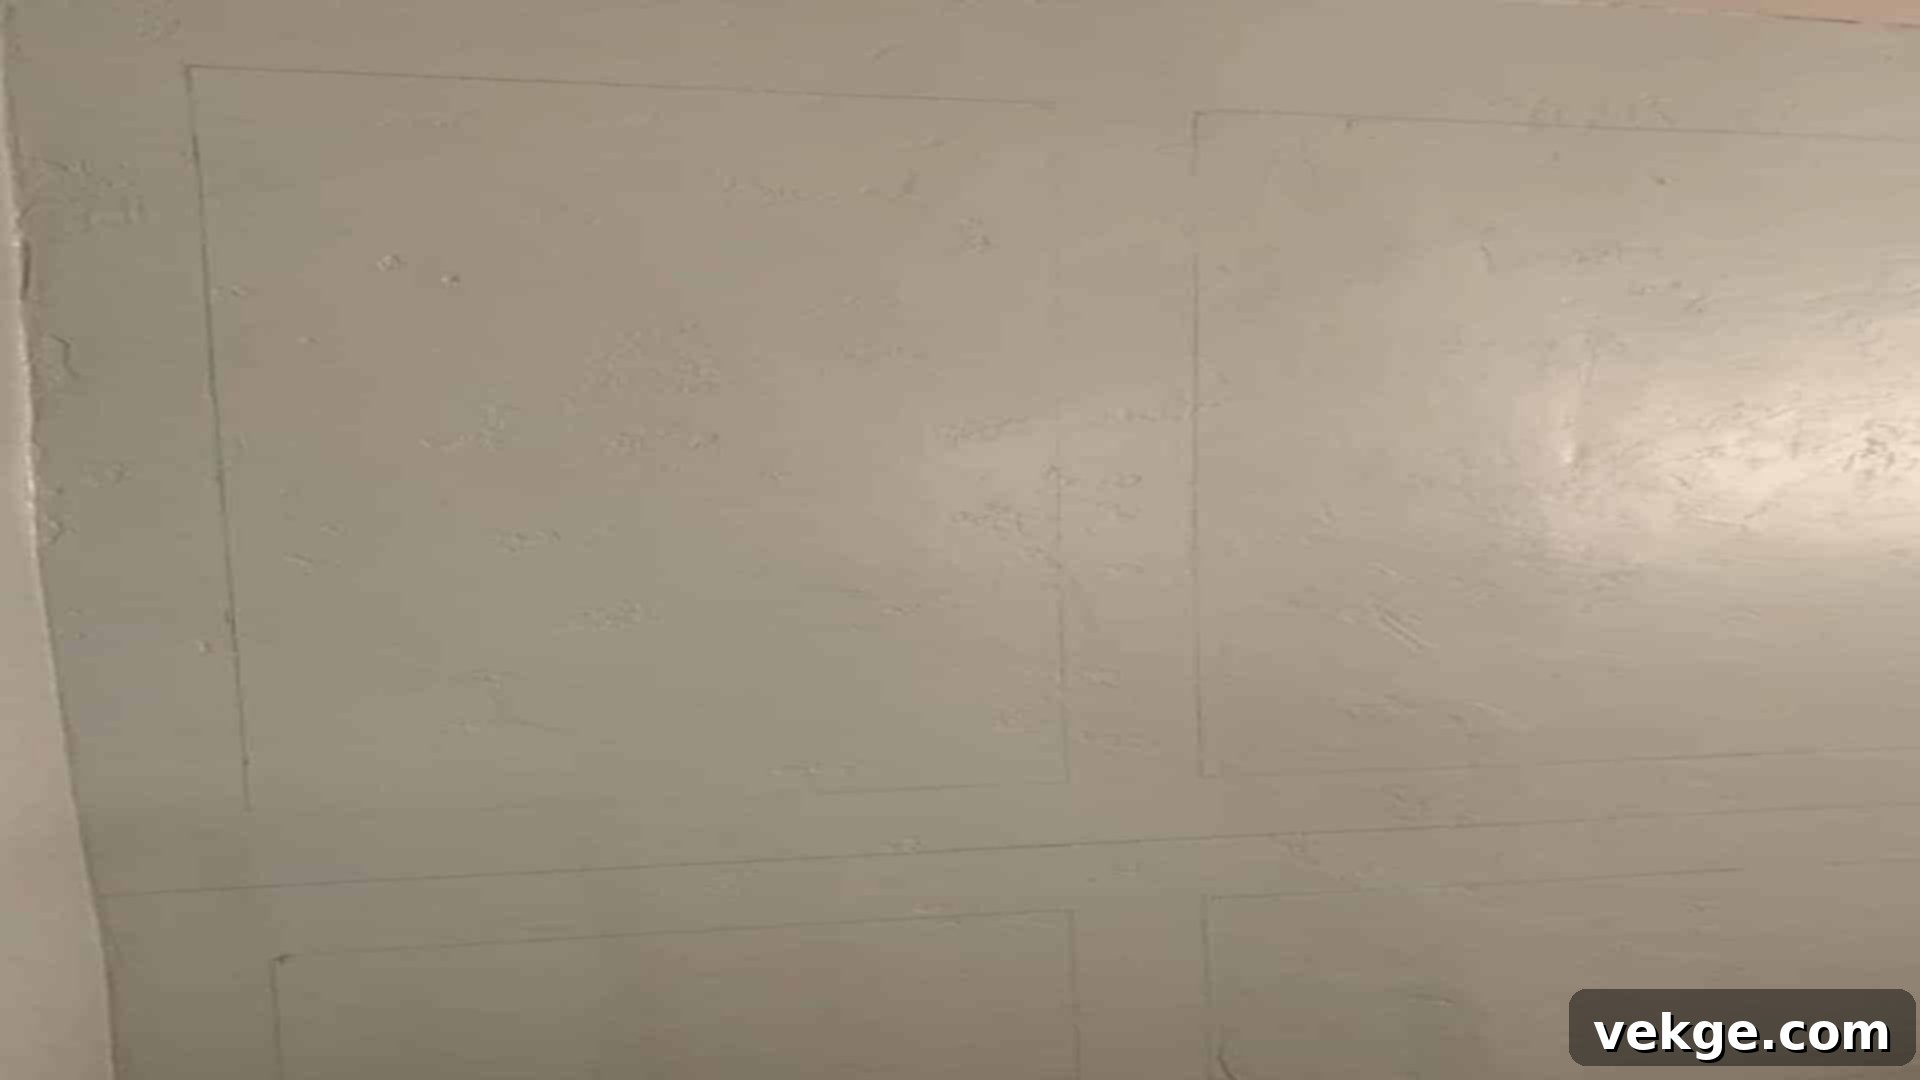
Transfer your paper plan to the actual wall. Using your measuring tape, a pencil, and most importantly, a reliable level, draw light, crisp lines where each piece of molding will be placed. These lines will serve as your exact roadmap during installation, ensuring every frame is perfectly straight and evenly spaced. Double-check all measurements before drawing your lines – this is a critical stage where careful attention prevents headaches later on.
STEP 3: Cut the Molding Pieces Accurately
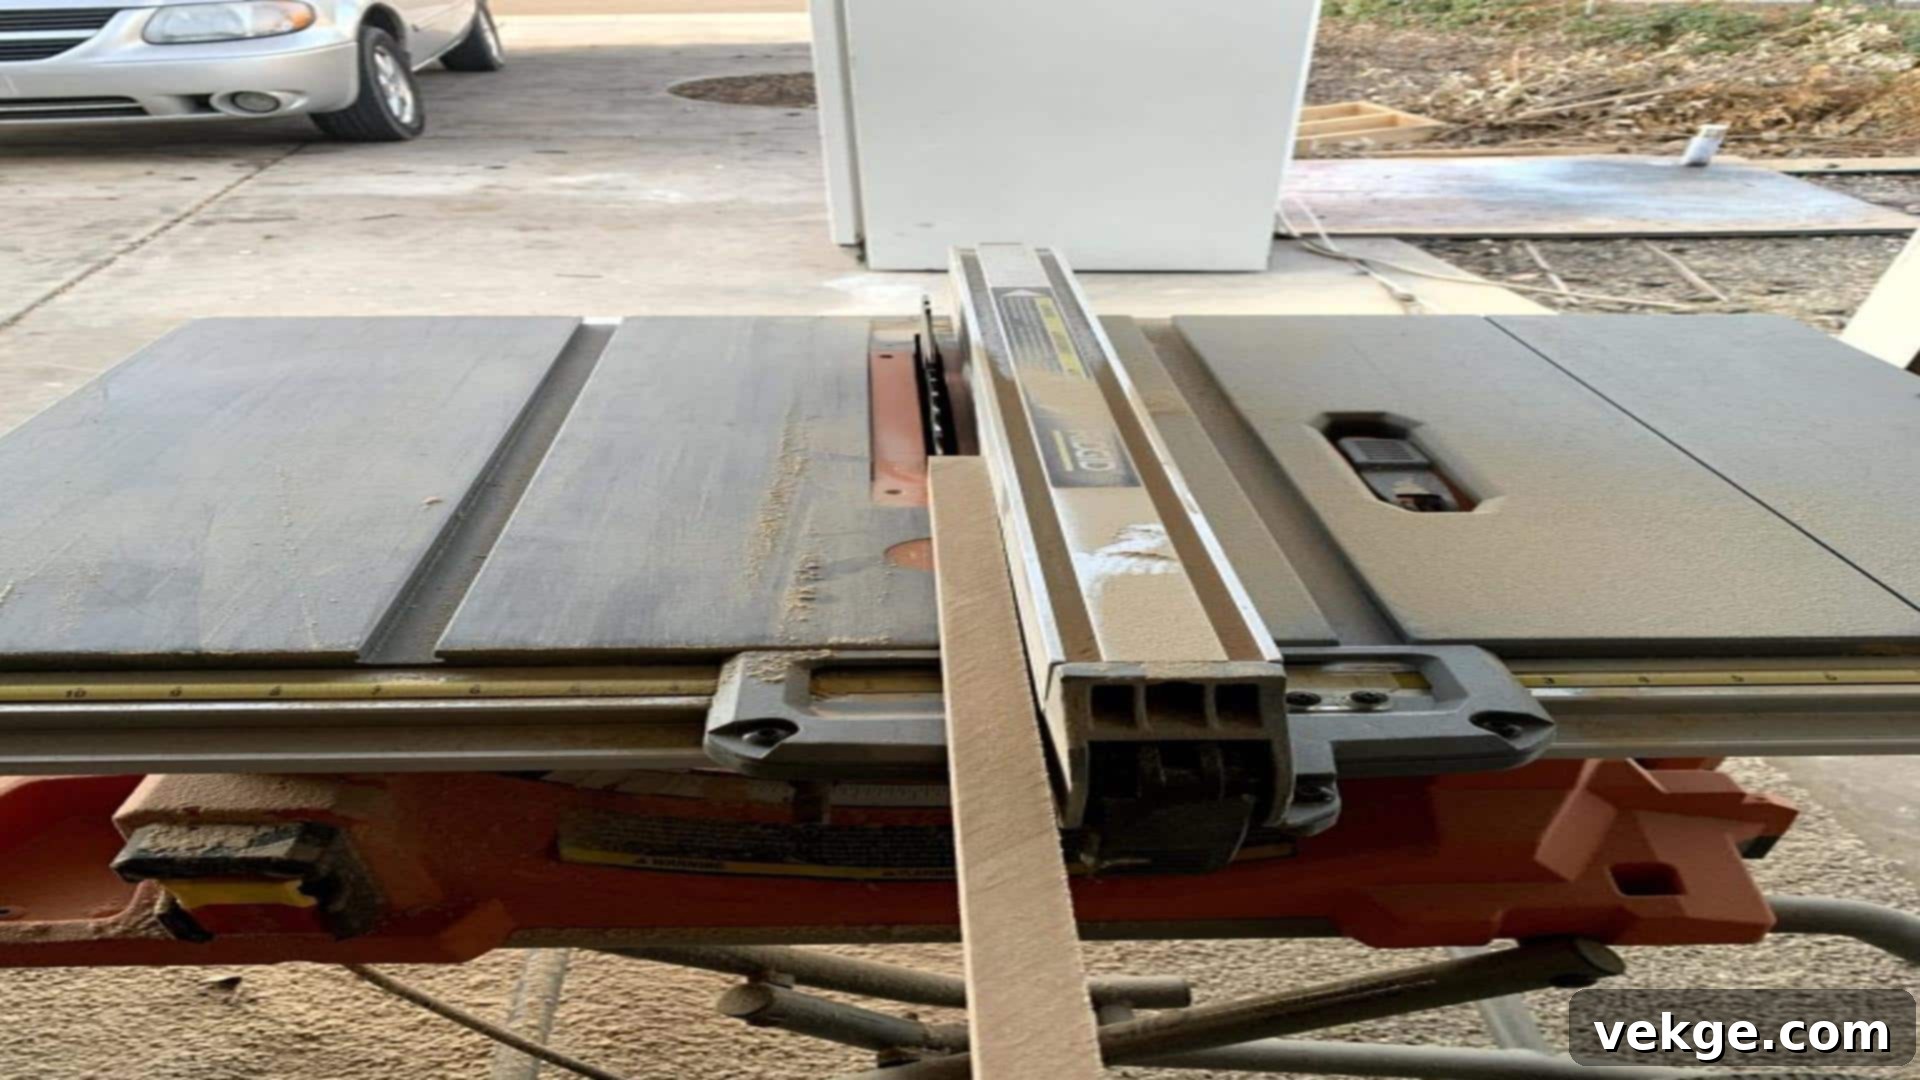
With your design marked on the wall, it’s time to cut your molding. Using your miter saw, carefully cut each piece to the precise lengths determined in Step 1. For the corners of your picture frames, you’ll need to make 45-degree angle cuts. Remember that for an inside corner (where two pieces meet to form a point, like the inside of a box), the long point of your angle cut will be on the outside edge of the molding. For the opposite corner, the short point will be on the outside. Accuracy here is paramount for tight, seamless joints. Always wear your safety goggles and ear protection when operating the saw.
STEP 4: Perform a Dry Fit Test
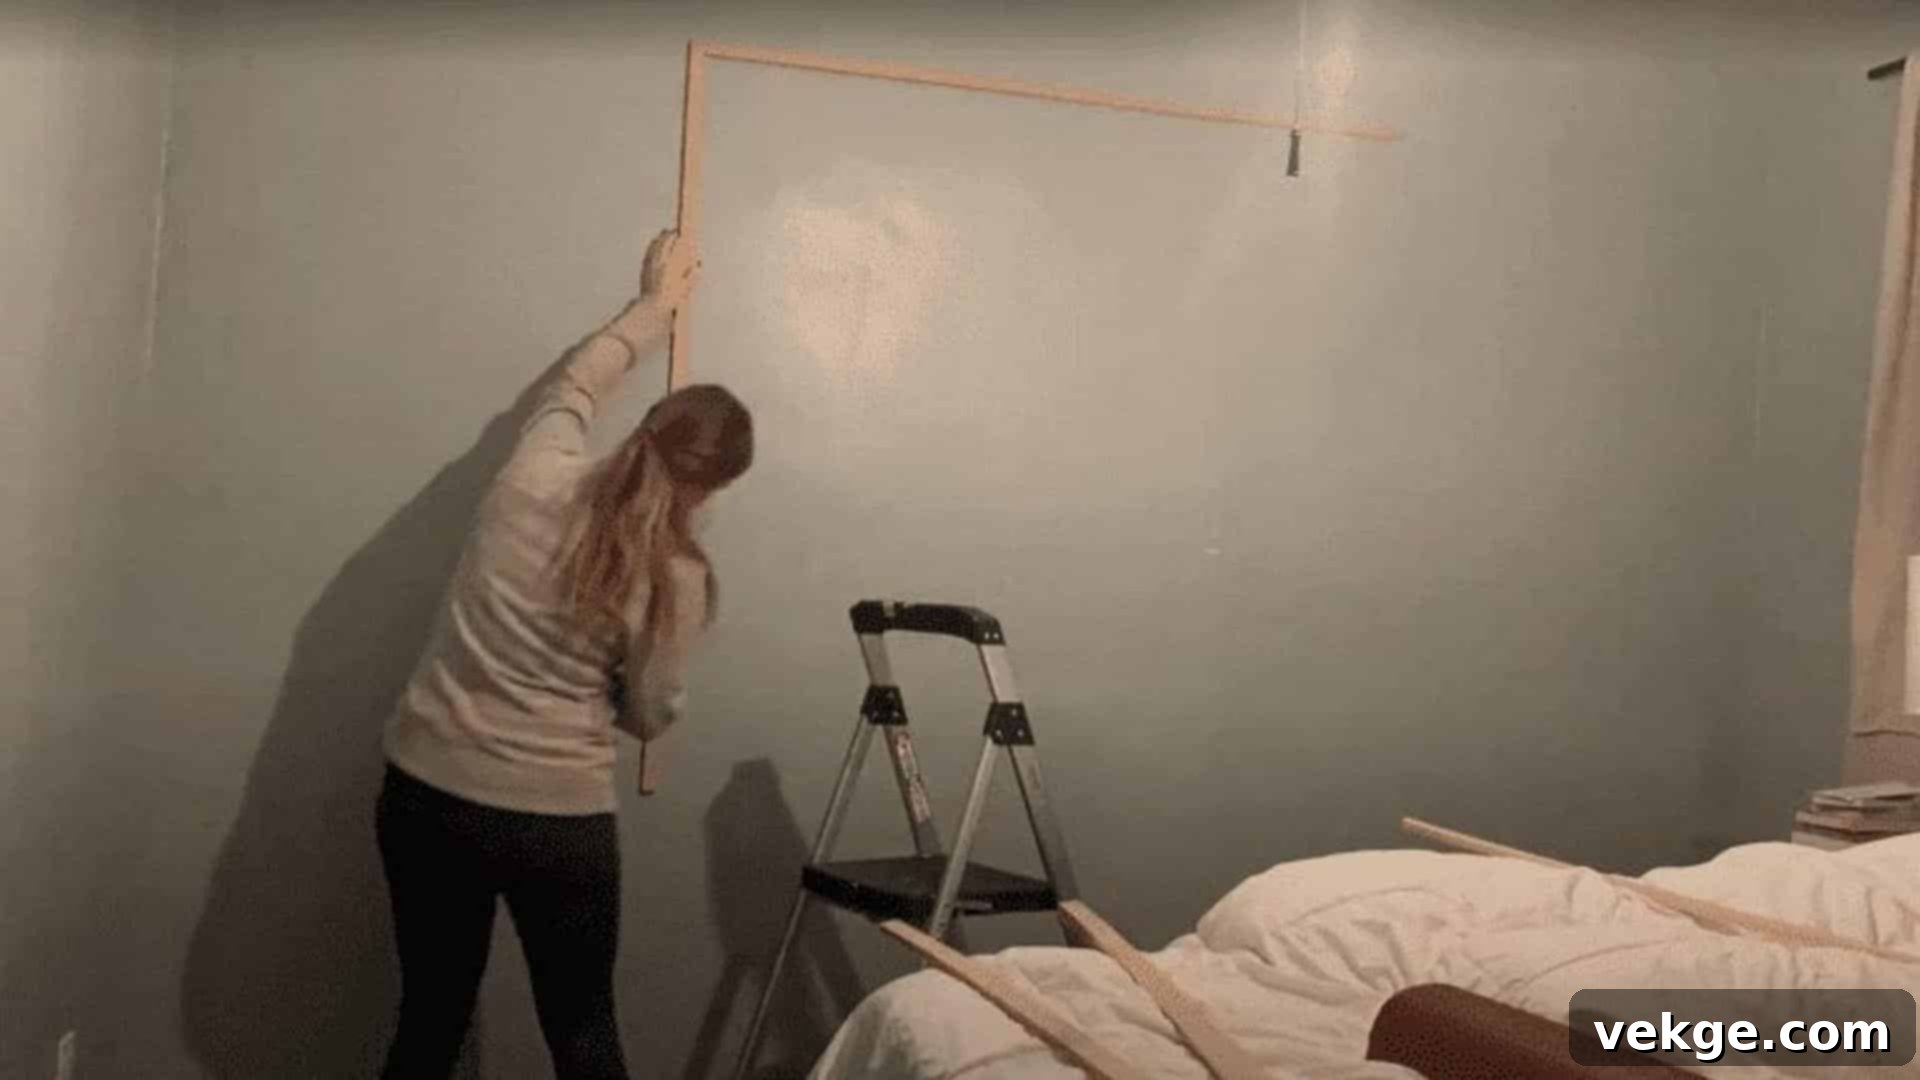
Before any permanent attachment, hold each cut molding piece up to the wall along your pencil lines. This “dry fit” allows you to check if the pieces fit perfectly and if your 45-degree corner cuts meet without gaps. If there are slight imperfections, make minor adjustments to your cuts. This step can save you from costly mistakes and ensures a professional-looking result.
STEP 5: Apply Construction Adhesive (Optional but Recommended)
For added security and longevity, apply a thin, continuous bead of construction adhesive to the back of each molding piece. This adhesive helps secure the molding to the wall and prevents any future separation, especially in areas prone to temperature or humidity fluctuations. Don’t overdo it, as excess adhesive can squeeze out and be difficult to clean.
STEP 6: Nail the Molding Securely to the Wall
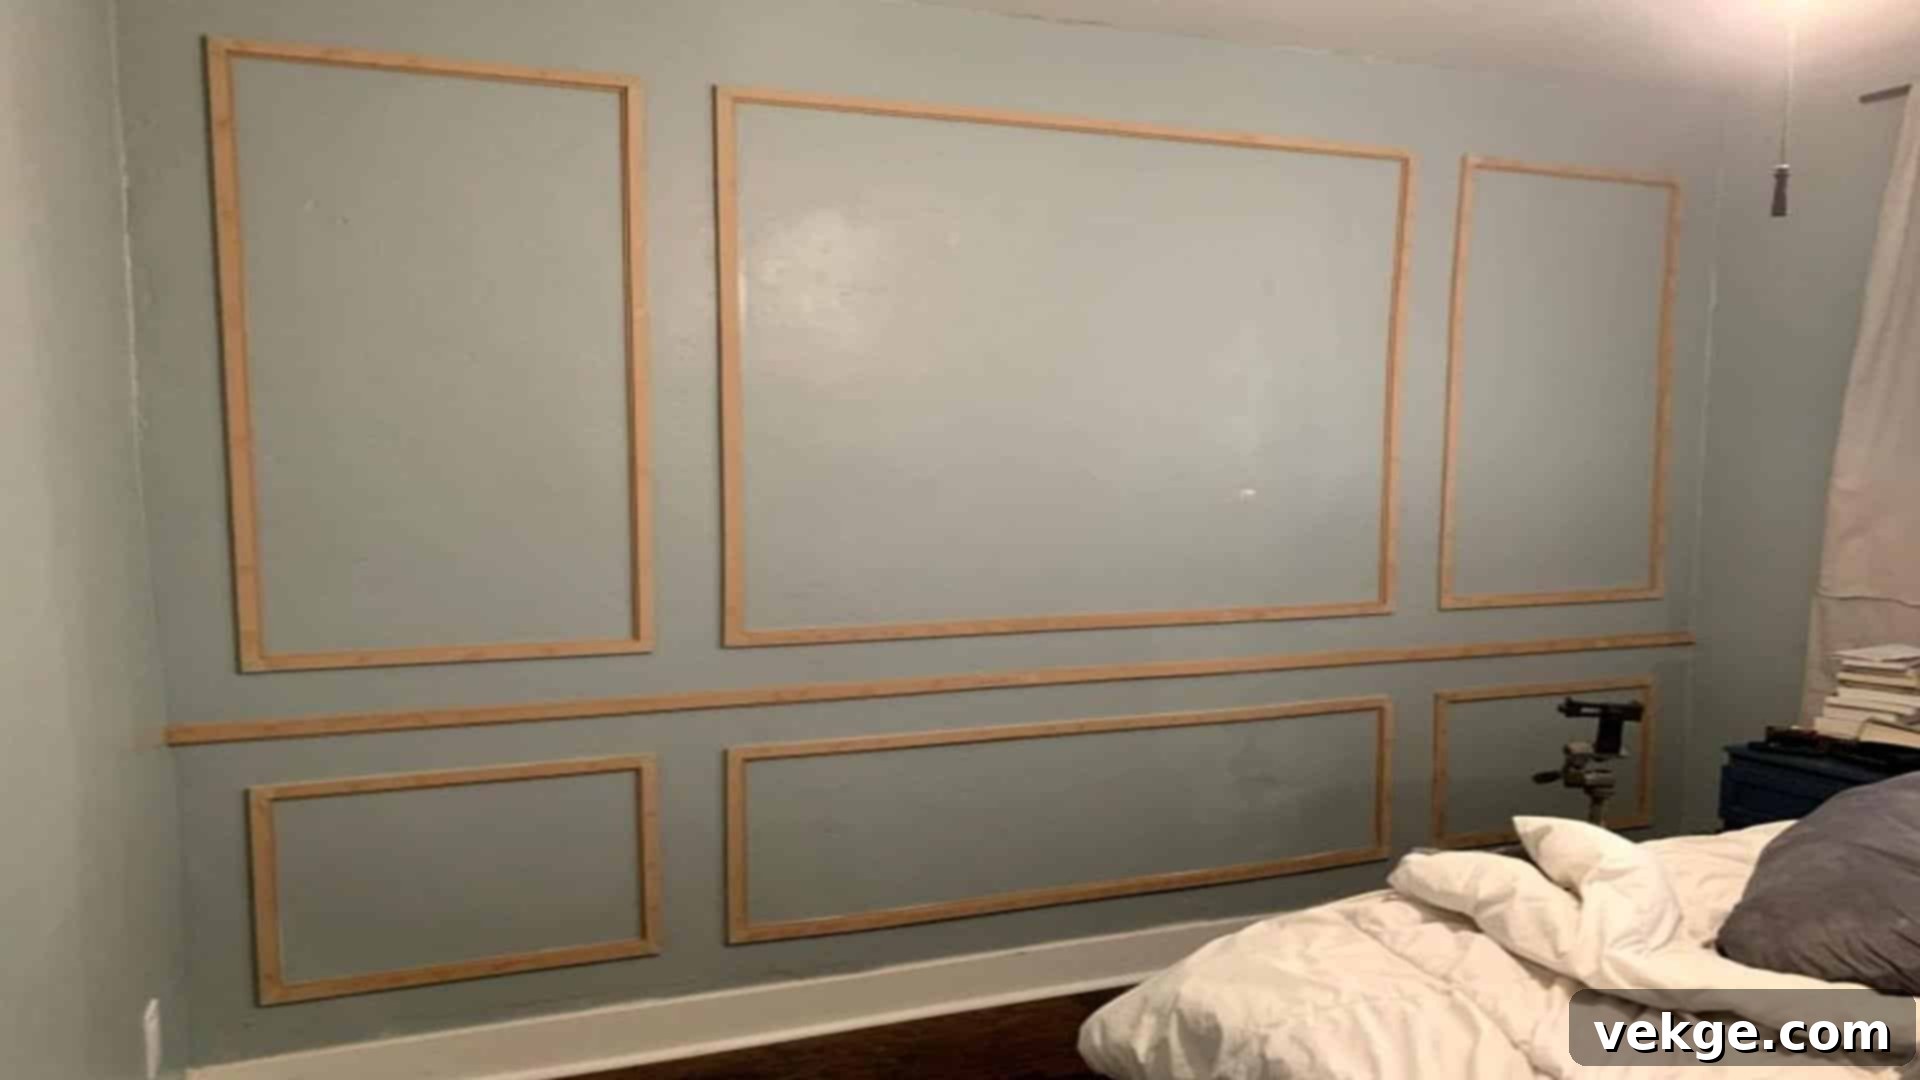
Carefully position each molding piece onto your marked lines, ensuring it’s level and pressed firmly against the wall. Using your nail gun, secure the molding by shooting brad nails every 12 to 16 inches along the length of the strip. Aim for the center of the molding and angle the nails slightly where pieces meet for extra hold. Ensure the nails are countersunk just below the surface of the wood.
STEP 7: Fill All Nail Holes and Imperfections
Once all the molding is attached, use a small amount of wood filler to cover every nail hole. Also, fill any minor gaps or imperfections at the mitered corners where the molding pieces meet. Apply the filler with a putty knife, ensuring it’s slightly proud of the surface, then allow it to dry completely according to the manufacturer’s instructions.
STEP 8: Sand for a Perfectly Smooth Surface
After the wood filler has dried, lightly sand all filled areas and any rough spots on the molding with fine-grit sandpaper (e.g., 220-grit). The goal is to achieve a perfectly smooth, seamless surface that will disappear once painted. Wipe away all sanding dust with a damp cloth before moving to the next step.
STEP 9: Caulk the Edges for a Flawless Finish
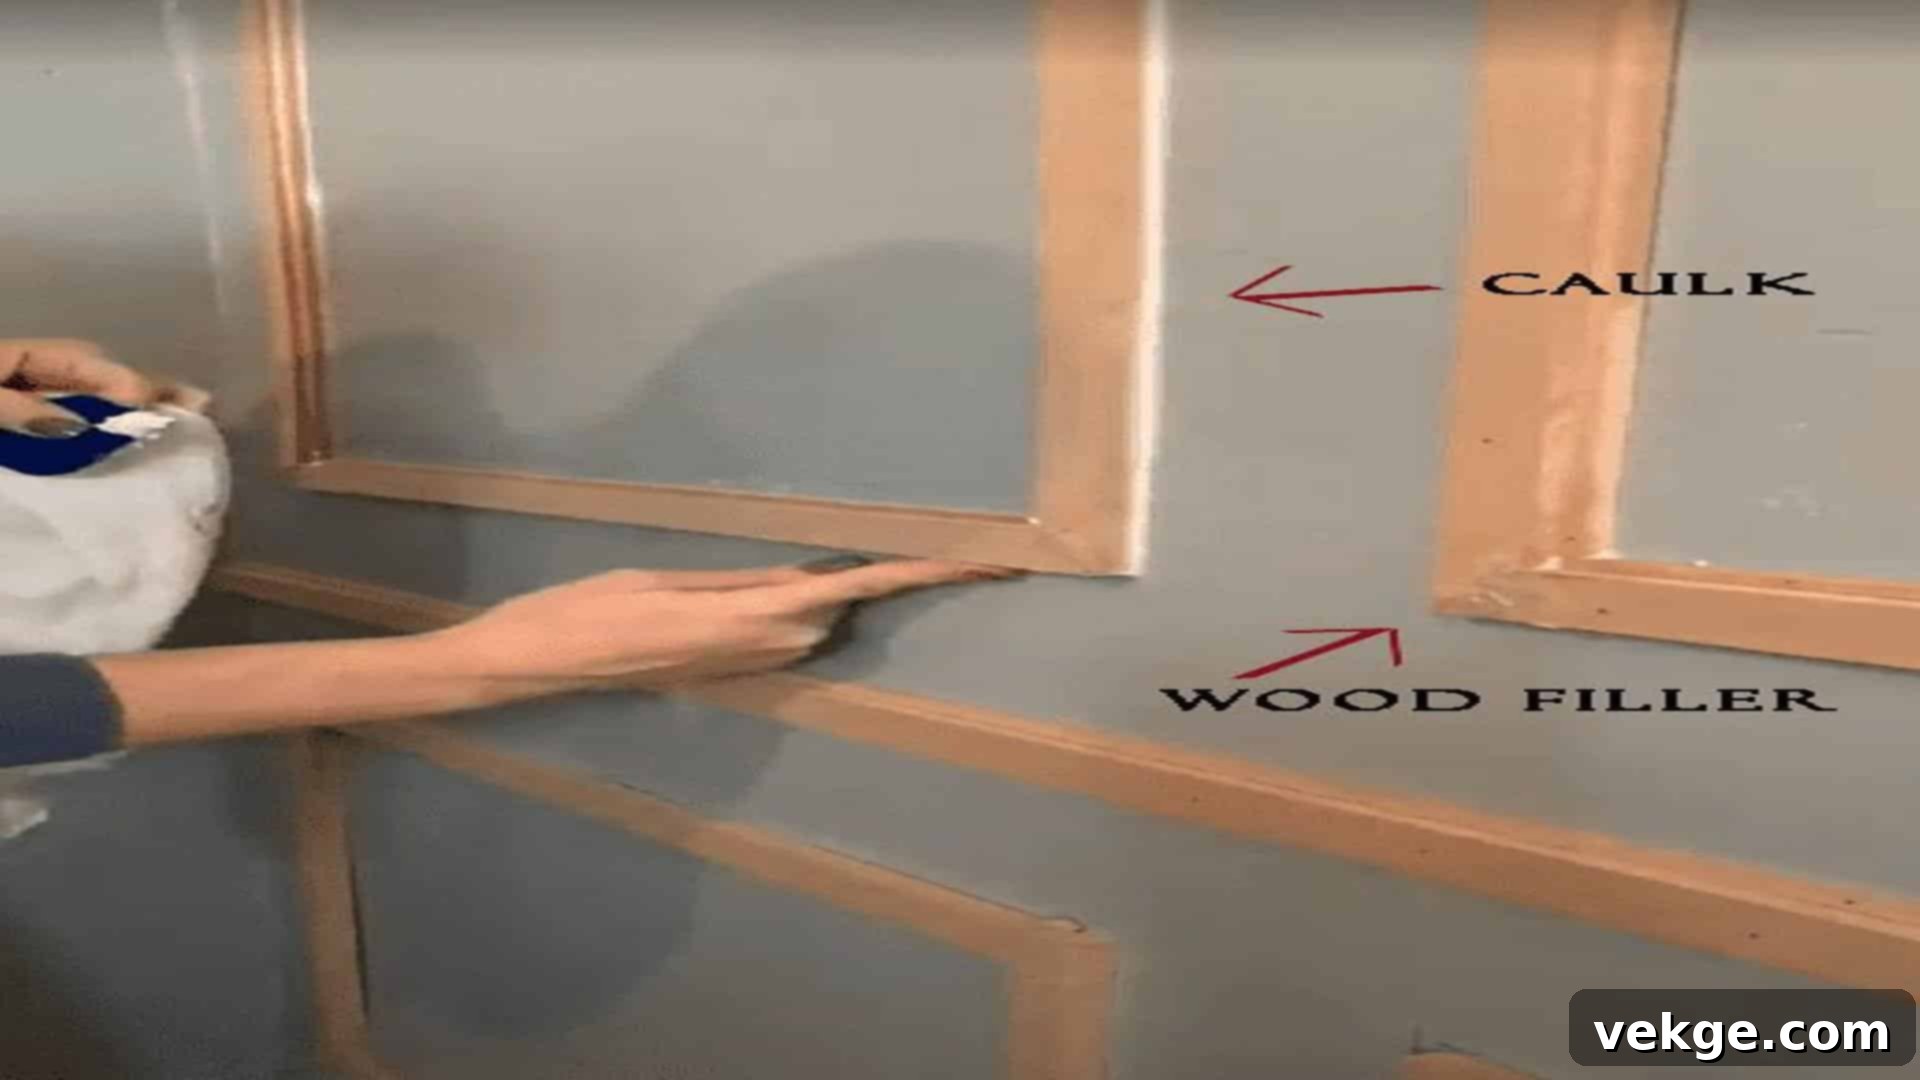
This step is crucial for a professional look. Load your caulk gun and apply a thin, consistent bead of paintable caulk along every seam where the molding meets the wall. Immediately smooth the caulk with a wet finger or a damp sponge to create a clean, seamless transition. This fills any tiny gaps, making the molding look like it was custom-built into the wall. Allow the caulk to dry completely.
STEP 10: Prime the Molding for Optimal Paint Adhesion
Apply a thin, even coat of primer to all the molding pieces. This step is especially important for unprimed molding or if you’re making a significant color change. Primer ensures better paint adhesion, provides a uniform base, and helps prevent wood tannins from bleeding through the final paint coat. Allow the primer to dry fully according to product directions.
STEP 11: Paint the Molding to Match or Contrast
Finally, it’s time to paint! Apply two thin coats of your chosen paint color to the molding. I opted to match my wall color for a cohesive, understated elegance, but you could also choose a contrasting color for a bolder statement. Use an angled brush for precision, especially where the molding meets the wall. Allow adequate drying time between coats.
STEP 12: Final Inspection and Touch-Ups
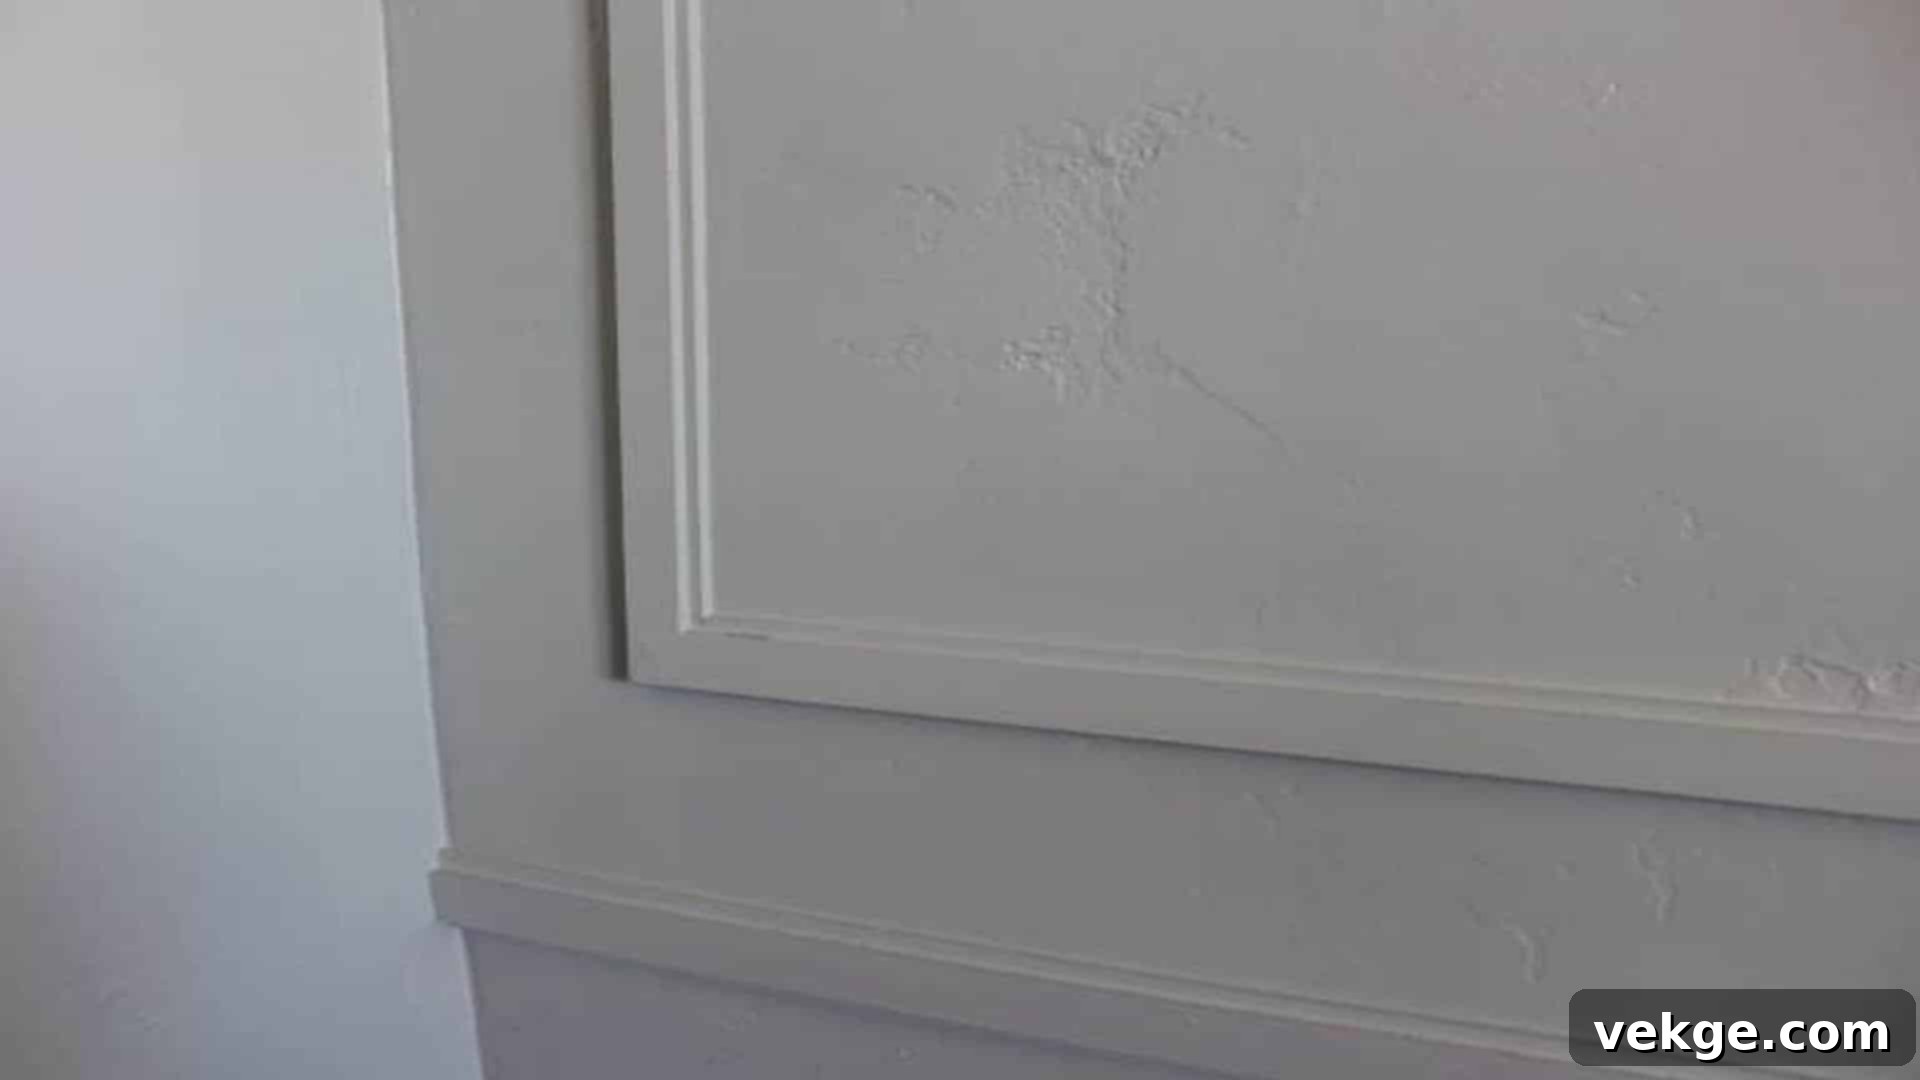
Once the final paint coat is dry, step back and admire your handiwork! Then, thoroughly inspect the entire installation. Look for any missed spots, uneven paint, or small imperfections. Use a small artist’s brush for delicate touch-ups. This final attention to detail ensures your picture frame molding looks absolutely perfect.
Each step requires patience and care, but seeing your vision materialize into a stunning architectural feature is incredibly rewarding. Remember, it’s perfectly fine to take your time and double-check your work – that’s the secret to a professional-looking DIY outcome!
Breaking Down the Bill: Understanding Picture Frame Molding Costs
One of the most appealing aspects of picture frame molding, especially as a DIY project, is its affordability compared to many other home improvement endeavors. When I embarked on my project, I was pleasantly surprised by how much impact I could achieve for a relatively modest investment. Here’s a transparent breakdown of my expenses for a typical 12′ x 12′ room, giving you a realistic idea of what to budget:
| Item | Estimated Cost (for a 12’x12′ room) | Notes on Cost Variation |
|---|---|---|
| 1. Molding (40 linear feet at $2.10/ft) | $85 | Cost varies significantly based on material (MDF is cheapest, solid wood more expensive) and profile complexity. Always factor in 10-15% extra for waste. |
| 2. Paint and Primer (using leftovers/small quantities) | $30 | If you need to buy full cans, this cost will increase. Matching existing wall paint often means less expense. |
| 3. Nails and Adhesive | $15 | Brad nails for the nail gun are inexpensive. Construction adhesive adds a little, but is worth the added security. |
| 4. Caulk and Wood Filler | $10 | These are usually very affordable, small-volume purchases. |
| 5. Miter Saw | $0 | I borrowed mine. Purchasing a basic miter saw can range from $100-$300. Renting is also an option, usually $30-$50 per day. |
| 6. Nail Gun | $25 | I rented a brad nailer. A decent DIY-friendly electric nail gun can cost $50-$150. Pneumatic ones are more, plus the cost of an air compressor. |
| 7. Other Tools (level, measuring tape, brushes, safety gear) | $0 | Assumed most DIYers already own these. If buying from scratch, add $50-$100+. |
| Total Estimated DIY Cost | $165 | This total reflects a highly budget-conscious approach, leveraging existing tools or rentals. |
Factors Influencing Your Total Cost:
- Molding Material and Profile: As mentioned, MDF is the most economical, followed by primed pine. Hardwoods like oak or maple will be considerably more expensive. Elaborate, ornate profiles also tend to cost more per linear foot.
- Room Size and Design Complexity: A larger room or a design with many smaller frames will require more linear feet of molding, increasing your material costs.
- Paint Choice: High-quality paints or specialty finishes can add to the expense. If you’re painting the molding a contrasting color, you’ll need to purchase that separately.
- Tool Ownership: If you already own a miter saw, nail gun, and other basic tools, your costs will be significantly lower. Renting is a great alternative for tools you won’t use frequently.
- Hiring Professionals: While a DIY project is cost-effective, hiring a professional for installation can range from $3-$10 per linear foot, often adding several hundred to over a thousand dollars to the project, depending on labor rates and complexity.
My project total of $165 demonstrates just how budget-friendly this home upgrade can be when you take the DIY route. It’s truly one of the most impactful ways to add perceived value and bespoke character to your home without breaking the bank.
Before and After: The Transformative Power of Picture Frame Molding
Words can describe the process, but seeing the tangible results of picture frame molding is what truly drives home its incredible impact. Here, I want to share my personal “before and after” experience, which perfectly illustrates how this seemingly simple addition utterly transformed the entire feel of my living room. It’s a testament to the fact that thoughtful design, even on a budget, can yield spectacular results.
BEFORE: A Wall Lacking Personality
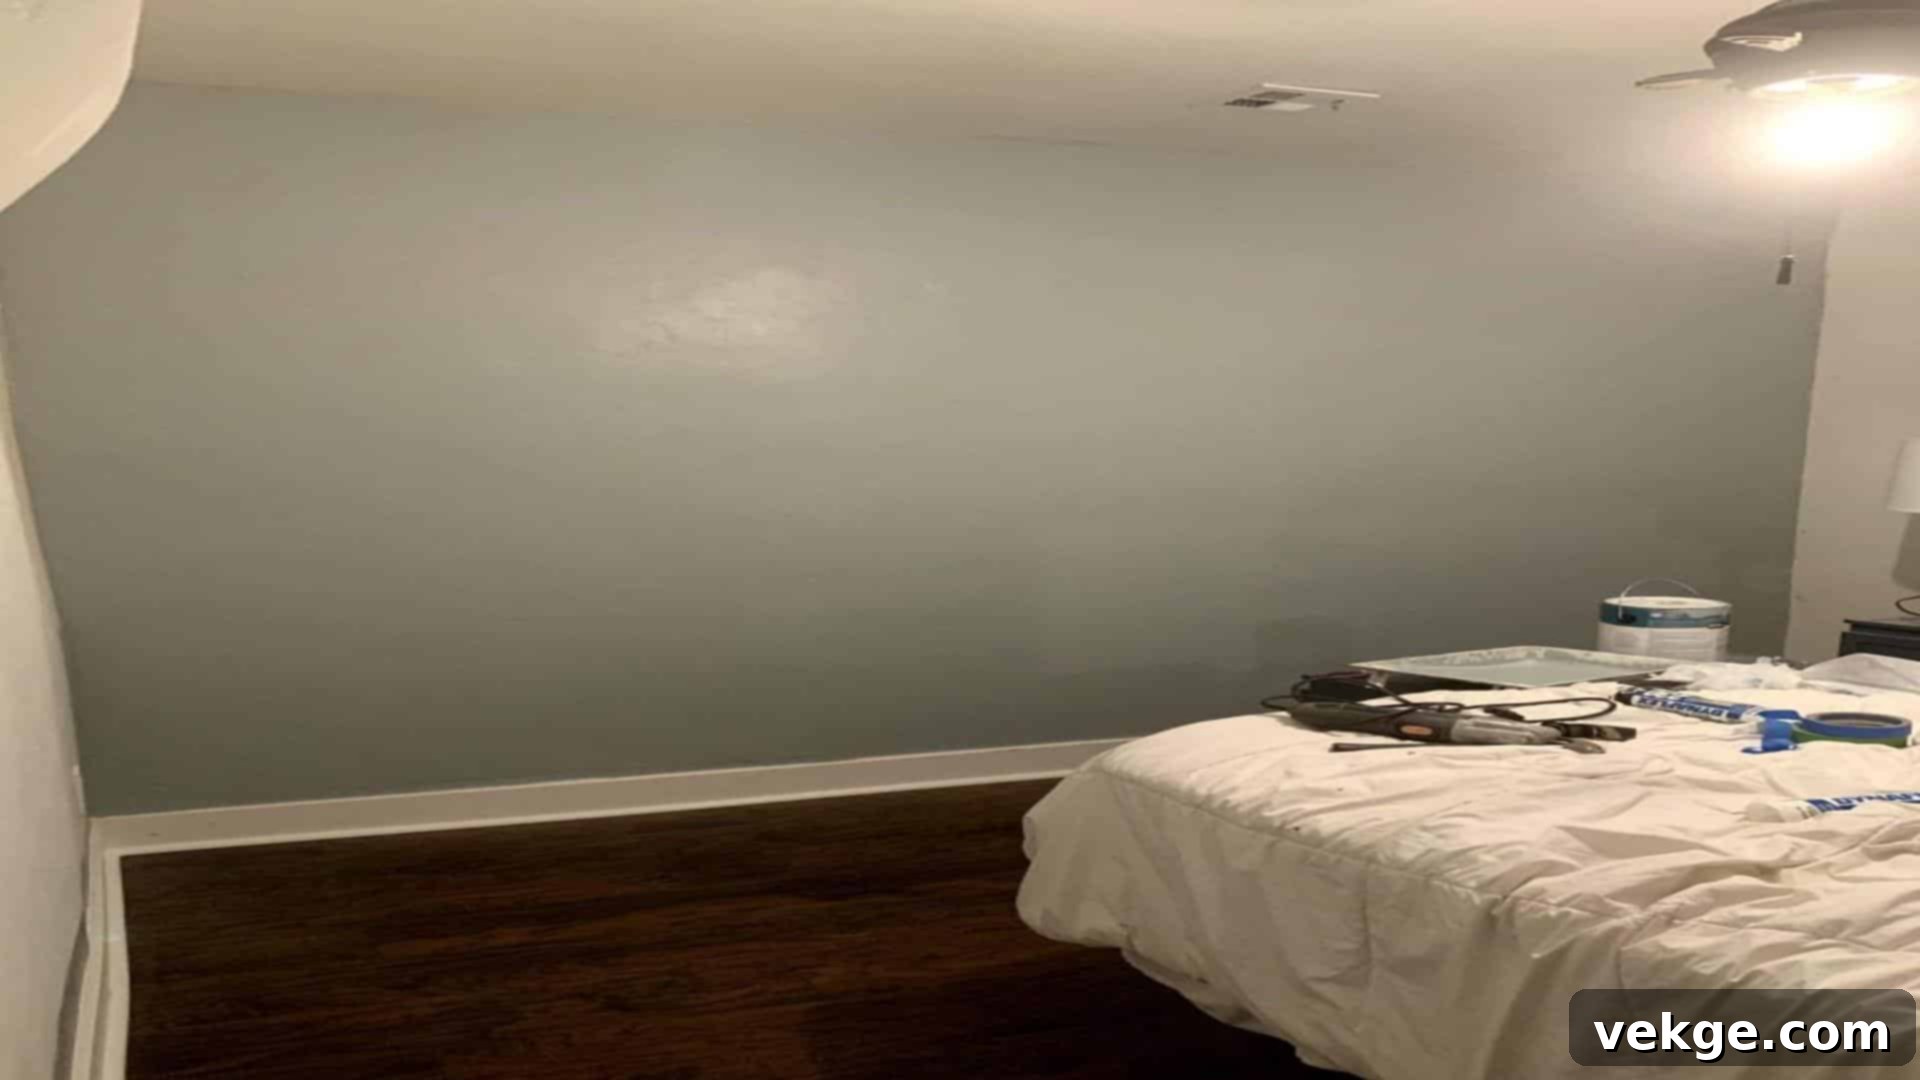
Before the picture frame molding, my living room wall was, to put it mildly, plain and utterly forgettable. Despite my best efforts to adorn it with artwork and furniture, it simply lacked inherent character. It was just a flat, painted surface, blending into the background without contributing any real design interest to the room. The space felt unfinished, somewhat cold, and didn’t reflect the warmth and style I envisioned for my home. Guests would often overlook it, and it certainly didn’t spark joy or admiration.
AFTER: An Accent Wall Transformed into a Focal Point
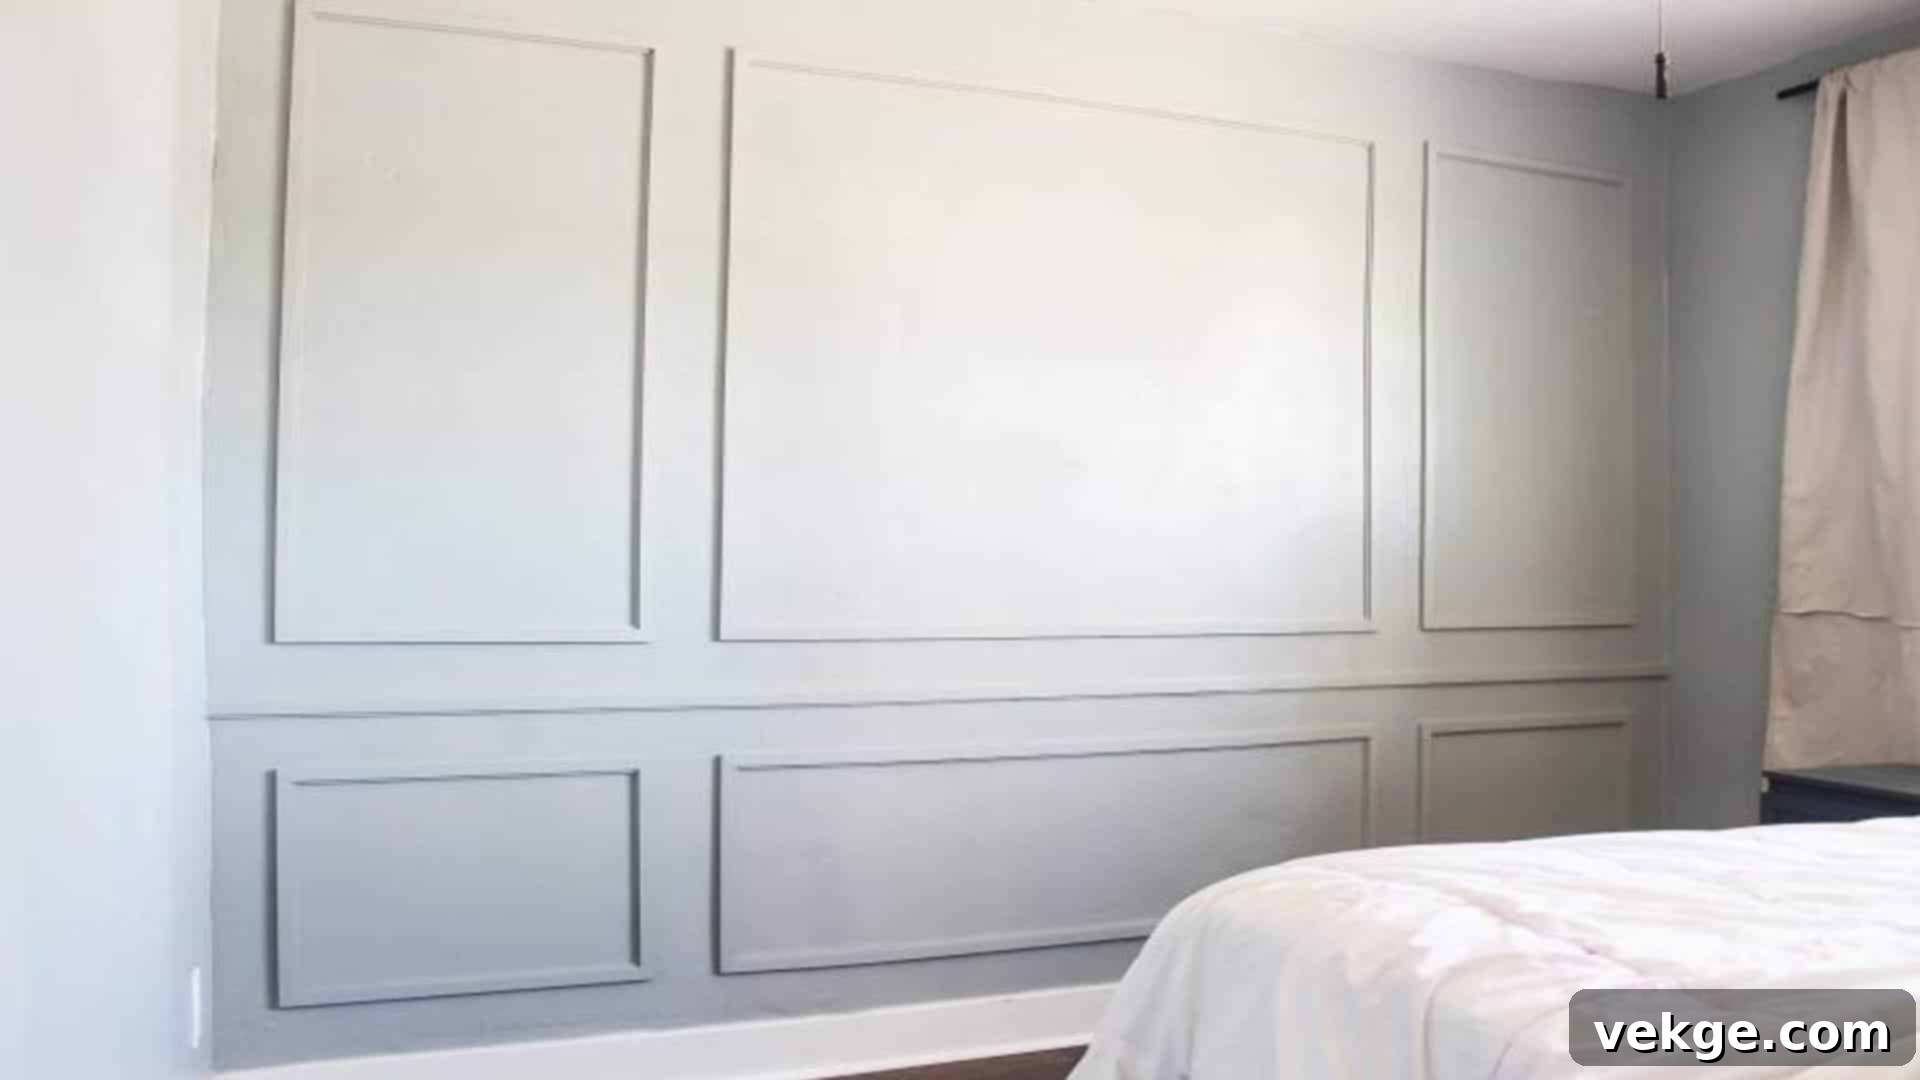
The transformation was nothing short of remarkable. With the addition of picture frame molding, the same wall was instantly elevated from drab to dramatic. It became the undeniable focal point of the living room, drawing the eye and adding a sense of architectural grandeur. The subtle shadows and dimension created by the molding made the room instantly feel more “put-together,” bespoke, and undeniably high-end. It introduced a layer of sophistication and visual texture that was previously missing, making the space feel larger, more inviting, and imbued with a custom touch.
The impact wasn’t just visual; it was emotional too. Every time I walk into the room now, I feel a surge of pride and satisfaction. It’s proof that a relatively small investment of time and effort can yield monumental changes in home improvement. This project taught me that you don’t need a massive budget or professional help to create a space that feels luxurious and deeply personal. It’s a true demonstration of the power of DIY and the transformative magic of picture frame molding.
Creative Picture Frame Molding Designs to Inspire Your Next Project
Picture frame molding is incredibly versatile, allowing for a multitude of creative applications beyond the classic rectangular panel. To truly spark your imagination, let’s explore some inspiring design ideas that showcase how this simple architectural detail can dramatically alter a room’s aesthetic and function.
1. Floor-to-Ceiling Picture Frame Molding: Grandeur Redefined
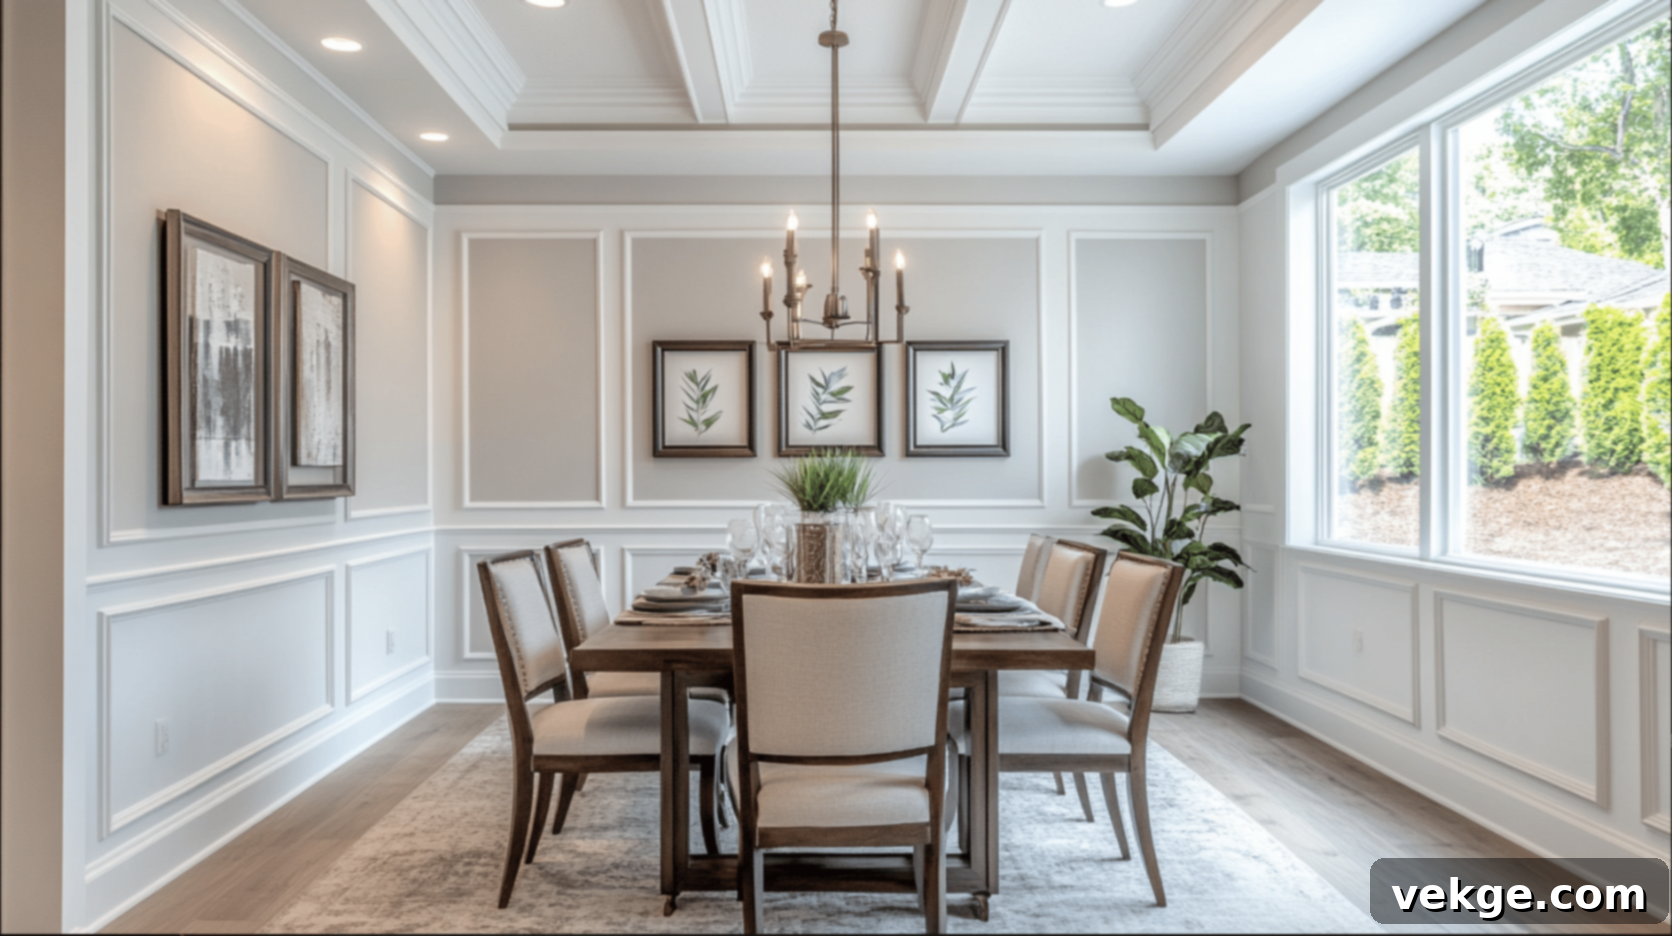
This exquisite dining room exemplifies the timeless elegance of floor-to-ceiling picture frame molding. Here, the molding isn’t just an accent; it’s the defining architectural feature of the entire wall. The evenly spaced, symmetrical frames create a sense of order and balance, instantly elevating the room’s formality. Within these stately frames, carefully arranged artwork adds a layer of curated sophistication. The soft, neutral color palette, complemented by the elegant chandelier and abundant natural light, creates an ambiance that is both refined and inviting. This design works wonderfully in larger spaces or rooms where you want to achieve a truly grand, classic European feel, drawing the eye upwards and making the ceilings appear even higher.
2. Picture Frame Molding Outlining Mural Wallpaper: Artistry Amplified
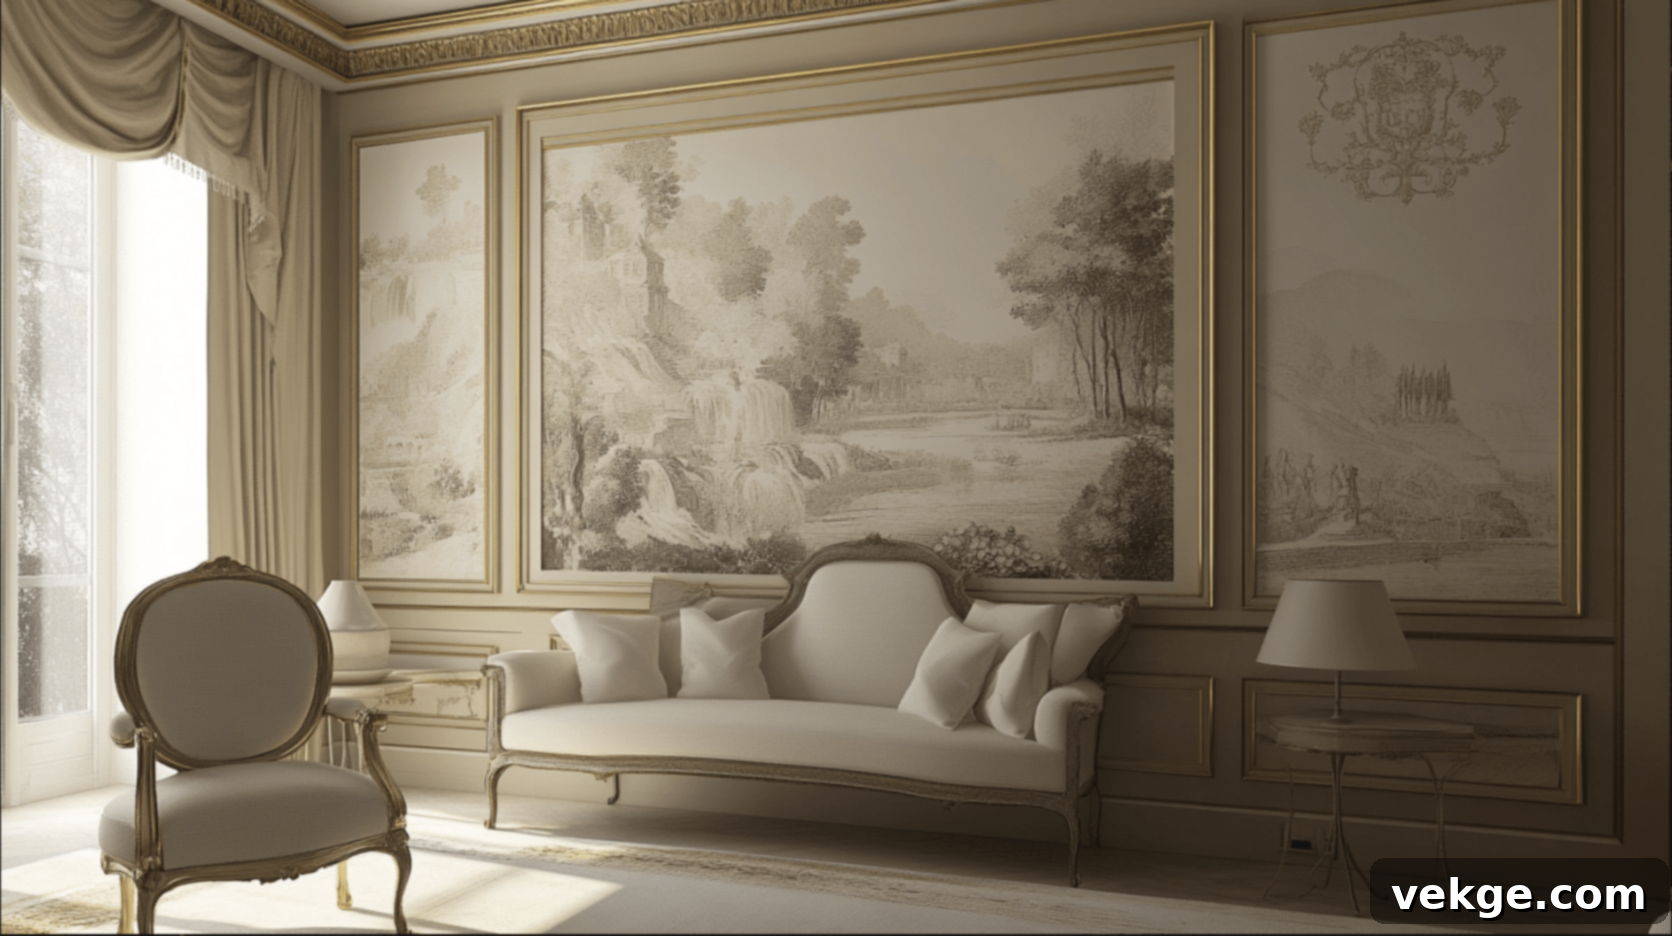
This creative design seamlessly blends decorative molding with artistic expression. Here, picture frame molding is strategically used to gracefully outline a mural-style wallpaper, effectively framing the artwork within the wallpaper and giving it a structured, gallery-like presentation. The molding acts as a defined border, enhancing the intricate details and sweeping narrative of the mural. This approach heightens the visual impact of the wallpaper, transforming it from a simple covering into a deliberate piece of art. It’s a brilliant way to introduce a focal point, add depth, and combine two distinct decorative elements into a cohesive and sophisticated statement, perfect for an entryway or a study.
3. Two-Tone Picture Frame Molding: A Bold Statement
This design ingeniously uses a stylish two-tone application of picture frame molding to create striking visual interest. The molding itself is painted in contrasting shades – a deep, rich green on the lower panels and a softer, complementary hue above. This division not only enhances the wall’s depth but also introduces a dynamic play of color and texture. The bold combination of green and orange tones creates a vibrant, personality-rich statement, while the meticulously curated decor on the mantelpiece further grounds the design, adding warmth and a personal touch. This two-tone approach allows for creative color blocking, making the molding a central element in the room’s overall color scheme and providing a fresh, modern twist on a classic technique.
4. Picture Frame Molding Accent Wall: Serene Sophistication
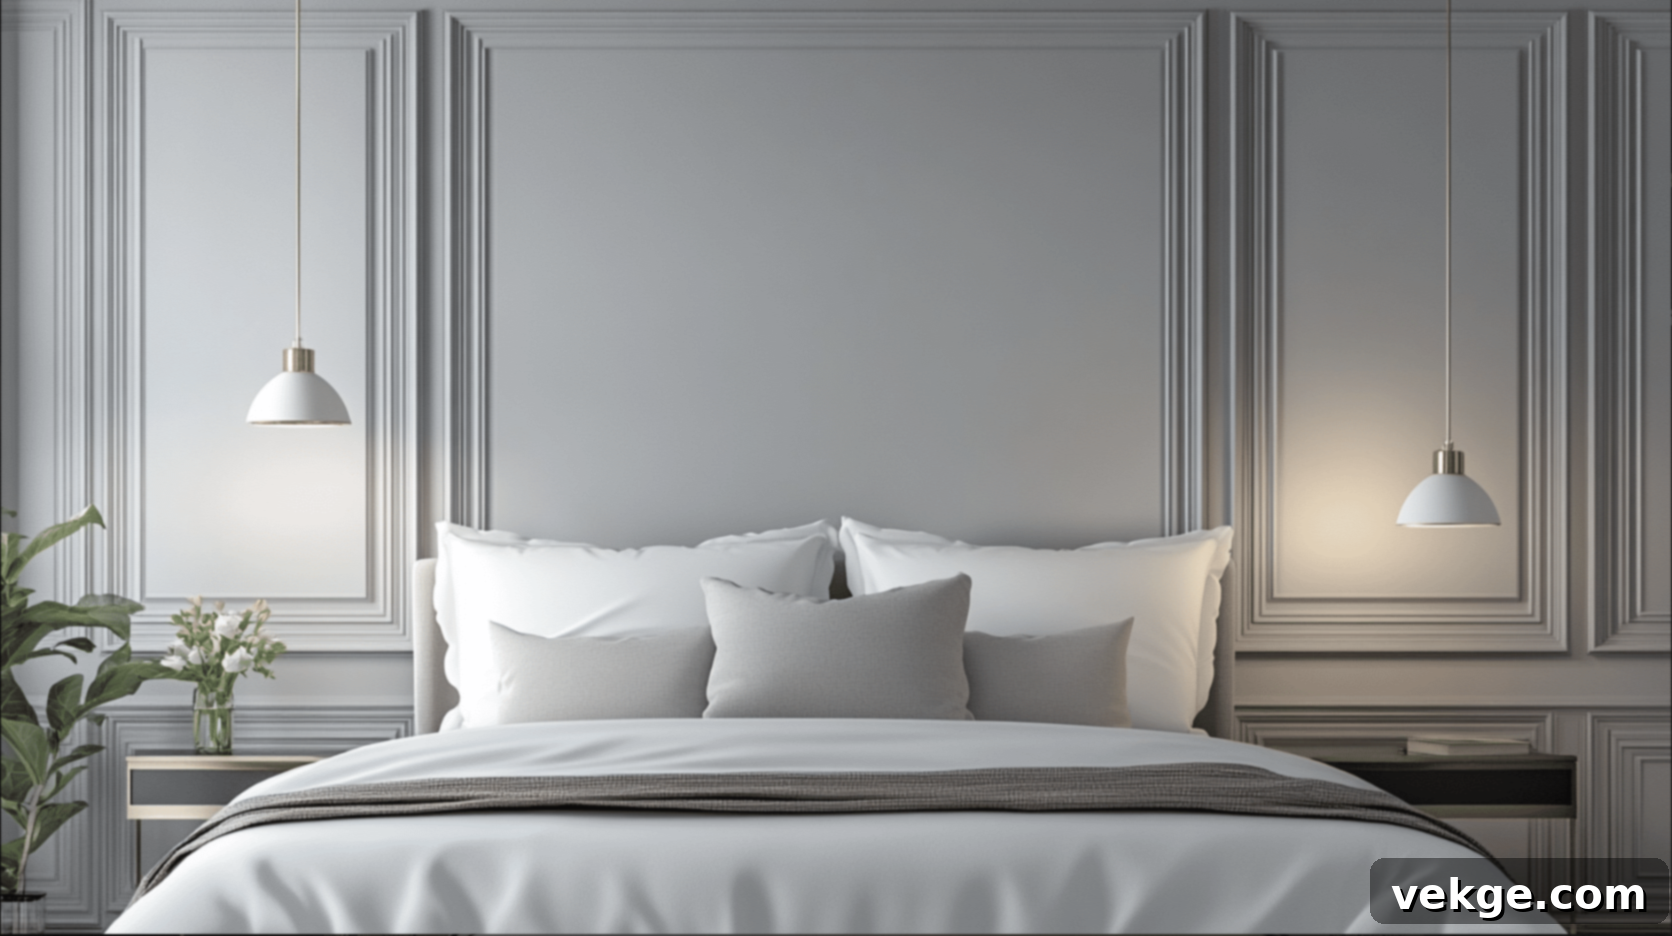
In this serene bedroom, picture frame molding takes center stage as an elegant accent wall behind the bed. The molding frames the main wall, adding subtle texture and a sophisticated layer to an otherwise minimalist space. By choosing a neutral tone that matches or softly contrasts with the wall color, the molding creates a tranquil backdrop that enhances the feeling of calm and luxury. The delicate interplay of shadows within the frames adds depth without overwhelming the senses, while soft bedding and stylish pendant lighting complete the balanced, calming atmosphere. This design proves that picture frame molding can be both a refined focal point and a subtle enhancer, perfect for creating a peaceful retreat.
5. Fireplace with Picture Frame Molding: Elevated Hearth
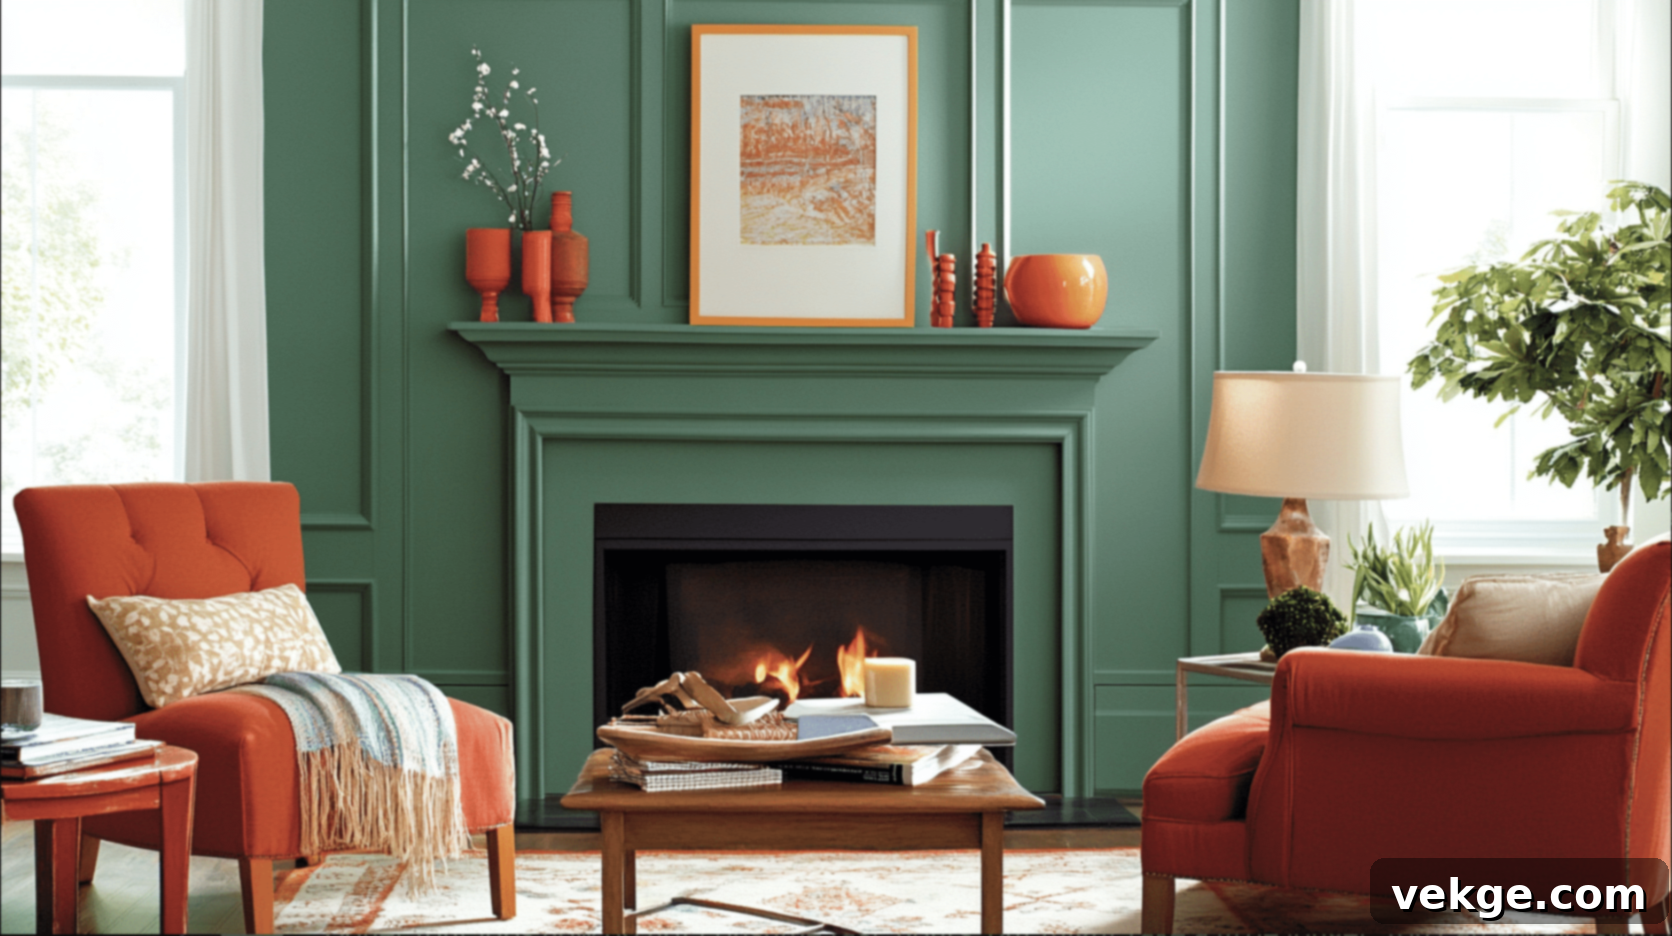
This idea showcases how picture frame molding can magnificently enhance a fireplace, transforming it into an extravagant focal point. Here, the fireplace surround and the wall above are enveloped in intricate picture frame molding, all painted in a soft, inviting green. This extensive molding adds incredible depth, structure, and a sense of architectural grandeur to the wall. Above the mantel, a piece of artwork, thoughtfully framed in contrasting colors, further emphasizes the hearth as the room’s central feature. The warm-toned decor and vibrant orange seating complement the green molding, creating a rich, layered, and visually appealing space. This design demonstrates how molding can be used to build out and adorn existing features, making them truly shine.
Wrapping It Up: Your Walls Await Their Transformation!
Picture frame molding has genuinely revolutionized the look and feel of my home, and I sincerely hope this detailed guide empowers you to achieve similar breathtaking results in your own space. It’s truly remarkable how this relatively simple, DIY-friendly addition can make any room feel instantly more sophisticated, curated, and custom-designed. Gone are the days of plain, overlooked walls; now, they are canvases of character and elegance.
Beyond the immediate visual upgrade, picture frame molding offers a fantastic return on investment. It’s a budget-friendly project that significantly boosts your home’s aesthetic appeal and perceived value, all without the need for extensive renovations. The most empowering aspect of this journey is knowing that you can achieve such a high-impact transformation yourself! I was initially nervous, like many DIY beginners, but by breaking down the project into manageable steps, it became an enjoyable and incredibly rewarding experience.
Whether you’re aiming for a classic, timeless look, a modern minimalist aesthetic with subtle texture, or something entirely unique and personalized, picture frame molding provides an incredible canvas for expressing your individual style. It’s an opportunity to inject personality and architectural interest where it once lacked.
I would absolutely love to hear about your own picture frame molding projects! Did you decide to give it a try after reading this guide? How did your installation go? What creative designs did you implement? If you have any questions at any stage of your project, please don’t hesitate to ask. Remember, every DIY endeavor is a chance to learn, grow your skills, and create something truly beautiful and enduring for your home. Happy molding!
Frequently Asked Questions (FAQs) About Picture Frame Molding
What Is the Formula for Calculating Picture Frame Molding?
To calculate the amount of molding needed, first measure the total length and height of the wall(s) you plan to adorn. Then, determine the desired size and number of individual picture frames you want to create on that wall. For each frame, calculate its perimeter (2 x length + 2 x width). Add up the perimeters for all your frames. Finally, add an extra 10-15% to your total linear footage to account for miscuts, errors, or any damaged pieces, ensuring you have enough material to complete your project without delays.
How Do I Figure out How Much Molding I Need for My Project?
Start by drawing your design on paper or directly on the wall with painter’s tape to visualize the layout. Measure the exact length of each individual piece of molding required for every frame (e.g., four pieces for each rectangle). Sum all these individual lengths to get your total required linear footage. As a crucial final step, always add a buffer of 10-15% to this total. This extra amount is invaluable for covering any cutting mistakes, accommodating slightly off-kilter wall angles, or simply having a spare piece in case one gets damaged during handling or installation.
Is Picture Frame Molding Outdated, or Is It Still a Valid Design Choice?
Absolutely not! Picture frame molding is far from outdated; it remains a timeless and highly versatile design element that continues to gain popularity in modern interior design. While it has historical roots, its adaptability allows it to enhance a wide range of aesthetics, from traditional and classic to transitional and even contemporary spaces. Modern iterations often feature cleaner, simpler profiles and can be painted in monochromatic tones for a sophisticated, understated look. It’s a go-to choice for designers looking to add architectural interest, depth, and a bespoke feel to any room, proving its enduring appeal and relevance in today’s homes.
