Transform Your Home: The Ultimate Guide to DIY Wood Trim Accent Walls
Welcome to the definitive guide on creating breathtaking wood trim accent walls! I’m thrilled to share my passion and expertise, guiding you through every step of crafting stunning wall designs using versatile wood trim. This guide is your complete resource, covering everything from selecting the perfect style that complements your home to adding those essential final touches that elevate your space.
In my experience, wood trim offers an unparalleled ability to infuse any room with a sense of warmth, sophisticated texture, and architectural character. Beyond its aesthetic appeal, it’s a remarkably budget-friendly method to refresh and revitalize your living environment. Whether your taste leans towards sleek modern minimalism or time-honored classic elegance, you’ll discover a wood trim style perfectly suited for your home and personal aesthetic.
Throughout this comprehensive guide, I’ll reveal my favorite wood trim patterns and share invaluable insights I’ve gathered over the years for selecting the ideal trim to harmonize with your specific space. You’ll also find a detailed, step-by-step process for flawless installation, alongside expert advice on painting, staining, and maintaining your beautiful new accent wall to ensure it looks impeccable for years to come.
Are you ready to unlock your creativity and dramatically transform your walls? Let’s embark on this exciting journey into the captivating world of DIY wood trim accent walls together!
What Is a Wood Trim Accent Wall?
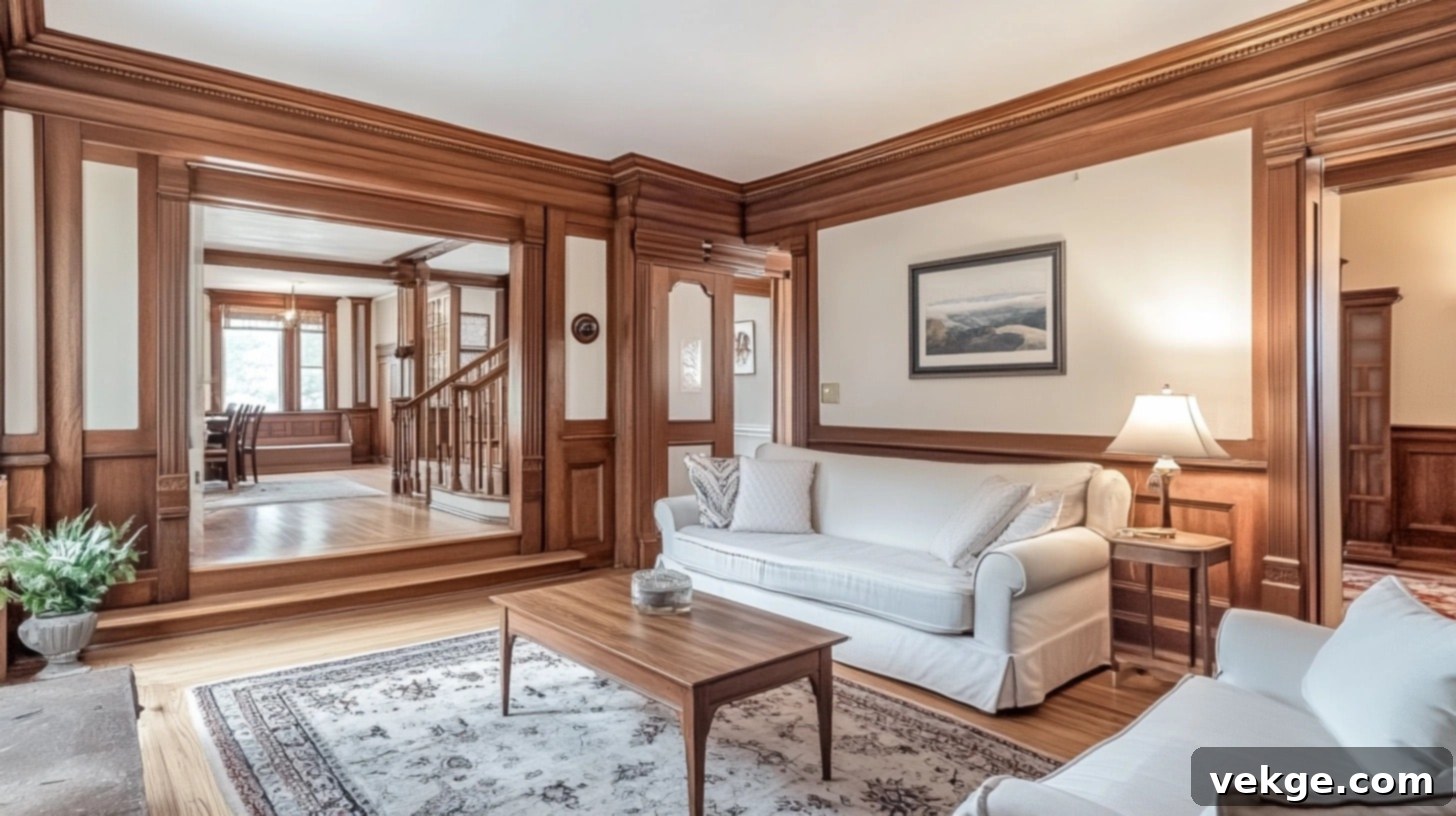
A wood trim accent wall is an ingenious and highly effective way to dramatically enhance a room’s aesthetic appeal and add architectural interest. This popular interior design technique involves attaching thin pieces of wood, often referred to as trim or molding, to a single wall in various patterns and configurations. Unlike full wood paneling that covers an entire wall surface, a wood trim accent wall leverages the strategic placement of these strips to create distinct shapes, geometric designs, or traditional framed panels.
This approach offers a remarkable transformation without the significant expense and complexity associated with full wall coverings. By focusing on just one wall, it creates a striking focal point, drawing the eye and adding a layer of sophistication and depth that a plain painted wall simply cannot achieve. These accent walls are exceptional for making a statement, defining a specific area within an open-concept space, or simply imbuing a room with a cozier, more inviting atmosphere.
Styles of Wood Trim Accent Walls
Wood trim offers an incredible spectrum of design possibilities, allowing for personalized expressions of style:
- Simple Linear Trim: This fundamental design features straight lines of wood trim, typically running vertically or horizontally across the wall. It creates a clean, modern aesthetic, enhancing perceived ceiling height or elongating a room.
- Geometric Patterns: Unleash creativity by forming intricate shapes like diamonds, squares, rectangles, or even more complex tessellations. Geometric patterns add dynamic energy and a contemporary flair to any space.
- Paneled Looks: This style mimics the timeless elegance of traditional wall panels, such as wainscoting or ornate raised panels. It brings a sense of formality, classic charm, and rich architectural detail to a room.
Adding Depth and Character
Wood trim accent walls are masters at altering the perception and feel of a room:
- They introduce textural layers and three-dimensional elements to an otherwise flat wall, making the room feel more intentional, thoughtfully designed, and cohesive. The play of light and shadow on the trim adds visual intrigue.
- These walls are inherently designed to create a powerful focal point, instantly drawing attention to a specific area of the room, such as behind a bed, a sofa, or a dining table. This helps anchor the space and guides the eye.
- Their versatility is unmatched; they work seamlessly in various room types, from bedrooms and living rooms to hallways and home offices, and can be adapted to suit diverse interior design preferences, from farmhouse to ultra-modern.
In essence, wood trim accent walls are a highly adaptable and impactful way to refresh your home’s interior. Regardless of whether you gravitate towards a sleek, contemporary aesthetic or a more traditional, classic ambiance, there’s a wood trim design that can perfectly articulate your vision and transform your space.
Neutral Color Palettes Design Ideas for Wood Trim Accent Walls
1. Vertical Batten Accent
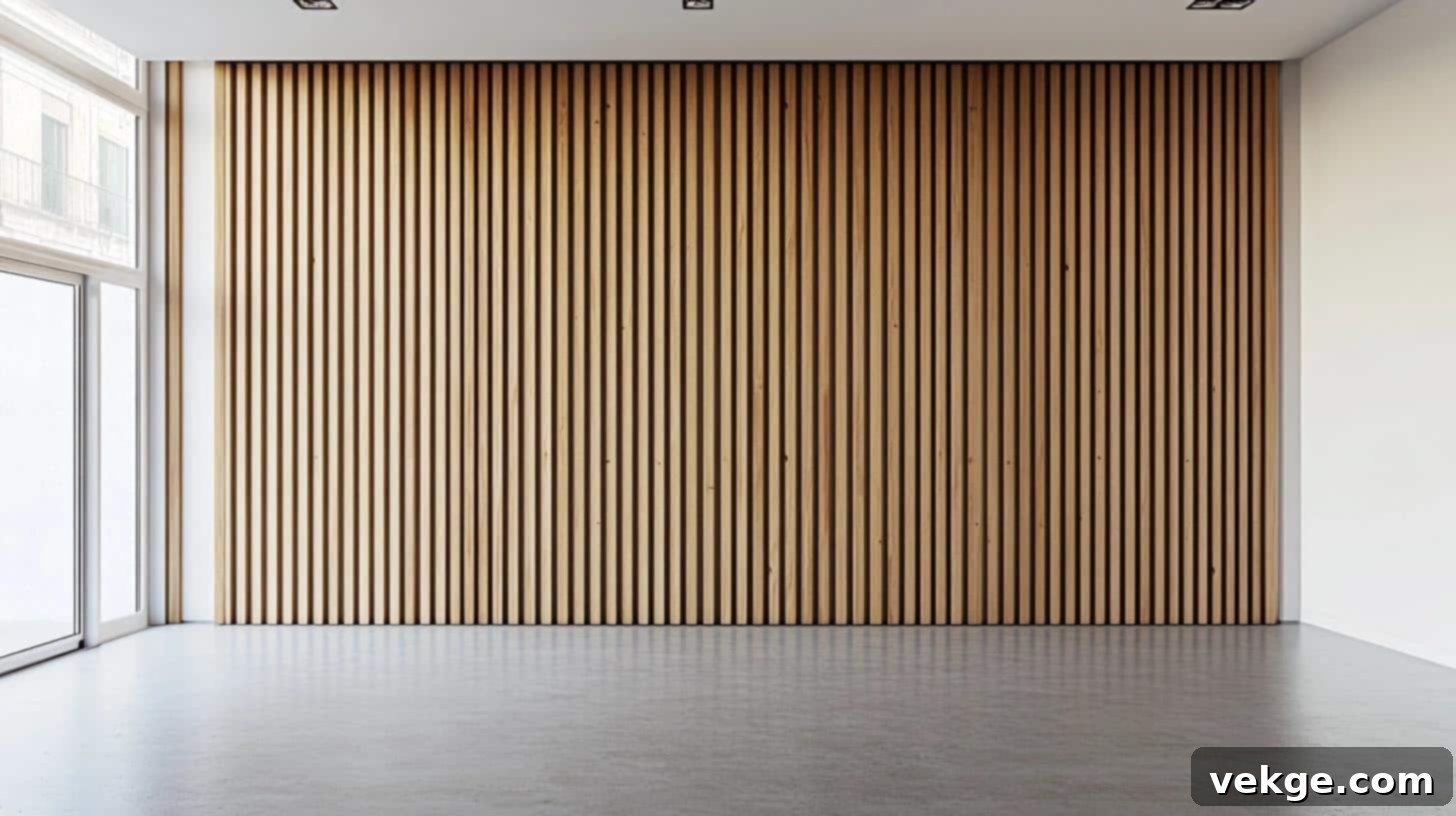
Vertical battens are an exceptional choice for adding both height and subtle texture to a room. By drawing the eye upward, they masterfully create the illusion of higher ceilings, instantly imparting an air of elegance and expansive visual interest. This minimalist yet impactful approach is particularly well-suited for rooms where a subtle, sophisticated design element is desired without overwhelming the space, blending seamlessly with neutral color palettes.
Suitable For: Hallways, smaller bedrooms, cozy reading nooks, and entryways, where making the space feel taller is beneficial.
Installation Tips: Achieve a polished, uniform look by meticulously spacing the battens evenly across the wall. Utilize a laser level for precise vertical alignment and employ a strong construction adhesive in conjunction with a nail gun for a secure, long-lasting installation, especially on larger wall expanses.
2. Minimalist Horizontal Wood Slats

Thin horizontal wooden slats introduce a simple, clean, and highly sophisticated aesthetic to any room. This design choice beautifully emphasizes the inherent natural texture and grain of the wood, all while maintaining an understated, minimalist look that perfectly complements neutral color schemes. It creates a serene and expansive feel, often making a room appear wider.
Suitable For: Bedrooms (especially behind the headboard), modern living rooms, contemporary office spaces, and dining areas.
Installation Tips: Precision is key; ensure equal spacing between each slat for a perfectly uniform and harmonious appearance. Consider opting for a light, natural wood tone like maple or birch, or paint the slats in a coordinating neutral shade (greys, whites, muted tones) to preserve the desired minimalist vibe. Use thin spacers for consistent gaps.
Bold Contrasts Design Ideas for Wood Trim Accent Walls
3. Diagonal Slat Wall

A diagonal slat wall injects a sleek, incredibly dynamic, and energetic touch into any room. By positioning the wood slats at an angle, this design masterfully creates a sense of movement and a distinctly modern aesthetic that immediately captures attention. It offers a unique and refreshing alternative to the more conventional vertical or horizontal slat patterns, making it an excellent choice for contemporary spaces yearning for an unconventional, artistic flair and a bold visual statement.
Suitable For: Modern living rooms, contemporary bedrooms, innovative office spaces, and creative studios.
Installation Tips: Meticulous measurement and careful planning of the slat angles are paramount to ensure consistency and a cohesive design. Utilize a protractor and a long level to maintain balance and precision throughout the installation. Cutting test pieces is highly recommended before committing to the final cuts.
4. Herringbone Wood Accent
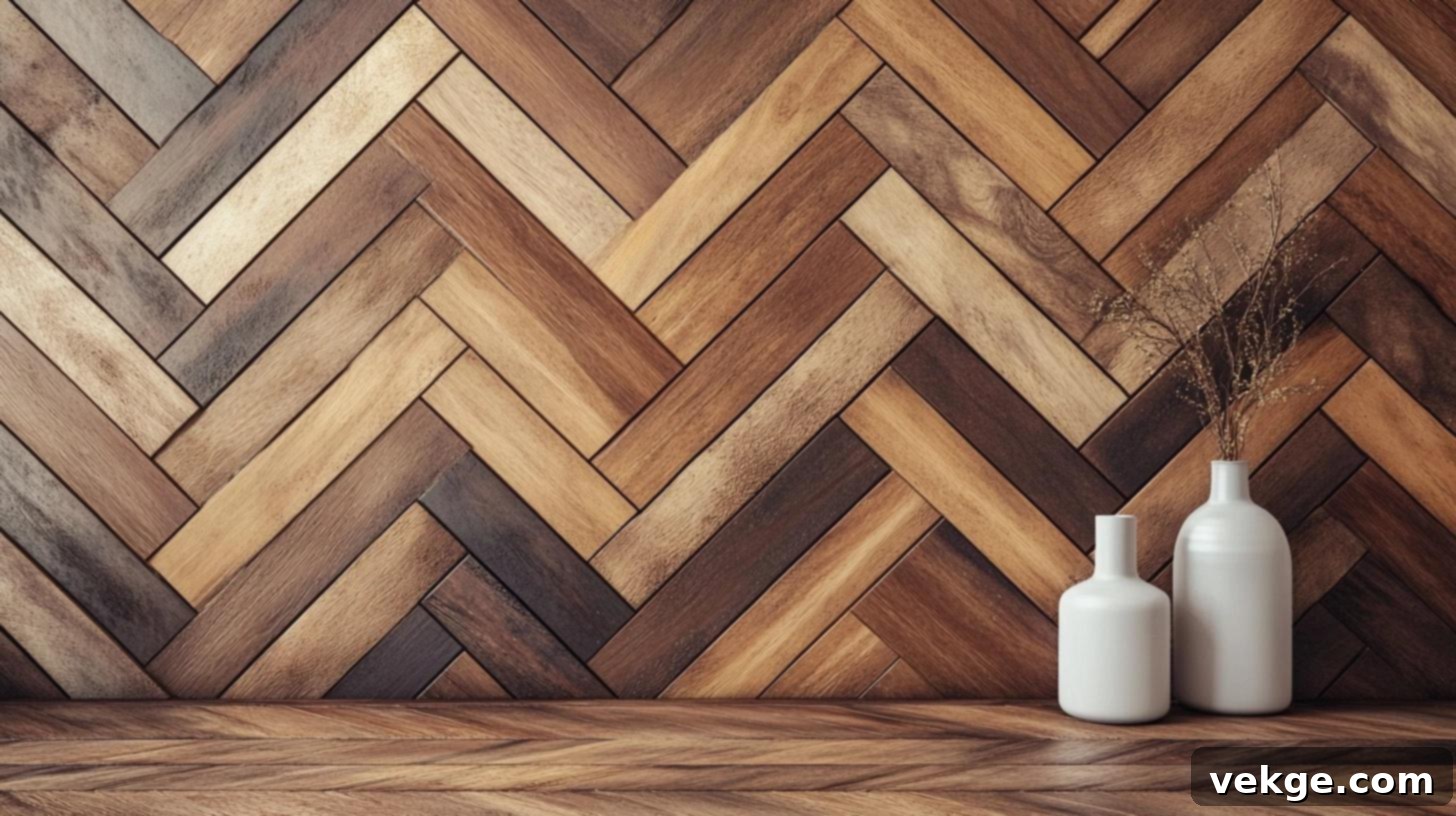
The herringbone pattern stands as a truly timeless and elegant design, celebrated for its intricate geometric and structured feel. When applied with wood trim, this pattern brings both warmth and an undeniably bold statement to a feature wall, making it a versatile choice that seamlessly integrates into both modern and classic interior schemes. The interlocking ‘V’ shapes create a visually rich and sophisticated surface.
Suitable For: Formal living rooms, sophisticated home offices, grand entryways, and master bedroom feature walls.
Installation Tips: Achieving an authentic herringbone pattern demands precise cuts, typically at 45-degree angles, for each trim piece. Consider using contrasting wood tones – for example, alternating light and dark stains – or a bold paint color on the trim against a neutral wall for a more dramatic and impactful visual effect.
5. Wood Slat Wall with Ombre Effect

A wood slat wall featuring an ombre effect delivers a truly captivating and bold contrast, characterized by a smooth, gradual transition of color tones from light to dark (or vice versa). This unique gradient design not only adds immense visual interest but also creates profound depth and dimension, effectively transforming the wall into the undisputed focal point of the entire room. It’s a contemporary twist on a classic design element.
Suitable For: Striking feature walls in living rooms, bedrooms, contemporary dining spaces, and creative common areas.
Installation Tips: To achieve the best ombre effect, strategically plan your color progression. Typically, start with the lightest shade at the top of the wall, subtly transitioning to progressively darker tones as you move downward. Ensuring exceptionally smooth and seamless transitions between each shade is crucial for a polished, professional outcome.
Geometric Patterns Design Ideas for Wood Trim Accent Walls
6. Grid Wall with Inset Panels
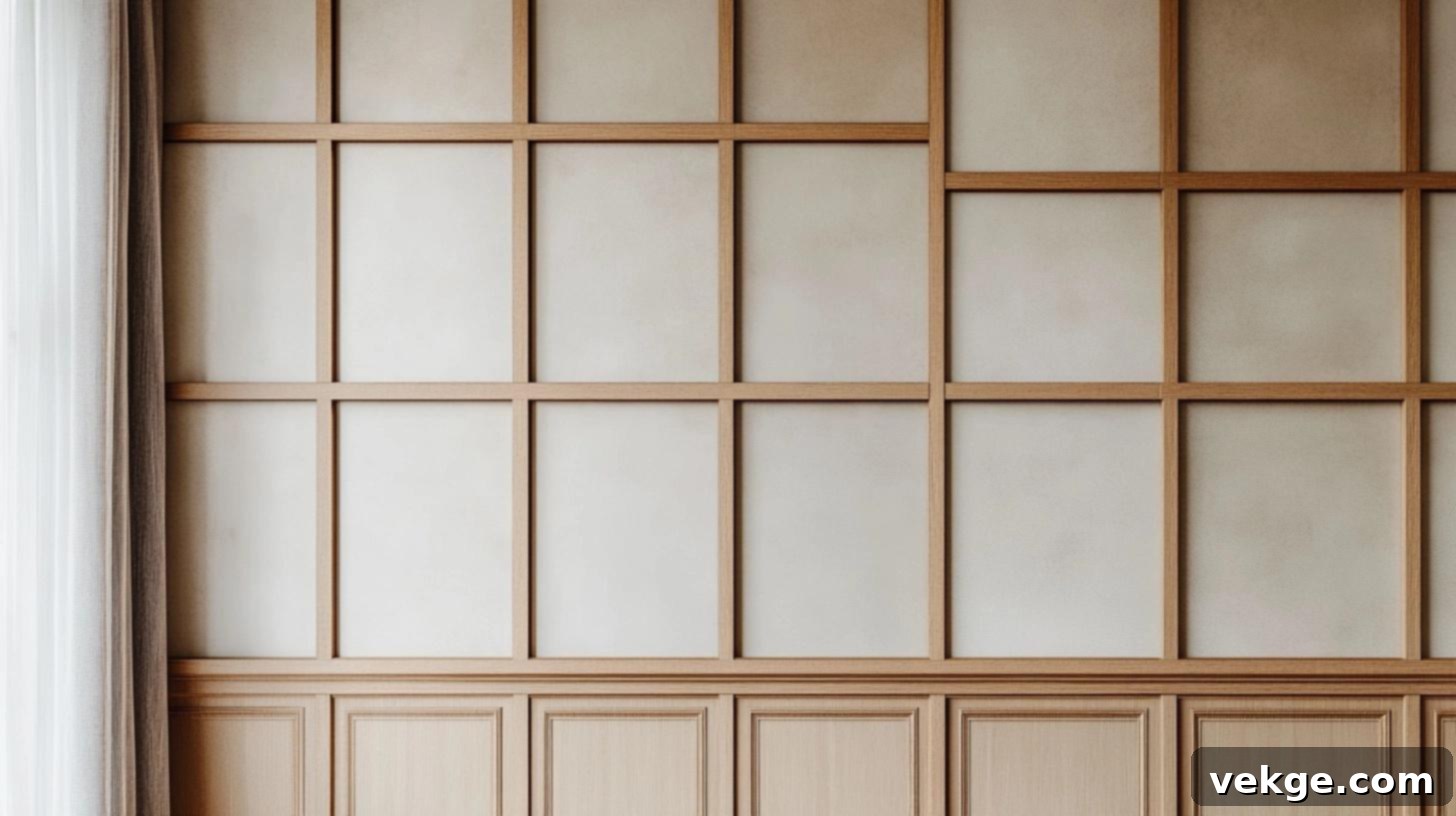
A grid wall with inset panels introduces an exquisitely structured and refined aesthetic to any interior. The wood trim meticulously forms a symmetrical grid pattern, while the recessed inset panels offer a fantastic opportunity for personalization. These insets can be painted in a contrasting color, wallpapered with a complementary texture or pattern, or even adorned with mirrors to create a dynamic visual interplay with the grid lines. This versatile style works exceptionally well in both formal and more relaxed casual settings.
Suitable For: Elegant dining rooms, sophisticated living rooms, formal studies, or any space where a touch of classic architectural detail is desired.
Installation Tips: Precise measurement and planning of the grid pattern are critical before cutting any trim. Consider using thinner trim profiles to allow the inset panels to truly stand out. For a cleaner and more efficient installation process, pre-painting or pre-wallpapering the inset panels before attaching the trim can save significant time and effort.
7. Chevron Pattern Wood Trim
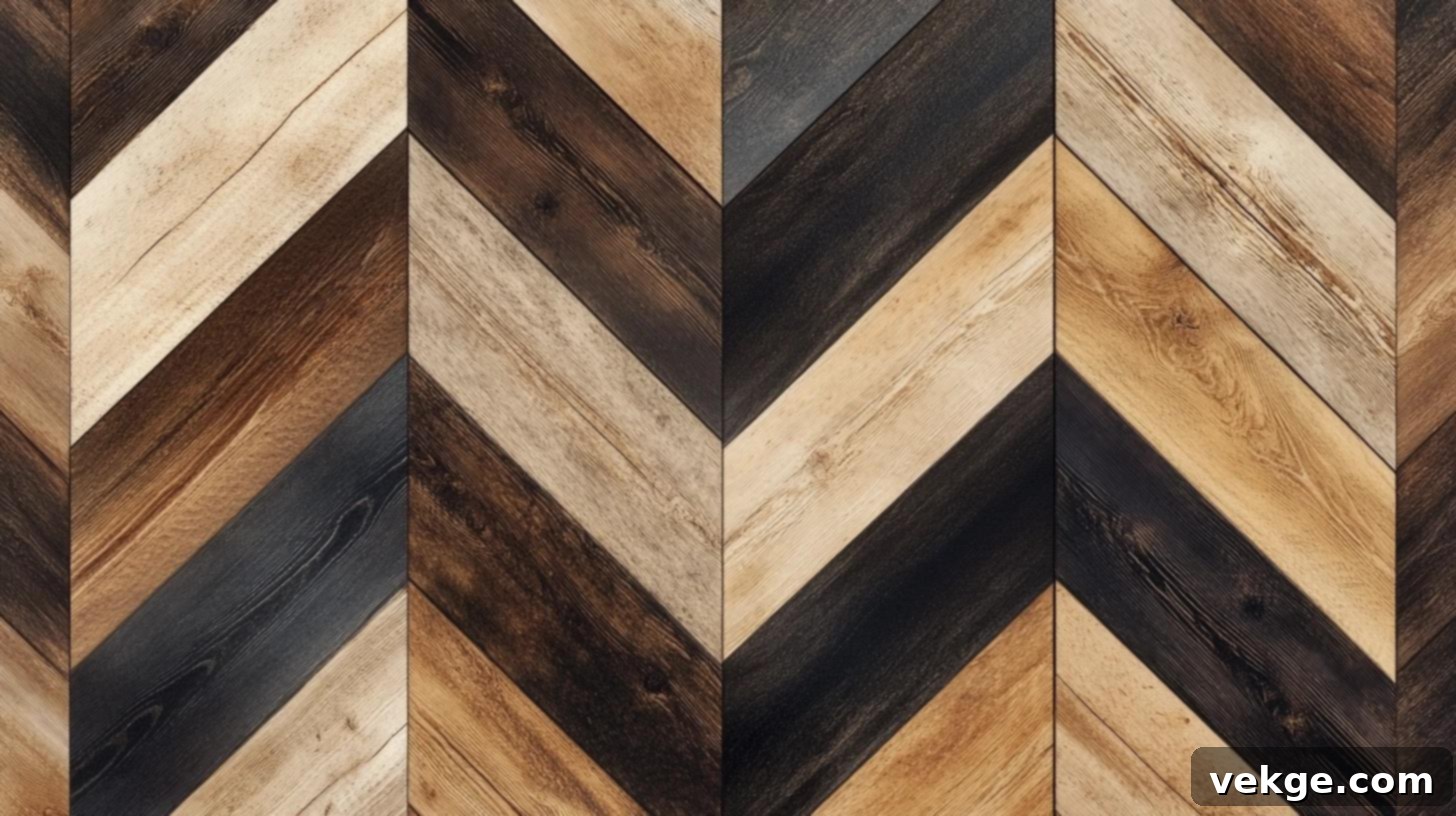
The chevron pattern is masterfully created by arranging wood trim in a striking zigzag design, offering a thoroughly modern and stylish approach to accent walls. This dynamic pattern instantly adds a powerful geometric feature to any space, making it an ideal choice for individuals who desire a bold, contemporary, and visually engaging aesthetic. The repetitive “V” shape creates movement and visual rhythm that can enliven a room.
Suitable For: Contemporary bedrooms, vibrant living rooms, chic hallways, and entryways where a strong design statement is welcomed.
Installation Tips: Achieving the distinctive chevron look requires exceptionally precise angle cuts for each piece of trim. Consistent 45-degree or 30-degree angles are typically used. Opting for darker wood stains or applying contrasting paint colors to the trim can significantly enhance the design’s boldness and make the pattern pop against the wall.
8. Diamond Lattice Wood Wall
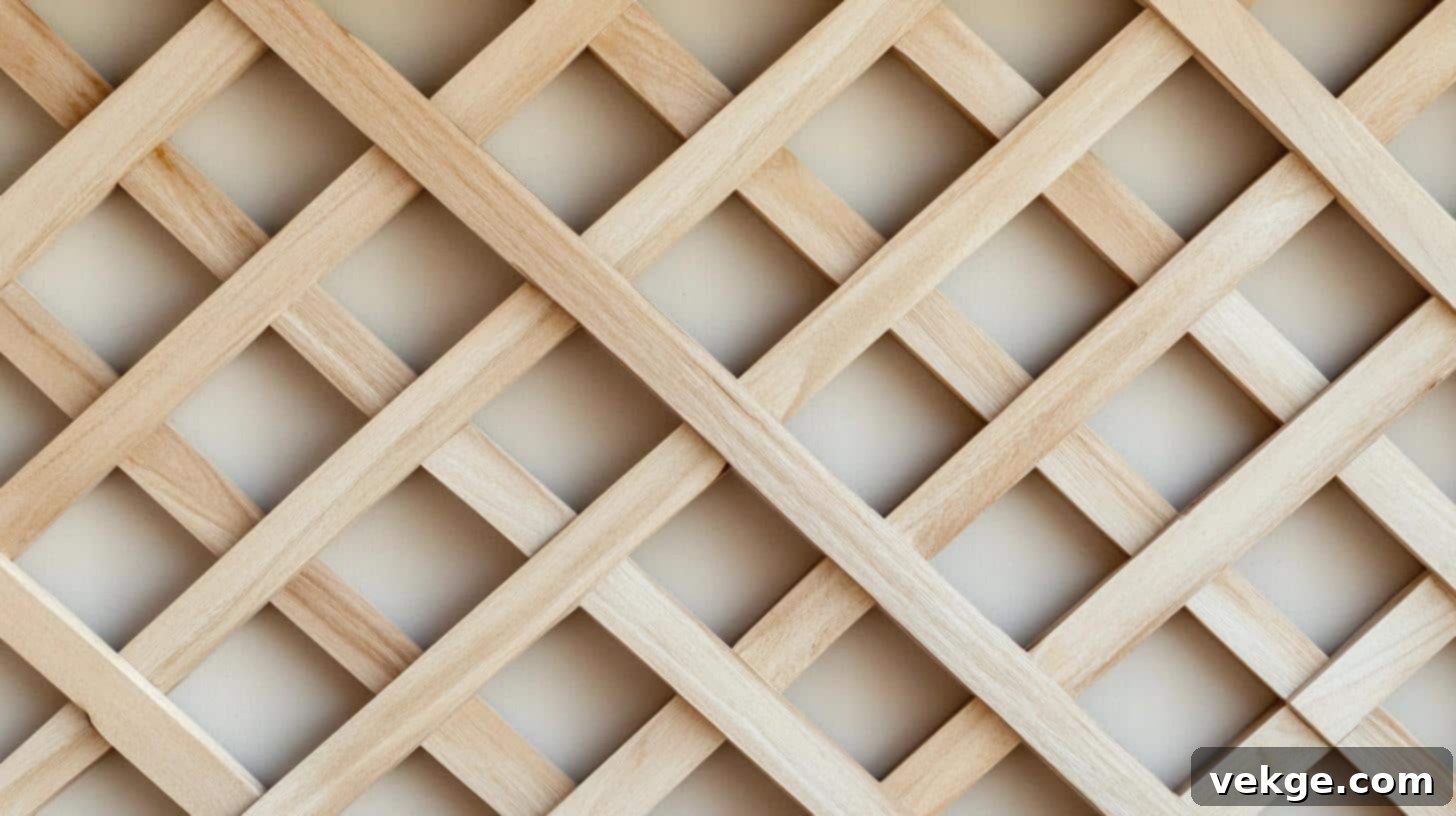
This intricate and sophisticated design utilizes carefully cut and arranged wood trim pieces to form a beautiful diamond-shaped lattice pattern. The detailed and repetitive geometry creates an exceptionally eye-catching and luxurious wall. The diamond lattice design adds significant sophistication, visual texture, and impressive depth to any space, making it feel more opulent and thoughtfully designed.
Suitable For: Elegant living rooms, formal dining areas, refined master bedrooms, or any sophisticated space that could benefit from an ornate decorative element.
Installation Tips: Due to the intricate nature of the pattern, meticulous measurement and precise cutting of each trim piece are absolutely essential to ensure perfectly formed diamond shapes and seamless junctions. Using contrasting wall colors or a metallic paint behind the lattice can dramatically highlight the pattern and enhance its visual impact.
Classic Styles Design Ideas for Wood Trim Accent Walls
9. Half-Wall Wainscoting with Trim Molding
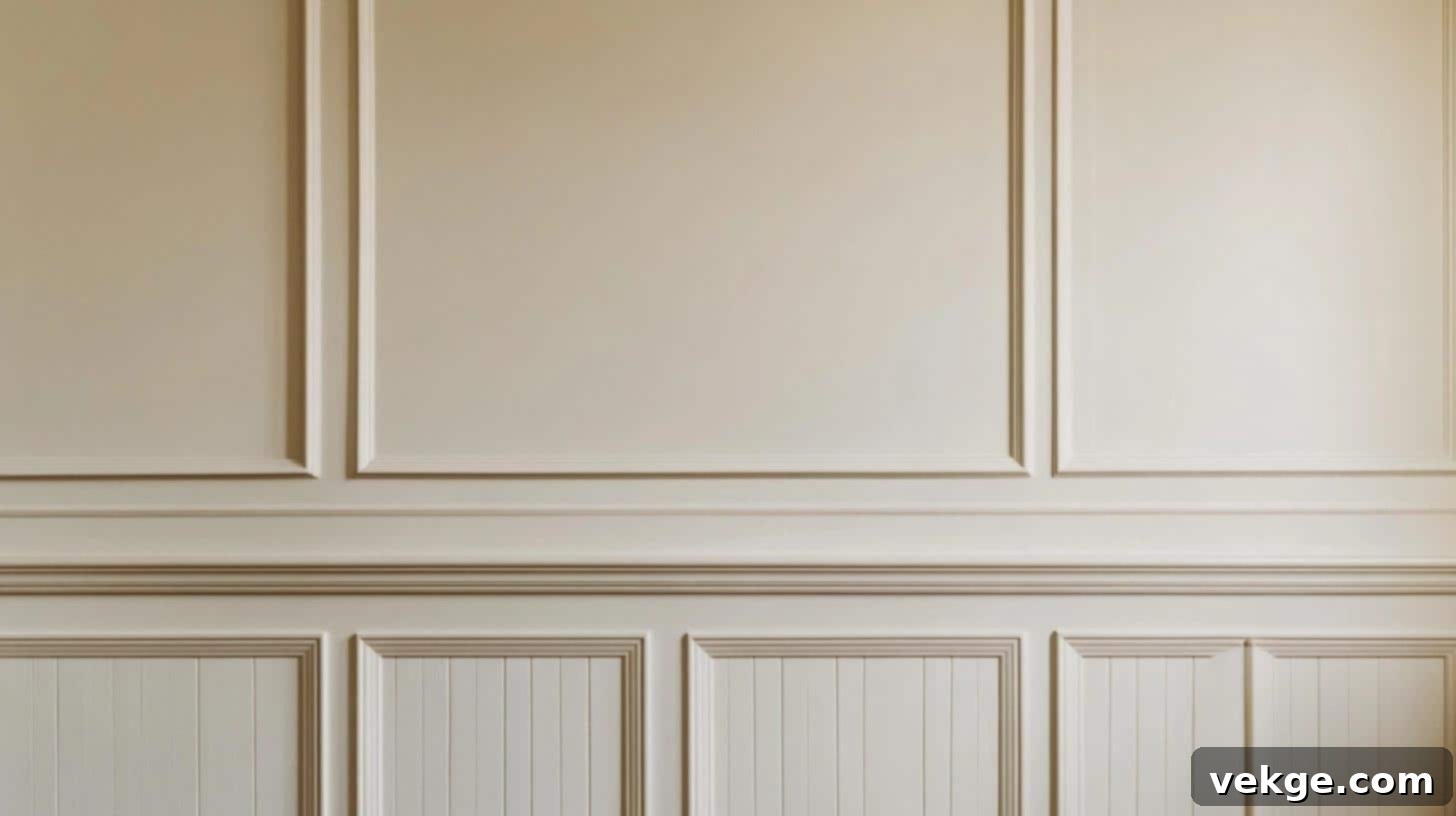
Wainscoting is a timeless and universally admired design that elegantly covers the lower half of a wall with wood panels, which are then artfully framed by decorative trim molding. This traditional design immediately establishes a refined and inherently elegant look, demonstrating remarkable versatility across various interior styles, from classic colonial to transitional contemporary. Beyond its beauty, wainscoting also offers practical protection for the lower portion of walls.
Suitable For: Formal dining rooms, inviting hallways, grand entryways, and sophisticated living spaces where an air of classic charm is desired.
Installation Tips: Begin by carefully installing the wainscoting base panels first, ensuring they are level and securely attached. Subsequently, frame these panels with your chosen trim molding for a polished, professional-grade finish. Painting the upper half of the wall in a complementary, often lighter, shade will further enhance the traditional appeal and visual balance of the wainscoting.
10. Raised Panel Accent Wall
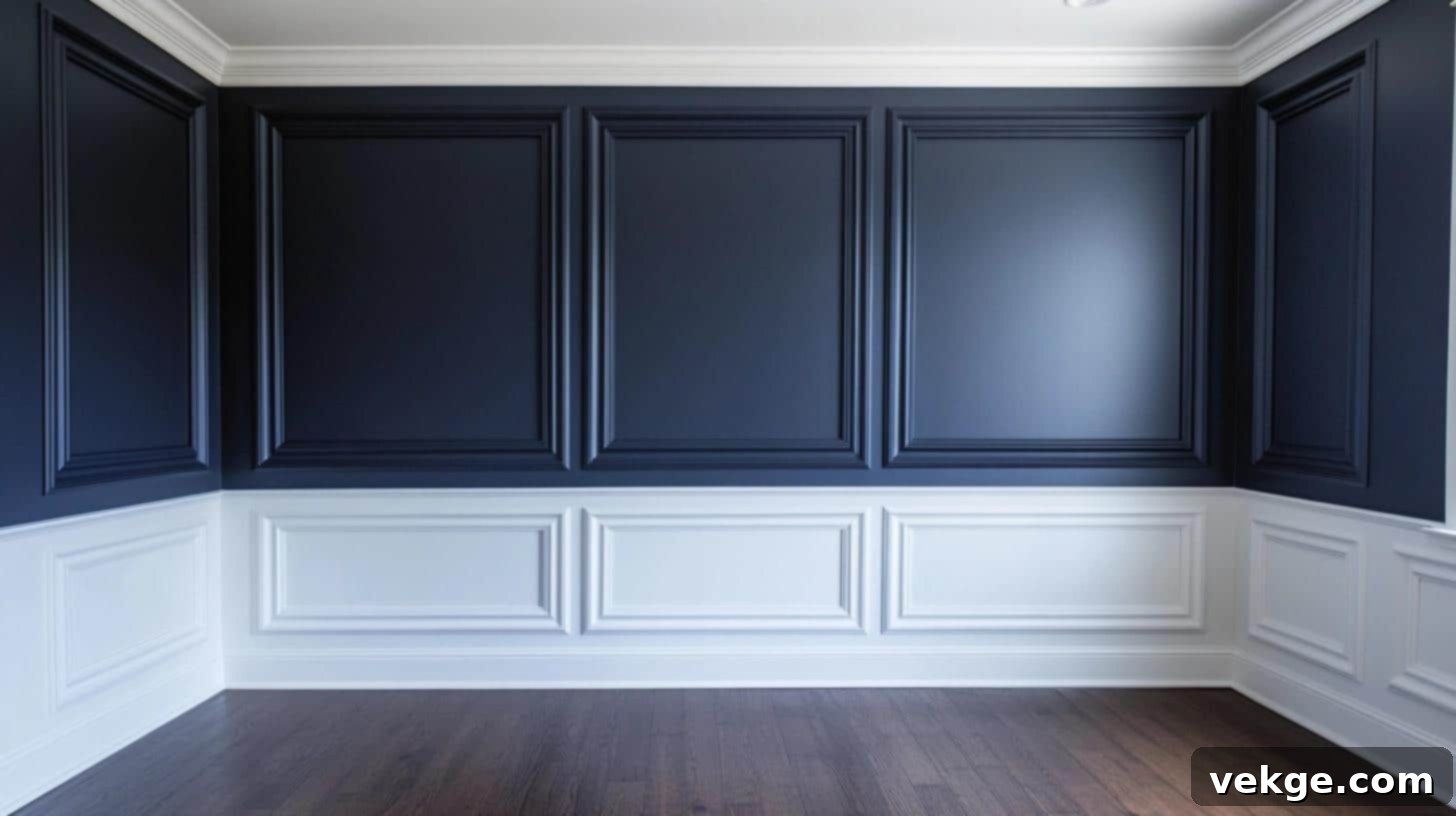
A raised panel accent wall is a quintessential classic design, characterized by prominent wood panels that protrude slightly from the wall surface, meticulously framed by a series of decorative trim pieces. This style instantly creates a formal and undeniably elegant look, adding significant architectural depth, rich texture, and a sophisticated, polished appearance to any room. It evokes a sense of grandeur and historical charm.
Suitable For: Grand dining rooms, luxurious formal living rooms, opulent master bedrooms, and distinguished home libraries or studies.
Installation Tips: The process typically involves installing the raised panels first, followed by the meticulous placement of the surrounding trim to frame them securely and precisely. To achieve even greater depth and visual drama, consider using darker paint colors or contrasting tones for the panels and the trim, which will make the raised elements truly stand out.
Unique Applications Design Ideas for Wood Trim Accent Walls
11. Rustic Wood Trim with Mixed Finishes
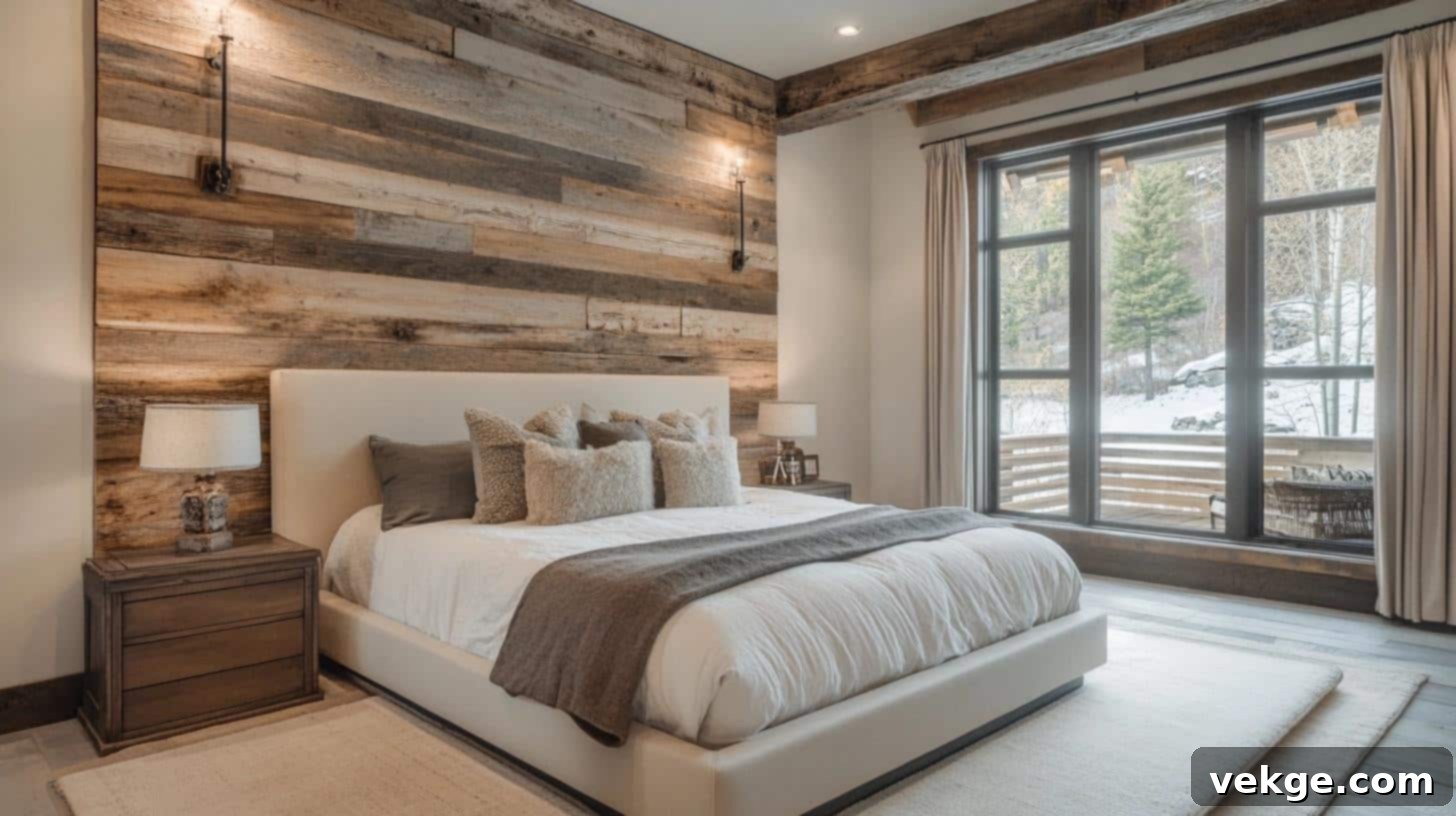
This innovative design approach utilizes wood trim with a deliberate mix of finishes, such as combining matte, semi-gloss, and glossy textures, to craft an accent wall that perfectly balances rustic warmth with a contemporary twist. The thoughtful variation in finishes introduces subtle yet captivating texture and profound visual interest, creating a multi-faceted surface that is both inviting and modern. This plays on light reflection and tactile appeal.
Suitable For: Eclectic living rooms, bedrooms, kitchens with a modern farmhouse or transitional style, and spaces seeking a unique sensory experience.
Installation Tips: Experiment with different contrasting wood finishes and shades on scrap pieces to find your ideal combination. Ensuring consistent spacing and precise alignment of the trim pieces is crucial for the best visual impact, allowing the varied finishes to shine without making the design appear chaotic.
12. Wood Trim Accent with Integrated Lighting
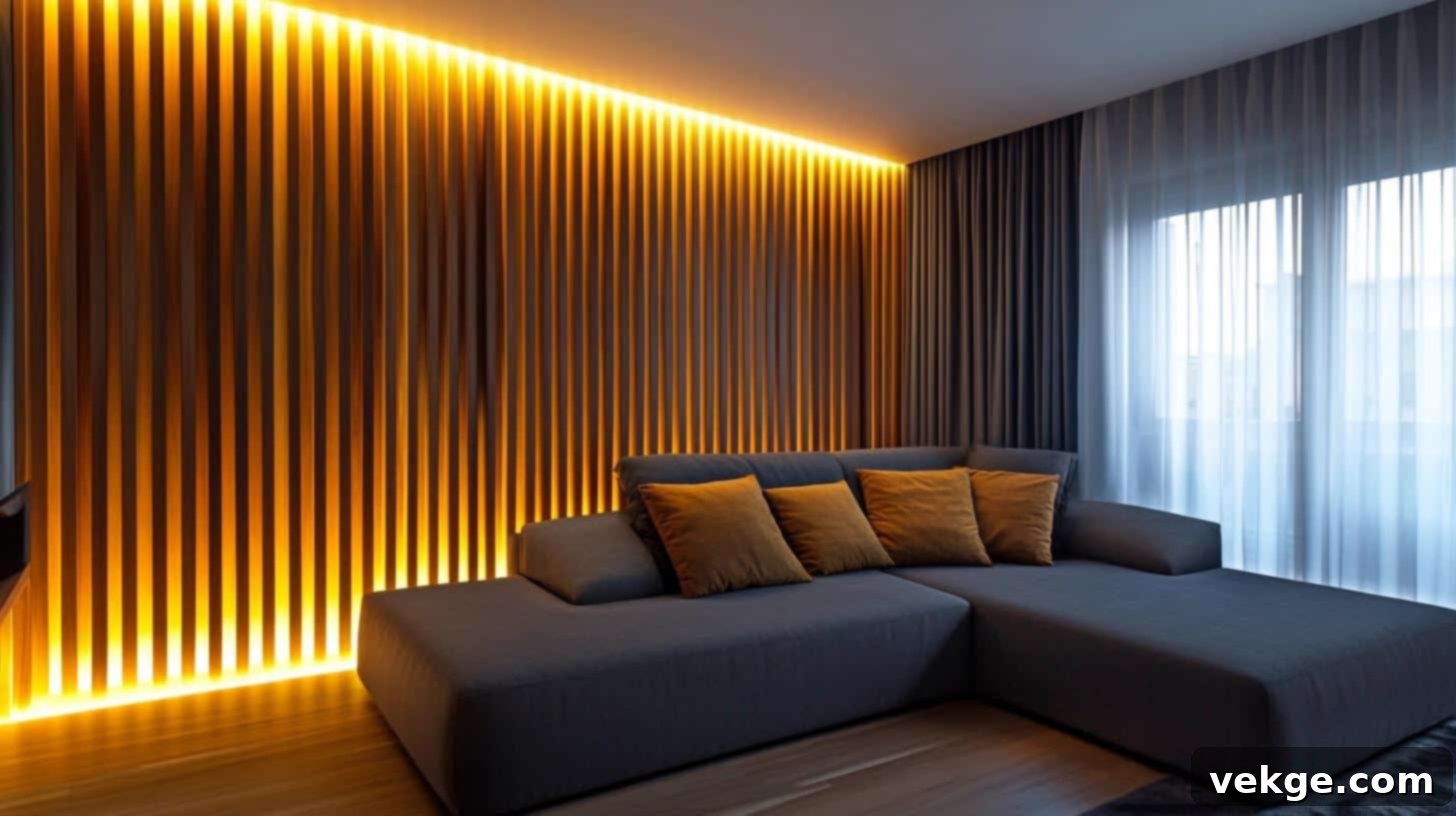
This truly modern and sophisticated idea seamlessly combines the tactile beauty of wood trim with the subtle glow of integrated LED strip lighting. The result is a dynamic wall that offers both rich texture and soft, inviting illumination. The strategically placed lighting enhances the natural warmth and intricate grain of the wood, simultaneously providing ambient light that can dramatically alter the mood and atmosphere of the room. It’s an excellent way to add a high-tech yet organic touch.
Suitable For: Contemporary bedrooms (especially behind headboards), luxurious living rooms, dedicated media rooms, and atmospheric hallways.
Installation Tips: Meticulous planning of the lighting placement is essential to ensure even and flattering distribution of light, avoiding harsh shadows. Opt for recessed LED strips or channels to keep the focus predominantly on the exquisite wood trim, creating a clean, integrated look. Consider dimmable LEDs for ultimate mood control.
13. Modern Grid with Mixed Materials
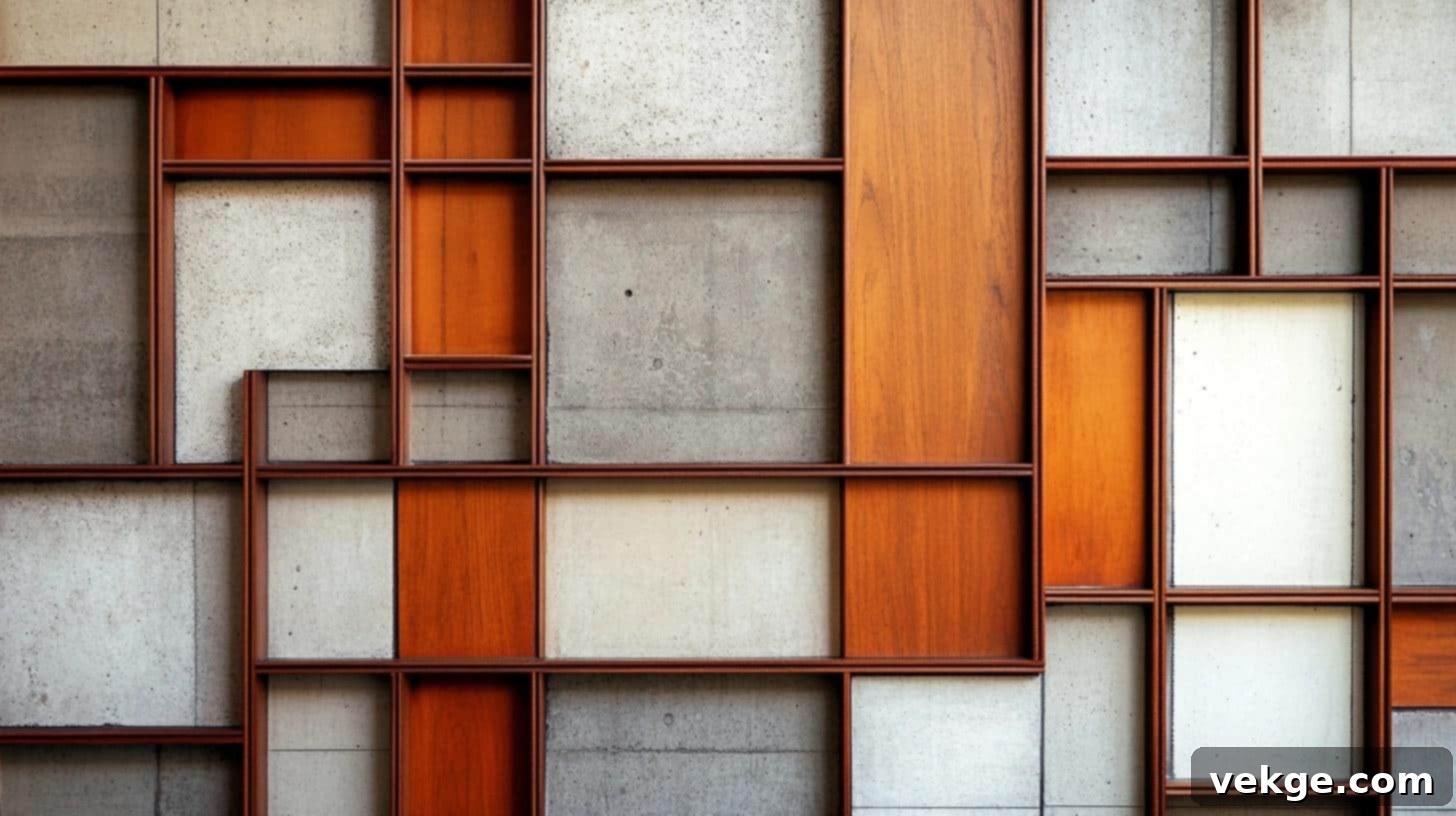
This avant-garde design breaks free from traditional boundaries by ingeniously mixing wood trim with other compelling materials, such as sleek metal panels, raw concrete slabs, or even textured fabric insets. The result is a modern, often industrial-style grid that is rich in contrasting textures and visual interest. This bold combination of diverse materials offers a fresh, innovative, and highly dynamic take on traditional wood accent walls, perfect for urban and contemporary aesthetics.
Suitable For: Loft-style living rooms, cutting-edge home offices, creative studio spaces, and industrial-chic dining areas.
Installation Tips: Ensuring proper and precise alignment of the various different materials within the grid is paramount for a professional and cohesive finish. Employ contrasting tones and textures – for instance, dark wood with polished chrome or light wood with raw concrete – to create a truly striking and memorable effect that highlights each material’s unique qualities.
14. Recessed Shelving with Wood Trim Frame
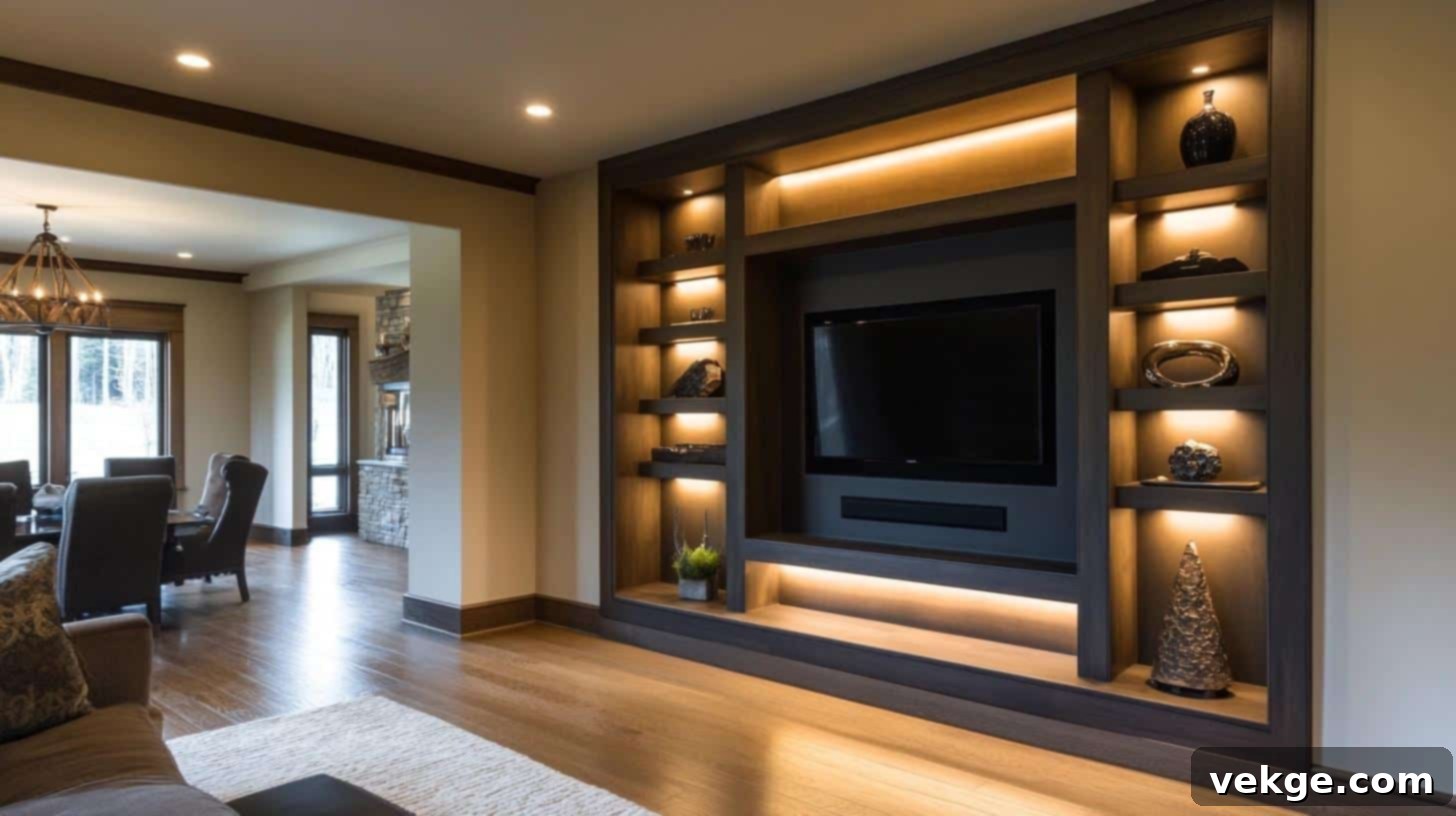
This clever design brilliantly blends essential functionality with sophisticated style by integrating recessed shelves, which are then elegantly framed by wood trim. The shelves offer invaluable practical storage or display space for books, decor, or art, while the surrounding wood trim adds a refined decorative touch that elevates the entire unit. This integrated solution is particularly perfect for optimizing space in smaller rooms, providing both utility and aesthetic appeal without protruding into the room.
Suitable For: Home offices (for books and supplies), living rooms (for displaying curated items), entryways (for keys and small decor), and cozy reading nooks.
Installation Tips: The structural integrity of the recessed shelves should be established and installed first. Subsequently, precisely frame the openings with your chosen wood trim. For enhanced visual interest and definition, use wood trim that either subtly contrasts or beautifully complements the color or finish of the shelves themselves.
15. Shiplap Accent Wall with Wood Trim Overlay
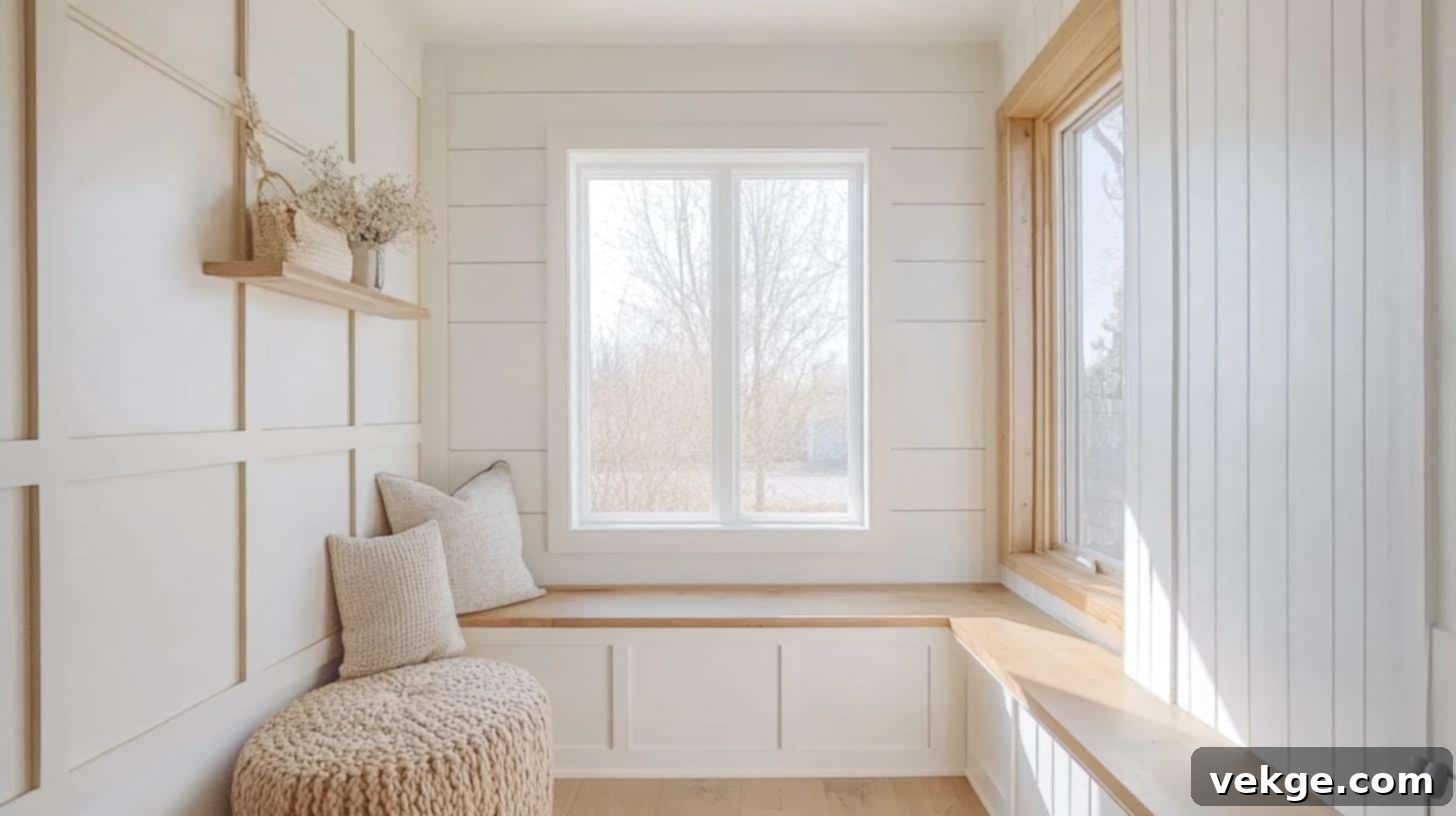
Shiplap, renowned for its charming, cozy, and distinctly rustic foundation, serves as an excellent base for this layered design. When overlaid with additional wood trim arranged in creative geometric patterns, it introduces multiple layers and significant depth to the overall wall design. This innovative combination beautifully merges the relaxed, inviting aesthetic of modern farmhouse style with the clean, structured lines of contemporary accents, creating a versatile and rich visual experience.
Suitable For: Inviting living rooms, comfortable dining areas, or charming bedrooms within modern farmhouse, coastal, or transitional interior designs.
Installation Tips: Ensure the shiplap is meticulously installed and finished first, forming a solid and even background. Then, carefully measure and overlay the additional wood trim to create your desired geometric pattern on top of the shiplap. Pre-painting or pre-staining the overlay trim pieces before installation can streamline the process and lead to a cleaner, more professional final look.
16. Textured Wood Trim in a Sunburst Pattern

In this captivating design, individual pieces of textured wood trim are artfully arranged to radiate outwards from a central focal point, culminating in a striking sunburst pattern. This energetic design element instantly brings immense visual interest, dynamic movement, and a powerful sense of energy to a space. It’s an excellent choice for making a bold and unforgettable statement, creating an artistic focal point that draws the eye and sparks conversation.
Suitable For: Grand living rooms, dramatic dining rooms, impressive entryways, or above a fireplace as a dominant focal feature.
Installation Tips: Achieving perfect symmetry and balance in a sunburst pattern requires meticulous measurement and precise placement of each trim piece. Begin by establishing the central point accurately and then work outwards, ensuring consistent angles and alignment for all radiating pieces. Using a laser level is highly recommended for precision.
17. Double Trim in Two-Tone Color Scheme
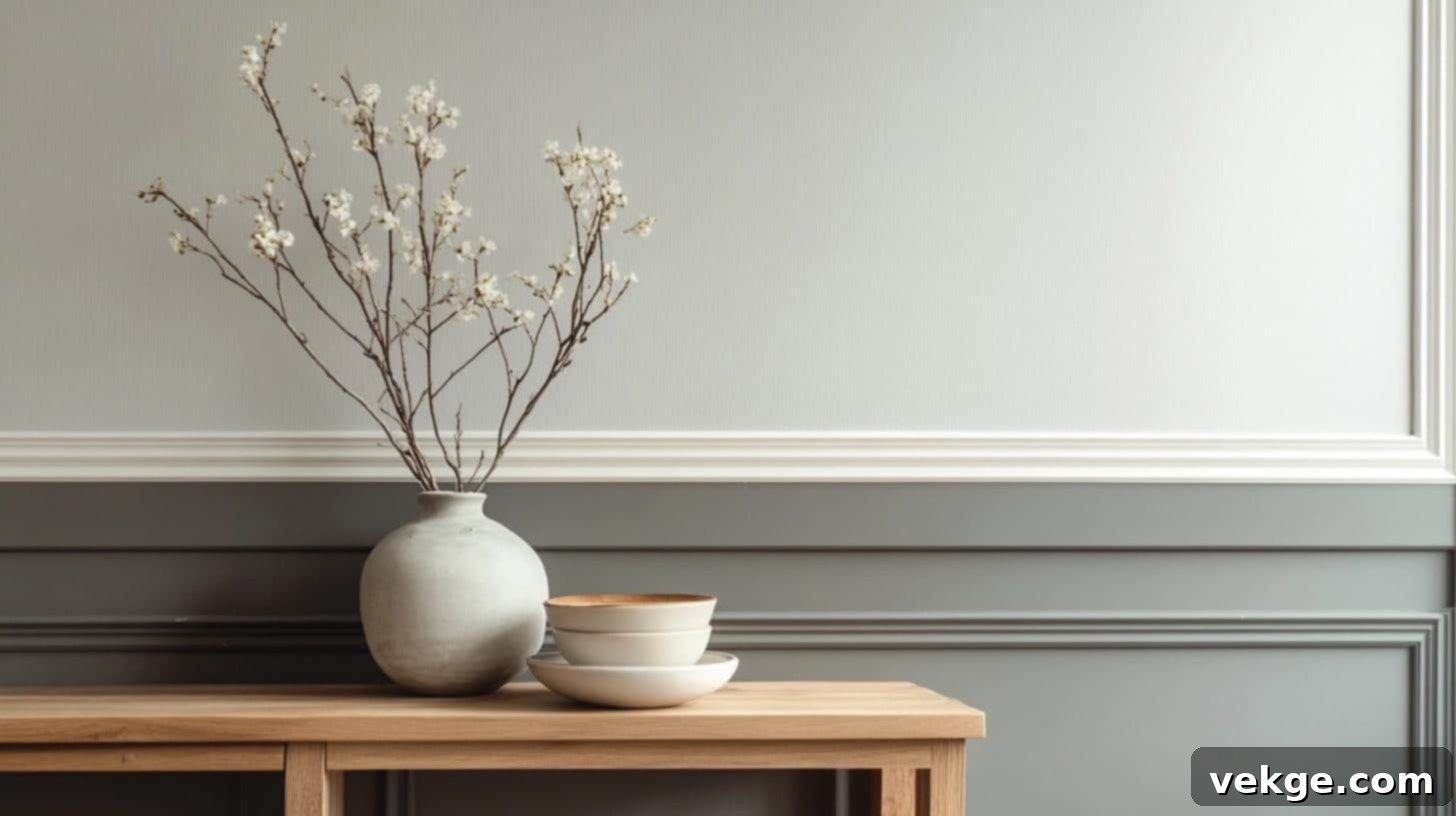
This sophisticated design elevates the traditional trim concept by utilizing two distinct layers of wood trim, each finished in a different color, to create a captivating double-framed effect. The strategic combination of two contrasting or complementary colors adds remarkable depth, complexity, and a unique contemporary flair to the accent wall. It’s a subtle yet impactful way to introduce more visual interest and a custom-designed feel.
Suitable For: Elegant bedrooms, refined living rooms, formal dining areas, and sophisticated studies where a layered aesthetic is appreciated.
Installation Tips: For the most striking and intentional look, carefully select two paint or stain tones that either contrast sharply or beautifully complement each other. Ensure exceptionally even spacing between the two layers of trim for the best visual effect and a truly professional finish. Pre-painting each layer before installation can make the process much smoother.
18. Wood Trim with Textured Wallpaper Insets
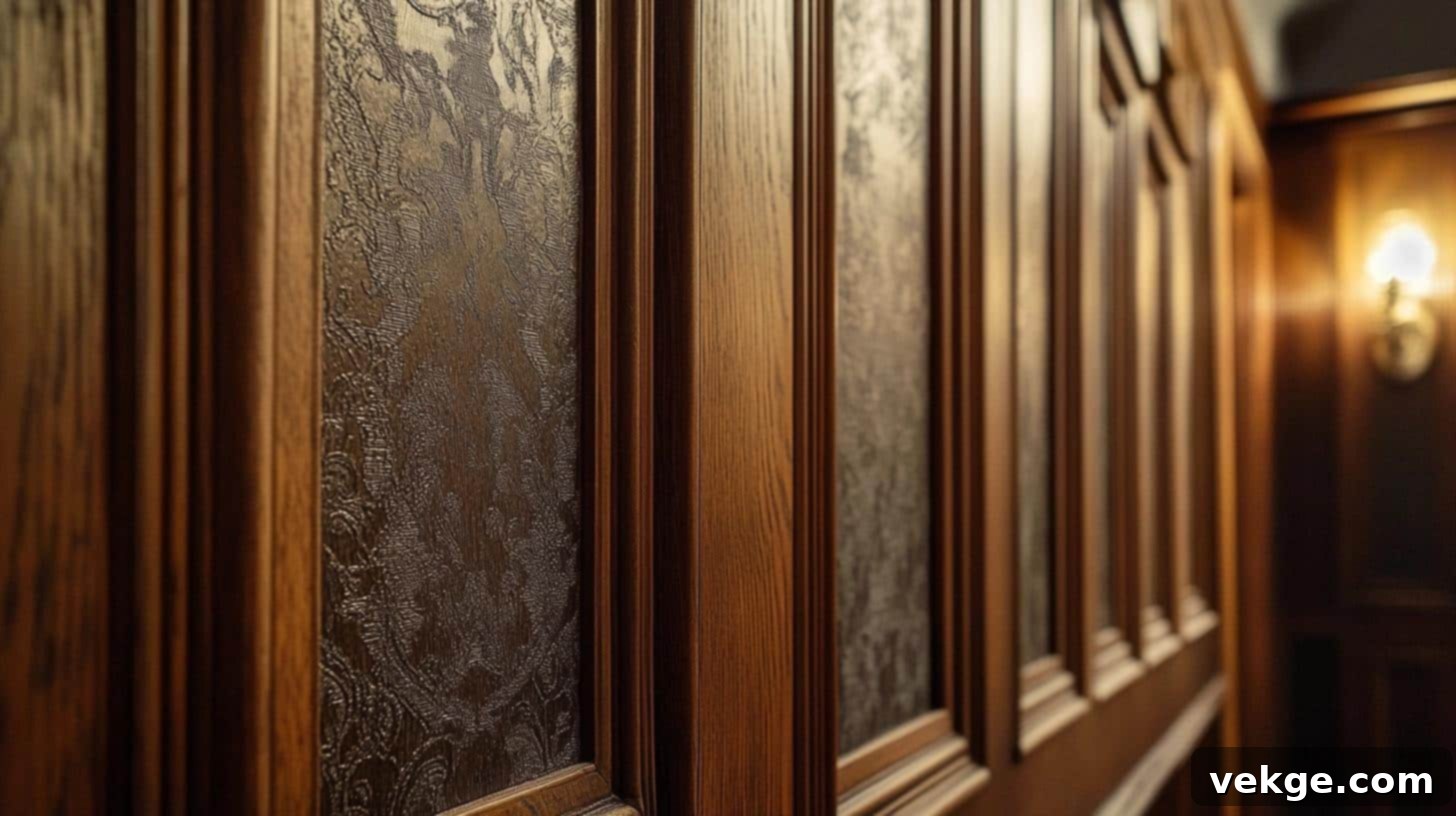
This ingenious design concept frames carefully chosen sections of textured wallpaper with elegant wood trim, creating a harmonious blend of natural wood warmth and soft, tactile elements. This captivating combination results in a visually pleasing and incredibly dynamic wall design, striking a perfect balance between organic materials and decorative patterns. It adds a luxurious and bespoke feel to any room.
Suitable For: Sophisticated living rooms, cozy bedrooms, creative home offices, and elegant dining areas where a balanced and rich aesthetic is desired.
Installation Tips: Begin by precisely installing the wood trim to create the desired framed sections, leaving appropriate space for the wallpaper inserts. Carefully select wallpaper with a distinct texture – such as grasscloth, linen, or subtle geometrics – to create a beautiful tactile and visual contrast against the smooth or subtly textured wood trim. Ensure wallpaper is expertly applied within the frames.
Essential Tools and Materials for Your Wood Trim Project
Embarking on your wood trim accent wall project requires a thoughtful selection of the right tools and materials. Having everything prepared beforehand ensures a smooth, efficient, and ultimately successful installation. This section outlines the crucial items you’ll need, from the choice of wood itself to the specialized tools that will make the job manageable and enjoyable.
Recommended Wood Types
The type of wood you choose significantly impacts the final look and feel of your accent wall:
- MDF (Medium-Density Fiberboard): An excellent, affordable choice, especially if you plan to paint your trim. It’s smooth, stable, and less prone to warping than solid wood, providing a consistent surface for paint.
- Pine: A popular and budget-friendly option that’s easy to work with and takes stain well, showcasing a lovely natural grain. Ideal for both painted and stained finishes.
- Oak: Known for its strength, durability, and distinctive grain pattern, oak adds a robust and classic feel. It’s an investment but offers timeless beauty.
- Poplar: A relatively inexpensive hardwood that’s very smooth and takes paint exceptionally well. It’s a good choice for painted trim where durability is key.
- Reclaimed Wood: An eco-friendly and character-rich option, bringing unique history, imperfections, and a rustic charm to your accent wall. Sourcing can be a treasure hunt.
Trim Options
Beyond flat strips, various trim styles can be incorporated into your design:
- Crown Molding: An ornate trim typically placed at the top where walls meet the ceiling, adding a touch of grandeur and elegance.
- Baseboards: Installed at the bottom of the wall where it meets the floor, providing a finished look and protecting the wall from damage.
- Chair Rails: Positioned horizontally about a third of the way up the wall, these add architectural detail and can protect walls from furniture.
- Picture Rail Molding: Historically used for hanging pictures, it adds a traditional touch and a practical element without putting holes in the wall.
- Custom-Cut Trim: Many lumber yards or specialty shops can mill trim to specific dimensions or profiles, perfect for unique or intricate designs.
Necessary Tools
These essential tools will empower you to execute the job with precision and efficiency:
- Miter Saw: Absolutely indispensable for making precise angled cuts, ensuring tight, seamless joints for professional-looking corners.
- Level (Laser Level Recommended): Crucial for ensuring every piece of trim is perfectly straight, preventing a crooked or amateurish appearance. A laser level simplifies marking long, straight lines.
- Nail Gun (Brad Nailer or Finish Nailer): Speeds up the installation process dramatically, attaching trim to the wall quickly and securely with minimal visible nail holes.
- Stud Finder: Essential for locating wall studs, allowing you to secure longer trim pieces directly into structural elements for maximum stability.
- Caulk Gun & Caulk: Used to fill in small gaps between trim pieces and the wall, creating a smooth, seamless transition and a truly finished appearance.
- Wood Glue/Construction Adhesive: Provides additional bonding strength, especially for trim pieces that aren’t nailed into studs, ensuring long-term adhesion.
- Tape Measure, Pencil, & Speed Square: Fundamental for accurate measuring, marking cuts, and checking angles quickly.
- Safety Glasses & Dust Mask: Always prioritize safety when cutting and sanding wood.
Finishes and Paints
The final aesthetic of your accent wall heavily depends on your chosen finish:
- Stains: Enhance and bring out the natural beauty, color, and grain patterns of the wood, offering various tones from light to dark.
- Varnishes/Polyurethanes: Provide a clear protective layer, adding durability and sheen (matte, satin, semi-gloss, gloss) while safeguarding the wood from wear and moisture.
- Paint Colors: Offer endless possibilities to match or contrast with your room’s existing color scheme, allowing for bold statements or subtle integration. Consider paint primers for MDF or raw wood.
- Sealants: Especially important for reclaimed wood or areas prone to moisture, sealants protect and preserve the wood’s integrity.
DIY Guide: Creating a Modern Wood Trim Accent Wall
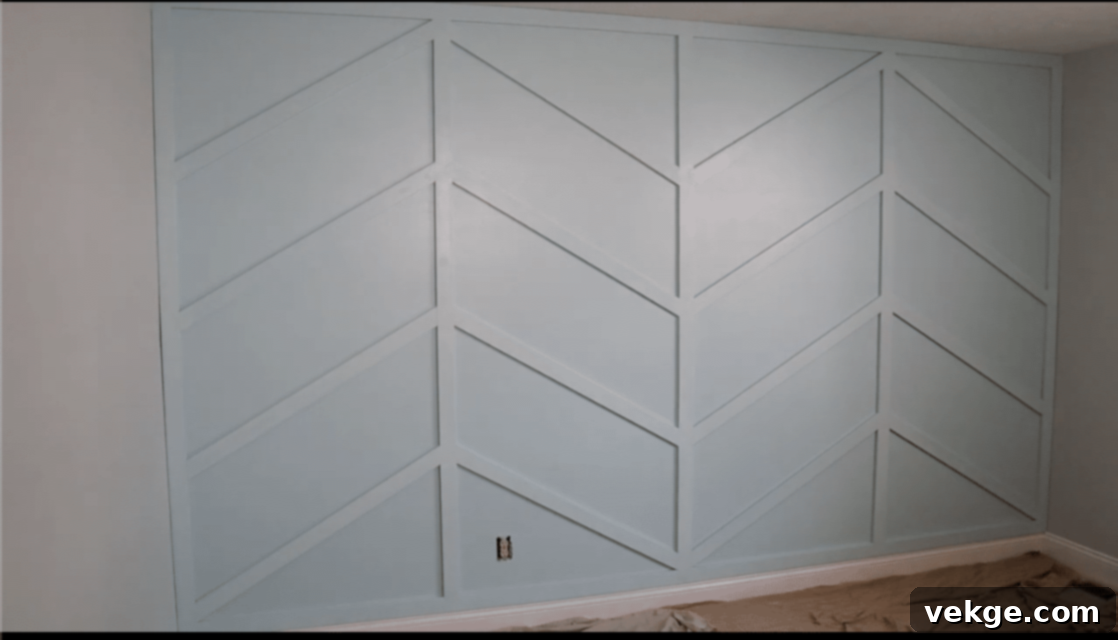
This detailed guide will walk you through the process of creating a sleek, modern wood trim accent wall. With careful planning and execution, you can achieve a professional-looking result that dramatically enhances your space.
Materials Needed
- 2.5-inch wide primed MDF trim with beveled corners (or your preferred style)
- High-quality paint for the wall and trim (consider a durable finish for the trim)
- 1.5-inch 18-gauge nails (for initial trim attachment)
- 2.5-inch 16-gauge nails (for securing to studs)
- Lightweight spackling compound or wood filler
- Fine-grit sandpaper (180-220 grit)
- Caulk (paintable acrylic latex caulk)
Tools Required
- Miter saw (or miter box with a hand saw for small projects)
- Nail gun (brad nailer or finish nailer) and air compressor (if air-powered)
- Level (a laser level is highly recommended for accuracy)
- Stud finder
- Tape measure
- Pencil
- Paint roller, roller covers, and brushes (angled brush for cutting in)
- Caulk gun
- Damp cloths for cleanup
- Safety glasses
Step-by-Step Instructions
1. Prepare the Wall
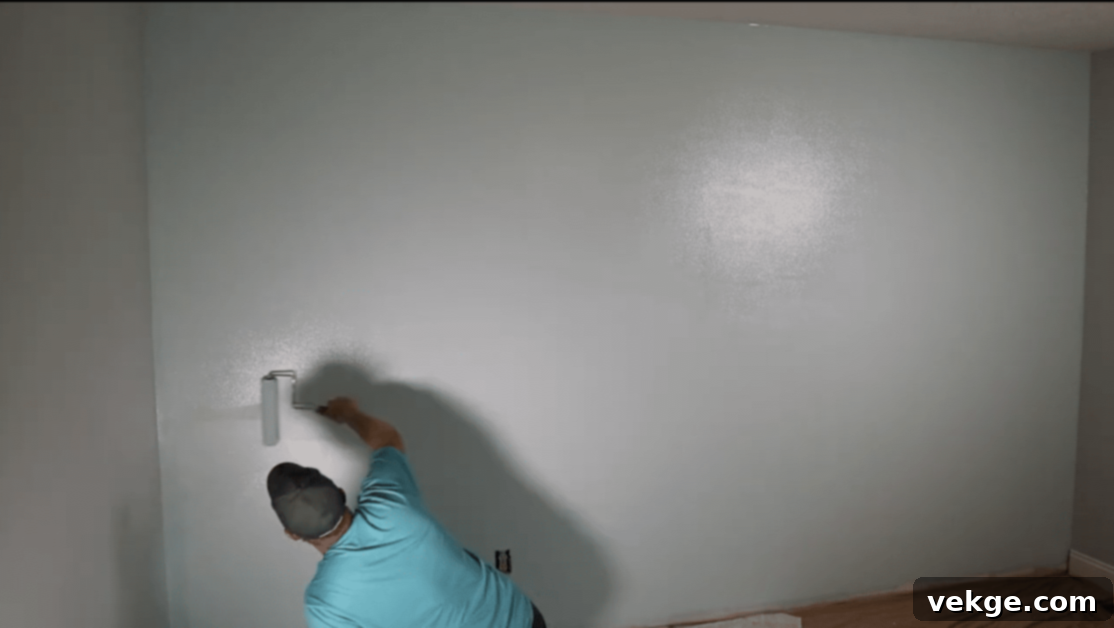
- Thoroughly clean the wall surface to remove any dust or grime.
- Apply at least two coats of your chosen base color to the entire accent wall.
- Allow the paint to cure fully for at least 7 days. This crucial step prevents the trim from peeling off the paint when moved or adjusted, ensuring a lasting finish.
2. Plan Your Design
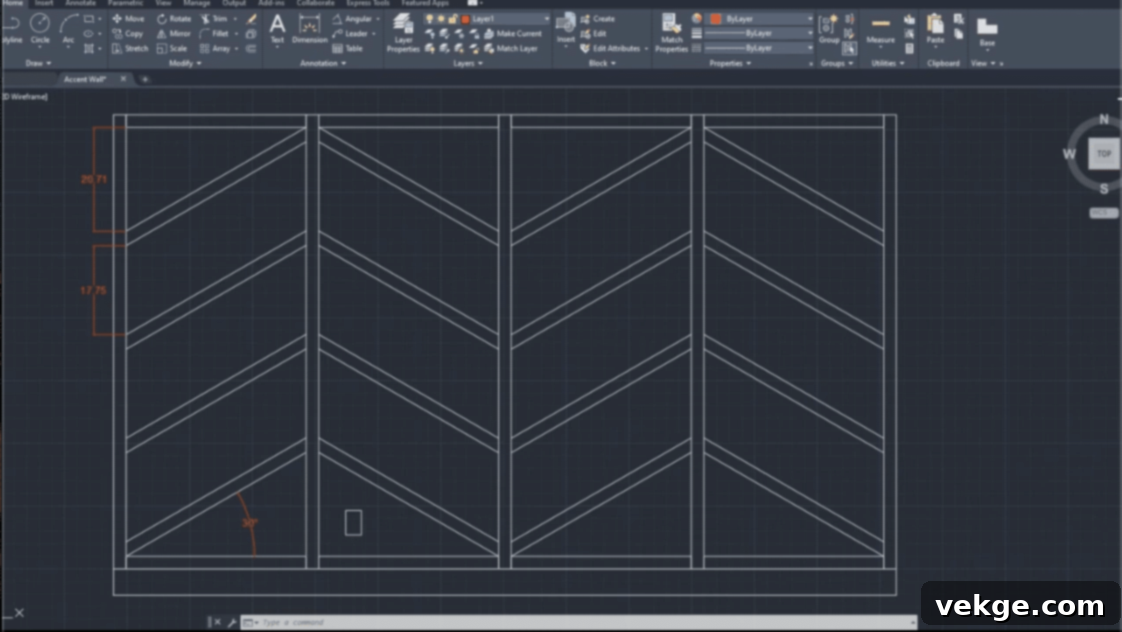
- Sketch your desired pattern (e.g., a chevron design, geometric grid, or vertical battens) on paper first.
- Accurately measure the height and width of your accent wall.
- Calculate the number of trim pieces you’ll need, factoring in waste for cuts.
- Use painter’s tape or a pencil and ruler to lightly draw your pattern directly onto the wall. This visual guide is essential for placement.
- Note: For beginners, simpler patterns often yield excellent results with less frustration.
3. Prepare the Trim
- Using your miter saw, carefully cut all the MDF trim pieces to the precise lengths and angles required by your design. Double-check all measurements before cutting.
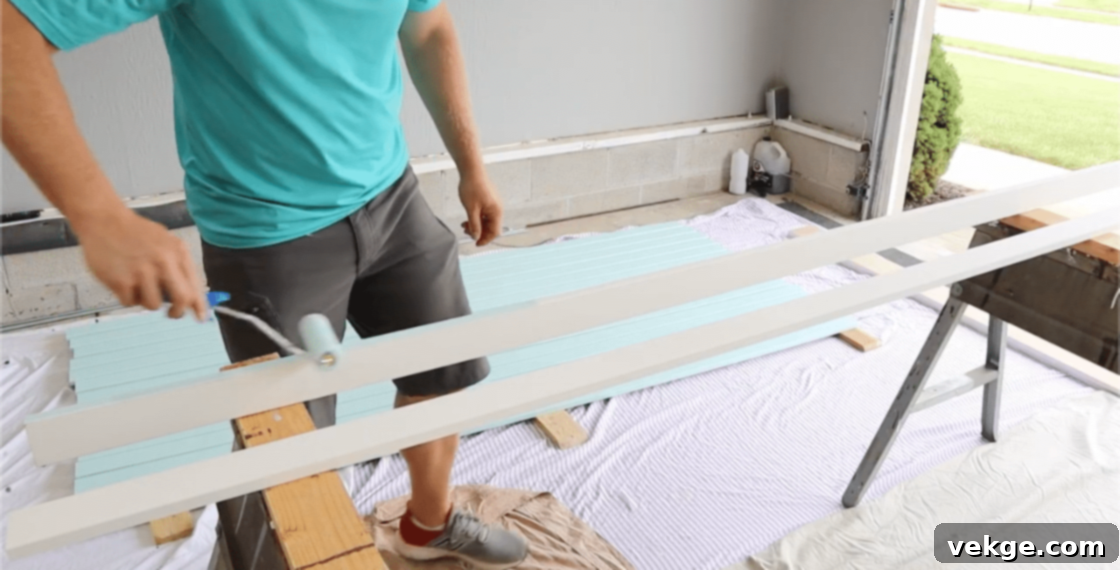
- Pre-paint all sides of your trim pieces with at least two coats of your chosen trim color. This step saves significant time and ensures a smoother, more even finish than painting after installation.
- Use a foam roller for a remarkably smooth, streak-free finish.
- Allow the trim to dry completely between coats and before handling.
- Label each piece to correspond with your design plan on the wall, especially for complex patterns.
4. Mark the Wall
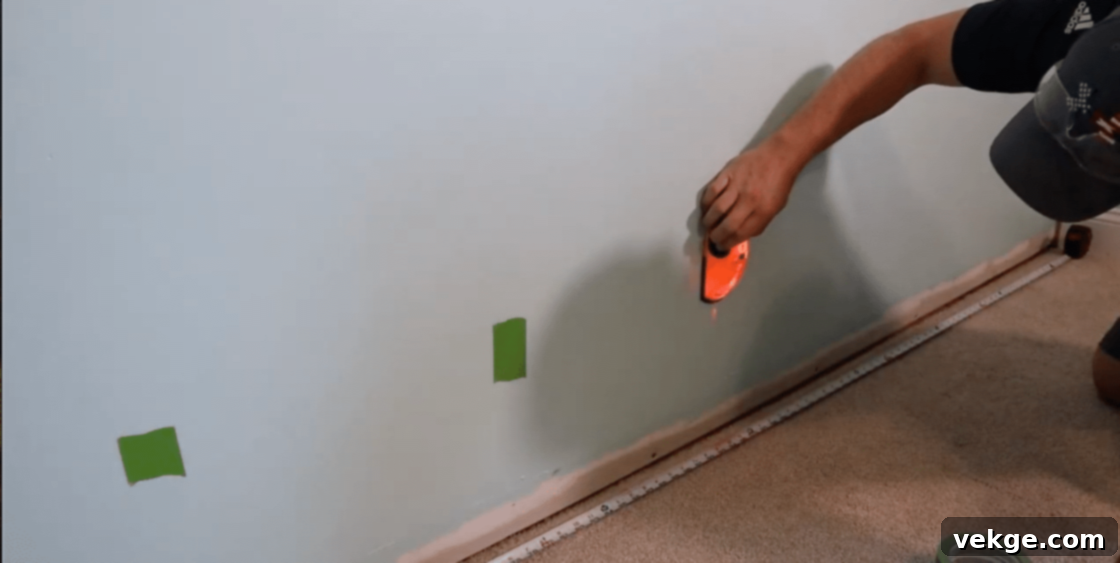
- Use a stud finder to locate and mark the positions of wall studs. These provide the most secure anchoring points for your trim.
- Using your laser level or a long straightedge and level, draw precise guidelines on the wall following your planned design. These lines will ensure your trim pieces are perfectly aligned and straight.
5. Install Perimeter Trim
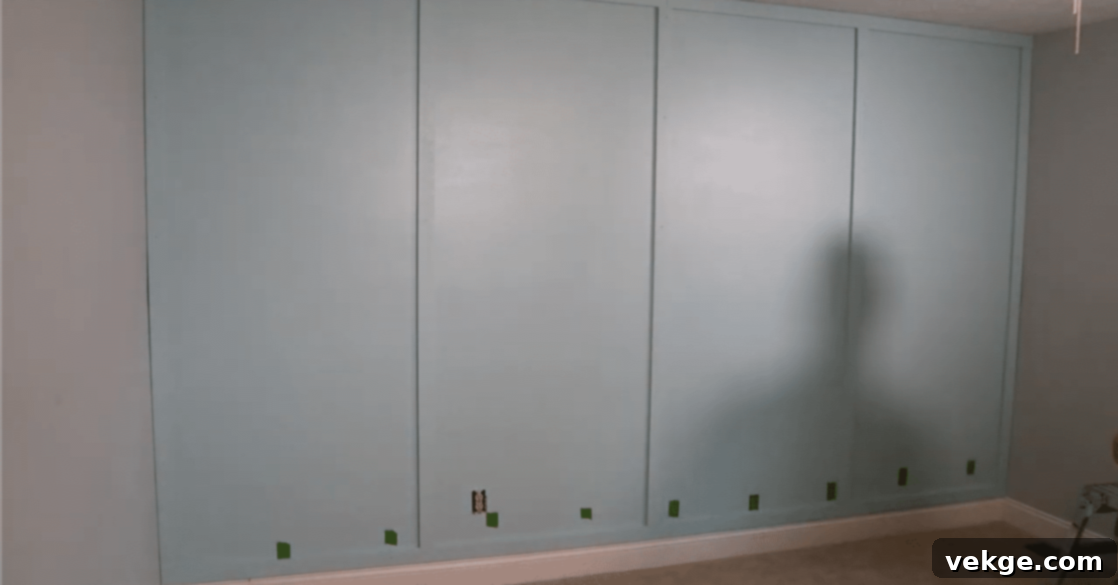
- Begin by installing the outer border or perimeter pieces of your design. This establishes the framework.
- Apply a bead of construction adhesive to the back of each trim piece for extra hold.
- Use 1.5-inch 18-gauge nails to temporarily secure the trim to the wall. This gauge of nail creates smaller holes that are easier to fill.
- Continuously check with your level as you go to ensure each piece is perfectly straight and plumb.
- Space these nails approximately every 16-18 inches, or more frequently for lighter trim.
6. Add Design Elements
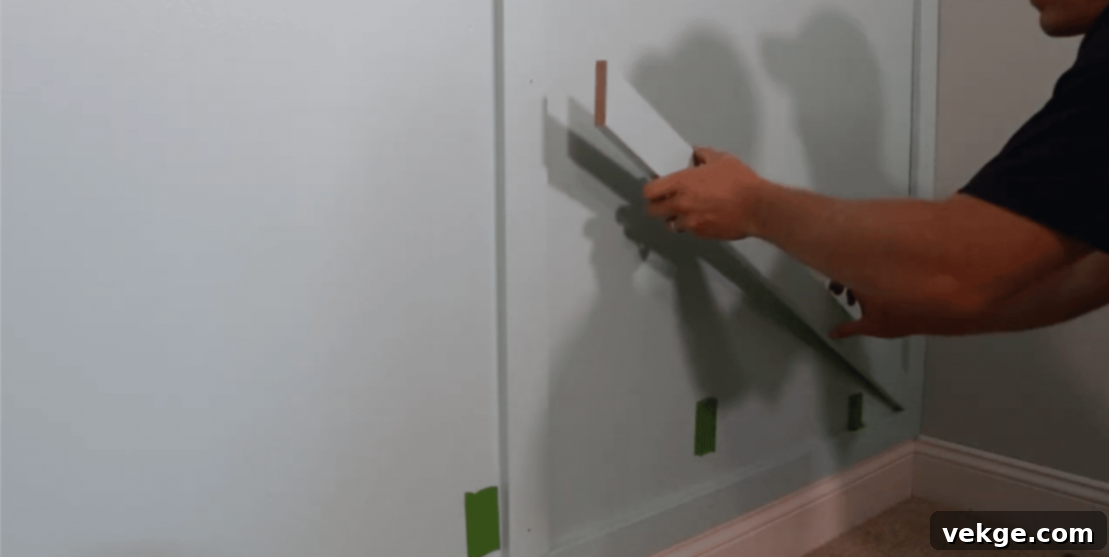
- Carefully cut any angled or intricate pieces as needed for your specific pattern (e.g., 30-degree angles for a chevron pattern or various angles for diamond lattices).
- Apply adhesive to the back of each piece.
- Nail these interior pieces into place, meticulously following your drawn guidelines.
- Always test-fit pieces before applying adhesive and nailing them permanently.
- Mark each piece’s exact location on the wall as you work to avoid confusion.
- Address any mistakes or misalignments immediately, as they become harder to correct later.
7. Secure to Studs
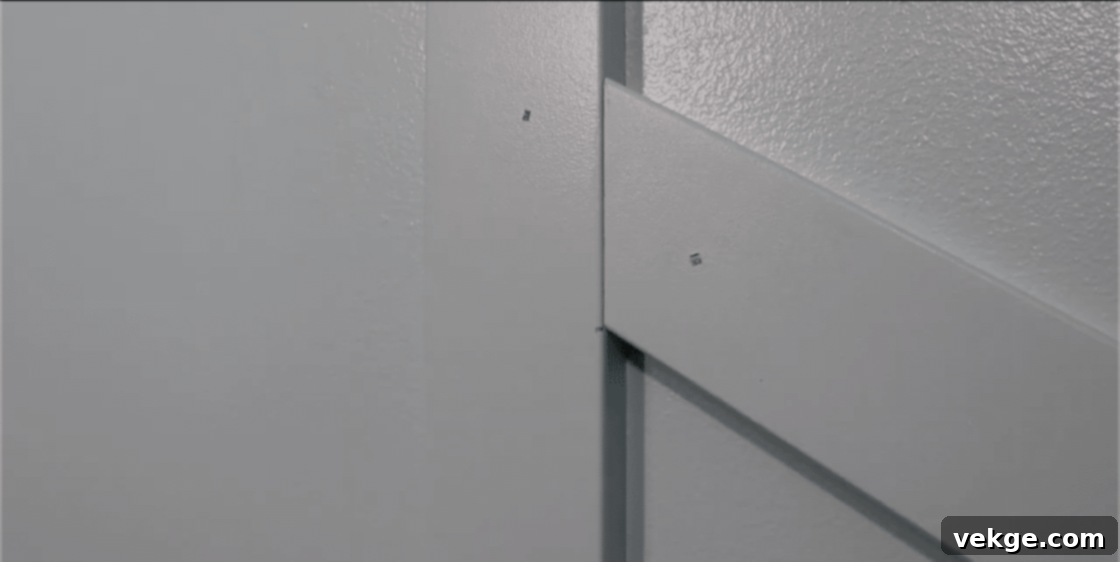
- Once all trim pieces are in place, use 2.5-inch 16-gauge nails to secure the trim pieces directly into the wall studs you marked earlier. This provides crucial long-term stability and prevents warping.
- Ensure the trim remains flat and flush against the wall as you nail, using your hand to apply pressure if necessary.
- This step is especially important for longer pieces or those that will bear any weight (e.g., picture rails).
8. Fill and Sand
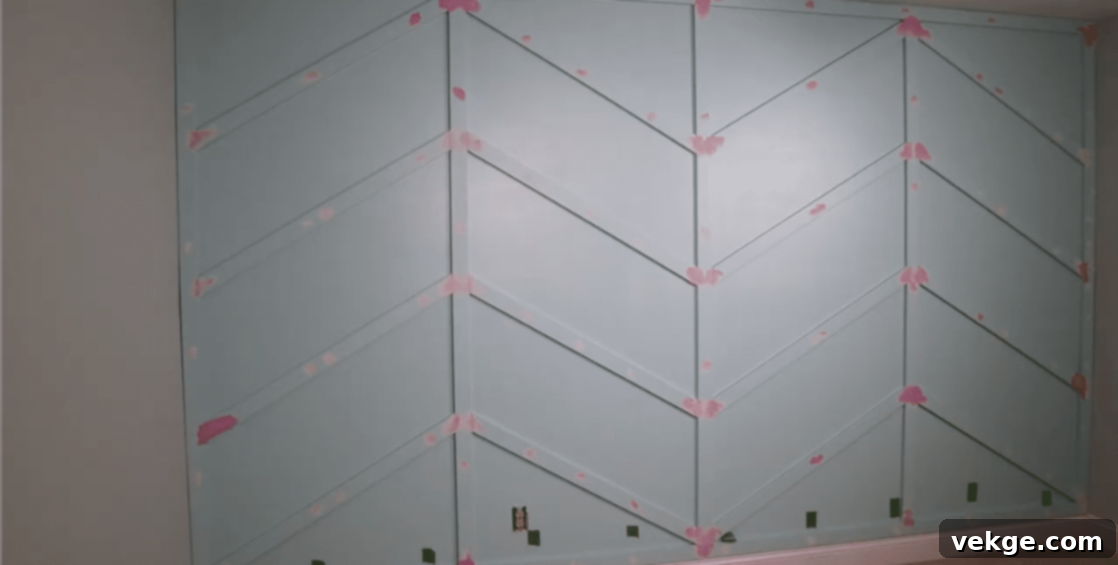
- Using a small putty knife, apply a small amount of spackling compound or wood filler to carefully fill all visible nail holes and any small gaps between trim pieces.
- Also, use paintable caulk to fill any gaps where the trim meets the wall. This creates a seamless, built-in look.
- Once the spackling and caulk are completely dry (check product instructions), lightly sand the filled areas smooth with fine-grit sandpaper. This ensures an undetectable repair.
9. Clean Up
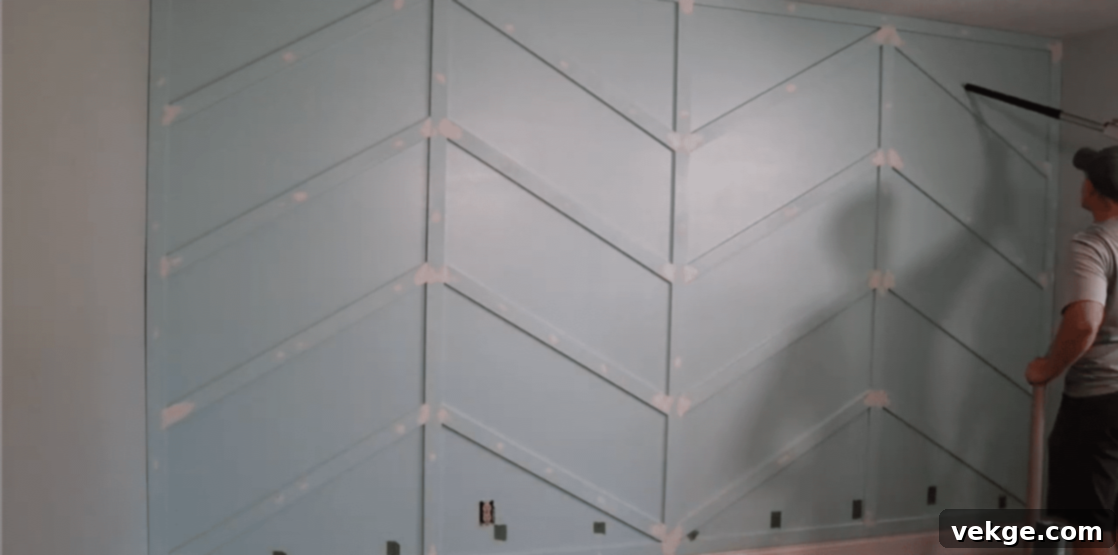
- Thoroughly vacuum or use a dry cloth to wipe away all dust and debris created during sanding. A clean surface is essential for proper paint adhesion.
- Ensure no sanding dust remains on the trim or wall surfaces.
10. Final Painting
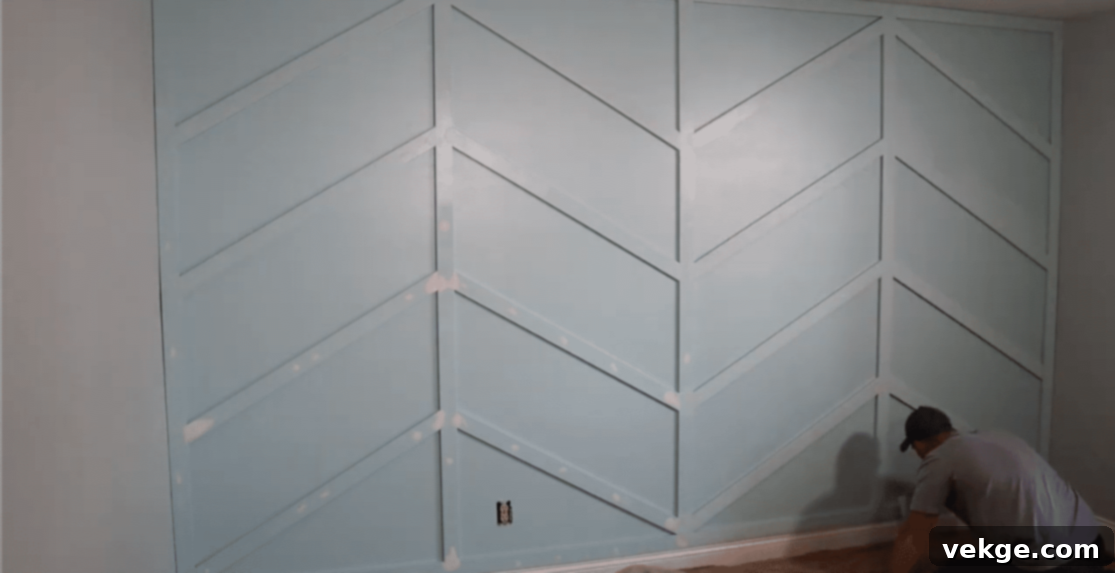
- Apply 1-2 final coats of your chosen paint to the trim. Use a high-quality angled brush for cutting in along edges and a small foam roller (mini roller) for the flat surfaces of the trim to achieve a smooth, professional finish.
- Carefully touch up any areas of the wall paint that may have been smudged or affected during installation.
- Focus on painting the trim face and edges, ensuring crisp lines.
Tips for a Flawless Finish:
- Pre-painting the trim before installation is a game-changer; it saves significant time and effort and results in a much smoother, more professional finish with fewer drips or smears on your base wall color.
- Always double-check all measurements before making any cuts. “Measure twice, cut once” is the golden rule in trim work.
- Use a level frequently – for every piece of trim – to ensure straight lines and a perfectly balanced design. A slightly crooked line can detract from the entire project.
- Don’t underestimate the power of caulk. It magically fills small gaps, transforming a decent DIY job into one that looks professionally installed.
For a detailed video demonstration of the entire process, click here.
Tips for Success: Avoid Common DIY Mistakes
When undertaking a wood trim accent wall project, the difference between a good result and a truly exceptional one often lies in the meticulous attention to small details. This section is designed to help you proactively avoid common pitfalls and errors that DIY enthusiasts frequently encounter. By following these practical tips, you can ensure your accent wall boasts a polished, professional look that stands the test of time.
Proper Measurement Techniques
Accuracy in measurement is the bedrock of a successful trim installation:
- Measure Twice, Cut Once: This age-old adage is paramount. Always take two independent measurements before making a cut to minimize errors and material waste.
- Clear Marking: Use a sharp pencil or a fine-tip marker to clearly mark your measurements on the trim. Consider using a speed square for precise square lines.
- Account for Corners and Edges: Remember that trim pieces meeting at corners require angled (mitered) cuts, which slightly change the effective length. Plan for these angles in your measurements.
- Document Everything: Maintain a detailed diagram of your wall with all measurements clearly noted. This prevents confusion, especially for complex patterns or when taking breaks from the project.
Cutting Tips
Clean, accurate cuts are fundamental for seamless joints and a professional finish:
- Sharp Blade is Key: Always use a sharp, appropriate blade in your miter saw. A dull blade can splinter the wood, leading to rough edges and poor fits.
- Mark Clearly and Precisely: Ensure your cutting line is well-defined. When cutting, align the blade just to the waste side of your mark to ensure the piece you keep is the exact length.
- Support Long Pieces: Long lengths of trim can sag or wobble during cutting, leading to inaccurate angles. Use roller stands or saw horses to provide ample support.
- Cut a Little Long: When in doubt, it’s safer to cut a piece slightly longer than needed. You can always trim a sliver off, but you can’t add material back. This is particularly useful for pieces that need a perfect friction fit.
- Test Your Angles: Before cutting multiple pieces, make a test cut on a scrap piece of wood and check the angle with a protractor or against a known square edge.
Installation Tricks
Correct installation ensures your trim looks good and stays put:
- Frequent Level Checks: Do not rely solely on your initial markings. Use a level (preferably a laser level for long runs) for every single piece of trim to ensure it is perfectly straight and plumb.
- Start Smart: Often, starting in a prominent corner or the longest straight run and working your way out is the most effective approach. This helps establish a consistent baseline.
- Secure Adequately: While construction adhesive provides strong bonding, use a nail gun to secure trim with nails every 16 to 24 inches, or wherever studs are located, for maximum long-term stability.
- Pre-Drill (for Hardwood): If working with dense hardwoods like oak, pre-drilling pilot holes can prevent the wood from splitting when nails are driven in.
- Use Spacers: For batten walls or slat designs, use consistent-sized spacers between pieces to ensure perfectly even gaps.
Finishing Touches
These final steps are what truly differentiate a DIY project from a professional installation:
- Fill Nail Holes Faithfully: Apply wood filler or spackling compound to all nail holes. Allow it to dry completely and sand smooth for an invisible repair.
- Caulk Every Gap: Use paintable caulk to meticulously fill any small gaps where the trim meets the wall or where two trim pieces meet imperfectly. This creates a seamless, built-in appearance.
- Sand All Rough Spots: Before painting or staining, run your hand over all surfaces. Sand any rough spots, splinters, or dried filler for a perfectly smooth finish.
- Apply Paint or Stain Evenly: Use high-quality brushes and rollers, and apply paint or stain in thin, even coats, following the grain of the wood. Avoid drips and uneven coverage.
By diligently paying attention to these crucial details and learning from common mistakes, you can confidently create a wood trim accent wall that not only looks fantastic but also enhances the value and beauty of your home. Remember, taking your time with each step and prioritizing precision will inevitably lead to superior, more satisfying results.
Budget-Friendly Options for Your Accent Wall
Creating a stunning wood trim accent wall doesn’t necessarily demand a hefty investment. This section delves into practical strategies and savvy choices that can make your project significantly more affordable without compromising on style or visual impact. We’ll explore cost-effective materials, smart sourcing locations, and help you determine if a DIY approach truly aligns with your financial goals.
Affordable Wood Trim Alternatives
You can achieve a high-end look without the premium price tag by selecting less expensive materials:
- MDF (Medium-Density Fiberboard): This is a highly popular and economical choice, especially if your design involves painting the trim. MDF is significantly cheaper than solid wood, offers a very smooth surface for painting, and is stable, resisting warping or cracking.
- Pre-Cut Trim: Often, purchasing standard, pre-cut trim profiles from home improvement stores is less expensive than requesting custom-milled options. These readily available trims come in various styles that can suit many designs.
- Lightweight Polyurethane Trim: This synthetic material is designed to mimic the appearance of wood molding but at a fraction of the cost. It’s incredibly lightweight, easy to cut and install, and holds paint exceptionally well, making it ideal for ornate designs.
- Pine or Poplar: As mentioned previously, these softwoods are more budget-friendly than hardwoods like oak or maple and are versatile enough for both painting and staining.
Reclaimed or Recycled Wood
Utilizing existing or salvaged wood is a fantastic way to save money and imbue your accent wall with unique character and a rich history:
- Local Building Sites: Inquire with local contractors or visit active building sites (with permission, of course) for leftover lumber or scraps that might otherwise go to waste.
- Salvage Yards & ReStore Locations: Search for architectural salvage yards or Habitat for Humanity ReStore locations in your area. These places often have a rotating inventory of reclaimed wood at significantly reduced prices.
- Friends, Neighbors & Online Marketplaces: Spread the word among your network; friends or neighbors might have leftover wood from past renovation projects. Online marketplaces like Craigslist, Facebook Marketplace, or local free groups often feature individuals selling or giving away used wood.
- Pallet Wood: With careful selection and preparation (cleaning, sanding, treating), discarded wooden pallets can be transformed into rustic and charming trim, offering an extremely low-cost option.
DIY vs. Hiring a Professional
Deciding whether to tackle the project yourself or hire a professional largely depends on your skill level, available time, and overall budget:
DIY Costs:
- Materials: Typically ranges from $100 to $500, varying greatly based on the size of your accent wall, the type of wood or alternative trim chosen, and the complexity of the design.
- Tools: If you need to purchase or rent specialized tools like a miter saw or nail gun, factor in an additional $50 to $200. This might be a one-time cost if you plan future DIY projects.
- Time: This is your personal investment. Consider how much free time you have and if you’re willing to dedicate it to the project.
- Learning Curve: Be prepared for a learning curve, which might lead to some material waste initially.
Professional Costs:
- Labor: Professional carpenters or installers often charge between $200 to $650 per day, depending on their experience, location, and the complexity of the work.
- Materials: Professionals may have access to wholesale pricing on supplies, but their markup will typically be included.
- Guaranteed Results: You pay for expertise, efficiency, and a guaranteed polished, high-quality finish, often with less stress and no learning curve.
- Higher Overall Cost: The total cost for a professional installation can range from $1000 to $3000 or more, depending on the project scale and materials.
When making this crucial choice, honestly assess your comfort level with DIY projects, the amount of time you can genuinely commit, and the level of finish you desire. Sometimes, a sensible middle ground involves doing the simpler prep work yourself (like painting the base wall) and hiring a professional for the trickier installation aspects (like complex miter cuts or large-scale patterns).
Maintenance and Care of Wood Trim Accent Walls
Proper maintenance and consistent care are vital for preserving the beauty and longevity of your wood trim accent wall. This section provides practical advice on how to effectively clean and protect your wall, what common issues to look out for, and when it might be time to refresh its appearance. With the right approach, your accent wall will remain a stunning and cherished feature of your home for many years.
Cleaning Tips
Keeping your wood trim clean and pristine doesn’t require extensive effort:
- Regular Dusting: Use a soft, dry microfiber cloth, a feather duster, or the brush attachment of your vacuum cleaner to gently remove dust from the trim surfaces on a weekly or bi-weekly basis.
- Gentle Wiping: For deeper cleaning or to remove smudges, lightly dampen a soft cloth with plain water (or a mild wood-safe cleaner if specified by the finish manufacturer). Ensure the cloth is barely damp, not wet.
- Avoid Harsh Cleaners: Steer clear of abrasive cleaners, strong chemicals, or oil-based polishes unless specifically recommended for your trim’s finish, as these can damage the paint or stain and alter the wood’s appearance.
- Immediate Spill Cleanup: If any liquids spill or splash onto the trim, wipe them up immediately with a dry cloth to prevent water damage or staining.
Preventing Warping and Damage
Proactive measures can significantly extend the life and pristine condition of your wood trim:
- Control Moisture Levels: Wood is highly susceptible to moisture changes. In damp rooms (like bathrooms or basements), use a dehumidifier to maintain a consistent relative humidity (ideally between 35-55%). Excessive moisture can lead to swelling and warping.
- Protect from Direct Sunlight: Prolonged exposure to direct sunlight can cause wood to fade, discolor, or even dry out and crack. Consider using curtains, blinds, or UV-filtering window films on windows facing the accent wall.
- Minimize Temperature Fluctuations: Try to maintain a relatively stable room temperature. Extreme or rapid temperature changes can stress the wood, leading to expansion and contraction that can cause cracks or gaps.
- Beware of Bumps and Scratches: Exercise caution when moving furniture or heavy objects near your accent wall. Place felt pads on furniture that may brush against the trim, and consider corner guards in high-traffic areas if necessary.
Repainting and Refinishing
Over time, even the most well-maintained accent wall may benefit from a refresh:
- Annual Inspection: Conduct a quick visual inspection of your accent wall once a year, looking for any signs of wear, chips, scratches, fading, or minor gaps forming.
- Touch-Up Small Marks: For minor scuffs or chips in painted trim, gently clean the area, then carefully apply matching paint using a small artist’s brush. For stained wood, a stain pen or a light application of matching stain can work wonders.
- Preparation for Repainting: If the trim needs a full repaint, lightly sand the existing finish (enough to de-gloss it) with fine-grit sandpaper (e.g., 220-grit). Clean off all sanding dust before applying new coats of primer and paint for optimal adhesion.
- Refinishing Stained Wood: If stained wood looks very worn or scratched, you might need to sand down to the bare wood, reapply stain, and then finish with a protective topcoat like polyurethane. This is a more involved process but can completely revitalize the wood.
By diligently adhering to these maintenance and care tips, you can ensure your wood trim accent wall remains a beautiful, vibrant, and impactful feature in your home. Regular, gentle cleaning coupled with a conscious effort to protect the wood from environmental stressors will go a long way in preserving its appeal. And when the time comes for a refreshed look, a new coat of paint or stain can effortlessly make your wall feel brand new again, extending its lifespan and enjoyment.
Modern Trends in Wood Trim Accent Walls
The world of interior design is constantly evolving, and wood trim accent walls are no exception, adapting to fit contemporary styles and emerging aesthetic preferences. This section explores the most popular and innovative trends currently shaping wood trim designs. From understated minimalist approaches to daring combinations of different materials, there are countless ways to ensure your accent wall is not just a feature, but a true statement piece that reflects modern sensibilities.
Minimalist Designs
The “less is more” philosophy continues to dominate, with simple, clean looks taking center stage:
- Thin, Straight Lines: Emphasis on slender, clean-lined trim pieces arranged in straightforward patterns, often vertical or horizontal, to create a sense of calm and order.
- Light Colors & Natural Tones: Predominance of white, off-white, light grey, or untreated natural wood tones to maintain an airy, open, and uncluttered feel.
- Generous Open Space: Designs that incorporate significant areas of negative space between trim pieces, allowing the wall itself to breathe and contribute to the minimalist aesthetic.
- Subtle Focus: Often, the design will focus on one or two main lines or simple geometric shapes, relying on precision and quality of materials rather than complexity.
Rustic and Reclaimed Wood
The allure of natural, aged, and imperfect wood continues to be a powerful trend, bringing warmth and authenticity:
- Textural Richness: Wood trim that highlights natural imperfections such as knots, unique grain patterns, and subtly rough or wire-brushed textures.
- Weathered Finishes: Popularity of finishes that emulate the look of naturally worn, sun-bleached, or distressed wood, adding character and history.
- Asymmetrical & Organic: Designs that embrace uneven or slightly mismatched pieces, creating a handmade, artisanal feel rather than perfect uniformity.
- Muted Color Palettes: Colors that appear faded, sun-bleached, or naturally oxidized, evoking a sense of time and natural exposure.
Mixing Materials
Combining wood with other tactile and visual elements creates exciting, multi-dimensional designs:
- Wood & Wallpaper: Wood trim used to frame sections of textured or patterned wallpaper, blending organic wood with intricate designs.
- Stone/Brick & Wood: Incorporating elements of natural stone, exposed brick, or faux stone panels alongside wood accents for a contrasting, earthy appeal.
- Metal & Wood: Mixing sleek metal strips (e.g., brass, steel, black iron) with wood trim to introduce an industrial-chic or contemporary edge.
- Painted Sections & Natural Wood: Alternating areas of painted wall with sections of natural or stained wood trim, creating a dynamic interplay of color and texture.
- Fabric & Wood: Insetting upholstered fabric panels within a wood trim grid for a luxurious, sound-dampening, and tactile accent.
Sustainable Design
Growing environmental awareness is influencing material choices and practices:
- Responsibly Sourced Wood: A strong preference for wood trim sourced from sustainably managed forests, often indicated by FSC (Forest Stewardship Council) certification.
- Eco-Friendly Finishes: Choosing paints, stains, and sealants that are low in VOCs (volatile organic compounds) and non-toxic, promoting healthier indoor air quality.
- Local Sourcing: Opting for locally grown or milled wood to reduce the carbon footprint associated with long-distance transportation.
- Reused & Recycled Materials: Actively seeking out leftover, reclaimed, or recycled wood from demolition sites, old barns, or other renovation projects, giving materials a second life.
These evolving trends vividly demonstrate the incredible adaptability of wood trim accent walls, proving they can be tailored to perfectly complement virtually any contemporary interior style. Whether your preference lies with the clean simplicity of modern design, the comforting allure of rustic aesthetics, or a bold mix of materials, there’s an innovative way to make it work. Furthermore, by embracing sustainable design principles, you can make choices that are not only visually appealing but also align with environmental responsibility, creating spaces that feel good on every level.
Where to Buy Wood Trim and Materials
Sourcing the right wood trim and associated materials is a critical step towards creating an accent wall that meets your vision and quality expectations. This section will guide you through various purchasing options, helping you make informed decisions based on convenience, selection, price, and environmental considerations.
Online Retailers
The internet offers a vast and diverse selection, often with competitive pricing:
- Major E-commerce Sites: Large online marketplaces such as Amazon, Home Depot, Lowe’s, and Wayfair feature an extensive range of trim styles, wood types, and finishes, often with detailed product descriptions and customer reviews.
- Specialty Online Stores: Websites dedicated to architectural molding, custom millwork, or reclaimed wood may offer unique profiles, exotic wood species, or bespoke cutting services not found elsewhere.
- Custom-Cut Services: Some online vendors provide the option to order trim pieces cut to your exact specifications, which can save time and reduce waste.
- Research is Key: Always read customer reviews, check product specifications carefully, and understand return policies before making a purchase, especially for larger quantities or custom orders.
Local Hardware Stores
Purchasing from nearby stores offers tangible benefits and immediate gratification:
- Big Box Stores: Large chains like Home Depot and Lowe’s typically have a good selection of standard trim profiles, lumber, paints, and tools at fair prices. They are convenient for quick pickups.
- Independent Hardware Stores: Smaller, local hardware stores or lumberyards often provide more personalized service, expert advice, and sometimes even unique local wood options or custom milling services.
- Physical Inspection: The immense advantage of local shopping is the ability to physically see, feel, and inspect the wood before you buy, checking for knots, warps, or damage.
- Easier Returns/Exchanges: If you need to return or exchange materials, doing so at a local store is generally more straightforward and less cumbersome than online returns.
Sustainable Sources
For environmentally conscious DIYers, these options prioritize ecological responsibility:
- Reclaimed Wood Retailers: Seek out businesses specializing in reclaimed wood from old barns, factories, or deconstructed buildings. This wood has a unique character and prevents deforestation.
- FSC-Certified Lumber Yards: Look for lumber yards that explicitly sell FSC (Forest Stewardship Council) certified wood, which guarantees the wood comes from responsibly managed forests.
- Local Artisans & Woodworkers: Explore local craft markets or community woodworking shops. These individuals often work with locally sourced, sustainable wood and can create custom trim pieces.
- Upcycling Centers/Salvage Yards: As mentioned, Habitat for Humanity ReStore or other local salvage operations are excellent places to find used wood and architectural elements at reduced prices, promoting reuse.
- Ask About Byproducts: Some larger lumber mills or furniture makers might sell wood off-cuts or byproducts at a discount, which can be perfect for smaller trim projects.
When selecting where to purchase your wood trim and materials, consider your priorities. If variety and competitive pricing are paramount, online retailers might be your best bet. If you prefer to inspect materials firsthand and value personal assistance, local hardware stores or lumberyards are ideal. And if environmental impact is a significant concern, actively seeking sustainable and reclaimed sources will allow you to create a beautiful accent wall that also aligns with your values. A combination of these sources might even offer the best blend of cost, quality, and conscience.
Conclusion
In wrapping up, it’s clear that wood trim accent walls represent an exceptional opportunity to inject unique character, sophisticated texture, and architectural interest into your home, all without necessitating a substantial financial outlay. Throughout this comprehensive guide, I’ve meticulously walked you through every stage of the process, from the initial conceptualization and meticulous planning to the detailed installation and the crucial final touches of painting and finishing.
This journey has hopefully demonstrated that creating a stunning wood trim accent wall is not just a feasible DIY endeavor, but a highly rewarding one. Remember, the cornerstone of a successful project lies in diligent and careful planning, thorough wall preparation, precise measurement and cutting, and a healthy dose of patience throughout the installation phase. These foundational steps ensure a professional-looking and durable result.
Whether your design aspirations lean towards the dynamic energy of a modern chevron pattern, the timeless elegance of classic paneled wainscoting, or a unique blend of textures and materials, this project empowers you with ample room for personal creativity and bespoke expression. The inherent versatility of wood trim allows for endless customization, ensuring your accent wall truly reflects your individual style and enhances your living space.
Furthermore, an often-overlooked but significant advantage of wood trim accent walls is their potential removability. This feature is particularly beneficial for renters who wish to personalize their space without permanent alterations, or for decor enthusiasts who delight in frequently refreshing their home’s aesthetic. The ability to update or change the design down the line provides incredible flexibility and peace of mind.
Now that you’re armed with all the knowledge, tips, and inspiration, are you ready to pick up your tools and embark on transforming your space? Don’t hesitate any longer – embrace the challenge and the satisfaction of creating a focal point that will undoubtedly elevate your home’s appeal!
Once you’ve brought your vision to life, we’d absolutely love to see your incredible wood trim accent wall creations. Please don’t forget to share your stunning results and inspiring stories in the comments section below!
Frequently Asked Questions
What is the best wood for accent walls?
The “best” wood largely depends on your desired aesthetic and budget. Popular choices include pine and poplar for their affordability and ease of work, especially if painting. Oak and maple offer greater durability and beautiful grain for staining. MDF (Medium-Density Fiberboard) is excellent for painted designs due to its smooth surface and stability. Reclaimed wood adds unique character and an eco-friendly touch. Consider your specific style (rustic, modern, classic) to make the best choice.
How do I maintain and clean my wood accent wall?
Maintenance is relatively simple. Regularly dust the trim with a soft, dry microfiber cloth or a feather duster to prevent buildup. For deeper cleaning, use a slightly damp cloth (ensure it’s not dripping wet) with plain water or a mild, wood-safe cleaner if needed. Always wipe dry immediately. Avoid harsh chemical cleaners, abrasive scrubbers, or excessive moisture, which can damage the finish. Touch up paint or stain every few years, or as needed, to keep it looking fresh.
Are wood trim accent walls suitable for small rooms?
Absolutely, wood trim accent walls can be highly effective in small rooms. The key is strategic design. Opt for lighter paint colors on both the wall and trim to create a sense of openness. Choose simple patterns, such as vertical battens or subtle geometric designs, to avoid overwhelming the space. Vertical designs are particularly beneficial as they can draw the eye upward, creating the illusion of higher ceilings and making the room feel taller and more expansive.
What’s the average cost of a wood trim accent wall?
The cost varies significantly based on material choice, wall size, and design complexity. For a DIY project using materials like MDF or pine, costs typically range from $100 to $500. This estimate includes the wood, paint, adhesive, and basic fasteners. If you need to purchase new tools (e.g., a miter saw or nail gun), add an additional $50-$200. Professional installation, which covers labor, materials, and expertise, can increase the price substantially, generally ranging from $1000 to $3000 or more for a single accent wall, depending on your location and the specific design.
