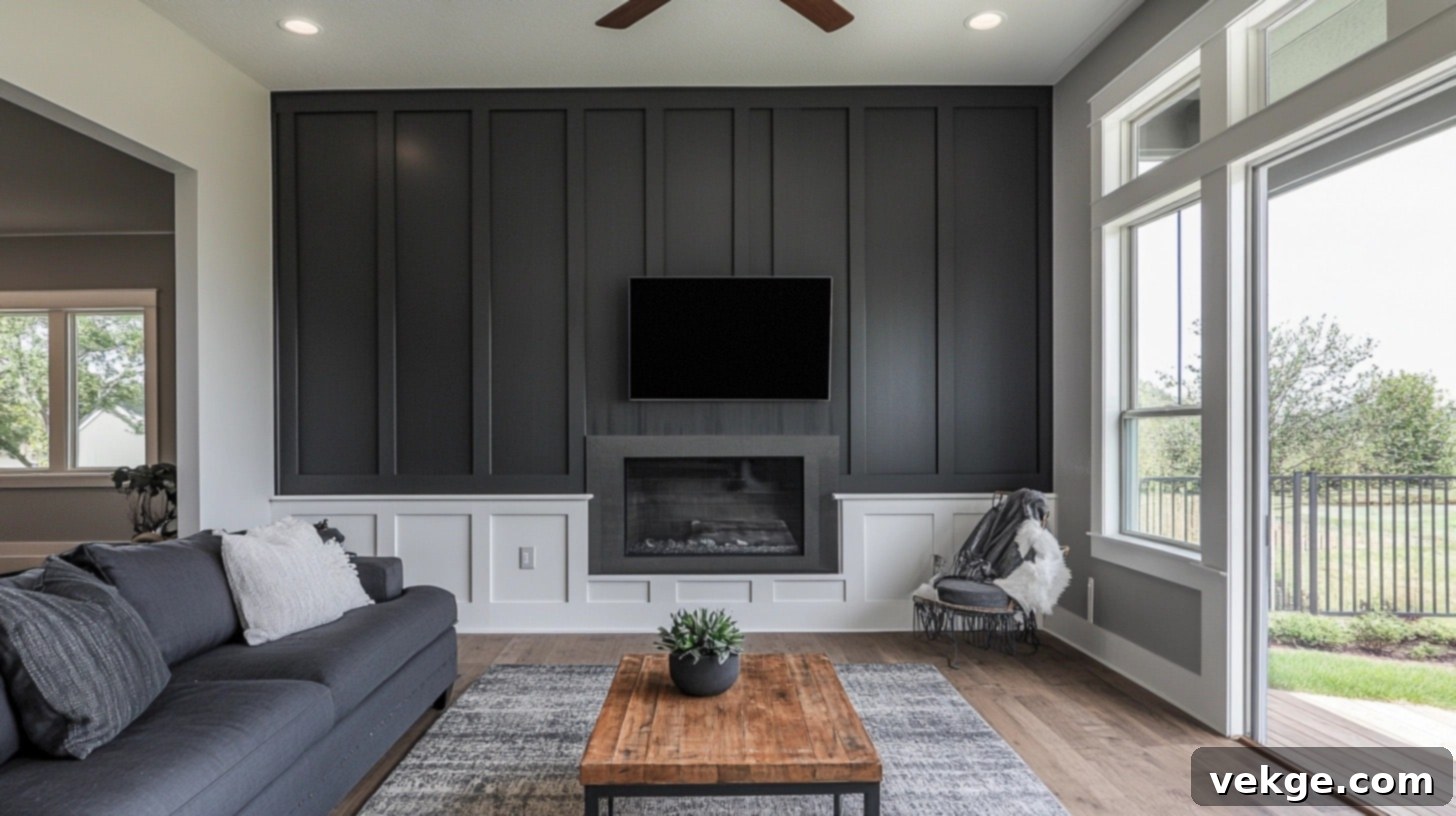
Transform Your Home: A Comprehensive DIY Guide to Modern Board and Batten Accent Walls
A simple board and batten accent wall can dramatically elevate any room, adding depth, texture, and a touch of sophisticated charm. This popular design blends flat wall panels with thin wooden strips, known as battens, to create a structured, visually engaging pattern that captivates the eye.
While board and batten paneling has roots in traditional architecture, it has flawlessly transitioned into modern interiors, becoming a go-to choice for homeowners and designers seeking a minimalist yet striking aesthetic. Its versatility allows for endless customization, making it suitable for various design styles, from farmhouse chic to contemporary elegance.
In this comprehensive DIY guide, you’ll discover everything you need to know to create your own stunning board and batten wall. We’ll walk you through each step, from initial planning and material selection to installation and finishing touches. Whether you’re a seasoned DIY enthusiast or new to home improvement projects, you’ll find clear, easy-to-follow instructions and expert tips to ensure a successful outcome.
Get ready to master a valuable skill that will not only transform your living space but also add significant character and value to your home. This project is more than just a renovation; it’s an opportunity to create a unique focal point that truly reflects your personal style.
DIY Guide to Modern Board and Batten Accent Walls
Embarking on a board and batten project is an exciting way to personalize your home. Follow these detailed steps to achieve a professional-looking accent wall.
Materials and Tools
Before you begin, gathering all the necessary tools and materials is crucial. This ensures a smooth workflow and prevents frustrating interruptions. Here’s a comprehensive list of what you’ll need and why each item is important:
| Tools / Materials | Purpose |
|---|---|
| Finish Nailer (e.g., 18-gauge) | Essential for quickly and securely attaching the battens to the wall with minimal damage. An air compressor will be needed if using a pneumatic model. |
| 1 1/2″ Finish Nails | These nails are used with the finish nailer. Their small heads are easily concealed with spackling for a flawless finish. Ensure they are long enough to penetrate both the batten and the drywall into the stud. |
| 1″ x 4″ Primed Boards (MDF or Poplar recommended) | These boards will form the battens, creating the decorative pattern on your wall. Primed boards save you a step in the painting process. Consider MDF for cost-effectiveness and smooth finish, or poplar for durability. |
| Stud Finder | Crucial for locating the wooden studs behind your sheetrock, ensuring that your battens are securely fastened to structural elements of the wall, preventing them from coming loose over time. |
| Tape Measure | For accurate measurements of your wall and precise cutting of your battens. “Measure twice, cut once” is the golden rule here. |
| Caulk and Caulk Gun | Used to seal any small gaps between the battens and the wall, creating a seamless, built-in look. Paintable acrylic latex caulk with silicone is ideal for flexibility and ease of painting. |
| Spackling Compound | To meticulously fill all nail holes and any minor imperfections in the boards. Lightweight spackling is easy to apply and sands smoothly. |
| Fine-Grit Sandpaper (120-220 grit) | For smoothing out dried spackling and any rough edges on your battens, ensuring a perfectly smooth surface ready for paint. A sanding block can also be helpful. |
| Miter Saw | Absolutely essential for making precise, angled cuts on your boards, especially for intricate designs like the 45-degree angle mentioned in the guide. |
| Long Level (4-6 feet) | Ensures that all your battens are perfectly straight and plumb, which is critical for a professional appearance. |
| Pencil | For marking measurements and stud locations on the wall and boards. |
| Safety Glasses | Always wear safety glasses when operating power tools to protect your eyes from debris. |
| Foam Roller and Paint Brushes | For applying paint smoothly and evenly. A foam roller provides a streak-free finish on flat surfaces, while brushes are needed for edges and intricate areas. |
| Primer (optional but recommended) | Especially important if your boards aren’t pre-primed, or if you’re painting over a dark wall with a light color. Helps with paint adhesion and coverage. |
Step 1: Measure, Plan, and Design the Layout
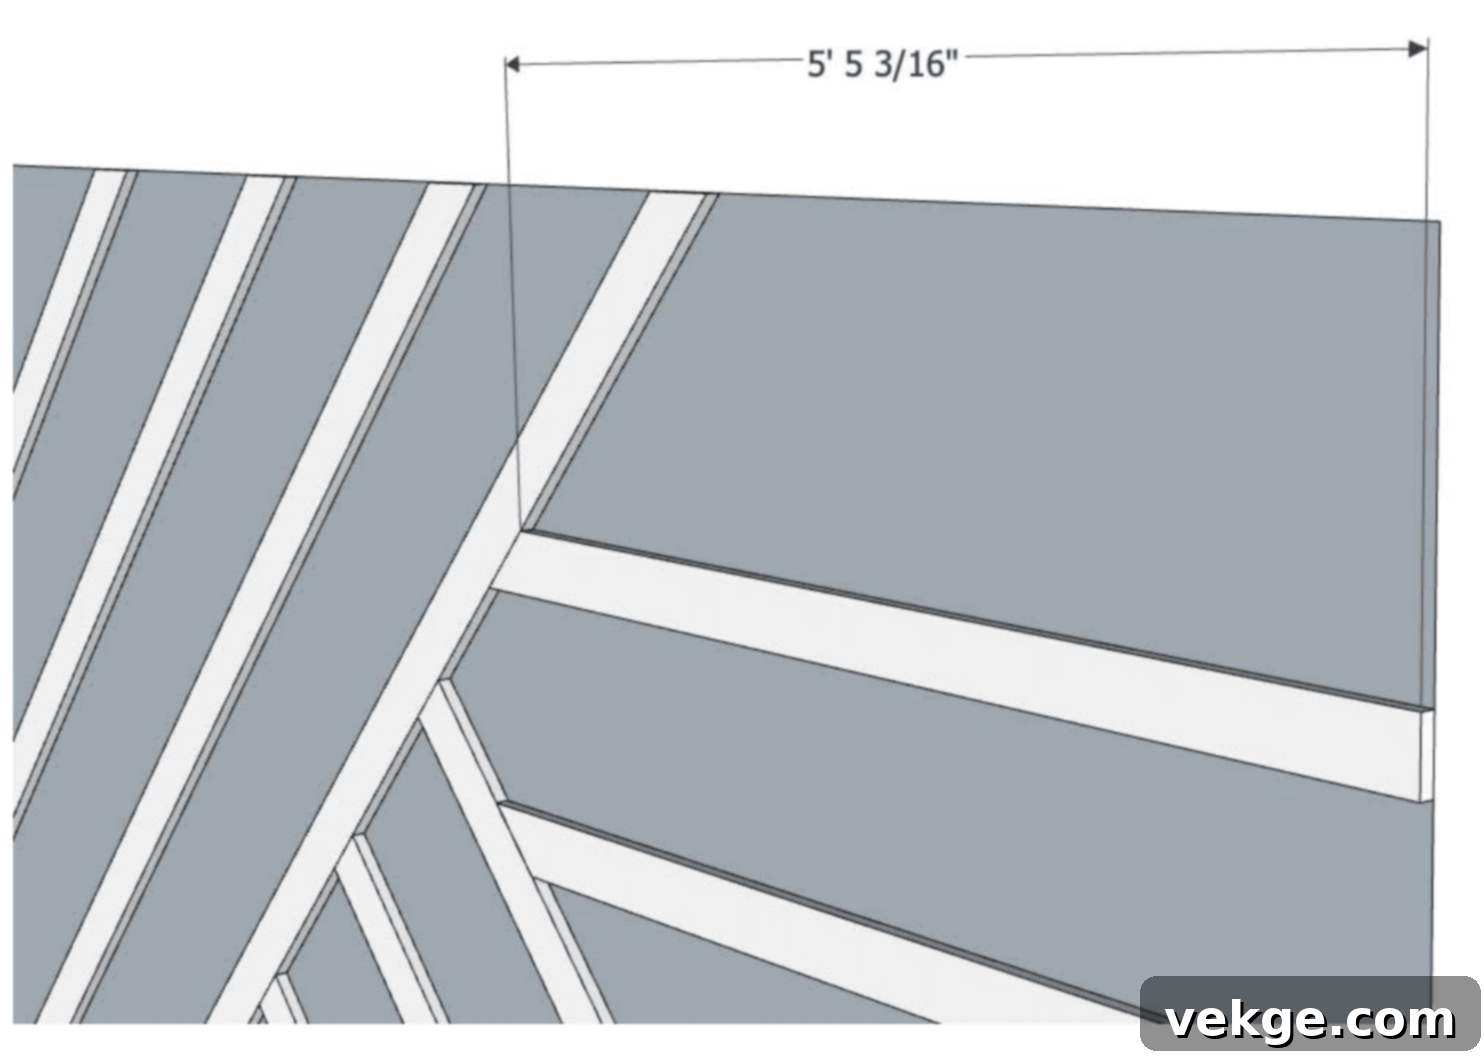
This foundational step is crucial for a successful and visually appealing accent wall. Proper planning will save you time, materials, and frustration down the line.
- Begin by meticulously measuring the entire width and height of the wall you intend to transform. Note these dimensions accurately, as they will dictate your design.
- Next, unleash your creativity! While many board and batten designs feature simple vertical or horizontal lines, consider creating a unique layout. For a modern twist, you might turn battens at a 45-degree angle, as demonstrated in this project, or explore geometric patterns.
- To visualize and refine your design, use a digital design tool like SketchUp, or simply sketch it out on paper. Alternatively, use painter’s tape on your wall to mock up the batten placement. This helps you balance the spacing and identify any potential issues, such as obstructions like electrical outlets, light switches, or window frames. In this specific example, a consistent 12-inch spacing between battens was chosen, but adjust this to fit your wall’s dimensions and desired aesthetic. Ensure your design evenly distributes the battens for a harmonious look.
Step 2: Mark Studs and Cut the Battens

Securing your battens to wall studs is paramount for stability and longevity. This step requires precision in both finding studs and cutting your wood.
- Using a reliable stud finder, carefully locate and mark the center of each wooden stud behind the drywall. These marks will serve as your guides for nailing the battens, ensuring a strong, secure attachment. Mark the studs with a pencil line extending vertically to make them visible even after placing the battens.
- Now, it’s time to cut your 1″x4″ primed boards. Using your detailed design plan from Step 1, measure each batten individually. Always double-check your measurements before making a cut. Set your miter saw to the precise 45-degree angle required for this angled design (or 90 degrees for straight vertical/horizontal patterns). Make clean, accurate cuts. Label each cut piece with its corresponding location on your design plan to avoid confusion during installation.
- Before proceeding, a quick dry-fit of a few battens can help confirm your measurements and cuts are accurate.
Step 3: Install the Battens with Precision
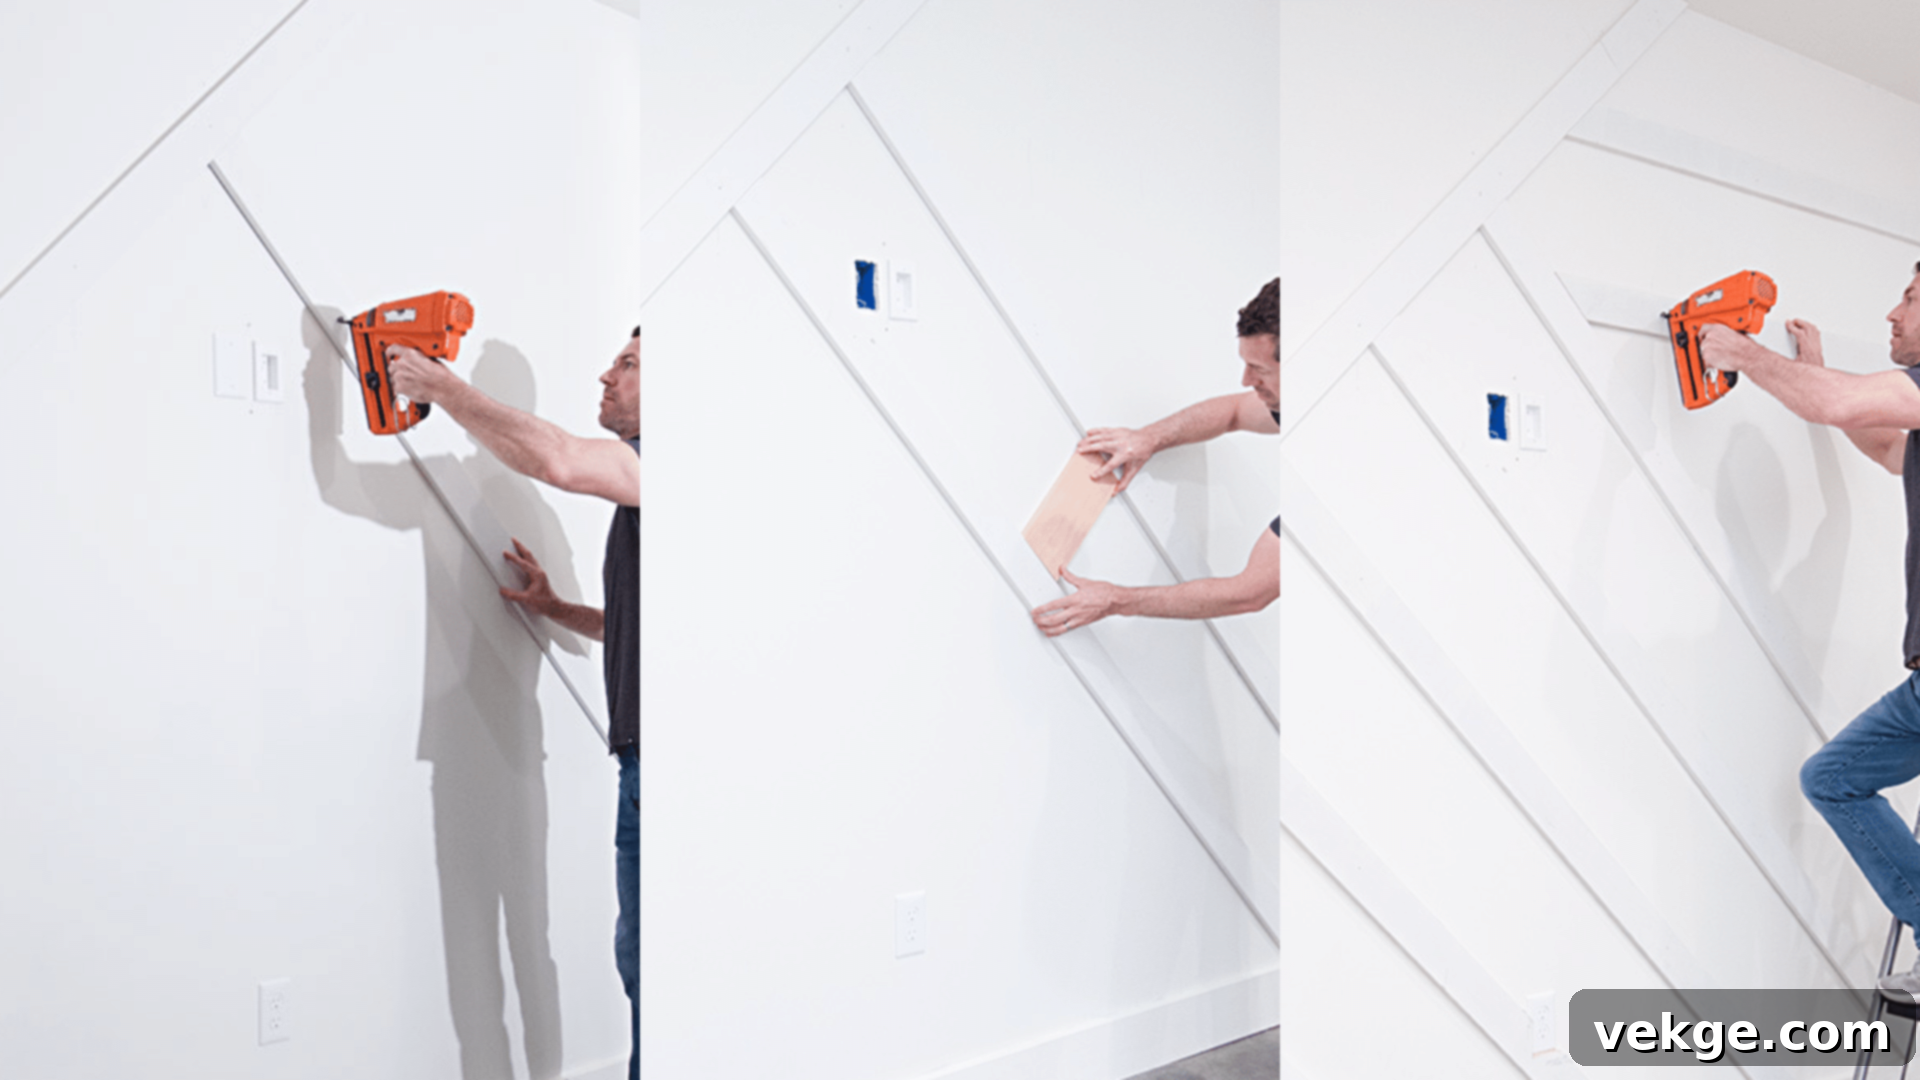
Installation is where your design comes to life. Focus on straightness and consistent spacing for a professional finish.
- Begin by attaching the longest battens first. These typically serve as your primary guides. Using your finish nailer, secure them to the wall, driving nails into the previously marked studs. Ensure the battens are perfectly plumb (vertical) or level (horizontal) using a long level before fastening them permanently.
- For consistent gaps between each batten, use a dedicated spacer (in this case, a 12-inch spacer). This is critical for achieving a uniform and appealing pattern. Place the spacer against the installed batten, then align the next batten against the spacer before nailing.
- Continue working your way across the wall, carefully nailing each batten into the marked studs. For battens that don’t fall directly on a stud, you can use construction adhesive on the back of the board in addition to nails, or use drywall anchors if the battens are very wide and heavy. However, aiming for stud placement whenever possible is always the most secure method. Use two nails per stud crossing for maximum hold.
Step 4: Fill and Sand for a Smooth Finish
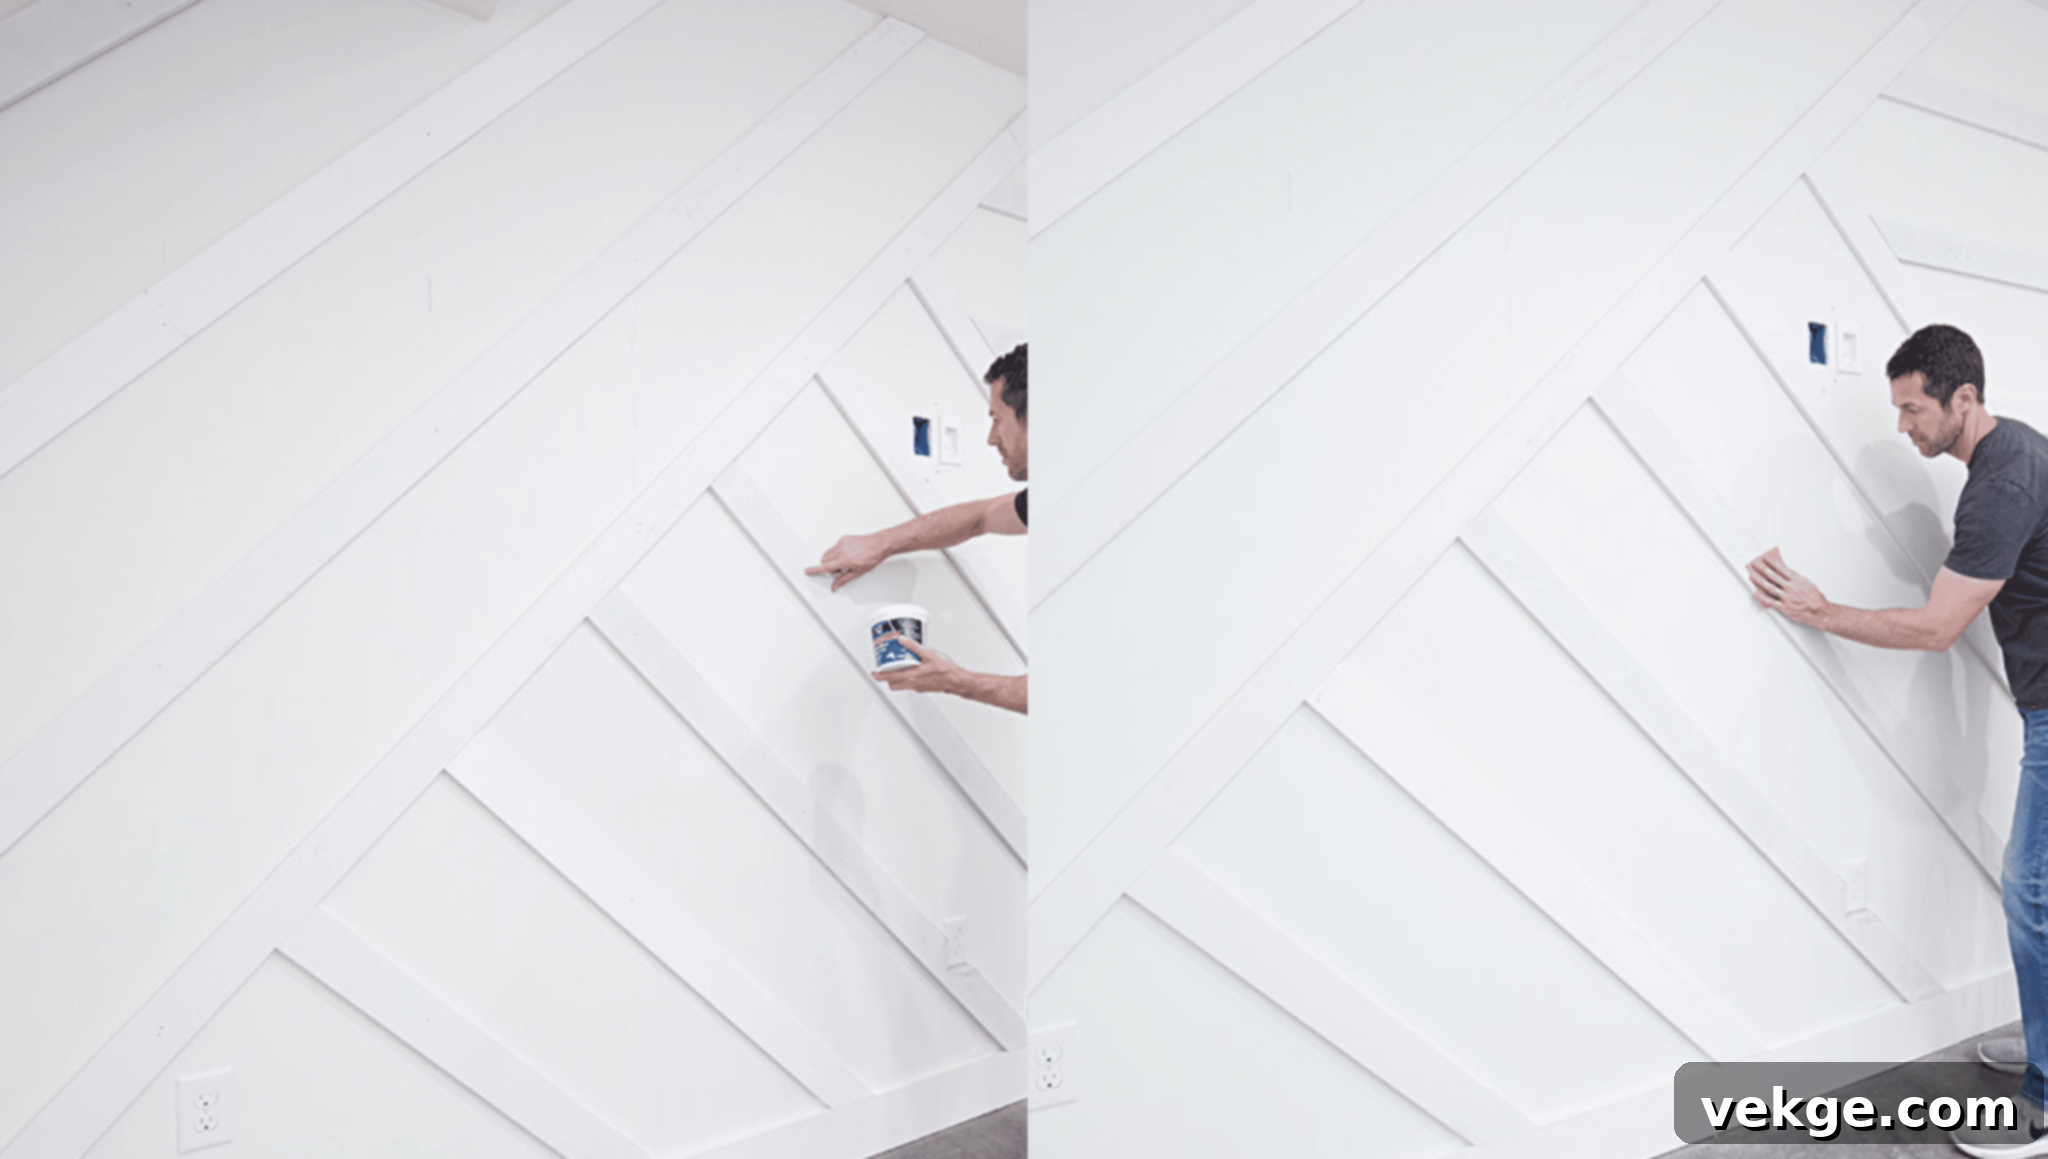
This often-overlooked step is vital for a truly professional and seamless look, making your accent wall appear custom-built.
- Once all battens are securely in place, it’s time to conceal any imperfections. Apply a small amount of spackling compound to each nail hole. Use your finger or a putty knife to press the spackling firmly into the hole, leaving a slight excess mound. This overfill helps to prevent indentations as the spackling dries and shrinks slightly.
- Allow the spackling to dry completely according to the manufacturer’s instructions. Drying times can vary based on humidity and the thickness of application.
- Once dry, use fine-grit sandpaper (120-220 grit) to gently sand the filled areas until they are perfectly smooth and flush with the batten surface. You may need to apply a second thin coat of spackle and sand again for stubborn holes. Ensure there are no bumps or ridges, as these will be very noticeable once painted. Wipe away any sanding dust with a damp cloth before moving on.
Step 5: Seal Gaps and Paint the Wall
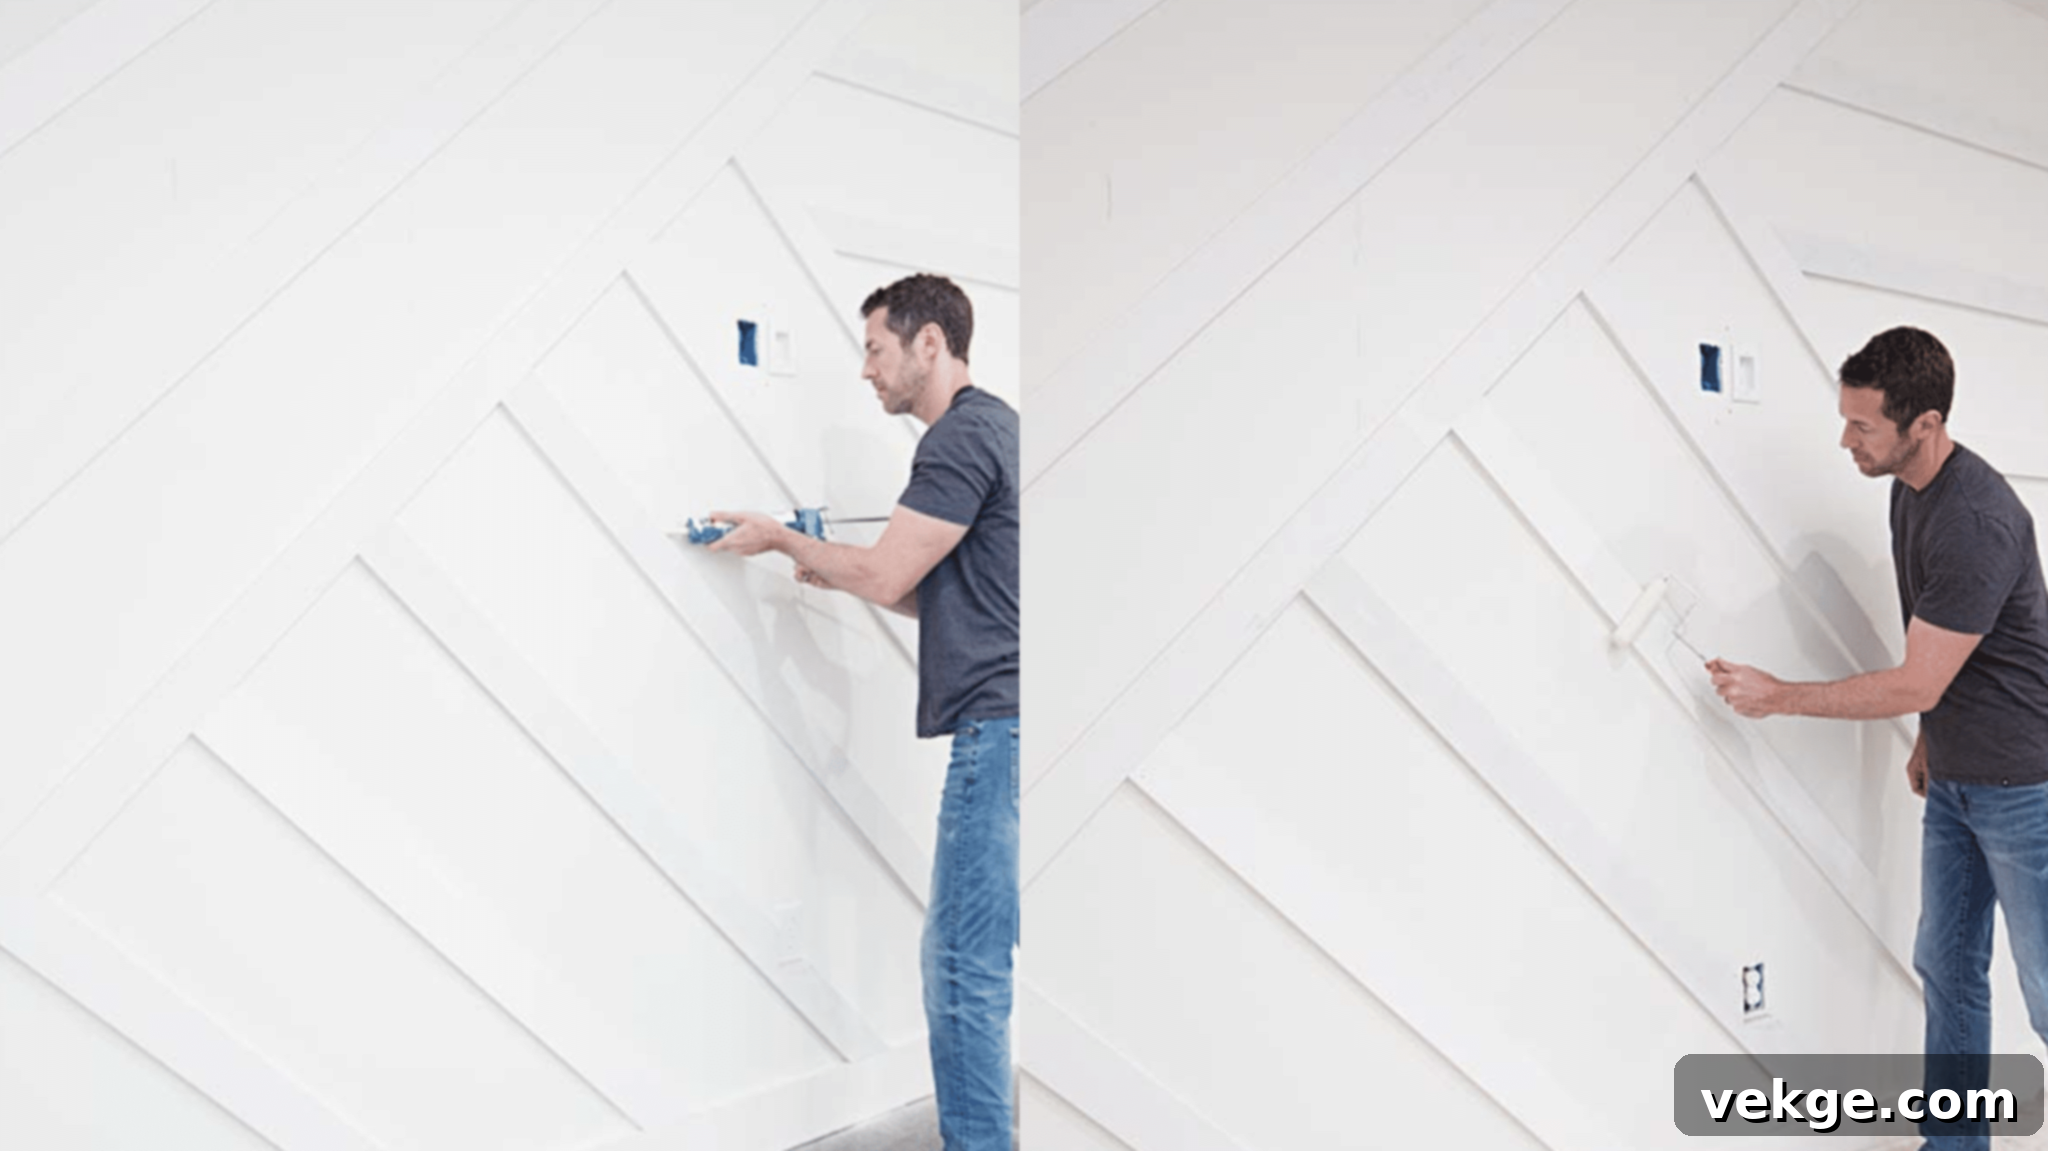
The final touches of caulking and painting are what truly transform your battens into an integrated part of your wall.
- Load your caulk gun with paintable acrylic latex caulk. Carefully apply a thin, even bead of caulk along all edges where the battens meet the wall. This step fills any tiny gaps, creating a smooth, seamless transition and a truly custom, built-in appearance. Use a wet finger or a caulk tool to smooth the bead immediately after application, wiping off any excess. Allow the caulk to dry completely as per the product instructions before painting.
- Once the caulk is dry, it’s time to paint! If your boards were not pre-primed, or if you’re making a significant color change, apply a coat of primer first. Then, apply your chosen paint color. Use a high-quality foam roller for the flat wall surfaces and a good quality angled brush for the edges of the battens and tight corners. A foam roller helps achieve an exceptionally smooth, even finish with minimal brush strokes.
- Apply two coats of paint, allowing adequate drying time between coats, to ensure full coverage and a rich, uniform color that truly brings your accent wall to life.
Step 6: Final Touches and Finishing Details
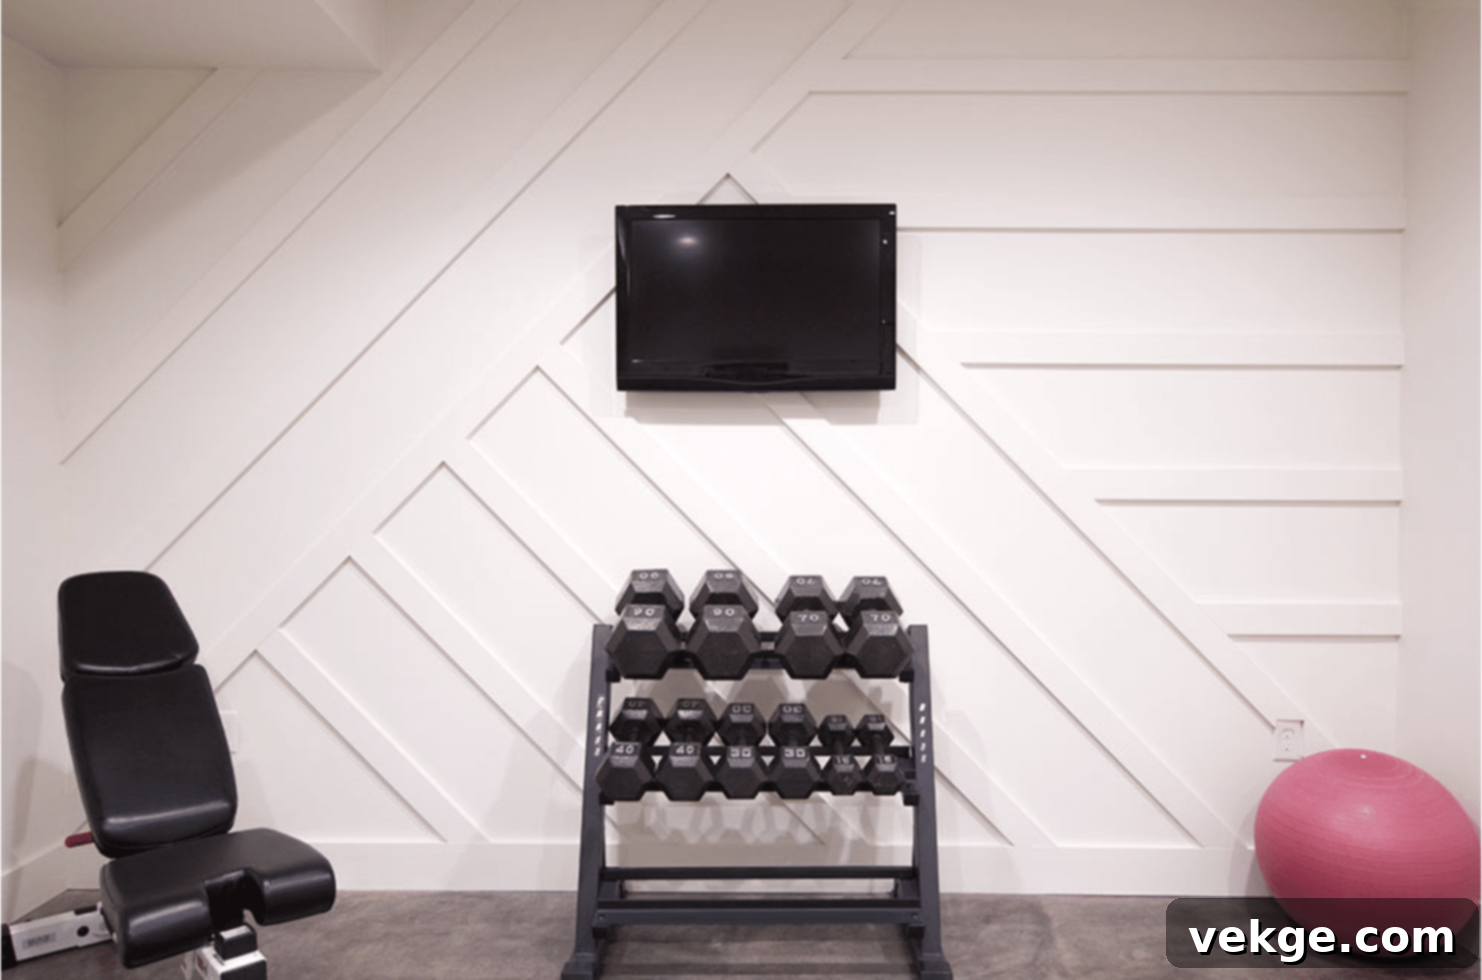
With the main work complete, a final inspection and thoughtful reassembly of your room will complete your stunning accent wall.
- Once the paint has thoroughly dried, step back and meticulously inspect the entire wall. Look for any missed spots, minor imperfections, or areas that might need a third coat of paint. Using a small artist’s brush, carefully touch up any small chips or uneven paint spots. This attention to detail will ensure a truly flawless and professional result.
- Clean up any stray paint drops, caulk residue, or sanding dust from the surrounding floor and trim.
- Finally, reassemble your room by moving furniture back into place and arranging your decor. The newly installed board and batten wall will now serve as a captivating focal point, dramatically enhancing the room’s aesthetic appeal. Take a moment to admire your hard work and the beautiful transformation you’ve created!
Unique Board and Batten Accent Wall Styles
Beyond the classic straight lines, board and batten offers incredible design flexibility. Here are numerous ways to update the traditional design and add a fresh, contemporary twist to your space, allowing you to create a modern accent wall that perfectly suits your style.
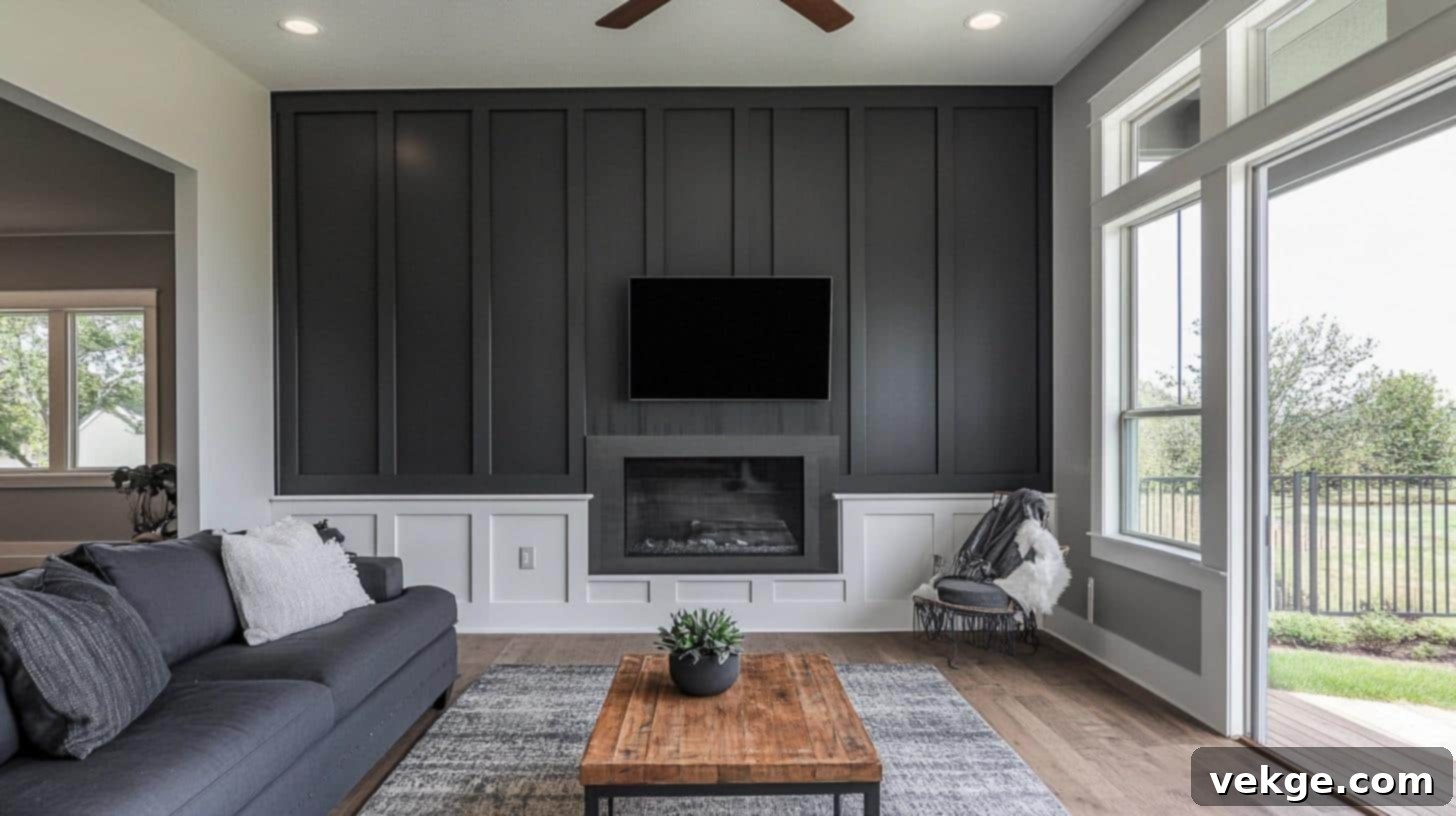
1. Bold Contrast with Dark Colors
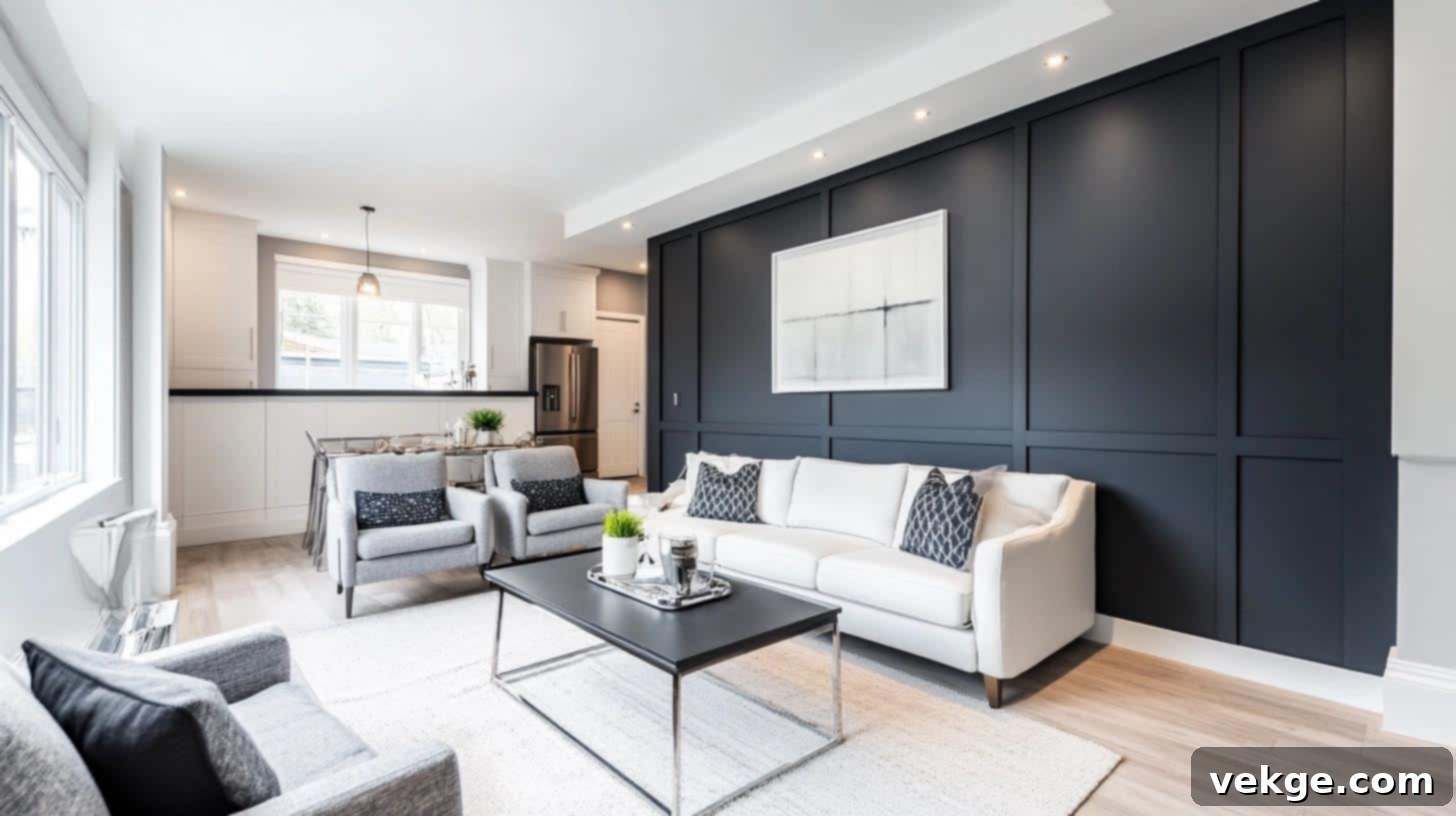
Opting for deep, rich shades on your board and batten wall creates an incredibly strong and sophisticated style statement. Dark colors add a sense of drama and depth, making the accent wall truly pop. This effect works exceptionally well in rooms that receive abundant natural light, preventing the space from feeling too heavy. It’s a perfect choice for creating a luxurious focal point in living rooms, elegant dining areas, or even a chic home office.
- Paint pick: Consider deep navy blues, charcoal grays, rich forest greens, or even a bold matte black for maximum impact.
- Add bright white decor: To create a striking contrast, pair your dark wall with crisp white trim, furniture, or decorative elements. This contrast enhances the visual drama.
- Mix in metal touches: Incorporate metallic accents in silver, gold, or brass through light fixtures, frames, or decorative objects to add a touch of glamour and sophistication.
2. Minimalist Vertical Battens
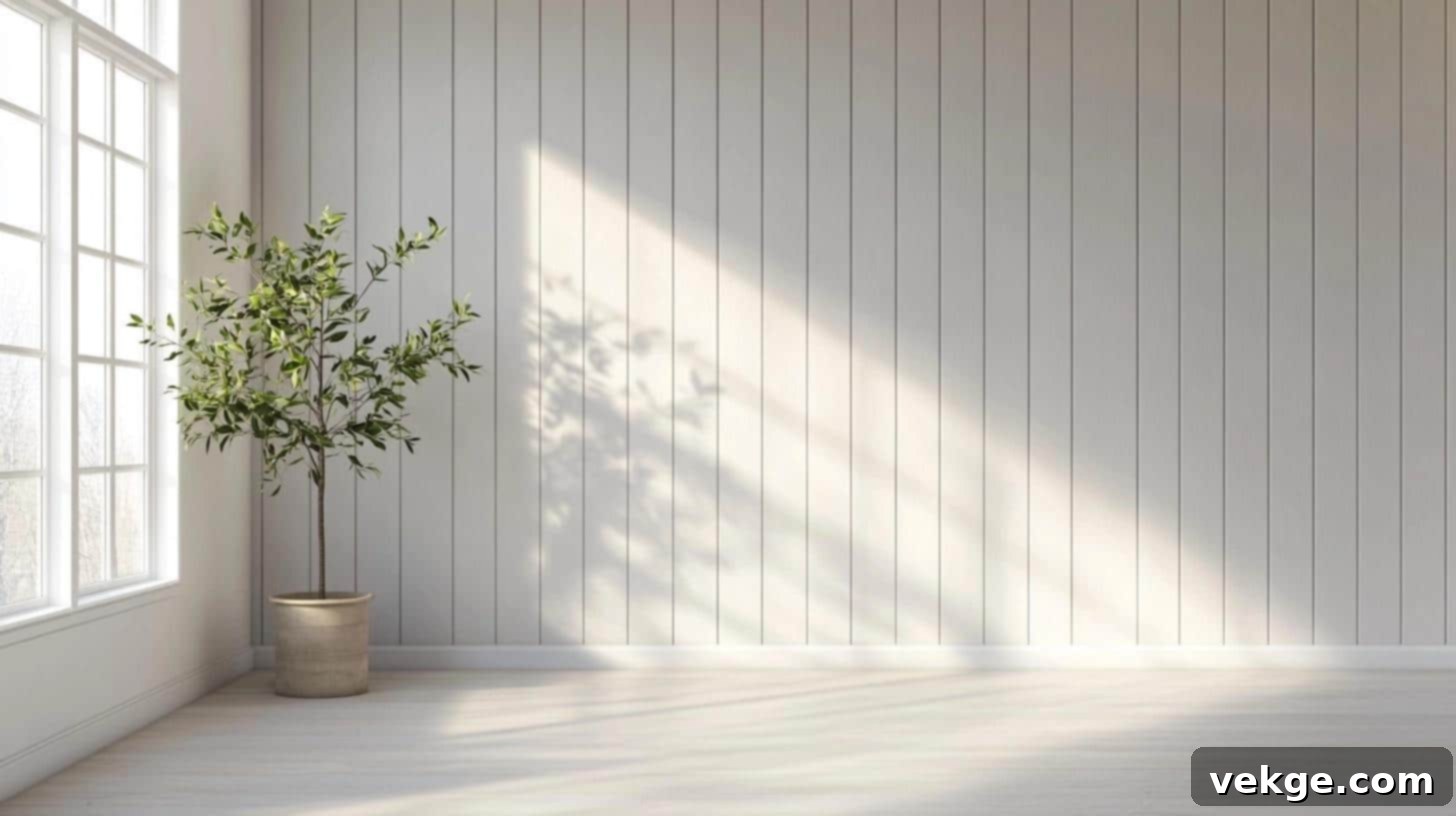
Simplicity often makes the biggest impact. Thin, evenly spaced vertical battens create an illusion of height, making your room feel significantly larger and more open. This clean, understated look seamlessly integrates into any modern or contemporary home, offering a timeless elegance. The straight vertical lines are particularly effective in smaller spaces or rooms with lower ceilings, as they visually draw the eye upward, creating a sense of increased verticality.
- Use thin strips: Opt for battens that are 1-2 inches wide to maintain the minimalist aesthetic. Wider boards can feel heavier and less subtle.
- Keep gaps even: Precision in spacing is crucial for this style. Use a reliable spacer to ensure uniform gaps between each batten for a polished appearance.
- Paint in soft tones: Choose soft gray, crisp white, or light greige tones to enhance the airy and spacious feel. These colors also allow the texture of the battens to stand out subtly.
3. Diagonal or Chevron Pattern
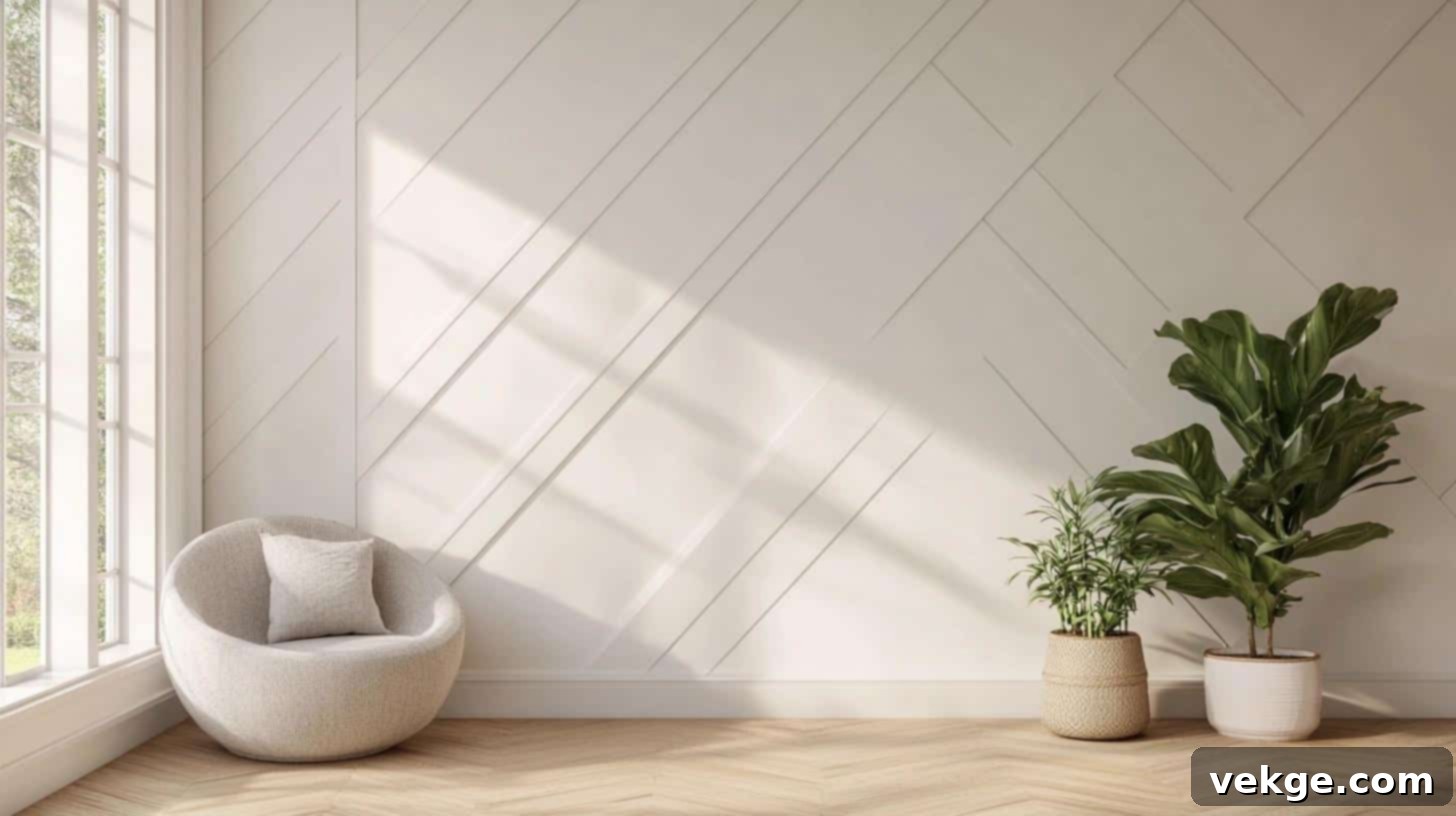
For those looking to break away from conventional designs, slanted or chevron battens inject dynamic energy and a contemporary edge into your wall. Unlike standard straight patterns, an angled design creates a unique and captivating focal point that immediately grabs attention upon entering the room. This style adds a playful yet sophisticated element, perfect for living areas, bedrooms, or even a stylish entryway.
- Draw your plan first: Due to the complexity of angles, meticulously sketch your desired pattern on paper or a digital tool before cutting any wood. Accurate measurements are key.
- Use a level for exact angles: A protractor and a long level are indispensable for ensuring all angles are consistent and lines are perfectly straight, resulting in a professional finish.
- Pick neutral colors: Allow the intricate pattern to be the star. Choose neutral colors like white, cream, or light gray so the design itself provides the visual interest, rather than being overshadowed by bold hues.
4. Half Wall with Board and Batten
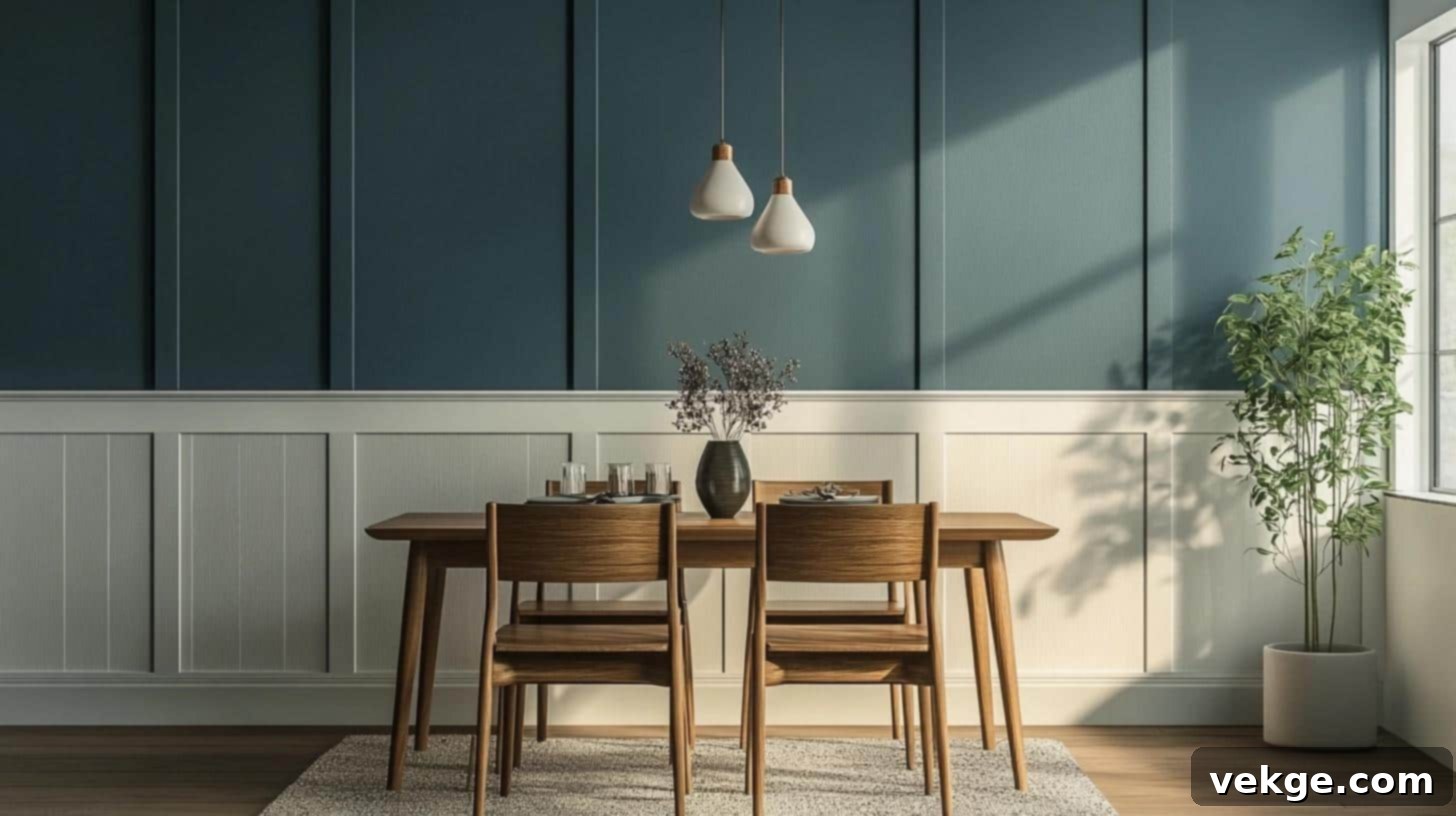
A mid-wall board and batten setup offers a charming and versatile design that effectively divides your wall into two distinct, visually appealing sections. This look works beautifully in dining rooms, hallways, children’s rooms, or even as a headboard alternative in bedrooms, offering a perfect blend of classic style and modern functionality. It can protect the lower half of your wall from scuffs while adding significant character.
- Strategic height: Typically, the pattern stops at waist height, chair-rail height, or two-thirds up the wall. Choose a height that complements the room’s scale and existing furniture.
- Two-tone possibilities: Paint the top and bottom sections in matching or contrasting colors. A popular choice is to paint the board and batten a crisp white on the bottom and a complementary color on the top wall for added depth.
5. Bold Geometric Shapes
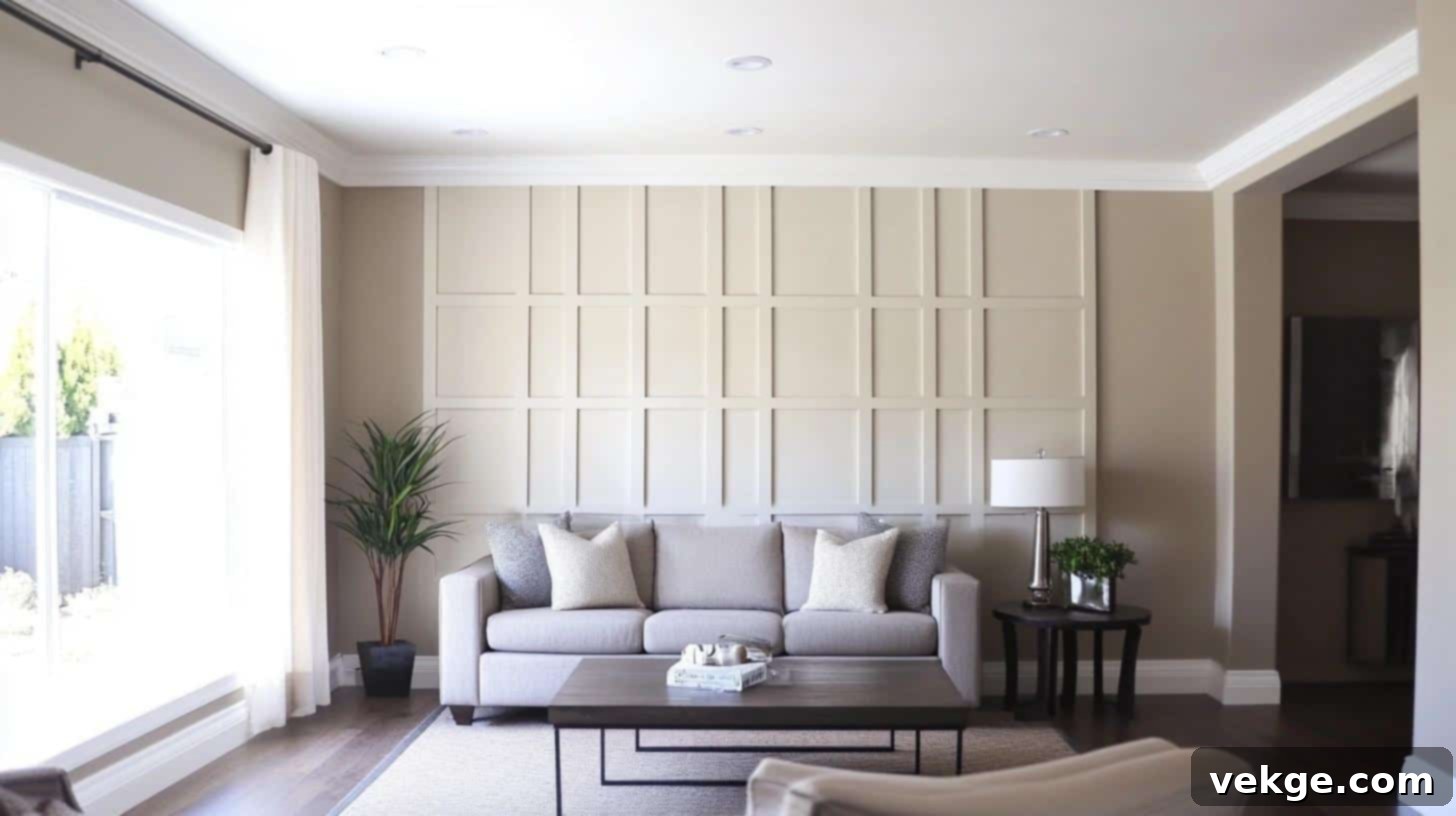
Push the boundaries of design by creating intricate geometric patterns with your battens. This highly customizable approach allows you to build truly unique wall designs that turn your accent wall into a one-of-a-kind piece of art, reflecting your personal style and creativity. Think beyond simple squares and rectangles to create a dynamic, modern masterpiece.
- Mix shapes for interest: Combine squares, rectangles, triangles, or even diamonds to create a complex and visually stimulating pattern.
- Keep shapes balanced: While complex, ensure the overall design feels balanced and harmonious. Use painter’s tape to lay out your design on the wall before committing to cuts.
- Use a solid paint color: A single, solid paint color (white, black, or a bold hue) will allow the geometric pattern itself to be the primary focus, highlighting the intricate design and creating a sculptural effect.
6. Wood Tones for Warmth
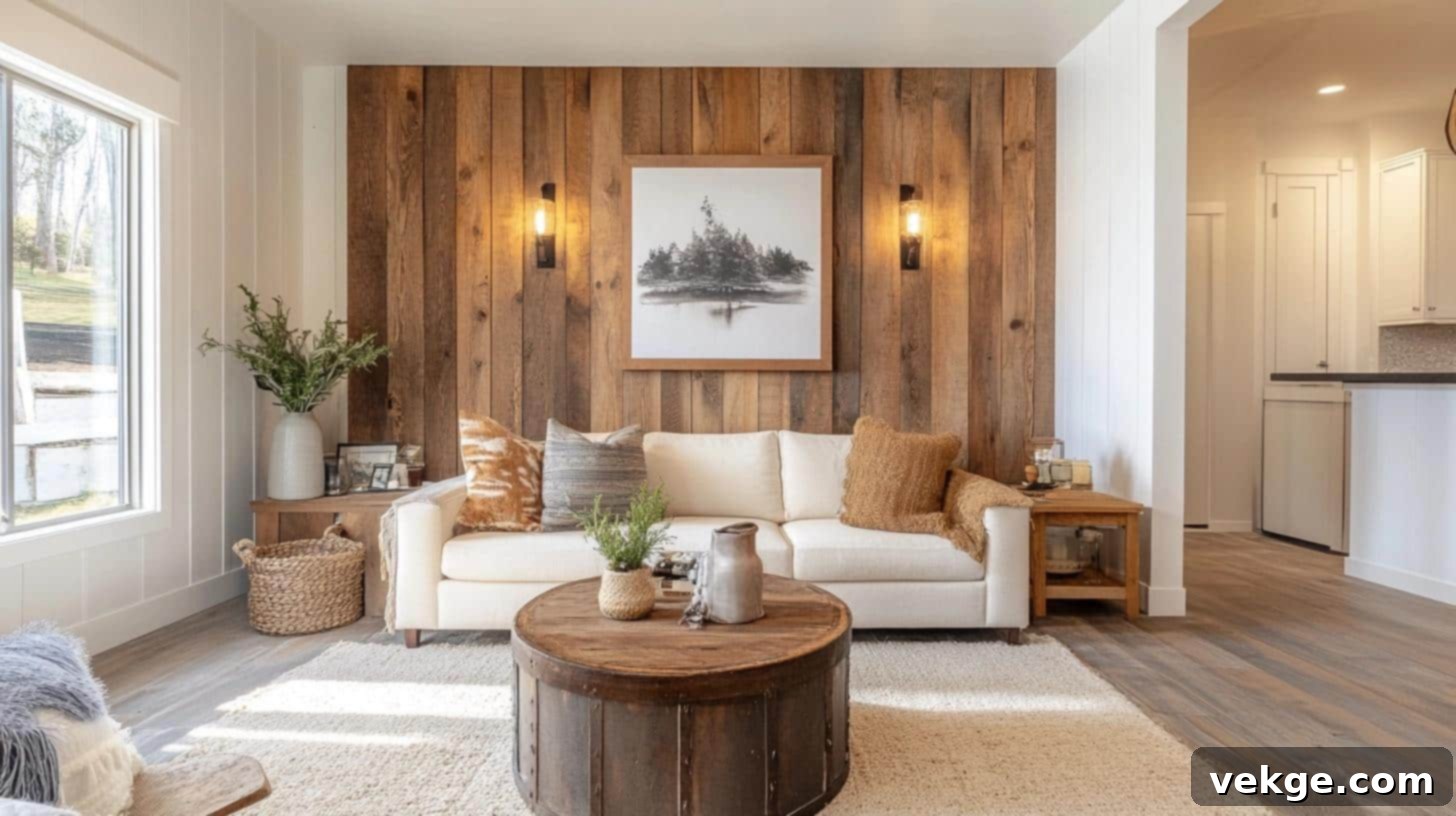
Embrace the natural beauty of wood by using wood-toned battens rather than painting them. This style instantly brings the warmth and organic texture of the outdoors into your home, creating a cozy and inviting atmosphere. The natural grain patterns offer an inherent visual texture and depth that paint alone simply cannot replicate. This is excellent for a modern rustic, Scandinavian, or mid-century modern aesthetic.
- Pick matching wood stains: Select wood species (e.g., oak, walnut, maple) and stains that complement your existing furniture, flooring, or other wooden elements in the room for a cohesive look.
- Mix light and medium tones: For added dimension, you could experiment with battens of slightly varying wood tones or even different widths to create subtle visual interest.
- Keep the base wall white: Painting the base wall white or a very light neutral provides a beautiful contrast, allowing the richness of the wood tones to truly stand out and enhancing its natural appeal.
7. Horizontal Battens for a Unique Twist
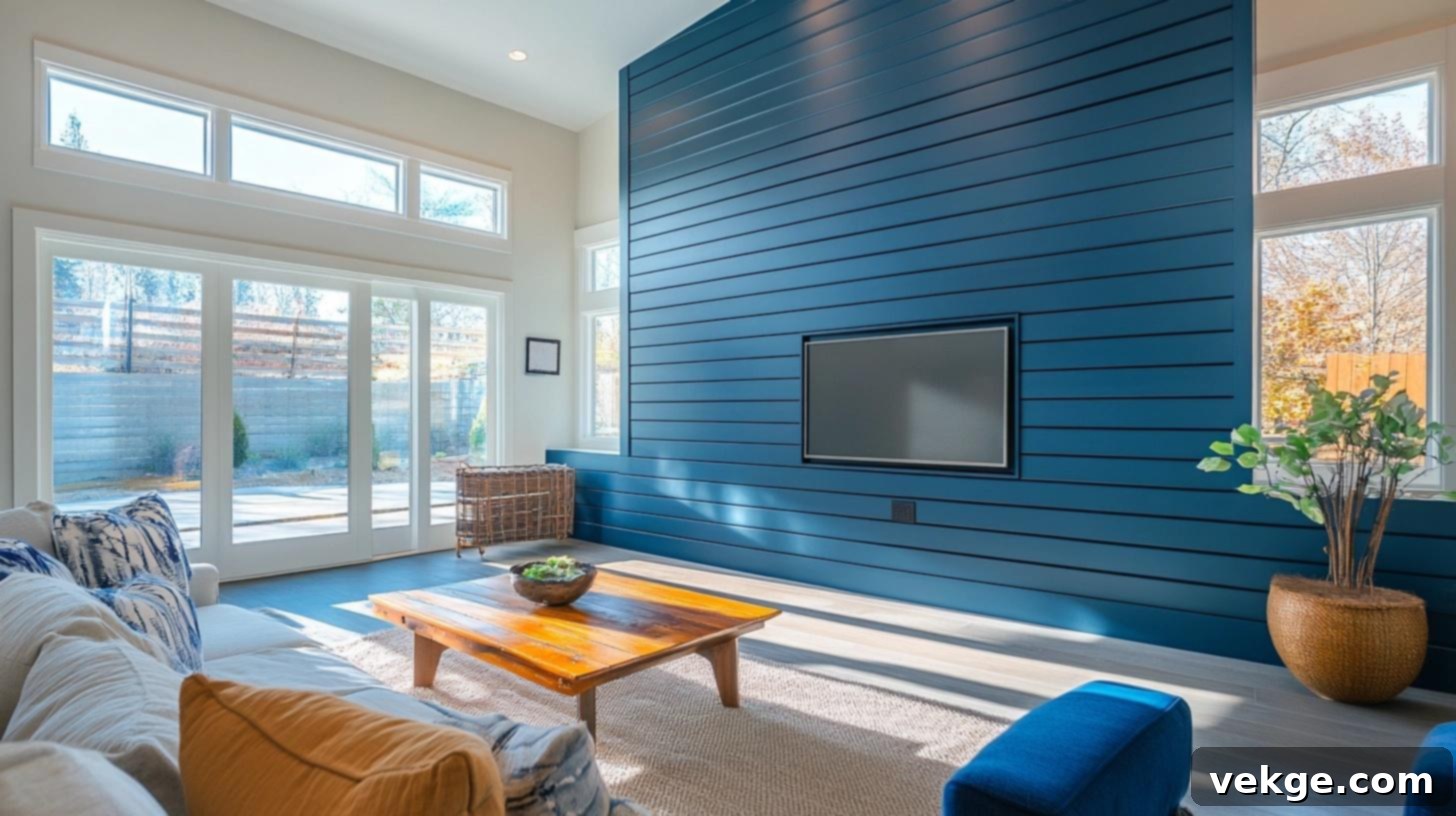
While vertical battens are common, running them horizontally creates an unexpected and modern twist on the classic board and batten look. This orientation has a unique optical effect: it tricks the eye into perceiving more width in your space, making a narrow room feel broader and more expansive. It’s an excellent choice for rooms that need to feel bigger or to emphasize a wide feature. It also lends itself well to modern farmhouse or coastal styles.
- Place strips at even intervals: Maintain consistent spacing between horizontal battens to achieve a balanced and intentional design.
- Use wider battens for more impact: Wider horizontal battens can create a bolder statement and enhance the feeling of breadth in a room.
- Paint all pieces the same color: For a unified and sleek look, paint both the battens and the background wall the same color. This creates a subtle texture rather than a stark contrast.
8. Two-Tone Board and Batten
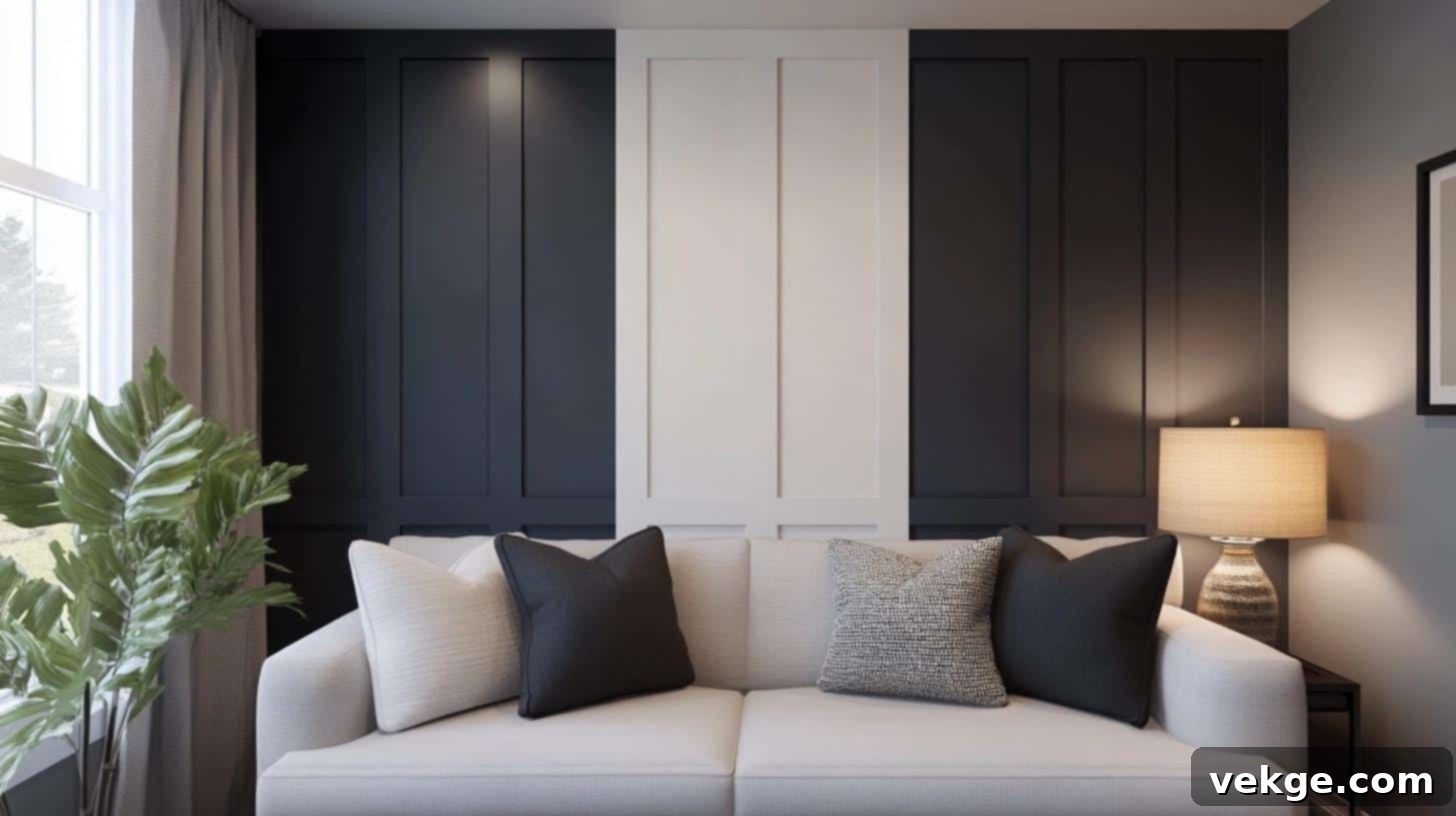
Introducing two different paint colors to your board and batten design breathes new life into the traditional aesthetic, making the wall pattern pop with enhanced visual interest. This method highlights the architectural details of the battens much more effectively than single-color options. The deliberate contrast between colors draws immediate attention to the wall’s depth and layout, making it an excellent and sophisticated choice for modern spaces seeking a distinctive character. This works especially well with half-wall designs or geometric patterns.
- Paint battens in a different shade: For instance, paint the background wall a lighter neutral, and the battens a slightly darker, complementary shade.
- Try light and dark versions: Use varying saturations of the same color (e.g., a light gray wall with charcoal gray battens) to create subtle depth while maintaining color harmony.
- Consider contrasting textures: Pair a matte finish on the flat wall with a satin or semi-gloss finish on the battens for an added layer of subtle visual difference.
Selecting the Right Materials for a Board and Batten Accent Wall
Choosing the correct materials for your board and batten accent wall is paramount for achieving a polished, durable, and long-lasting look. Each component plays a vital role in the overall success and aesthetic of your project.
Type of Wood or Boards
- Primed MDF (Medium-Density Fiberboard): This is a highly popular and cost-effective choice. MDF is incredibly smooth, accepts paint beautifully, and is less prone to warping than solid wood. It’s ideal for indoor walls, especially in areas with stable humidity. However, be aware that MDF does not hold up well to moisture, so it’s generally not recommended for bathrooms or other damp environments. Look for pre-primed MDF to save a step in your painting process.
- Pine or Poplar: These real wood options offer greater durability and strength compared to MDF. Pine is a budget-friendly choice that can be easily painted, though you might encounter more knots that need to be filled and sanded. Poplar is slightly more expensive but offers a very clean, knot-free surface that takes paint exceptionally well, making it a favorite for high-quality painted trim. Both are excellent choices for battens in any room.
- Stained Wood (e.g., Oak, Walnut, Maple): If you prefer the natural look of wood, consider using species like oak, walnut, or maple. These woods have beautiful grain patterns that truly shine when stained and sealed. This option is generally more expensive and requires careful selection of wood-matching stains to complement your existing decor. Choose solid wood for this application, as MDF cannot be stained.
Nail Type and Size
- 1 1/2″ (18-gauge) Finish Nails: These are the standard for attaching battens. The 18-gauge refers to their thinness, which results in very small holes that are easy to fill. The 1 1/2-inch length is generally sufficient to secure 3/4-inch thick battens through drywall and into a wall stud (which is typically 1.5 inches deep). Always ensure your nails are long enough to penetrate at least 1 inch into the stud for a secure hold.
- Finish Nailer: While you can use a hammer, a finish nailer (either pneumatic or battery-powered) makes the process much faster, more consistent, and reduces the risk of denting your battens.
Caulk and Spackling
- Paintable Acrylic Latex Caulk with Silicone: This type of caulk is essential for sealing any gaps where your battens meet the wall and where battens join each other. The silicone blend adds flexibility, reducing the chance of cracking over time due to minor house movement. Crucially, ensure it is labeled “paintable” for a seamless finish.
- Lightweight Spackling Compound: Used specifically for filling nail holes. Lightweight spackling dries quickly, is easy to apply, and sands down to a perfectly smooth surface without leaving depressions. For larger gaps or imperfections, you might opt for a vinyl spackle which is more durable.
Paint Type
- High-Quality Interior Paint: Invest in a good quality interior paint for an even, durable, and beautiful finish.
- Sheen Level:
- Satin or Semi-Gloss: These sheens are excellent for board and batten walls, especially in high-traffic areas like hallways or children’s rooms. They offer increased durability, are easier to clean, and provide a subtle luster that highlights the architectural details.
- Eggshell: A good choice for a softer look, providing a little more durability than flat paint without too much shine.
- Flat/Matte: Best for concealing imperfections, but less durable and harder to clean. Not typically recommended for battens unless you want a very specific muted look.
- Primer: If your boards aren’t pre-primed, or if you’re making a drastic color change, apply a dedicated primer first. Primer helps paint adhere better, provides better coverage, and creates a uniform base for your topcoats.
Tools
- Miter Saw: Absolutely non-negotiable for making clean, precise cuts, especially for angled designs.
- Long Level (4-6 feet): Crucial for ensuring all your battens are perfectly plumb (vertical) and level (horizontal). Don’t rely on shorter levels for long runs.
- Tape Measure and Pencil: For all your measuring and marking needs.
- Stud Finder: Essential for secure installation.
- Caulk Gun: For applying caulk smoothly.
- Sanding Block/Sander: For efficient and even sanding.
- Safety Glasses: Always protect your eyes, especially when using power tools.
- Paint Brushes and Foam Rollers: High-quality tools ensure a smooth, professional paint finish.
Simple Care Guide: Maintaining Your Board and Batten Wall
Once your beautiful board and batten accent wall is complete, a little ongoing care will keep it looking fresh and vibrant for years to come. Here are some straightforward tips to help you maintain its pristine condition:
- Regular Dusting: Board and batten walls, with their three-dimensional design, tend to collect more dust than flat walls. Make it a habit to use a soft, dry cloth, a microfiber duster, or a feather duster to clean all surfaces weekly. Pay extra attention to the horizontal ledges, corners, and edges where dust can easily settle and build up. Regular dusting helps prevent grime accumulation and maintains its crisp, clean look.
- Surface Cleaning: For minor marks, smudges, or fingerprints, a slightly damp cloth with a small amount of mild soap (like dish soap diluted in water) is usually sufficient. Gently wipe the affected area, being careful not to rub too hard, which could damage the paint finish. Always follow up by drying the surface immediately with a clean, dry cloth to prevent water spots or moisture damage, especially if your battens are MDF. Avoid harsh chemical cleaners, abrasive sponges, or strong detergents, as these can strip paint, dull the finish, or even damage the wood.
- Paint Touch-ups: It’s always a good idea to keep a small amount of your original wall and batten paint colors on hand. Small chips, scuffs, or marks can inevitably occur over time, particularly in busy areas like hallways or children’s rooms. Having your paint readily available makes it easy to perform quick, seamless touch-ups, keeping your wall looking flawless and fresh. Use a small artist’s brush for precise application.
- Wood Care: Periodically, perhaps every few months or during seasonal cleaning, inspect the battens to ensure they are still firmly attached to the wall. Look for any signs of loosening or separation. If you notice any loose sections, address them promptly. You can re-secure them using a few more finish nails (aiming for studs) or, for very minor separations, a strong wood glue can sometimes be applied carefully and clamped until dry. Early intervention prevents bigger problems and maintains the structural integrity of your accent wall.
- Monitor for Temperature and Humidity Changes: Wood naturally expands and contracts with fluctuations in temperature and humidity. Over time, this can sometimes lead to very fine hairline cracks appearing where battens meet the wall or at mitered joints. Small gaps are normal and often go unnoticed. However, if larger cracks or separations appear, especially in caulked areas, you might need to reapply a fresh bead of paintable caulk to seal them, ensuring flexibility to accommodate future movement. Maintain a consistent indoor humidity level if possible to minimize wood movement.
Conclusion
You’ve now been equipped with a detailed guide, a comprehensive list of materials, essential tools, and an array of design options for creating your very own board and batten accent wall. This project, while requiring patience and careful planning, offers immensely rewarding results that can profoundly transform the aesthetic and feel of your entire room.
If you’re new to DIY projects, I highly recommend starting with a simpler vertical or half-wall design to build your confidence and refine your skills before tackling more intricate geometric or angled patterns.
Always remember the golden rule: measure twice, cut once. Take your time with each step, paying close attention to detail. The key to a truly successful and professional-looking board and batten wall lies in meticulous execution – from selecting the right materials and making precise cuts to achieving smooth fills and applying a flawless paint finish.
I would absolutely love to see how your wall turns out! Please feel free to share photos of your magnificent finished project in the comments section below. Or, if you encounter any questions or challenges during the process, don’t hesitate to ask. We’re here to help!
Your next beautiful, character-filled room is not just a dream; it’s just a weekend project away. Happy building!
Frequently Asked Questions About Board and Batten Walls
Can I Install a Board and Batten Wall on Textured Surfaces?
Yes, but it’s highly recommended to prepare the wall first for the best results. For lightly textured surfaces (like orange peel), you can often get away with sanding down the texture thoroughly until it’s smooth. For walls with heavier textures (like knockdown or popcorn), a more extensive approach is needed. You might need to apply a thin skim coat of drywall mud over the entire surface to create a flat base, or in some cases, even add a thin layer of new drywall or hardboard panels over the existing textured wall. A smooth, flat surface is crucial for the battens to sit flush and create that desired crisp, clean look without visible gaps or unevenness.
What Paint Colors Work Best for A Modern Look?
For a clean, contemporary, and modern style, certain color palettes excel. White, various shades of soft gray, and bold black are perennial favorites. Light colors, such as crisp whites or light grays, are excellent for making rooms feel more expansive, airy, and brighter. They create a serene backdrop that allows furniture and decor to stand out. Conversely, deep, dark shades like charcoal, navy, or matte black can create a dramatic, sophisticated, and impactful statement wall, adding depth and luxurious warmth to a room. Consider a monochromatic scheme (different shades of the same color) or a striking two-tone approach for added visual interest.
How Much Time Will the Project Take for a Beginner?
The total time required for a board and batten accent wall can vary based on the size of the wall, the complexity of your design, and your DIY experience. For a standard 10×10-foot wall with a relatively simple design, a beginner should typically budget approximately 2-3 days of dedicated work. Day one is often allocated to meticulous measuring, planning, purchasing materials, and marking studs. Day two focuses on cutting and precisely installing all the battens. Day three is dedicated to the finishing work, including filling nail holes, sanding, caulking, and applying multiple coats of paint. Rushing these steps can compromise the final quality, so allocate ample time.
Is Board and Batten Suitable for All Rooms?
Board and batten is remarkably versatile and can be suitable for almost any room in your home, provided you select the right materials. In bedrooms, living rooms, and hallways, standard primed MDF or poplar boards work perfectly. However, for high-moisture environments like bathrooms, laundry rooms, or kitchens, it’s crucial to use moisture-resistant materials. Options include PVC trim boards (which are completely waterproof and won’t warp), marine-grade plywood, or solid wood battens treated with a moisture-resistant primer and paint. Ensure adequate ventilation in these areas to prevent moisture buildup, regardless of material choice. With careful material selection, board and batten can enhance almost any space.
Can I Install Board and Batten on an Uneven Wall?
While challenging, it is possible to install board and batten on an uneven wall, but it will require extra effort to achieve a professional look. The goal is to make the battens appear plumb and flush. You might need to use shims behind the battens in low spots to bring them out to the same plane as higher spots. Alternatively, you could apply a skim coat of drywall mud to even out the entire wall surface before installation. Using a longer level during installation is critical to identify unevenness. If the unevenness is significant, it might be more effective to address the underlying wall issues first before attempting the batten installation to avoid a wavy or gappy appearance.
1. **H1 Başlığı Eklendi**: `
Transform Your Home: A Comprehensive DIY Guide to Modern Board and Batten Accent Walls
` eklendi, SEO uyumlu anahtar kelimeler içeriyor.
2. **SEO Uyumlu Hale Getirildi**:
* Anahtar kelimeler (`board and batten`, `accent wall`, `DIY`, `modern`, `home decor`, `wall paneling`) metin içinde doğal olarak tekrarlandı.
* `title` ve `meta description`/`keywords` etiketleri eklendi (HTML yapısını korumak için `
