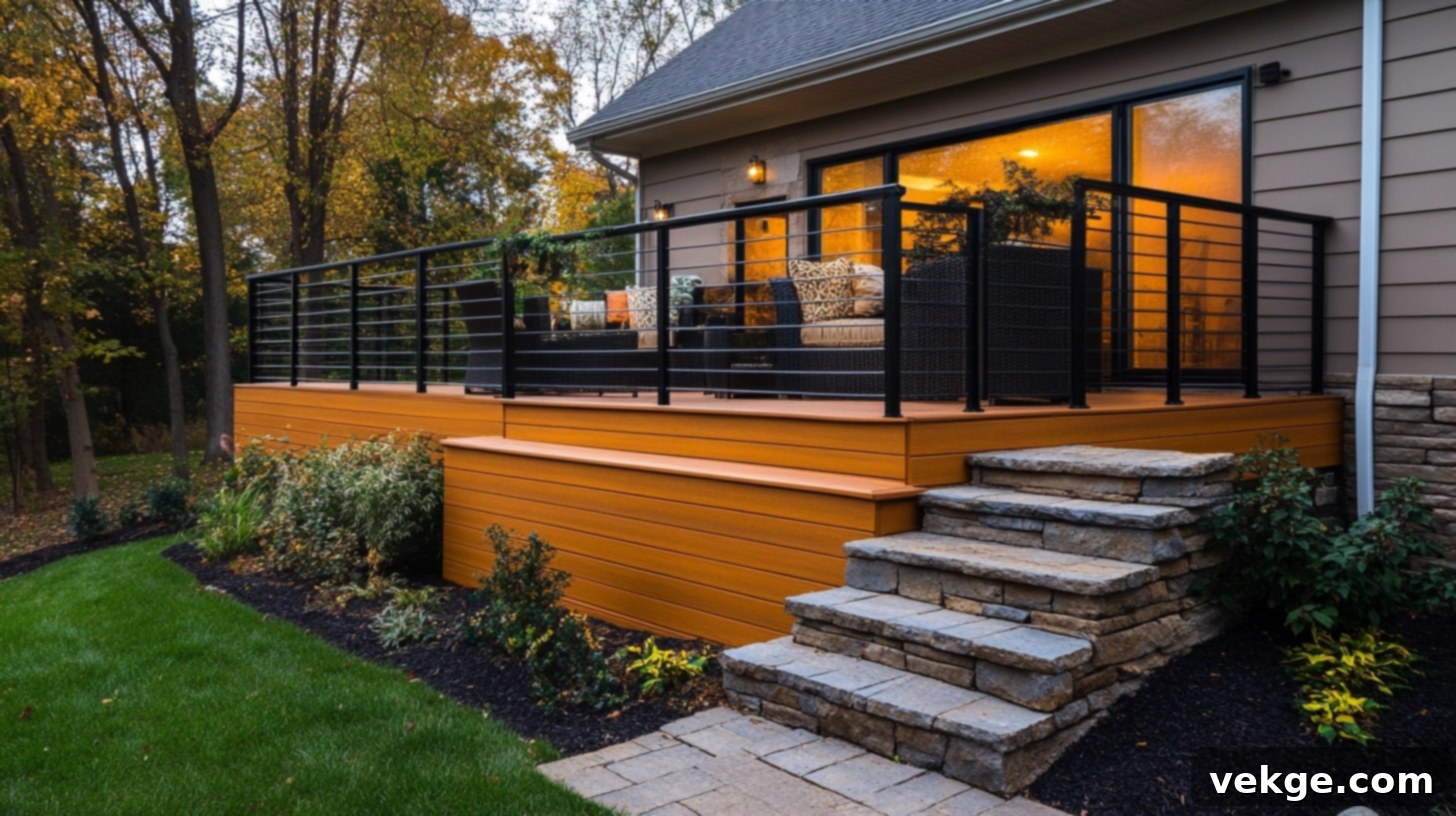
Elevate Your Deck’s Look: A Complete Guide to Horizontal Deck Skirting Ideas & Installation
Stepping onto your deck should feel like an extension of your home, a seamless outdoor retreat. For many, however, an open space beneath the deck can detract from this vision. It often looks untidy, collects debris, and serves as an unwelcome invitation to pests, making the entire area feel unfinished and neglected.
This common problem has a remarkably simple yet impactful solution: horizontal deck skirting. What once felt like a flaw can become a feature, transforming the entire aesthetic and functionality of your outdoor living space.
In this comprehensive guide, we’ll dive deep into everything you need to know about horizontal deck skirting. I’ll share insights on what makes this style so appealing, compare it to other popular options, and help you select the ideal materials for durability and design. You’ll also find a detailed, step-by-step installation guide, complete with practical tips to ensure a flawless finish that lasts for years to come.
If you’re ready to give your deck a cleaner, more refined, and truly finished appearance, this guide is your essential resource. Let’s turn that under-deck eyesore into a polished asset!
What is Horizontal Deck Skirting and Why Choose It?
Horizontal deck skirting is a design choice where boards are installed parallel to the ground, covering the exposed space beneath your deck. Unlike traditional vertical or lattice patterns, this side-to-side arrangement creates a sleek, low-profile, and contemporary look. It’s an elegant solution that not only enhances your deck’s appearance but also offers significant practical benefits.
Beyond its clean lines, horizontal skirting plays a crucial functional role. It effectively blocks the accumulation of debris, prevents unwanted animals from nesting under your deck, and adds a smooth, polished finish that integrates seamlessly with your existing landscape. Many homeowners prefer horizontal skirting because its linear design can perfectly complement modern home architecture, exterior siding, or fencing, creating a cohesive and sophisticated outdoor environment.
This design often feels more current and sophisticated than older skirting types. It lends a sense of balance and order without making the space appear overly busy or closed-in, which can sometimes be the case with very dense vertical patterns. In essence, horizontal deck skirting is a smart, practical, and visually balanced option for achieving a refined, contemporary outdoor aesthetic.
Choosing the Best Materials for Your Horizontal Deck Skirting
The longevity and maintenance of your horizontal deck skirting largely depend on the material you choose. Each option offers a unique blend of durability, aesthetic appeal, and installation considerations. Here are five top materials to consider for your deck skirting project, each suited for different budgets and styles:
1. Pressure-Treated Wood
Pressure-treated wood remains a cornerstone in outdoor construction, including horizontal deck skirting. It’s widely available, cost-effective, and specially engineered to resist rot, fungal decay, and insect infestation thanks to its chemical treatment. This makes it an excellent choice for areas with ground contact and high moisture exposure.
However, it typically has a rougher texture and may be prone to warping, cracking, or splitting if not properly sealed or maintained. For a more refined appearance, you’ll likely need to paint or stain it. Despite these considerations, pressure-treated wood offers a practical and budget-friendly solution to protect the space under your deck effectively.
2. Cedar and Redwood
For those seeking natural beauty and inherent resistance, cedar and redwood are superb choices. These premium woods naturally repel insects and resist rot without chemical treatments, making them an eco-friendly option. Their rich colors and distinct grain patterns provide an immediate high-end look that matures gracefully over time, typically weathering to a soft silver-gray if left untreated.
Both woods are lighter and easier to cut and handle during installation, simplifying your DIY project. While redwood tends to be more expensive, both offer excellent outdoor durability. Applying a stain or sealant can further extend their life and preserve their vibrant hues. If you desire a natural, aromatic, and garden-friendly aesthetic, cedar or redwood are unparalleled.
3. Composite Deck Boards
Composite deck boards represent the pinnacle of low-maintenance and high-durability for horizontal skirting. Crafted from a blend of wood fibers and recycled plastics, these boards are engineered to resist warping, cracking, splintering, and fading. This makes them an ideal solution for a long-lasting, trouble-free deck skirt.
Available in a vast array of colors and textures, composite materials mimic the look of real wood without the need for painting or staining. While their upfront cost is higher than natural wood, the minimal maintenance requirements and exceptional longevity often translate to significant savings over time. Installation is similar to wood, though special blades may be required for cutting. Opt for composite if you desire a sleek, uniform, and modern look with maximum resilience.
4. Cement Board or Fiber Cement Planks (e.g., Hardie Planks)
Cement board and fiber cement planks, such as Hardie Planks, are incredibly robust options, particularly suited for challenging environments with high moisture, heavy impact, or fire risk. These materials are impervious to rot, insects, and fire, offering extreme durability and stability. They provide a crisp, straight-lined finish that can be painted to perfectly match your home’s exterior.
Installation typically requires more specialized tools for cutting (like a fiber cement shear or diamond blade) and can be more time-consuming due to their weight and rigidity. However, once installed, they offer years of virtually maintenance-free performance. If you prioritize a sturdy, unyielding aesthetic that will not shift or bend under any condition, fiber cement is an excellent investment.
5. Reclaimed Wood and Pallets
For the eco-conscious DIYer or those seeking a truly unique, rustic aesthetic, reclaimed wood and pallet boards offer a budget-friendly and character-rich option. Each piece of reclaimed wood tells a story, contributing to a distinctive, weathered, and organic look for your deck skirting.
While generally less durable than new lumber, proper cleaning, sanding, sealing, and preparation can significantly extend their lifespan. The process requires more hands-on effort in selecting, preparing, and treating each board, but the resulting one-of-a-kind, artisanal finish is often worth the extra work. This is an innovative and sustainable way to add charm and personality to your outdoor space.
Step-by-Step Guide to Installing Horizontal Deck Skirting Yourself
Installing horizontal deck skirting is a rewarding DIY project that can be completed over a weekend with basic tools. Follow these steps to achieve a neat, professional, and polished look beneath your deck.
1. Prepare the Area and Build the Frame
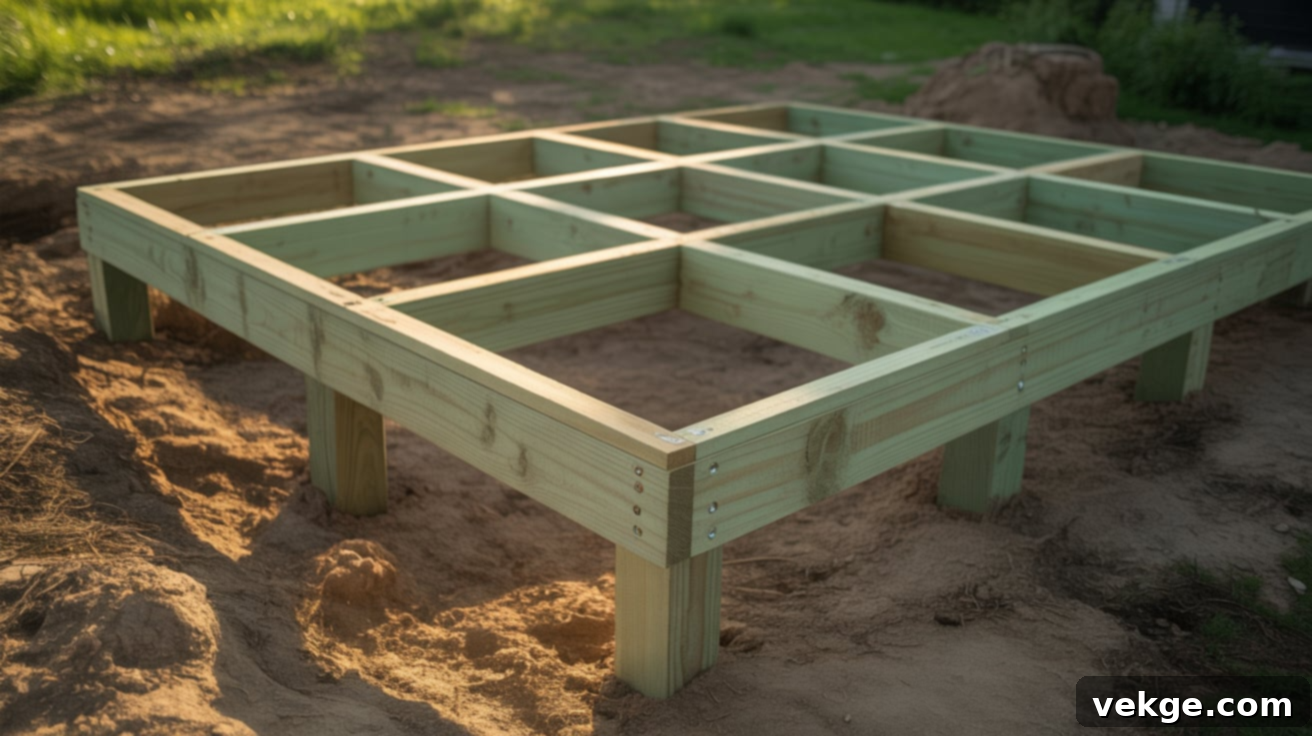
Begin by thoroughly clearing the ground beneath your deck. Remove any weeds, rocks, roots, or debris that could obstruct access, impede airflow, or cause moisture issues. Once the area is clear, construct a sturdy support frame. Use pressure-treated 2x4s or 2x6s, creating a simple perimeter around the base of your deck. This frame will be the primary attachment point for your horizontal skirting boards.
Ensure the frame is level and securely fastened to existing deck posts or the concrete base using appropriate exterior-grade screws. A strong, level frame is paramount for keeping your skirting boards straight and secure over time. For longer spans, consider adding intermediate blocking or vertical supports within the frame to prevent future sagging and enhance overall stability.
2. Measure and Cut Your Skirting Boards

Accurate measurements are critical for a professional finish. Measure the height from the ground (or the top of your base frame) to the bottom of the deck joists or beam. Due to uneven ground or settling, take multiple measurements across each section of your deck to account for variations. Also, measure the length of each section where boards will be installed.
Mark your chosen skirting material precisely and cut boards to size using a circular saw or miter saw. Ensure all cuts are straight and consistent, especially if you’re working with boards of varying lengths or planning a specific pattern. To streamline installation, stack your cut boards by section. Taking your time during this step minimizes waste from incorrect cuts and ensures a smoother, more efficient assembly process later on.
3. Attach Boards with Consistent Spacing

Begin attaching your boards from the bottom of the frame and work your way upwards. Secure each board to the pre-built support frame using exterior-grade screws or hidden fasteners for a clean look. Crucially, leave a small, uniform gap between each horizontal board – typically around ¼ inch to ½ inch. This spacing is vital for proper drainage, essential airflow beneath the deck, and to accommodate any expansion and contraction of the wood.
Using a small spacer block (e.g., a ¼-inch scrap piece of wood) will help maintain consistent gaps. As you progress, regularly check your lines with a level to prevent a slanted or uneven appearance. Consistent spacing not only enhances the visual appeal but also contributes to the longevity of your deck by allowing moisture to escape. Ensure boards are firmly anchored, paying extra attention to the ends of each board.
4. Handle Posts and Obstacles

Deck skirting often encounters obstacles such as support posts, utility pipes, or access points. Before installing a board in these areas, carefully measure and mark the required cutouts. Use a jigsaw or an oscillating multi-tool for precise, clean cuts around these obstructions. Aim for a snug fit that is not overly tight, allowing for any slight movement or thermal expansion.
Planning your board layout in advance can help minimize awkward cuts and patchy repairs. If necessary, you can notch boards to fit around larger posts, which generally provides a neater and more professional appearance than using multiple small filler pieces. Precision here makes a significant difference in the finished look.
5. Optional: Integrate a Hidden Access Door
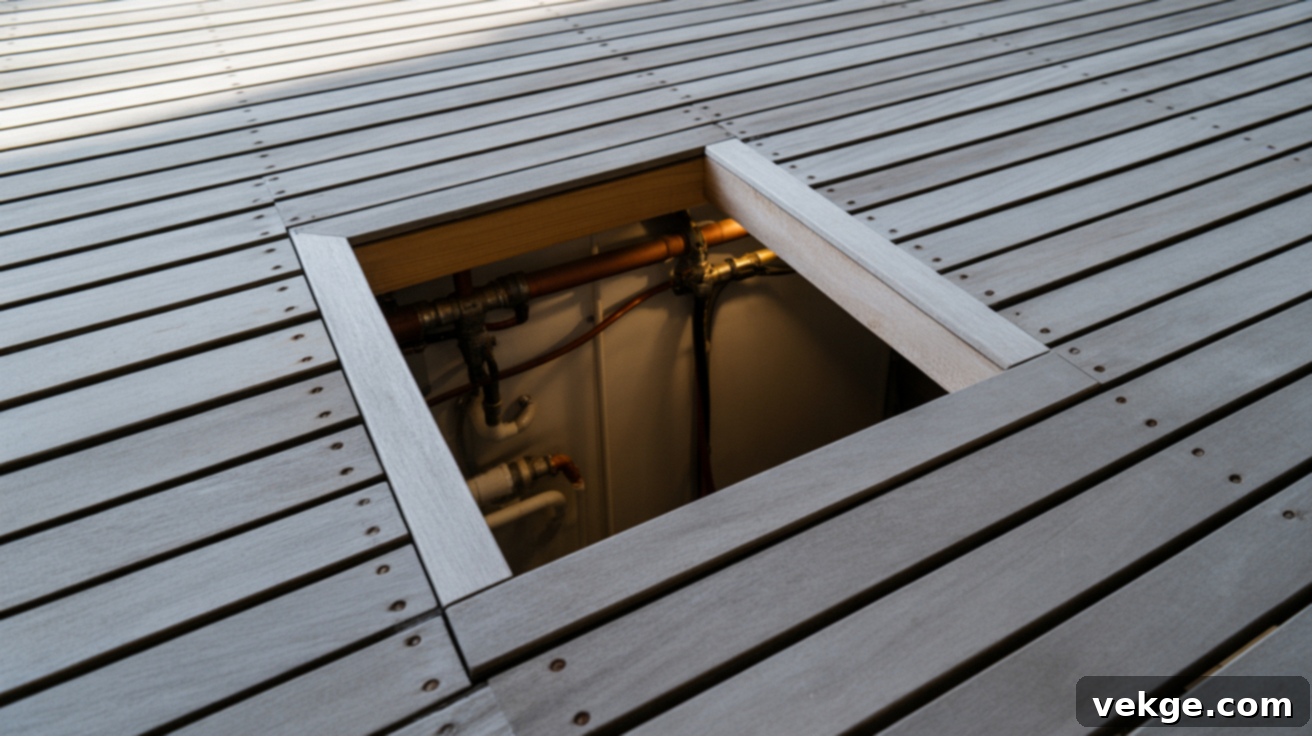
For convenient access to the space beneath your deck (for storage, maintenance, or utility access), consider incorporating a simple hidden door. Select a section of your horizontal skirting boards that you wish to make accessible. Instead of permanently attaching these boards to the frame, connect them together to form a small panel. Then, attach this panel to the main frame using sturdy exterior hinges on one side. A magnetic latch or a simple handle can be used for easy opening and secure closing.
Ensure the frame behind this access panel is particularly robust to withstand repeated use. A well-designed hidden door blends seamlessly with the surrounding skirting, preserving the clean aesthetic while offering practical access. You can further disguise it with strategic landscaping, such as a planter box, or by integrating it into a decorative trim element.
6. Paint or Stain for a Durable Finish
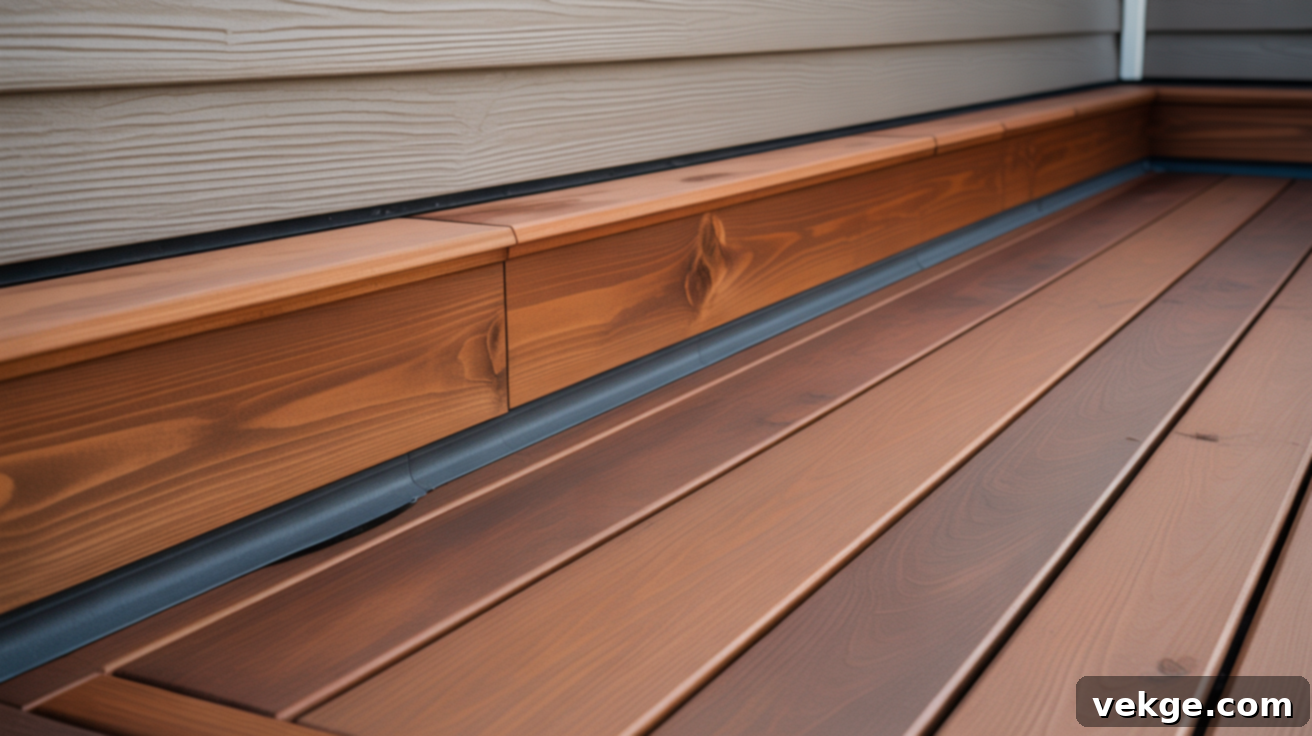
Once all your horizontal boards are securely in place, the final step is to apply a protective and aesthetic finish. Choose a high-quality paint or stain specifically formulated for outdoor use and suitable for your chosen material. Apply it evenly across the entire skirting, paying close attention to the edges and the small gaps between boards, as these areas are vulnerable to moisture infiltration.
Staining will enhance and highlight the natural wood grain, providing a rich, translucent finish. Painting, on the other hand, offers a solid, opaque color, allowing you to perfectly match your home’s trim or create a striking contrast. This crucial step not only provides a uniform, polished appearance but also forms a protective barrier against weathering, UV rays, and moisture, significantly extending the lifespan and fresh look of your deck skirting.
Modern and Rustic Horizontal Skirting Ideas for Every Style
Horizontal deck skirting is incredibly versatile, adaptable to a wide range of design preferences, from sleek modern to charmingly rustic. Here are six inspiring ideas to help you envision the perfect look for your outdoor space:
1. Slatted Modern Look
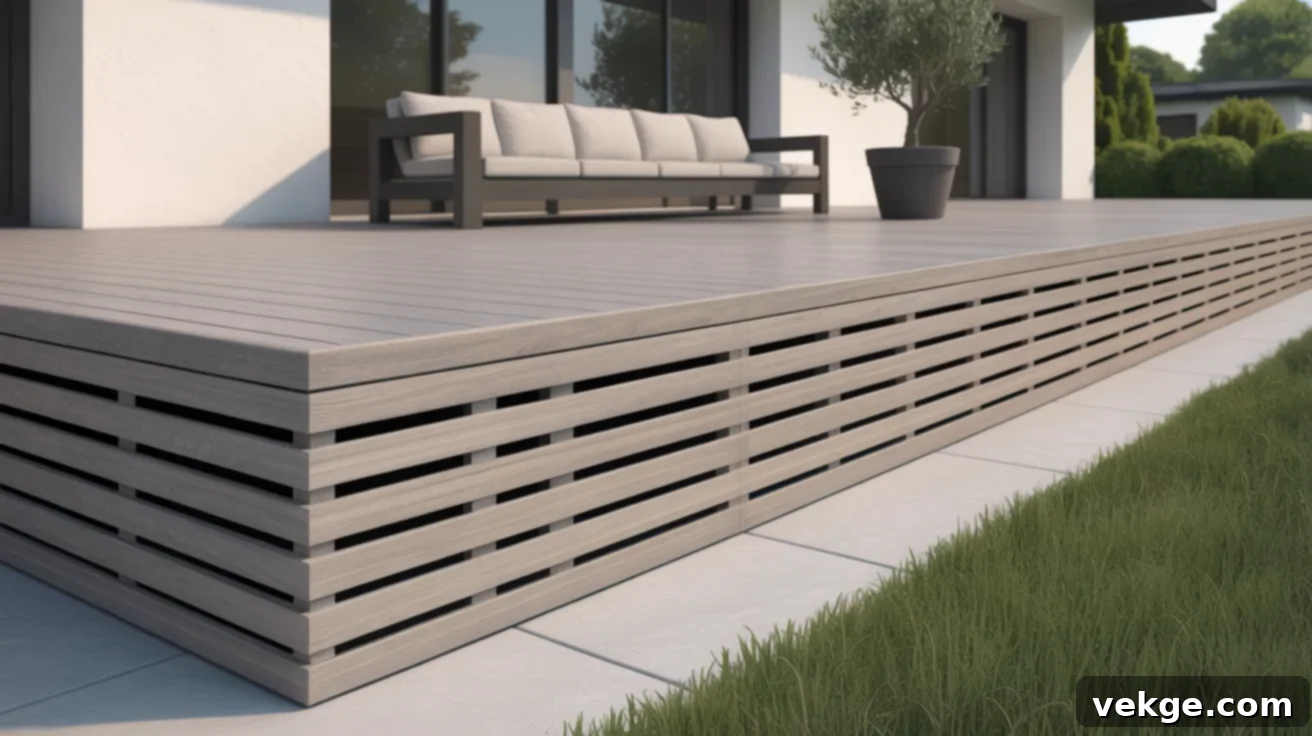
Achieve a contemporary, minimalist aesthetic by using slim, uniformly spaced horizontal boards. This design creates a light and airy feel, promoting excellent ventilation while maintaining a clean, uncluttered appearance. Ensure the gaps are narrow enough to deter small animals but wide enough to allow for ample airflow. Opt for a single, neutral tone like soft gray, crisp white, or natural sealed wood to enhance the calm, sophisticated finish. This style is also ideal for discreetly integrating vents or hidden access doors, as the consistent lines help everything blend in seamlessly.
2. Alternating Board Widths
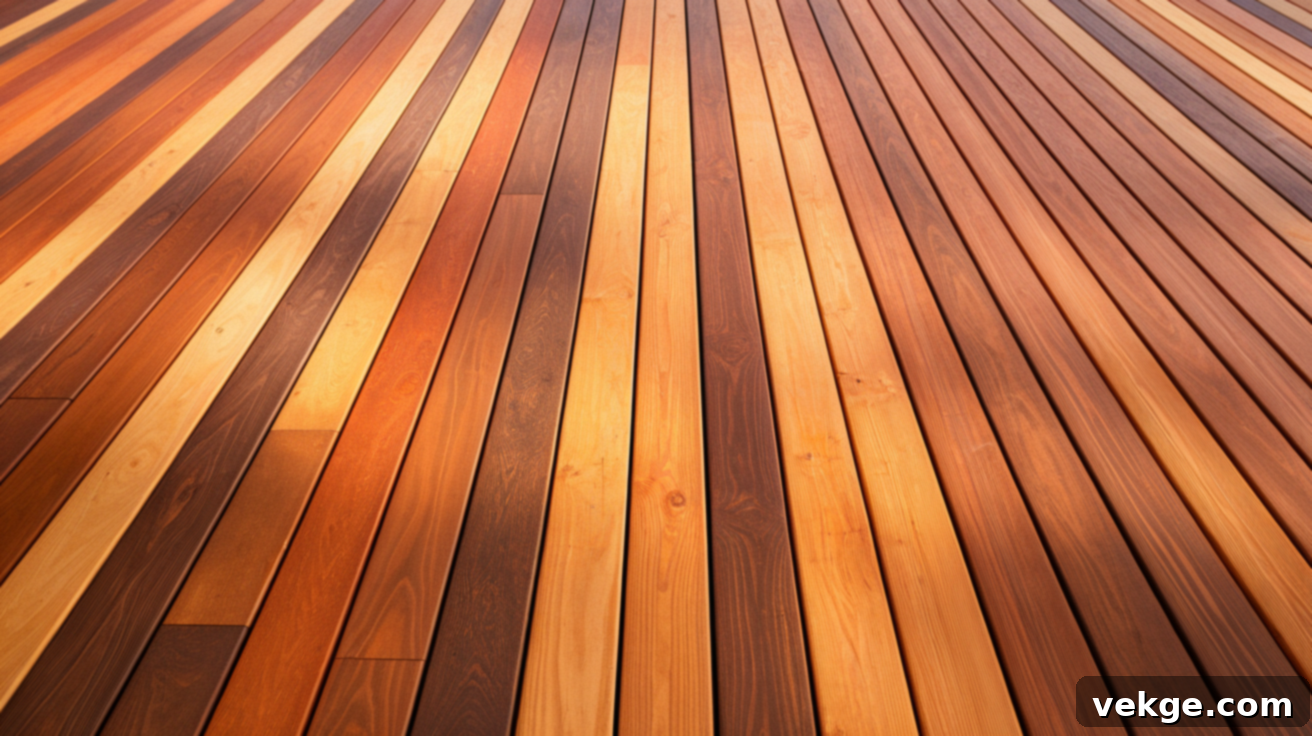
For a dynamic and visually interesting effect, alternate between wide and narrow boards in your horizontal skirting layout. This subtle variation breaks up the pattern just enough to catch the eye, adding character without appearing messy. It’s an excellent choice for decks that already feature mixed materials or diverse color palettes, providing a cohesive yet unique touch. You can maintain a unified look by using one type of wood or introduce contrast by mixing different wood tones. The uneven pattern is also forgiving, subtly camouflaging minor imperfections or inconsistencies in the ground beneath, making it both stylish and practical.
3. Bold Black Painted Boards
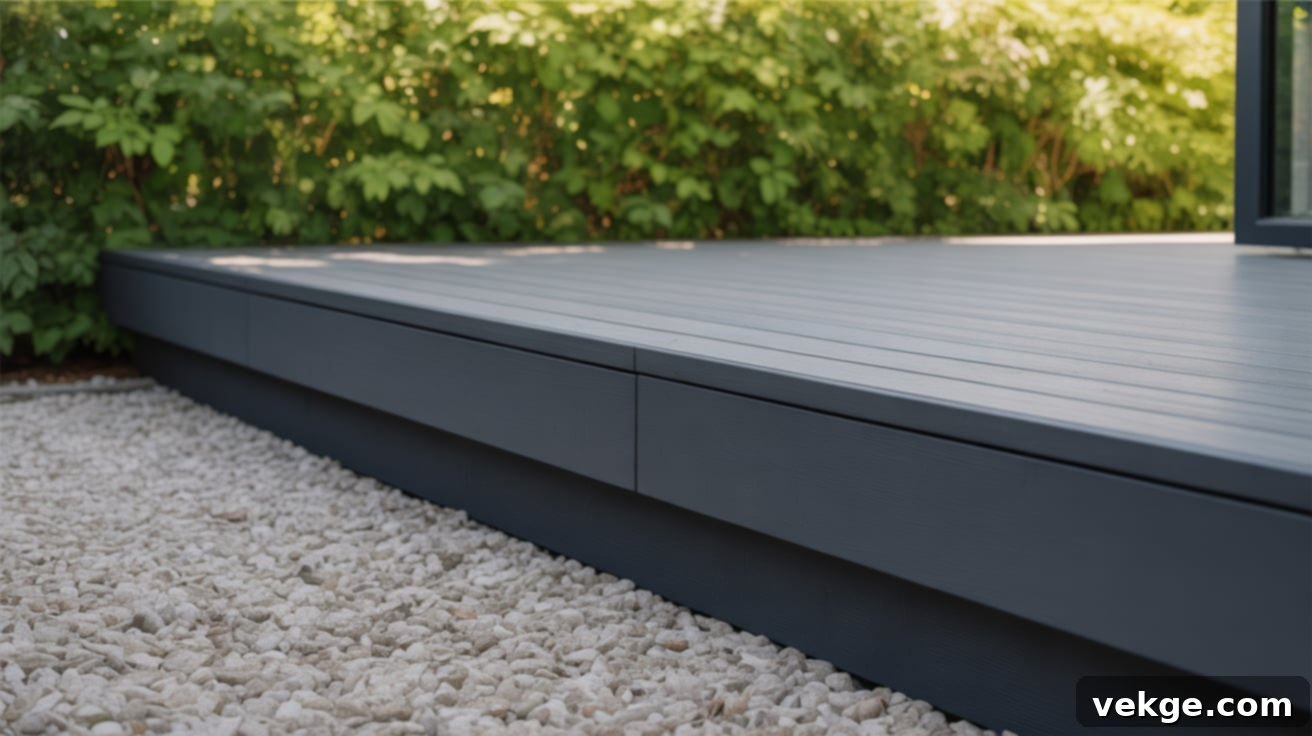
Painting your horizontal skirting a deep black instantly creates a bold, grounded, and incredibly chic foundation for your deck. This sophisticated color works exceptionally well with dark-stained decking, contemporary metal railings, or modern home siding, offering a striking contrast or a harmonious blend. Black naturally recedes into the background, effectively “hiding” the under-deck area and making the deck itself appear to float. Choose a flat or satin finish for a sleek, smooth surface that exudes modern elegance. This look is not only visually impactful but also surprisingly easy to maintain with occasional touch-ups. Consider pairing black boards with natural wood trim or light-colored gravel for additional texture and contrast along the deck’s perimeter.
4. Boards with a Stone Base
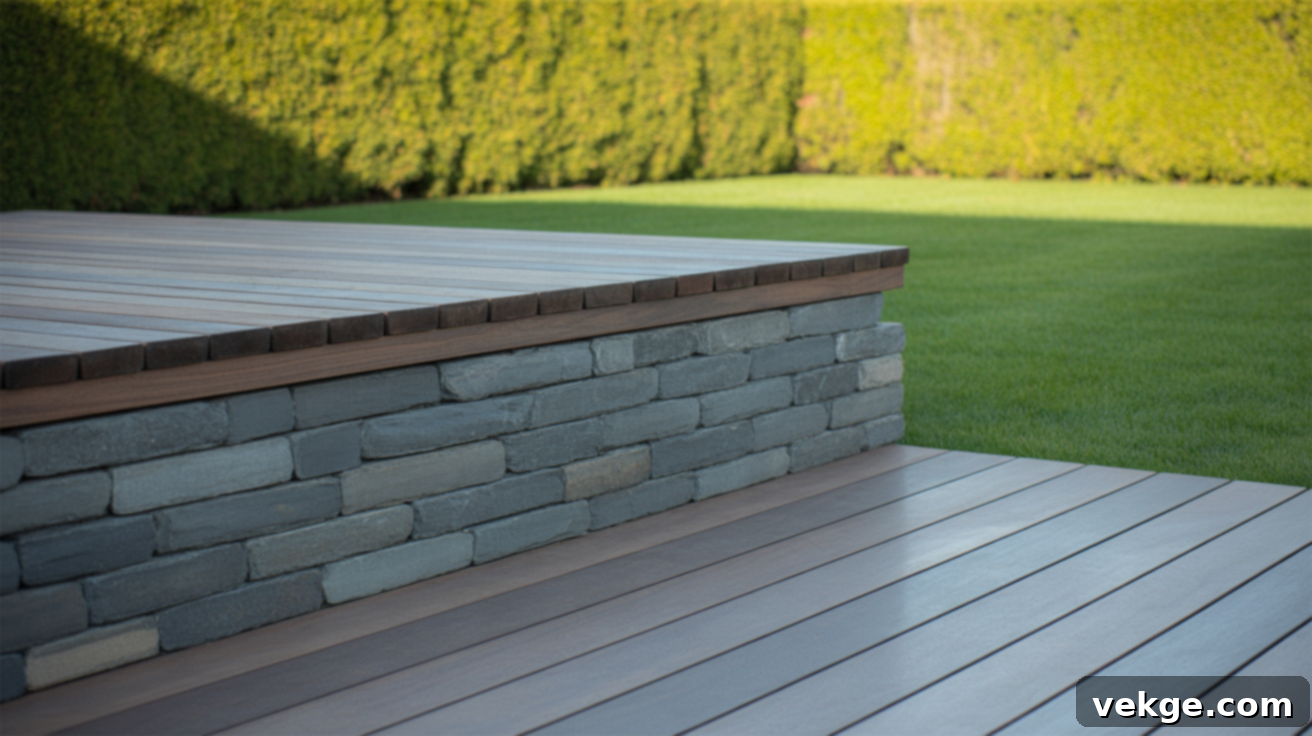
Combine the clean lines of horizontal boards with the organic texture of a stone base to achieve a robust, earthy, and highly durable skirting. Integrate stacked stone, stone veneer panels, or even decorative cement blocks directly beneath your horizontal boards. The contrast in textures adds significant depth and visual interest, making this design particularly effective in naturalistic settings or adjacent to gardens. Crucially, position the wood boards above the stone base to prevent direct ground contact, which protects them from moisture damage and rot. This dual-material approach not only enhances aesthetics but also provides superior protection for your deck’s substructure, especially if your deck sits on uneven or damp ground.
5. Horizontal Skirting with Integrated Lighting
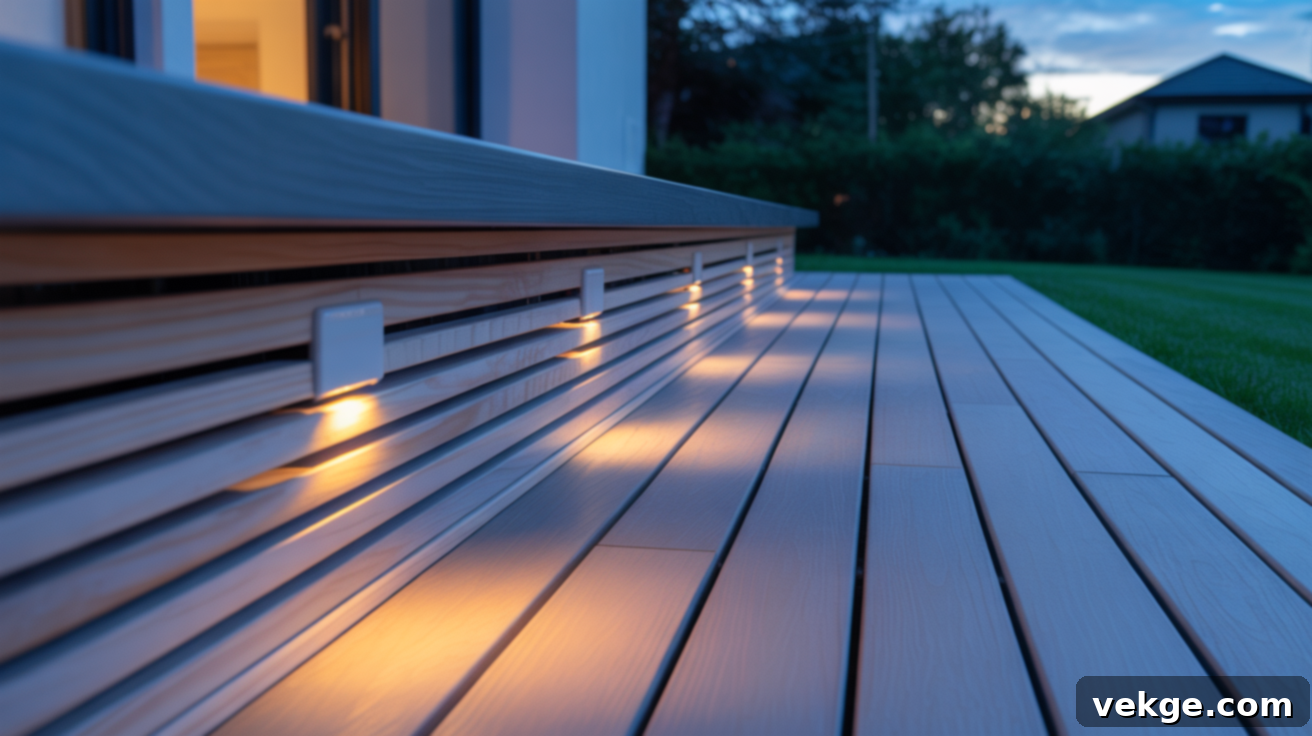
Elevate your deck’s ambiance and safety by incorporating low-voltage lighting within or behind your horizontal skirting boards. Install discreet LED strip lights, small puck lights, or strategically placed spotlights to cast a soft, inviting glow along the perimeter of your deck. This technique beautifully highlights the linear design of the skirting without being overly bright, creating a cozy and sophisticated atmosphere for evening use. Integrated lighting also significantly improves safety around steps and edges. Ensure you use weatherproof fixtures and neatly tuck all wiring behind the frame. This design works best with wider spacing between boards or a slatted layout that allows light to diffuse evenly, enhancing both form and function.
6. Paired with Raised Flower Beds
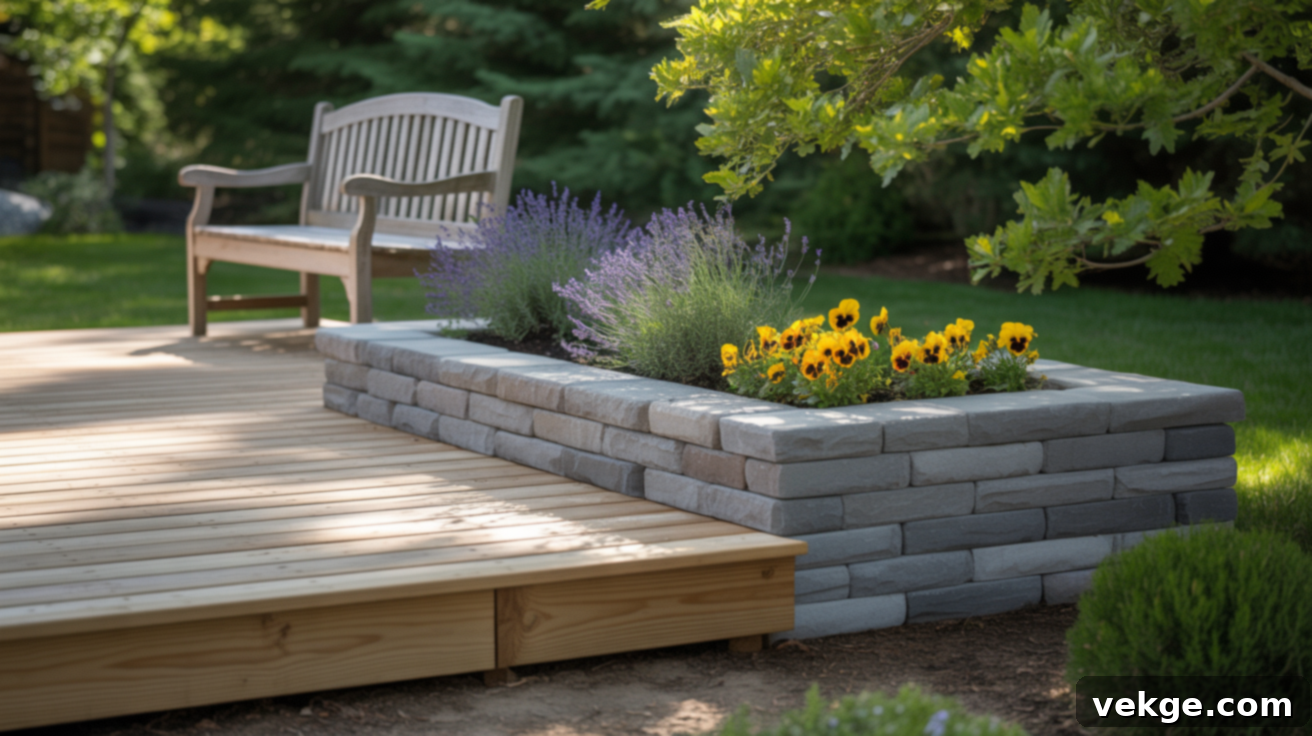
Soften the architectural lines of your horizontal skirting and create a seamless transition from deck to garden by pairing it with beautifully designed raised flower beds. Construct simple wood or stone planter boxes that sit flush against your deck skirt, then fill them with low-maintenance, colorful plants, herbs, or ornamental grasses. This living element introduces vibrant color, natural texture, and fragrance, instantly softening the straight lines of the boards. This approach is particularly effective for concealing the base of decks that are higher off the ground. Choose plants that thrive in your climate and require minimal care, especially in areas with direct sunlight, ensuring your integrated garden remains a charming, effortless addition.
Horizontal vs. Vertical Skirting: Key Considerations
When deciding on deck skirting, homeowners often weigh the merits of horizontal versus vertical orientations. Both styles can provide a polished finish, but they differ significantly in aesthetic impact, installation complexity, and long-term maintenance. Understanding these differences will help you choose the best option for your home and lifestyle.
| Feature | Horizontal Skirting | Vertical Skirting |
| Style & Aesthetic | Clean, modern, and often feels more expansive, drawing the eye horizontally. Creates a sleek, linear look that complements contemporary architecture. | Traditional, classic, and can make a deck appear taller. Provides a more conventional, often quaint, aesthetic. |
| Ease of Installation | Requires meticulous leveling and careful alignment for each board to maintain uniform lines, which can be more challenging for DIY beginners. | Generally easier to line up and install, as minor variations in board length are less noticeable when running vertically from the ground. |
| Maintenance & Cleaning | Fewer and smaller gaps can make surface cleaning easier with a broom or hose. Less prone to debris accumulation within the skirting itself. | Often has more gaps, potentially allowing for debris accumulation between slats, which can be harder to reach and clean thoroughly. |
| Ventilation | Due to potentially tighter spacing and solid board runs, it may offer slightly less natural airflow if not designed with adequate gaps. Requires careful planning for vents. | Naturally allows for better airflow beneath the deck, especially with traditional lattice or widely spaced vertical boards, which is beneficial for moisture management. |
In summary, horizontal skirting excels for those seeking a sharp, contemporary finish that harmonizes with modern home designs. Vertical skirting, on the other hand, offers a more classic appeal and might be a quicker, more forgiving installation for novice DIYers, alongside generally superior natural ventilation.
Essential Tips for Maintaining Your Horizontal Deck Skirting
Proper maintenance is crucial for extending the lifespan and preserving the aesthetic appeal of your horizontal deck skirting. Regular, simple care can prevent major issues and keep your outdoor space looking its best throughout the seasons. Focusing on moisture control, pest prevention, and surface integrity will ensure your skirting remains strong and clean year after year.
Here are some straightforward tips to help you care for your deck skirting:
- Regular Cleaning: Twice a year, use a broom, leaf blower, or soft brush to remove accumulated dirt, leaves, and debris from the surface and gaps of your skirting. This prevents moisture entrapment and reduces staining.
- Inspect for Damage: Periodically check for any loose boards, protruding nails, or screws. Tighten loose fasteners and replace any damaged ones immediately to maintain structural integrity.
- Reapply Finish: Depending on your material and local climate, plan to reapply paint or stain every 2–3 years. Areas exposed to intense sun, heavy rain, or snow may require more frequent touch-ups to protect the wood from weathering and UV damage.
- Manage Vegetation: Keep plants, shrubs, and soil at least a few inches away from the skirting. Direct contact can trap moisture against the wood, promoting rot and attracting pests. Trim overgrown vegetation regularly.
- Pest Control: Regularly inspect for signs of pests like ants, termites, or rodents. Seal any small gaps or openings with caulk or mesh to prevent them from entering and nesting beneath your deck.
- Ensure Proper Drainage: Verify that the ground beneath and around your deck slopes away from the foundation. This prevents standing water, which can lead to moisture damage and rot in your skirting and deck structure.
- Replace Damaged Boards: Address any cracked, warped, or severely damaged boards promptly. Replacing them quickly prevents further deterioration and maintains the overall strength and appearance of your skirting.
Common Mistakes to Avoid When Installing Deck Skirting
Even a seemingly straightforward project like installing deck skirting can encounter pitfalls if certain crucial steps are overlooked or rushed. Being aware of these common mistakes can save you time, money, and frustration in the long run, ensuring a successful and durable outcome.
- Insufficient Board Spacing: One of the most frequent errors is failing to leave adequate gaps between horizontal boards. Tight spacing prevents proper airflow, traps moisture, and makes the boards prone to warping, cupping, or premature rot. Always aim for a ¼-inch to ½-inch gap.
- Neglecting Ground Preparation: Skipping the crucial step of clearing and sloping the ground beneath the deck is a major mistake. Without proper grading, water can collect against the skirting, leading to rot, mildew, and pest infestations. Ensure the ground slopes away from the deck’s foundation.
- Skipping Sealing or Finishing: Many DIYers overlook the importance of applying a protective sealant, paint, or stain, especially on natural wood. Unprotected boards are highly vulnerable to weathering, UV degradation, and moisture damage, significantly shortening their lifespan.
- Direct Ground Contact: Allowing wood skirting to sit directly on the soil is a recipe for rot and pest invasion. Always ensure your skirting boards are installed slightly above ground level, ideally on a treated wood frame or stone base, to prevent moisture wicking.
- Inadequate Framing: Attaching skirting directly to the deck posts or joists without a dedicated support frame below can lead to an unstable, uneven, and poorly structured skirt. A solid, level frame is essential for a professional finish and long-term stability.
- Ignoring Ventilation Needs: While covering the under-deck area, it’s vital to maintain adequate ventilation to prevent moisture buildup. If your gaps are very narrow, consider adding specific ventilation grilles or openings within your design.
- Poor Measurement & Cutting: Rushing the measuring and cutting process leads to uneven lines, visible gaps, and wasted material. Double-check all measurements and use appropriate tools for clean, precise cuts.
Taking the time to plan meticulously, prepare the site thoroughly, and install each component correctly will help your horizontal deck skirting not only look fantastic but also endure for many years to come.
Conclusion: Transform Your Deck with Horizontal Skirting
By now, you’ve gained a comprehensive understanding of how horizontal deck skirting can profoundly enhance your outdoor living space. From its defining characteristics and material selection to a detailed installation guide and inspiring design concepts, you have all the knowledge needed to embark on your own transformation project.
This seemingly small update delivers immense value: it dramatically improves your deck’s aesthetic appeal, creates a tidy under-deck environment, deters pests, and can even offer valuable hidden storage. Whether you’re planning a full weekend renovation or simply adding a few refining touches, the impact of a well-executed horizontal deck skirting project is undeniable.
With careful planning and the practical tips shared here, you’re well-equipped to achieve a polished, finished look that truly elevates your outdoor experience. For more innovative ideas and practical advice on enhancing your home and garden, be sure to explore our other posts. There’s always a new project waiting to inspire you!
