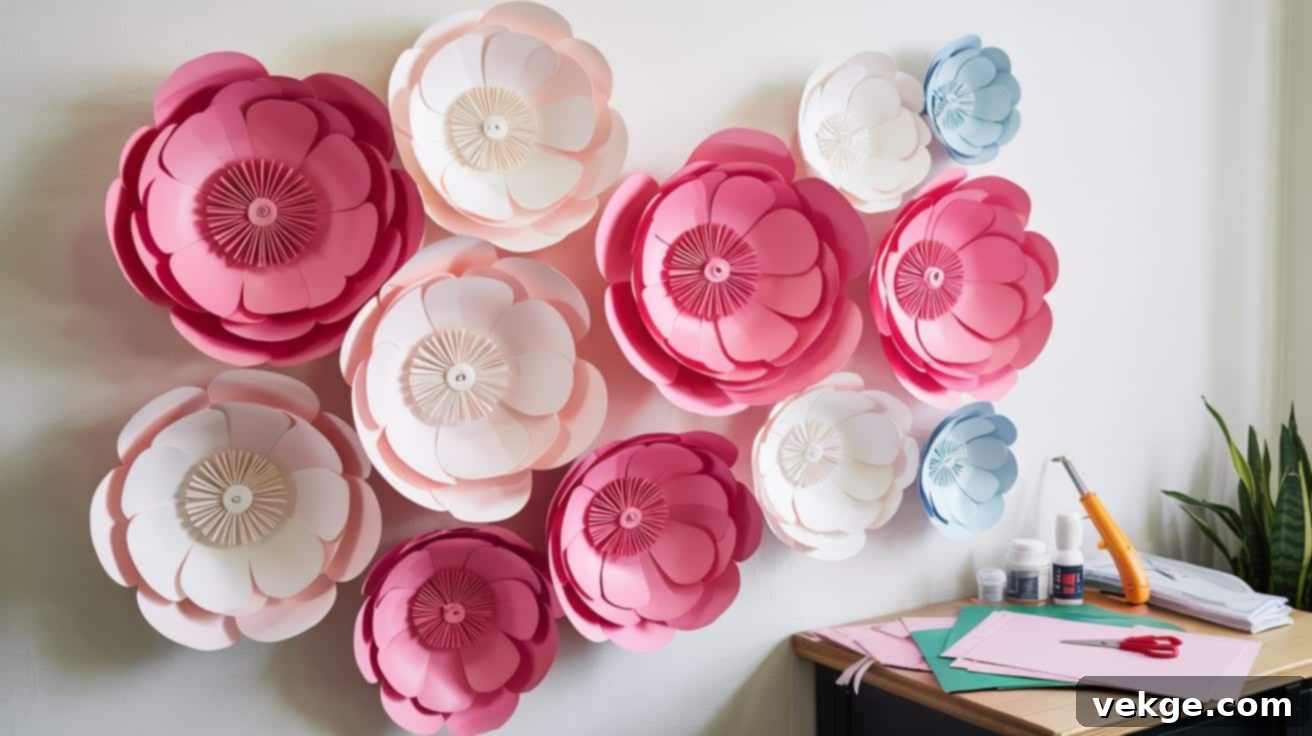
DIY Giant Paper Flowers: A Comprehensive Guide to Crafting Stunning Decor
Giant paper flowers are revolutionary for transforming any space, from everyday home interiors to grand event venues. These oversized, eye-catching blooms offer a beautiful and long-lasting alternative to real flowers, promising durability without sacrificing aesthetic appeal. Imagine vibrant, custom-designed flowers that never wilt, adding a touch of elegance and whimsy to your surroundings.
The process of making these impressive paper creations is surprisingly straightforward, turning a daunting DIY project into an accessible and rewarding craft. Whether you’re planning a lavish wedding, a lively birthday party, or simply wish to infuse your living room with a splash of color and charm, giant paper flowers deliver significant visual impact without a significant financial outlay. Their true magic lies in their adaptability: you can personalize every aspect to perfectly align with any color scheme, style, or theme imaginable. With just a few hours and some fundamental crafting supplies, you can produce magnificent paper blooms that will undoubtedly spark admiration and inquiries about where you acquired such unique decorations.
Why Giant Paper Flowers are a Game-Changer for Your Decor
Giant paper flowers are not just decorations; they are a transformative element for any interior design or event setting. They stand out as a creative, affordable, and sustainable solution to elevate your decor. Unlike their natural counterparts, these meticulously crafted paper blooms defy the passage of time – they won’t wilt, fade, or require any watering or maintenance, making them an incredibly practical and enduring choice for long-term display.
Their versatility is unmatched. Picture them brightening up a cozy living room corner, adding an exuberant focal point to a sophisticated wedding reception, or making an unforgettable statement at a themed party. The beauty of giant paper flowers is their complete customizability. You have total creative control to match any specific color palette, design style, or thematic vision. Whether you prefer the subtle elegance of neutral tones for a minimalist aesthetic or the dramatic flair of bold, vivid hues to make a grand impact, paper flowers are an exceptional medium to inject personality and unique charm into any environment.
Beyond their visual appeal, these paper marvels offer significant practical advantages. They are remarkably easy to create, even for novice crafters, and can be effortlessly stored and reused for multiple occasions. This reusability makes them an incredibly budget-friendly option, eliminating the recurring cost of fresh flowers. Furthermore, by choosing paper over real flowers, especially those with high environmental footprints, you are opting for an environmentally conscious decoration solution that supports sustainability without compromising on beauty or grandeur.
Step-by-Step Guide: How to Make Giant Paper Flowers
Crafting stunning giant paper flowers is an engaging process that combines artistic vision with precise execution. It typically involves several key stages: meticulous preparation of your chosen paper, precise cutting of petals in various sizes, artful shaping to achieve a natural, lifelike appearance, careful assembly from the central core outwards, and finally, securely attaching your magnificent creation to a stem or base for prominent display. Each step is crucial for achieving a professional and beautiful end result.
Essential Materials
To embark on your giant paper flower project, gathering the right materials is the first crucial step. The quality and type of your supplies will significantly influence the final look and durability of your blooms. Here’s a detailed list of what you’ll need:
- Cardstock or Crepe Paper: These are the primary materials. Cardstock (65-110 lb) offers a sturdy, structured flower, ideal for defined shapes. Crepe paper, especially floral crepe paper (180g-250g), provides a more natural, delicate, and pliable texture, perfect for realistic curves and ruffles. Choose your preferred colors based on your design scheme.
- Sharp Scissors or Paper Cutter: Precision is key. Sharp scissors ensure clean, crisp cuts, which are essential for professional-looking petals. A paper cutter can speed up the process for straight edges, while a craft knife might be useful for intricate details.
- Hot Glue Gun with Extra Glue Sticks: A hot glue gun is indispensable for quickly and securely attaching petals. Ensure you have plenty of glue sticks on hand, as you’ll use a significant amount. Low-temperature glue guns are often recommended to prevent burns and allow for slight adjustments before the glue sets.
- Dowel, Marker, or Curling Tool: A wooden dowel, a thick marker, or specialized curling tool is used to gently curl and shape the edges of your petals, adding dimension and a lifelike curve. Different diameters can create various curl types.
- Cutting Machine (e.g., Cricut, Silhouette): (Optional) For crafters with access to these machines, they can drastically reduce cutting time and ensure perfect, consistent petal shapes. Pre-designed templates are widely available, or you can create your own.
- Ruler or Measuring Tape: Essential for accurate measurements of paper strips and petal dimensions, ensuring uniformity and proper scaling.
- Pencil or Fading Fabric Marker: For tracing petal patterns onto your paper. A light pencil mark can be easily erased or hidden, while a fading marker disappears over time.
- PVC Pipes, Wooden Dowels, or Sturdy Wire: (For stems) If your flowers are intended for freestanding displays, these materials provide the necessary support. PVC pipes offer robust stability for very large flowers, while wooden dowels are great for medium sizes. Floral wire can be used for smaller stems or to add flexibility to leaves.
- Craft Stores or Online Retailers: Most of these items are readily available at any local craft store or through various online suppliers.
- Complete Paper Flower Kits: (For beginners) If you’re just starting, consider a pre-packaged kit that includes patterns, pre-cut paper, and all necessary tools, offering a convenient way to learn the basics.
Step 1: Preparing Your Paper
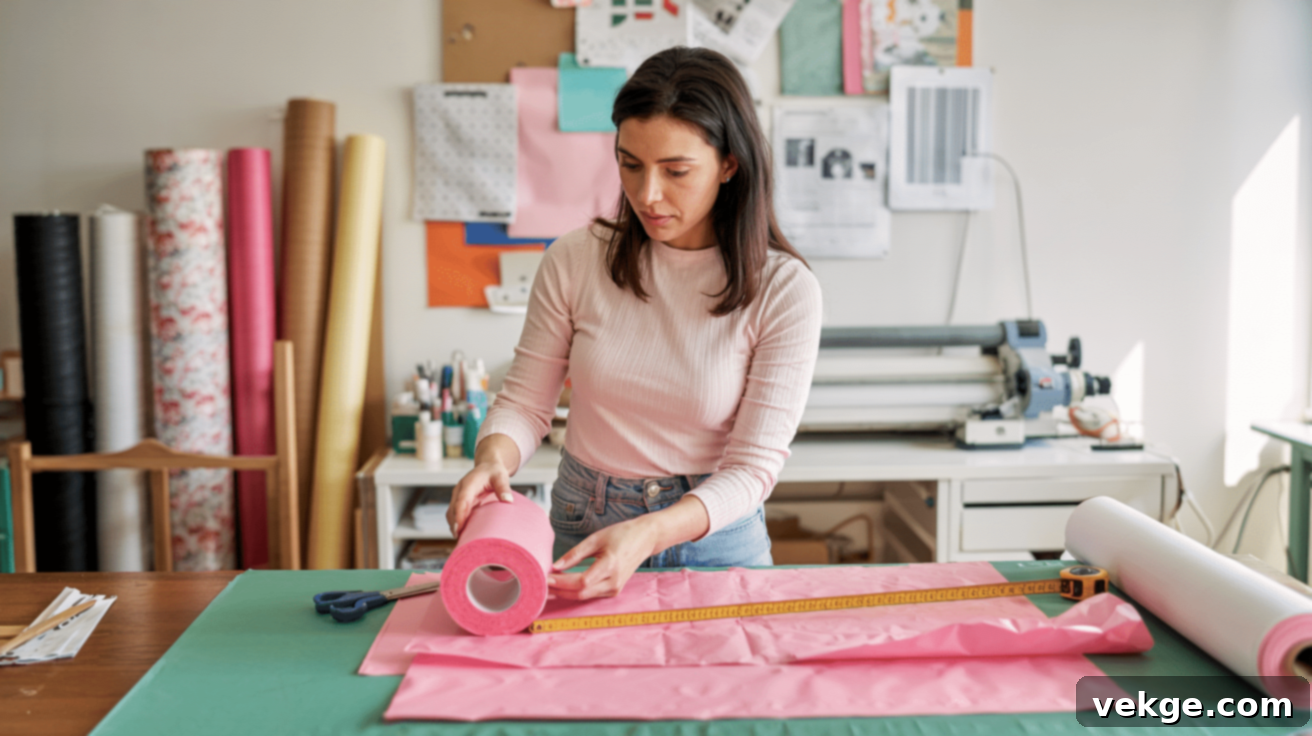
The foundation of a beautiful giant paper flower lies in meticulous paper preparation. Begin by ensuring your workspace is clean, flat, and spacious enough to handle large sheets of paper comfortably. If you’re working with crepe paper rolls, carefully unroll them, taking care to avoid any accidental tears or creases that could compromise your petals. For specific designs, measure the paper precisely according to your chosen pattern. A common guideline is to cut strips approximately 8 inches wide for smaller, inner petals and up to 12-16 inches for the larger, outer petals, depending on the desired size of your finished flower.
For cardstock flowers, the process involves either printing pre-designed patterns directly onto your chosen cardstock or meticulously tracing them by hand. To enhance efficiency and accuracy, mark all your measurements and pattern outlines onto the paper before you begin any cutting. This foresight ensures consistency across all petals and saves time in subsequent steps. If you’re utilizing a cutting machine like a Cricut or Silhouette, load your digital design and perform a test cut on a scrap piece of paper first. This crucial step helps confirm that your settings (blade depth, pressure) are correct and prevents wasting your primary material. The key to this preparatory stage is absolute precision with measurements and markings, as even minor discrepancies can significantly alter the symmetry and overall appearance of your final flower. Investing ample time and care in this step will ensure a smoother, more successful crafting experience later on.
Step 2: Cutting the Petals
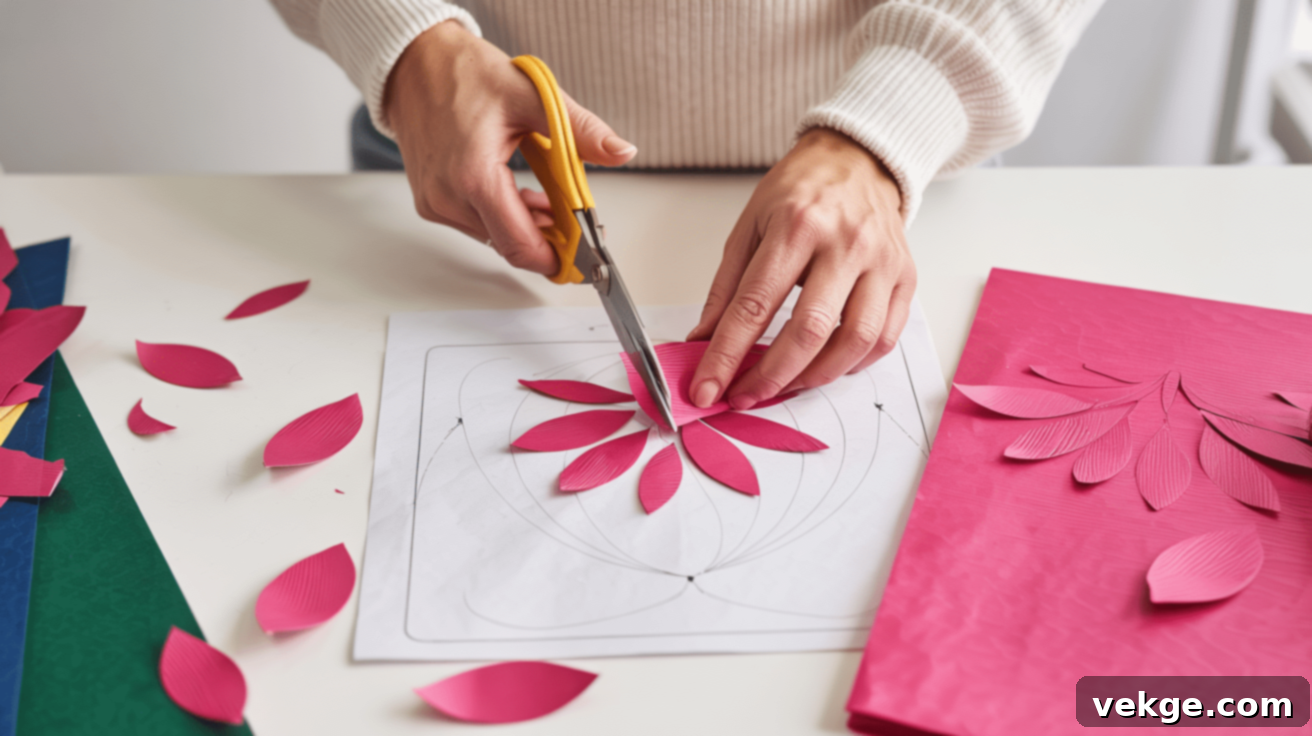
With your paper meticulously prepared, the next step is to accurately cut your petals according to your chosen pattern or specified measurements. For crepe paper flowers, particularly roses, you’ll typically cut individual petal shapes or strips of paper to be shaped later. For instance, strips around 8 inches wide are ideal for the more delicate, smaller inner petals, while widths of 12 inches or more are reserved for the voluminous, larger outer petals. The exact dimensions will depend on the overall size and style of the flower you intend to create.
For cardstock flowers, patterns often come in groups of connected petals, such as sets of four. If you are cutting by hand, use sharp scissors and diligently follow your traced pattern lines. Maintaining clean, continuous cuts is paramount to avoid jagged edges that can detract from the flower’s aesthetic. A cutting machine, if available, is a superb asset for this stage, providing rapid, precise, and consistent cuts, which is particularly beneficial when creating multiple flowers or numerous petals. Ensure you cut a sufficient number of petals for a full and lush flower; a common requirement is approximately 12 small petals and 12 large petals for a standard full-sized bloom, but this can vary greatly with design. Remember to keep any paper scraps; these can be repurposed for creating the flower’s center, crafting smaller filler blooms, or cutting delicate leaves to complement your main flower. Precision in cutting here directly impacts the elegance and realism of your finished flower.
Step 3: Shaping the Petals
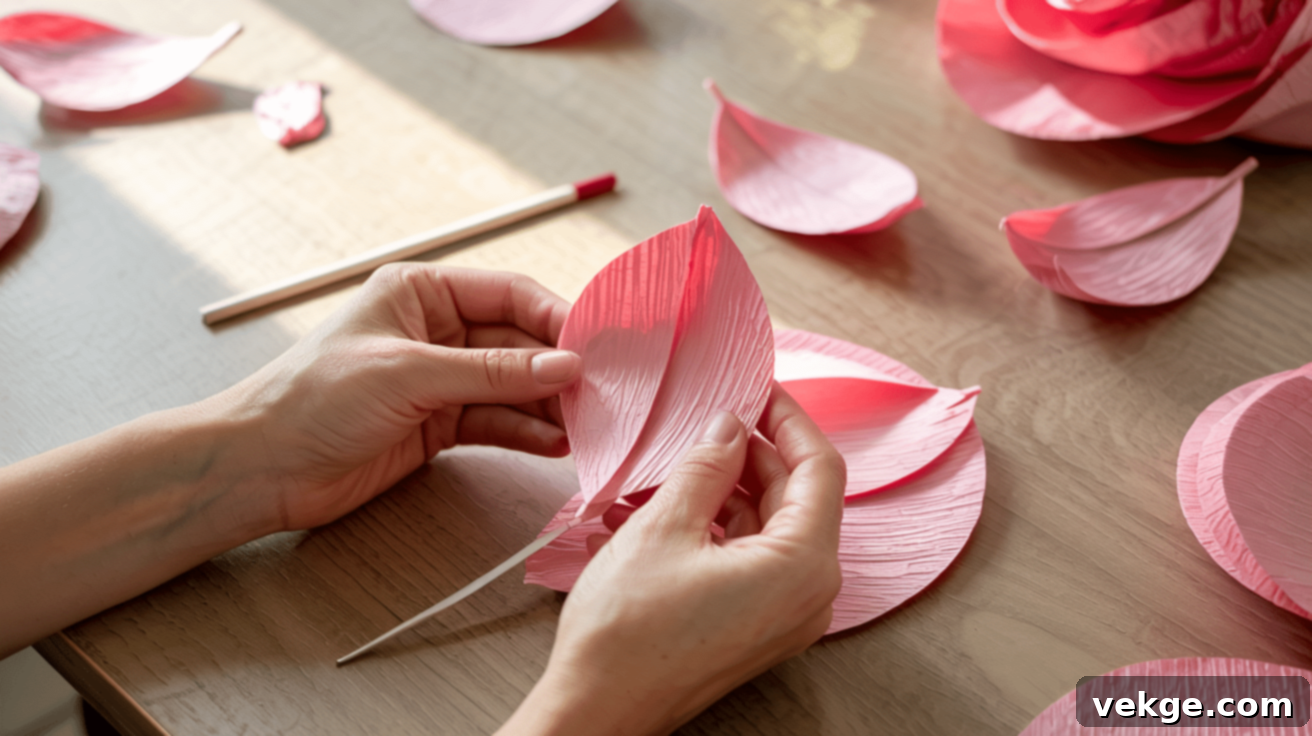
Shaping the petals is where your flat paper begins its transformation into a lifelike floral element. This step adds crucial dimension and realism, moving beyond simple cuts to create organic forms. For crepe paper, which boasts inherent stretchiness, gently pull and stretch the edges of each petal between your fingers. This action creates a natural, subtle curve, mimicking the soft undulations of real flower petals. Exercise caution not to pull too vigorously, as crepe paper can tear if handled roughly. To achieve a more pronounced and authentic curl, roll the edges of the petals around a dowel, a thick marker, or a specialized curling tool. Rolling inward often works best for the tighter, inner petals, while rolling outward creates a graceful flare for the larger, outer petals.
For cardstock petals, which are stiffer, dimension is added differently. Begin by making a small cut at the base of each petal, along the center line. Then, apply a dot of hot glue to one side of this cut and overlap the other side, creating a small “cup” shape at the petal’s base. This simple technique gives the petal a natural curve and volume. For the edges of cardstock petals, you can use the same dowel-rolling technique, or gently bend and crease the paper to add subtle folds and ripples. The goal is to avoid a flat, two-dimensional appearance. Devote ample time to shaping each individual petal with care and attention, as the realism and overall beauty of your finished giant paper flower are significantly determined by the artistry applied in this vital step.
Step 4: Assembling the Flower
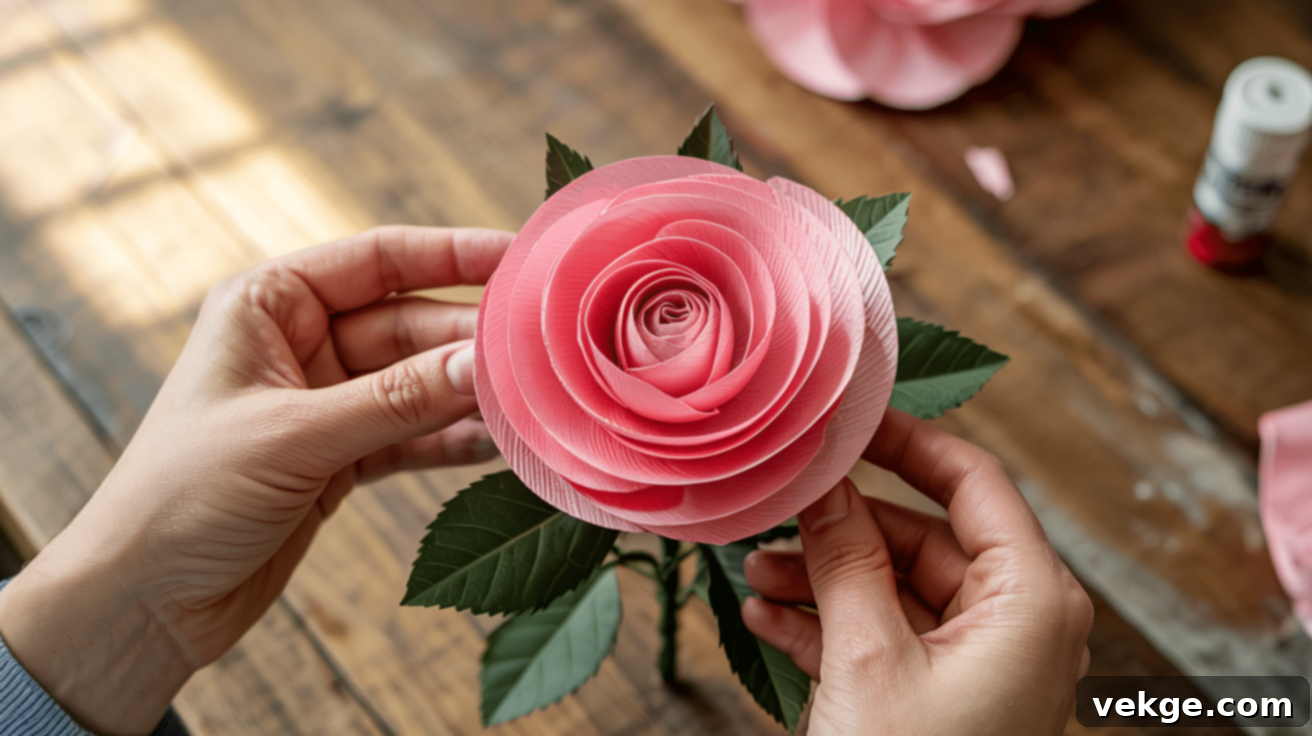
Assembling your giant paper flower is the thrilling stage where all your prepared petals come together to form a magnificent bloom. Begin by establishing the center of your flower. For crepe paper roses, a common technique is to create a small, ball-shaped core using scraps of crepe paper, which will serve as the innermost bud. For cardstock flowers, you typically start with your smallest pre-cut petal group or individual petals, forming a tight central spiral or cluster. This core provides the foundation around which subsequent layers will be built.
Once the center is established, proceed to add the next layer of petals. It is crucial to offset each new petal or petal group, ensuring they fill the gaps between the petals of the previous layer. This overlapping technique creates a full, dense, and natural-looking flower. Continue this process, progressively adding layers from the smallest petals (closest to the center) to the largest petals (forming the outer perimeter of the flower). Apply hot glue strategically at the base of each petal or petal group. The amount and placement of glue are key: applying glue higher up the petal creates a tighter, more closed flower, ideal for bud-like forms, whereas applying glue just at the very base allows the petals to fan out more openly, creating a fuller, blooming effect.
Work methodically in a circular fashion, continuously assessing the arrangement to maintain balance and symmetry. To prevent petals from shifting or detaching, allow each layer of glue to set and cool completely before adding the next. This patience ensures a robust and well-structured flower. By paying close attention to these layering and gluing techniques, you will construct a stunning giant paper flower that is both beautiful and structurally sound.
Step 5: Attaching the Stem
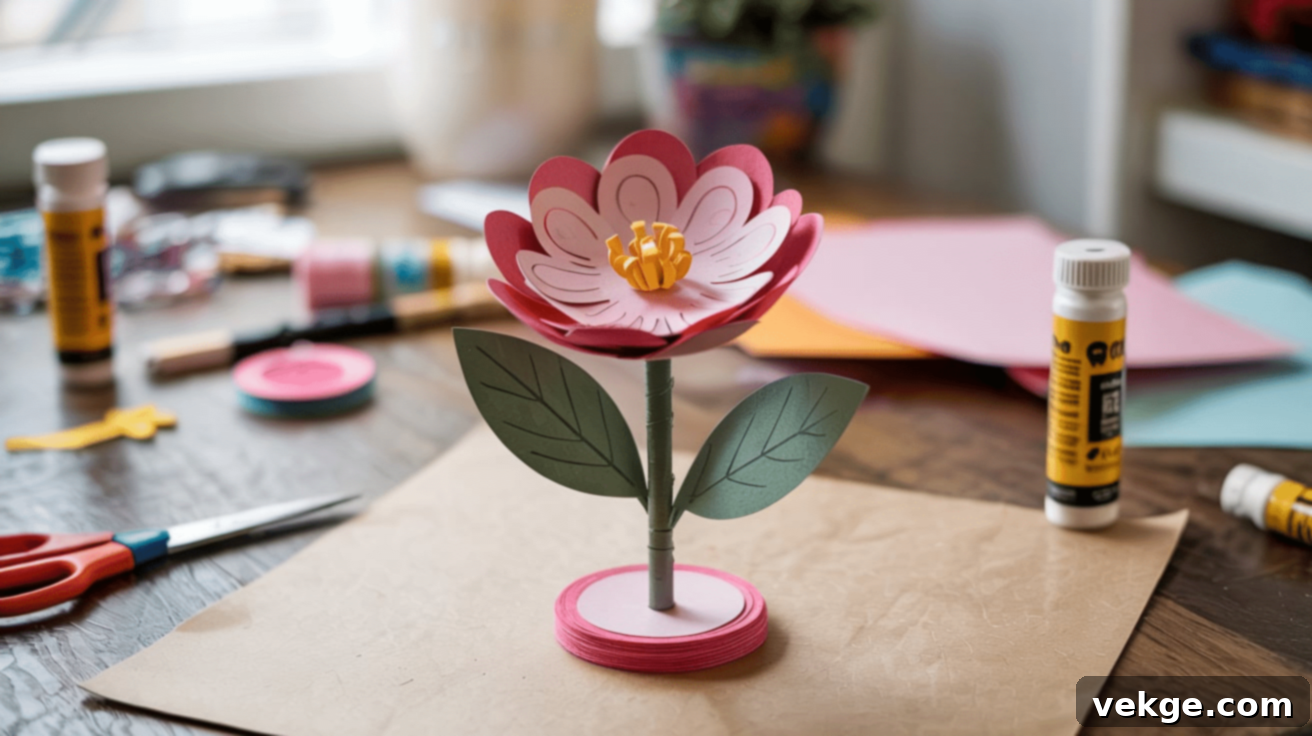
The final step in crafting your giant paper flower is to securely attach it to a stem or create a suitable base for display. Your choice of stem material will depend on the size and intended use of your flower. Robust options include PVC pipes, which offer excellent stability for very large, freestanding flowers, or sturdy wooden dowels for slightly smaller yet equally impressive blooms. For a more flexible stem or for creating leaves, heavy-gauge floral wire wrapped in green floral tape works effectively. Alternatively, if your flower is destined for a wall display without a traditional stem, you will need to create a flat, sturdy base.
To attach your flower, first create a secure connection point. This can be done by forming a small, firm ball out of paper scraps and hot-gluing it firmly to the top of your chosen stem. Alternatively, cut a circular base from thick cardstock, which will serve as the foundation for your flower. Once this base is securely affixed to the stem, carefully center your assembled paper flower onto it and apply a generous amount of hot glue to firmly join the flower to the base. For enhanced security, especially for larger flowers, consider wrapping additional strong tape, such as floral tape or duct tape, around the connection point between the flower and the stem. This reinforcement ensures longevity and stability.
If you are creating a wall-mounted flower, skip the traditional stem. Instead, firmly glue a flat paper circle to the back of the flower as a stable base. To hang it, attach a heavy-duty picture hook, a strong adhesive strip (like Command strips for damage-free hanging), or a wire loop to this back plate. Always ensure that the attachment method is strong enough to support the weight of your finished flower, guaranteeing it remains secure and beautiful whether it’s standing tall or adorning a wall.
When to Use Larger Petals and How to Make Them
Incorporating larger petals is a strategic choice when you aim for a more dramatic, visually impactful flower or when your blooms need to be easily visible from a distance. This is particularly true for applications like grand stage backdrops, expansive event venues, or large-scale photo opportunities. Larger petals provide a greater surface area, allowing the flower to command more attention and fill space effectively. To craft these impressive oversized petals, you’ll typically need to scale up your measurements significantly, often by 20-30% or even more, relative to your standard petal sizes.
For crepe paper, this translates to cutting much wider strips – for instance, expanding from a typical 12-inch width to 16 inches, 20 inches, or even larger, depending on the desired flower diameter. When working with cardstock, you can resize your existing petal patterns using a copier or advanced design software. Ensure the scaling is uniform to maintain the petal’s proportion. It’s important to remember that larger petals inherently require more support. To prevent them from appearing flimsy or sagging, consider using heavier-weight paper, or employ a technique called double-layering, where two petals are glued together for increased strength and rigidity. When shaping these larger petals, don’t shy away from adding extra curves, folds, and gentle crinkles. This added dimension prevents them from looking flat and contributes to a more organic, realistic appearance. Strategically position these generously sized petals as the outermost layers of your flower. This arrangement naturally frames the inner, smaller petals, creating a beautiful progression of size and adding to the overall fullness and lifelike quality of your magnificent paper bloom.
Improving the Look of Your Paper Flower
Once you’ve mastered the basic construction, elevating your giant paper flowers to the next level involves incorporating simple yet effective enhancements that add realism, depth, and unique character. These small details can transform a lovely craft into a stunning work of art.
- Detailed Flower Centers: Instead of a simple core, create a more intricate center. Use small, tightly curled petals in a contrasting or complementary color to mimic a dense bud. Alternatively, craft fluffy pom-poms from tissue paper or fine crepe paper for a softer, textured core. Even small, decorative beads or gems can add a touch of sparkle.
- Realistic Greenery: Design and cut leaves from various shades of green paper. Shape them with gentle curves and glue them strategically to the stem or the base of the flower. Adding subtle veins with a scoring tool or a dull knife can enhance their authenticity. You can also incorporate small paper tendrils or thin branches for a more complete botanical look.
- Varying Shades for Depth: Avoid a monochromatic look by using paper in a range of shades of the same color. For example, use darker tones for the innermost petals, gradually transitioning to lighter, softer shades for the outer petals. This gradient effect adds incredible depth and mimics the natural variations found in real flowers.
- Subtle Color Accents: Employ soft pastels or chalks to gently brush along the edges of your petals, adding a subtle blush or highlight. Alternatively, use watercolor paints or diluted acrylics to create delicate washes or define petal tips, providing a painterly finish.
- Textural Elements: Before shaping, gently crinkle or scrunch some of your petals to introduce natural-looking wrinkles and texture. This technique works particularly well with crepe paper, giving it an aged or softer appearance. Experiment with different levels of crinkling for varied effects.
- Sparkle and Shimmer: For a touch of glamour, lightly brush the petal edges with clear craft glue and then dip them into fine glitter. This adds a beautiful sparkle that catches the light, perfect for celebratory events or festive decor. Alternatively, use metallic paints or sprays for a more subtle sheen.
These thoughtful touches require minimal extra effort but yield significant improvements, making your paper flowers look more sophisticated, realistic, and truly professional.
DIY Tips for Displaying Giant Paper Flowers
Once your magnificent giant paper flowers are complete, the next exciting step is to showcase them beautifully. Their versatility allows for a myriad of display options, transforming any space. Here are some creative and practical DIY tips for displaying your paper blooms, along with considerations for longevity and aesthetic appeal:
Tip 1: Wall Displays
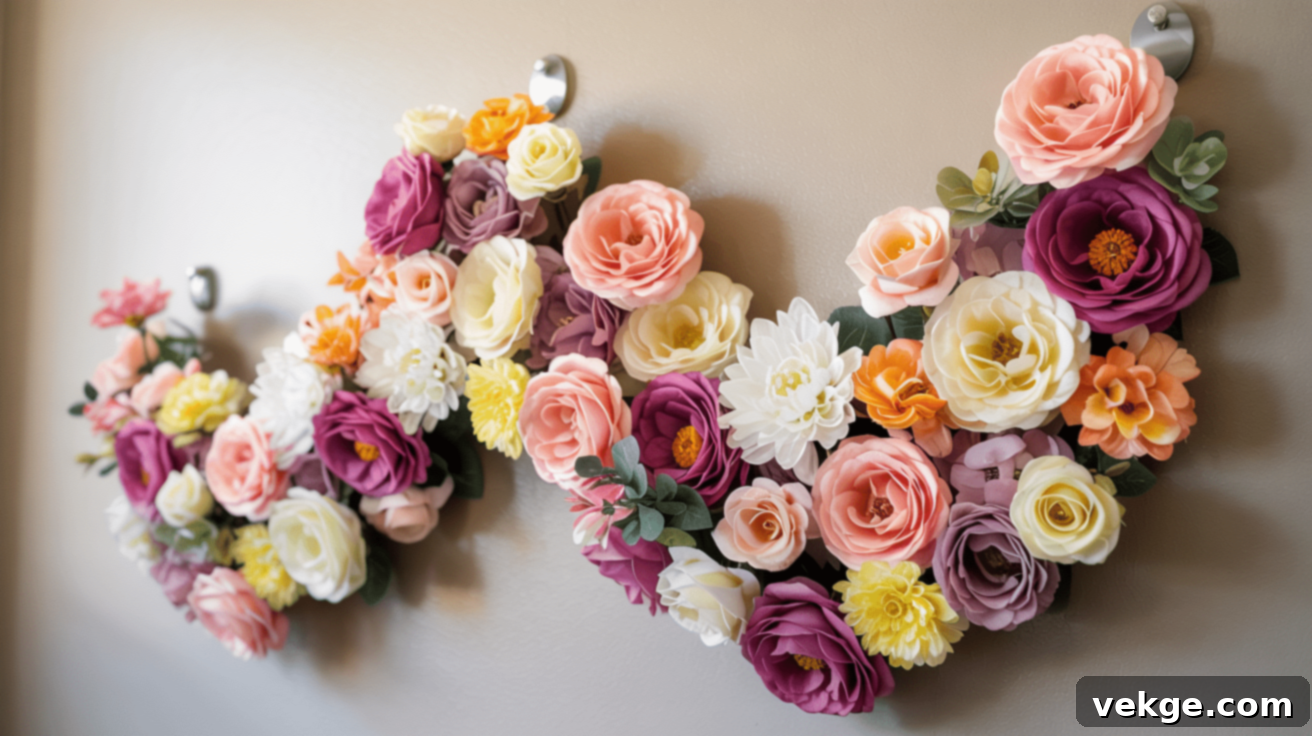
For a truly captivating wall decor statement, think beyond a simple cluster. Design a dynamic, flowing pattern using flowers of varying sizes, colors, and even styles. A cascading arrangement, with larger flowers anchoring the bottom and smaller ones trailing upwards, creates visual movement. Alternatively, cluster them densely for a dramatic focal point. When attaching to walls, use damage-free methods such as removable Command Hooks or strong mounting tape, especially if you’re in a rental space. These options ensure secure attachment without leaving marks. Consider creating an ombré effect by transitioning flowers from light to dark shades of a single color, or mix complementary colors for a vibrant, contrasting display. Always place larger flowers as key focal points, then thoughtfully fill in the surrounding areas with smaller blooms to achieve a balanced and harmonious design.
Tip 2: Photo Backdrops
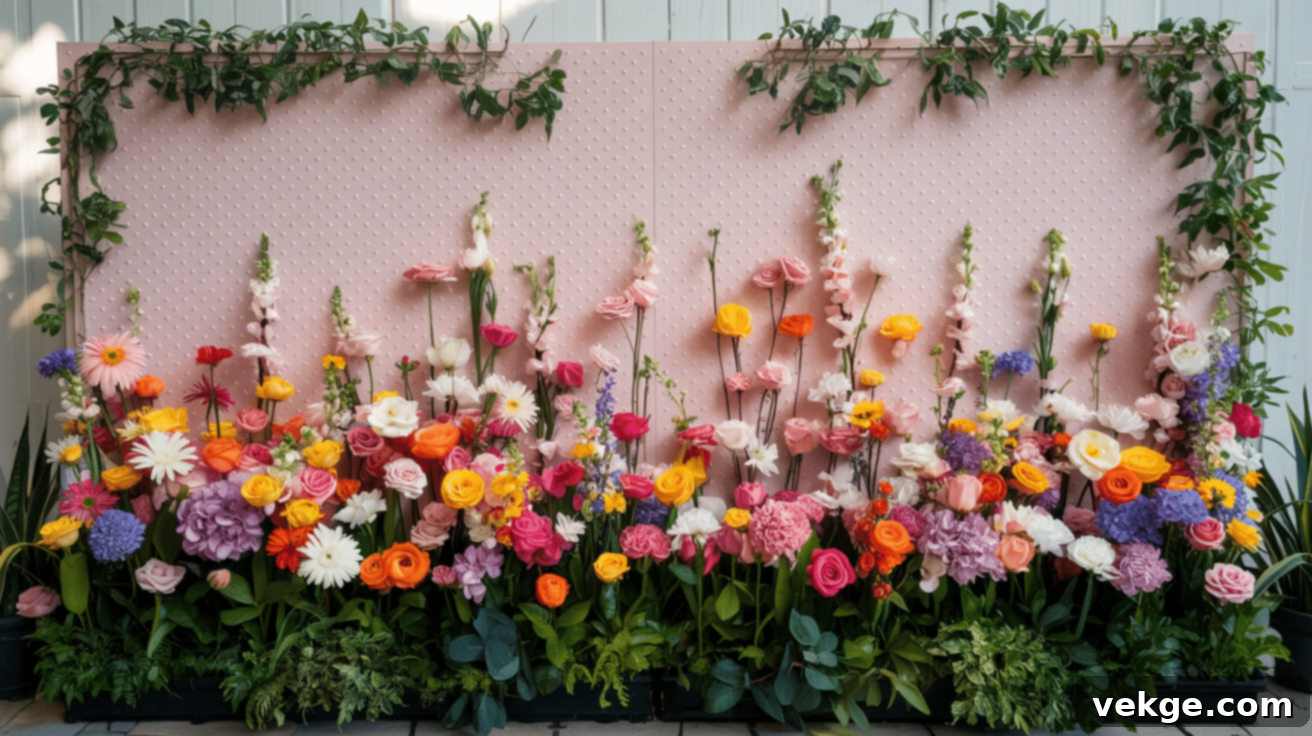
Giant paper flowers excel as stunning photo backdrops, ideal for capturing memorable moments at weddings, baby showers, birthday parties, or corporate events. To create a professional and portable setup, secure your flowers to a sturdy PVC frame or a large pegboard. This structure not only provides excellent stability but also allows for easy transport and quick assembly at different venues. When arranging, aim for a dense concentration of flowers in the center of the backdrop, gradually spacing them out towards the edges for a natural, organic flow. Incorporate green paper leaves or faux greenery between the flowers to add extra dimension and a touch of botanical realism. Varying the height and depth of the flowers can create a richer, multi-layered look. Ensure the frame itself is stable, especially for outdoor use, by utilizing proper support bases or weighting the feet to prevent tipping in wind.
Tip 3: Table Centerpieces
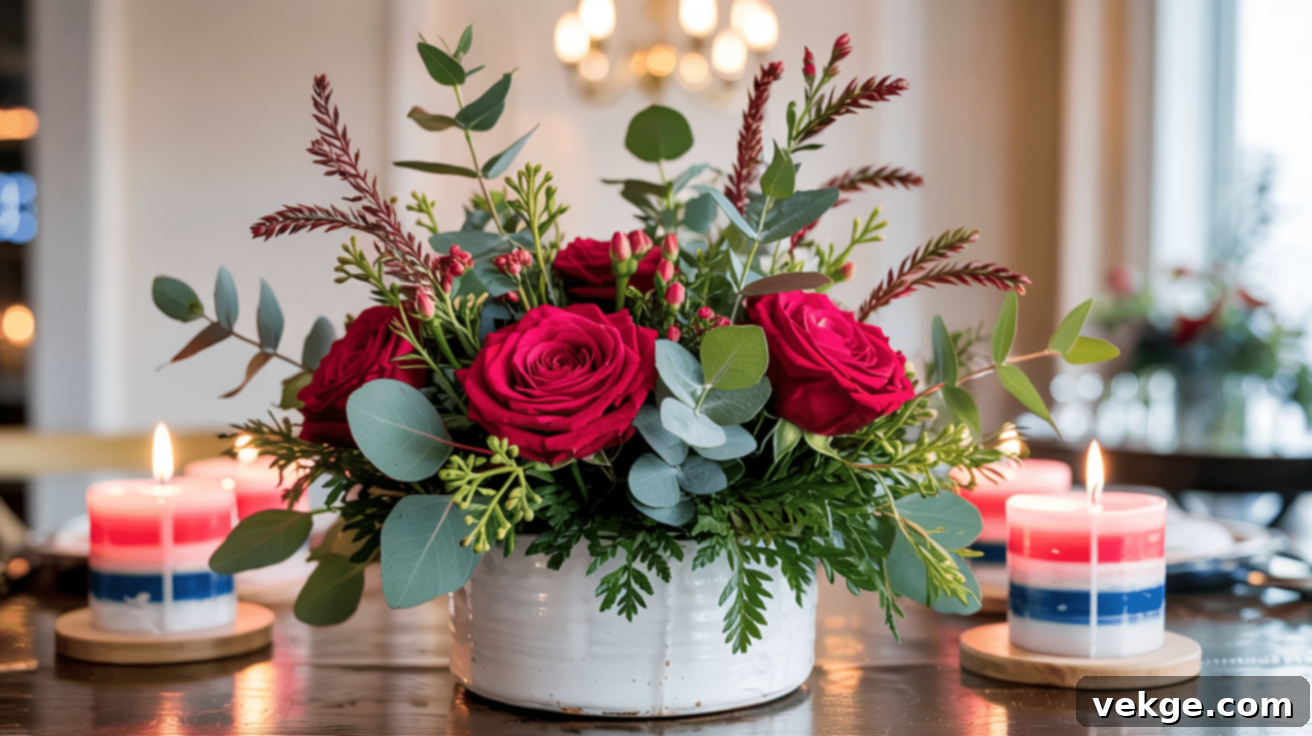
Elevate your table settings with impressive giant paper flower centerpieces. Insert the flower stems securely into floral foam or dense Styrofoam blocks placed inside decorative pots, elegant vases, or even custom-made bases. This method keeps them perfectly positioned and allows for effortless height adjustments to suit different table sizes and guest views. For the most aesthetically pleasing arrangement, group flowers in odd numbers (three, five, or seven) and vary their heights slightly to create visual interest. Select containers that match your event’s theme or opt for clear glass vases for a versatile and minimalist look. For evening events, subtly weave small battery-operated LED fairy lights among the petals to create a magical, warm glow. Crucially, ensure that your centerpieces are at an appropriate height so guests can comfortably converse and see each other across the table. These beautiful centerpieces often double as cherished keepsakes for guests or the hosts after the event concludes.
Tip 4: Hanging Decorations
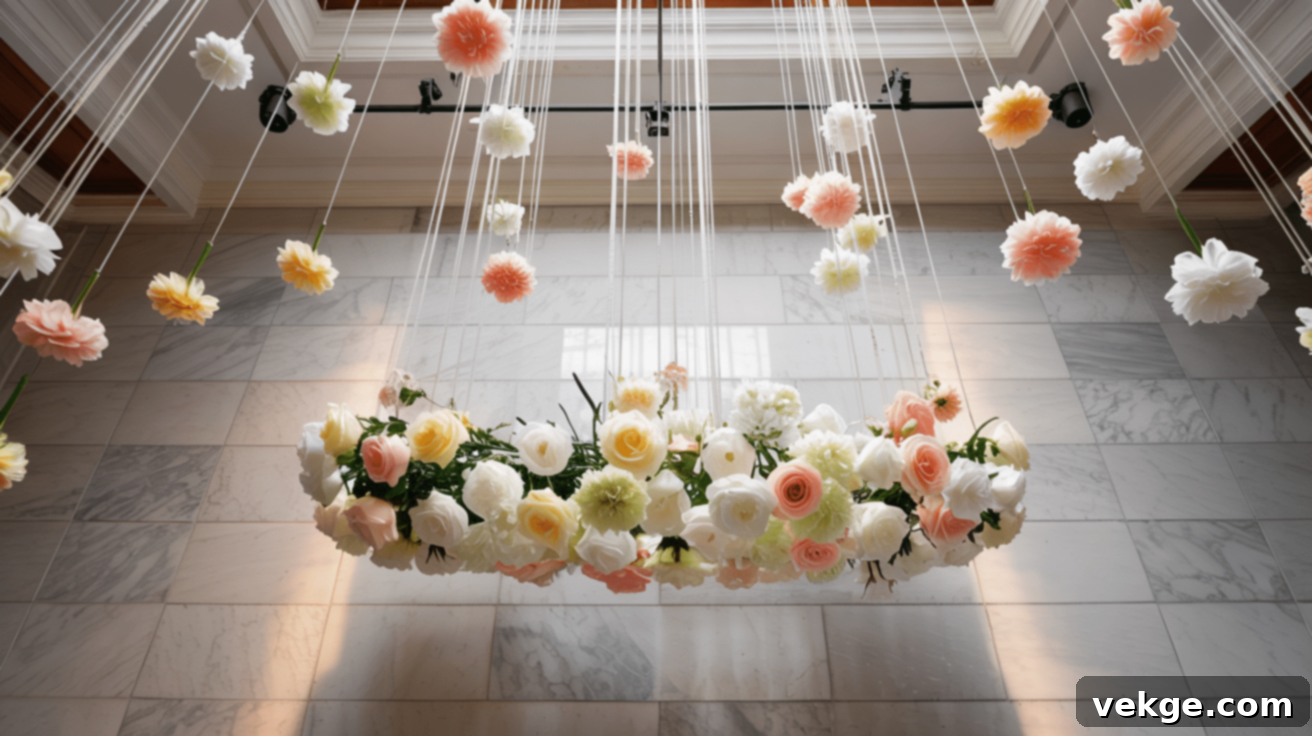
For a truly enchanting and ethereal display, hang your giant paper flowers from ceilings or overhead structures. Use clear fishing line to create the illusion of floating flowers, adding a dreamlike quality to your decor. Varying the hanging heights of individual flowers creates dynamic visual interest and a sense of movement. For heavier or larger blooms, always use secure ceiling hooks that are rated for the appropriate weight to ensure safety. Hanging flowers strategically over doorways or along hallways can create a dramatic, inviting entrance or guide guests through a space. In outdoor settings like pavilions or tents, attach flowers directly to existing support beams or rigging. For an extra touch of spectacle, consider using small, battery-operated motorized rotating hooks for slowly spinning displays that gently catch and reflect light from all angles, creating a mesmerizing effect. These floating floral displays are particularly stunning above dance floors, dining areas, or ceremony aisles.
Tip 5: Outdoor Displays
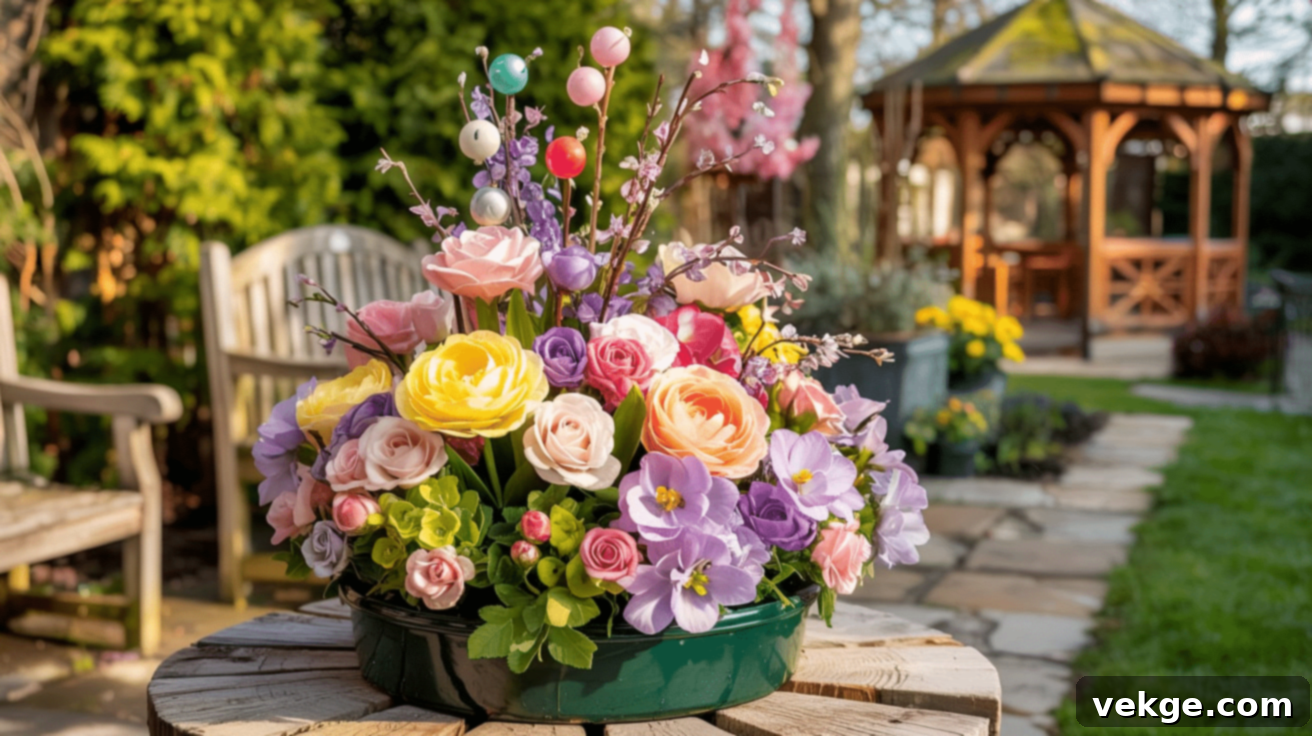
To keep your decor perpetually fresh and engaging, rotate your giant paper flower displays seasonally. Embrace the subtle beauty of pastel colors for spring, the vivacious energy of bright hues for summer, the rich warmth of oranges and reds for fall, and the crisp elegance of whites and blues for winter-themed aesthetics. This seasonal rotation allows you to maintain a current and relevant look without the need to create entirely new decorations from scratch each time. For holidays or special events, integrate themed elements such as small ornaments, ribbons, or sparkly stems directly into your paper flower arrangements, further enhancing their festive appeal. When storing unused flowers, carefully place them in large, sturdy boxes, interweaving sheets of tissue paper between each bloom to prevent crushing and damage. Labeling your storage boxes by color, season, or event type will greatly simplify retrieval and make future decorating endeavors much more efficient and enjoyable.
Alternative Methods for Making Giant Paper Flowers
While cardstock and crepe paper are the most popular choices, the world of paper crafting offers a wealth of alternative materials and techniques for creating unique giant paper flowers. Experimenting with different mediums can unlock new textures, durability, and aesthetic possibilities, allowing for even more creative expression.
- Coffee Filters: Surprisingly versatile, plain white coffee filters can be dyed using food coloring, tea, or coffee to create soft, ethereal gradients. Once dried, their delicate texture allows for beautiful ruffles and a watercolor-like appearance, perfect for light, airy blooms.
- Tissue Paper: For budget-friendly projects or flowers with an exceptionally light and airy feel, tissue paper is an excellent choice. Its translucency creates a soft glow, and its pliability makes it easy to scrunch, layer, and shape into voluminous, delicate petals, often used for pom-pom style flowers.
- Plastic Tablecloths: When crafting for outdoor events, durability is key. Plastic tablecloths, cut into petal shapes, offer a waterproof and surprisingly wind-resistant option. They come in a wide array of vibrant colors and can mimic the sheen of real petals, making them ideal for garden parties or long-lasting exterior decor.
- Recycled Materials: Consider repurposing old maps, newspaper, comic books, or even fabric scraps. These materials offer unique patterns and textures, adding a distinctive, upcycled charm to your flowers and making them a conversation piece.
- Cutting Machine Templates: If you own a cutting machine (like a Cricut or Silhouette), leverage the power of pre-made digital templates. These readily available designs significantly speed up the cutting process and ensure consistent, professional-grade petal shapes, allowing you to focus more on assembly and shaping.
- Free Printable Templates: For those without a cutting machine, a vast library of free printable paper flower templates is available online. Simply print them onto your chosen paper, cut them by hand, and follow the assembly instructions.
- Origami and Folding Techniques: Explore advanced paper folding methods, similar to traditional origami, to create intricate, geometric flowers. These techniques often involve precise folds and cuts to form multi-faceted blooms that stand out with their unique structural beauty.
Each material and method brings its own distinct advantages and challenges. Don’t be afraid to experiment to discover what works best for your specific project goals, desired aesthetic, and personal skill level. The beauty of giant paper flowers lies in endless creative possibilities!
Common Mistakes to Avoid When Making Giant Paper Flowers
Even seasoned crafters can encounter pitfalls, and understanding common mistakes before you begin can significantly improve the quality of your giant paper flowers. Being aware of these potential problems will not only help you produce more professional-looking blooms on your first attempt but also streamline your crafting process and reduce frustration. Here are the main errors to avoid:
- Rushing the Cutting Process: Hasty cutting leads to uneven, jagged, or inaccurately sized petals. This inconsistency will make your flower appear lopsided and unprofessional. Solution: Take your time, use sharp scissors, and follow your pattern lines meticulously. If using a machine, double-check your settings.
- Using Excessive Glue: Applying too much hot glue often results in visible, bulky globs that detract from the flower’s delicate appearance. It can also make petals stiff and difficult to shape. Solution: Use small dots or thin lines of glue, typically at the base of the petal where it will be hidden. Less is often more.
- Improper Crepe Paper Handling (Pulling Too Hard or Not Enough): Pulling crepe paper too aggressively can cause it to tear or overstretch, distorting the petal shape. Conversely, not stretching it enough means the petal won’t achieve its natural curve. Solution: Practice gentle stretching on scrap pieces to gauge the right tension. Aim for a subtle, natural curve.
- Placing Petals Side by Side Instead of Overlapping: Arranging petals without proper overlap leaves unsightly gaps and prevents the flower from looking full and lush. It also compromises structural integrity. Solution: Always overlap petals, ensuring each new layer covers the seams of the previous one, creating a dense, continuous flow.
- Failing to Secure the Base Properly: If the core or base of your flower isn’t firmly attached to the stem or mounting disc, the entire bloom can become wobbly, unstable, or even detach. Solution: Use ample glue at the connection point, allowing it to cool and set completely before moving. Add tape reinforcement for extra security.
- Crowding Too Many Same-Sized Petals in One Area: Placing too many petals of the identical size in a single layer creates a flat, unnatural look and can make the flower appear bulky rather than elegant. Solution: Vary petal sizes (small for the center, larger for outer layers) and stagger their placement to build dimension and a more organic, graduated appearance.
- Ignoring Proper Drying Time Between Steps: Impatience can lead to disastrous results. Moving on before glue is completely dry can cause petals to shift, detach, or create a messy finish. Solution: Allow glue to cool and set fully after each major step, especially after attaching layers or the stem. A few extra moments of waiting can save much rework.
By keeping these common pitfalls in mind, you’ll be well-equipped to create stunning, professional-quality giant paper flowers that impress and delight.
Conclusion
Crafting giant paper flowers is a profoundly rewarding and surprisingly accessible project that delivers immense visual impact for a relatively modest cost. Throughout this comprehensive guide, we’ve explored every essential step, from gathering your materials and meticulously preparing your paper to artfully cutting, shaping, and assembling your magnificent blooms, culminating in expert tips for display and advanced embellishments. With the detailed instructions and insights provided, you now possess the knowledge and confidence to create beautiful, show-stopping paper flowers for virtually any occasion – whether you envision them as captivating wall art, stunning event backdrops, elegant centerpieces, or enchanting hanging decorations.
The inherent magic of giant paper flowers lies in their unparalleled versatility. They are effortlessly adaptable to any color scheme, perfectly scalable to meet specific size requirements, and endlessly customizable to suit any desired aesthetic or style. This flexibility ensures that your handmade creations will always perfectly complement your vision. We sincerely hope that this guide has empowered you, igniting your creativity and providing you with the assurance needed to embark on your own journey of crafting these exquisite paper masterpieces.
Remember, like any art form, practice refines your technique and perfects your results, but even your very first attempts will yield beautiful and impressive flowers. So, gather your chosen materials, clear a dedicated crafting space, and immerse yourself in the delightful process of making giant paper flowers that are sure to amaze and inspire everyone who beholds them!
